Raymond's House: Crystal Petals and the Roll-Top Desk
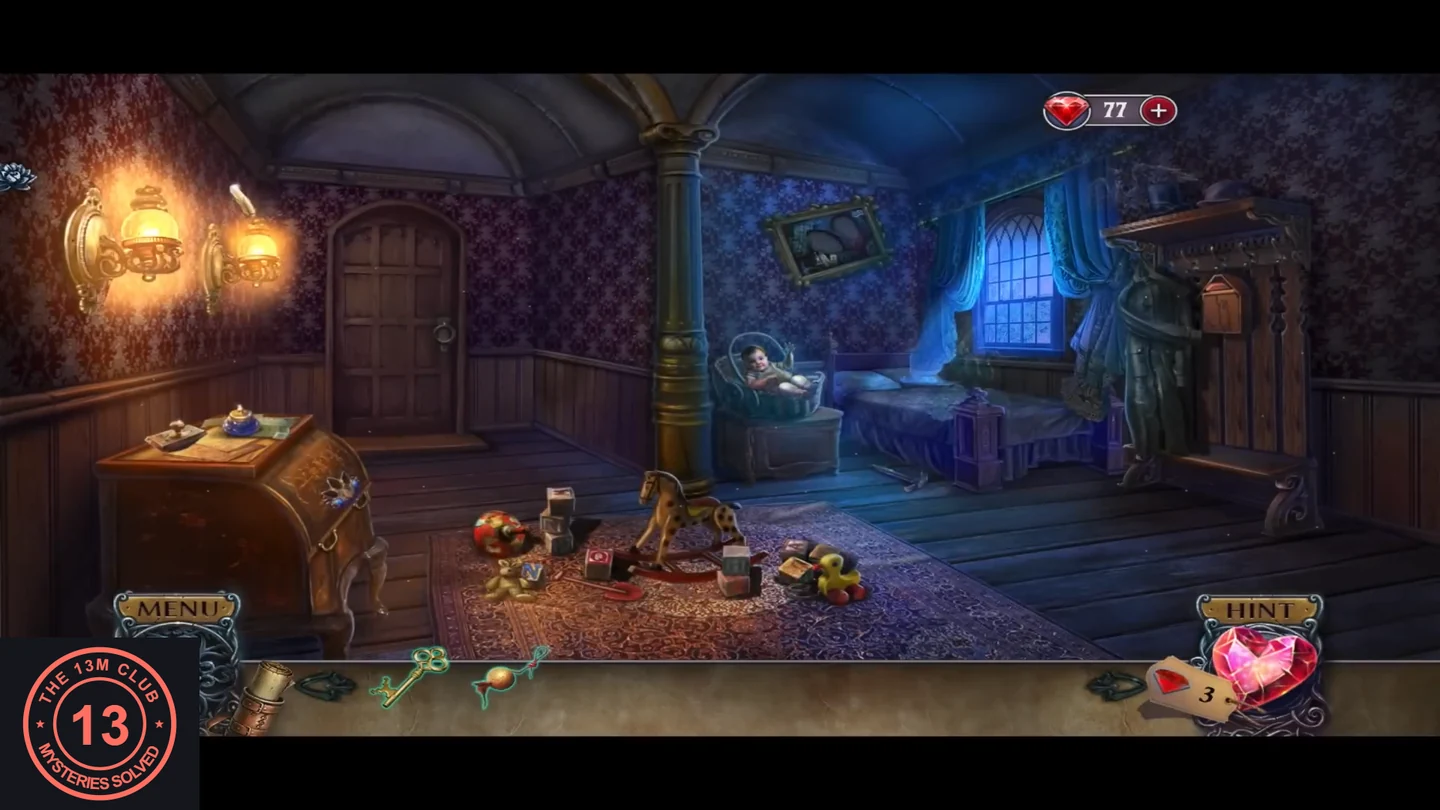
The Bonus Chapter entry becomes available after you finish the main game; in this free-to-play version it may also need a separate in-app unlock. Henrietta calls you back because Raymond has vanished and a baby was found in his clothes. Start by searching Raymond's house.
- Finish the main game, then choose Bonus Chapter on the main menu. It stays greyed out until the main game is complete. The developer describes the bonus chapter as additional content, with the main game free, so in this free-to-play version a separate in-app unlock may be needed after you select Bonus Chapter. The unlock screen and any price were not checked for this guide. After the intro, a letter from Henrietta calls you back to La Fleur Village: the curse of the castle is awake again. She tells you Raymond disappeared two days ago and villagers brought back a baby in his clothes. She gives you her key and asks you to search Raymond's house.
- Zoom into the toys on the floor in the middle of the room, by the rocking horse. Take the green toy ball on a string beside the teddy bear. Then click the loose blocks: they build a little toy house ('This house needs a roof.').
- Zoom into the cradle with the baby. Click the paper crane at the lower left; it unfolds into a sheet of paper. Take it. There is also a hook here for a chain ('It looks like there's a place to attach a chain here.').
- Take the hammer from the floor in front of the bed. You can read Raymond's note in the room: he saw the vision again, his brother is calling him, and he has gone to the castle to free him.
- Zoom into the dark coat hanging on the right wall by the hall stand. Take crystal petal 1/3 from the coat. Then take the red toy-house roof from the top of the small house-shaped picture beside it ('The picture seems incomplete.').
- Zoom into the lotus brooch on the front of the roll-top desk: 'Some of the petals fell off.' You need three crystal petals. Next, take the white feather from the lamp on the left wall by the door. Zoom into the papers on top of the desk and dip the feather in the inkwell to get a quill with ink.
- Zoom into the coat again and use the hammer to pull out the nail below the little picture. Take the nail.
- Zoom into the crooked portrait on the back wall, to the right of the pillar; both faces are missing. Put the nail in the frame, then use the hammer on it. The portrait now hangs straight: 'This must be a portrait of Raymond and his brother Paul. But where are their faces?'
- Zoom into the toy house and put the red roof on it. Its door opens: take rattle piece 1/2, a fish-shaped wooden toy.
- Crystal petal 2/3 now lies among the toys to the left of the rocking horse; take it. Then zoom into the cradle and take crystal petal 3/3 from beside the baby's hand.
- Zoom into the lotus brooch on the roll-top desk and put the three crystal petals into it. The lotus now has a keyhole: use Henrietta's key. The desk opens and a hidden-object scene starts.
Hidden Objects: Raymond's Roll-Top Desk
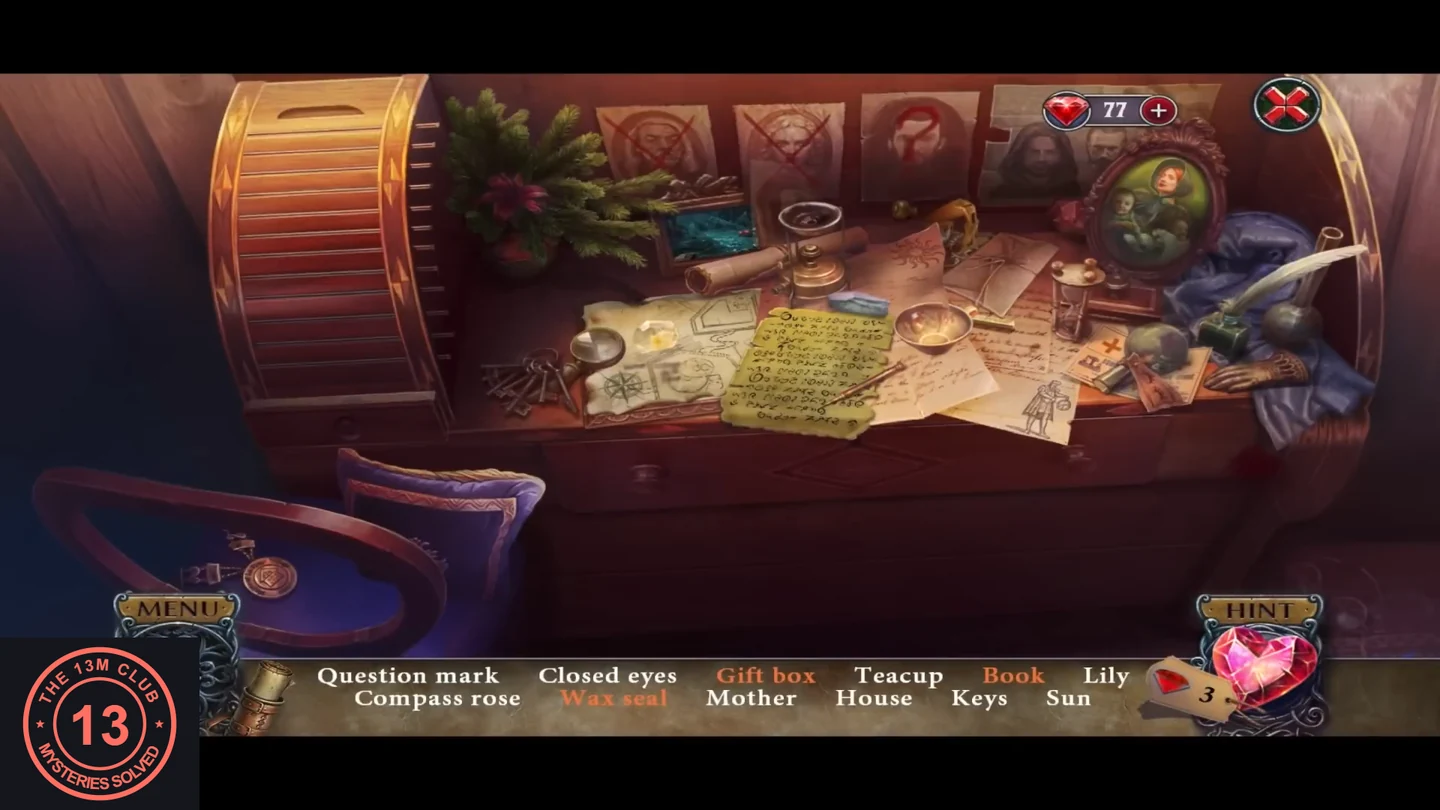
Find the listed items in the open desk to get the lotus medallion. Names in orange take an extra step.
- Find: Question mark, Closed eyes, Gift box, Teacup, Book, Lily, Compass rose, Wax seal, Mother, House, Keys and Sun. The Gift box, Book and Wax seal names are orange, so each takes an extra step. The question mark is the red '?' on the face poster at the top middle. The compass rose is drawn on the map on the left. The keys are the bunch of keys at the left end of the desk. Moving the rolled scroll uncovers the wax seal. A drawer under the desktop opens during the search; the gift box and the book are inside it. When everything is found, the roll-top slides open; take the reward, the lotus medallion.
The Portrait Code and the Rattle
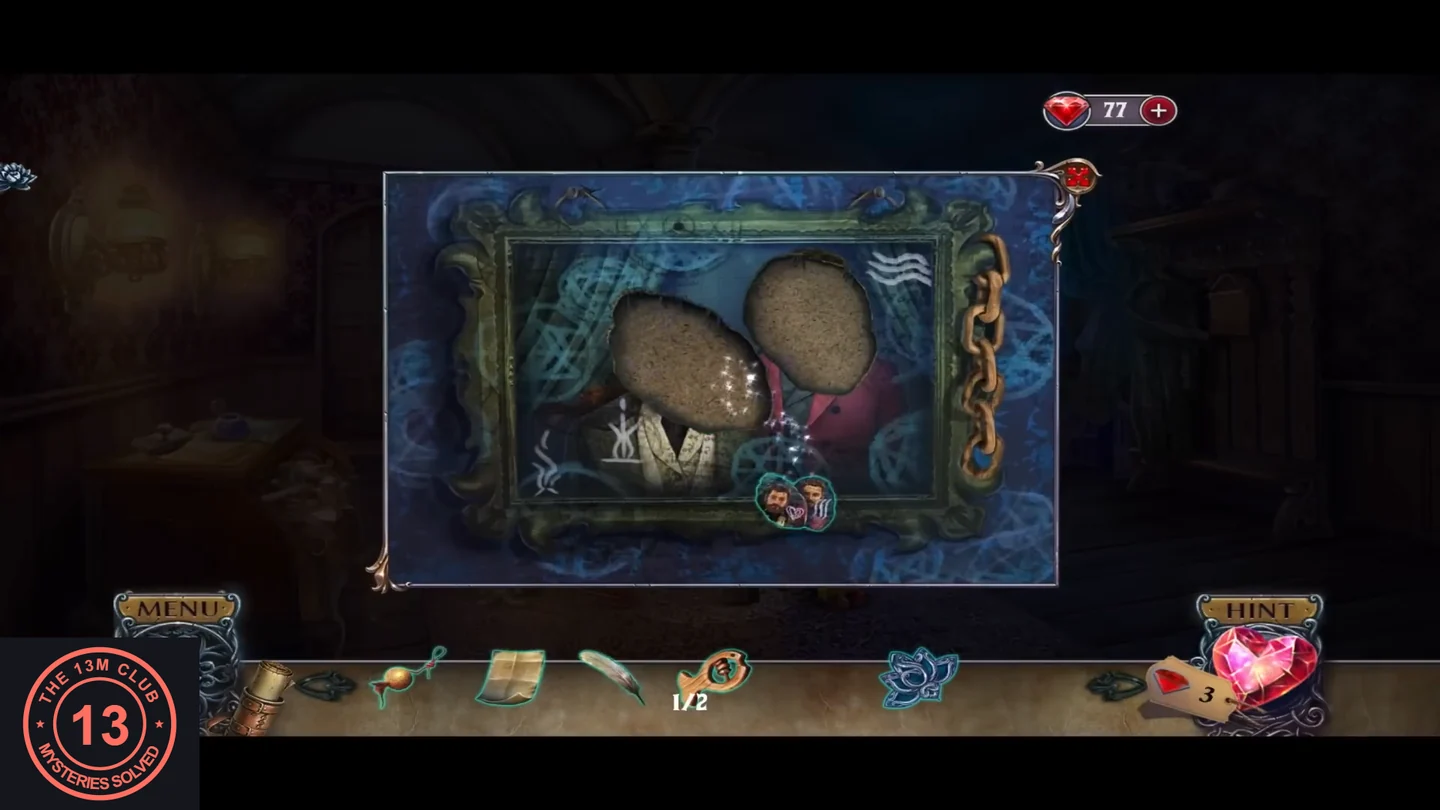
Complete the brothers' portrait, copy its code and use it to find the apothecary's recipe, then hang the rattle over the cradle so the baby shows you his palm.
- Tap the lotus medallion in your inventory to take two face pieces out of it (Raymond and Paul). Zoom into the portrait and put the faces in the blank ovals. A row of symbols appears on the portrait: 'Where can I write down this code?'
- Put the sheet of paper on the portrait, then use the quill with ink on it to copy the symbols. Take the code note.
- Zoom into the cradle. Take the green chain lying by the baby's feet and hang it on the hook: 'A chain isn't very entertaining without rattles.'
- Zoom into the papers on the desk and put the code note on them, by the inkwell. The papers rearrange: a letter from Pierre the Apothecary ('Raymond, I send my condolences about your brother. Your sleeping potion is almost ready.') with the word Library and a key sketch, and a recipe drawing (lavender, mortar, bottle, knife and phial). Take the recipe and rattle piece 2/2, the wooden piece on the right.
- Zoom into the cradle and hang the rattle on the chain. The baby lifts his hand: 'The symbol on the baby's palm looks exactly like the medallion!'
The Medallion on the Baby's Palm
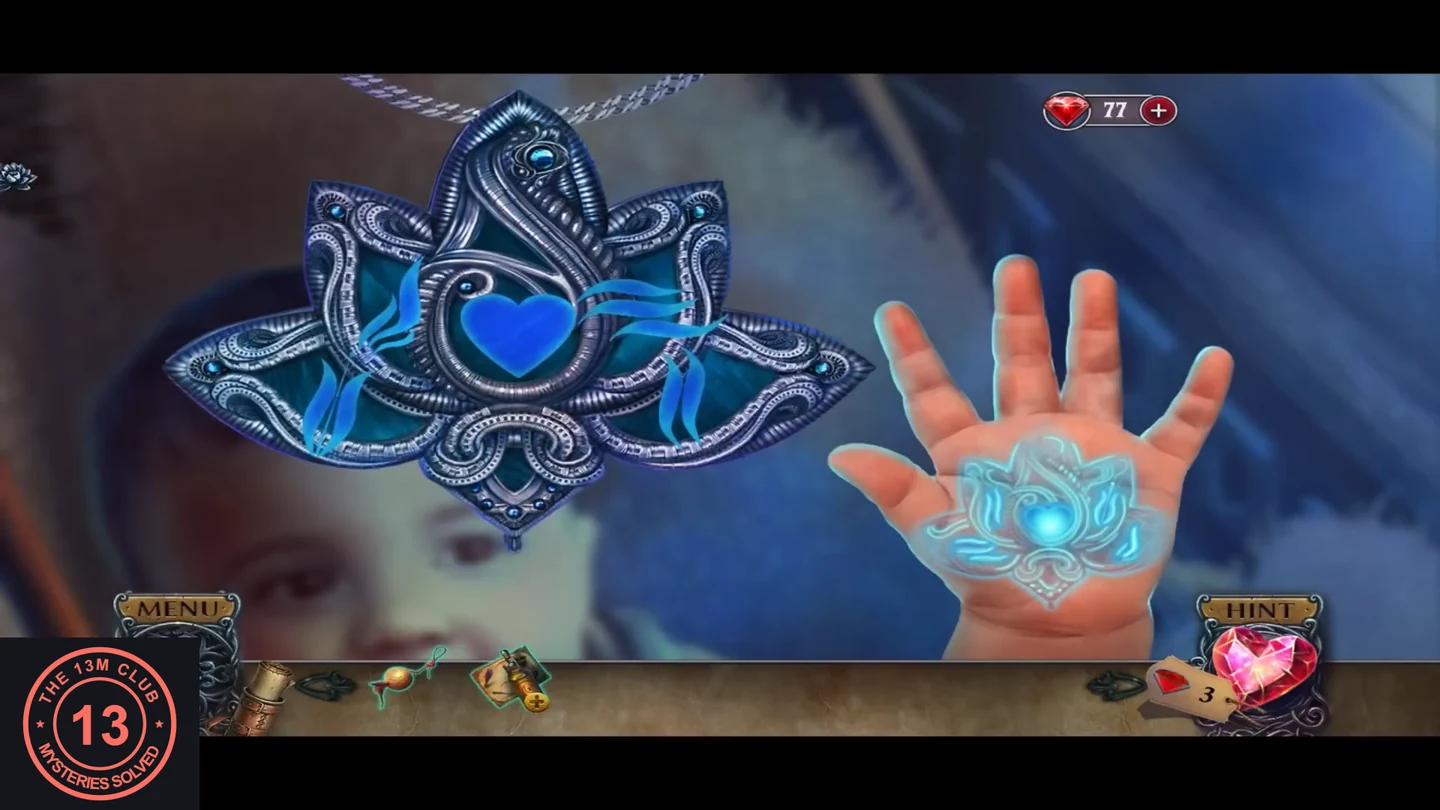
The lotus symbol on the baby's palm matches Raymond's medallion. Rearrange the medallion's pieces to copy the palm's pattern and see the baby's vision.
- Put the lotus medallion on the baby's palm. The medallion opens beside the palm with four blue pieces around a heart, and the palm shows the pattern to copy. Make each piece match its quarter of the palm: upper left, three upright flames; upper right, an upright tulip-shaped bud; lower left, three horizontal waves; lower right, three flames rising towards the upper right. A piece glows when it is correct.
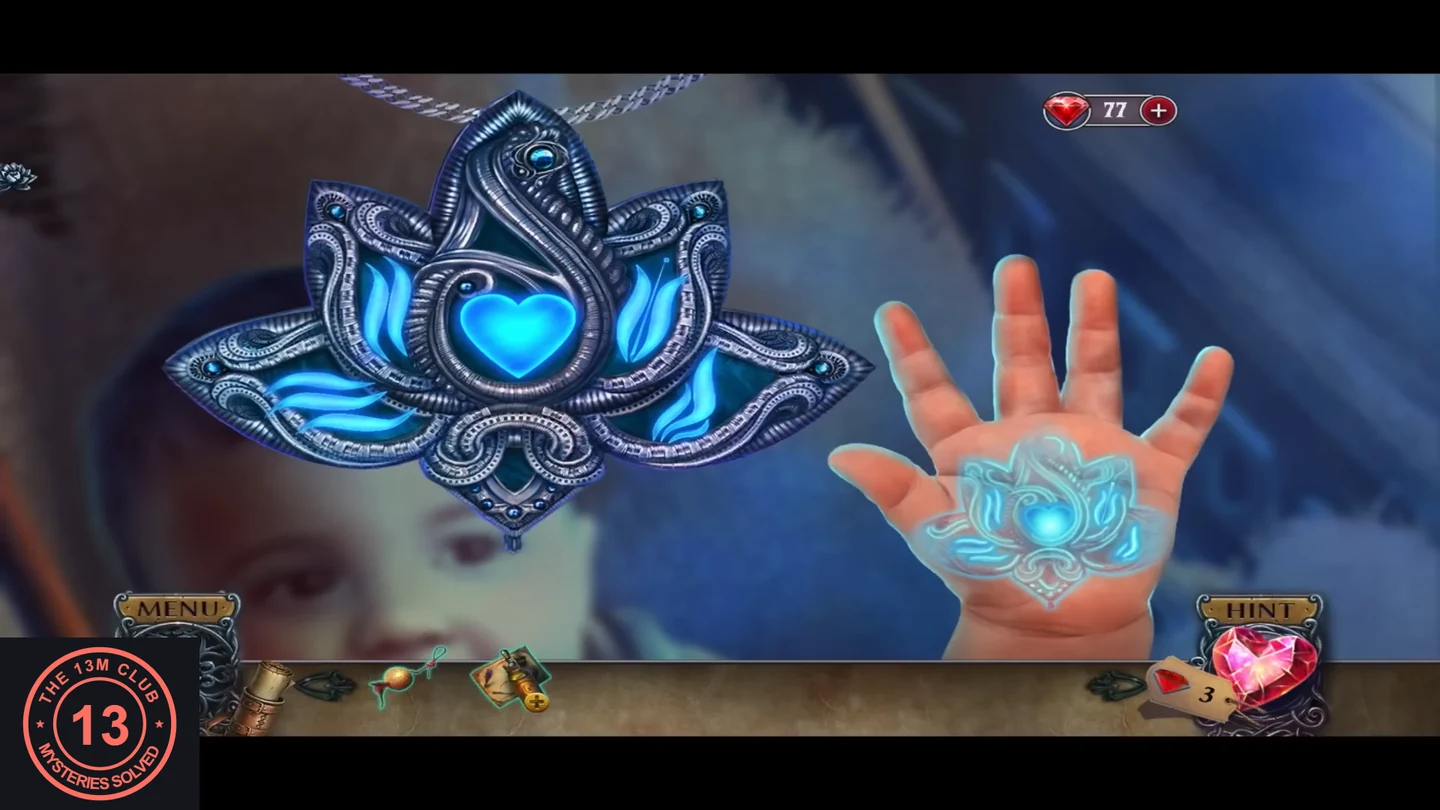
All four pieces match the palm and glow; the heart lights up and the vision starts. - When the last piece matches, the heart in the middle lights up and a vision shows a hooded man under the water among lotuses: 'Help... me...'. You can skip the cutscene.
The Village Street: Brewing a Sleeping Potion
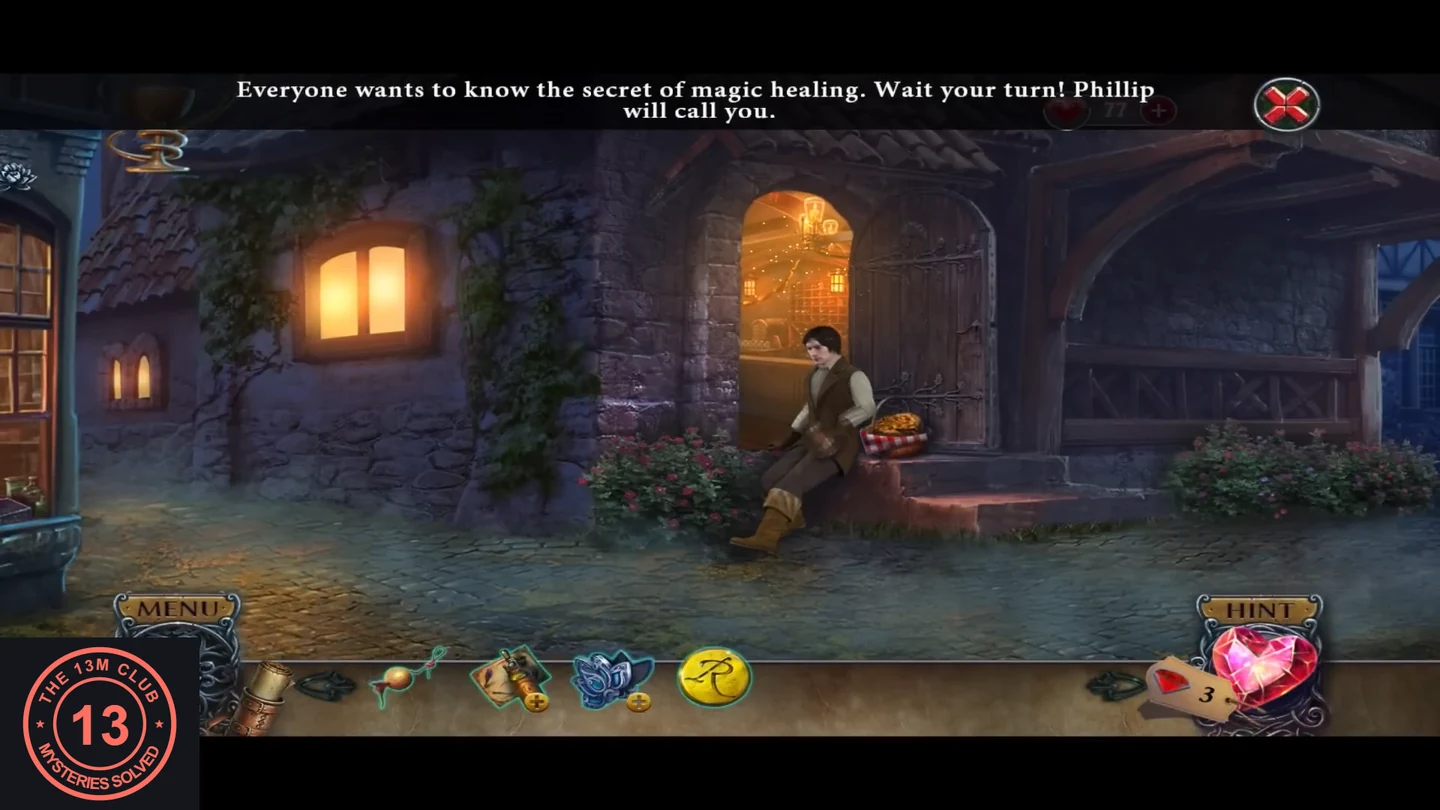
Henrietta sends you to One-Eyed Philip in the tavern, but the doorman won't let you in. Collect the ingredients on the recipe and put him to sleep.
- After the vision, Henrietta returns. She recognises the La Fleur medallion from the castle and tells you that One-Eyed Philip, who brought Raymond back, claims to have found a healing source there. He is in the tavern, but he is known to be dishonest. She hands the medallion back to you. Tap the medallion in your inventory to open it and take the coin with an R on it, Raymond's emblem ('There were two portraits in here, but now the medallion is empty.').
- Leave the house for the village street. The doorman sitting by the tavern door on the left will not let you in ('Wait your turn! Phillip will call you.'). Zoom into the fountain in the middle and take the teal pharmacy key from the left rim. The goldfish in the basin can't be caught yet. The pharmacy window on the left side of the street is locked.
- Scroll the street to the right. Zoom into the produce stall and take the purple lavender sprig ('I need somewhere to put this produce.'). Go to the castle gate: the guard says no one may go to the castle without Phillip's permission. Take the ladder leaning on the wall left of the gate. Optional: the street's phoenix tab shows 'Phoenixes to find here: 3'. This guide doesn't show where they are.
- Put the lavender on the recipe. Use the pharmacy key on the pharmacy window. Take the pipette and the mortar. The ornate box inside is locked: 'The inlay is missing.' Put the mortar and the pipette on the recipe too.
- The lantern on the lamp post to the right of the fountain is out of reach. Place the ladder against the post and zoom into the lantern. Take the bronze fish token hanging on its right side. Opening the lantern shows a glowing orange star on the candle, too hot to touch ('Ouch! It's hot!'). Leave it for now.
- Open the recipe and drag the lavender into the mortar; the pestle crushes it. On the right half of the street, zoom into the gap under the stone steps where a kitten hides. Take the hairpin lying in front of her. Give her the toy ball: she comes out to play and reveals a small bottle of valerian extract. Take it.
- Open the recipe again and add the valerian extract. The crushed lavender is poured into the bottle and finished with the pipette. Take the sleeping potion.
- Zoom into the tavern door and pour the sleeping potion into the doorman's basket of meat pies. He falls asleep. Take a meat pie and the large basket.
- Put the large basket on the produce stall. The produce moves into the basket and you get the empty net.
Philip's Card Game
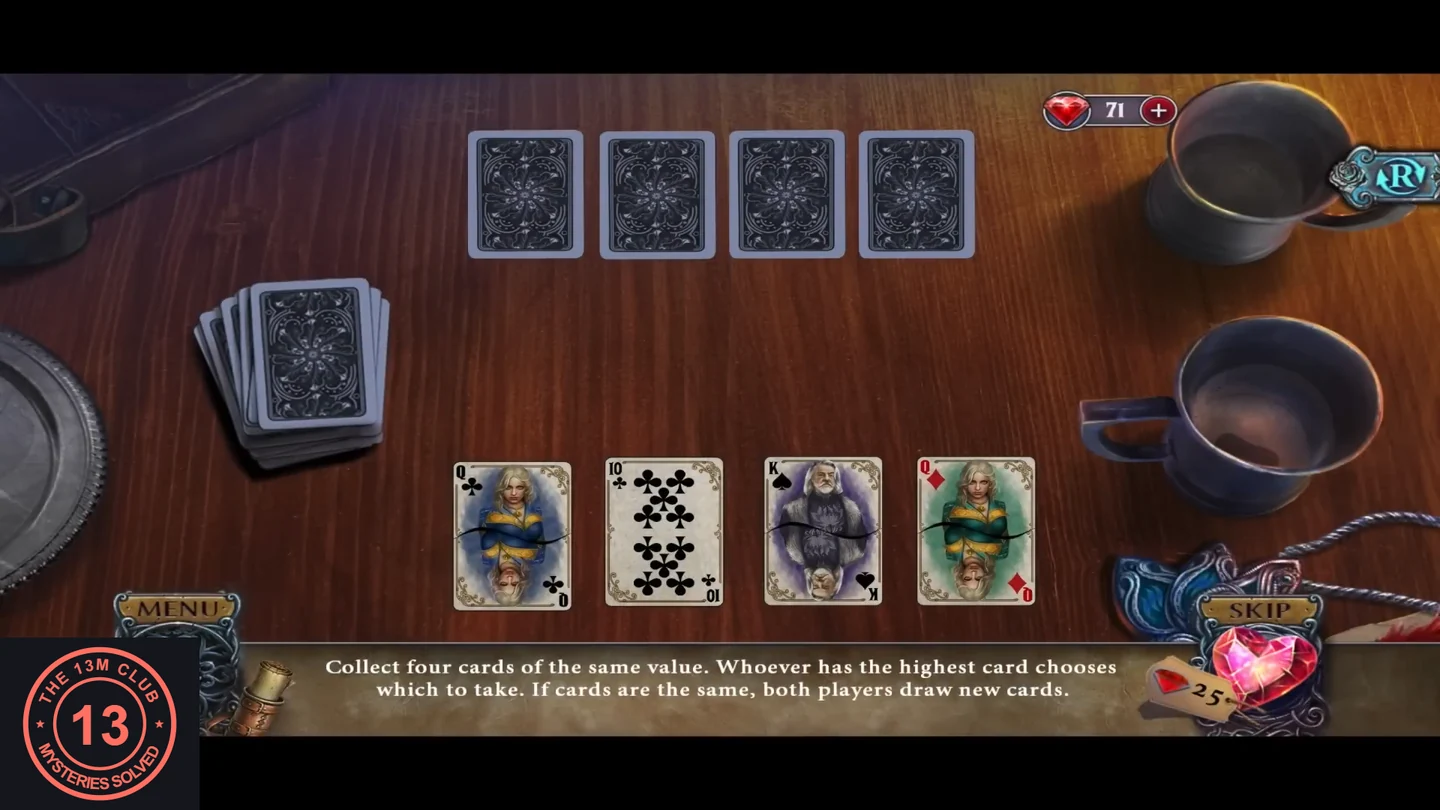
Philip took Raymond's belongings as payment. He bets Raymond's bag against your medallion in a game of cards.
- Enter the tavern past the sleeping doorman and talk to Philip at his table. He says he is no longer one-eyed after 'the miracle at La Fleur castle' and offers a game of cards: your medallion against Raymond's bag. If you win, he'll tell you everything.
- Rules: 'Collect four cards of the same value. Whoever has the highest card chooses which to take. If cards are the same, both players draw new cards.' Philip's four cards lie face down at the top and your four lie face up at the bottom. Each round, one card from each side goes to the middle. The higher card's owner chooses which of the two to keep. Equal cards make both of you draw new ones. The deals are random, so there is no fixed solution, and the cards are reshuffled from time to time ('Let's shuffle the cards.'). Keep the value you already hold most of and give up odd cards. You can also press SKIP (25 rubies). When you win, Philip hands over Raymond's bag. He explains that he and his friends followed Raymond through the castle's traps to the source of healing. He now heals people for three gold coins. Bring him the money and he'll give you the map of the traps.
The Tavern: Tokens, Glass Spires and Raymond's Bag
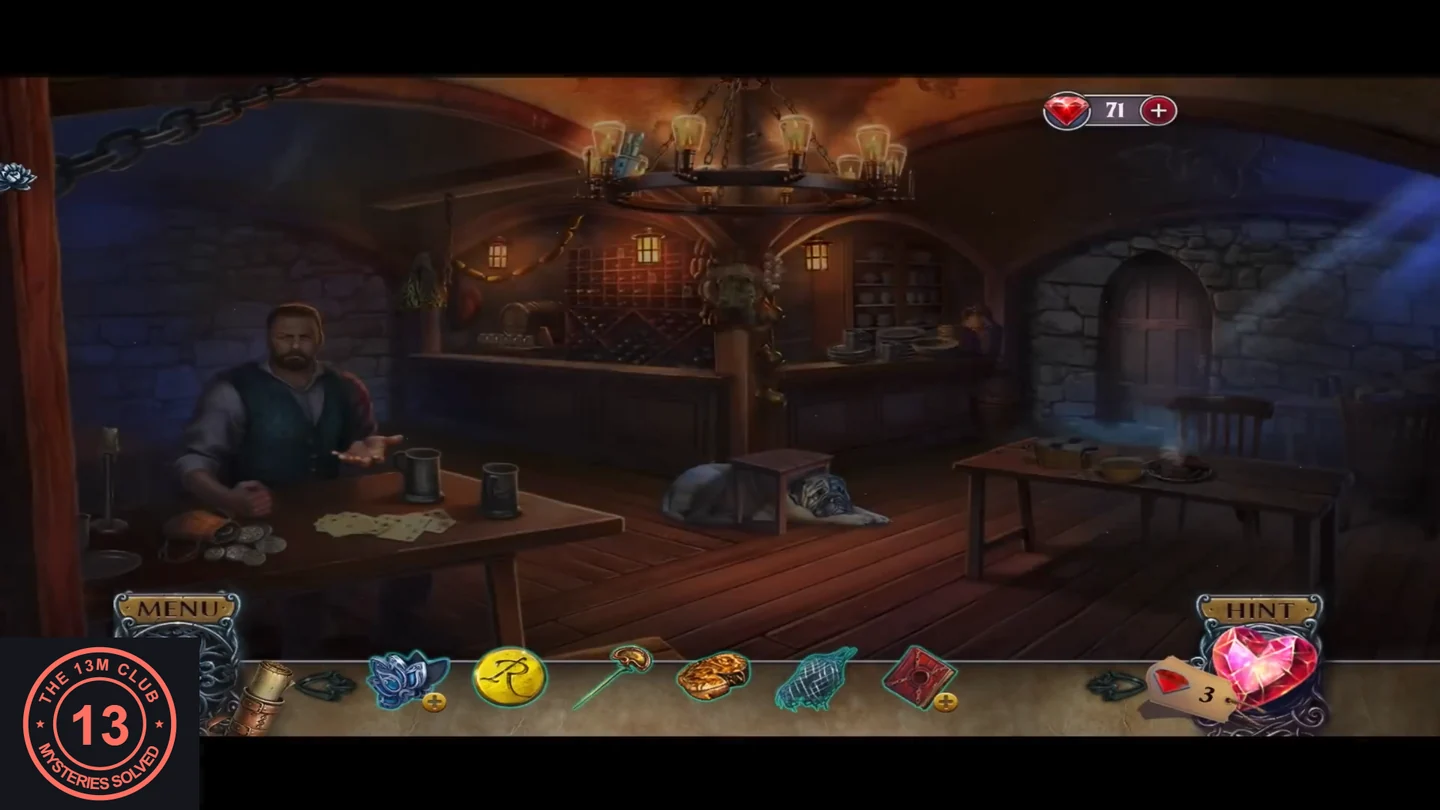
Philip wants three gold coins for his map of the castle traps. Search the tavern first: open the back door, the lost-and-found cabinet and Raymond's bag.
- Zoom into the back door on the right of the tavern. It has two round slots. Put the fish token in the bottom slot. 'It looks like a ham token would fit here.' (top slot).
- Zoom into the dog lying under the red stool in the middle of the room ('I get angry when I'm hungry, too.'). Give it the meat pie. While it eats, take the ham token from its collar and the stool.
- Zoom into the lost-and-found cabinet on the left, by the window. Click the stack of teapots and cups so they shift, and take the purple oven mitt. Use the hairpin on the padlock ('I'm sure I can pick this lock.'). The cabinet opens to shelves labelled Joanna, Raymond and Andre. Take the blue glass spire piece from Raymond's shelf.
- The chandelier is too high ('I'll need to step on something to reach up there.'). Place the stool under it, zoom in and take the second blue glass spire piece.
- Open Raymond's bag in your inventory and put Raymond's emblem (the R coin) on its lock. Inside are a cipher page with the portraits of Paul, Raymond and Lis de la Fleur ('This looks like part of the cipher for the letter on Raymond's desk, but half of the page is torn out.') and Raymond's diary. He found the count's secret laboratory in the library and planned to make the potion for Paul there, but heard something walking inside. Take the gold-and-blue key part from the diary page.
- Zoom into the back door again and put the ham token in the top slot. The door opens onto a storeroom shelf: take the broken fishing net. Open it in your inventory and lay the net from the produce stall into the torn hoop: 'The net is torn. I need to repair it somehow.'
Gold Coins: the Pharmacy Box, the Goldfish and Raymond's Cipher
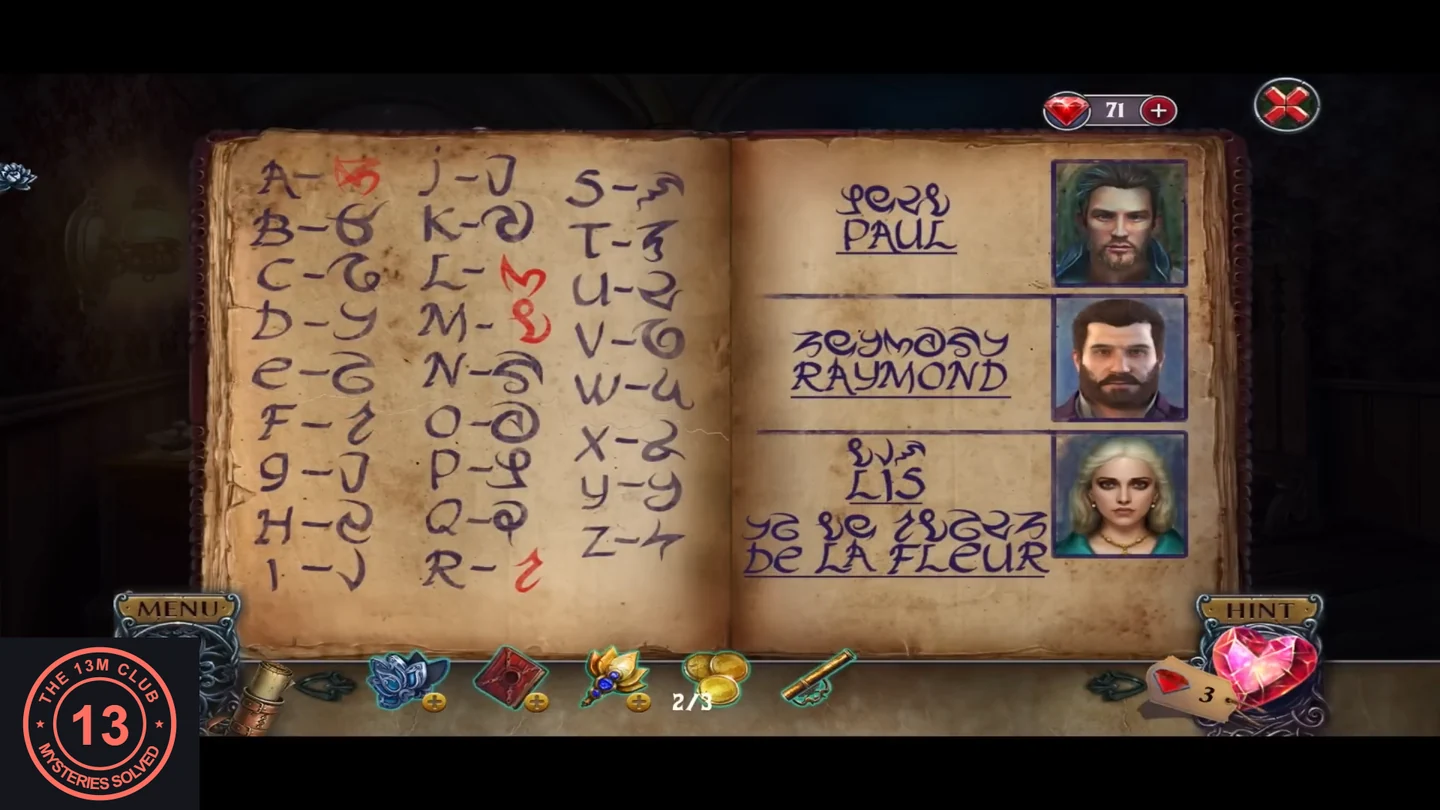
Get the first two gold coins in the village, then finish the cipher in Raymond's house.
- Go back out to the street. Zoom into the lantern and use the oven mitt to take the hot orange star: it is the pharmacy inlay. Put the inlay into the ornate box in the pharmacy window. The lid opens: take gold coin 1/3 and the needle and thread.
- Use the needle and thread on the broken fishing net to repair it. Zoom into the fountain and catch the goldfish with the fishing net. A gold coin flies out (2/3).
- Return to Raymond's house and zoom into the coat. Put the two blue glass spire pieces into the small castle picture beside it. The picture is complete and a little cupboard opens: take the torn cipher half and the bronze key part.
- Open Raymond's bag and add the torn cipher half. The cipher now runs from A to Z, but four symbols are shown in red: A, L, M and R. Tap each red symbol to cycle through shapes until it matches the letters in the names on the right page (PAUL, RAYMOND, LIS DE LA FLEUR). A is the curled 'e'-like glyph, the second letter of PAUL. L is the loop with a tail, the fourth letter of PAUL. M is the heart-shaped 'm', the fourth letter of RAYMOND. R is the '3'-shaped glyph, the first letter of RAYMOND.
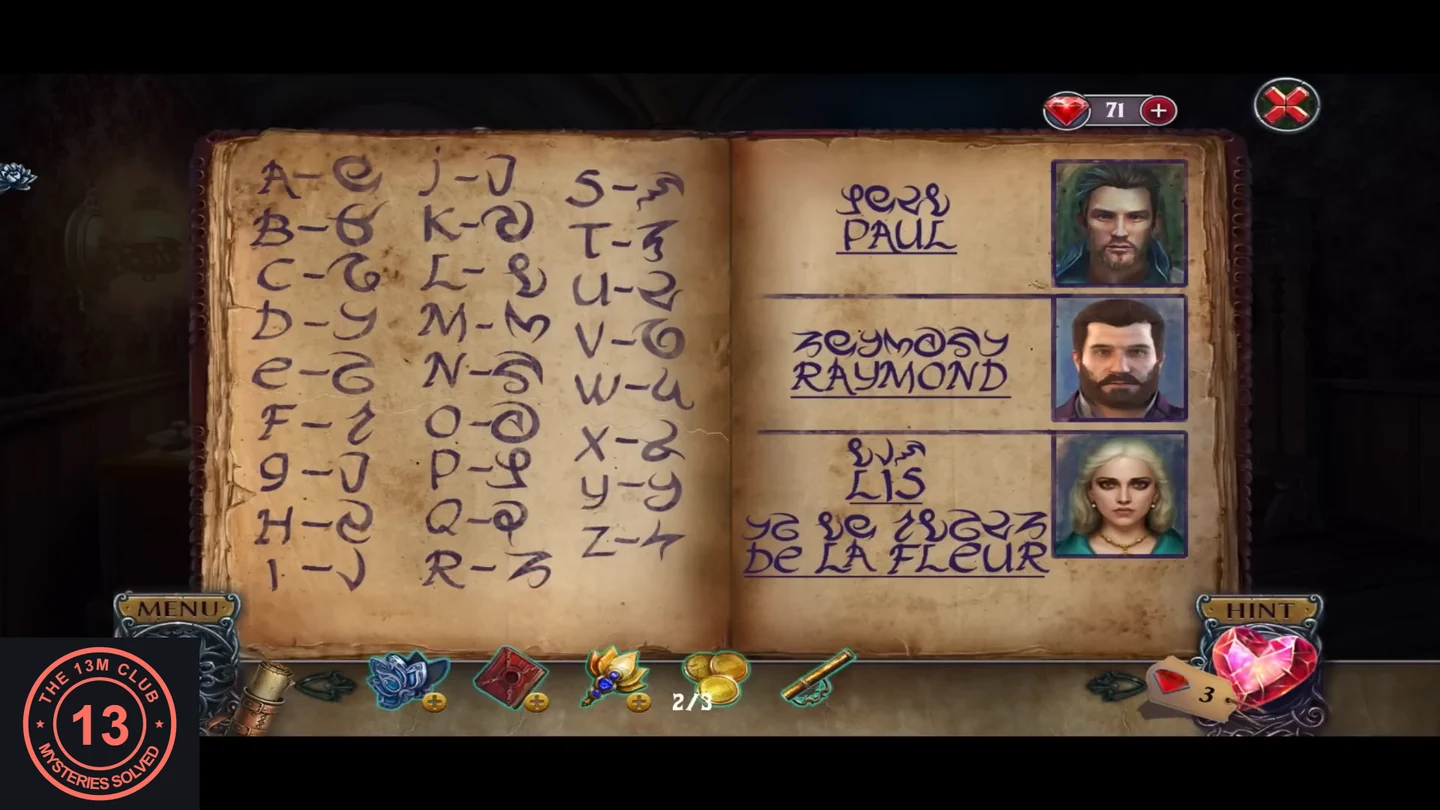
The corrected cipher: no red symbols remain.
Hidden Objects: Raymond's Coded Letter
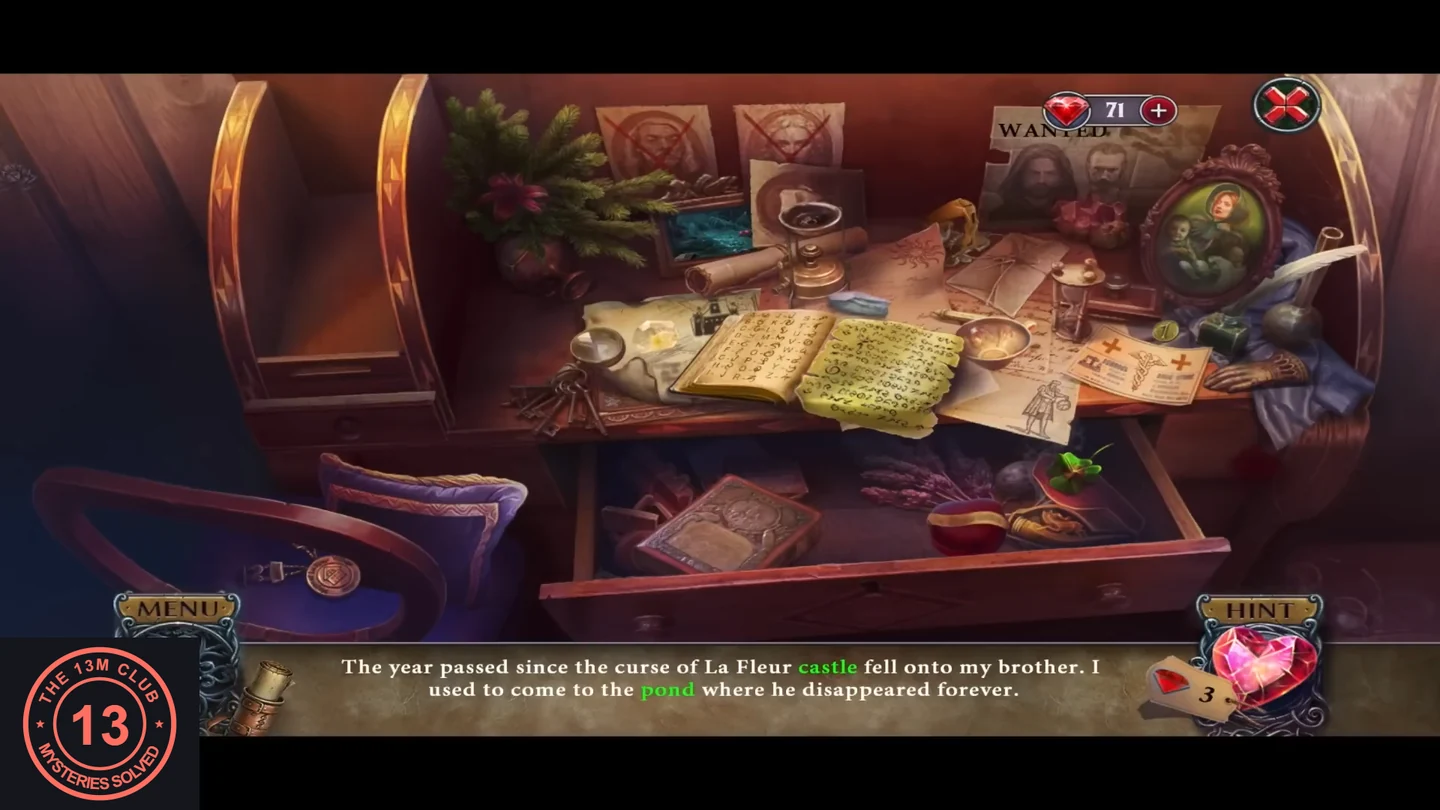
Decode Raymond's letter on the desk. Each green word is an object you find on the desk, and the last one is the third gold coin.
- Zoom into the papers on the roll-top desk ('I need the cipher so I can read it.') and put the cipher on the letter. The letter is revealed line by line. Tap the desk object matching each green word to turn it white. Pond: the teal framed pond picture at the top, left of centre. Castle: the small castle drawing on the map left of the cipher book. Medallion: the round bronze medallion on a chain on the chair seat, lower left. Luck: the four-leaf clover in the open right drawer. Old Count's: the crossed-out portrait at the top left. Time: the hourglass right of centre. Heal: the medical paper with red crosses on the right. Alchemist: the drawing of a man holding scales on the right. Bad people: the WANTED poster at the top right. Love: the red ring box in the drawer. Pillow: the purple cushion on the chair at the left. Letter: the tied envelope by the hourglass. Finally find the gold coin: 'This is Raymond's cipher!' and gold coin 3/3.
- Open the gold-and-blue key part in your inventory and add the bronze key part. You now have an ornate key for later.
- Go to the tavern and give Philip the three gold coins. He gives you his castle map with the traps marked and tells you to show it to the guard at the castle gate. Go to the gate on the right of the street and show the guard the castle map; he lets you pass.