Open the carved rock gate
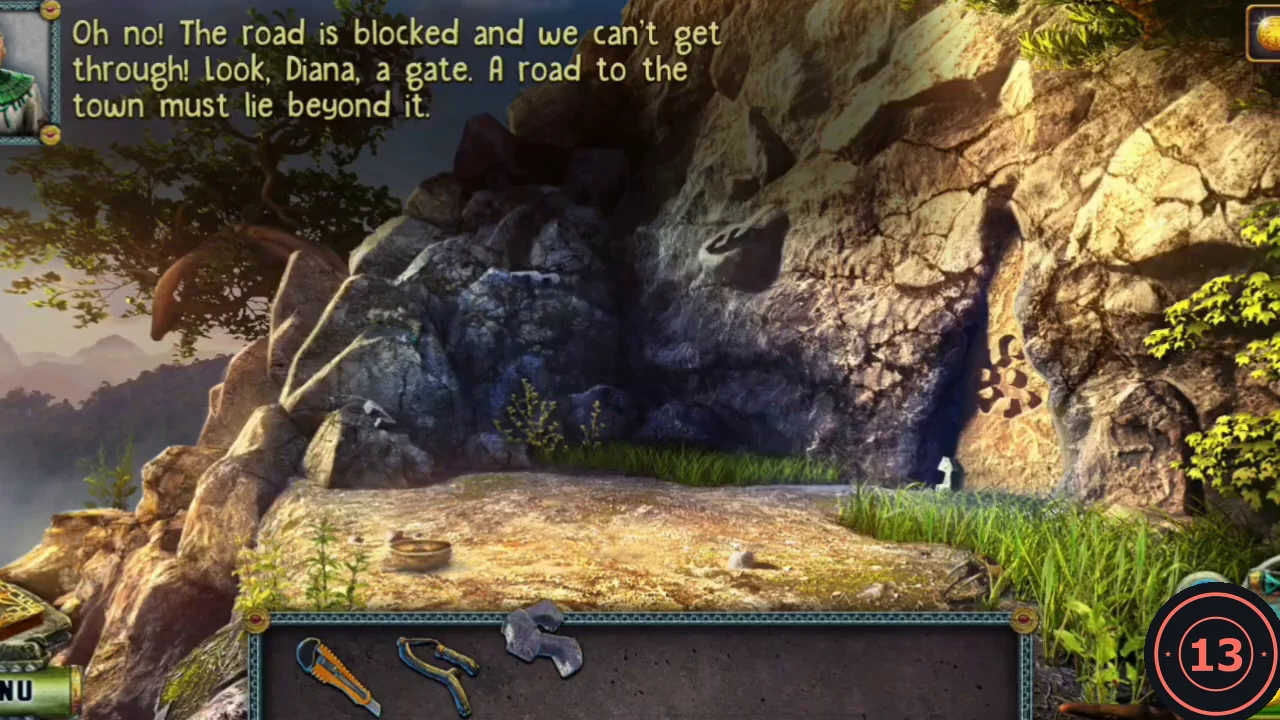
A rockfall blocks the road. Iocktor spots a carved gate in the rock: the road to the town must lie beyond it. Five Bas-relief parts are needed.
- Take the four Bas-relief parts in the scene: the grey piece on the ledge at the front right, the white hook-shaped piece on the rock face in the centre, and one each among the dark rocks at the upper left and lower left.
- Zoom into the carved rock face right of the ledge, by the small white stone. Take the fifth Bas-relief part from the bottom left of the close-up.
- Place all five Bas-relief parts into the star-shaped recess. The gate opens, a Rocktown guard appears and the golem attacks. Iocktor falls into a tunnel. New task: Find Iocktor.
Pull the bars from the tunnel hole
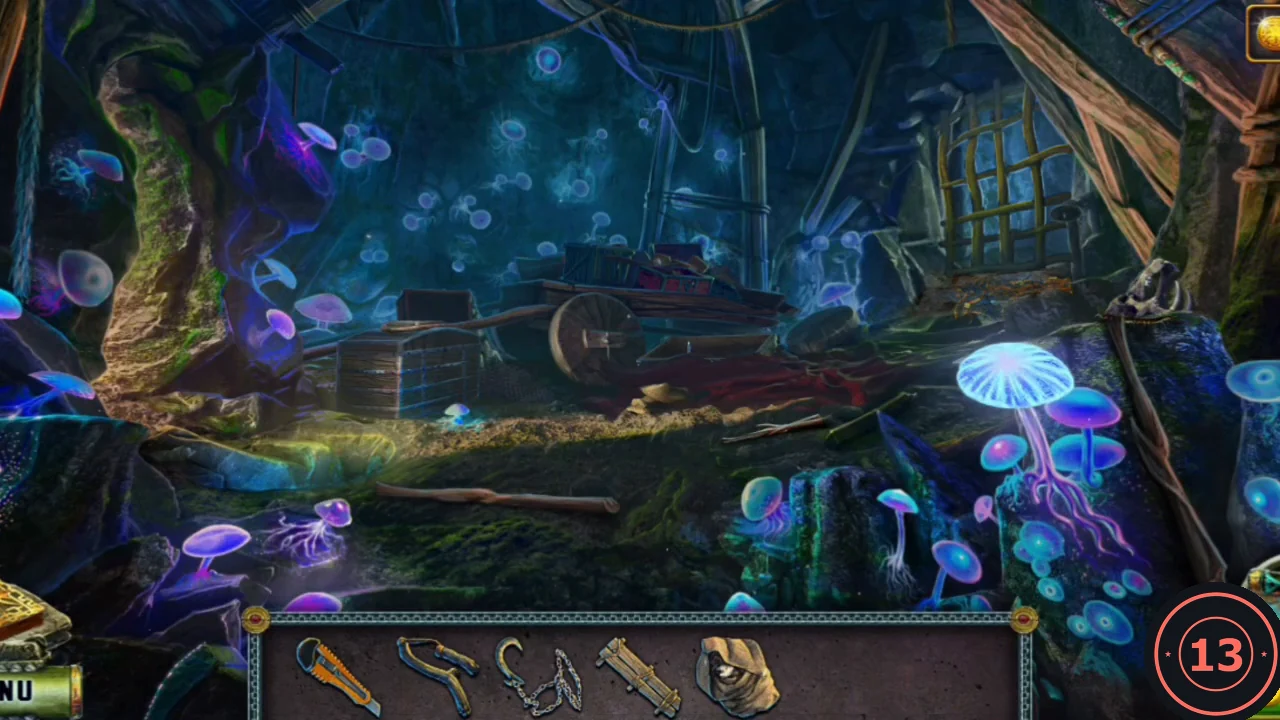
Iocktor fell through a barred hole. Tie something heavy to the bars and drop it into the hole.
- Zoom into the round-lidded chest on the left and take the Empty sack. The chest itself is locked for now.
- Zoom into the broken cart. Take the Chain with a hook. Place the Empty sack, click the six rocks to drop them into it, then take the Cart ledge and the Loaded sack.
- Collect Brushwood: this tunnel holds three of the ten pieces. One is the long branch lying on the mossy ground in front of the crate.
- Zoom into the hole in the floor and clear away the debris. Zoom into the grated window and attach the Chain with a hook to the bars. Then drop the Loaded sack into the hole: its weight pulls the bars away.
- Use the Knife on the large bright mushroom at the front right to cut a Glowing mushroom. Another Brushwood piece lies among the glowing mushrooms at the front right.
Labyrinth hall, troll trap and troll lair
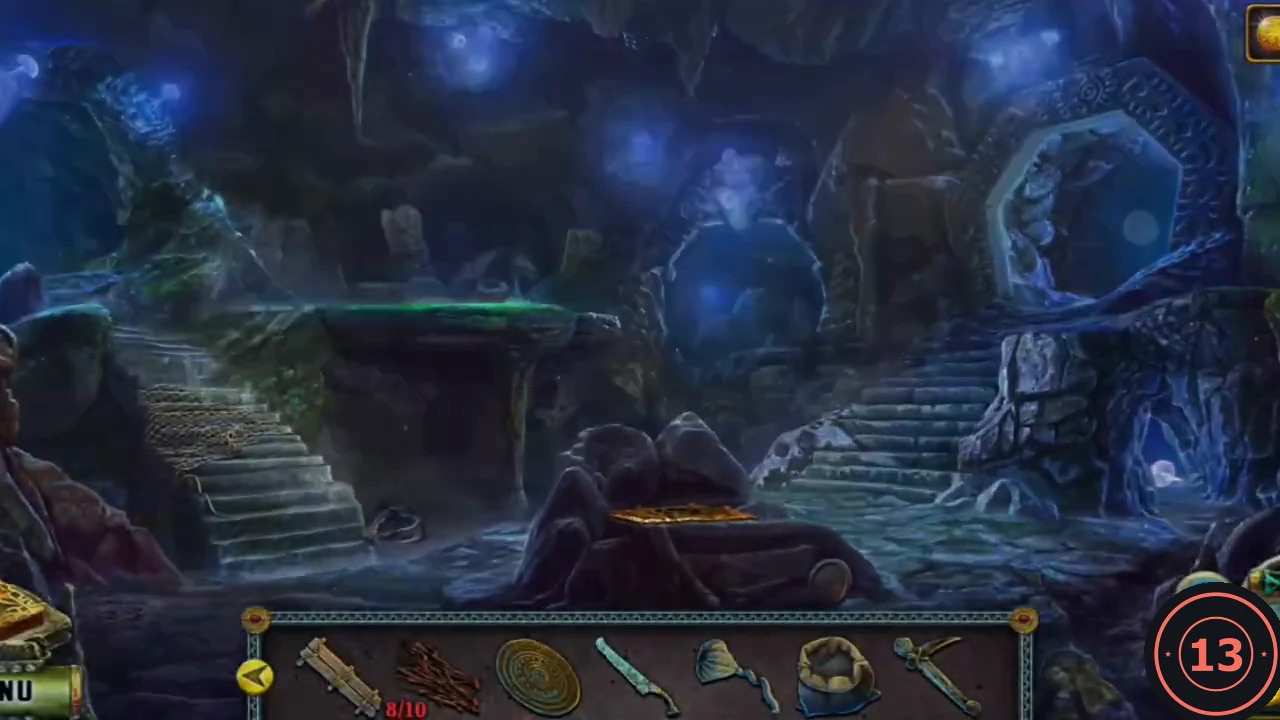
The caves form a labyrinth. Keep collecting Brushwood: four pieces in the labyrinth hall, one in the troll-trap cave and two in the troll lair.
- Go through to the labyrinth hall (the cave with stairs and a round stone lock on the central rock). Pick up the four Brushwood pieces here.
- Zoom into the dark niche in the right wall. Take the Metal tray, then use the Glowing mushroom to light the niche and take the Chest key.
- Go back to the mine tunnel and open the round-lidded chest with the Chest key. Take the Saw, the Fuse and the Gunpowder.
- Find the troll-trap cave, where Iocktor hangs in a cage. Take the Brushwood (8/10) and the Pickaxe here.
- Continue to the troll lair (blue round door, fire pit). Take the Hook. Zoom into the fur pile on the left: take the Forked club, move the fur and take the first Disk.
- In inventory, use the Saw on the Forked club, then add the old Slingshot from the Elder's loft to make a new Slingshot.
- Pick up the last two Brushwood pieces in the troll lair (10/10).
Light the fire and collect the jugs
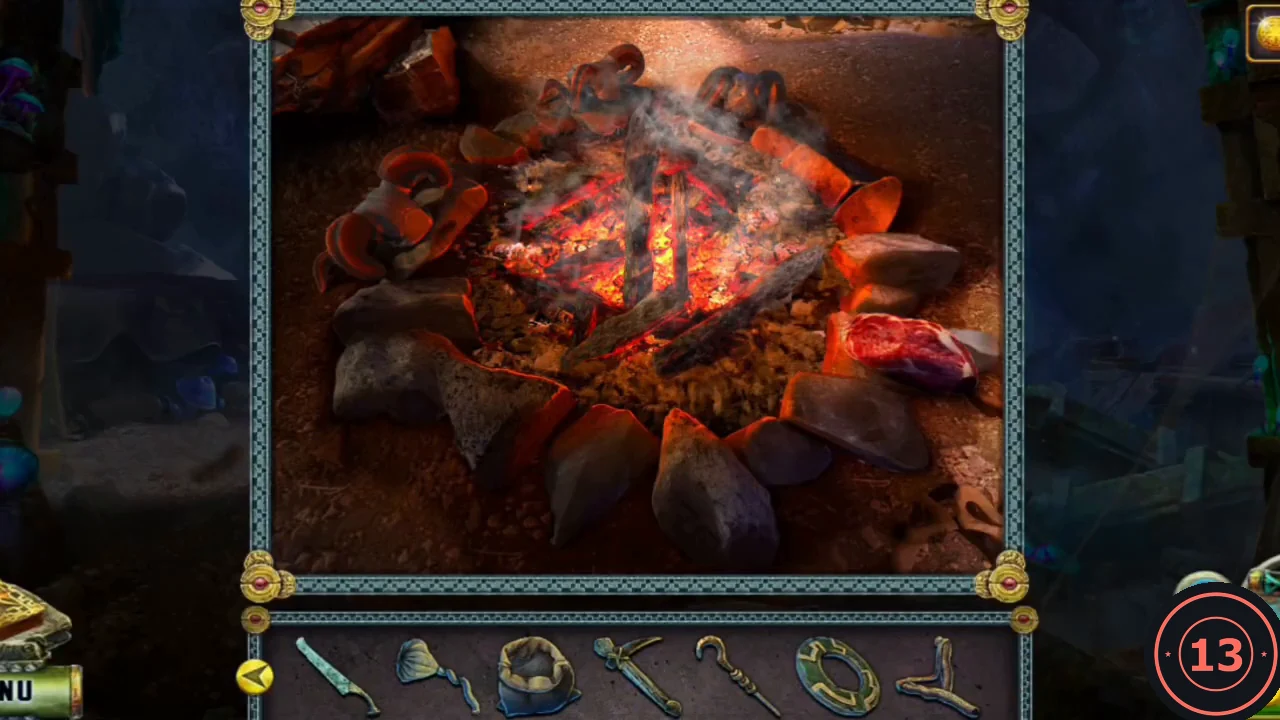
Light the troll's fire pit with the ten Brushwood pieces, then dig through the rubble for a pot to build a bomb.
- Zoom into the fire pit. Lay all ten Brushwood on the embers and fan them with the Metal tray until they catch fire. Take the Meat from the edge of the fire and a Burning branch.
- Zoom into the rubble pile right of the fire and break it with the Pickaxe.
- Collect all the jugs (counter at the bottom, 0/15). The pile scrolls sideways, so drag left and right. Jug locations in the order the recording found them: (1) glass pitcher on the ground at the lower left, between the mossy carved stone and the tied cloth sack; (2) dark blue jug lying on its side just above-left of that sack; (3) red spotted pitcher on the stone chest in the centre, half under the red cloth; (4) click the big brown sack at the top centre to move it, then take the gold lamp-shaped jug it was covering on the plank crate; (5) dark iron jug poking out at the bottom edge below the leaning wooden board; (6) brass two-handled jug inside the wooden barrel left of the plank crate; (7) teal long-necked vase leaning on the blue sack left of the wicker basket; (8) click the wicker basket's lid to remove it and take the orange patterned jug lying on top; (9) click inside the basket to zoom in and take the golden jug at the bottom; (10) green-and-yellow scaly jug behind the red cloth, next to the barrel; (11) clay amphora leaning against the right end of the plank crate, by the tall wooden post; (12) gold jug with a key pattern at the lower right, beside the round metal pot; (13) grey jug tucked behind the blue tied sack at the top, next to the crate; (14) green jug sitting on the blue sack in the top-left corner, above the wicker basket; (15) blue pitcher hidden behind the right side of the tied cloth sack at the lower left. At 15/15 the Pot is awarded.
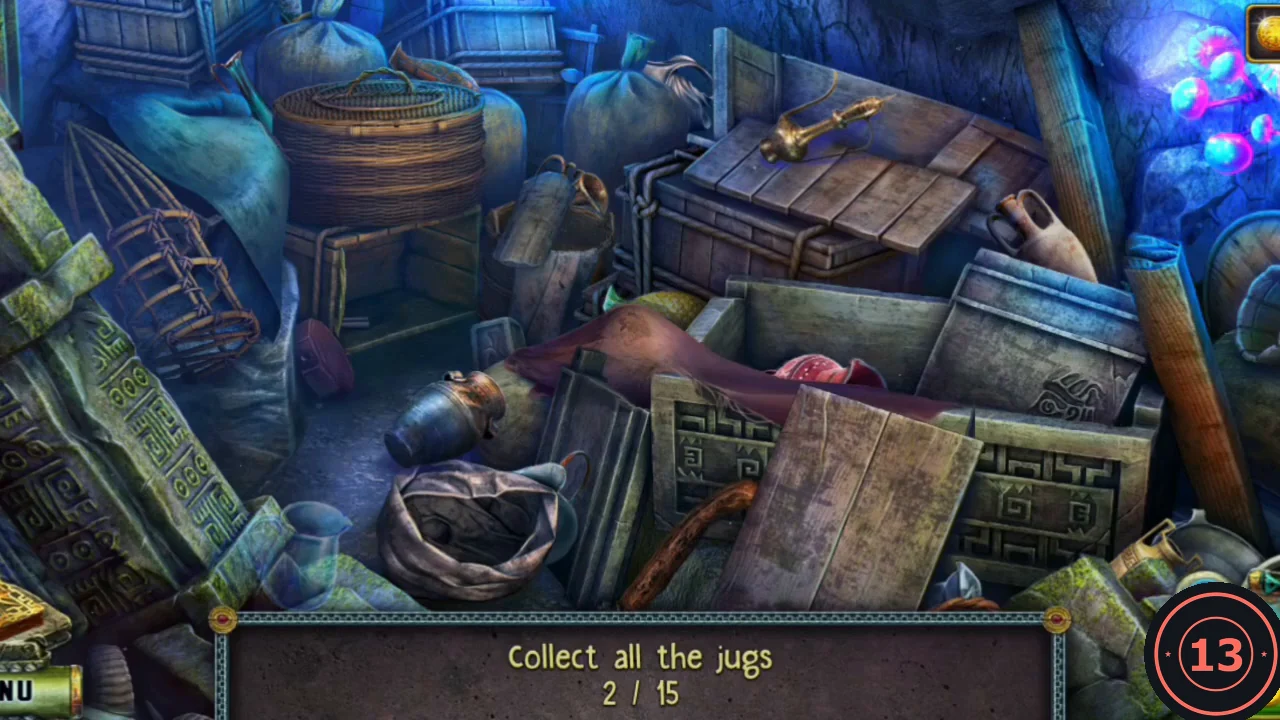
The rubble pile. The counter at the bottom tracks the jugs found (15 in total); the pile scrolls sideways. - In inventory, put the Fuse and the Gunpowder into the Pot to make a Bomb.
Free Iocktor and ride the lift
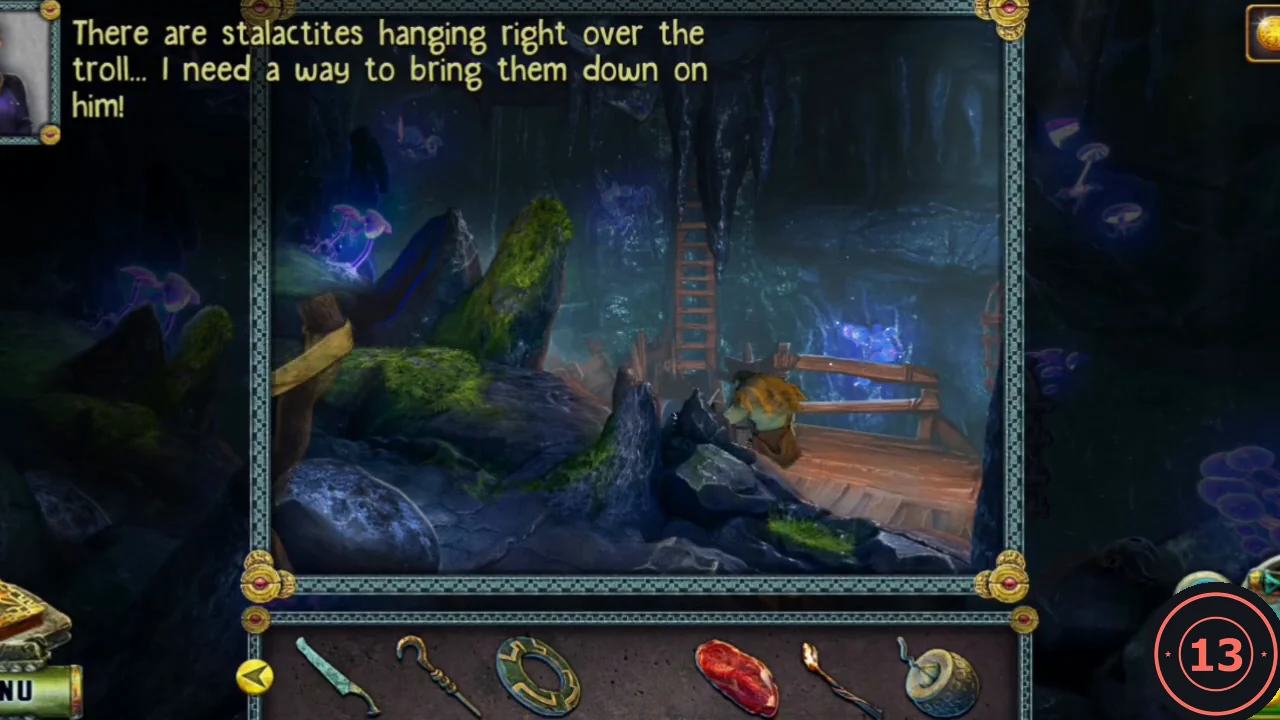
Stalactites hang right over the sleeping troll. Bring them down on him.
- In the troll-trap cave, zoom in on the troll. Place the Slingshot, lay the Burning branch on the ledge, then load the Bomb into the Slingshot. The stalactites fall on the troll.
- Zoom into the troll's pouch and open it. Take the Summer element.
- Zoom into Iocktor's cage. Use the Hook to pull the cage in, then cut the ropes with the Saw. Iocktor gives you the Turnkey he stole from the troll (task complete: Find Iocktor). Keep the Hook; you need it again.
- Back in the mine tunnel, zoom into the lift mechanism and use the Turnkey. Ride up to Rocktown. New task: People of Rocktown.
Rocktown square
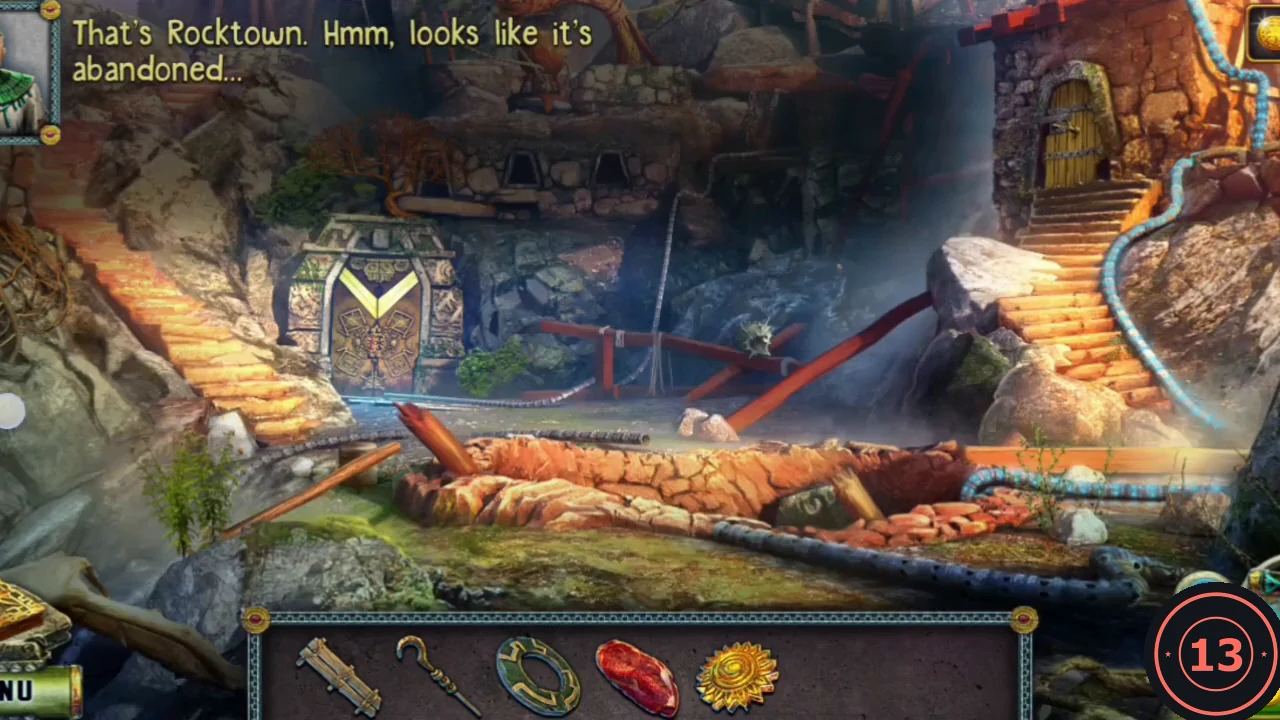
Rocktown looks abandoned. Search the square carefully; one small item at the stone gate is easy to miss.
- Take the Shaft lying on the ground at the front centre.
- Zoom into the carved stone gate on the left (V emblem). Take the Spring element (green flower) at its lower right. Also take the Bowstring: the small ring hanging at the upper right of the round disc lock. It is already there on this first visit but easy to overlook; the recording only came back for it when building the crossbow.
- Click the dug pit at the front centre to open a hidden-object list of 15 items: Shield, Mug, Feather, Hammer, Hook, Paddle, Machete, Stool, Gear, Rim, Figurine, Skull, Cage, Egg and Chain. The view scrolls slightly, so drag it if an edge is cut off. Locations: Egg in the straw nest inside the round stone ring at the top left; Paddle, the wooden scoop leaning against the stone left of centre; Machete, the blade hanging upright in front of the round wooden shield; Figurine, the small carved wooden figure between the green jade blocks at the lower left. Click the small wooden cross in the carved stone block at the top centre to see into the hole behind it, then take the Hook (silver hook on the left), the Stool (wooden frame lying across the hole), the Feather (dark feather on the right), the Skull (bird skull at the top) and the Rim (curved golden band at the lower left). Back in the pit: Shield, the round spoked wooden shield in the centre; Cage, the small golden birdcage by the fern at the bottom; Chain, looped over the dark clay pot behind the fern; Gear, the wooden cog wedged in the broken scaffold on the right; Hammer, the small hammer on the planks of that scaffold; Mug, the clay mug on top of the scaffold at the upper right. Reward: Crossbow stock.
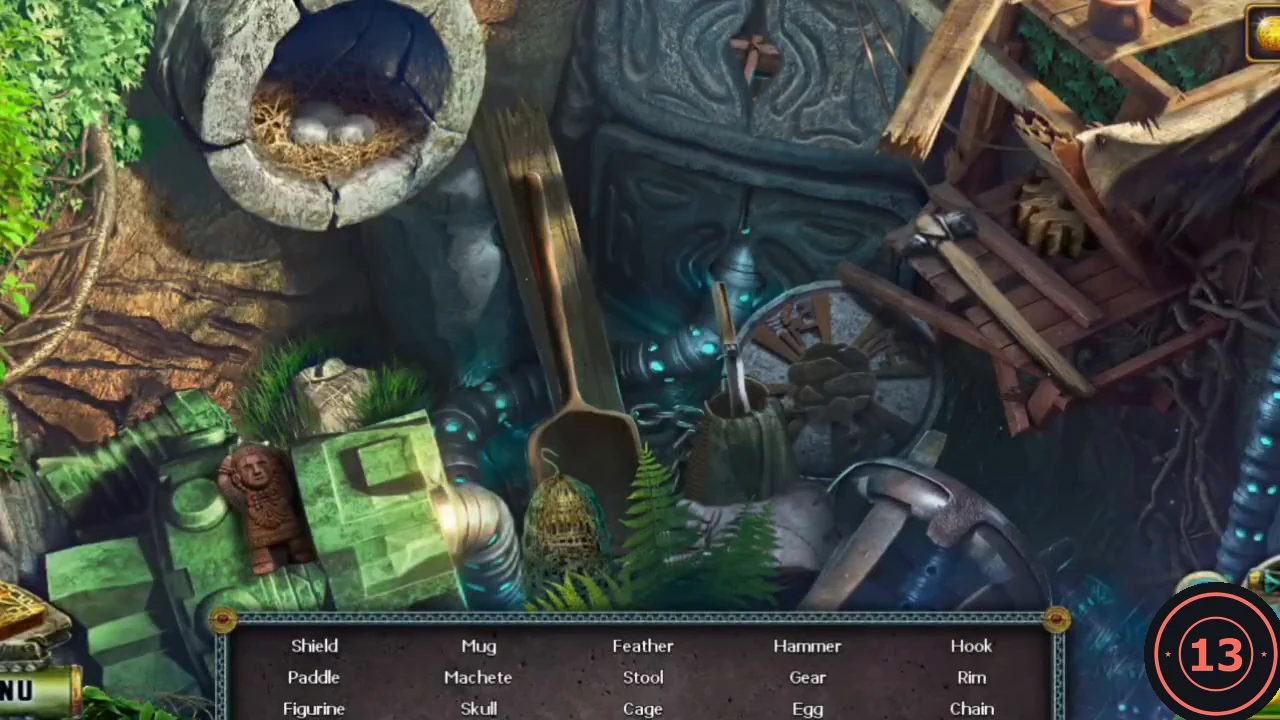
The dug pit hidden-object scene with its list of fifteen items. - Zoom into the house door at the top of the stairs on the right. It is bolted from inside; take the Sight lying there.
- Zoom into the tower at the upper left. The ladder is too high, so pull it down with the Hook and climb up into the house.
The guard's house and the forge
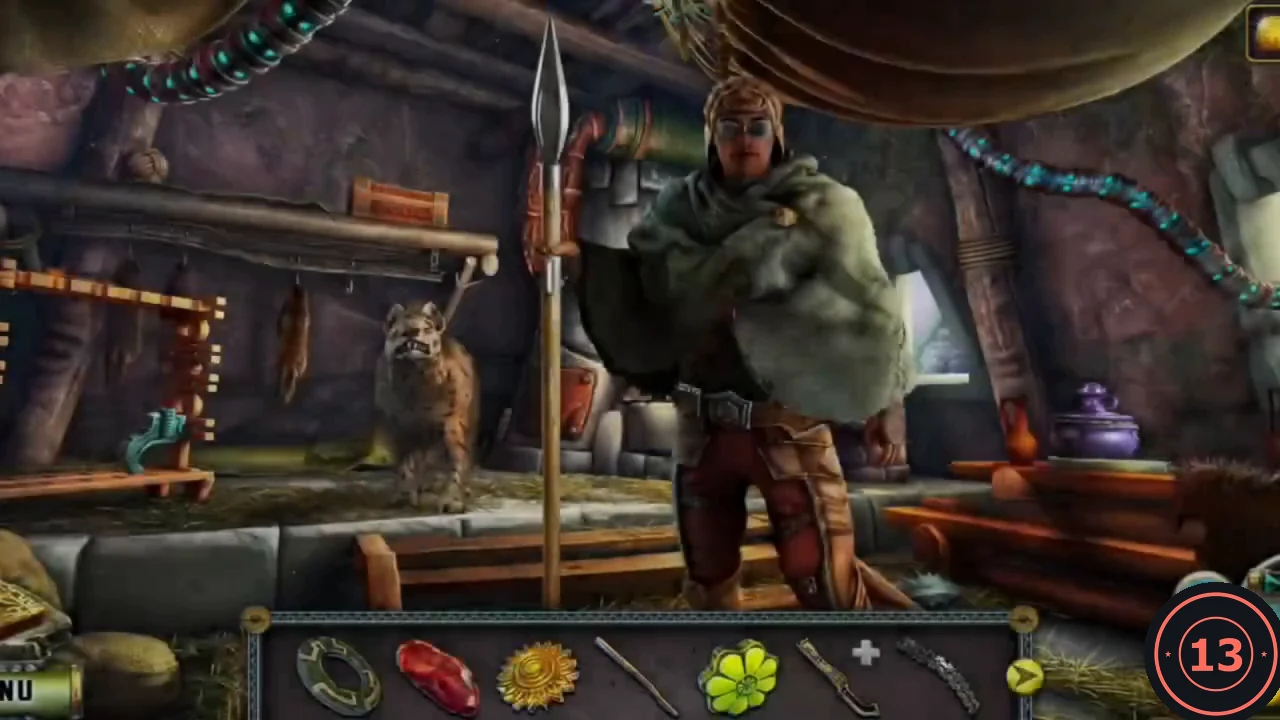
The man tells you the golem was sent by Kitron. New task: Destroy the golem. A Seed of growth can do away with the rocky monster.
- Talk to the man to receive the Tile.
- Give the Meat to the hyena by the forge on the left. It moves away and reveals a weapon rack.
- Zoom into the weapon rack. Take the Crossbow bolt (the arrow at the top), then fit the Shaft into the axe head to make the Battle axe.
- Lift the lid of the purple pot on the right. Take a Limb and the second Disk.
- Zoom into the forge and move the items aside to take the Bolts.
- A key hangs on a beaded string high above the forge, out of reach. Cut it down with the Battle axe to get the Key.
- Zoom into the small carved chest on the high shelf left of the forge. Take the second Limb from the lid, unlock the chest with the Key and take the Trigger.
Rotate the rings of the stone lock
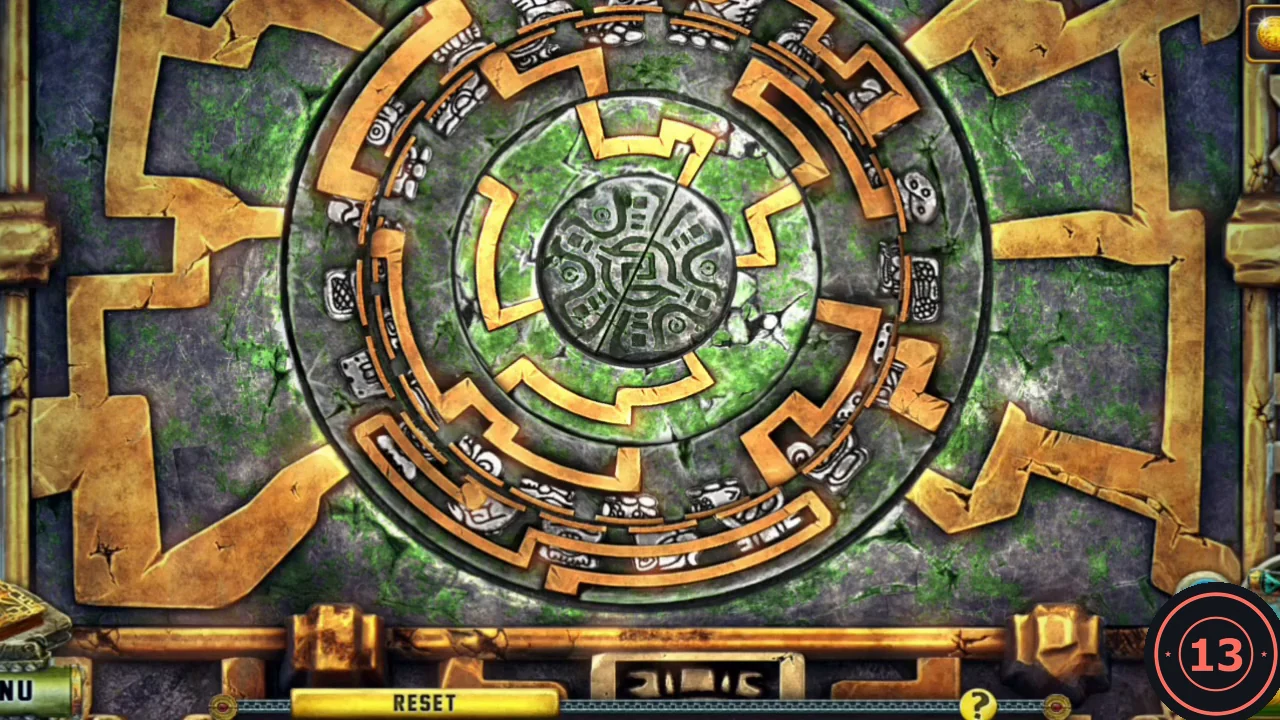
Go back down to the labyrinth hall and zoom into the round stone lock on the central rock. It needs both Disks.
- Place both Disks into the lock.
- The lock has three concentric rings (outer ring with white glyphs, middle and inner) carrying gold track segments. Rotate the rings until all gold segments join into one continuous pathway that links up with the gold lines on the surrounding frame; the solved lock glows green. Your starting position may differ, so match the finished picture rather than counting clicks. RESET restarts.
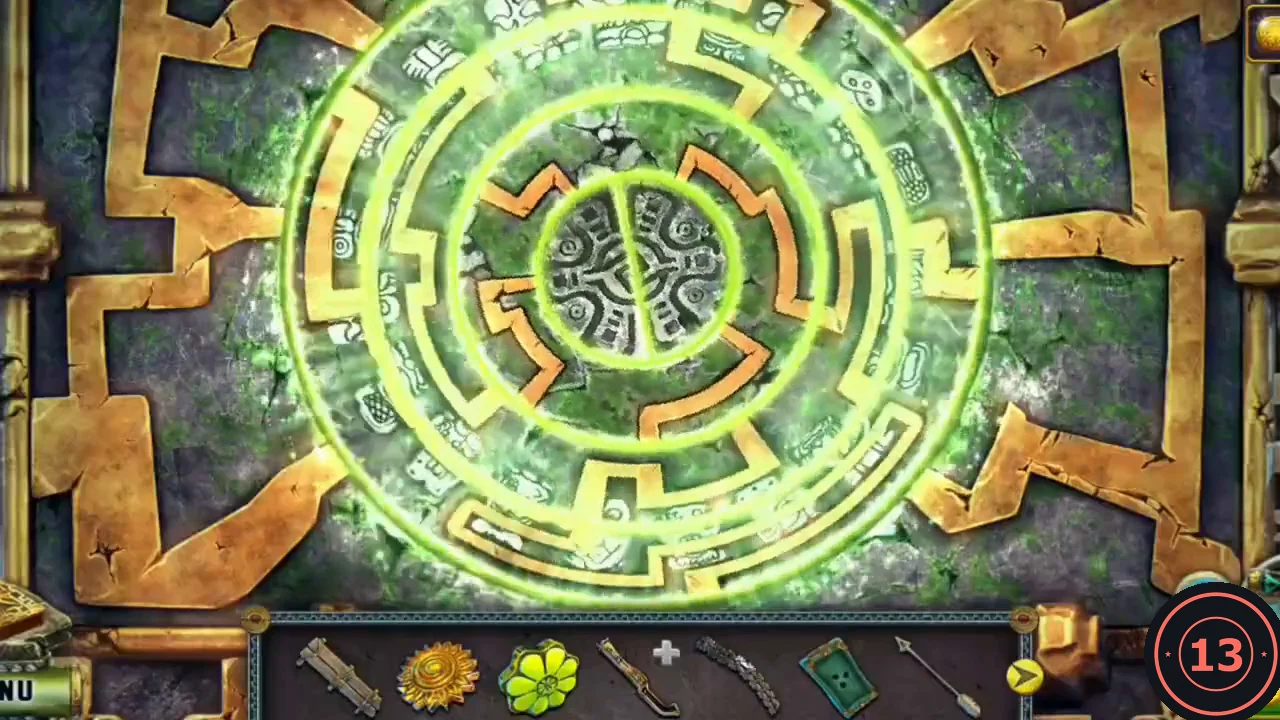
Solved: the gold segments form one pathway and the lock glows green. - Take the Autumn element (red leaf) from the opened centre.
Move the chips onto the red cells
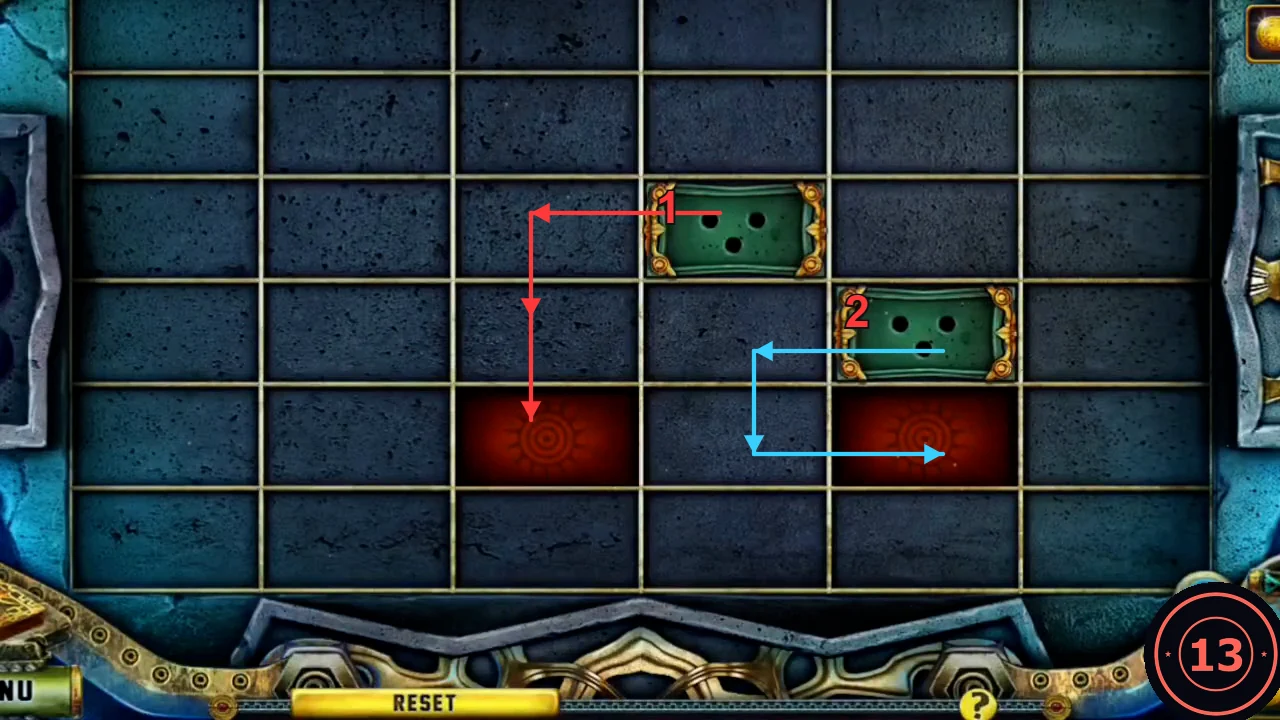
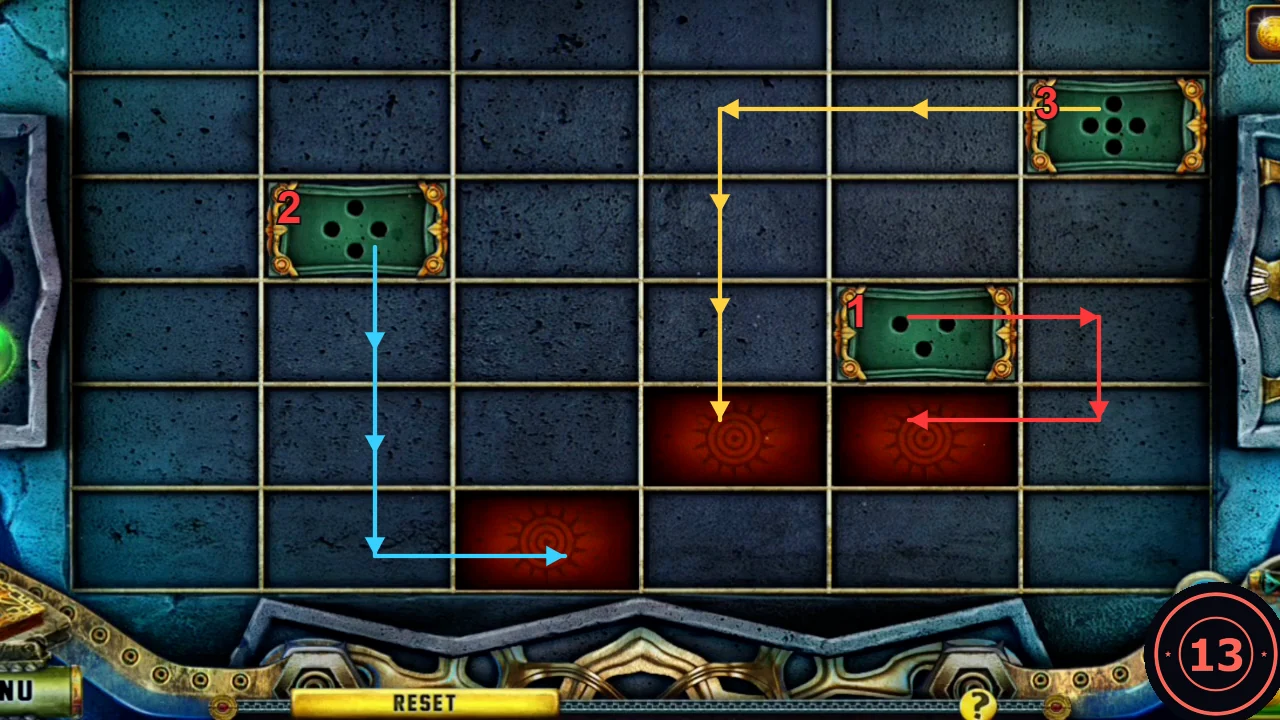
From the labyrinth hall go right into the ice cave with the round door and campfire. Rule: click a chip, then click a neighbouring cell to move it one cell up, down, left or right. The dots on a chip show how many moves it has left, and each chip must end on a red sun cell exactly when its dots run out. Columns are counted 1 to 6 from the left. Three rounds.
- Place the Tile on the panel on the wall right of the fire to start the puzzle.
- Round 1 has two 3-dot chips; the upper one sits one column left of and one row above the lower one, and the two red cells are one row below the lower chip. Upper chip: left, down, down onto the left red cell. Lower chip: left, down, right onto the right red cell.
- Round 2 has a 5-dot chip in the top-right corner, a 4-dot chip in column 2 and a 3-dot chip in column 5, with three red cells lower down. 3-dot chip: right, down, left. 4-dot chip: down, down, down, right. 5-dot chip: left, left, down, down, down.
Round 2. 1 red: 3-dot chip right, down, left. 2 blue: 4-dot chip down three times, then right. 3 yellow: 5-dot chip left, left, then down three times. - Round 3 has a 3-dot chip at the top of column 6, a 4-dot chip in column 3, and a 4-dot chip in column 2 and a 5-dot chip in column 4 on the row below it. Red cells: column 5 on that lower row, and columns 2, 3 and 4 on the bottom row. 3-dot: down, down, left. 4-dot in column 3: down, down, right, down. 4-dot in column 2: down, left, down, right. 5-dot: up, left, down, down, down.
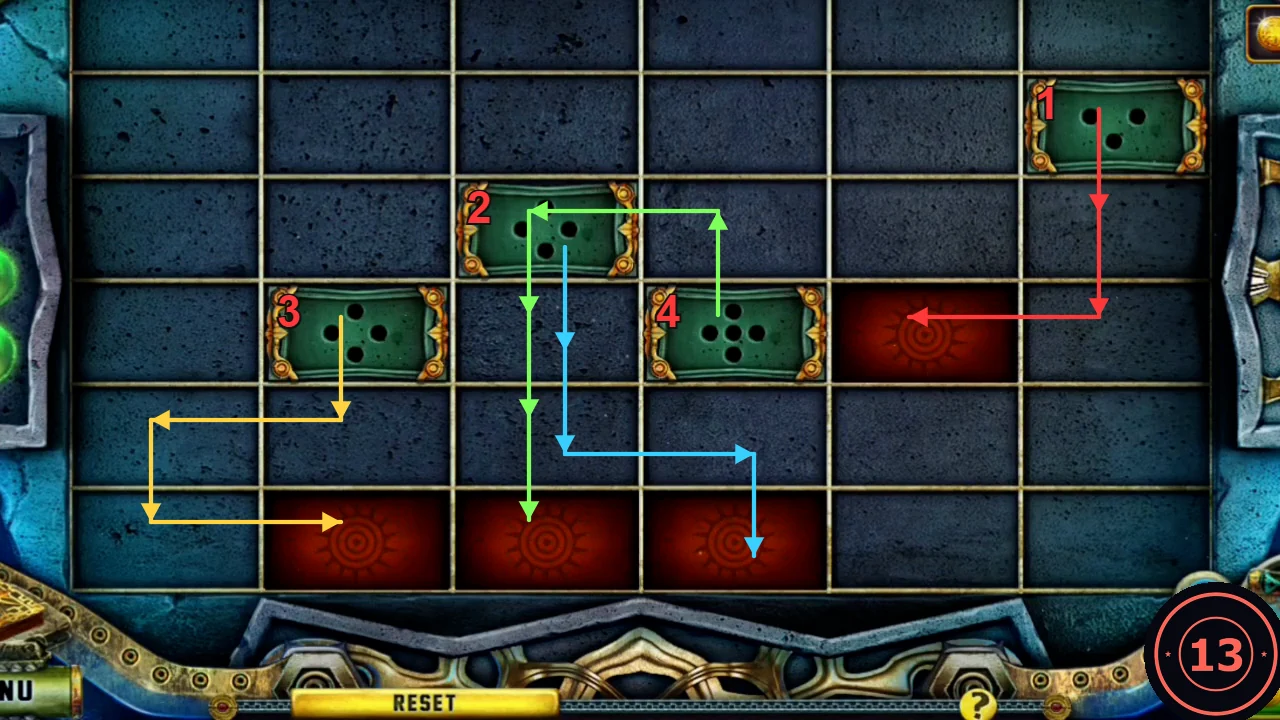
Round 3, in this order. 1 red: 3-dot down, down, left. 2 blue: 4-dot (column 3) down, down, right, down. 3 yellow: 4-dot (column 2) down, left, down, right. 4 green: 5-dot up, left, then down three times.
The four seasons and the Seed of growth
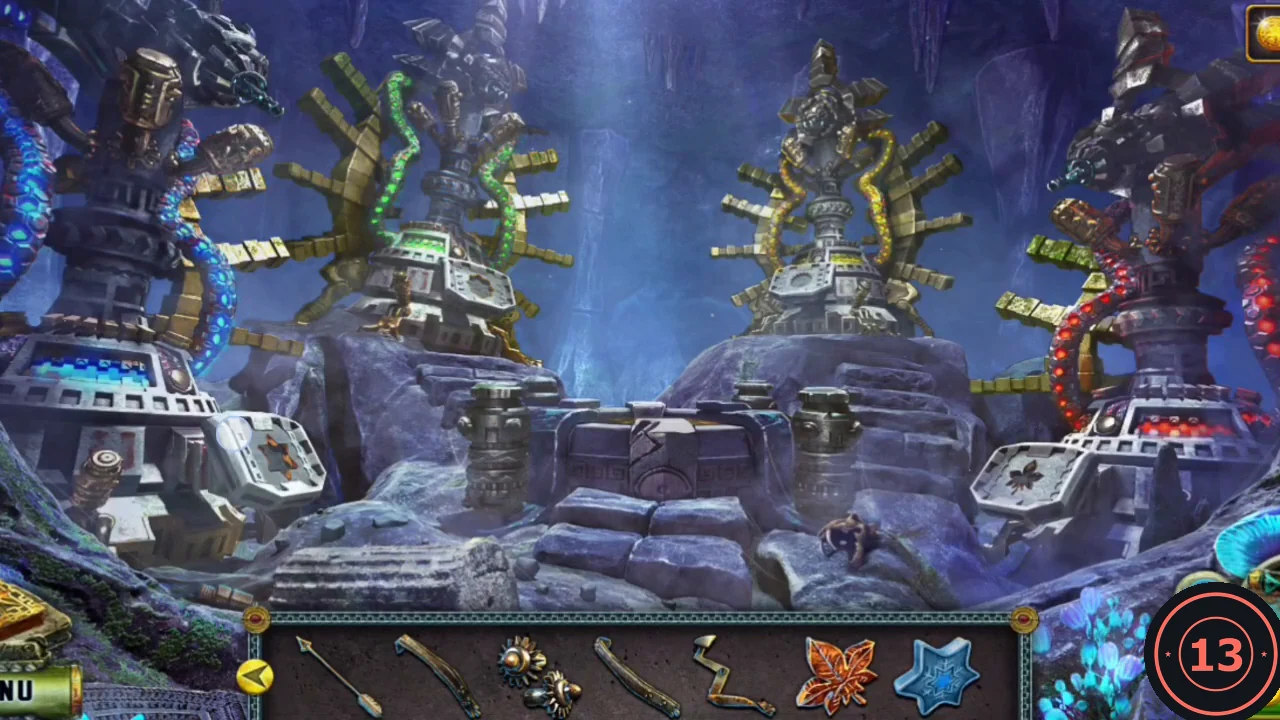
Go through the round door to a shrine with four statues: blue (far left), green (left of centre), yellow (centre back) and red (right). Each has a pedestal with an element-shaped recess in front of it.
- Zoom into the central altar at the front and take the Winter element (blue star).
- Place each element in its matching pedestal: Winter (blue star) at the left front, Spring (green flower) in the green pedestal, Summer (orange sun) in the yellow pedestal and Autumn (red leaf) at the right front.
- Click the statues to light their beams so that all four meet on the altar. The order used in the recording was green, blue, yellow, red (spring, winter, summer, autumn); if a beam goes wrong, press RESET and try again.
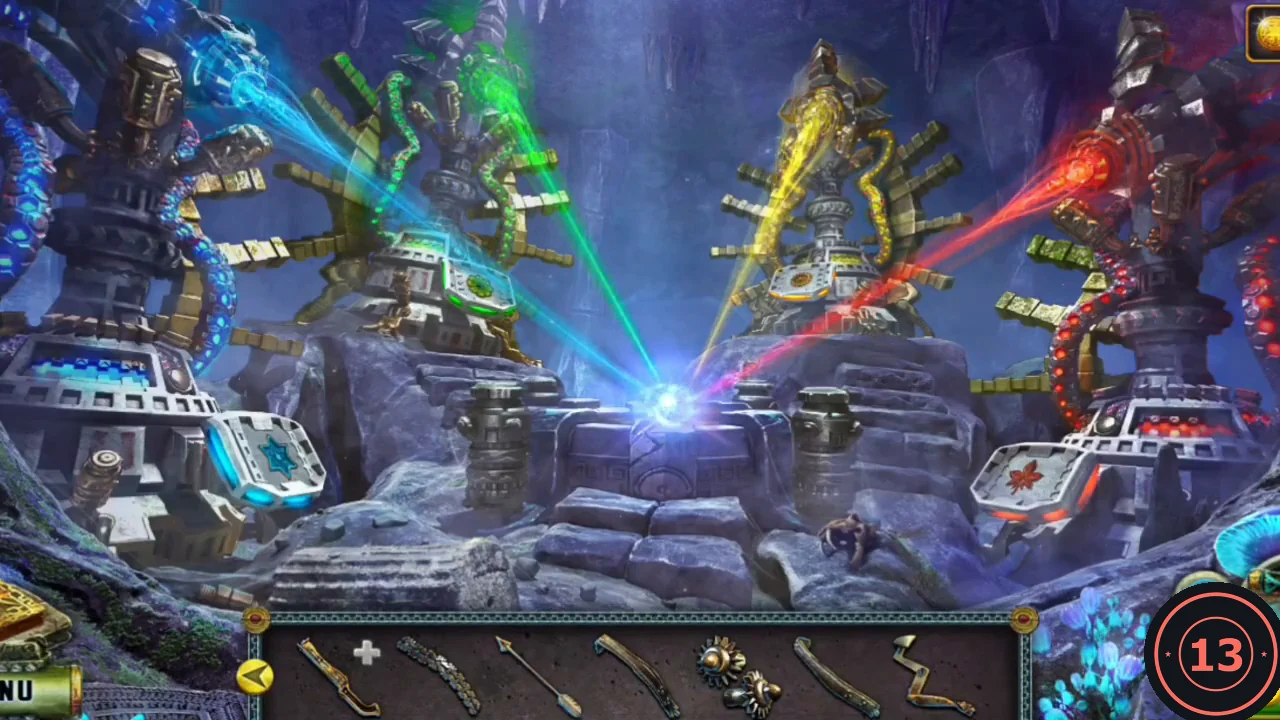
Solved: all four beams meet on the altar. - Zoom into the altar and take the Seed.
Build the crossbow and destroy the golem
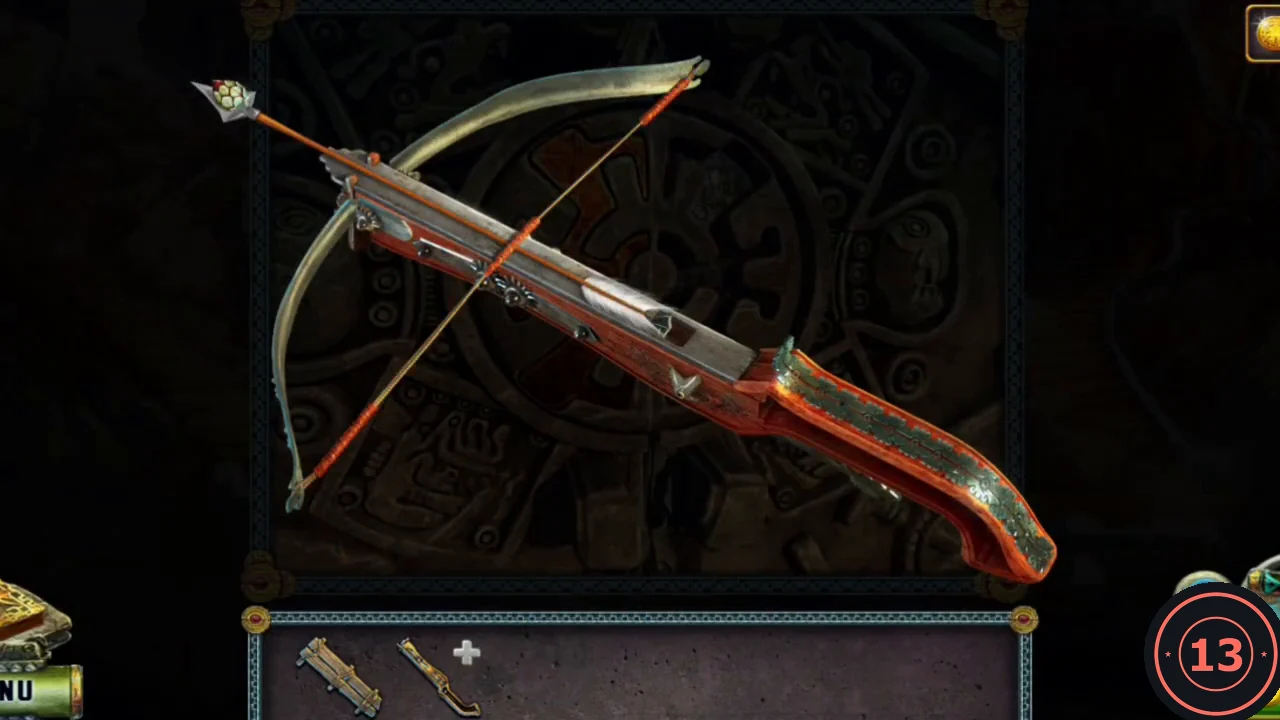
Assemble the crossbow from the parts collected in Rocktown, then use the Seed of growth on the golem.
- Open the Crossbow stock in inventory. Add the Sight, both Limbs, the Crossbow bolt, the Trigger, the Bolts and the Seed, then the Bowstring to finish the Loaded crossbow.
- Return to the mine tunnel where Iocktor fell. Zoom into the glowing tunnel opening and use the Loaded crossbow on the golem.
- The Rocktown man thanks you and hands over the Special key. New task: Search the Underwater City.
- In Rocktown square, zoom into the carved stone gate and put the Special key into the round disc lock. The gate opens onto a blue passage; go forward to the grotto with the submarine.
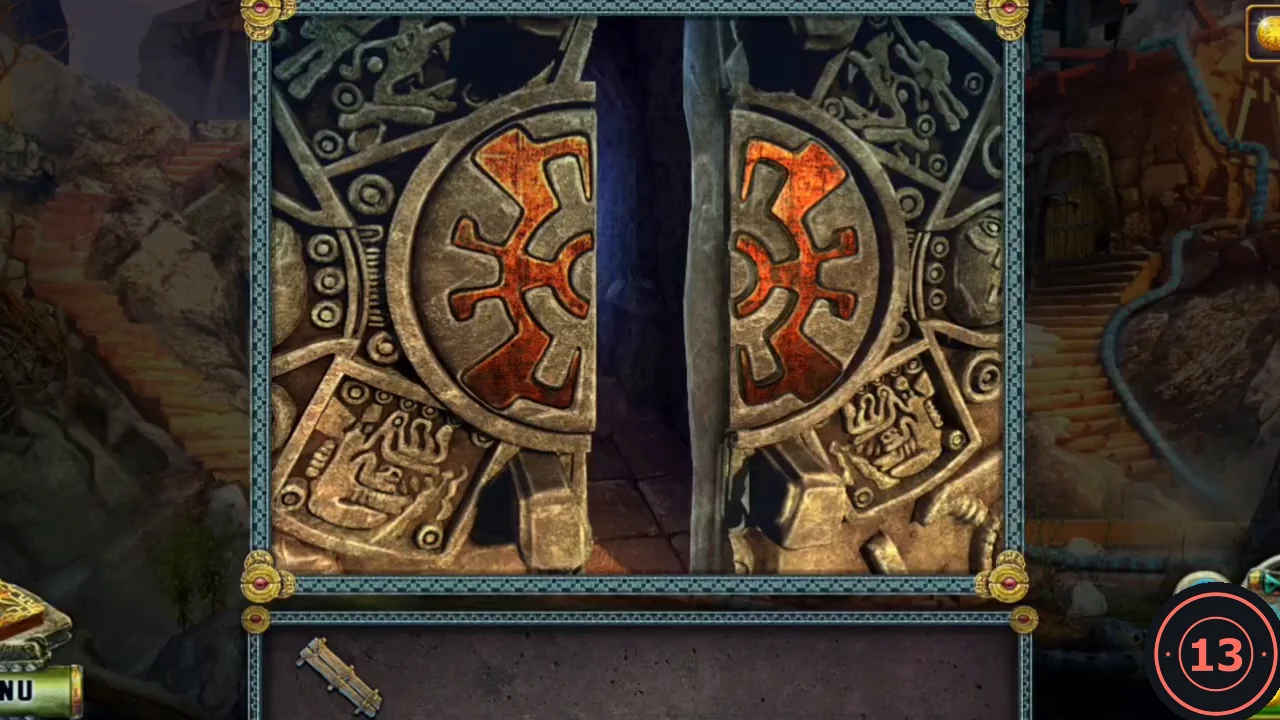
The Special key opens the carved stone gate in Rocktown square.