CHAPTER 8
The Museum Hall
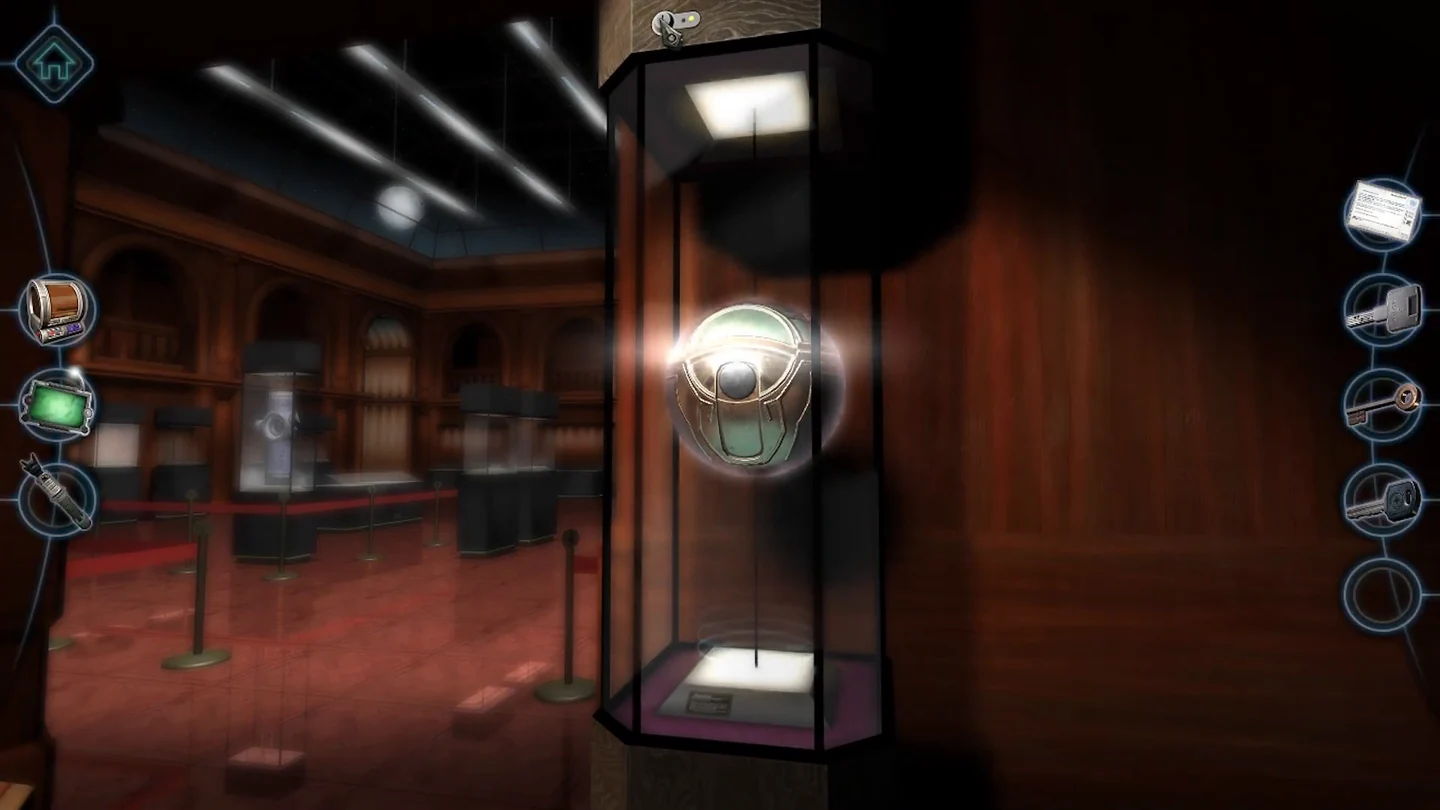
This chapter takes you out of the workshop into the museum's main hall.
- Pick up the set of keys from the stand and read the letter under them. Then go through the door into the museum's main hall.
- At the display cabinet, use the rectangular key in the upper lock, turn it and open the glass door. The machine inside turns out to be a replica. Use the old key in the lower lock and open the wooden door below; lift out the padded bag.
- Unzip the left zipper. The right zipper has no slider: click the button on the left side of the bag until it comes off, take the zipper slider and attach it to the right zipper. Drag the right zipper open, then lift the lid and take out the machine.
CHAPTER 8
The Outer Shell
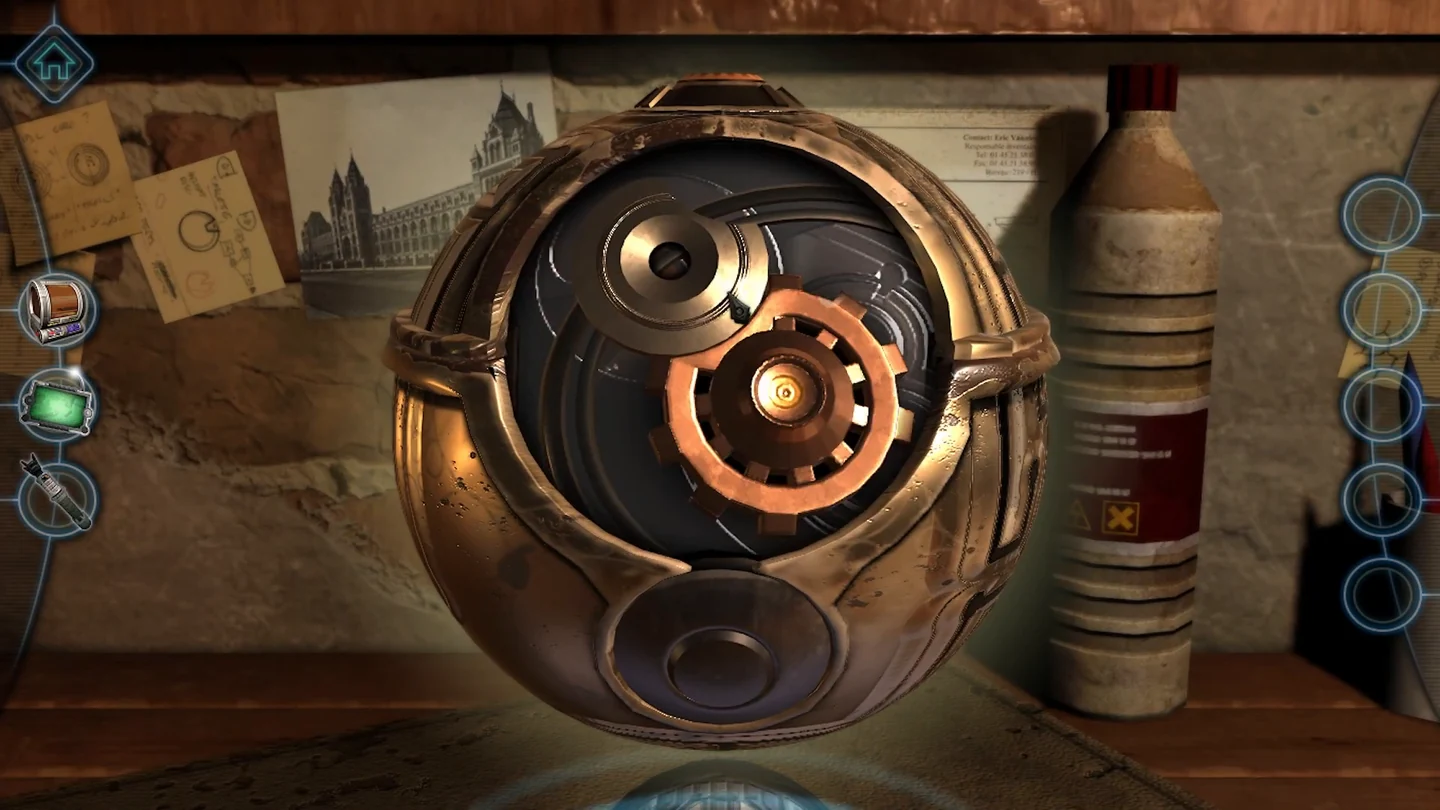
Open the machine's bronze shell by setting its dials and holograms and tracing the path on its casing.
- Slide open the front cover. Rotate the top-left disc, then the orange gear twice. Use the screwdriver on the raised disc near the bottom, match its shape and turn it; the machine changes shape several times.
- Turn the two small dials near the bottom of the machine to line up with the orange marks; two blue holograms appear. Match them to the symbol on the main machine: left planet with its C-shape facing 6 o'clock, both left moons at 6 o'clock; right planet with its larger disc facing 12 o'clock, outer moon at 12 o'clock and inner hollow moon at 1 o'clock. Both turn green.
- Look at the bronze casing; a yellow path appears. Drag the orange marker along the path from the bottom all the way to the top. A raised button appears there; press it and the machine opens to show a floating inner sphere.
CHAPTER 8
The Gear Panels
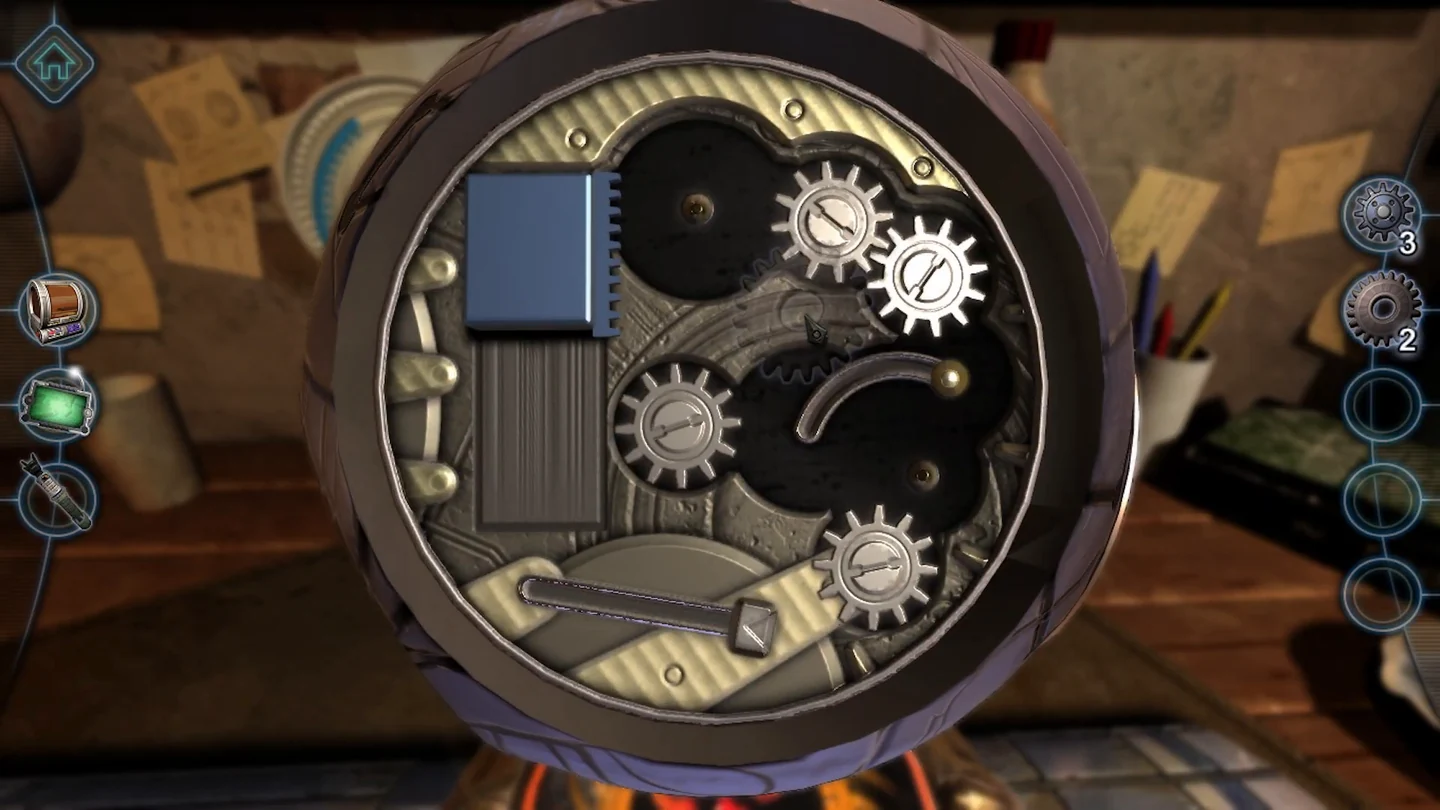
Build working gear chains on two panels. The first releases a crystal shard that powers the second.
- Remove the top panel and take the small gear and large gear. Duplicate them with the printer; you need two large and three small gears in total. Remove the other panels and take the floating half gear wheel.
- The panel with the blue cover takes two passes. First, make sure the movable spindle sits at the right end of its curved slot. Put a large gear on the upper-left peg, a small gear on the movable spindle and another small gear on the lower outer-right peg. Pull the small handle in the horizontal slot at the bottom to the left; the blue cover lowers halfway. Next, take back the large gear from the upper-left peg and the small gear from the movable spindle, leaving the lower outer-right small gear in place. Slide the empty spindle to the left end of its slot, put the large gear on it in the centre and pull the bottom handle left again. The cover lowers fully; take the crystal shard it uncovers.
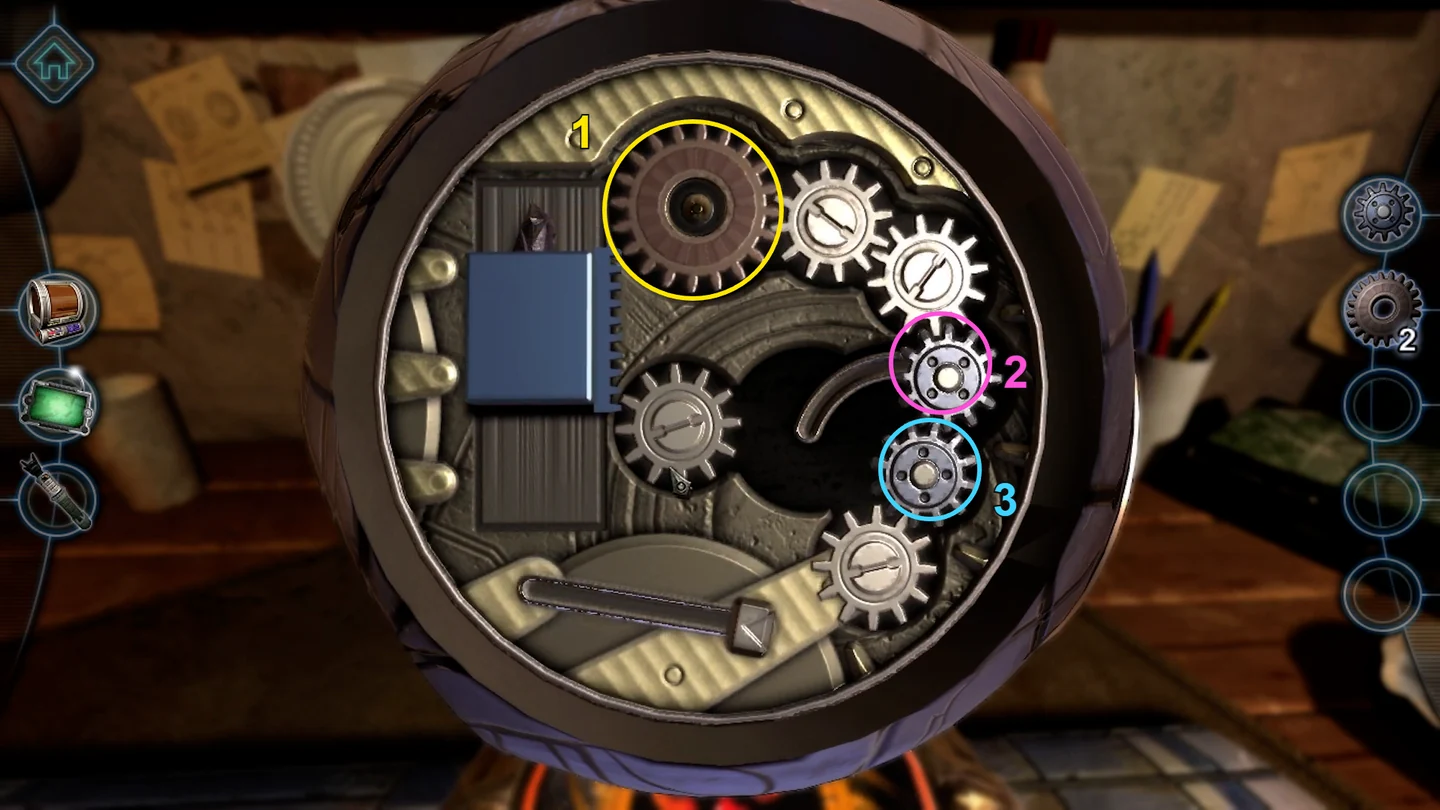
First pass: 1 large gear on the upper-left peg, 2 small gear on the movable spindle at the right end of its slot, 3 small gear on the lower outer-right peg. After pulling the handle, the blue cover has lowered halfway. 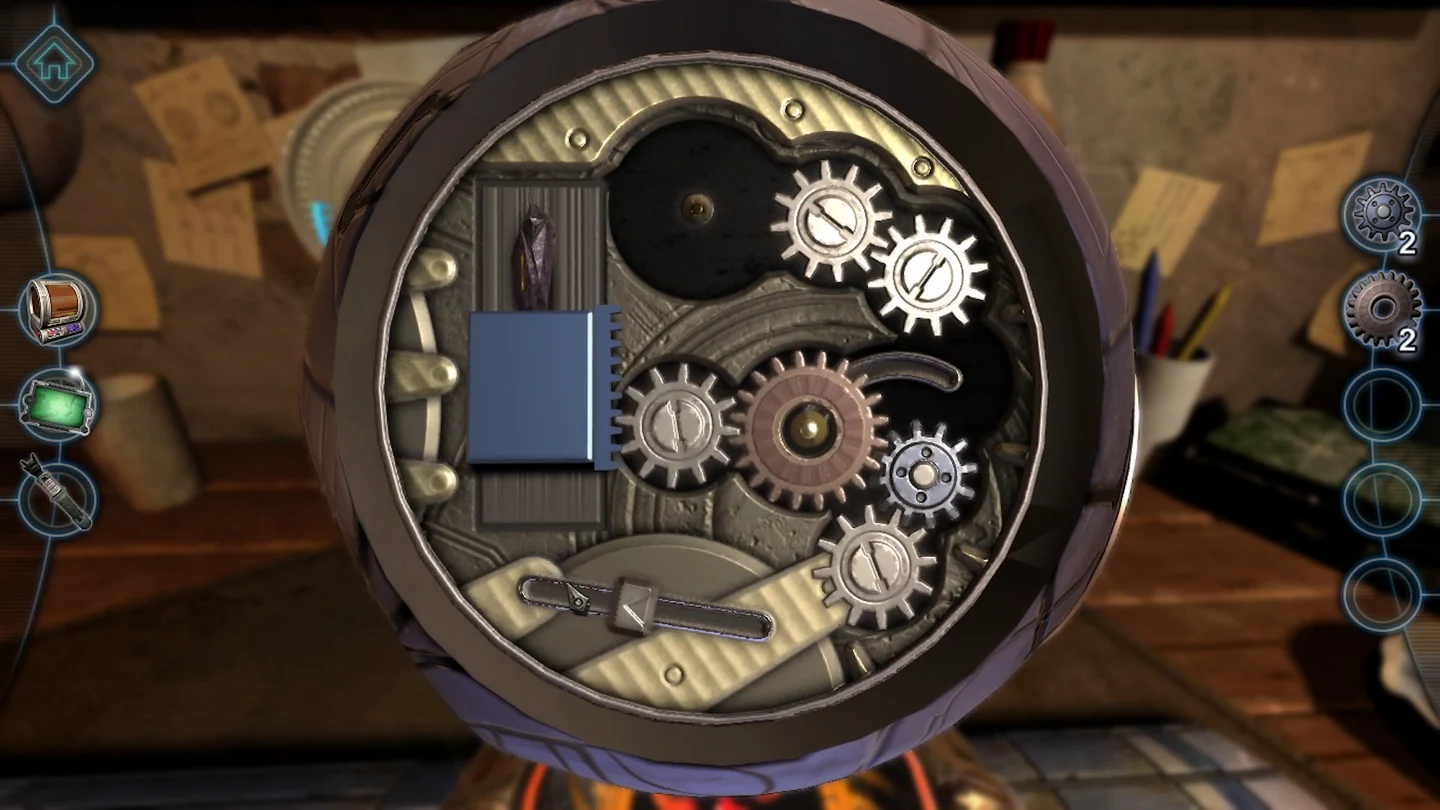
After the second pass: the large gear sits on the moved spindle in the centre, and the blue cover is lowering to expose the crystal shard. - The panel with the red gear has two movable spindles, each in its own curved track: an outer one on the right and an inner one between the fixed top gear and the right-hand spindle. Both must be at the upper ends of their tracks. First place a small gear from your inventory on the empty peg below and to the right of the red gear. Put a large gear on the right-hand spindle. Drag the inner spindle up to the top of its track, then put a small gear on it so it links the fixed top gear and the large gear. Fit the half gear wheel around the edge and insert the crystal shard on the left. Move the rectangular control so all the gears turn, then take the radiating crystal.
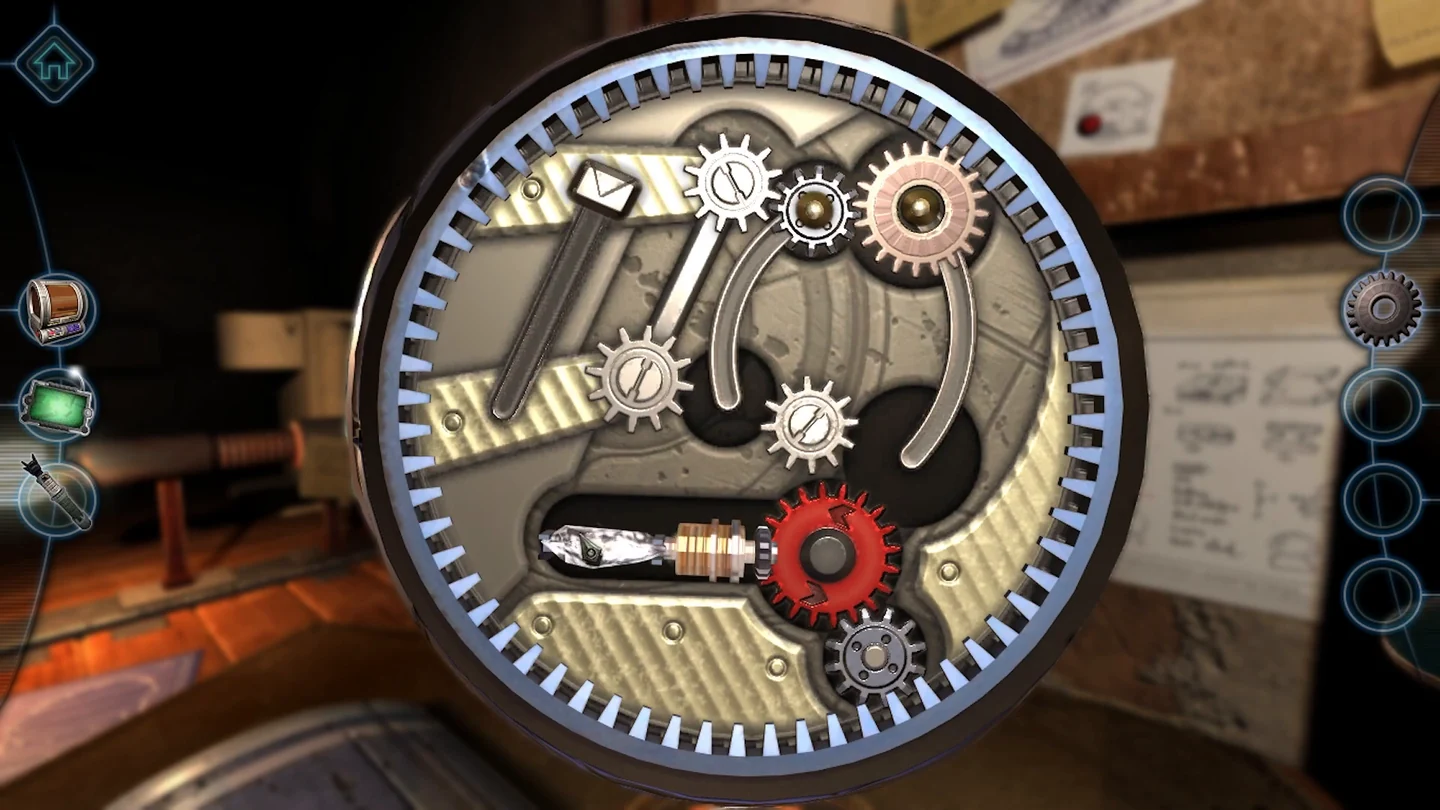
The finished red panel: large gear on the right-hand spindle and small gear on the inner spindle, both at the tops of their tracks, a small gear on the peg below and right of the red gear, the toothed ring fitted and the crystal shard inserted on the left.
CHAPTER 8
The Planetarium Core
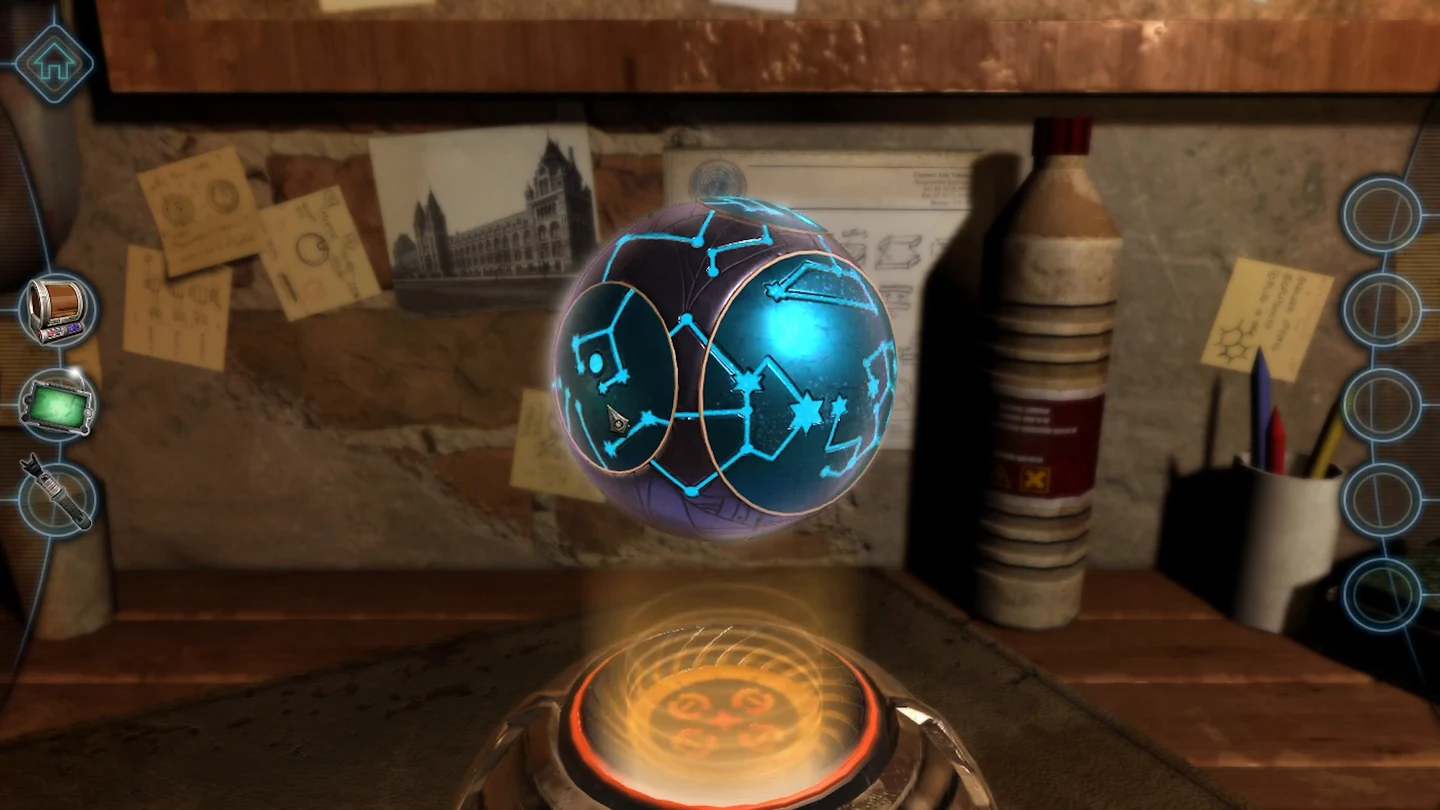
Wake the planetarium core by lining up its glowing markings and then its orbiting discs.
- Insert the radiating crystal into the smaller side panel. The markings around the sphere glow; rotate the panels until the glowing markings line up.
- An orange and white device appears. Insert the endoscope into the hole at its bottom. Press the device's five orange segments to move the coloured orbiting discs until they line up with the surrounding planets on the screen. The planetarium switches on and the chapter ends.
EVIDENCEBronze planetarium sphere