CHAPTER 7
The Code Trunk
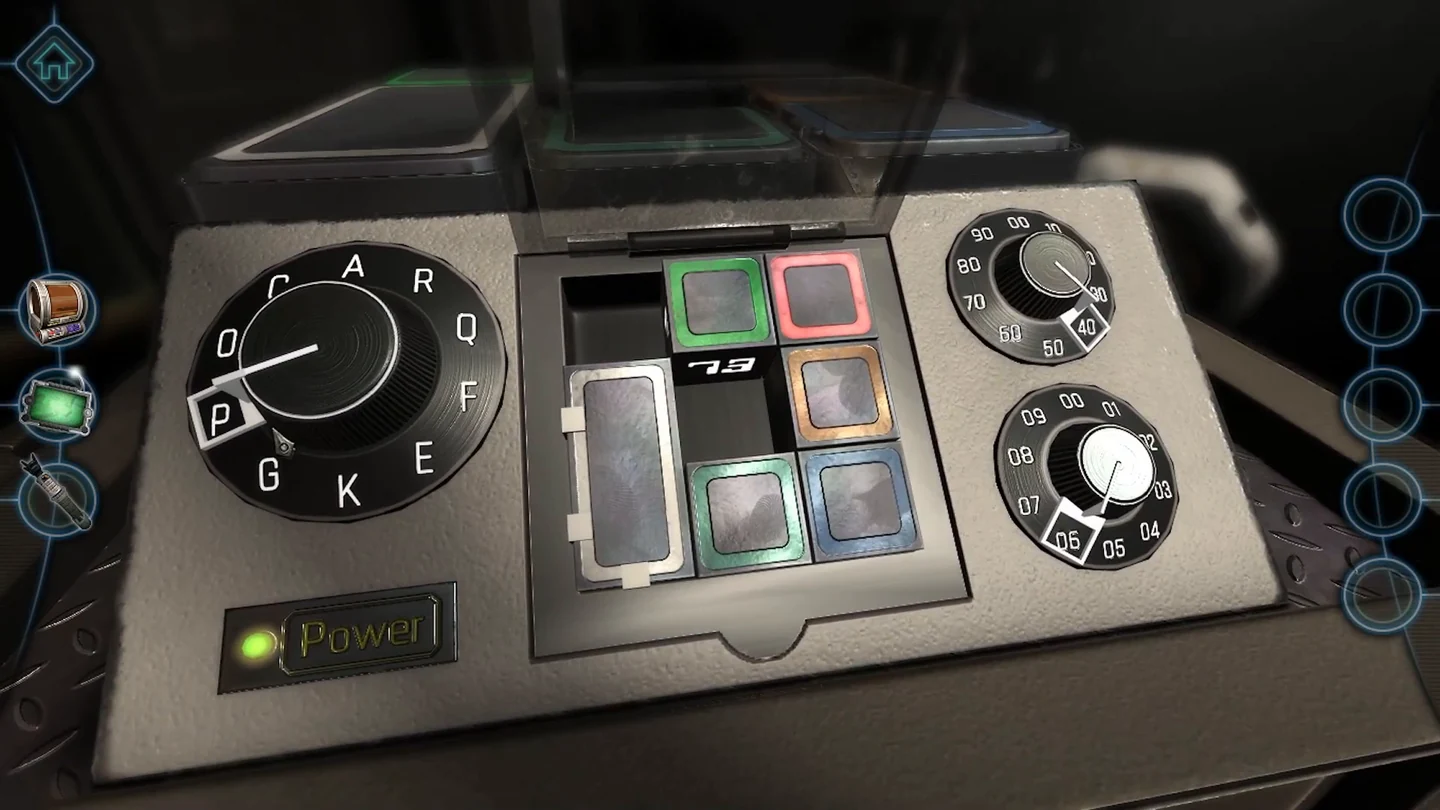
The trunk's console opens with the code from the letter, then asks for one code per coloured block.
- Take the letter from the trunk and read it; R14 is written on the back. Take the red crowbar too.
- Use the crowbar on the padlock and open the lid. The console has a letter dial, two number dials (tens and units) and a tray of coloured blocks.
- Set the letter dial to R, the upper number dial to 10 and the lower dial to 4 (R14). A hatch opens and the blocks can now slide.CODER14
- Slide the blocks around. Each one has a code marked on its side, easiest to read when you tilt the view. Enter each code with the dials; each correct code lights its block: red P46, green F73, orange C67, teal K09, blue G22 and white E98.
- Take the four machine parts and four cables from the compartments that opened on top. The last compartment then opens; take the final machine part.
CHAPTER 7
Assembling the Network
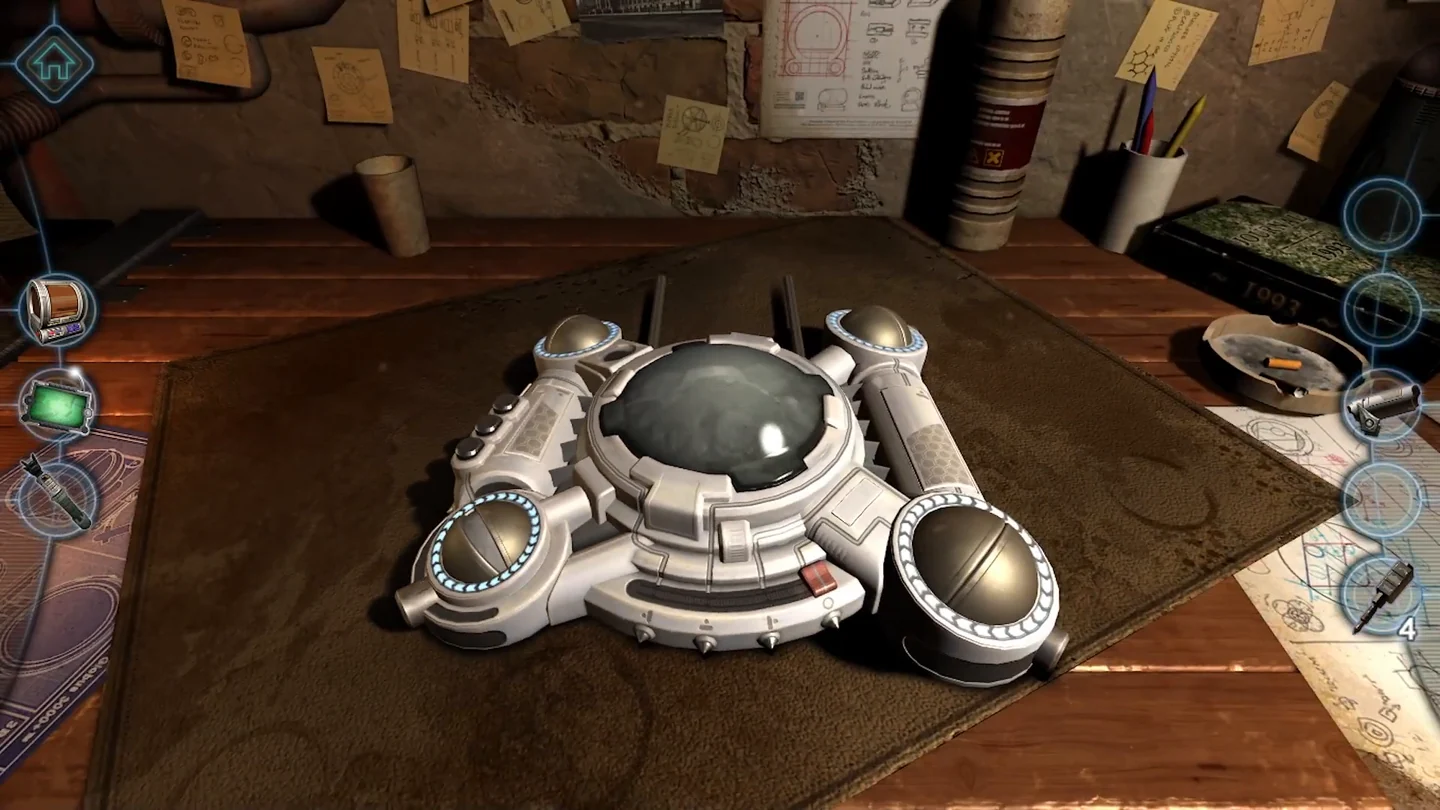
Build the Network machine and seat its three metal eyes where the lasers land.
- Attach the short round machine part to the spindle on the back of the machine and press the flashing green button. More spindles appear; fit the other three parts where their holes match and press the green button again. Unscrew the display on top so it lifts out.
- Take the three metallic eyes; they have different numbers of dots. From the starting layout, press the right-hand button on the rim of the laser panel twice; the plates turn each time. Then insert each eye where a laser hits, matching its dots to the number of dark rings around the spot: 3 at top left, 2 at top right and 4 in the middle. The display turns blue and sinks back, and the red slider becomes active.
CHAPTER 7
The Four Eyes
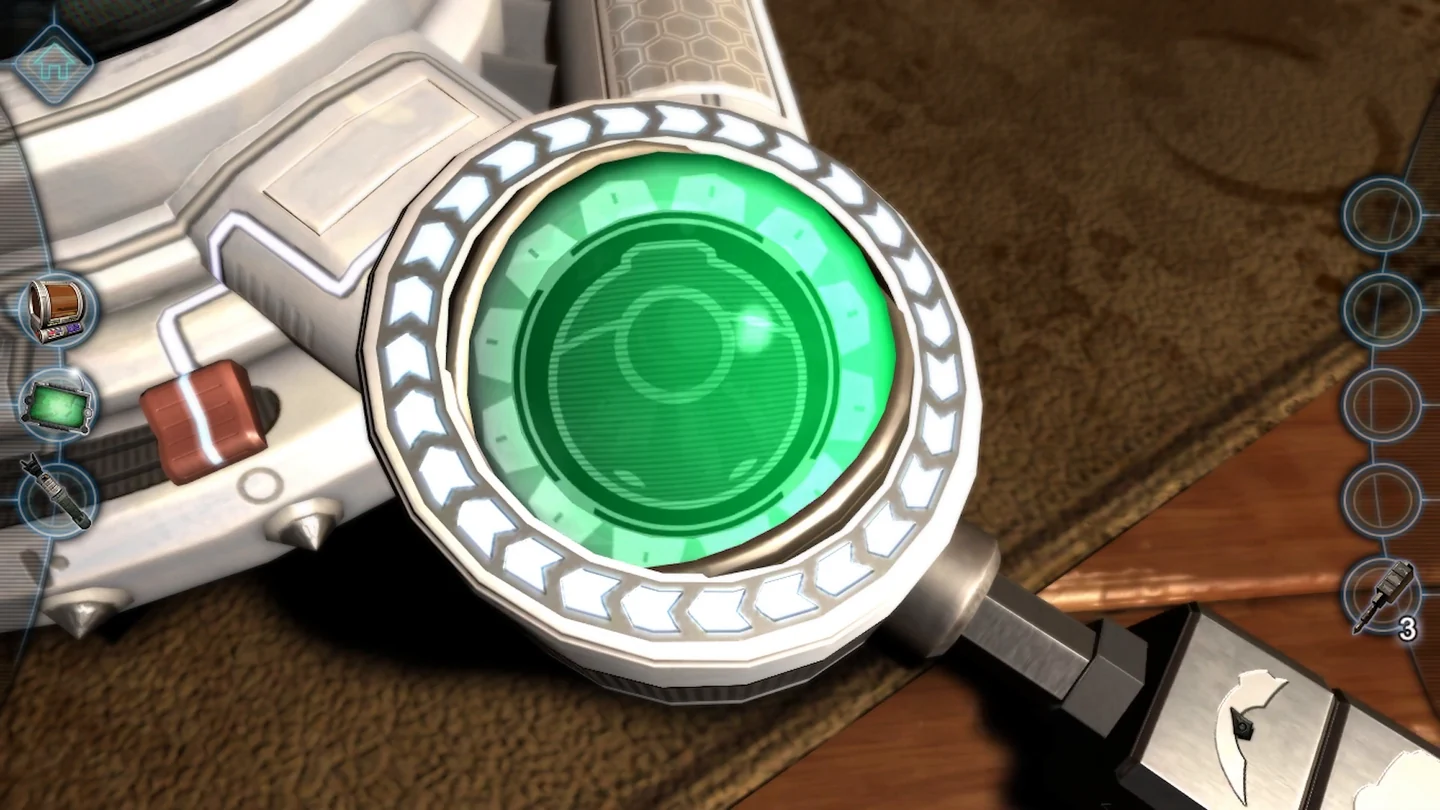
Each green eye needs a cable set to its symbol; after each one, a new puzzle opens. The cylinder and red-bar puzzles are solved by eye rather than with a fixed sequence.
- Power now flows to the green eye at the bottom right. Turn the dial around its edge to open it and attach a cable to the terminal. Turn the cable's three segments so they show the symbol on the green eye; it turns orange when correct. Then move the red slider to the left.
- A circuit panel opens. Take the semiconductors, duplicate them with the printer and place four of them so both the blue and red circuits (switch views with the slider at the top) link the left and right terminals: top left and top right connect right and bottom; bottom left and bottom right connect right and top.
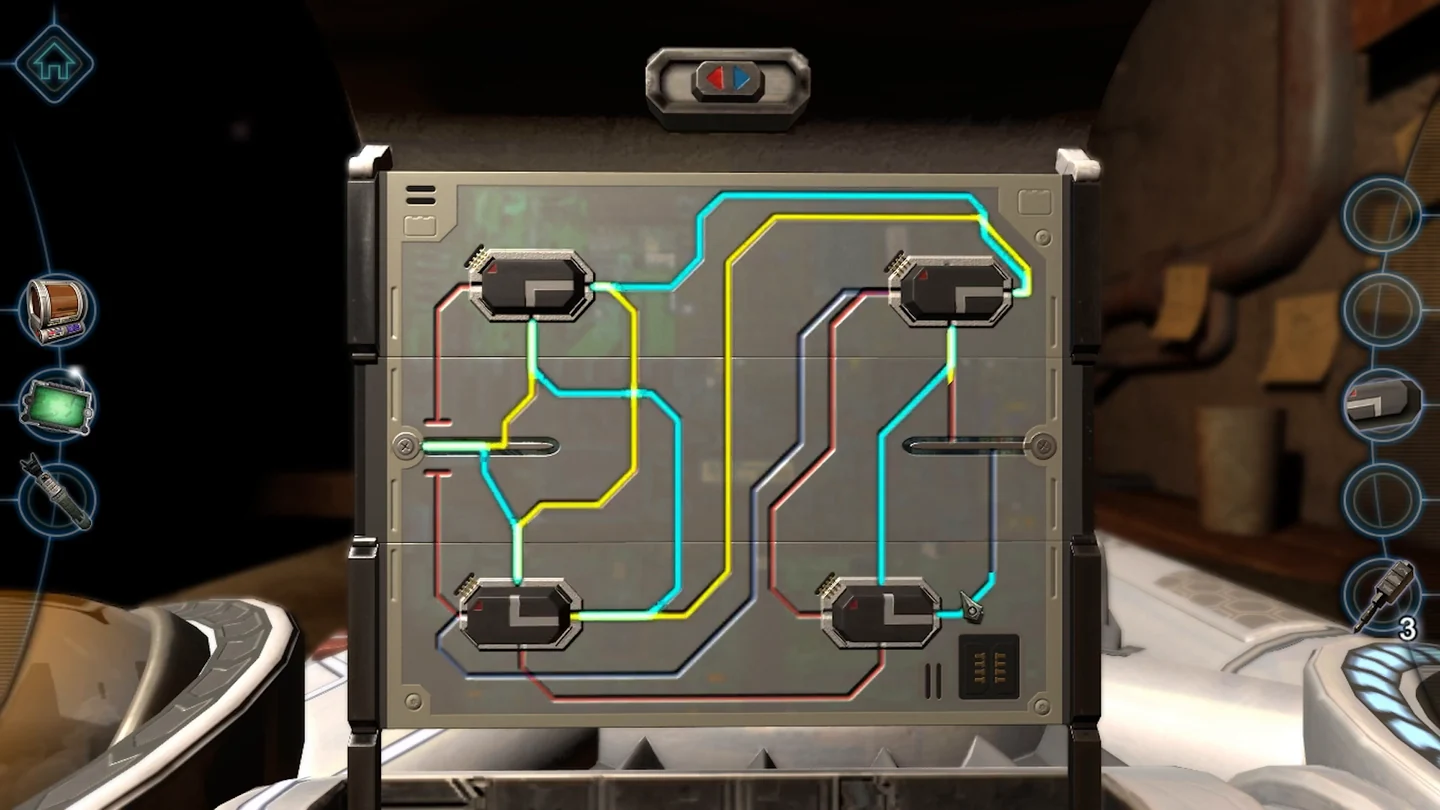
The four semiconductors placed. - Open the second green eye, attach a cable and match its symbol as before, then move the red slider left. A black cylinder appears; rotate its rings to make one complete path from the left arrow to the right arrow.
- Open the third green eye, attach a cable and match its symbol, then move the red slider left. A frame with red sliding bars appears. Open the small panel at the bottom left and put the endoscope in. Drag the red bars until the laser passes through the first opening, then advance the camera and adjust for the second and third openings.
- Open the fourth green eye, attach the last cable and match its symbol. When all four eyes are orange, the machine powers up and the lights go out.
CHAPTER 7
Blackout and Shutdown
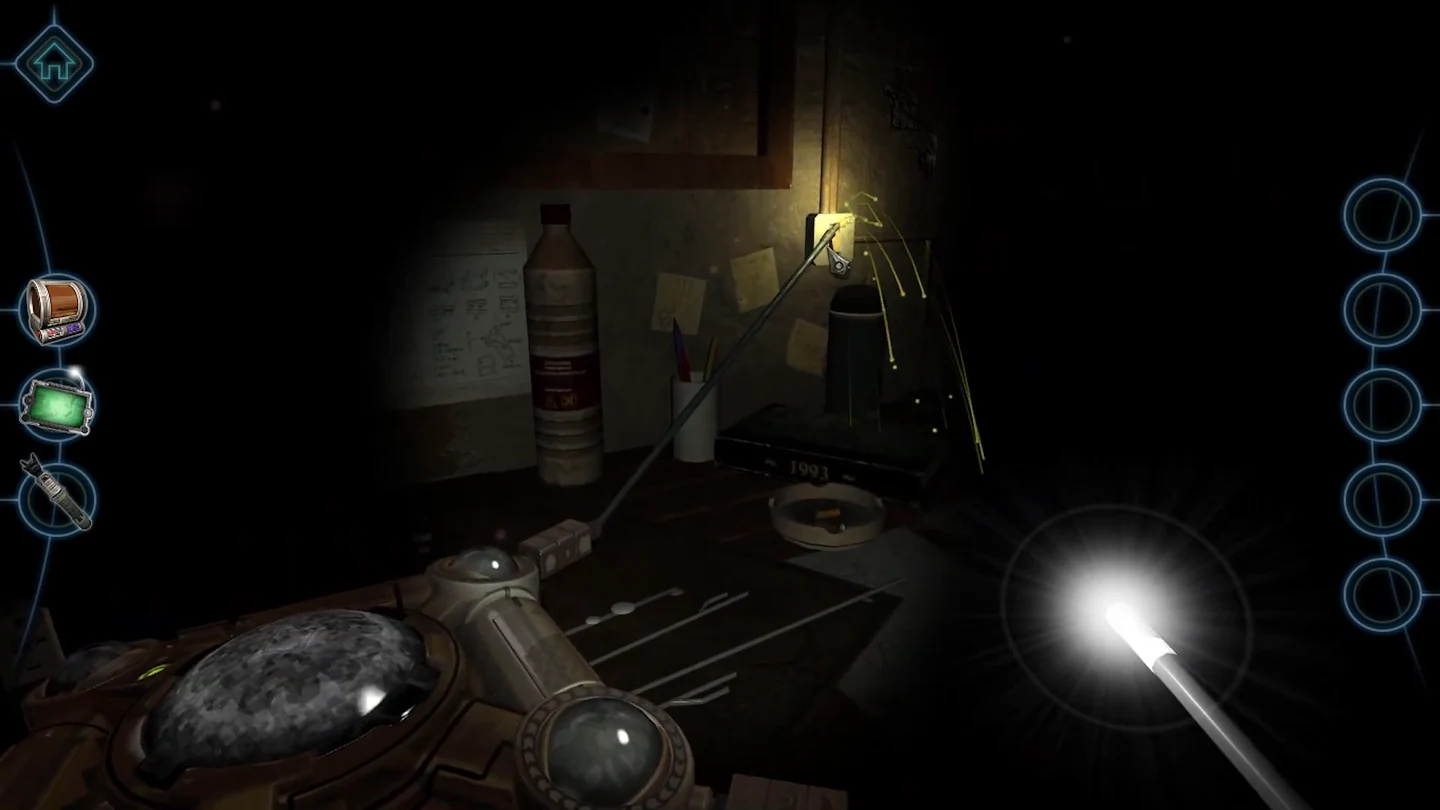
Once powered, the Network causes a blackout and turns dangerous. Restore the lights, then shut each eye down quickly.
- In the dark, go to the light switch and pull the probe back to stop the short circuit. Then turn left to the fuse box, open the latch, turn it and pull the door open. Copy the photo inside the door: top row on, off, off, on, off; bottom row on, off, on, on, off. Turn the large orange switch to restore the lights.
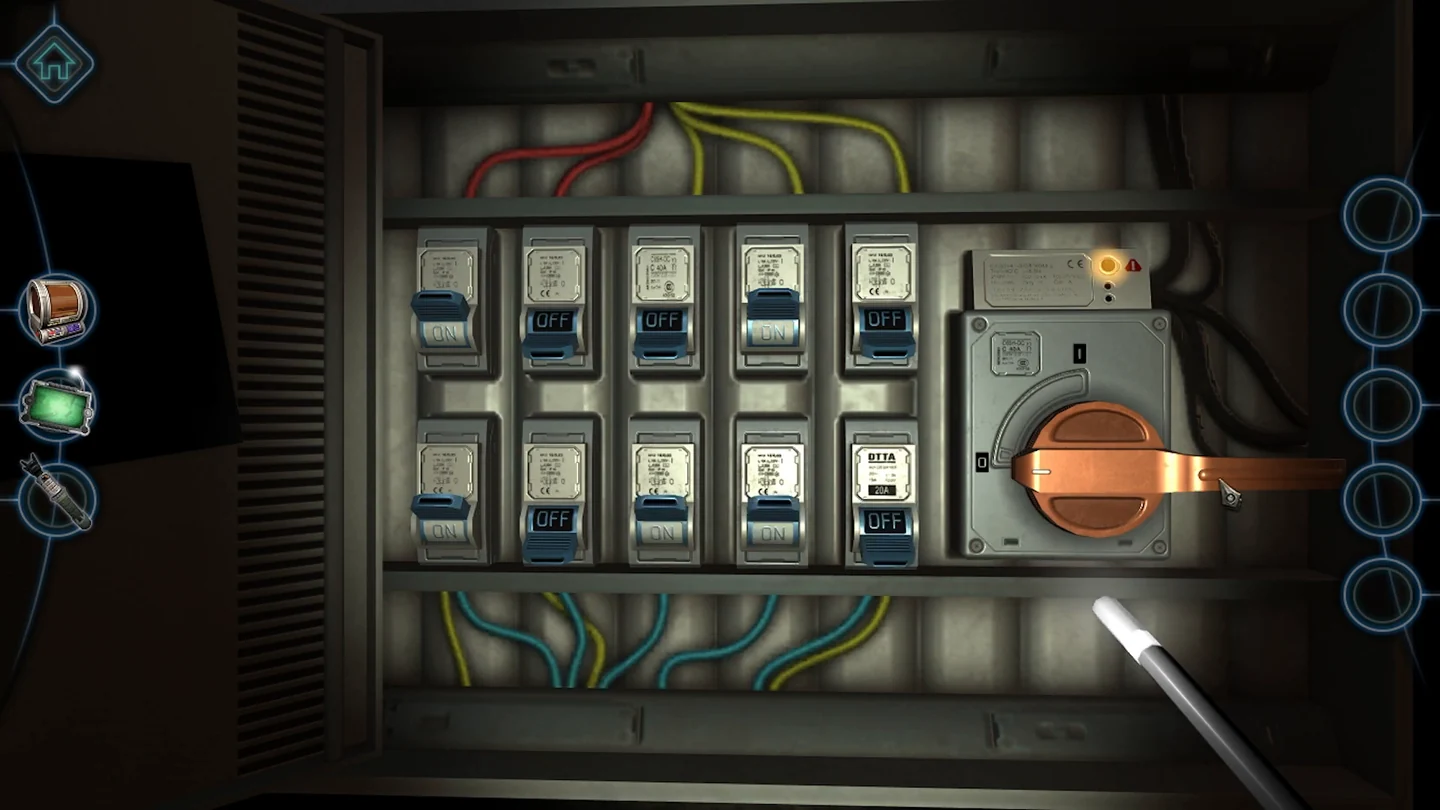
Top row: on, off, off, on, off. Bottom row: on, off, on, on, off. - The machine is now dangerous. For each of the four eyes: click the small red symbol on a corner of the central display to pause its defences, quickly rotate one of that eye's cable segments, then turn the dial around the eye to close it. Repeat for all four eyes and the machine calms down, ending the chapter.