CHAPTER 7
Security door
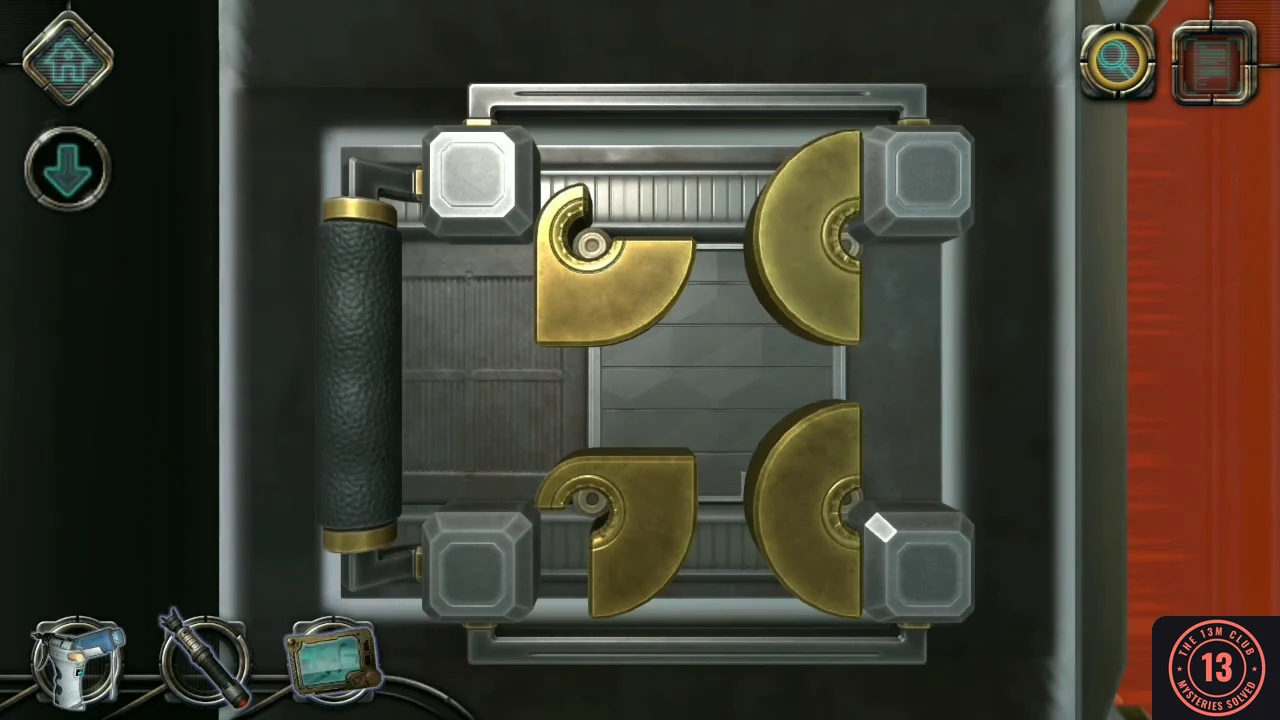
Leave the engine room and go to the red security door.
- At the lock beside the red door, turn the lower gold pieces out of the way, then slide the black handle on the left as far left as it goes. Rotate the gold pieces clear of the metal panel's path so the panel slides open.
- Tap the corner arrow buttons in the order they light up: top right, bottom right, top right, top right, bottom right, bottom left, bottom right, top right. Then press the green button.
CHAPTER 7
Wall circuit tiles
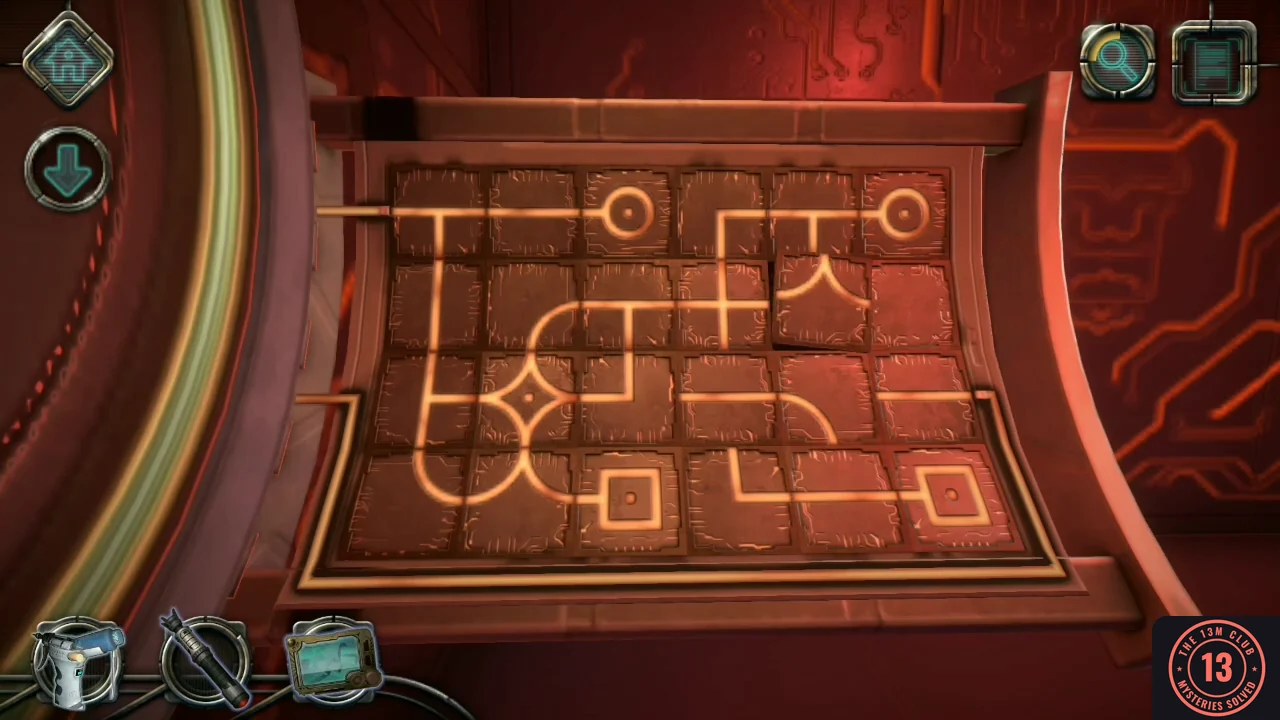
The security room is dark. Restore power through the two ports on the walls.
- Press the red button on the small pedestal.
- At the triangle port on the right wall, slide down the silver arch at its edge; a board of circuit tiles slides out. Tap the tiles to rotate them until every line connects.
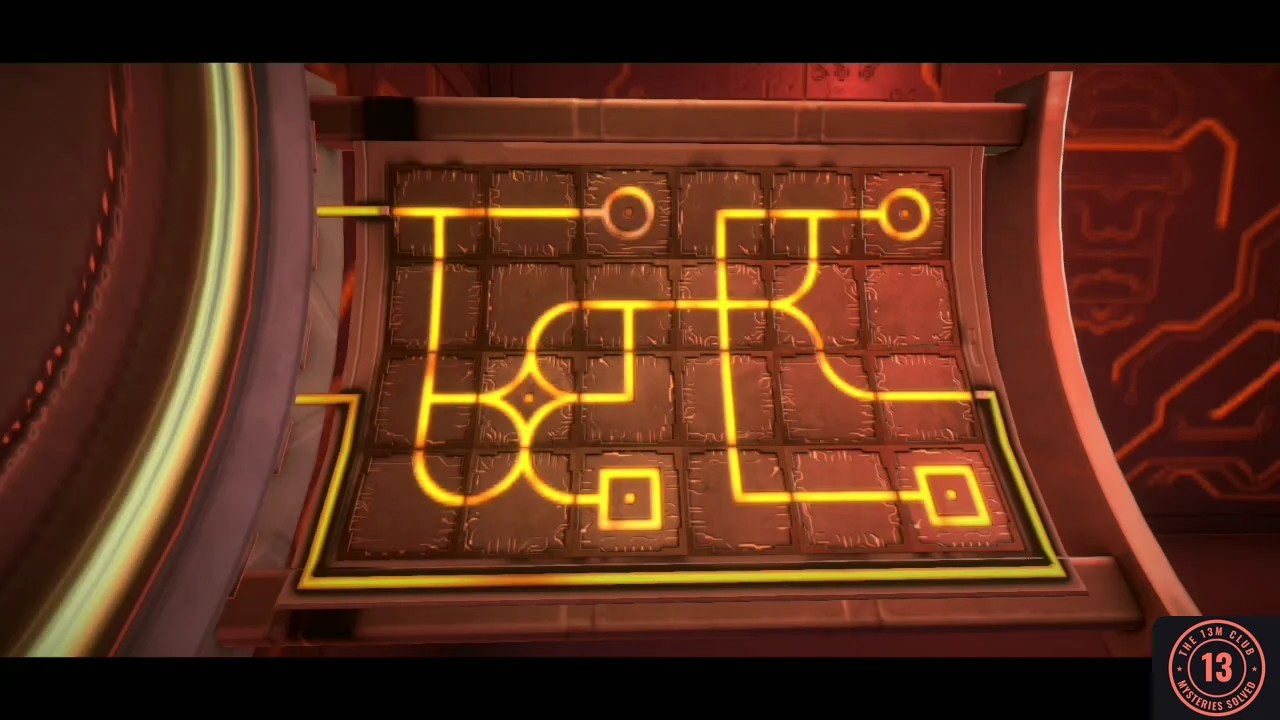
The completed triangle port. - Power now reaches the three-dot port on the opposite wall. Slide down the silver arch on its left side to bring out the second board, then rotate its tiles the same way until every line connects.
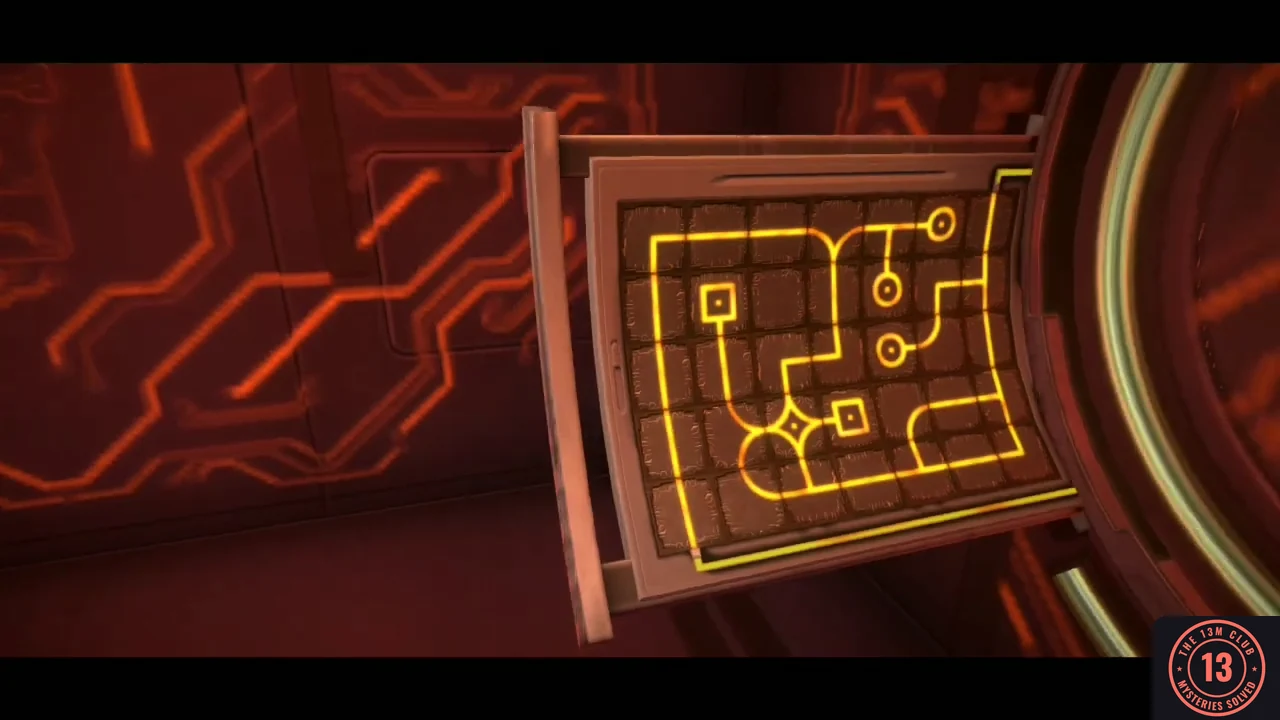
The completed three-dot port.
CHAPTER 7
Cube path
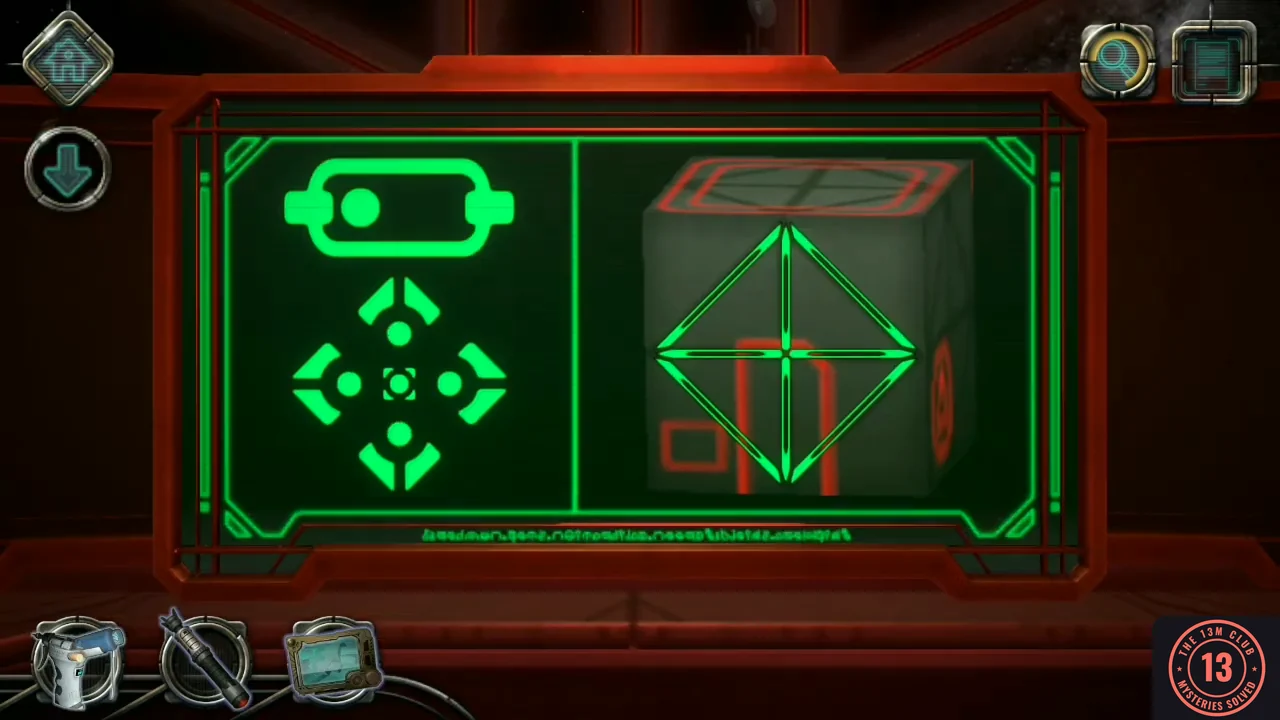
A control desk has risen from the floor. Its screen shows a cube.
- Above the arrow pad on the control desk is a small horizontal selector with a dot at its left end. Move the dot to the right: the energy path lights up along the walls and floor of the room. Look around the room to follow the path, then return to the desk. The cube stands for the room: use the arrows to turn it to each face, then tap the rods on that face to light the same route. Repeat on every face the path crosses until the whole path is drawn.
CHAPTER 7
Robot crate screens
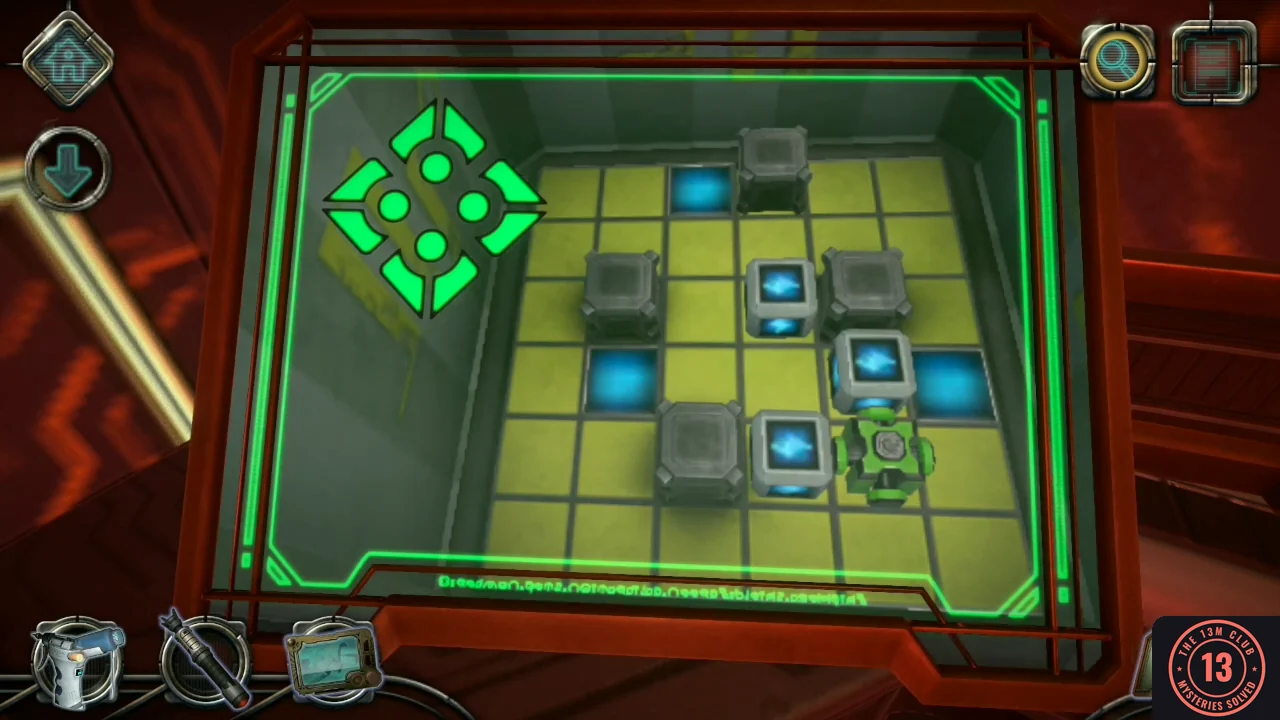
Two monitors beside the desk need working screens.
- Pick up the screen and examine its back. Turn the clip so one arm points straight up, then press the red buttons until a silver retaining pin sticks out beside each of the three arms.
- On the left screen, move the green robot next to a blue crate; the crate attaches to it. Carry the crate onto a blue floor tile, where it lets go. Repeat until every blue tile holds a crate.
- Put the repaired screen on the right monitor and solve its board the same way: pick up each crate with the robot and carry it onto a blue tile.
- Take the three projectors.
CHAPTER 7
Prism beams
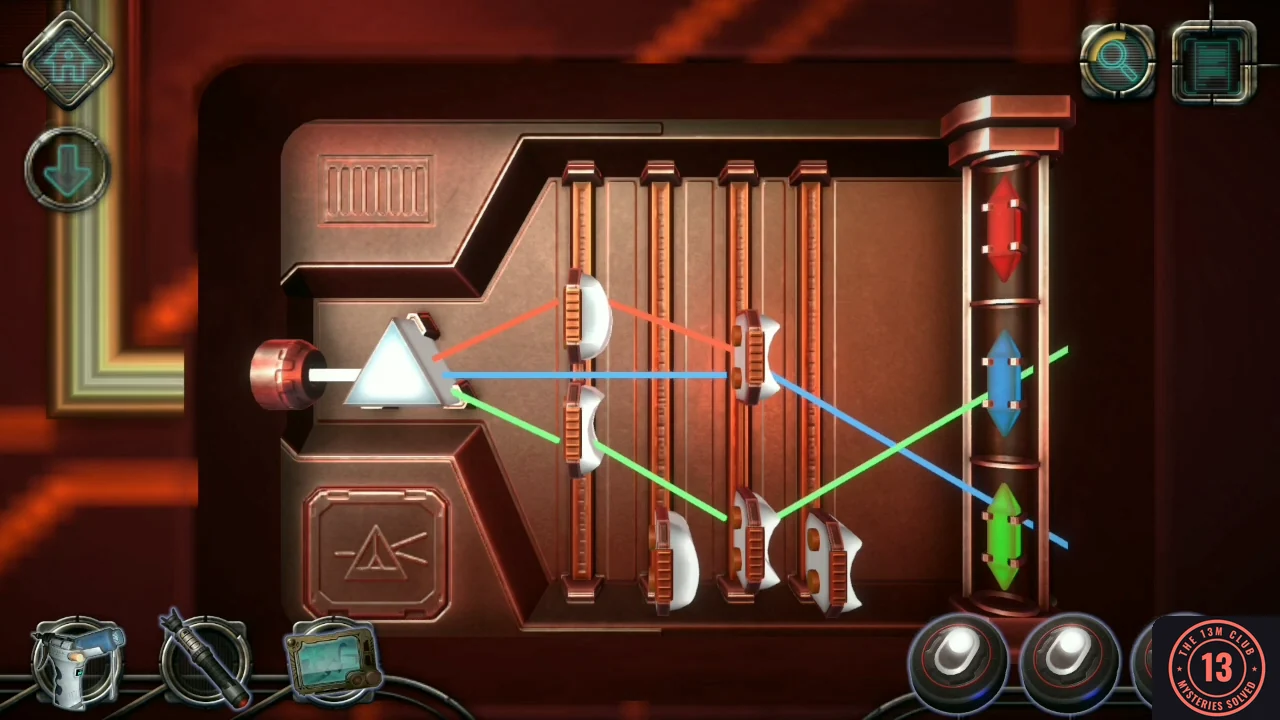
The prism hatch on the wall is now open.
- At the opened panel on the wall, move the lenses so each coloured beam reaches the receptor of the same colour.
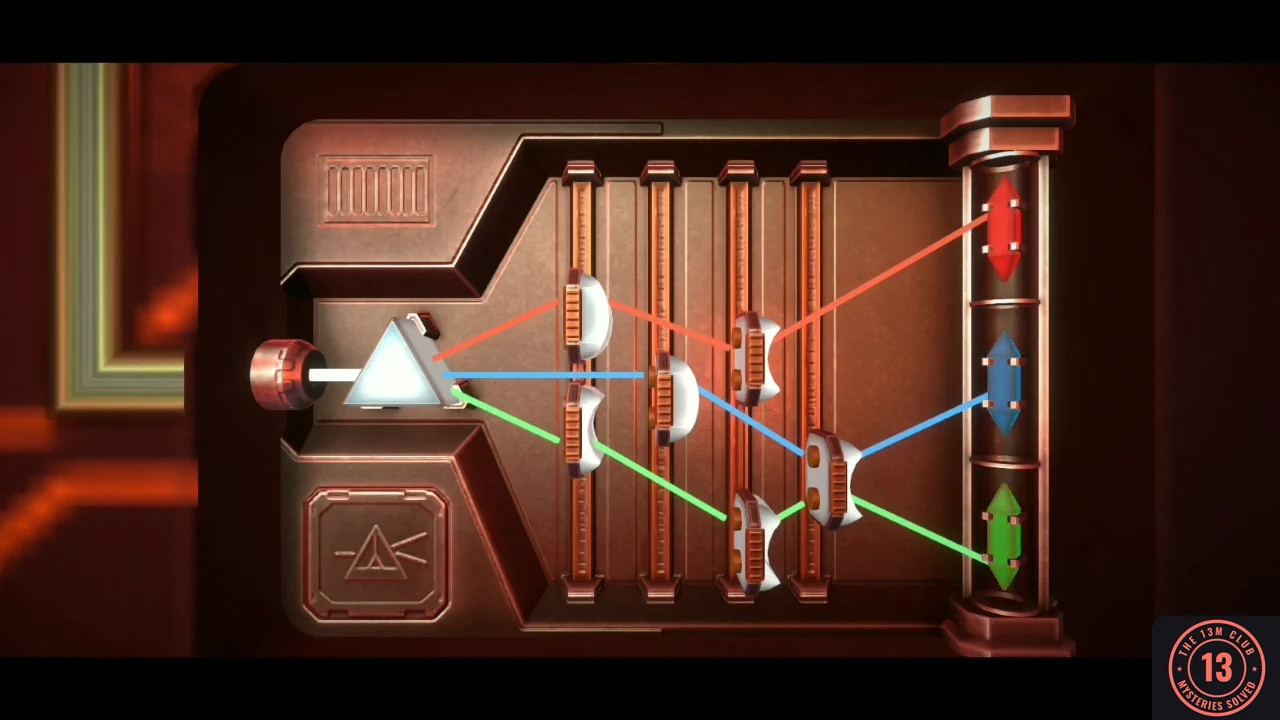
The solved prism panel with each beam on its matching receptor.
CHAPTER 7
Pedestal drone and hologram
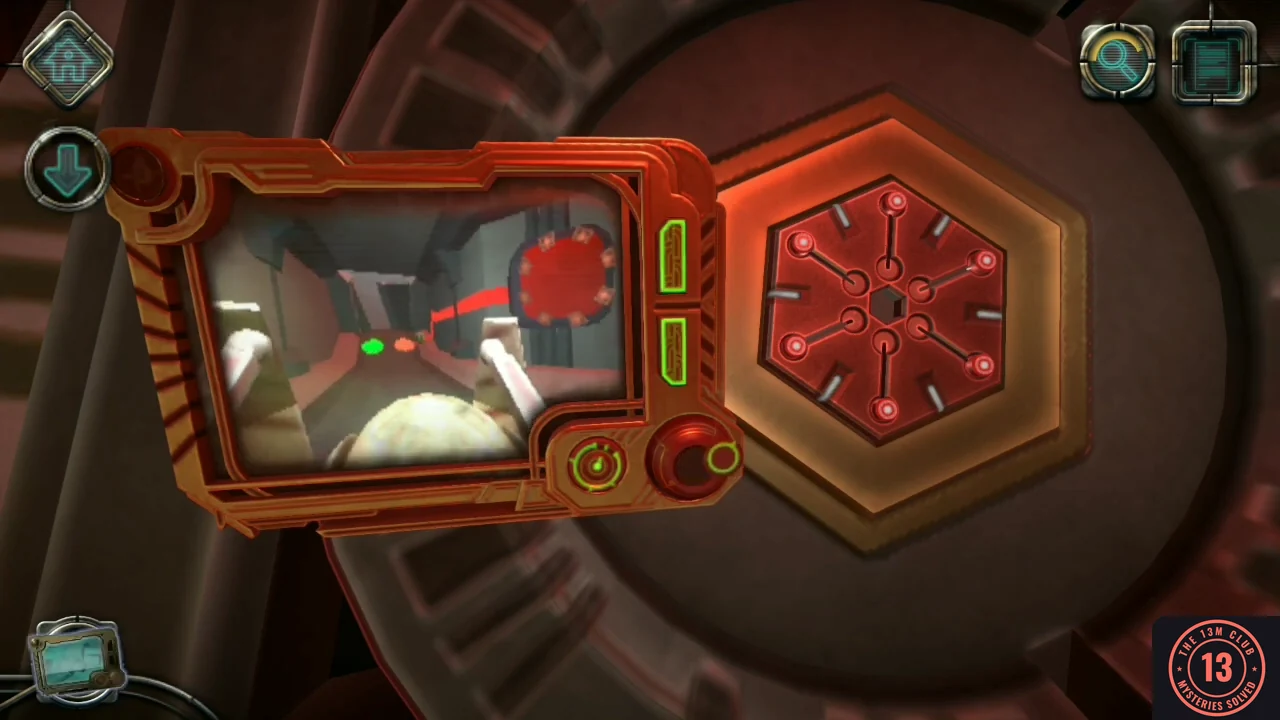
A pedestal has risen from the floor with a drone symbol on it.
- Use the drone controller on the pedestal. Drive forward, turn left and laser the red target. Go forward again and laser the target on the right, then go forward twice and look up at the hexagonal plate. The drone screen shows the plate from the other side and at an angle, so its layout does not line up directly with the red hexagon beside the screen: match the highlighted marker to its corresponding track rather than the same spot. The first highlighted marker, on the right of the screen, is matched by pushing in the upper-right slider of the red hexagon. A correct match turns the marker red and moves the highlight to another marker; keep matching each highlighted marker with its corresponding slider until all six sliders are in.
- Place the three projectors in the holes. A hologram of the ship appears above the table; tap it to examine it. It seems broken.
- A pyramid comes out of the wall. The goal is to make each face a single colour: the symbol at the top of a face shows the colour that face needs. Turn the base to look at the other faces, and rotate a tier to carry its symbols around to the neighbouring face. The circle in the middle of a face rotates to swap its two symbols between the tiers above and below, and the small diamond button on a tier cycles the three symbols joined by the engraved lines there. This takes a lot of trial and error: settle one face at a time, using the tiers to bring the right colour round and the circle and diamond buttons to drop each symbol into place. When every face matches its top symbol, the pyramid lights up and powers the shield.
CHAPTER 7
Shield hexagons
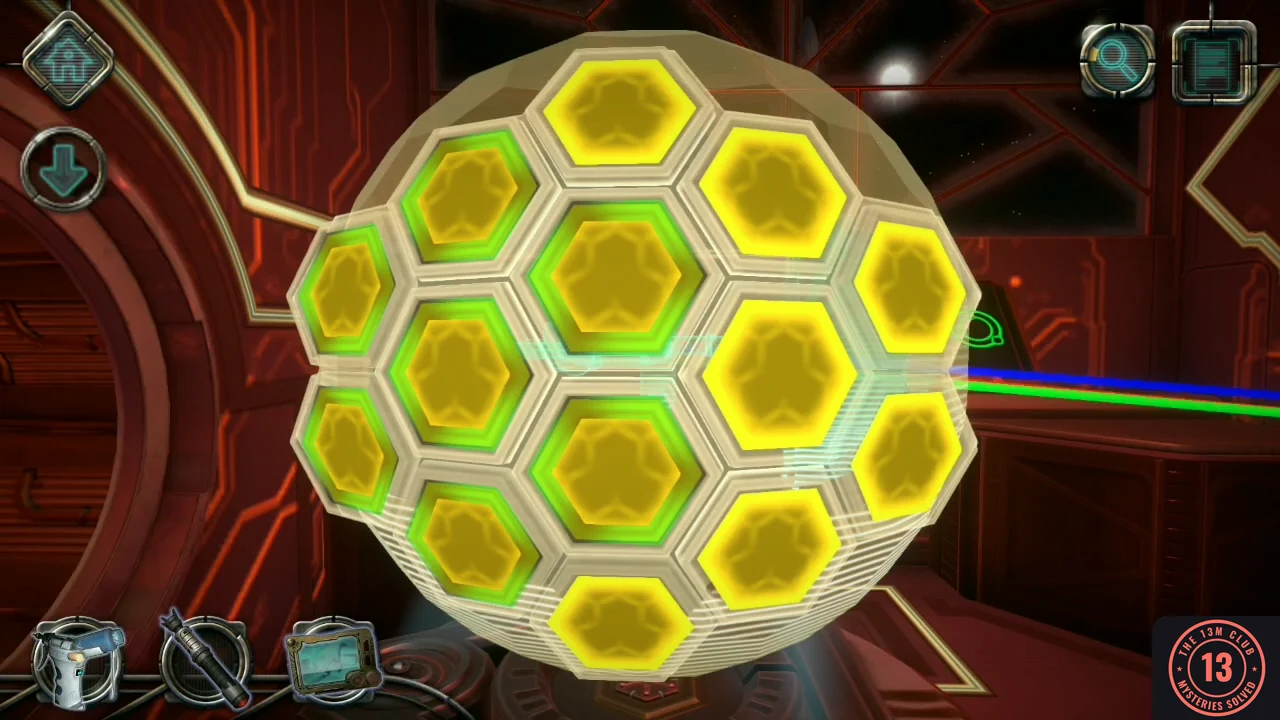
The hologram has turned into a damaged shield sphere.
- Look at the round recess in the wall behind the hologram to collect Letter #09.
- There are three rounds. In each, some hexagons have green outlines: those must end up green. Each tap flips the colours of a small cluster around the hexagon you tap, so one tap can change several at once, and a second overlapping tap flips them back. Tap the hexagon in the middle of an outlined group to turn that group green. For example, one tap in the middle of the outlined group on the left finishes the first round; the second round takes two taps (the bottom hexagon, then the lower right one); the third takes three: the upper of the two tiles on the far-left edge, then the large tile just right of the centre, then the bottom.