PROLOGUE
The cockpit key
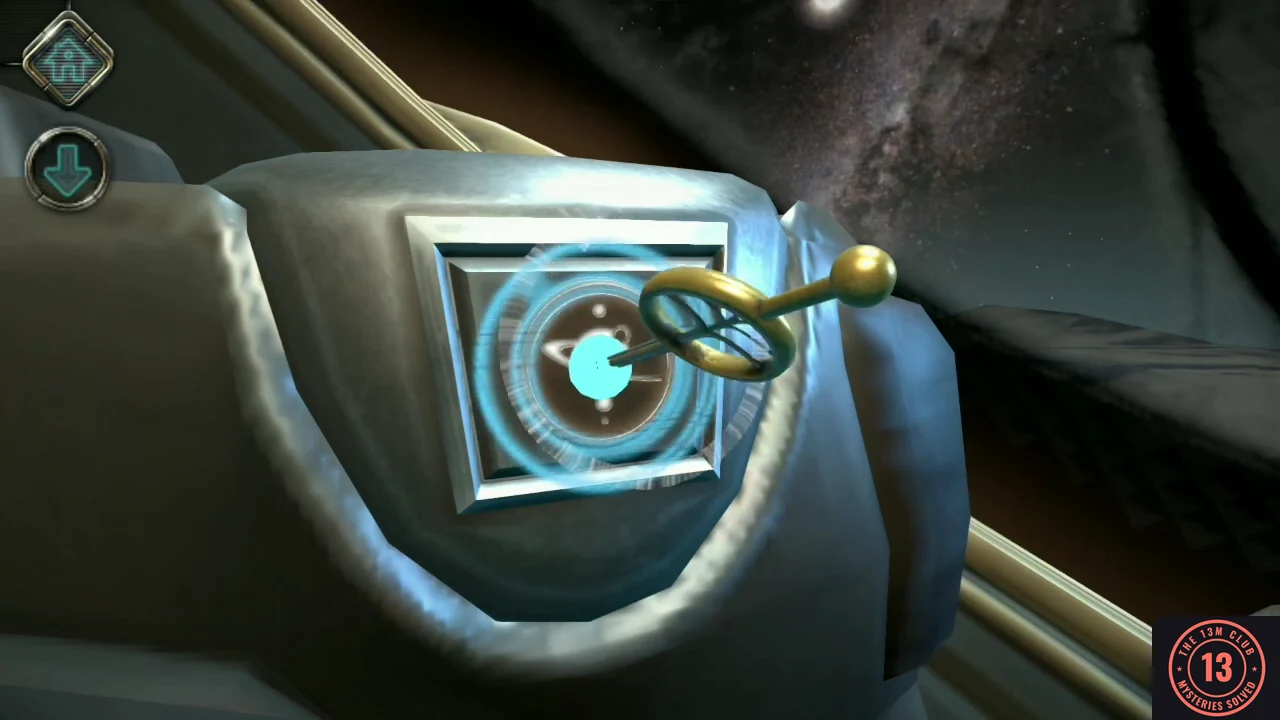
You wake up in a crashed cockpit. This short tutorial teaches dragging, double-tapping and using inventory items.
- Drag to look right. When the scroll tablet rises from the right armrest, double-tap it and let its slideshow finish.
- Tap the tablet, then drag the latch at the top of its right roller upwards and take the mysterious key.
- Examine the key in your inventory and slide the glowing ring along the shaft to the far end.
- Look down at the left armrest console, drop the key into its slot and turn it.
- Take the key back, examine it and slide the ring until the head forms an X. Put the key into the sphere and turn it.
- Tap the white button revealed in the sphere. The cockpit opens into the circular hub room and Chapter 1 begins.
CHAPTER 1
Light fixture and first letter
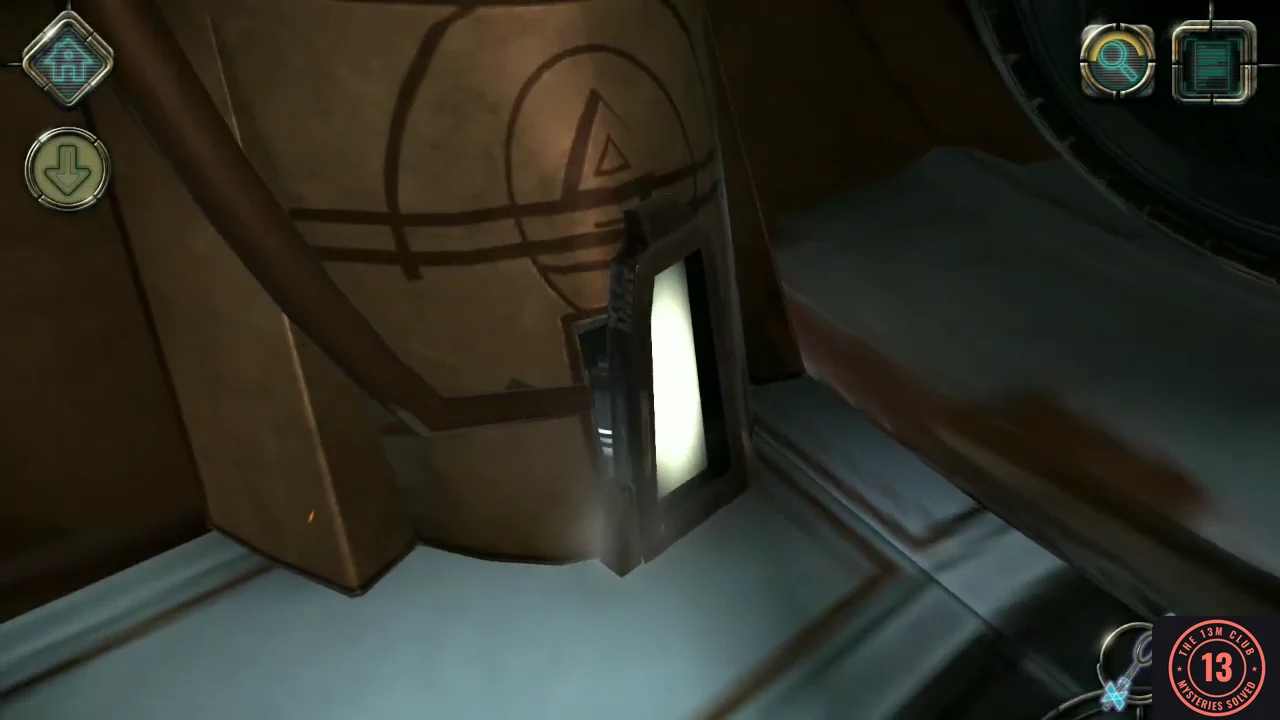
After the walkie-talkie fails to reach anyone, collect the basic tools in the hub room.
- Pick up the metal stick lying in a groove in the floor.
- Take Letter #01 from the top of the central pedestal.
- Go to the sparking light at the base of one of the pods. Use the metal stick to pry off its cover and take the round box.
- Examine the round box and turn its orange cover to take out the crystal.
CHAPTER 1
Pedestal disc compartment
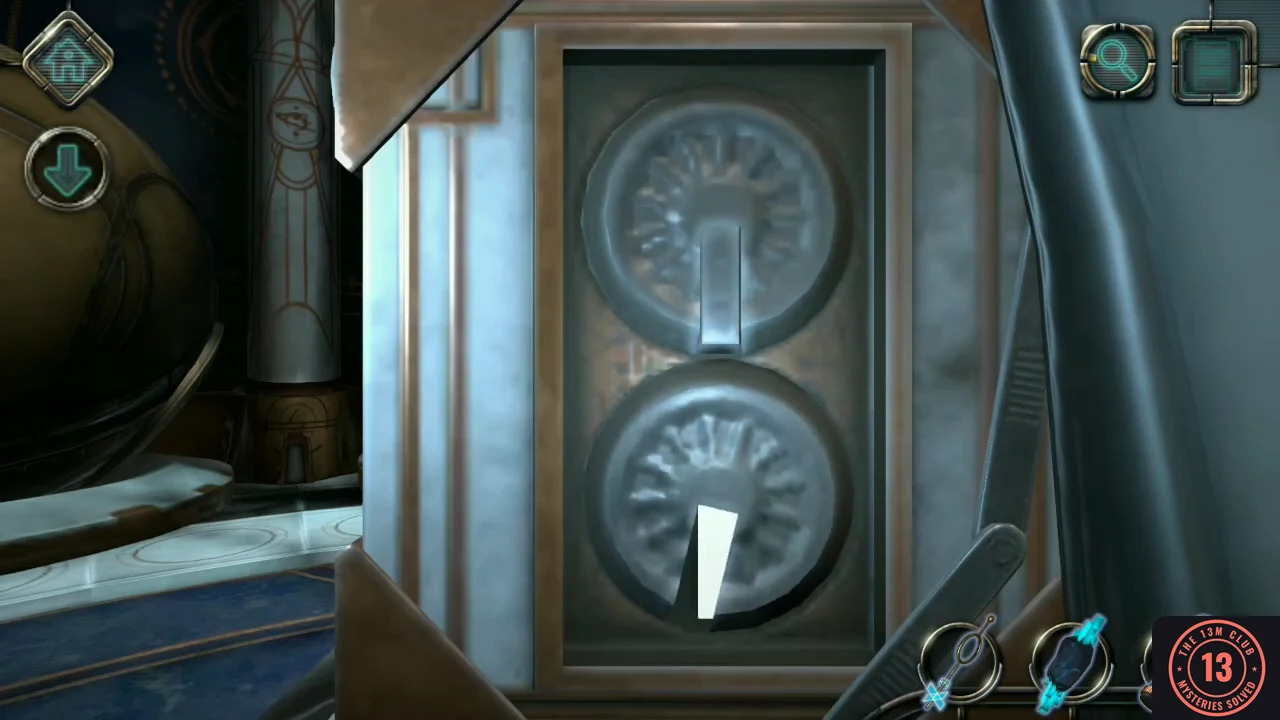
One side of the central pedestal hides a compartment with two slotted discs.
- On the clean side of the central pedestal, push the central part down and slide the latch at the top to the right. A box with two discs swings out.
- Rotate the top disc so its opening faces up and take the energy rod.
- Turn the top disc so its opening faces down, slide the small bar up into it, then turn the bottom disc so its opening faces down. Take the strange disc.
CHAPTER 1
Hexagon ring box
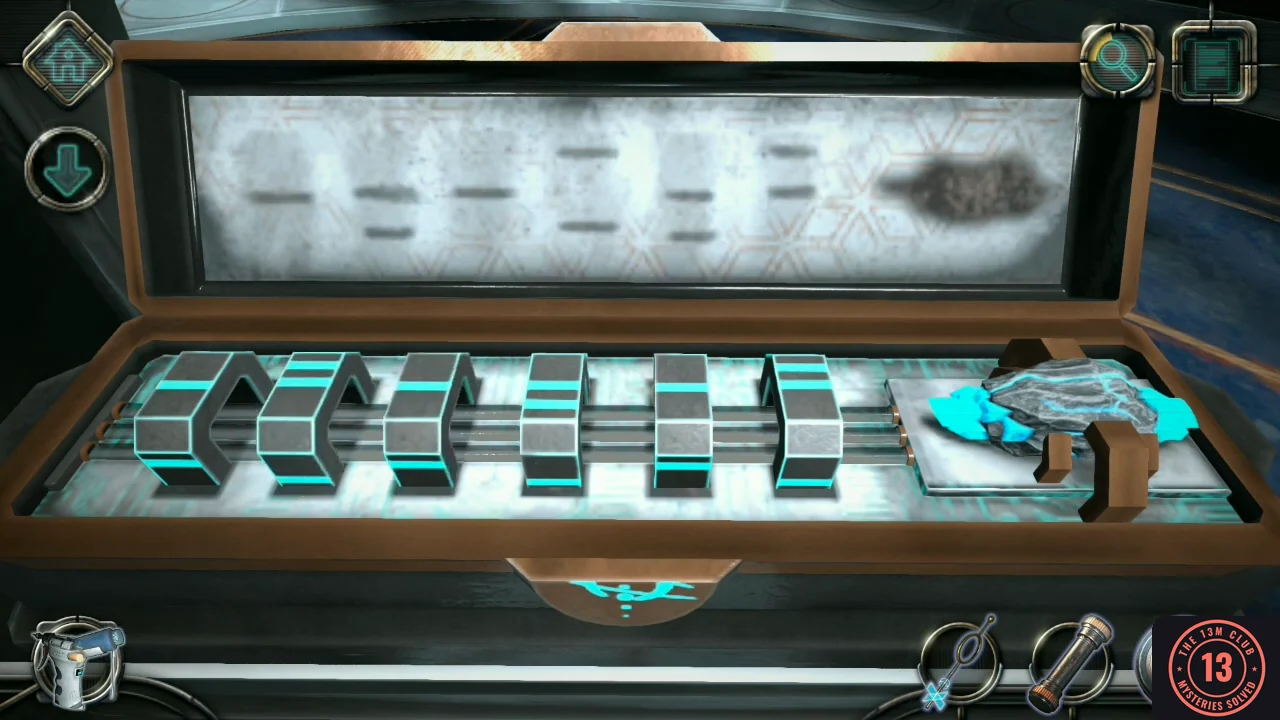
The other side of the pedestal is clogged with dirt and hides a box with six rings.
- Tap the dirt on the other side of the pedestal to take out the air duster, then hold it over the dirt until the track is clean.
- Push the central part down and slide the latch to the right. When the long box comes out, slide the two half-discs to the middle and lift the lid.
- Place the crystal in the slot on the right side of the box.
- Rotate the six rings so their blue lines match the scorch marks on the lid. From the starting position, left to right: up 1, up 1, down 2, down 2, down 2, up 1.
CHAPTER 1
Floor gears and circuit board
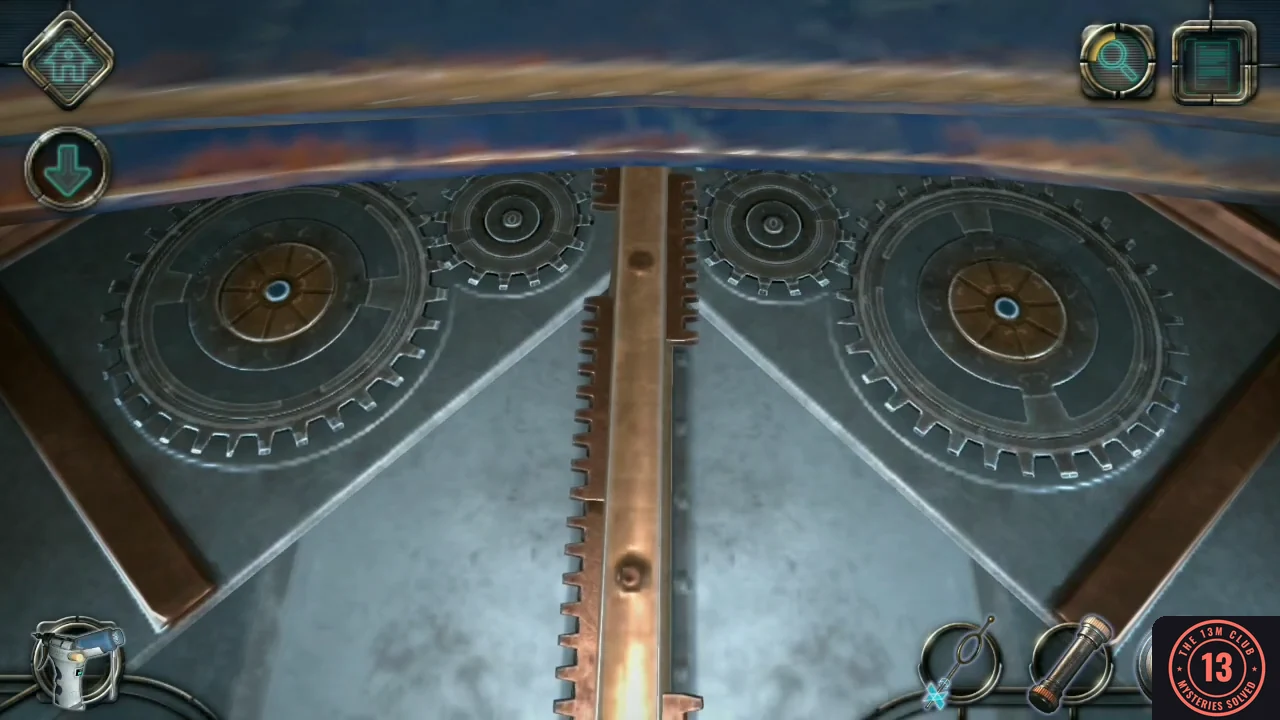
With the power back on, the top of the pedestal and a floor panel become usable.
- On top of the pedestal, spin the blue handle to open the iris. When the new scroll finishes its display, tap the large red symbol; a floor panel opens behind you.
- Press the large gears to slide the central bar all the way up: left, right, left, left, right.
- Clean the circuit board with the air duster.
- Turn the orange covers aside and remove the broken energy rod, then insert your energy rod in its place.
- Set the orange pieces so power reaches all three nodes on the right: top slider far left, left slider middle, right slider far right, left rotator up and down, right rotator right and down, bottom rotator up, right and down.
CHAPTER 1
Scroll ring maze
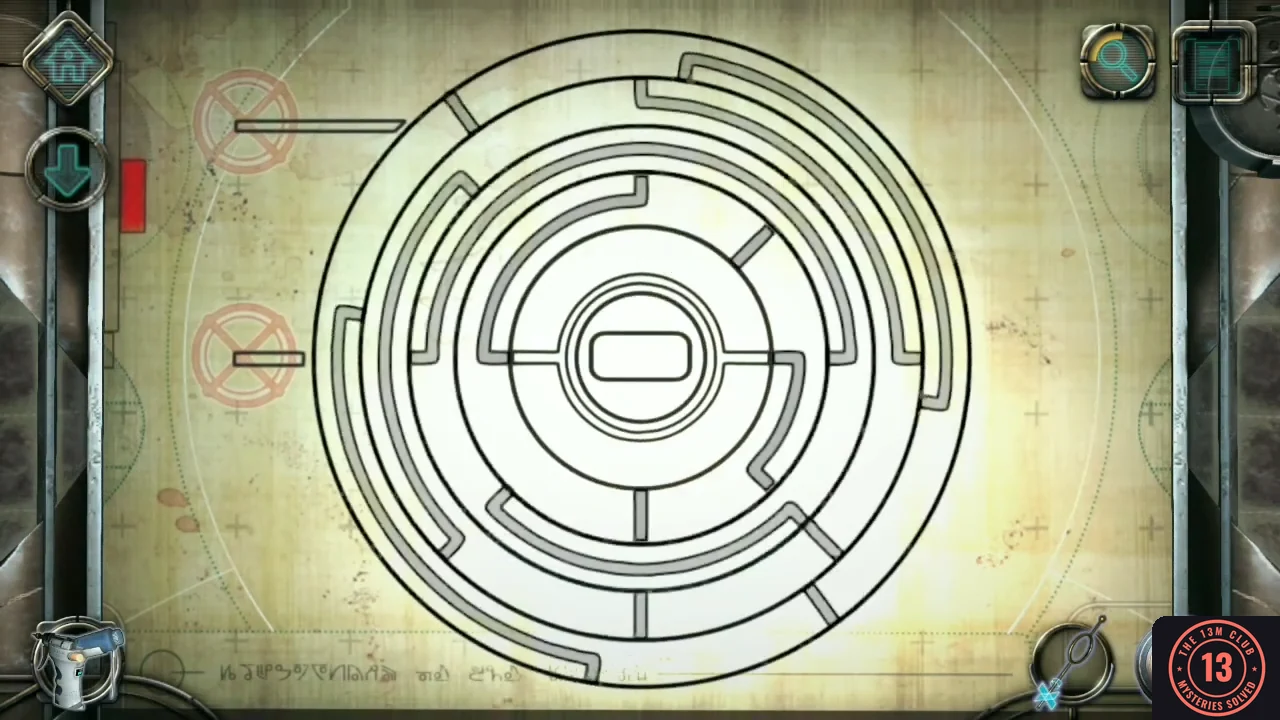
The view returns to the pedestal scroll, which now shows a circular maze.
- Rotate the concentric rings to create one continuous path between the two nodes on the left.
CHAPTER 1
Hub exit door
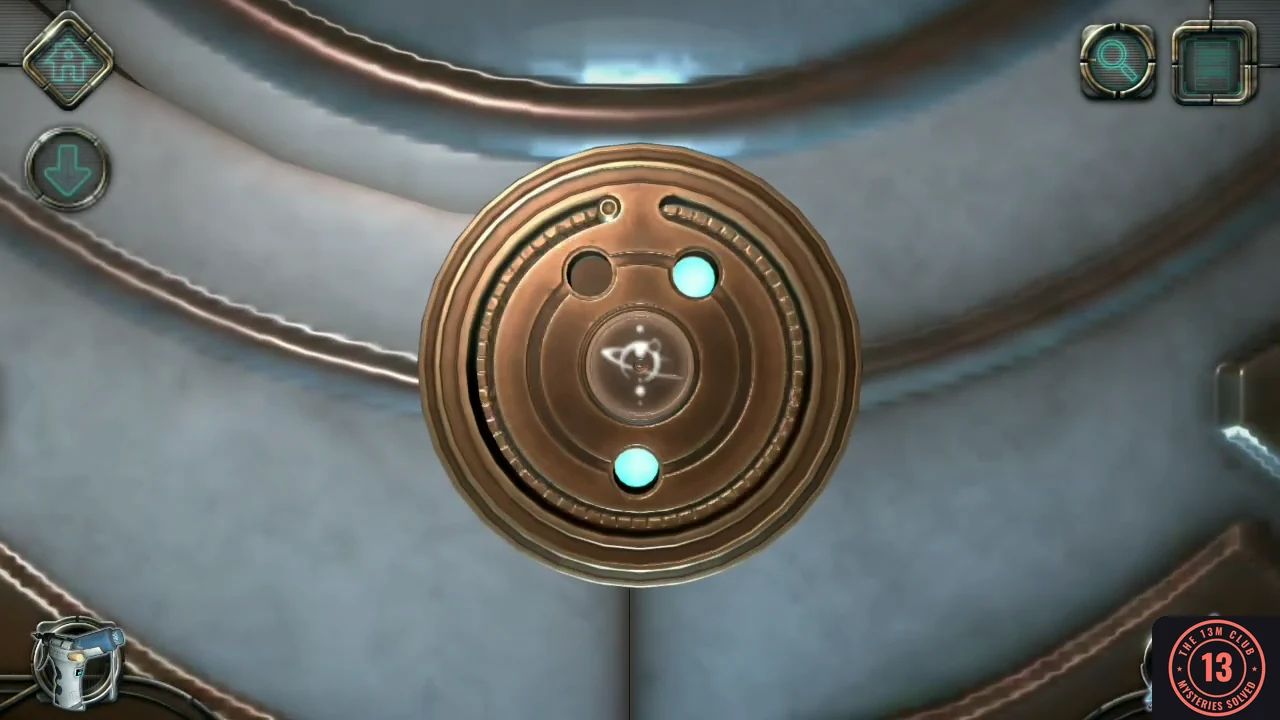
The round exit door has a lock that uses both the strange disc and the key.
- Use the strange disc on the door lock. Rotate it until all three holes in the disc line up with the glowing lights behind it; a blue diamond then appears over the lock.
- Examine the key and slide its ring until the head forms a diamond. Insert it into the lock and turn it.