BONUS CHAPTER
Skeleton Shelter: Hidden Items
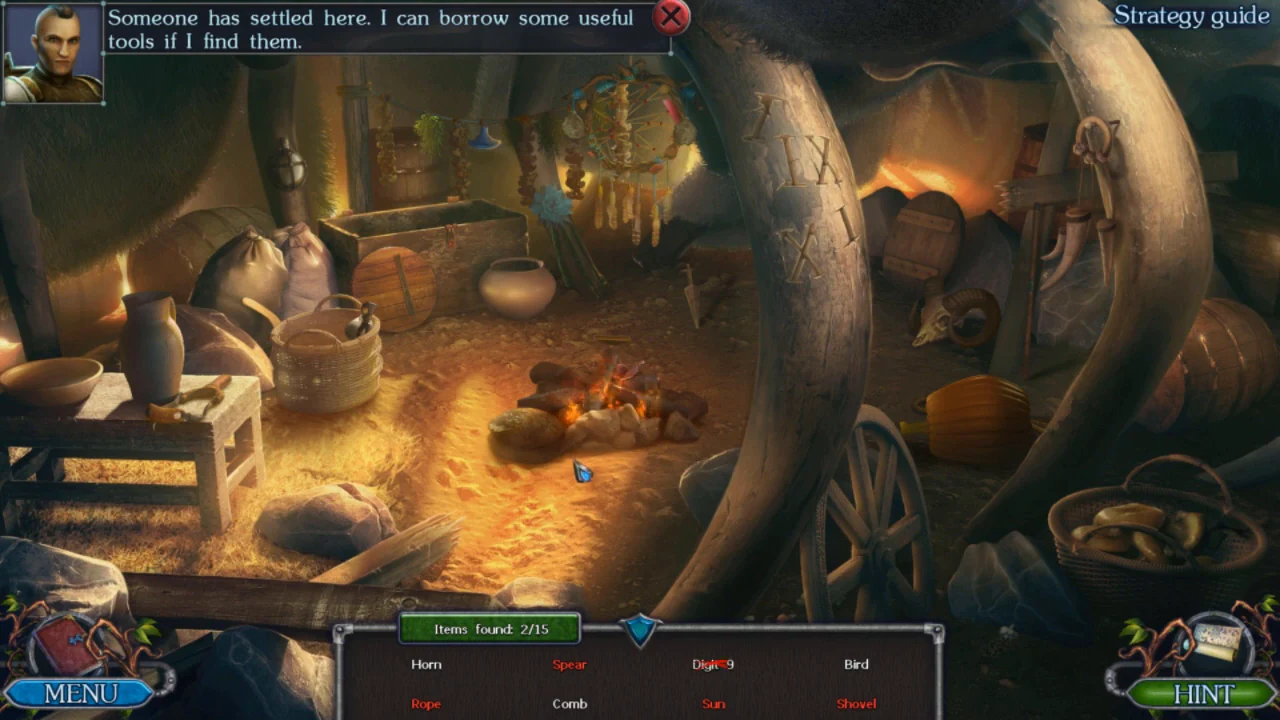
Across the ravine lies a building of the Ancients. Someone has set up a shelter inside a giant skeleton.
- Zoom into the skeleton head and enter the shelter. Find the listed items; the phoenix feather and the letter A traced in its web are in the dreamcatcher. Completing the list gives the SHOVEL.
BONUS CHAPTER
Plateau Tally Panel and the Crystal Shards
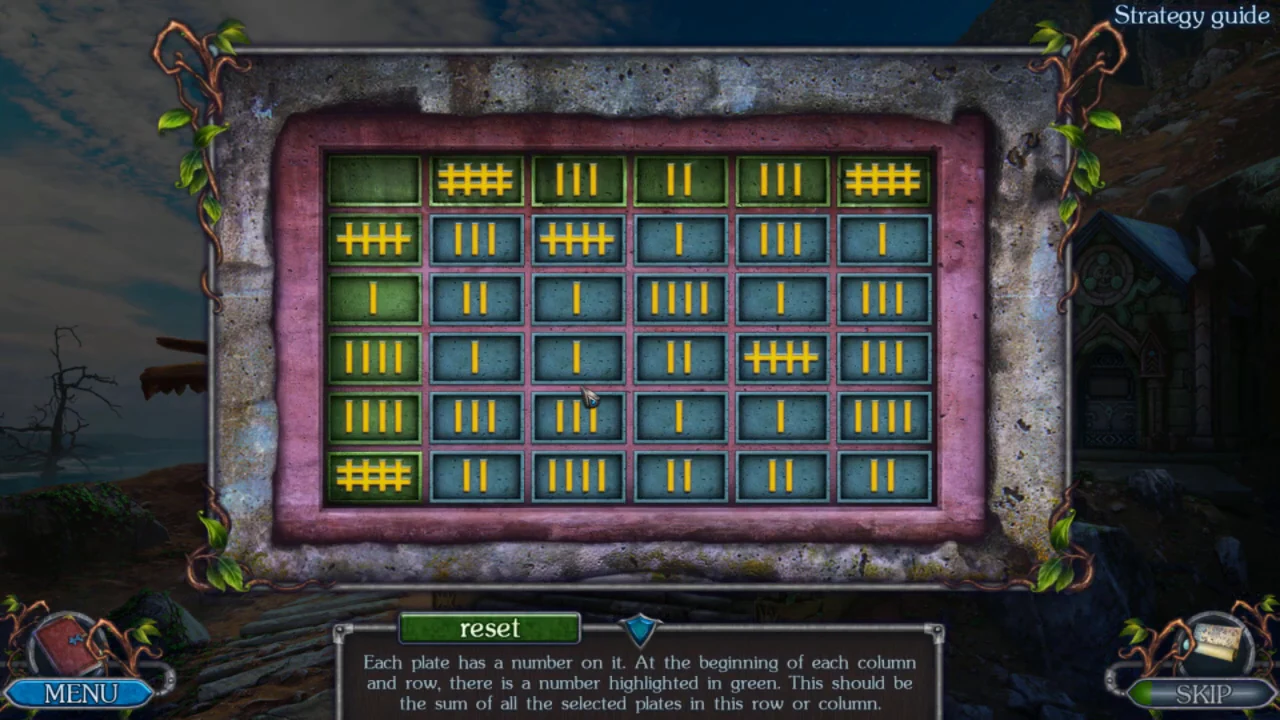
A stone panel of numbered plates on the plateau holds the third PLANKS WITH FLOWERS. One plate is missing.
- Put the PLATE from the BAG into the empty top-left plate cell of the tally panel to activate it. The green tallies give the sum of the plates you select in that row or column (four crossed strokes = 5). Select: row 1 columns 1, 3, 5; row 2 column 4; row 3 columns 1, 5; row 4 columns 2, 3; row 5 columns 1, 4, 5. The panel opens; take the PLANKS WITH FLOWERS.CODER1:1,3,5 R2:4 R3:1,5 R4:2,3 R5:1,4,5
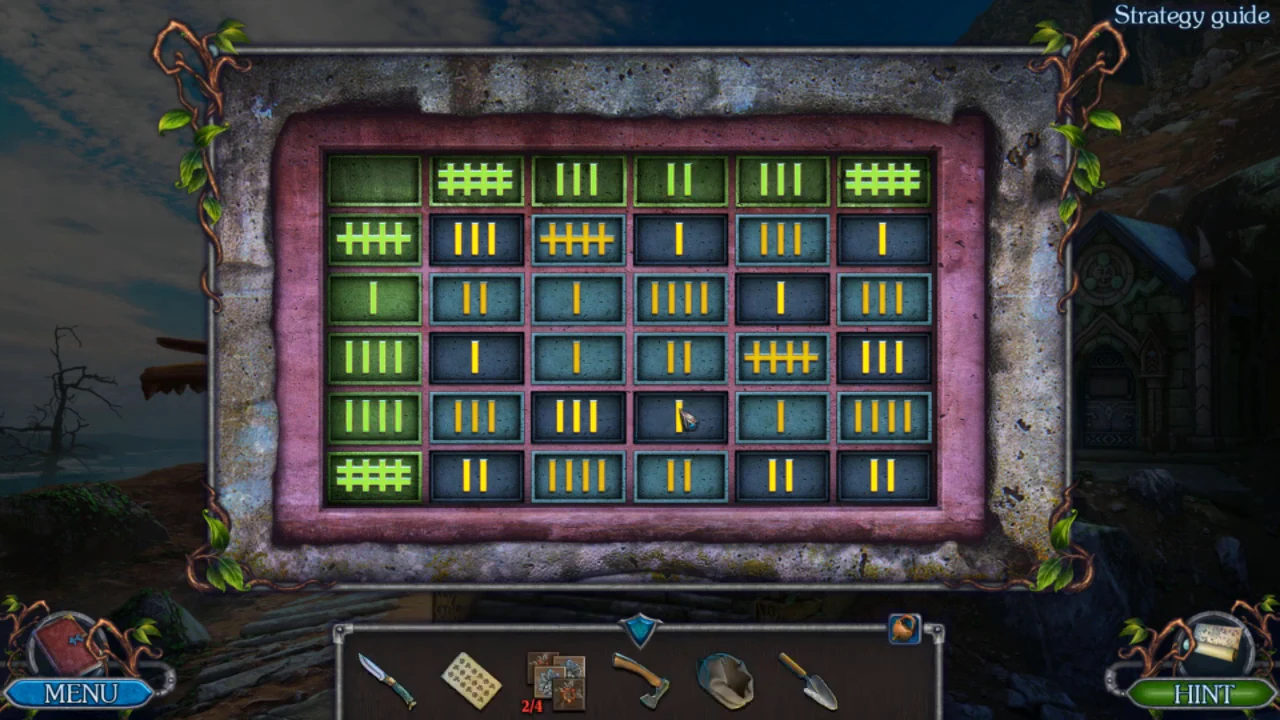
Solved tally panel: every green tally matches the sum of the selected (dark) plates in its row or column. - On the plateau, pick up the last PLANKS WITH FLOWERS left of the stairs. The grid panel on the floor cannot be activated yet.
- Go down to the wrecked shore. The green crystal rock is a weak energy source and the metal box is missing a button on its lid. The horned totem is wrapped in poison ivy: free its right horn with the KNIFE and take the GREEN HORN.
- At the riverside, dig the sand with the SHOVEL and take the PICKAXE. On the wrecked shore, strike the right edge of the green crystal with the PICKAXE: a DETAILS piece (1/4) breaks off and green shards scatter on the ground. Take the DETAILS, place the POUCH at the foot of the rock and click the shards to gather them into it. Take the BAG OF CRYSTALS.
BONUS CHAPTER
Root-Bound Chest: Flower Tiles
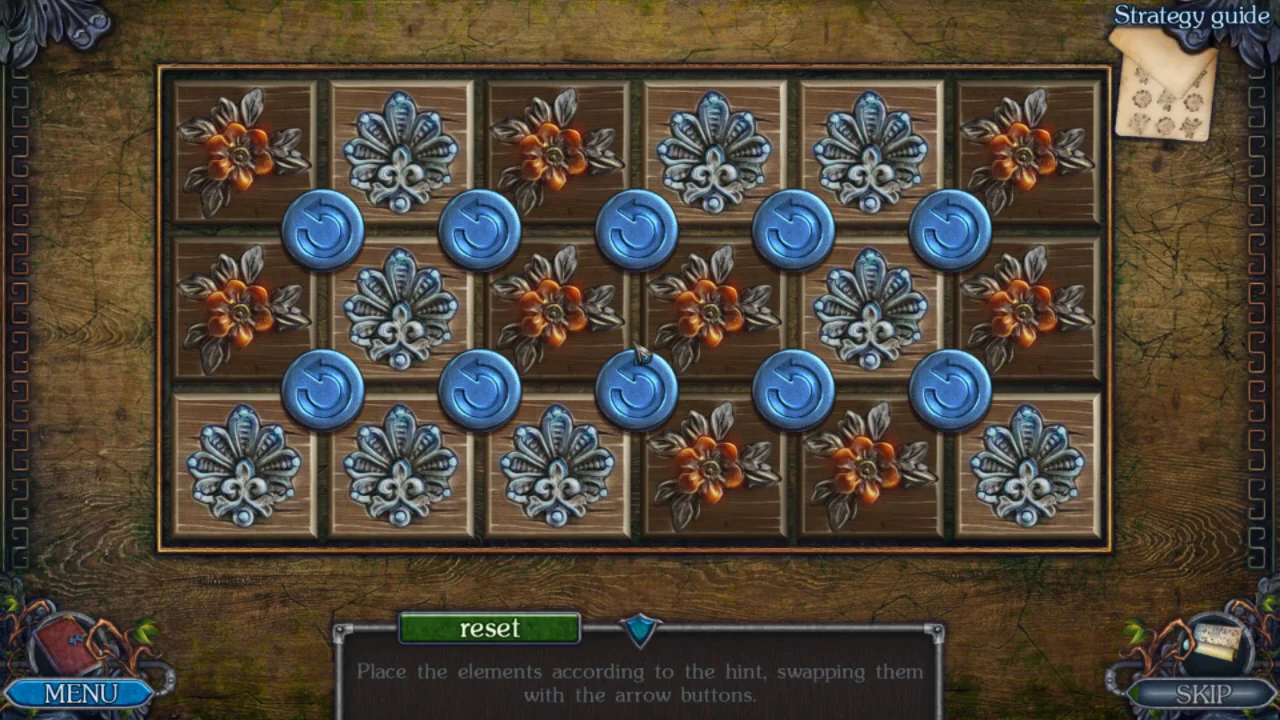
The chest on the jungle path is held by roots.
- On the jungle path, chop the roots around the chest with the AXE and fill the gaps in its lid with the PLANKS WITH FLOWERS. The DRAWING serves as the hint.
- Each round arrow button rotates the four tiles around it. Make the checkerboard from the hint: rows 1 and 3 start with a blue lily, row 2 starts with an orange flower, alternating across. The chest opens; take the RED HORN.
BONUS CHAPTER
Tower Door: Colour Link Puzzle
Two totems guard the tower of the Ancients on the plateau.
- Put the RED HORN on the right totem and the GREEN HORN on the left totem. Their tops light up and the tower door panel activates.
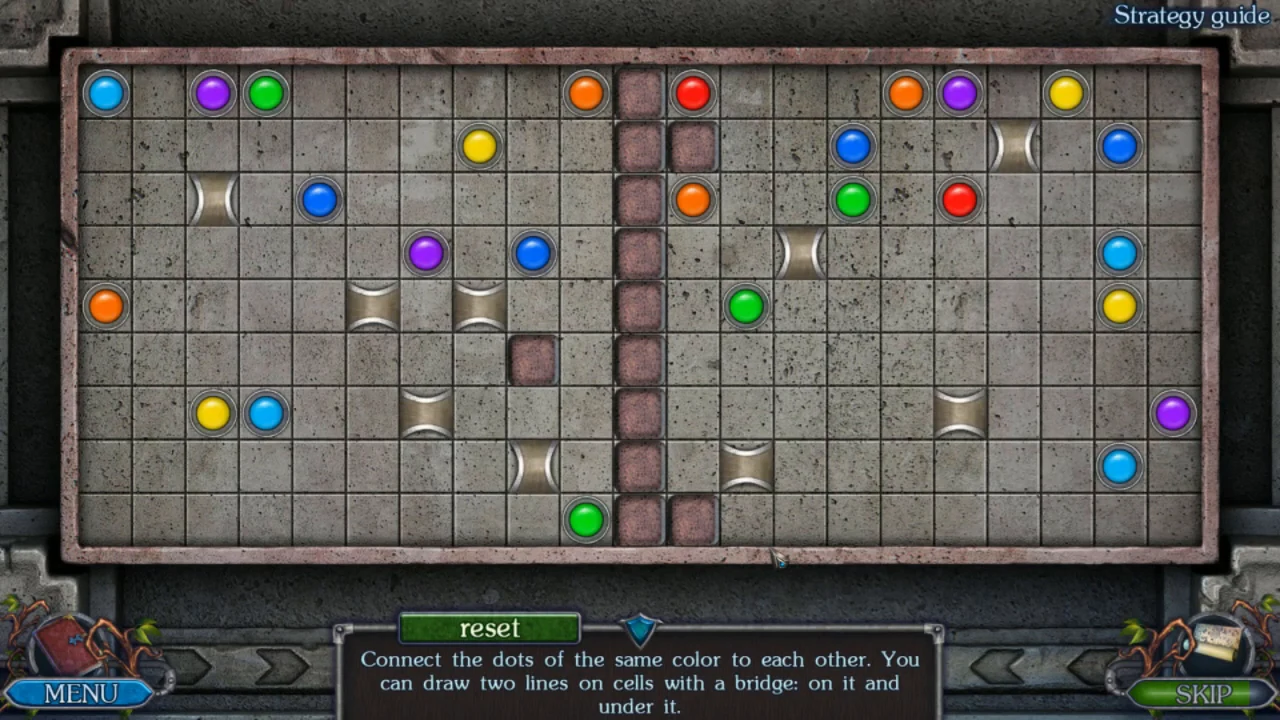
- Connect each pair of dots of the same colour with a line. On a bridge cell one line may pass over and another under it. Fill both boards. The tower door opens.
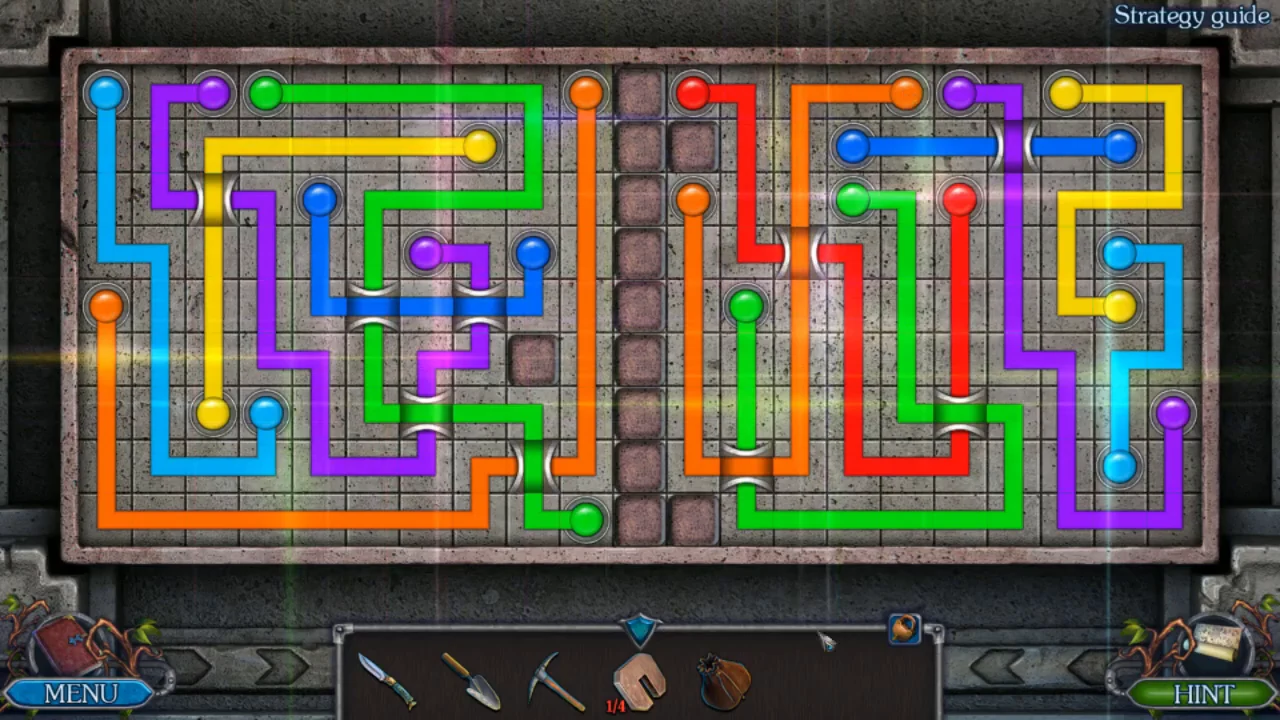
Both boards filled.
BONUS CHAPTER
Temple of the Ancients: Symbol Hunt
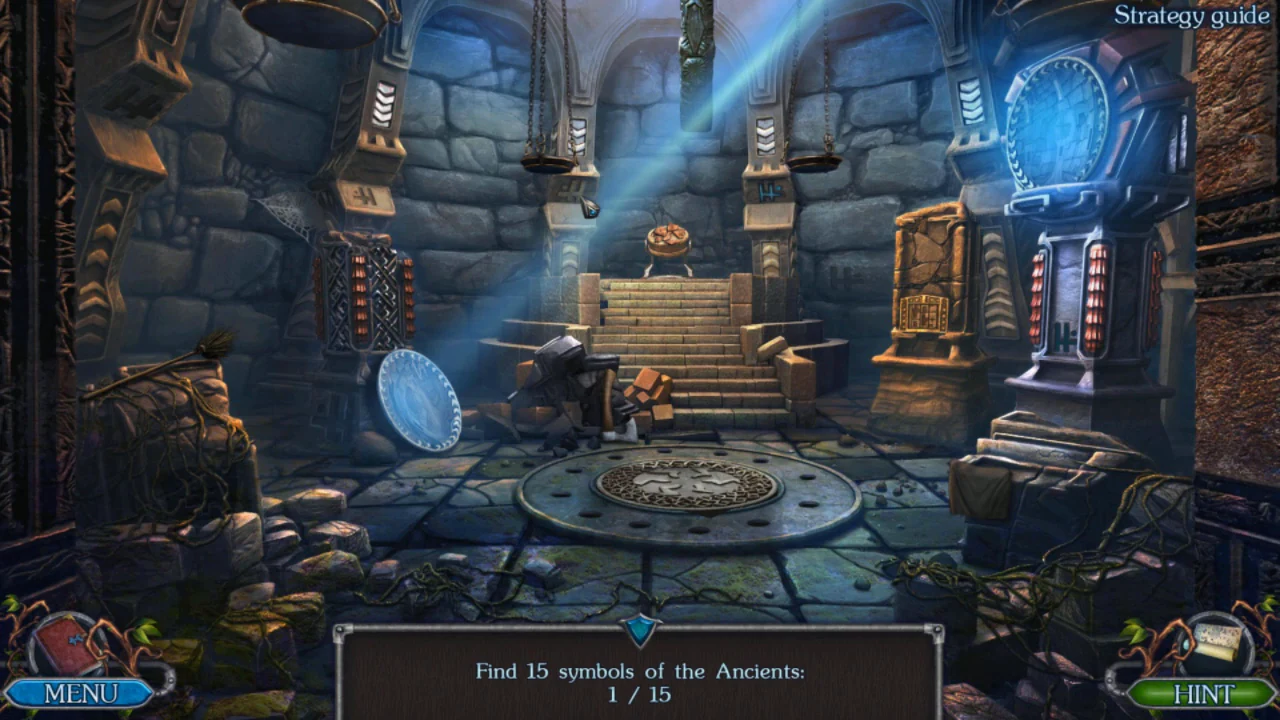
The glowing crystal sits under an energy dome inside the tower.
- Take the ELEMENTS from the bowl on the pedestal on the left. The mechanism needs energy crystals.
- Enter the temple and find the 15 symbols of the Ancients. Some are hidden in the scene and in close-ups of the floor; turn the round mirror on the left so the light beam crosses the room to reveal more. On the round stone plaque, move the fragments until the blue symbol appears, and in the wooden frame slide the blocks until the blue line symbol is restored. When all 15 are found, take the CARBINE from the chain between the hanging scales.
- Hook the chain to the dome with the CARBINE and put the BAG OF CRYSTALS into the bowl on the pedestal. The mechanism lifts the dome.
BONUS CHAPTER
Temple Wall: Hex Fill
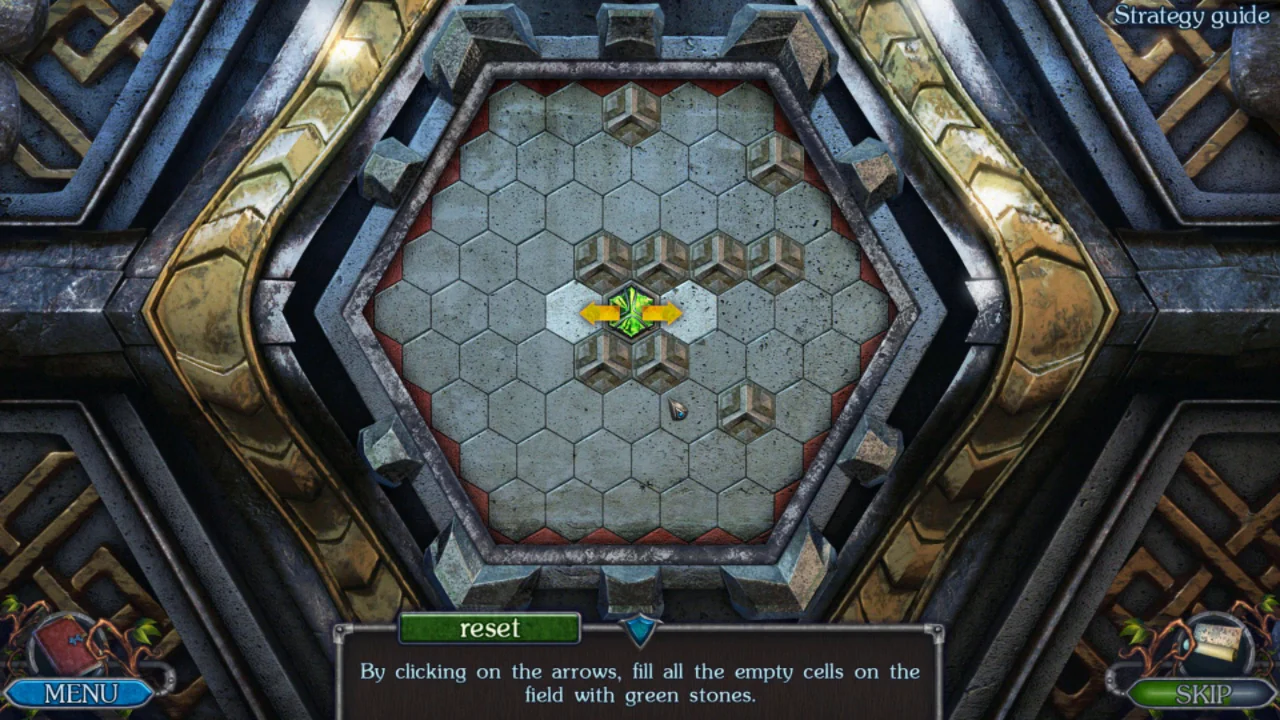
A hexagonal panel is hidden behind the roots on the right-hand wall of the temple.
- Clear the roots from the wall on the right with the PICKAXE to reveal a hexagonal panel.
- Click an arrow to send green stones in that direction; they run until they hit a wall or another stone. Fill every empty cell. Take the BUTTON.
BONUS CHAPTER
Metal Box: Two-Star Network
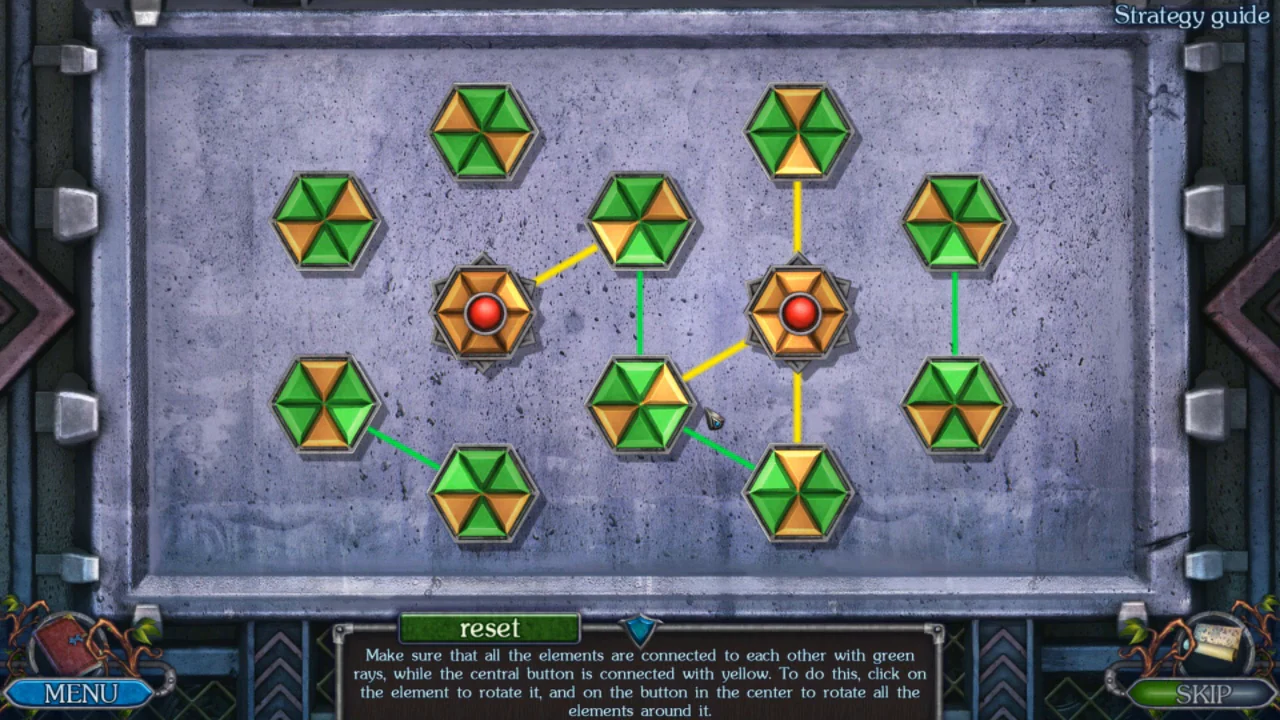
The metal box on the wrecked shore holds the Sword of the Ancients.
- Put the BUTTON on the lid of the metal box on the wrecked shore.
- Click an element to rotate it, or the red centre button to rotate all six elements around it. Make every link to a centre button yellow and every outer link between neighbouring elements green. The box opens.
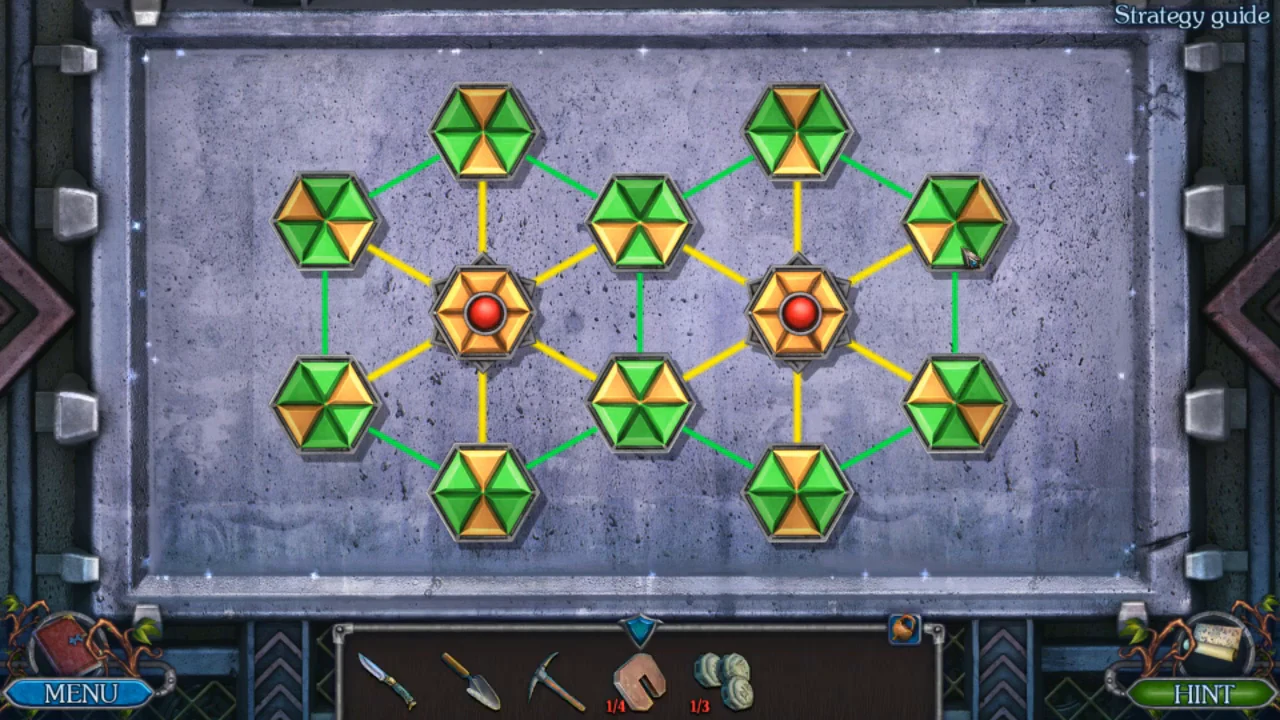
Solved: yellow links to the centres, green links between neighbours. - Take the CHAIN and THE SWORD OF THE ANCIENTS. Break the energy shield in the tower with the SWORD, take the ELEMENTS (2/3) from the rim of the pedestal, then take the crystal. The floor gives way and you fall into an underground hall.
BONUS CHAPTER
Underground Hall and Greenhouse: Patterned Tiles
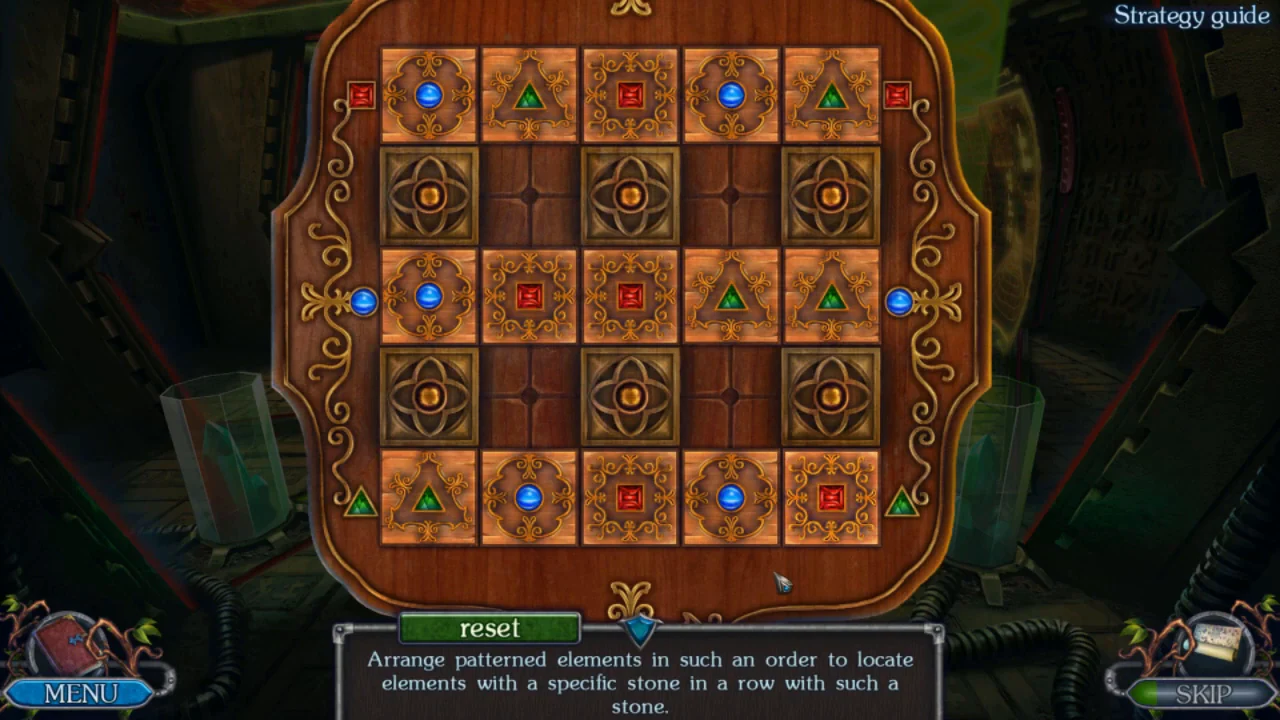
Someone slipped through the doors on the far side. Find a way to follow.
- In the underground hall the chest on the left is locked. Zoom into the barred opening left of centre (another room is behind the bars), hook the CHAIN onto the bars and lever them open with the PICKAXE to reach the greenhouse.
- In the greenhouse, cut BAMBOO from the clump on the left with the KNIFE and knock the KEY off the glass roof with it. At the workbench take the DETAILS (2/4) from the right end of the tabletop, pry the loose front BOARD off the bench with the PICKAXE, then dig the dirt under the bench with the SHOVEL and take the patterned BOX.
- Open the chest in the hall with the KEY and take the patterned ELEMENT (1/2), the DETAILS (3/4) and the BUCKET. Lay the BOARD across the gap below the triangular door.
- Fill the BUCKET at the barrel in the greenhouse and pour it on the red coals in the vat. Take the ELEMENTS from the cooled vat.
- Put the ELEMENTS into the triangular door and enter the energy cell room. The grooves in the floor lead to rods you cannot pull out yet. Take the patterned ELEMENT from the top of the glass cylinder on the right.
- Open the BOX and add the patterned elements to its lid. The markers at the ends of rows 1, 3 and 5 show which stone belongs in that row. Slide tiles through the empty cells until row 1 holds the five red-square tiles, row 5 the five green-triangle tiles and row 3 the five blue-dot tiles; rows 2 and 4 are left with their empty cells in columns 2 and 4. The bronze knot tiles in rows 2 and 4 do not move. The box opens; take the DETAILS (4/4).
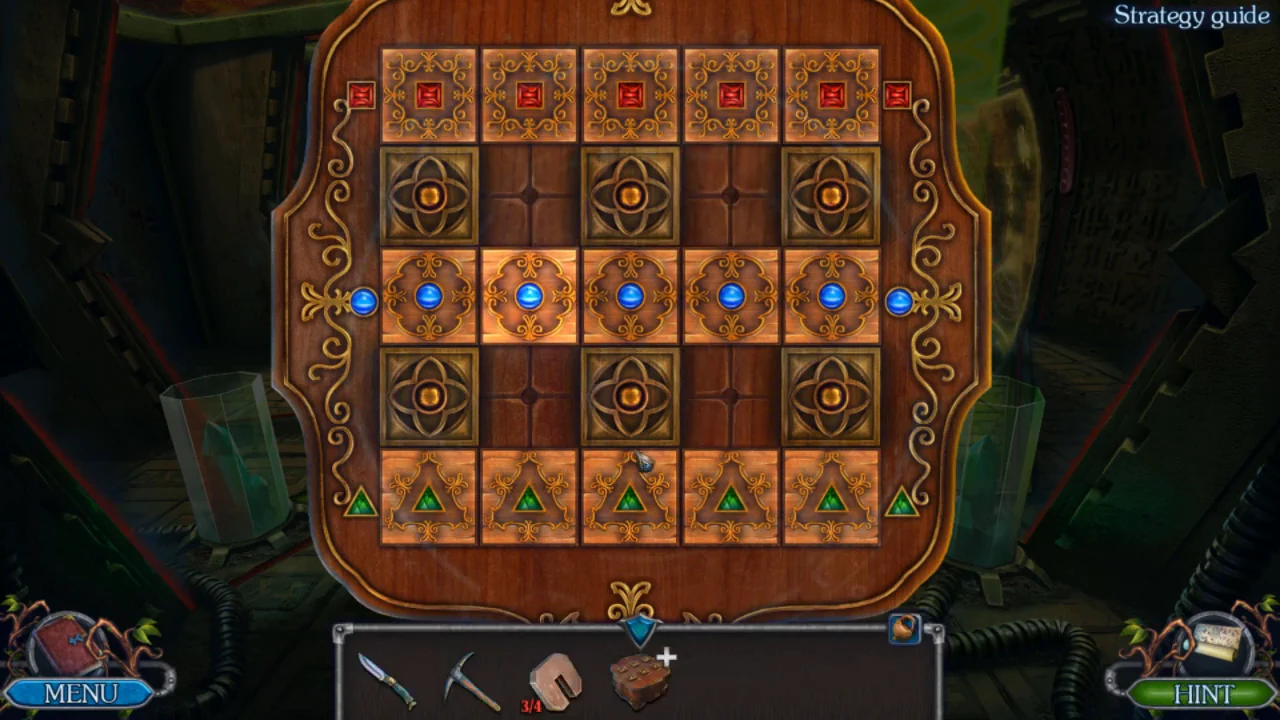
Solved: red squares in row 1, all five blue dots in row 3, green triangles in row 5.
BONUS CHAPTER
Energy Cell Barrier: Bars Release
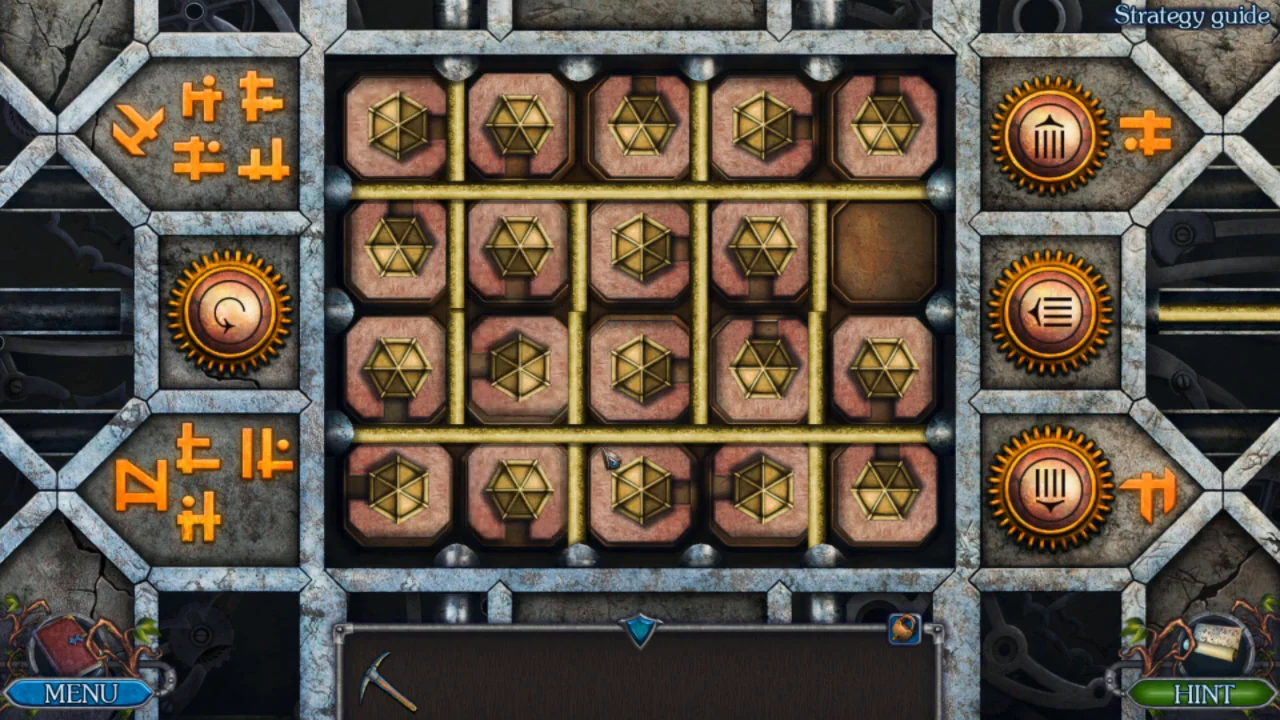
Disable the barrier around the energy cell.
- Pry the red rods out of the left and right floor grooves in front of the barrier with the KNIFE. When the console rises, put the DETAILS on it.
- The board has 19 hexagon elements in 4 rows of 5 cells; the only empty cell is row 2, column 5. Each element's plate has a dark slot on one side. Click an element to release it when its slot points into a neighbouring empty cell and no yellow bar lies between the two cells: it disappears and leaves another empty cell. The round button on the left turns every element a quarter turn, so press it until the slot you need faces the empty cell. The buttons on the right move the bars: top and bottom move the vertical bars up or down, the middle one moves the horizontal bars. Work outward from the empty cell. Start with the element below it (row 3, column 5), then clear rows 2 and 3 from right to left, opening the vertical bars that block you. Next move the horizontal bars so row 1 can drop into the empty row 2, and finally clear row 4. Use Reset if the board locks up.
- The barrier is still on. Strike the glass post on the right side of the barrier with the PICKAXE to break it, then watch the ending: Sindal captures Anum Kayfel and takes him to the ship, which leads into the main story.