Eltay Beach and the Straw Doll Treasury
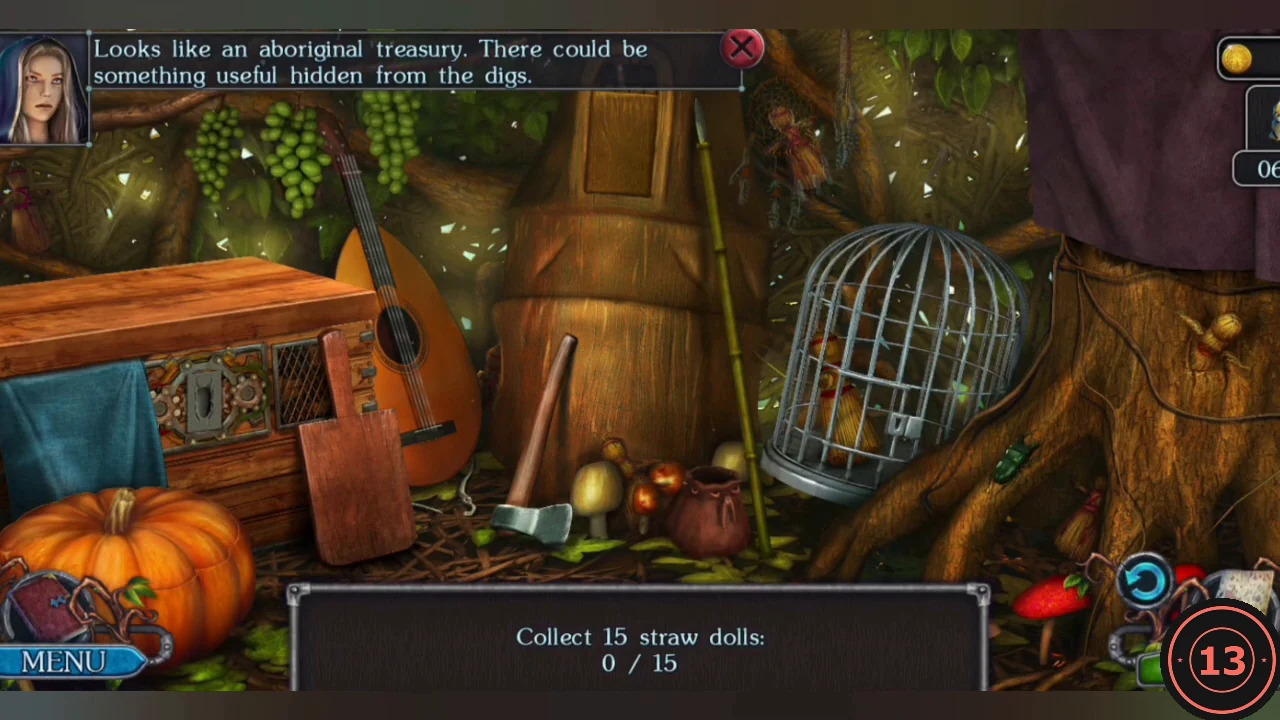
Tie up the guard and search the islanders' treehouse treasury.
- Pry open a crate in the centre of the beach with the DAGGER, take the ROPE and tie up the guard by the tree.
- On the volcano path, cut the vines over the panel at the lower right with the DAGGER. It is the outer defence system, missing its energy crystals. Take the FISH and the FLASHLIGHT, and take the LADDER leaning against the rocks right of the stone totem.
- Climb the ladder on the left to the treehouse and collect 15 straw dolls. Several need a small action first. In the lute close-up, join the two halves of the broken WIRE CUTTERS lying in the nest and cut the strings to reach the doll inside the lute. Lift the lid off the pumpkin and use the KEY inside it on the padlock of the bird cage. Move the leaning board by the chest to find a doll behind it. Drag the AXE to the thorny vines over the tree hollow on the right to chop them away, and knock down the doll stuck high in the trunk with the long pole leaning by the barrel. The chest with the beetle-shaped recess is a separate puzzle (next section).
Treasury Chest: Beetle Gear Lock
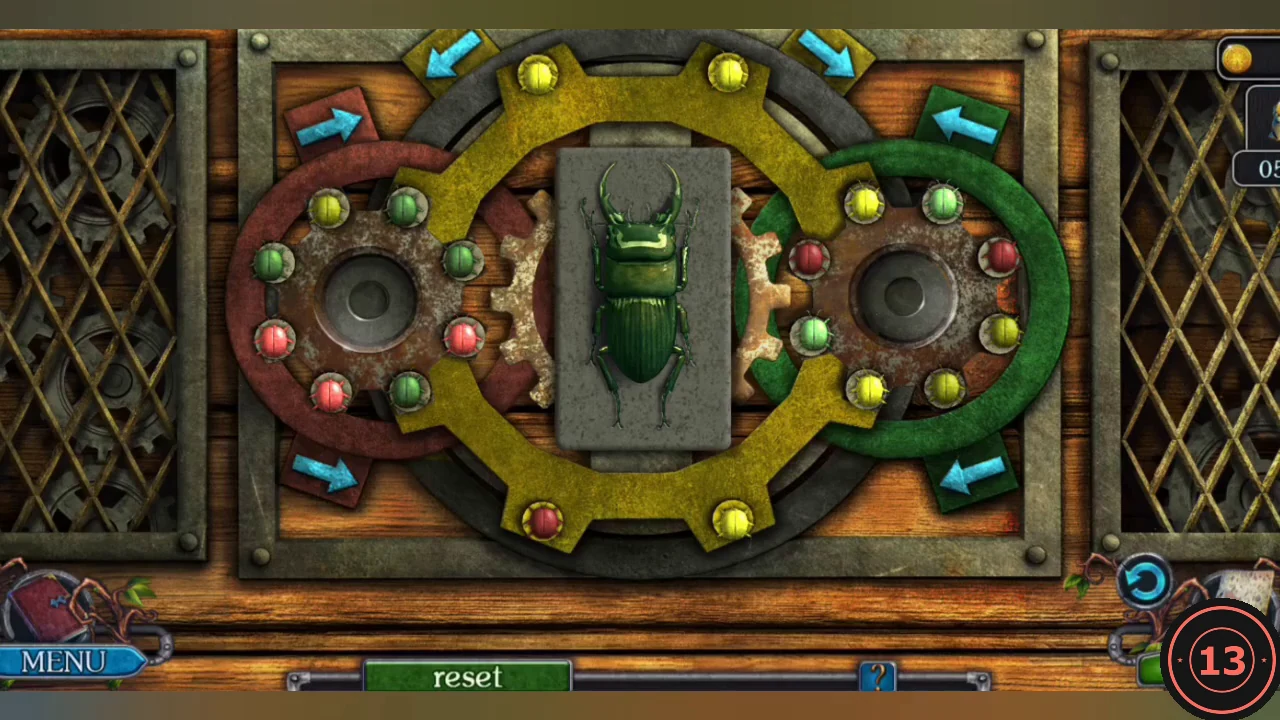
The beetle lock on the treasury chest.
- Three interlocking rings (red left, yellow centre, green right) carry coloured balls. Use the cyan arrow buttons to rotate each ring. Move every ball onto the ring of its own colour. The chest opens.
- Take the dolls from the chest and find the rest to complete 15/15. Take the reward, a LEVER.
Vine Flower Disc and the Lock Parts
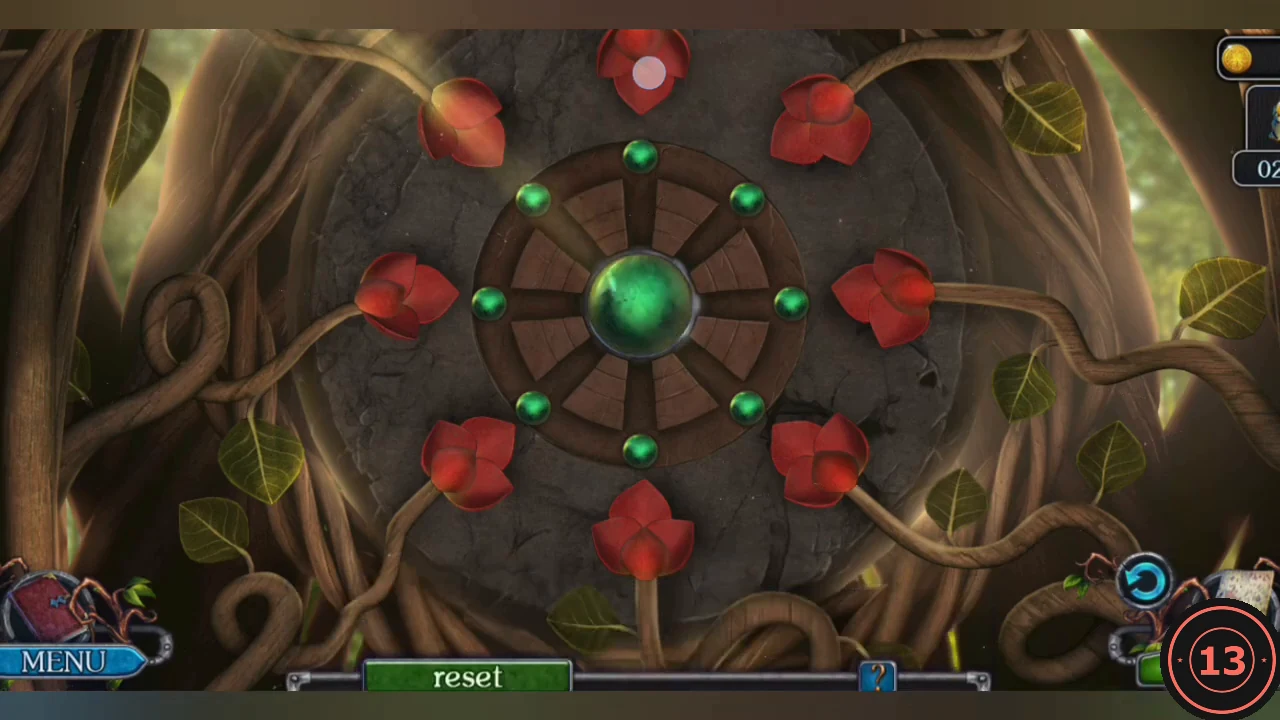
Recover the totem core and the parts needed for the chest and the bunker.
- Zoom into the spike pit at the lower right of the volcano path. Insert the LEVER from the treehouse into the socket on the left wall of the pit and pull it up: the spikes retract. Take the TOTEM CORE (the green gem).
- Place the TOTEM CORE in the centre of the vine wheel. The wheel rim holds eight green seeds, one facing each red bud. Clicking an empty bud with a seed facing it moves that seed into the bud. Clicking a filled bud with no seed facing it sends its seed back to the rim. After every click the wheel turns one step anticlockwise. Eight straight fills are impossible, so some buds must be emptied and refilled. From the start position (press Reset if needed), click the buds in this order: top, left, bottom, right, upper-left, lower-left, lower-right, right (empties it), upper-right, bottom (empties it), right, upper-right (empties it), upper-right, lower-left (empties it), bottom, lower-left. All eight buds are now green and the vines retract.
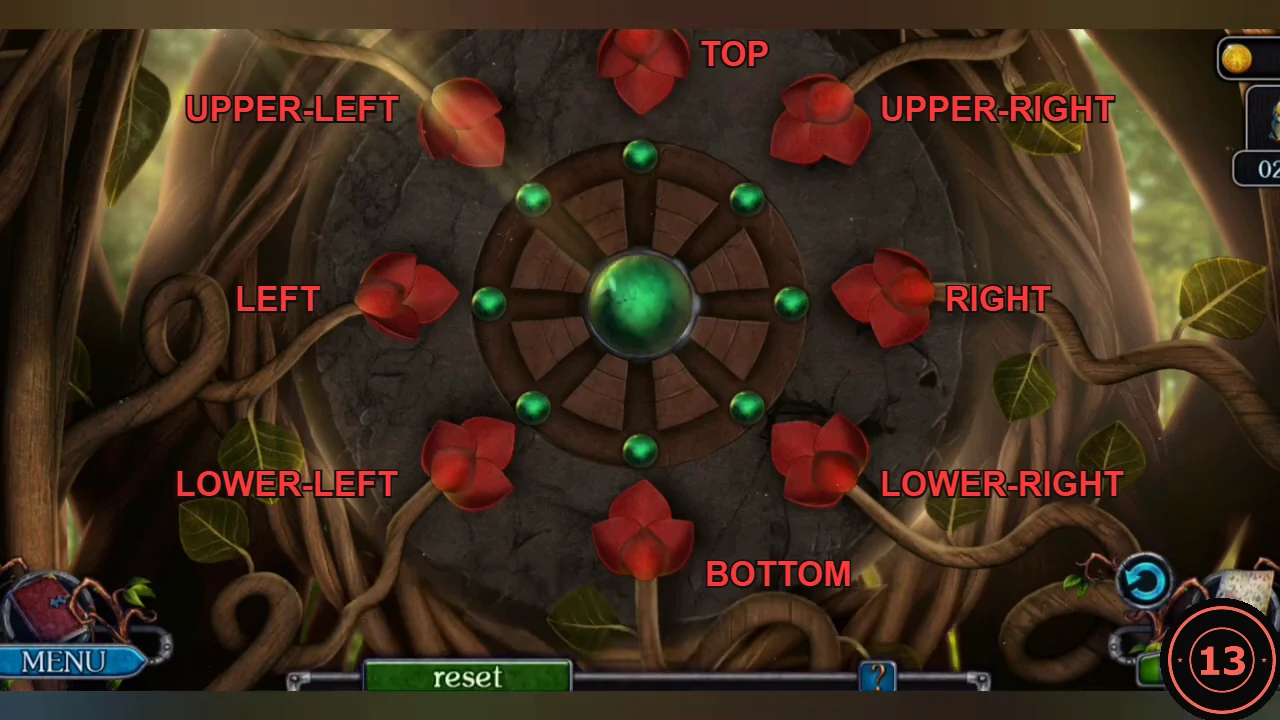
Bud names used in the click order of step 2. - Take the MASKS and the LOCK PARTS from the trunk. Lure the crab out of its hole on the beach with the FISH and take more LOCK PARTS.
- On the volcano slope, pry the blue gem out of the stump roots with the DAGGER (BUTTONS). Lean the LADDER from the volcano path against the tree on the right, take more BUTTONS from the nest and take the LADDER back.
- At the cave entrance on the left of the slope take the last LOCK PARTS from the floor, then light the dark corner with the FLASHLIGHT and take the MASKS there.
Beach Chest: Sliding Mask Bars
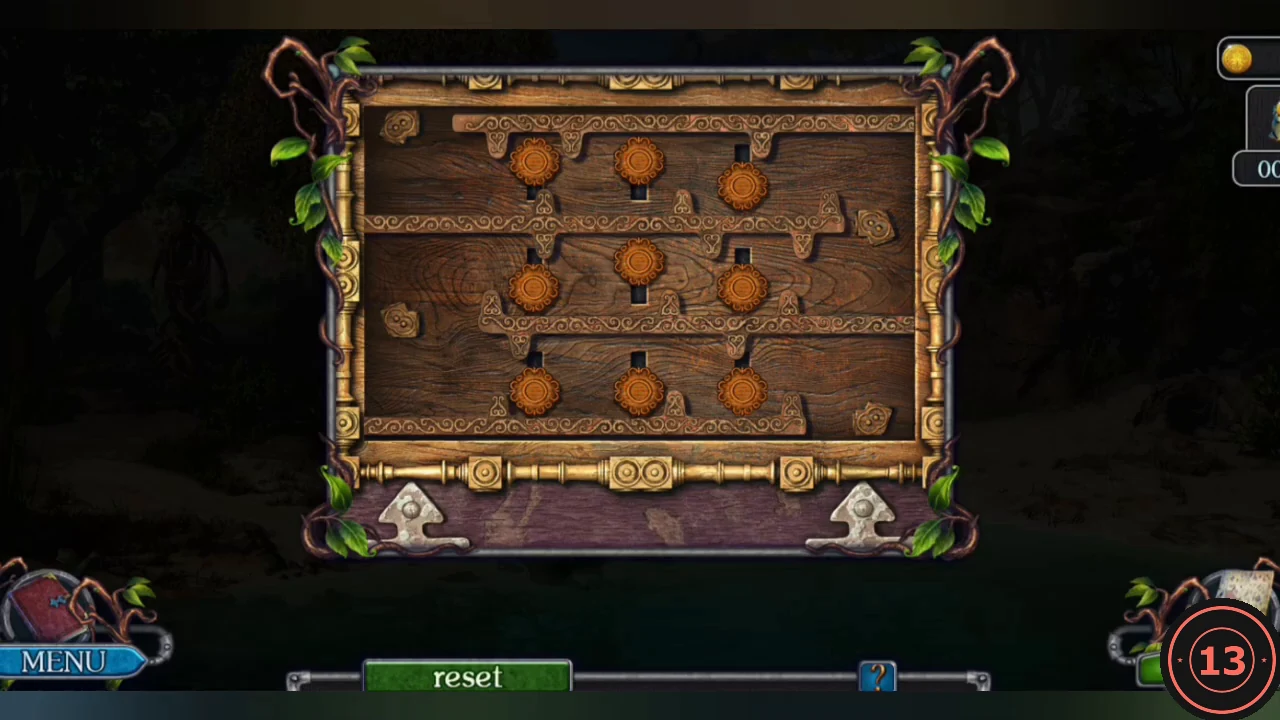
The purple chest among the crates on the beach.
- Zoom into the purple chest among the crates on the beach and put the LOCK PARTS on it.
- Four carved bars with teeth run across the board, locking nine round mask tokens that sit in short vertical slots. Drag a bar left or right (the bar you hold glows yellow); as the bars move, the tokens shift up or down in their slots, and a token in the way stops a bar. Work the bars back and forth to clear the tokens from their teeth, then slide each bar completely off the board. Remove all four bars; only the nine tokens remain and the chest opens.
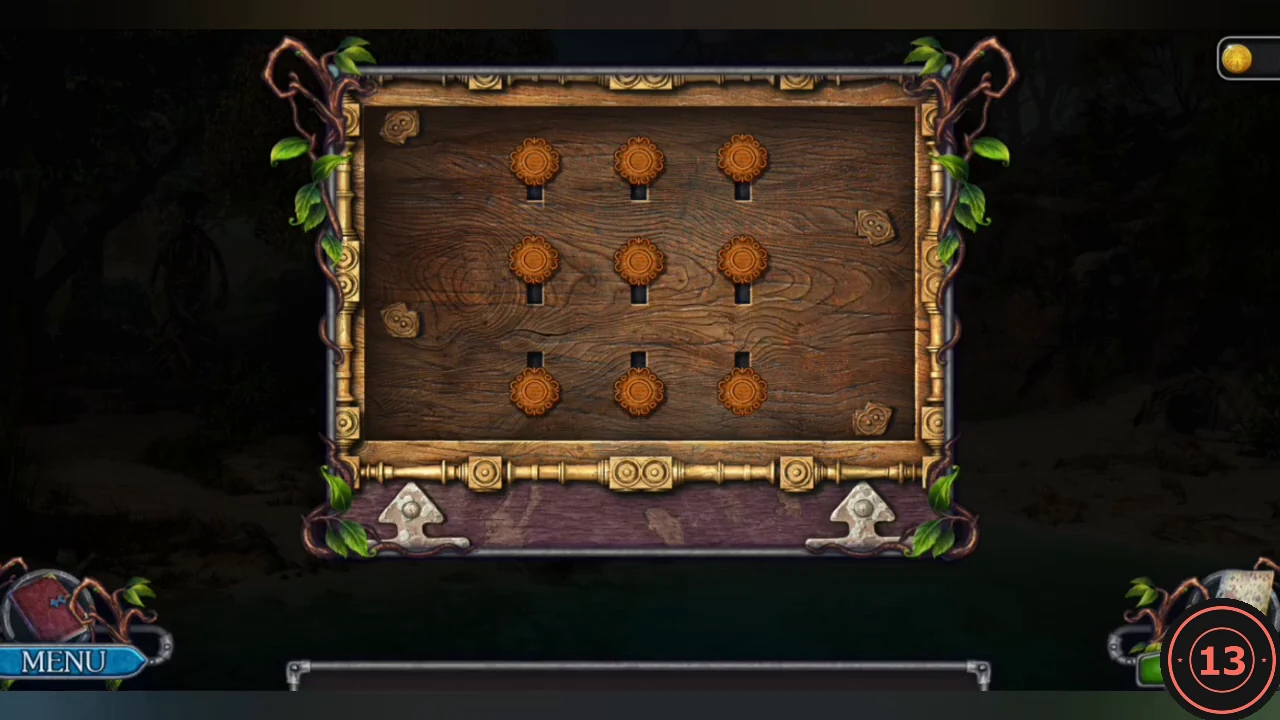
Solved: every bar has been slid off the board. - Take the BUTTONS from the open chest.
Excavation Camp Junk Pile
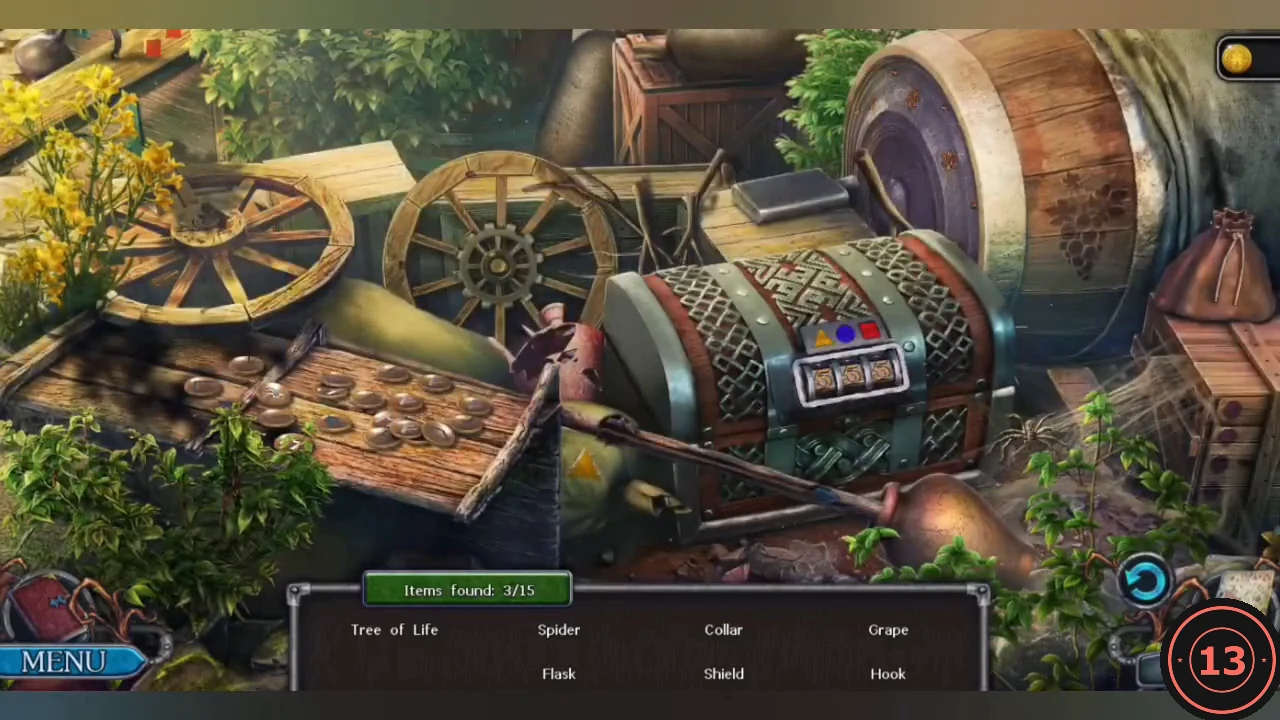
The witches' foreman found two defence crystals; the third is in the excavation camp junk pile.
- Watch the conversation between the purple witch and the foreman, then search the junk pile in the excavation camp for the listed items.
- The striped chest lock shows a triangle, a circle and a square. Count those shapes in the scene: one yellow triangle on the sack below the wheels, four dark purple circles on the side of the crate at the right edge and two red squares at the top-left corner. Enter 1-4-2 and take the CRYSTAL.CODE142
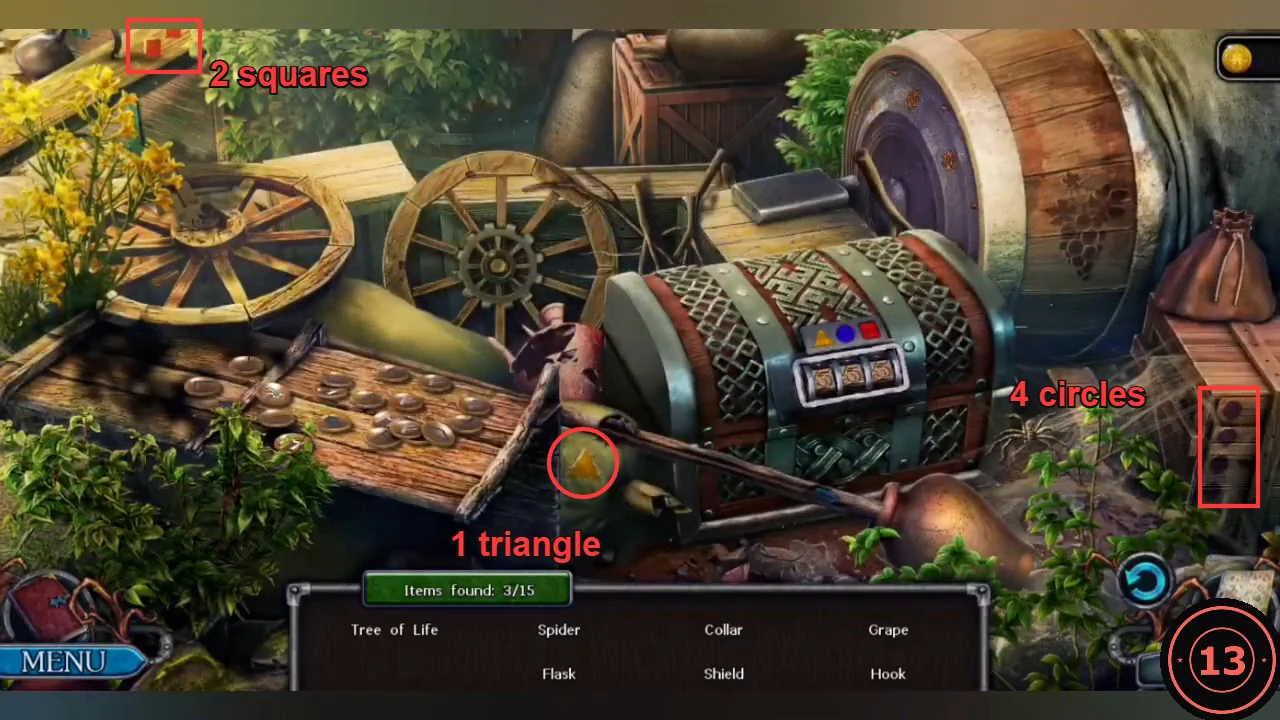
Count the shapes: 1 triangle, 4 circles and 2 squares give the chest code 1-4-2. - Finish the list to receive the CRYSTALS.
Outer Defence Panel: Beam Nodes
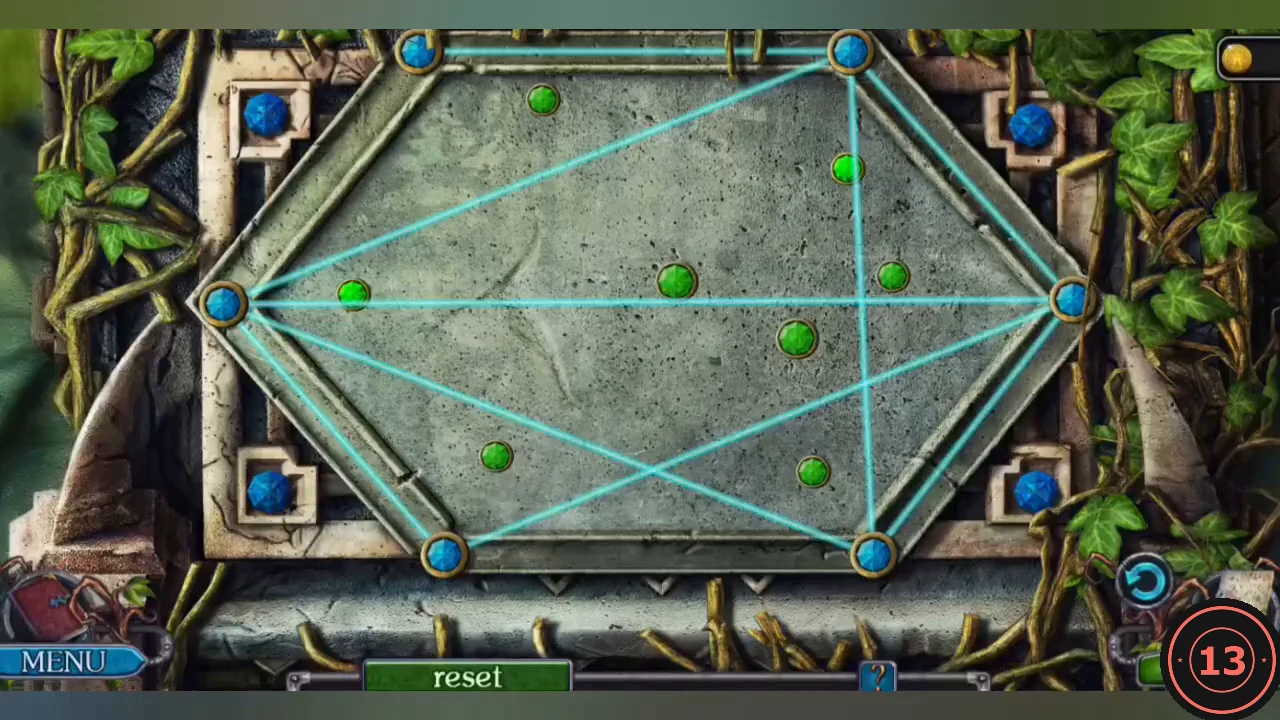
Activate the defence system to paralyse the excavation workers.
- Put the CRYSTALS into the defence panel on the volcano path.
- Slide the blue nodes along the hexagonal frame. Straight beams join the nodes; position them so every green dot lies on a beam. The defence field switches on and paralyses the excavation workers.
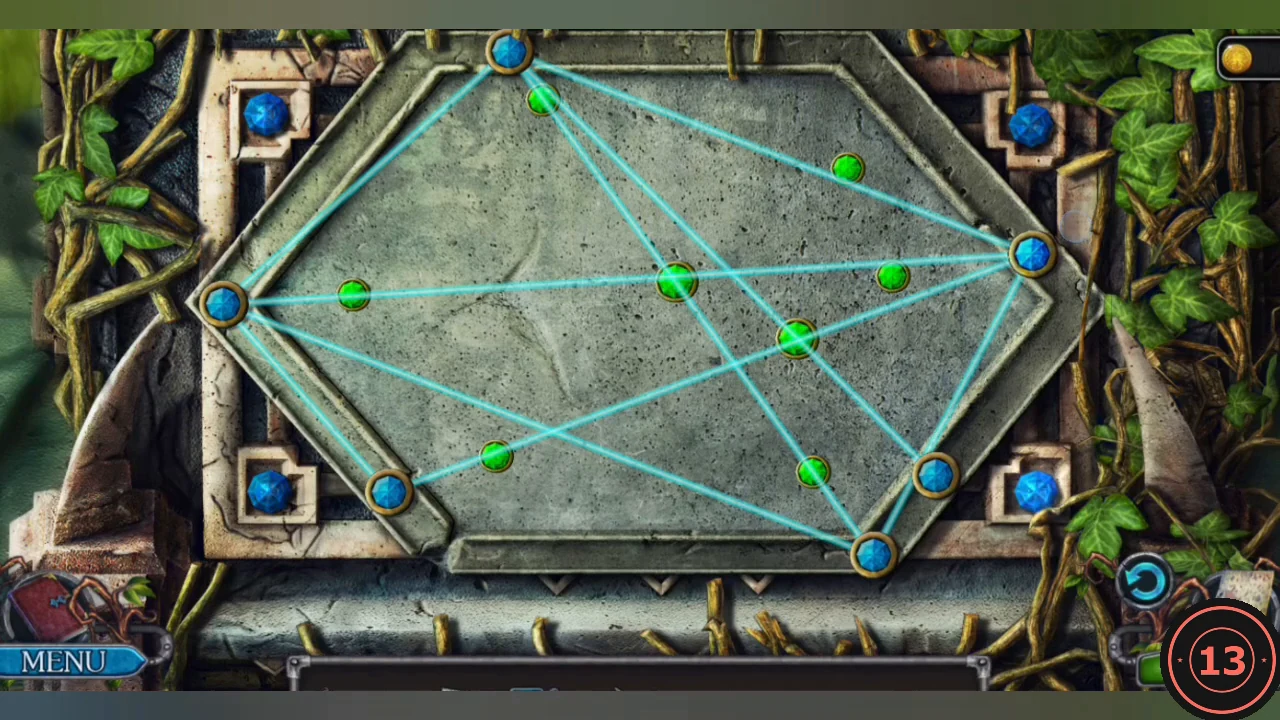
Solved: every green dot lies on one of the beams.
Bunker Door Panel
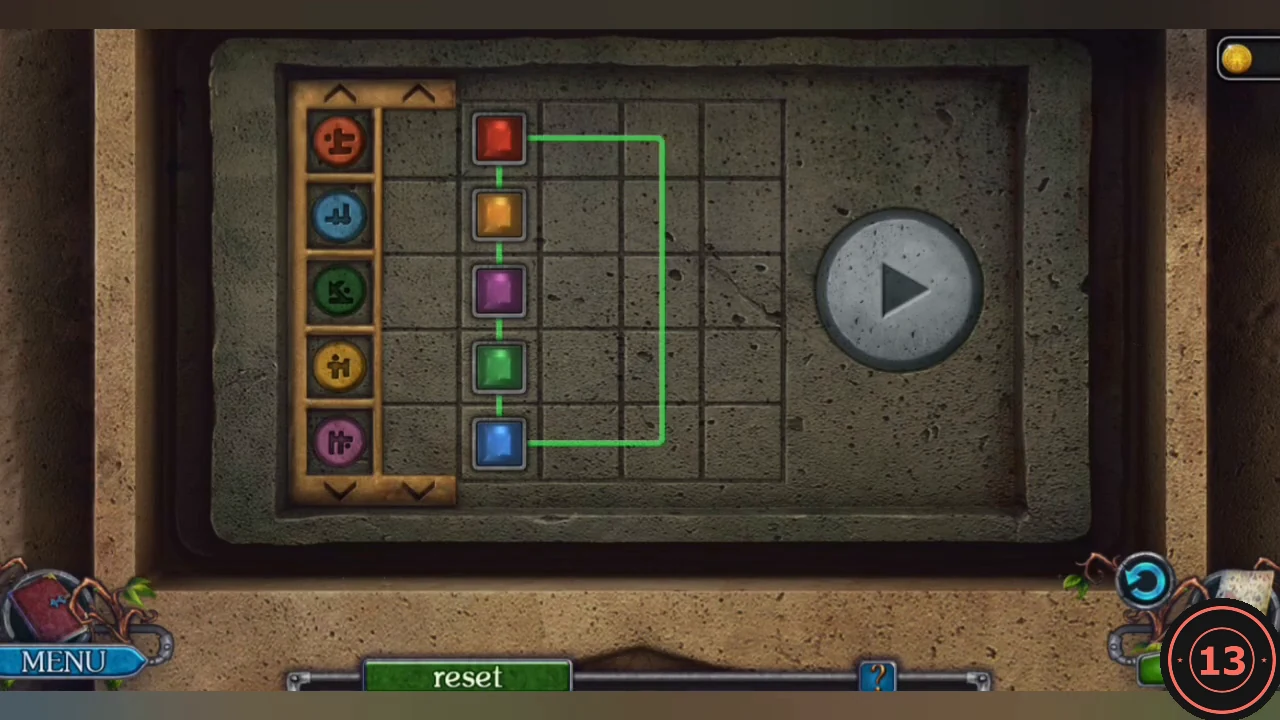
The bunker door is opened from a panel on its right.
- In the camp lean the LADDER against the watchtower on the left, take the last BUTTONS (4/4) from the top and take the LADDER back. Cut the rope of the crane bowl on the right with the DAGGER and take the PICKAXE. Break the rubble in the centre with the PICKAXE and take the ACTIVATOR and the BRUSH.
- Zoom into the panel right of the bunker door and take the MASKS (3/3). Sweep the cobwebs off the panel with the BRUSH and place the BUTTONS.
- Mark a rectangular loop on the grid through the blocks (it is outlined in colour); each press of the round play button moves every block on that loop one cell along it. Use different loops to reorder the blocks until each sits in the first grid column beside its matching symbol: red, blue, green, orange and purple from top to bottom.
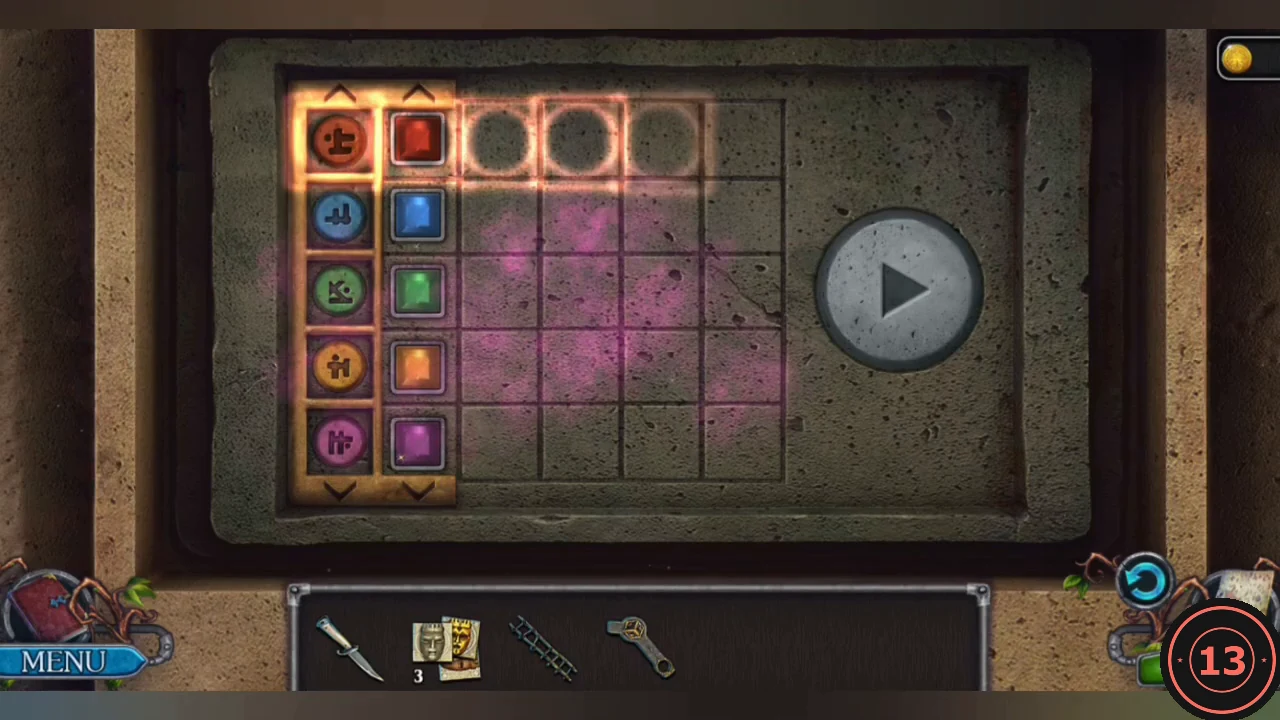
Solved: red, blue, green, orange and purple beside their symbols.
Volcano Temple: Mask Square
The islanders' temple seems to worship Anum as a volcano deity.
- Lay the LADDER across the gap in the broken floor. Cut the orange curtain at the upper left of the temple with the DAGGER and take the RAG. Zoom into the flower-decked shrine at the back right, wipe its dirty panel with the RAG and put the MASKS into it.
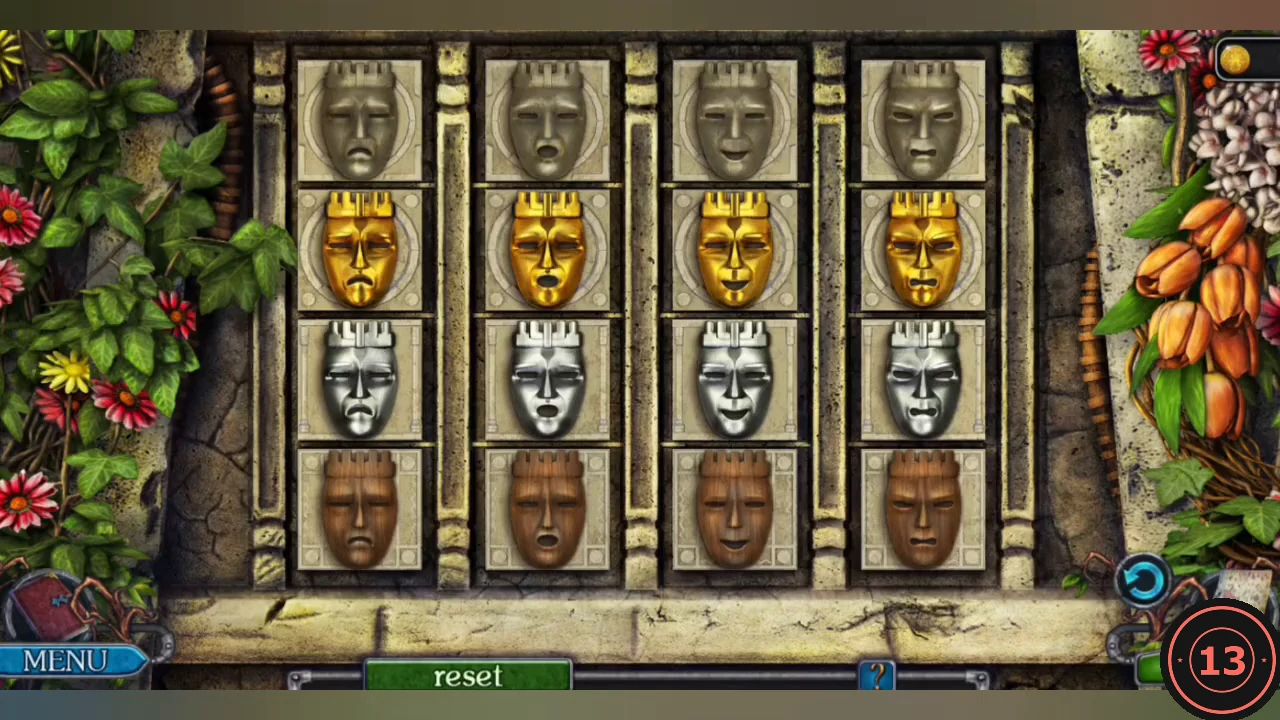
- Each mask has a colour (grey, gold, silver or brown) and a face: sad (mouth turned down), open-mouthed, smiling or grimacing (tight wavy mouth). At the start each row holds one colour and each column one face. Swap masks two at a time until every row and every column contains each colour once and each face once. Several arrangements meet both rules; one finished square, rows from the top: grey grimacing, gold smiling, brown sad, silver open-mouthed / gold sad, grey open-mouthed, silver grimacing, brown smiling / brown open-mouthed, silver sad, grey smiling, gold grimacing / silver smiling, brown grimacing, gold open-mouthed, grey sad. The panel opens.
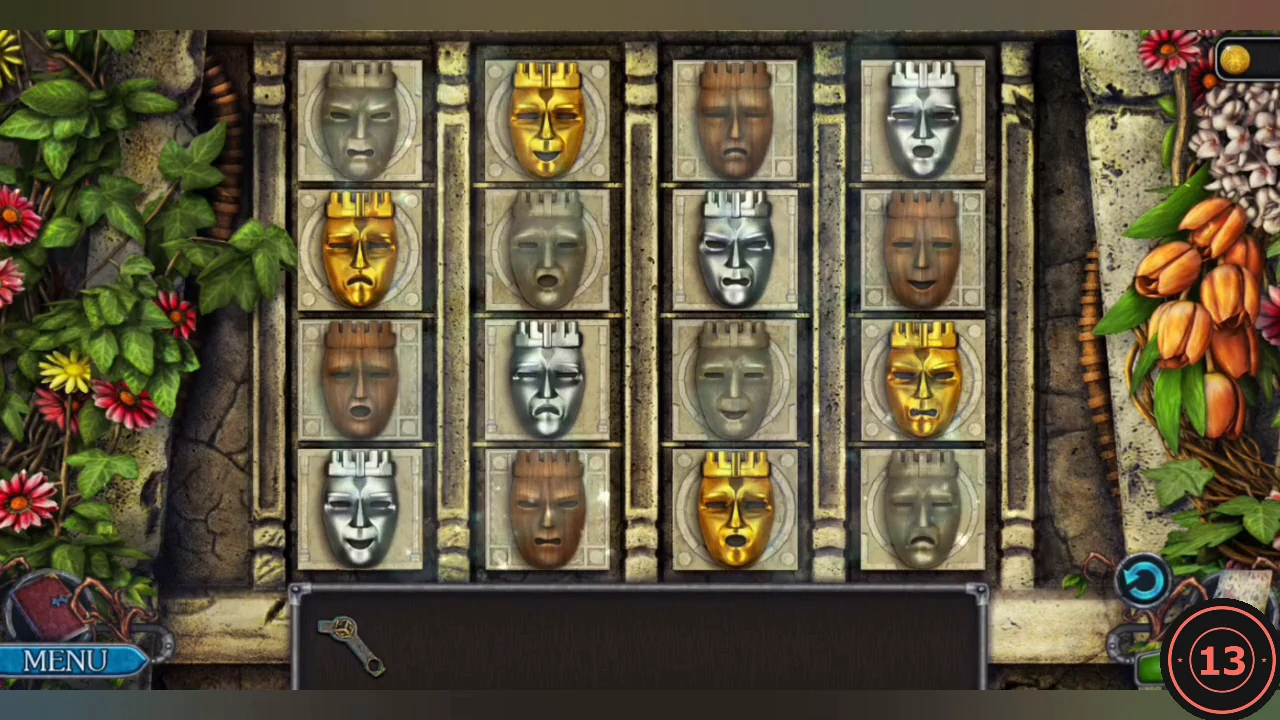
Example of a finished square. - Take the STAFF from the opened panel. Zoom into the central platform with the offerings and clear the leaves and fruit off the locked floor hatch. Put the STAFF into the round lock beside the grating and turn it; the grating opens.
Tunnel Maze and the Control Room
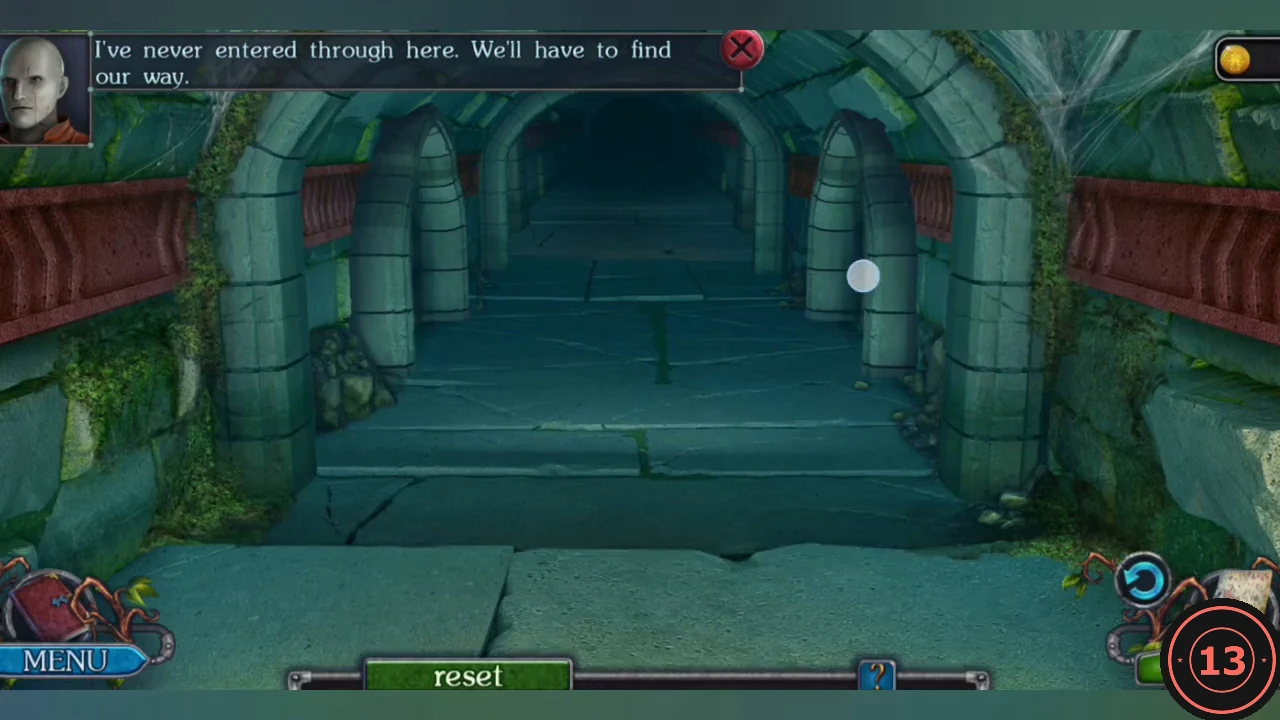
Nobody has entered through this tunnel; find the way to the reactor control room.
- Click the corridor openings in this order: right, left, straight ahead, right, left, straight ahead. The last corridor leads into the control room.
- Take the LEVER on the left and the SCREWDRIVER from the reactor console. The gold pocket watch by the doorway on the right wall is a collection item. Zoom into the screwed panel of the cabinet on the right wall, open it with the SCREWDRIVER and take the KEY TO THE SWITCHBOARD (the detail you are sent to fetch).
Buried Entrance: Hex Energy Network
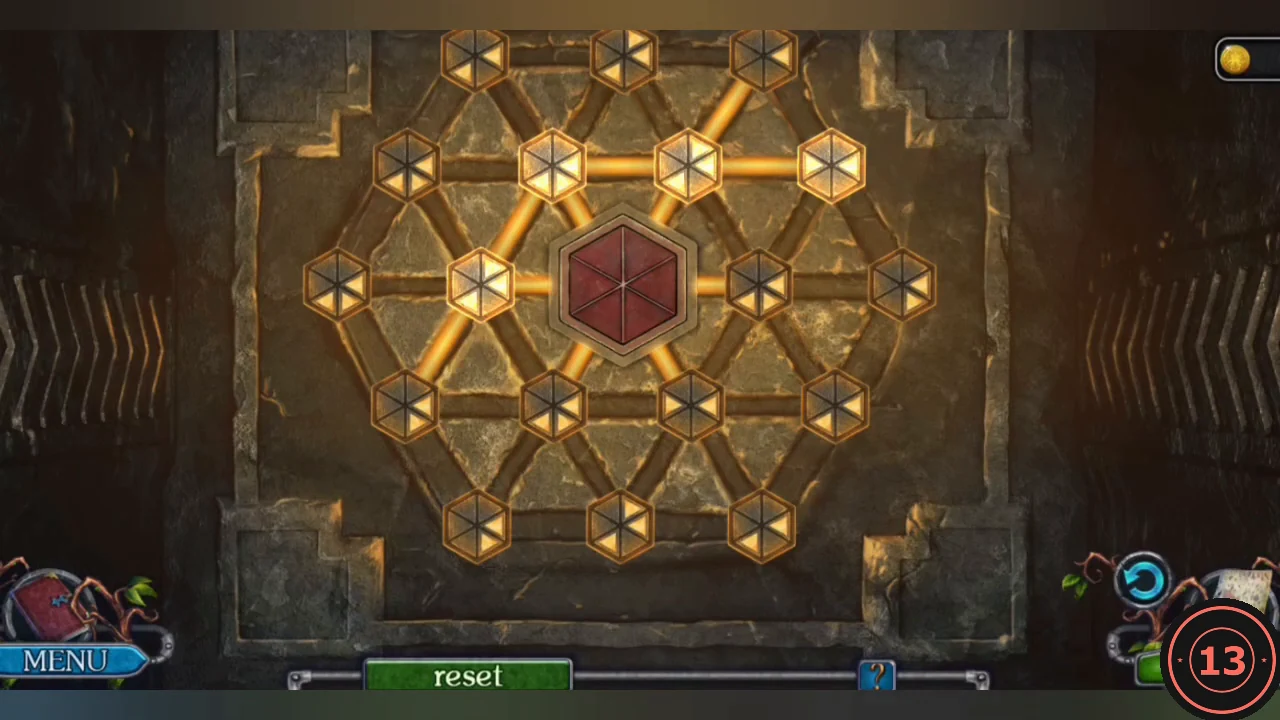
Restore power to the control room from the buried entrance on the volcano slope.
- Go back out to the cave entrance on the volcano slope and put the KEY TO THE SWITCHBOARD into the centre of the hexagonal door.
- Click a hex node to rotate its connectors. Turn the nodes until every bar is lit and the whole network glows. Power to the control room is restored.
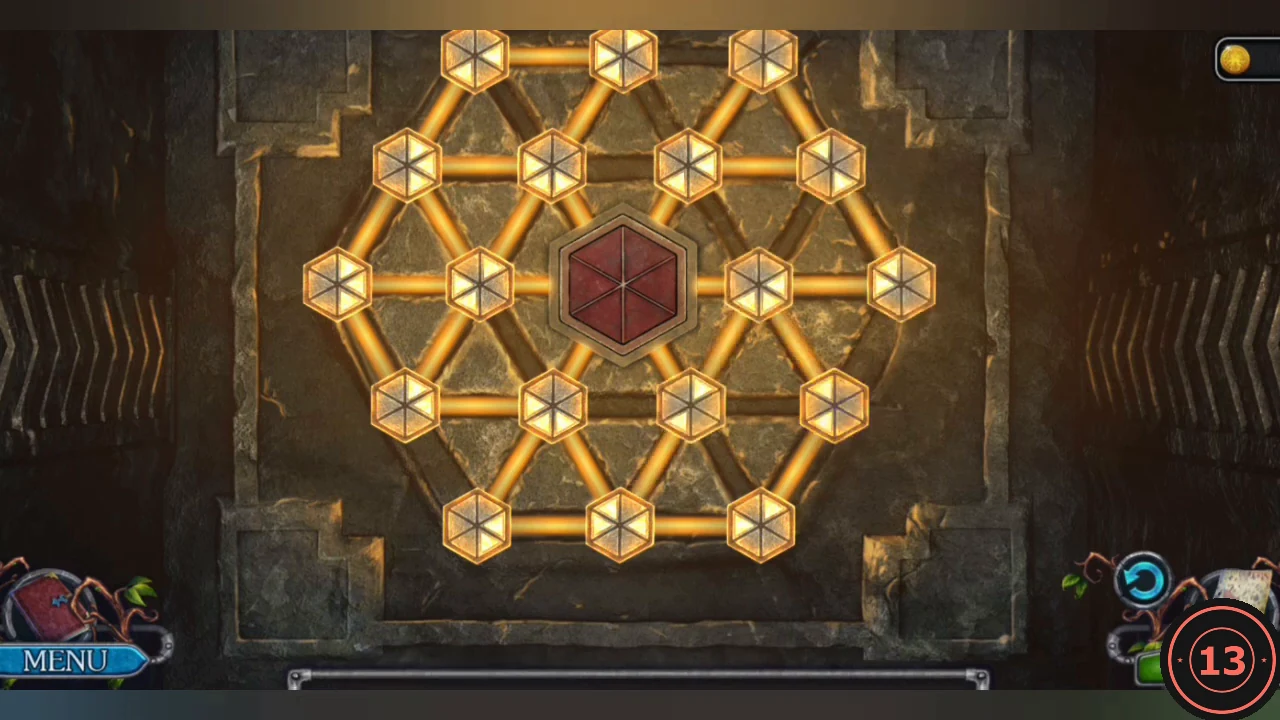
Solved: every bar is lit.
Reactor Safe and Self-Destruct
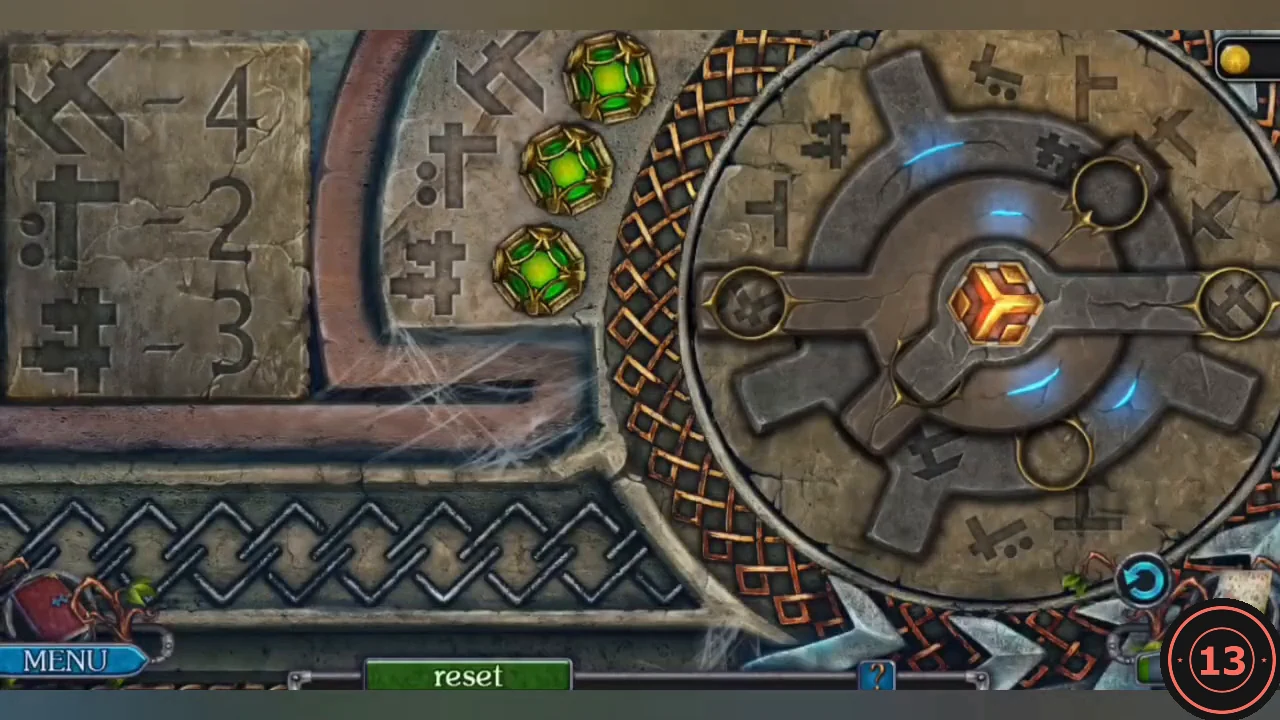
Lava is coming. Close the door and open the safe for the emergency panel key.
- Back in the control room, open the outer door of the safe on the left wall and put the ACTIVATOR into the lock in its centre; the lock still needs a password. Then insert the LEVER into the door mechanism on the right wall and pull it to close the door against the lava.
- After Anum speaks, take the PASSWORD.
- The password pairs three symbols with numbers: crossed arrows 4, colon-T 2, double cross 3. The symbols carved on the stone plate never move; the lock's stone pieces turn over them. Press a stone arm or a ring window and drag it around the centre to turn that piece. Turning one piece can carry a neighbouring ring with it, so check the whole lock after each drag. Because the plate is the same in every game, this position always opens the lock: the window of the outer ring at the top, the bar across the centre horizontal with the double-cross symbol in its right ring window, and the two windows of the inner ring pointing straight down and down-left (compare the solved picture). The three lights on the left then turn bright green. Take the SYSTEM KEY from the safe.
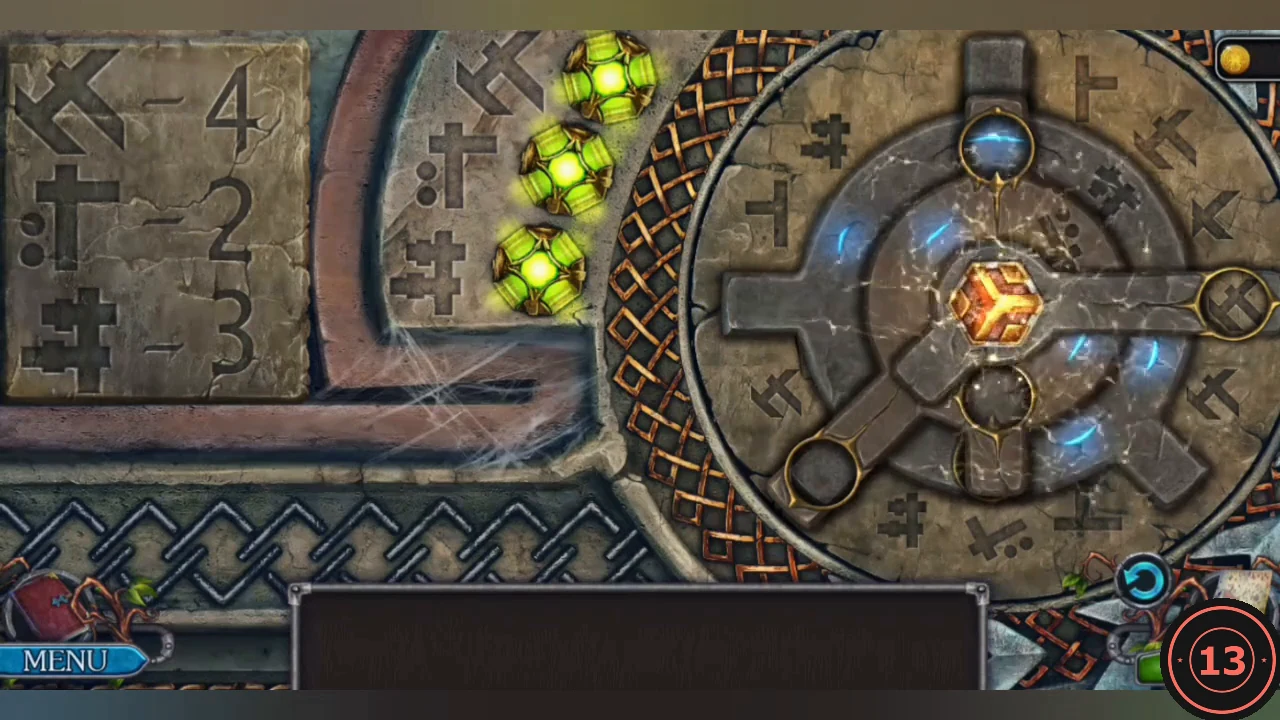
Solved position: the three lights on the left are bright green. - Insert the SYSTEM KEY into the reactor console.
Ending and Bonus Unlock
The reactor self-destructs and the heroine and Anum sail away.
- Watch the ending. After the credits a message confirms that the main game is complete and that the bonus chapter is now available. In the recorded game the Expert achievement pops up at the same moment; the published achievement list ties Expert to Hard difficulty (see Achievements in Part 9).