Tower Courtyard
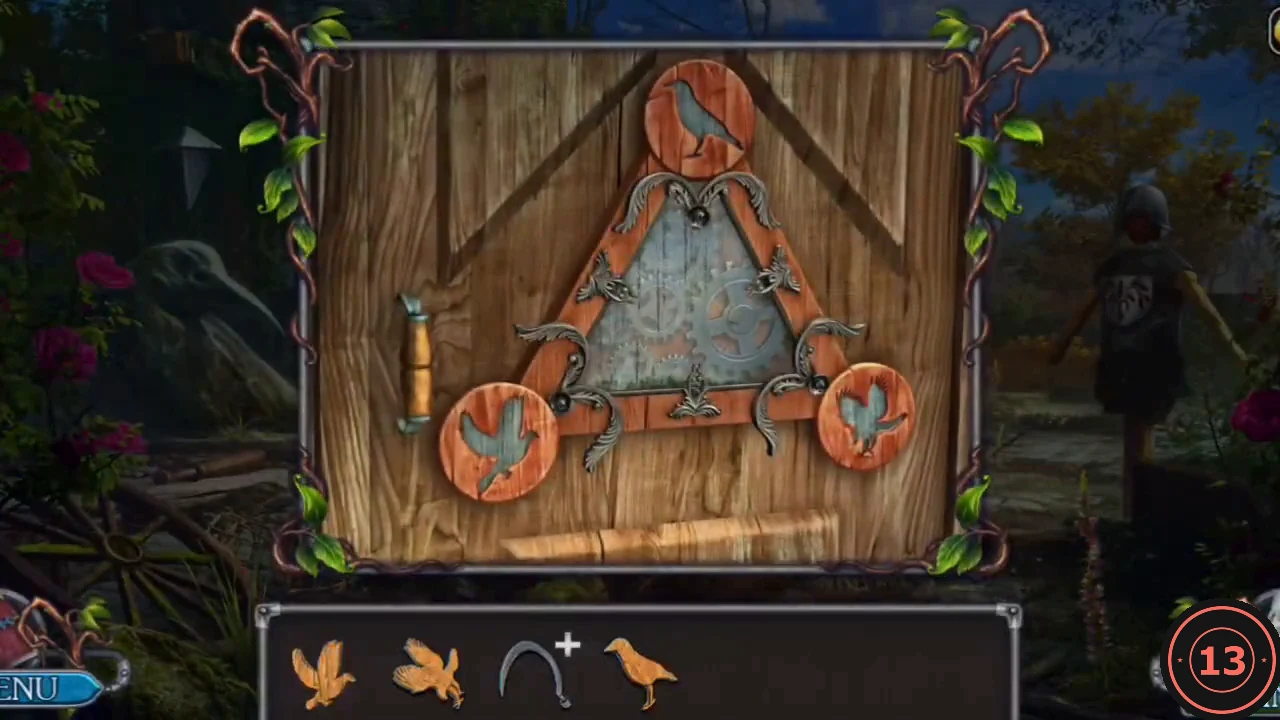
Collect three bird figurines in the courtyard to open the triangular lock on the tower door.
- Open the tie on the sack in the foreground and take the PIGEON FIGURINE.
- Zoom into the ironwork of the gate at the back right and take the EAGLE FIGURINE.
- Zoom into the scarecrow on the right. Take the BLADE and the STEEL GLOVE.
- Zoom into the rose bed at the lower left, use the STEEL GLOVE on the thorns and take the CROW FIGURINE.
- Zoom into the triangular lock on the tower door. Match the silhouettes: CROW in the top slot, EAGLE (spread wings) bottom right, PIGEON bottom left. Enter the tower.
Tower Hall: Ball Mosaic Puzzle
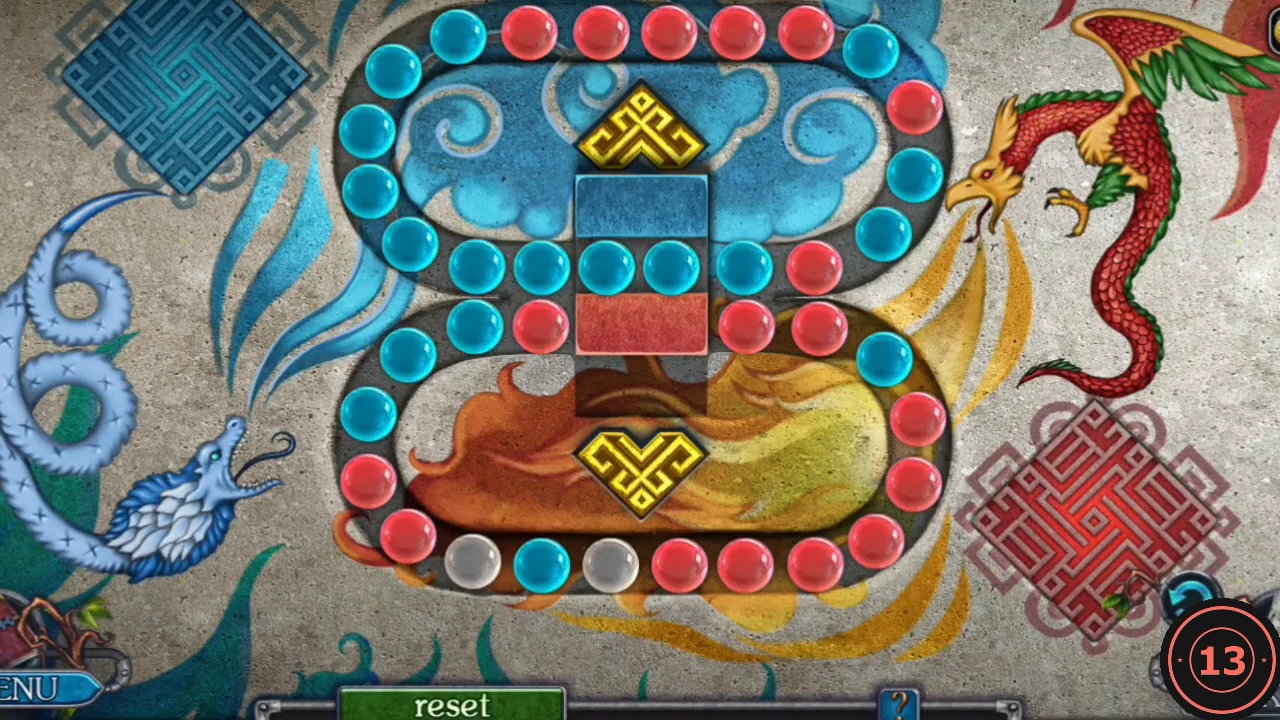
A colored tile from the knight armour starts a sliding-ball mosaic on the stone wall.
- Zoom into the knight armour and take the COLORED TILE.
- Zoom into the stone wall mosaic left of the knight and place the COLORED TILE.
- Use the patterned arrows to cycle the two loops and pass balls through the middle. Finish with all blue balls in the upper loop, all red balls in the lower loop and the two grey balls in the centre of the lower middle row. The starting layout may differ, so sort one colour at a time.
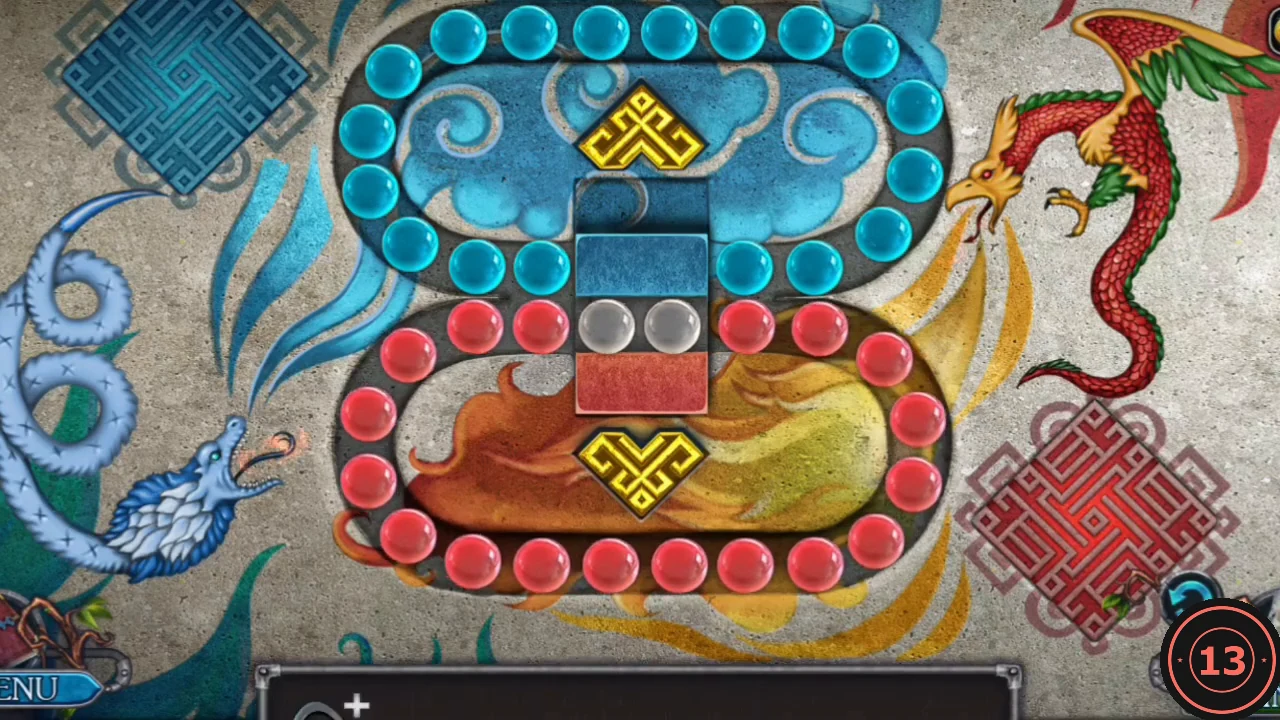
Solved: blue balls fill the upper loop, red balls the lower loop, with the two grey balls in the lower middle row. - Take the AMETHYST from the compartment behind the mosaic.
Crow Statue Key and the Cellar Gate
Use the amethyst outside, then open the patterned chest and the low iron gate.
- Go back to the courtyard. Zoom into the crow statue right of the door and place the AMETHYST in its empty eye. Take the KEY.
- In the tower hall, open the padlock on the patterned chest on the right ledge with the KEY. Take the CRYSTAL and the OIL.
- Use the OIL on the rusted gauntlet of the knight armour and take the SPEAR.
- Use the SPEAR as a lever on the low iron gate right of the knight and go down into the cellar.
Cellar: Fixing the Ladder
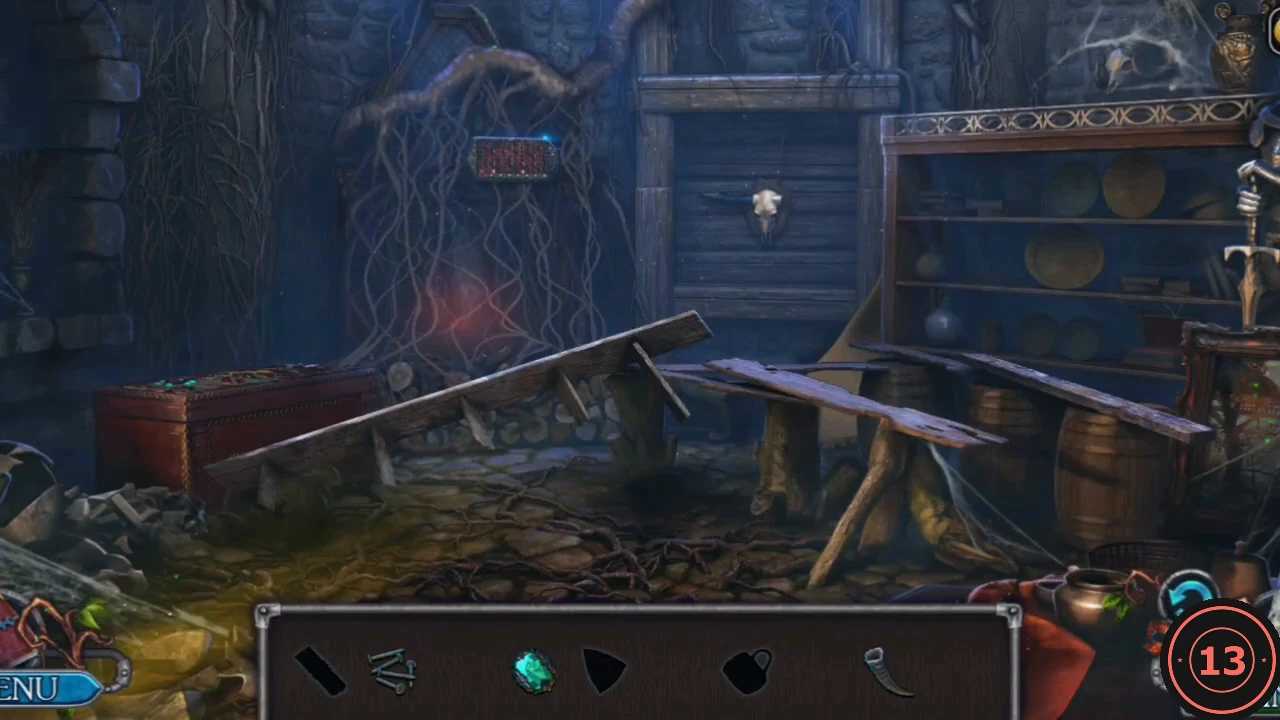
The cellar is an interactive item room: the bar at the bottom shows silhouettes of what you need. The goal is to repair the ladder.
- In the left alcove with the dried branches take the CRESCENT MOON and the AWL.
- Use the AWL on the ladder plank to pull out the NAILS.
- Place the CRESCENT MOON in the lower-right moon slot of the star tapestry. When it rolls up, take the SCISSORS and the HORN from the niche.
- On the right shelf take the STONE IN A FRAME, then cut the rope around the green stone with the SCISSORS and take the EMERALD.
- Put the EMERALD into the leaf socket of the chest lid on the left.
- Zoom into the plaque above the fireplace. Place the eight green gems so that every red crystal is lit; each gem lights the 3x3 area around it. Counting rows from the top and columns from the left, put the gems at R2C5, R2C8, R3C2, R3C11, R6C5, R6C11, R7C2 and R7C8.
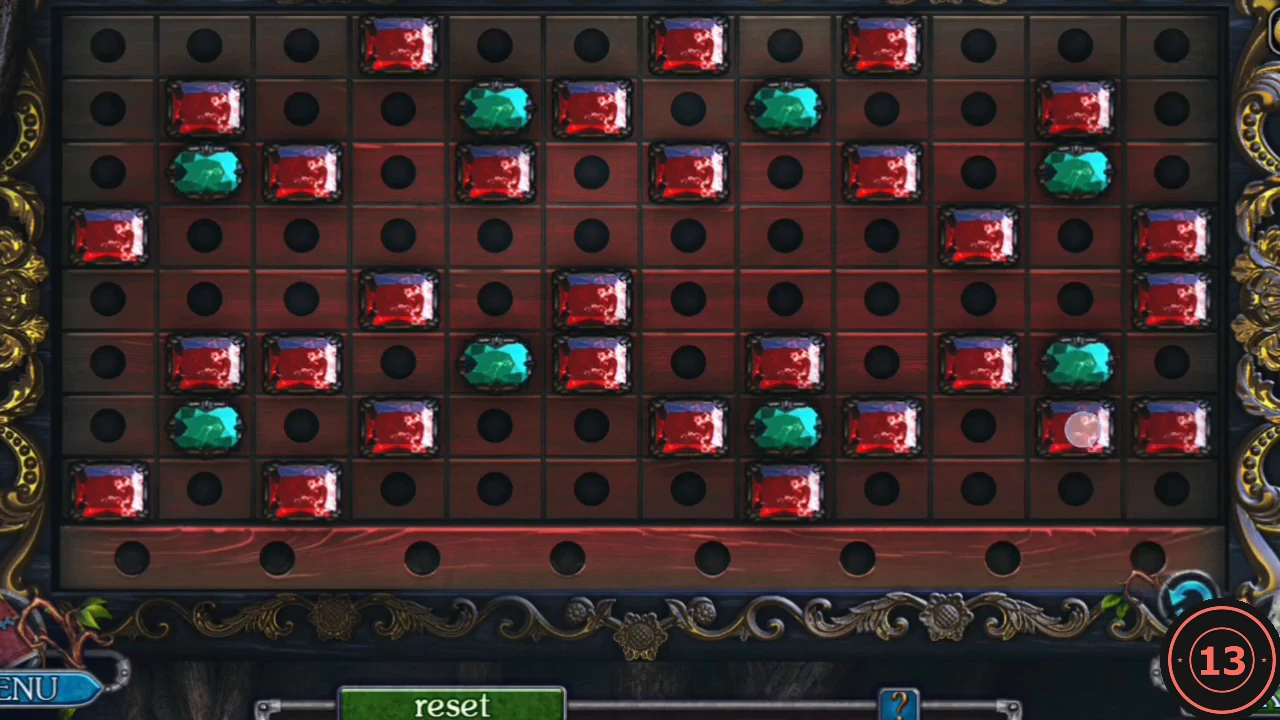
Solved fireplace plaque: the eight green gems light every red crystal. - Use the HORN on the hot coals in the fireplace and take the TOPAZ ring from them.
- Put the TOPAZ into the triangular socket of the chest. Take the CUP and the LADDER STEPS.
- On the broken ladder: place the LADDER STEPS, add the NAILS and hammer them in with the CUP. Take the LADDER.
- Back in the tower hall, set the LADDER under the ruined opening at the upper left and climb to the Oracle room.
Oracle Room: Portrait Sliding Puzzle
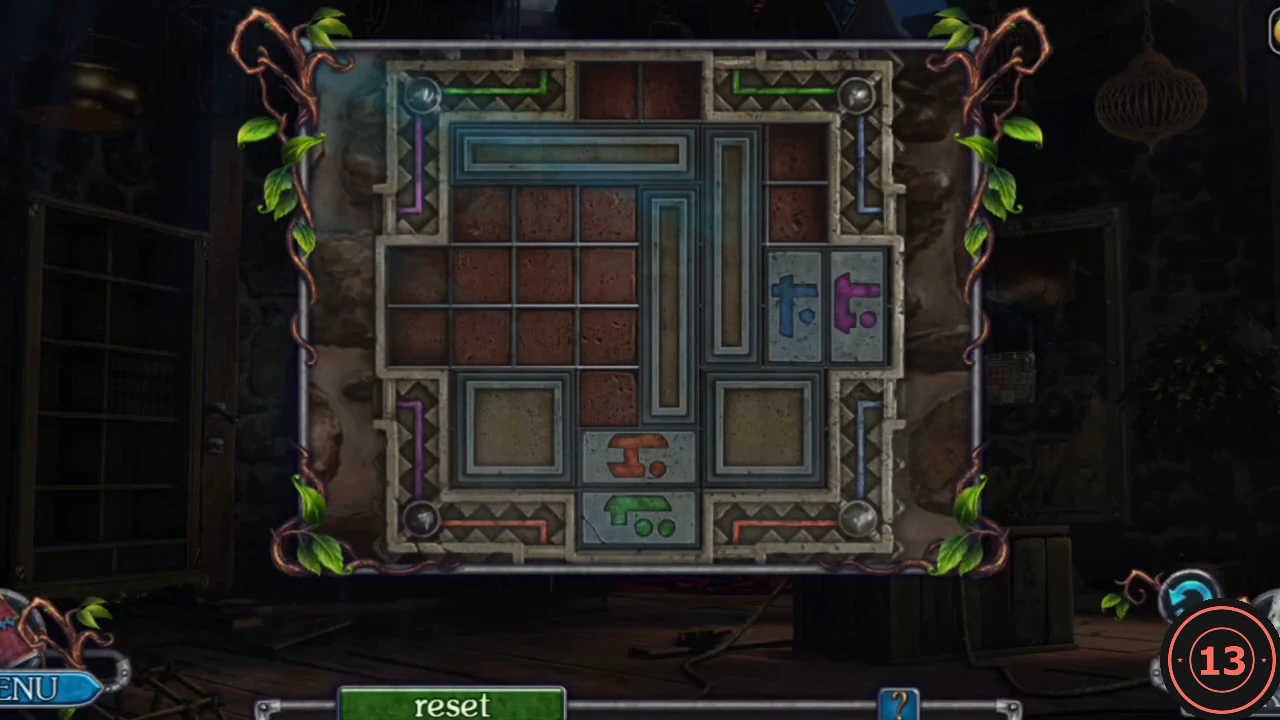
After the Oracle leaves, use the crystal on the light beam to reveal a sliding puzzle in the portrait.
- Take the BOATS piece and the LONG NAIL from the wooden post right of the desk.
- Place the CRYSTAL in the hanging holder in the light beam. Zoom into the portrait and scrape the lit spot with the LONG NAIL to uncover a sliding puzzle (keep the nail).
- Slide the bars and squares so that each symbol tile ends in the notch of its own colour: green at top centre, purple on the left, blue on the right and red at bottom centre. The move sequence is long, so bring one tile home at a time.
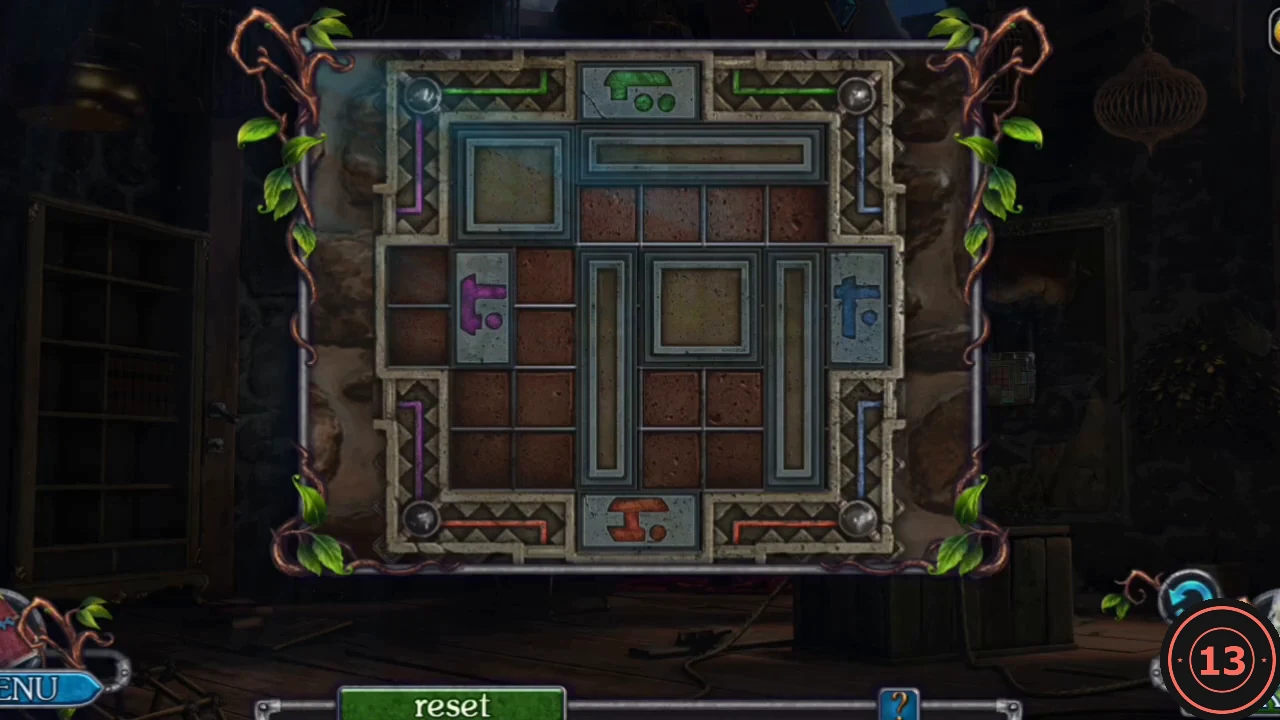
Solved: green at top centre, purple on the left, blue on the right and red at bottom centre. - Take the STATUETTE and the manuscript page from the compartment (Manuscript 1 of 8).
Sickle and Lion Knocker
Open the wardrobe in the hall and the birdcage in the Oracle room.
- In the tower hall, open the latch of the wardrobe on the left with the LONG NAIL. Take the BIRD FIGURINE and the HANDLE.
- In the inventory, combine the HANDLE with the BLADE to make the SICKLE.
- In the Oracle room, place the BIRD FIGURINE beside the other bird in the hanging round cage and take the KEY.
- Open the desk drawer with the KEY and take the LION KNOCKER.
Courtyard Gate: Silhouette Rings
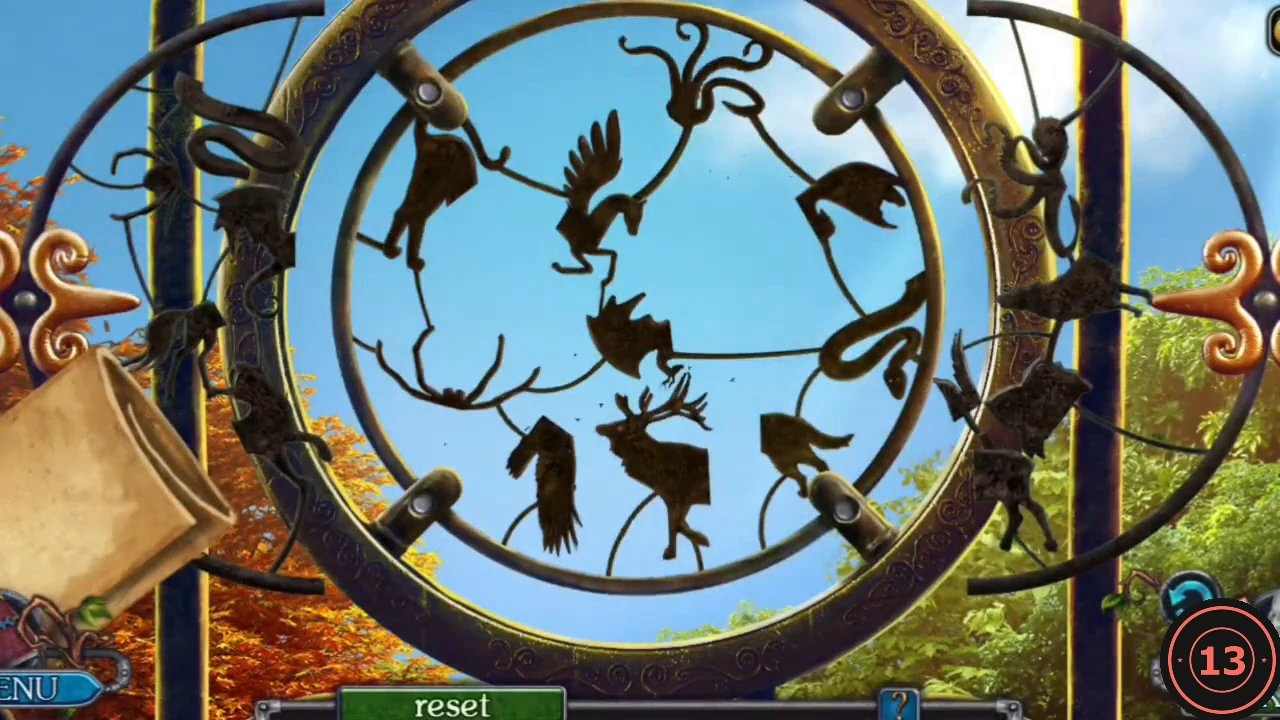
The gate lock asks you to build ten animal silhouettes from overlapping ring fragments.
- At the courtyard gate, cut the roses with the SICKLE and attach the LION KNOCKER.
- Build each animal named on the scroll: Wolf, Pegasus, Bird, Cat, Dragon, Snake, Spider, Fish, Elk and Octopus. Slide the movable ring with the ornate handles and turn the rings until the fragments form a complete silhouette; a finished animal glows green and is ticked off as soon as it is complete, without an extra click. The order is free.
The Road: Caravan, Horse and Totem
The cart is broken, so prepare the horse to ride to the port.
- Open the caravan door on the left. Pick up the round DISC on the floor and insert it into the chest lock. Take the APPLE, Manuscript 2 of 8 and the SADDLE.
- Put the SADDLE on the horse and take the MATCHES from the saddlebag. The saddle still needs a strap.
- Insert the STATUETTE into the broken crossbow in the rock pile on the far left and take the SHAFT. The statuette stays in your inventory.
- Use the SHAFT on the base of the tilted totem on the right and take the TORCH.
Oracle Room: Book Swap Puzzle
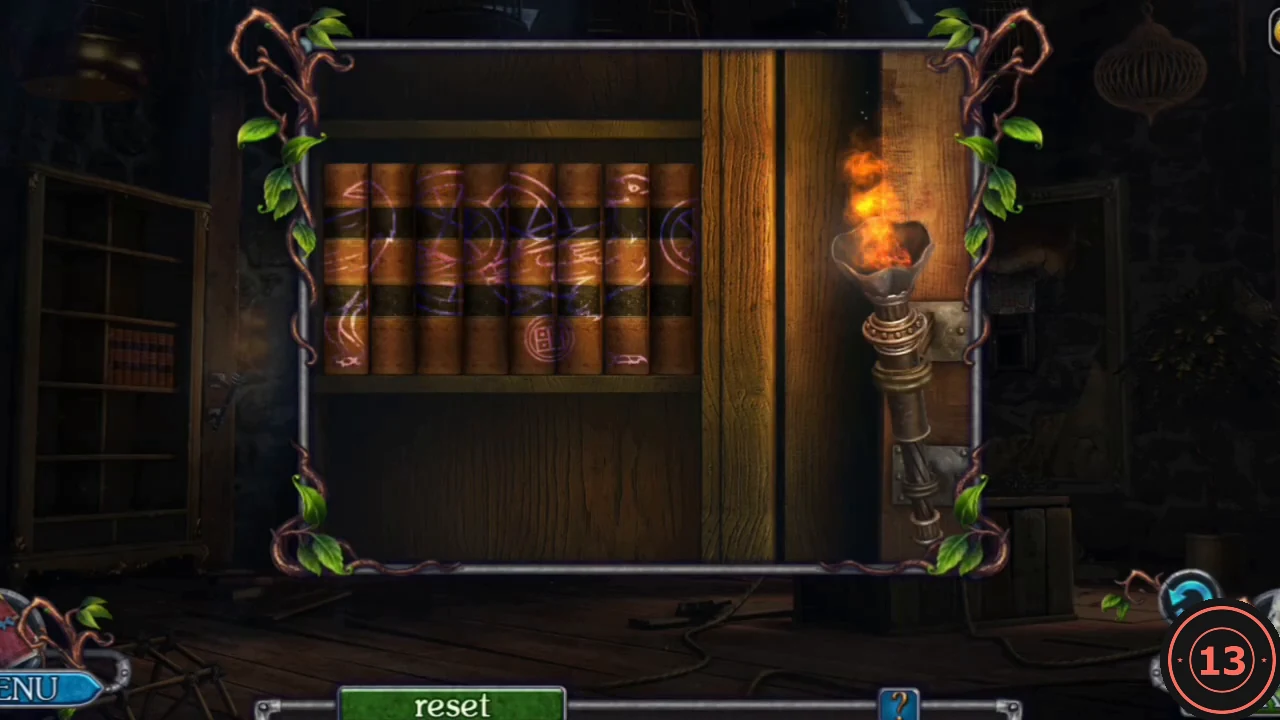
Lighting the bookcase reveals a purple drawing across the book spines.
- In the Oracle room, put the TORCH into the empty wall bracket by the bookcase and light it with the MATCHES.
- Click one book and then another to swap them. Arrange the books until the purple lines form one continuous picture of a large spoked wheel, a smaller wheel and a bird. The books vanish and reveal a hidden cabinet.
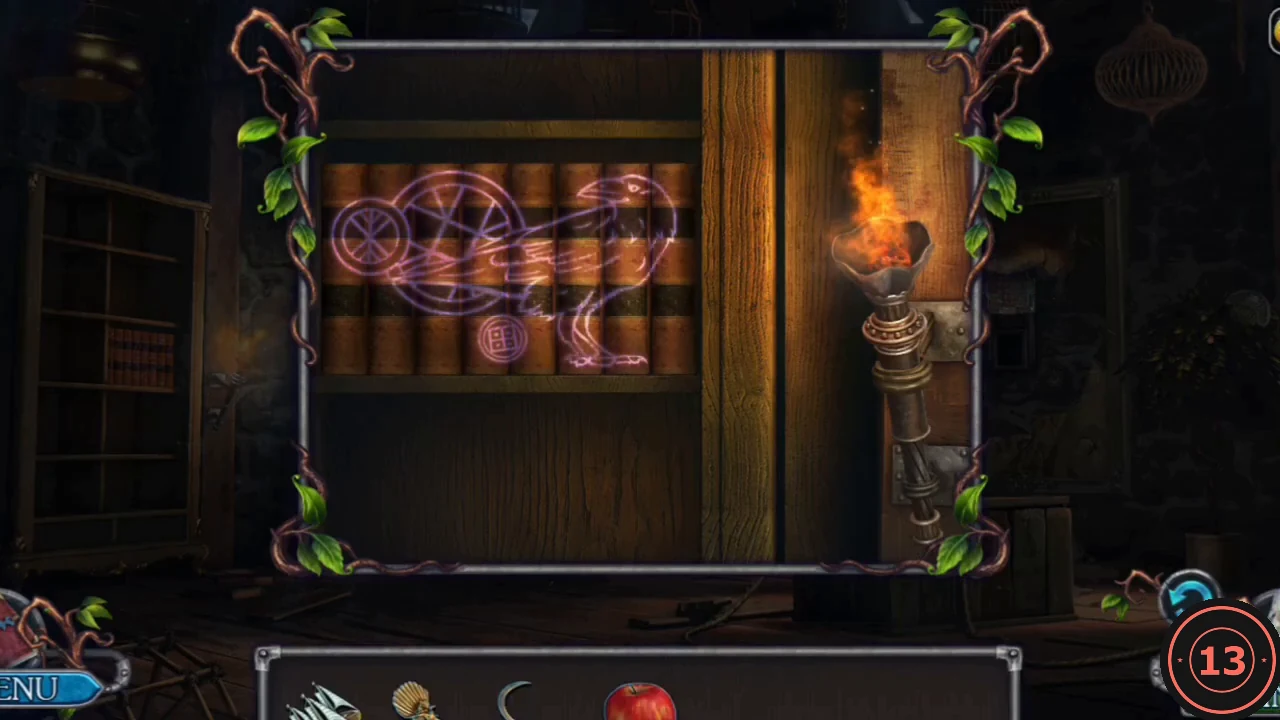
Solved: the purple lines form a large spoked wheel, a smaller wheel and a bird.
Cabinet Stamp Code and Ride to the Port
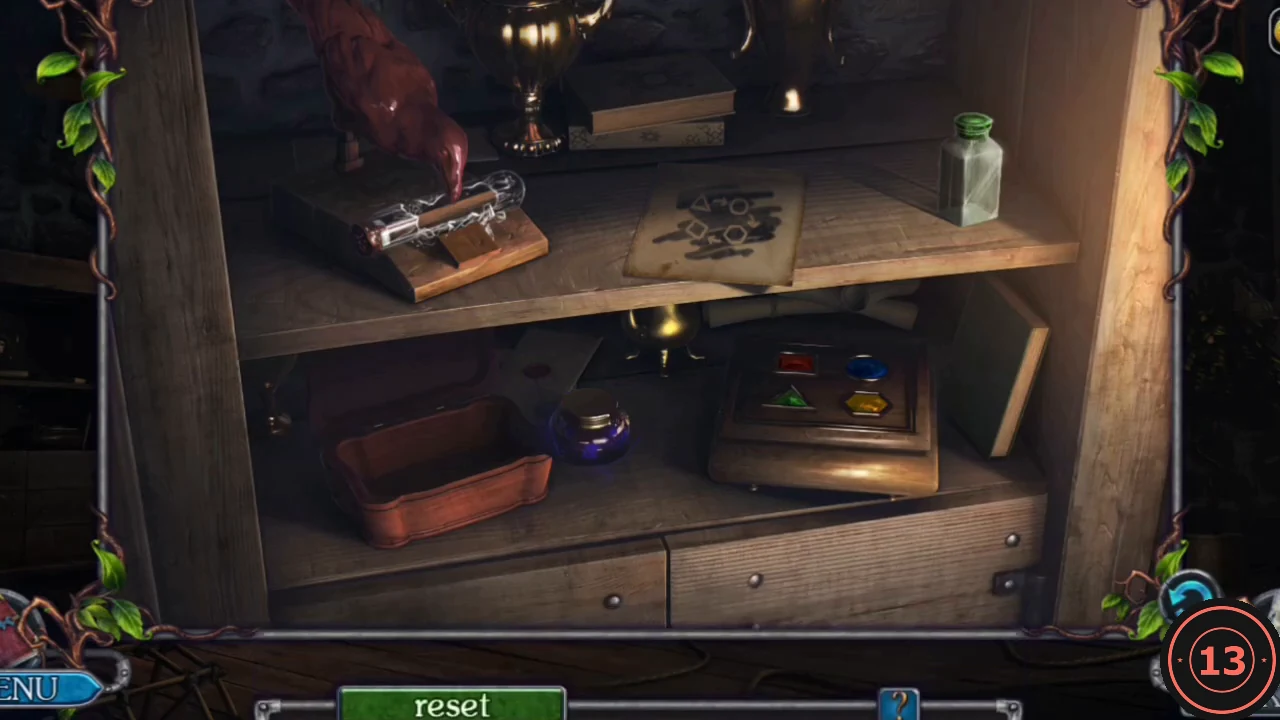
The hidden cabinet contains a stamp mechanism that prints the code for a gem box.
- In the cabinet, open the latch of the small red box on the lower shelf, take the RED GEM from the top shelf, click the purple ink jar so it goes into the box and put the RED GEM in the empty top socket of the gem box.
- Click the folded paper behind the trophies to lay it flat, then click the GLASS TUBE so it slides under the red bird. The bird stamps the order triangle, circle, hexagon, square.
- Press the gems in that order: green triangle, blue oval, yellow hexagon, red rectangle. Turn the T-shaped key inside the box.CODETriangle, oval, hexagon, rectangle
- Zoom into the low book compartment at the far lower left of the Oracle's room, under the bookcase. Move the note aside and take the BELT lying across the books.
- On the road, fix the saddle with the BELT and ride to the port.