RESISTANCE CAMP
Prison Cell: Rune Wheel
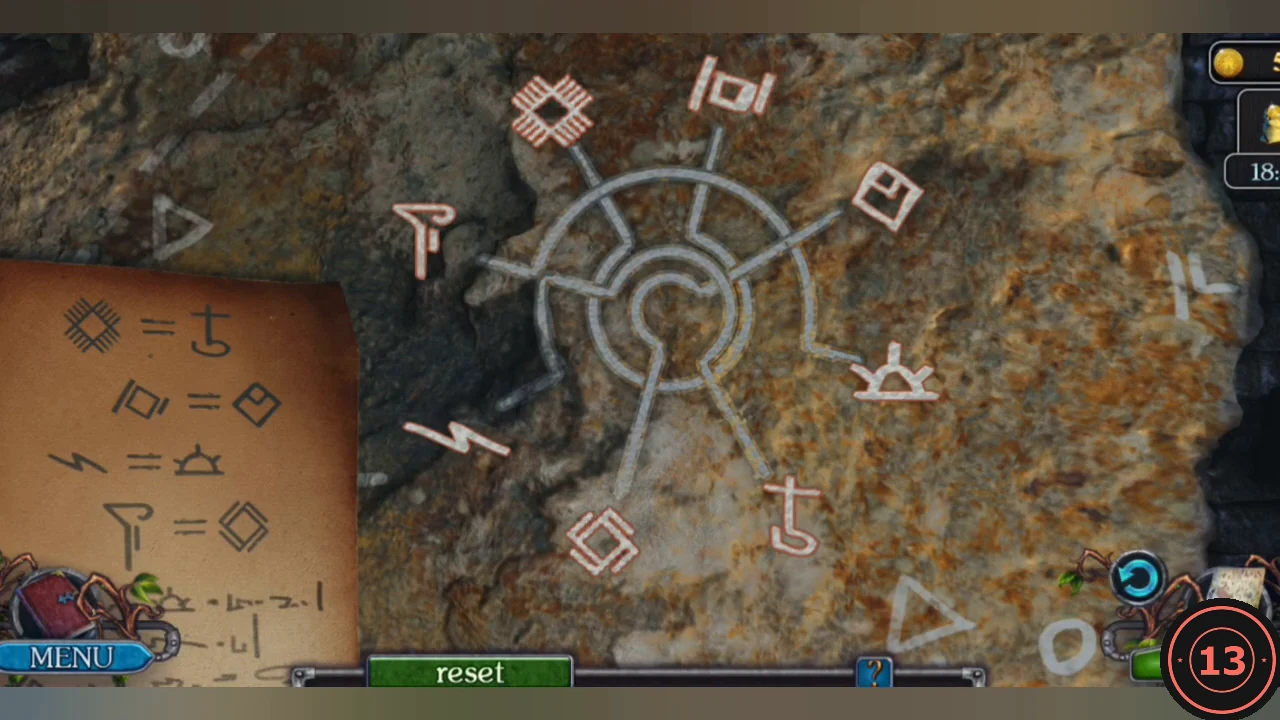
You wake up in a Resistance cell. A hint hidden in the wall opens the rune wheel beside the door.
- Move the pillow on the straw bed on the left and take the HAIRPIN.
- Zoom into the stonework immediately left of the cell door, between the rune wheel and the door frame, and use the HAIRPIN to pull the HINT parchment out from between the stones.
- Place the HINT on the rune wheel left of the door. It pairs each symbol with its partner. Click two symbols to swap them until each sits where the hint shows: hooked T at the top, square with a corner at the upper right, double diamond on the right, slanted box at the lower right and the sun on a line at the bottom.
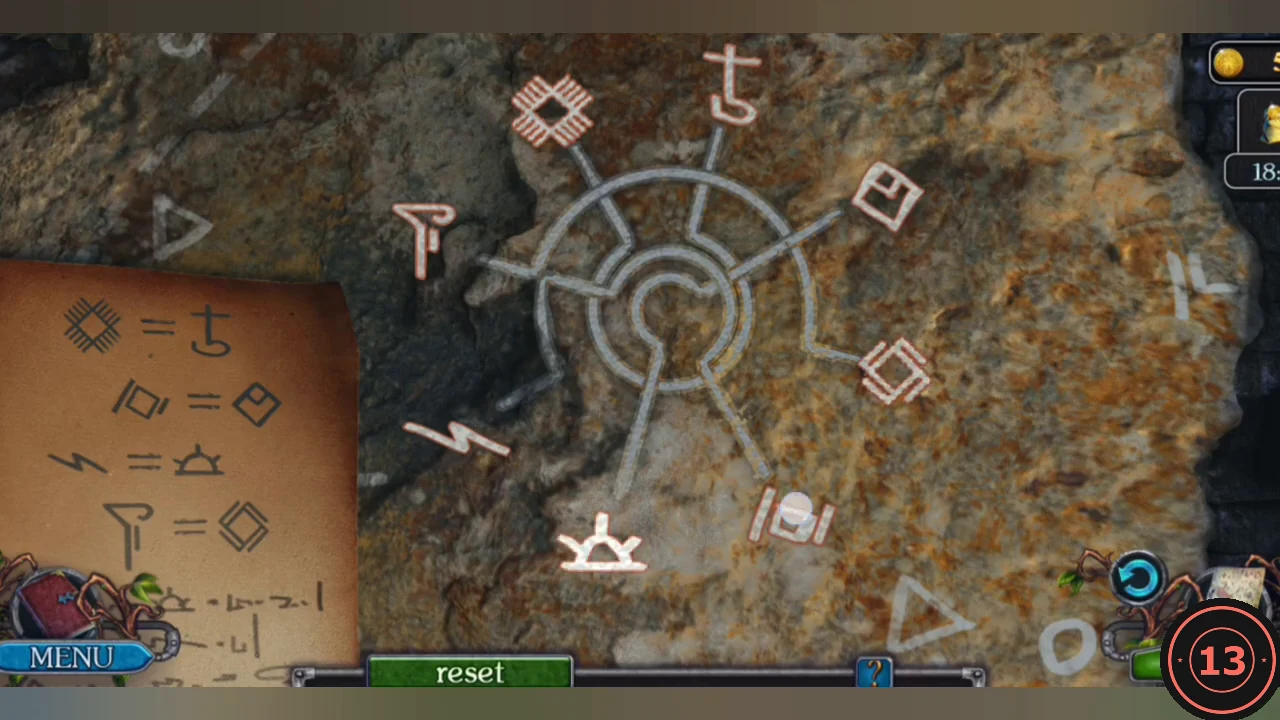
Solved rune wheel. - The sunbeam hits a stone above and right of the door. Zoom in, read the note that falls out and take the CHISEL.
RESISTANCE CAMP
Prison Escape and the Junk Pile
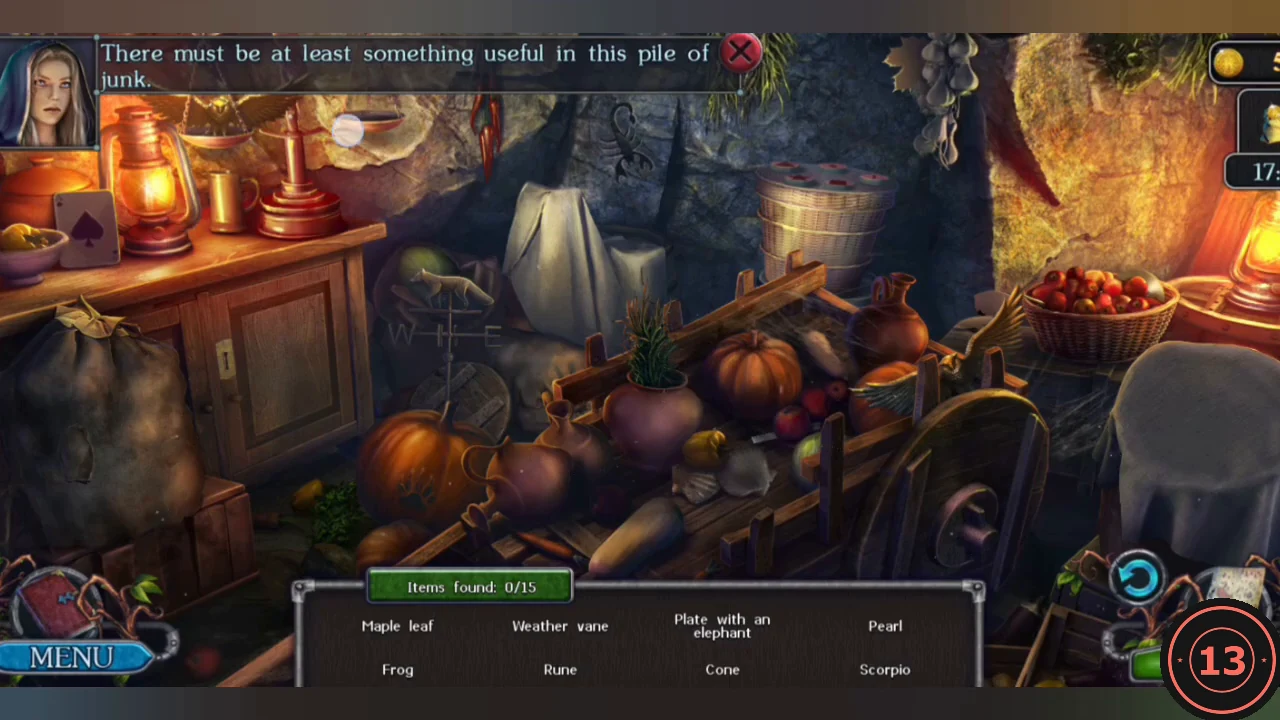
Bend the bars in the cell door with a wet rag, then search the junk pile in the camp storeroom.
- Cut the pillow on the straw bed with the CHISEL and take the RAG. Soak it in the trickling water on the right-hand rock to get a WET RAG.
- Zoom into the barred window in the cell door, wrap the WET RAG round two bars and twist it with the CHISEL to bend them. The cell door opens; go out.
- In the camp storeroom, take the HAMMER and open the junk pile.
- Junk pile: find the listed items. Lever the shells open with the blade for the PEARL. On the wicker basket lid press the buttons by count: one dot, two dots, triangle, square, star, and take the FROG. Put the golden eagle on the wall scales for the RUNE. Finish the list to receive the DAGGER.CODE1 dot, 2 dots, triangle, square, star
RESISTANCE CAMP
Forest Path and the Tent
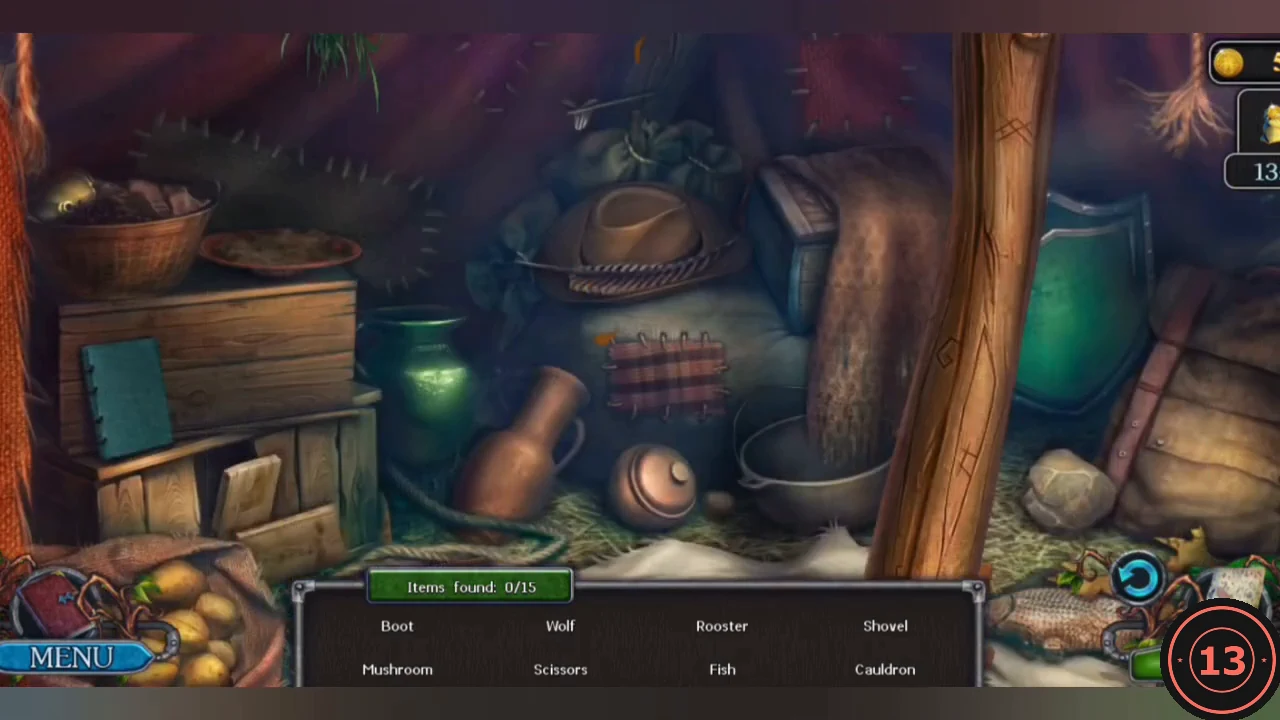
Leave the camp, gather tools along the forest path and search the abandoned tent.
- Cut the rope on the barred wooden gate in the camp yard with the DAGGER.
- Cut the bamboo bush with the DAGGER and take the BAMBOO.
- Go on to the clearing with the tent. Open the red sack right of the path with the DAGGER and take the PARTS OF THE MOSAIC (1/6). Take the STICK from the red soil patch in the foreground.
- Zoom into the tent entrance. Stand the tent peg lying in the grass upright, drive it in with the white stone beside it, then tie the tent rope to the peg to hold the flap open.
- Tent: find the listed items. In the crate is a fruit-tile box: the arrows move the grey fruit tiles between rows and slide the middle row; put each fruit on its engraved twin in the bottom row (strawberry far left, raspberry, plum, melon on the right) to get the CANDLE HOLDER. Finish the list to receive the SHOVEL.
RESISTANCE CAMP
Sleeping Darts for the Guards
Prepare a blowpipe with poisoned darts that only put the guards to sleep.
- On the forest path, dig the mound near the tree at the lower right with the SHOVEL. Read the note and take the DARTS and the PARTS OF THE MOSAIC.
- Knock the spiky POISONOUS FRUIT off the high branch of the tree on the left with the STICK.
- In the camp yard, lever the plank on the sandbags at the lower left with the STICK and take the PARTS OF THE MOSAIC.
- Remove the boards from the well in the yard, reach in with the STICK and take the BOWL.
- Fill the BOWL at the trickling water in the prison cell. In the inventory add the POISONOUS FRUIT and cut it with the DAGGER.
- Cut the BAMBOO with the DAGGER to make a BLOWPIPE, dip the DARTS in the poison and load them into the blowpipe.
RESISTANCE CAMP
Guardroom and the Captain's Room
Put the guards to sleep and search the guardroom and the captain's room.
- In the camp yard, click the gap in the wall right of the arched passage and use the BLOWPIPE on the guards.
- Take the KEY from the sleeping guard at the desk. Pry the green EMBLEM out of the plank by the lantern at the lower right with the DAGGER.
- Open the wooden door at the upper left of the camp yard with the KEY.
- Smash the chained green bottle on the left wall with the HAMMER and take the PARTS OF THE MOSAIC. Open the desk drawer and take the BUTTON.
- Cut the pillowcase on the bed with the DAGGER and take the second EMBLEM.
- Cut the rope knot on the left post with the DAGGER, then cut the lantern rope on the floor and take the ROPE.
RESISTANCE CAMP
Guardroom Grate: Suit Wheels
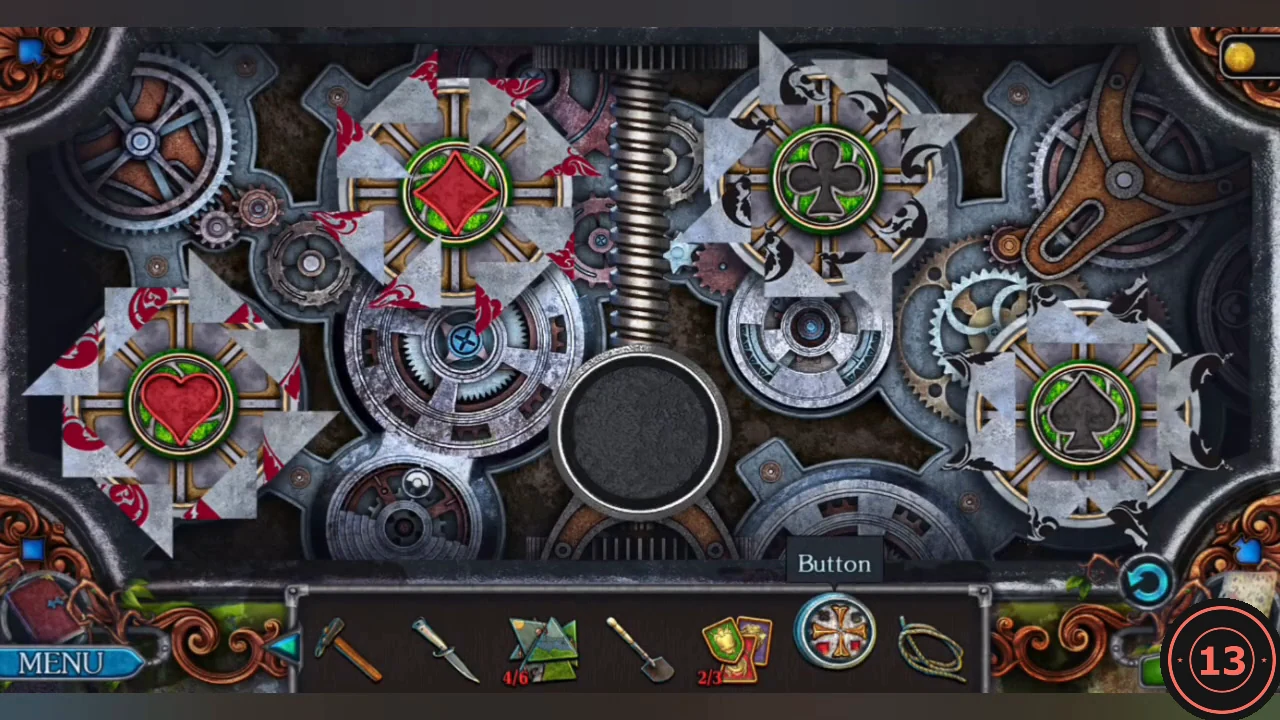
Anum is held in a pit under the guardroom floor grate.
- Put the BUTTON into the centre of the floor grate in the guardroom.
- Four layered wheels show a heart, diamond, club and spade. Click a wheel to rotate its layers (the active layer is outlined in blue) until each shows its complete, symmetrical ornament. Finishing one wheel does not disturb the others, so solve them one at a time. All four glow when solved and the grate opens.
- Lower the ROPE into the pit. Anum climbs out and hands you PARTS OF THE MOSAIC. Take the ROPE back.
RESISTANCE CAMP
Guardroom Shield: Emblem Swap
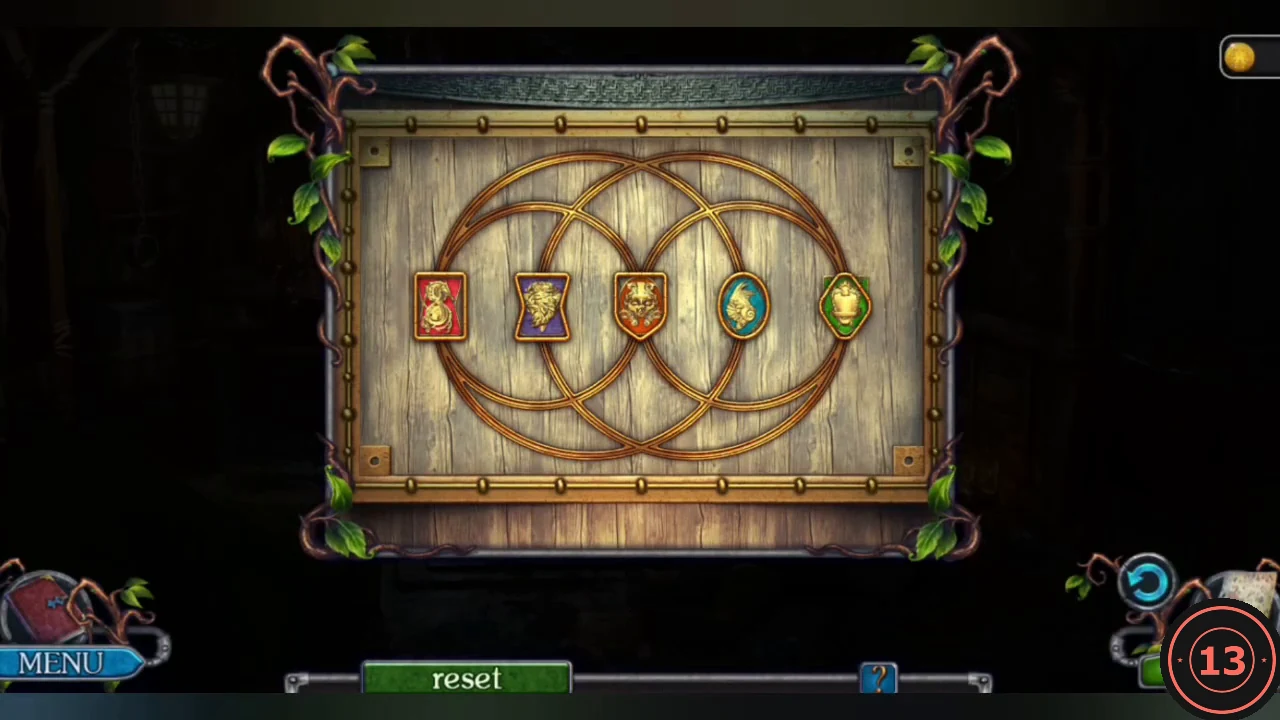
The shield in the guardroom is missing three emblems.
- In the prison cell, scrape the mossy rock beside the trickle with the CHISEL and take the third EMBLEM.
- Place the three EMBLEMS on the shield. Click one emblem and then another on a shared ring to swap them. The slot frames keep their shapes; only the coloured emblems move. Example of a finished shield, from left to right: purple lion, red seahorse, green bell, orange lion mask, teal fish. The compartment opens; take the last PARTS OF THE MOSAIC (6/6).
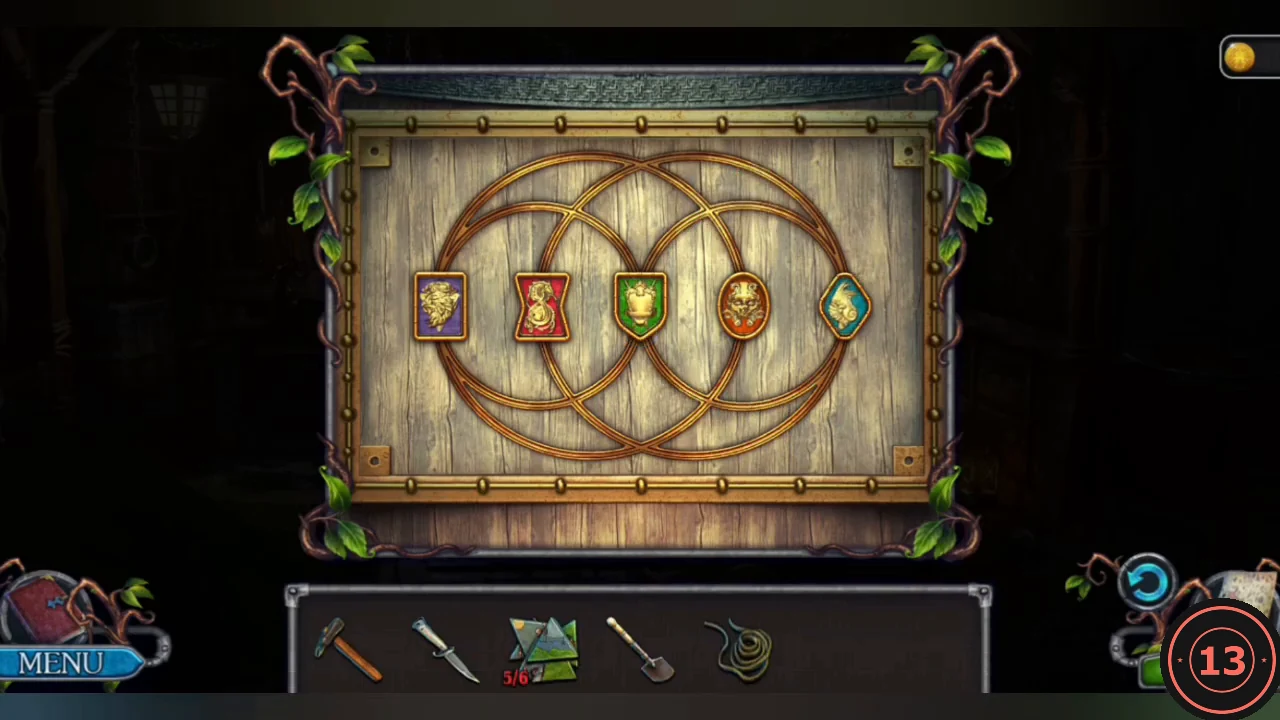
Example of a finished shield.
RESISTANCE CAMP
Captain's Chest Mosaic and the Bridge
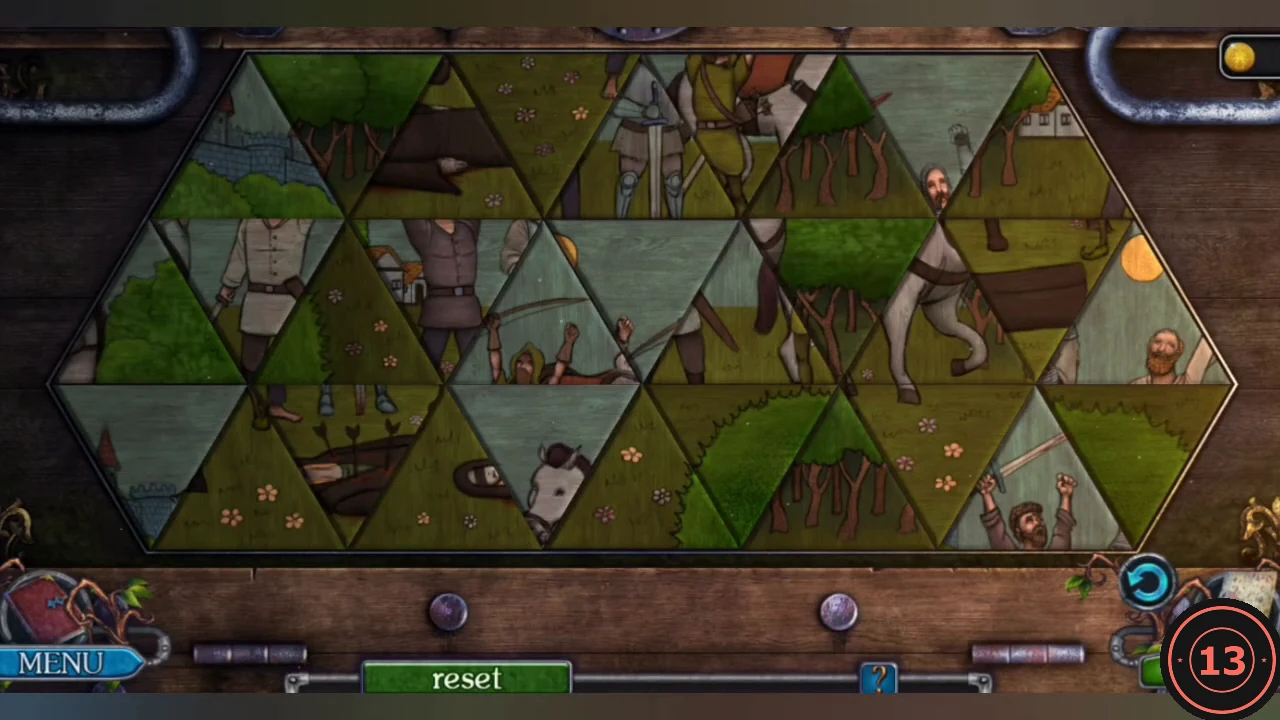
The captain's chest holds the hook you need to cross the broken bridge.
- Place the six PARTS OF THE MOSAIC on the captain's chest. Click a triangle and then one of the highlighted neighbours to swap them. Restore the picture of cheering Resistance fighters with a figure lying in front, a horse on the right and the sun at the top.
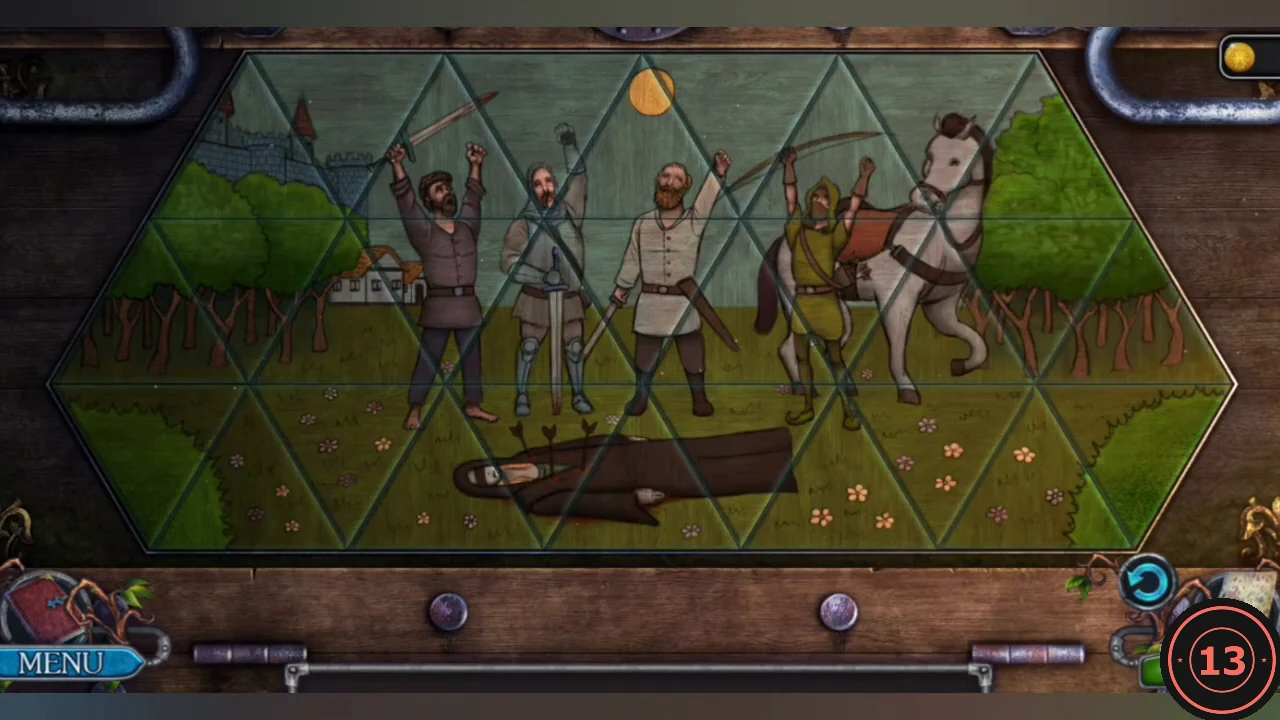
Restored picture: cheering fighters, a figure lying in front and a horse on the right. - Take the HOOK and the book (Manuscript 5 of 8). Combine the ROPE with the HOOK to make a GRAPPLE HOOK.
- In the clearing with the tent, use the GRAPPLE HOOK on the broken bridge and cross it.