Castle model
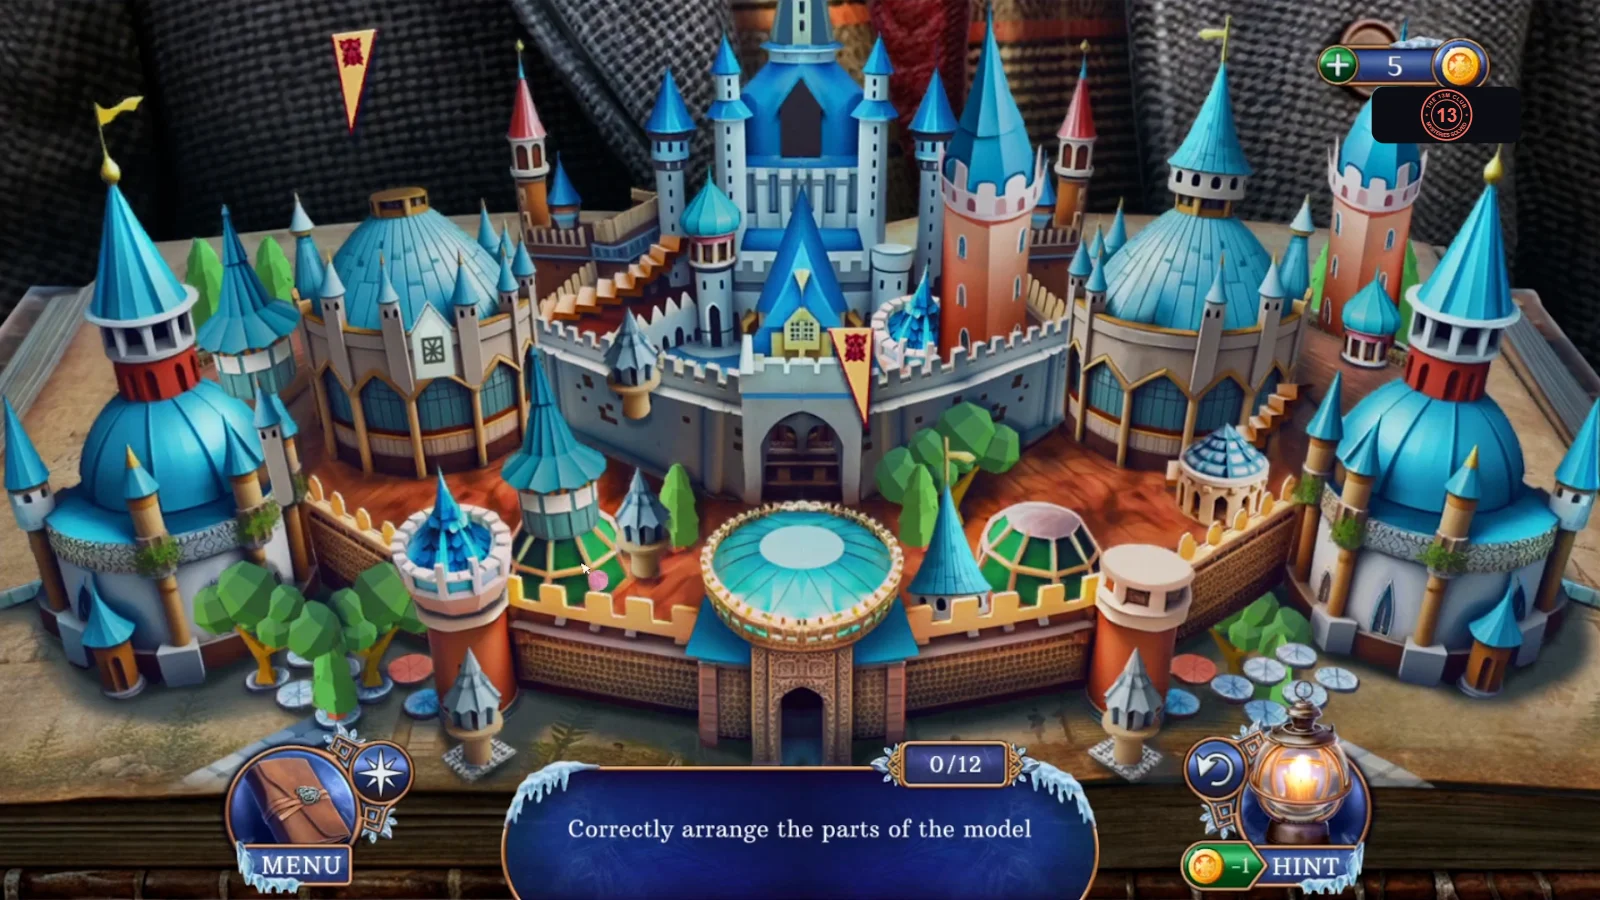
Goal: Correctly arrange the parts of the model. This drag-and-drop puzzle opens by itself after the King of Winter scene. A counter tracks the twelve parts. This section gives the method rather than a place for every part.
- The finished model is close to a mirror image around the central gate, so compare the left and right halves. Drag each floating or misplaced part to the spot where the other half shows it belongs, such as the floating red pennant to the empty side of the gate. Correct parts stay put and the counter rises. Twelve correct parts give you the Old Town Map.
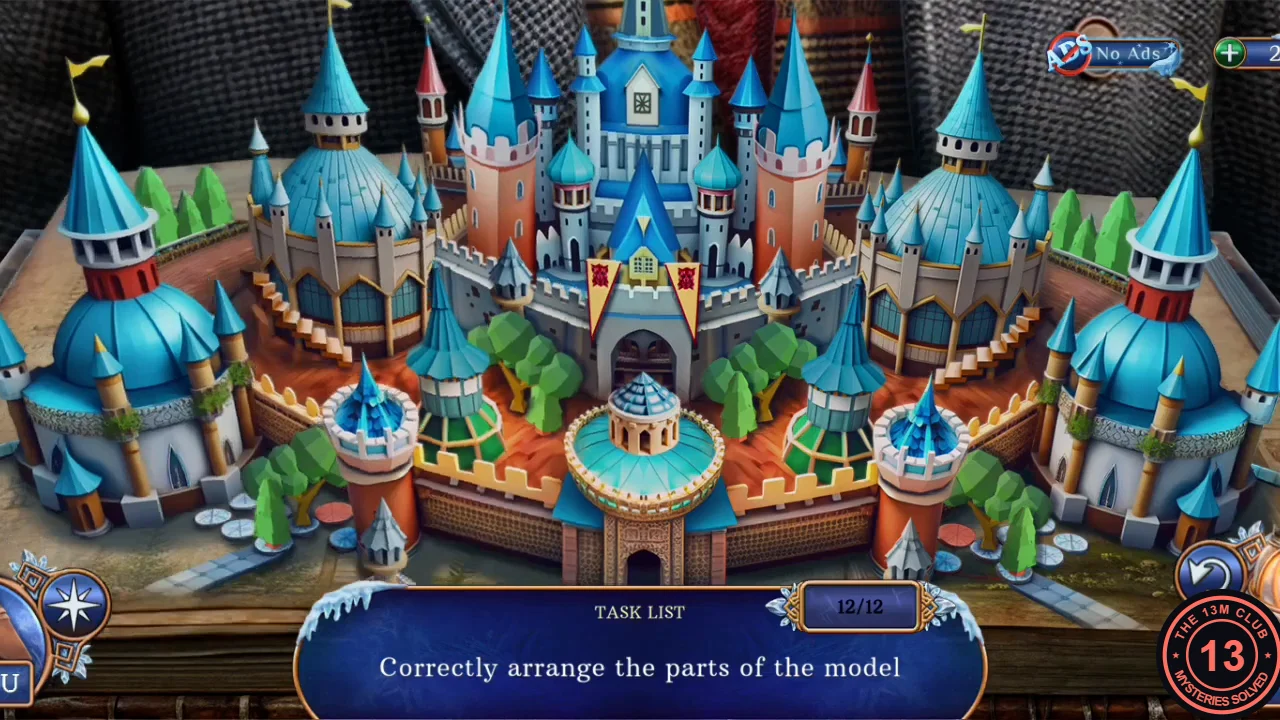
Solved: the finished model with the counter at 12/12.
Reach the Funicular Platform
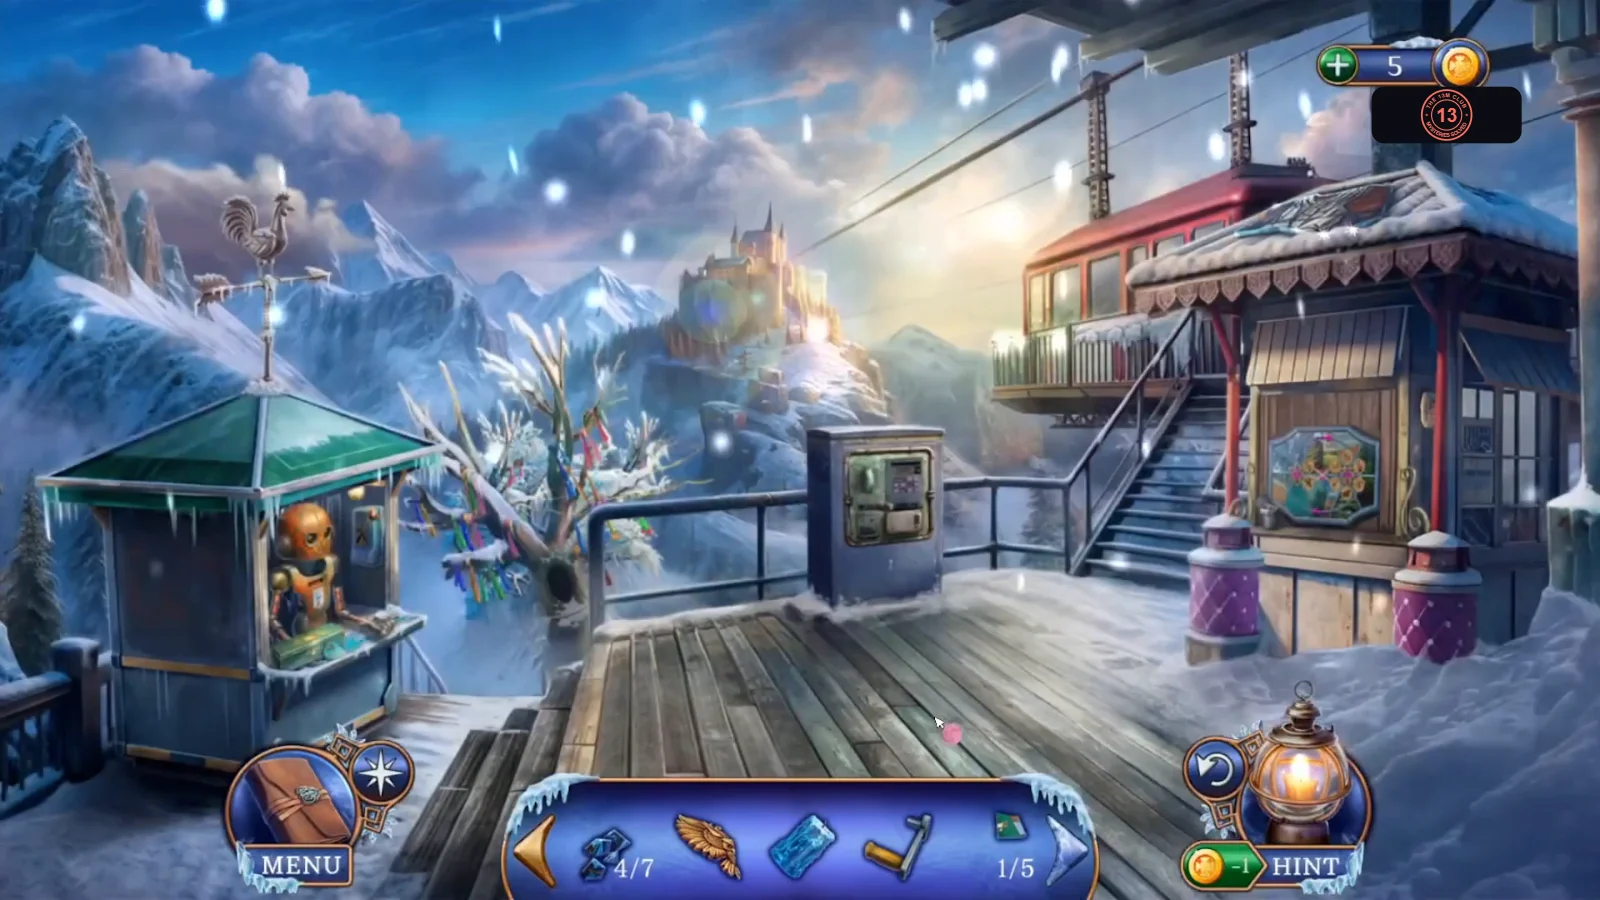
The Old Town Map opens the road to the Funicular Platform, where a cable car leads to the castle. Its control panel needs parts, and the star window needs tokens.
- Go to the Seer's street and use the Old Town Map on the scene. The game refuses it on the library street. The map opens, a new road appears and you travel to the Funicular Platform. New task: Find a cable car to get to the castle.
- Open the robot's booth and take the Mosaic Piece in front of the robot. The robot needs bills and its green box needs a shape, so leave both for later.
- Open the hollow in the old tree and take the Wooden Chip (acorn token).
- Open the control panel by the railing and take the Knob from its lower edge. The note says the panel still needs a power unit, a switch and buttons.
- Open the star-shaped window panel on the side of the station house. A few more tokens are missing. Take the Ice Wolf from the can on the sill below it. Back in the main view, take the Skeleton Stained Glass Shard from the roof of the station house at the top of the stairs.
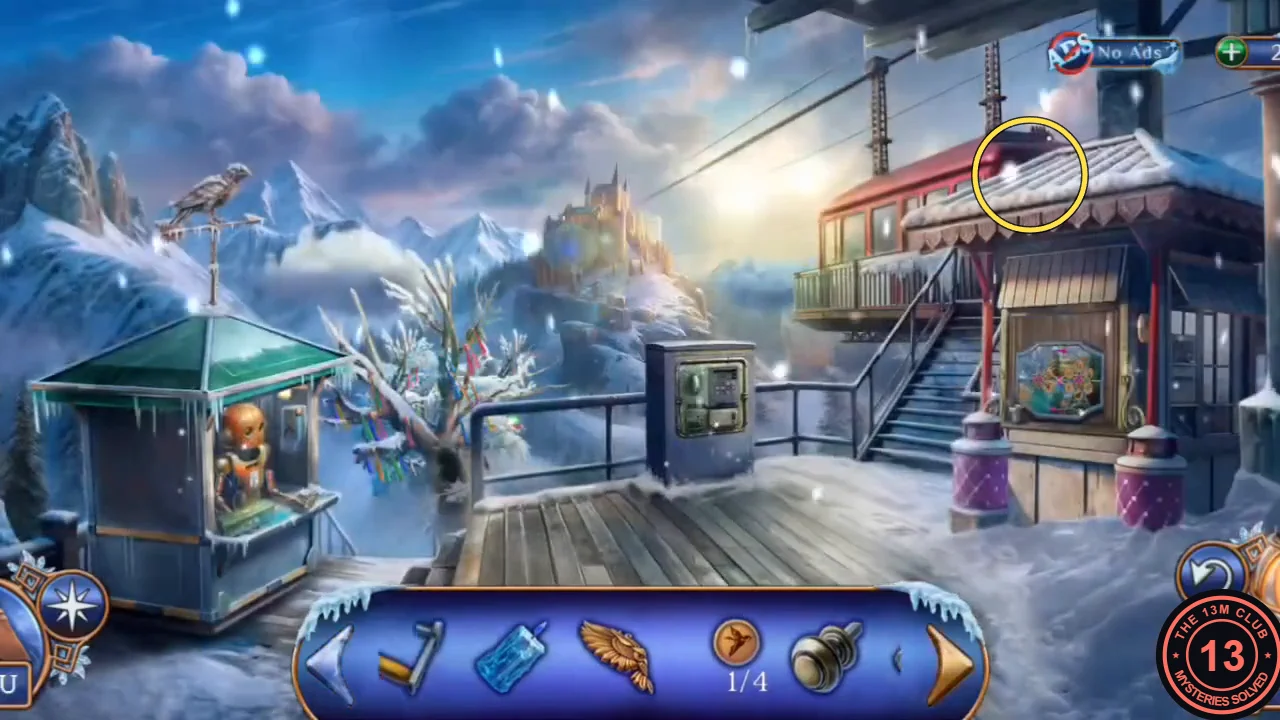
The fourth Skeleton shard is on the station house roof at the top of the stairs. - Go back to the Old Bridge balcony and open the nightstand. Fit the Knob on the drawer and open it. Take the Ice Fox, Wooden Chip and Power Cell.
- Go to the Ice Chapel and open the niche by the gravestone. Place the Candle of Memory in the middle, then the Ice Wolf and Ice Fox on either side. The drawer opens: take the Glowing Mushroom, Mosaic Piece and Mysterious Box.
- Back on the Funicular Platform, put the Glowing Mushroom in the tree hollow. Take the Wooden Chip and the Half Amulet Owl.
- Inspect the Mysterious Box in your inventory and fit both owl halves into the lid. Take the last Wooden Chip.
- Open the star window on the booth and use the Wooden Chips on its empty slots. The animal habitat puzzle starts.
Animal habitats
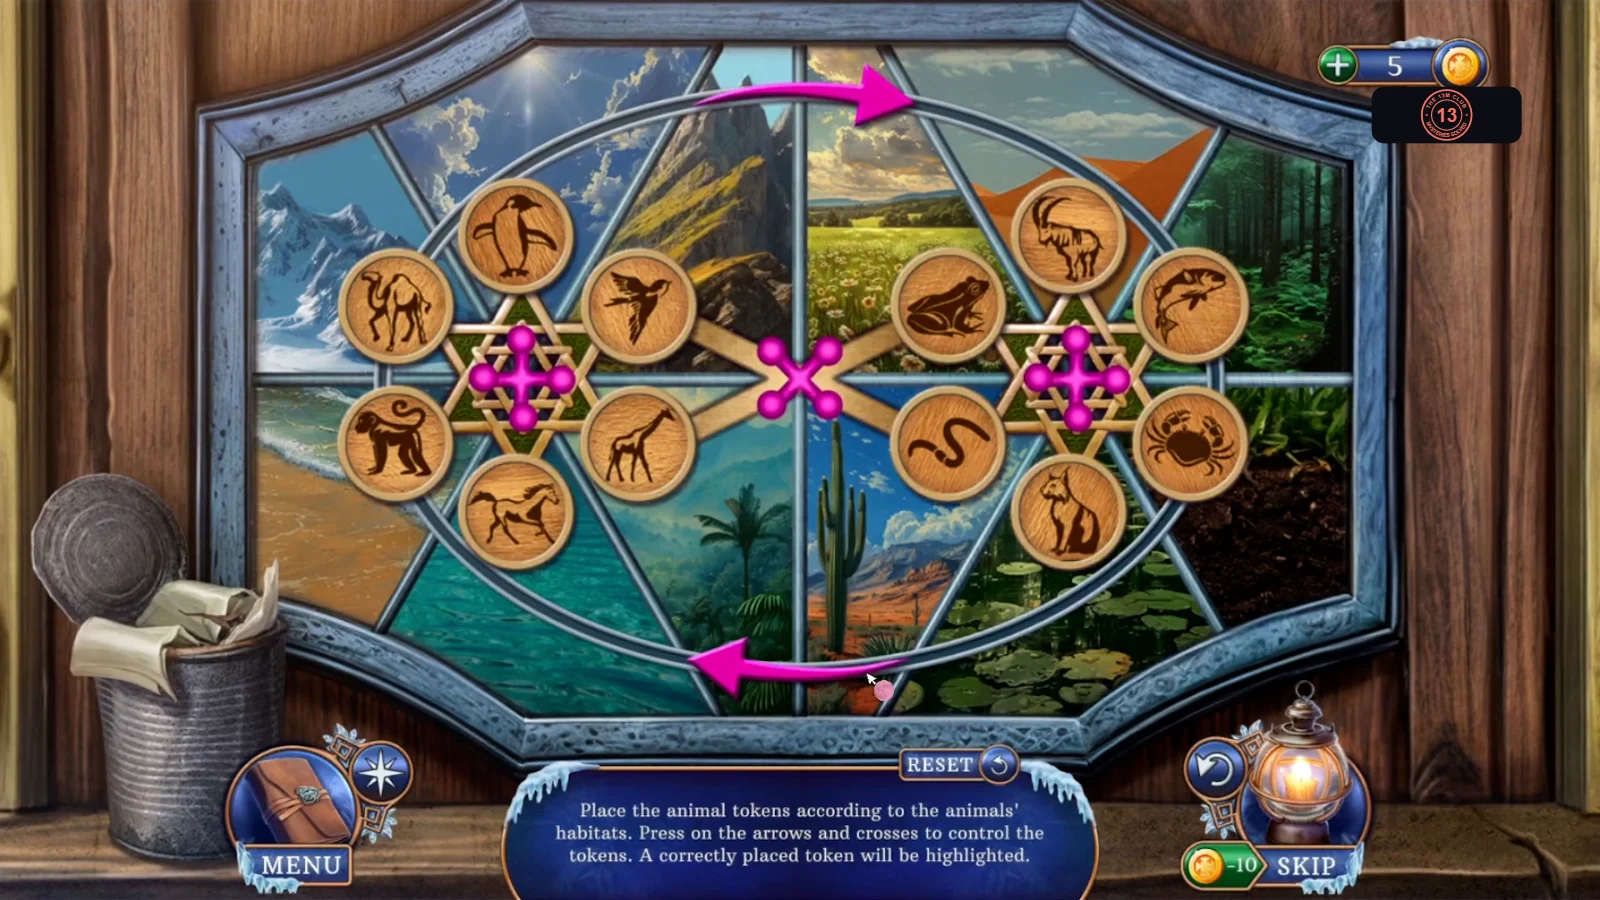
Goal: Put each animal token on the background of its natural habitat. A token on the correct background glows yellow.
- The outer arrows rotate the whole outer ring, each side cross rotates its own ring, and the centre cross rotates the four inner tokens. Match each animal to its background. Finished layout, clockwise from upper left: left ring Penguin, Bird, Goat, Monkey, Fish, Crab; right ring Horse, Camel, Cat, Snake, Frog, Giraffe. You receive the Knight Figurine and the Buttons.
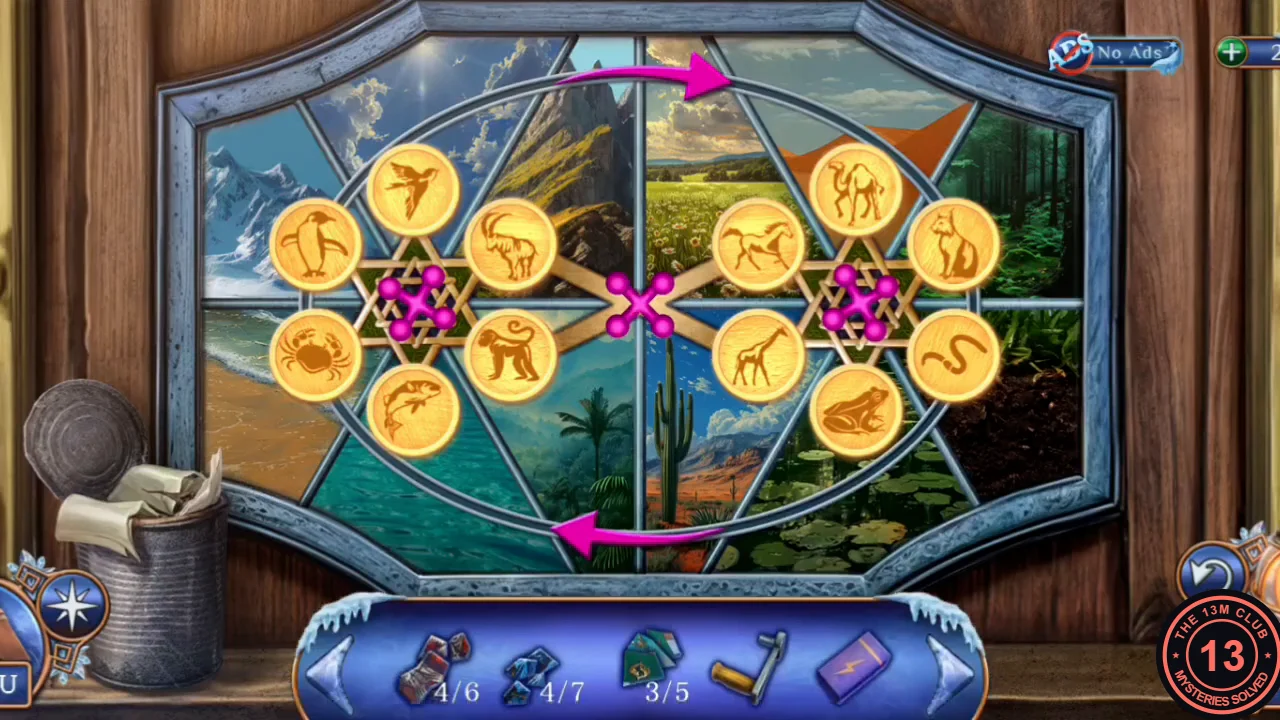
Solved: every animal is on its own habitat.
Cable car and the four castle statues
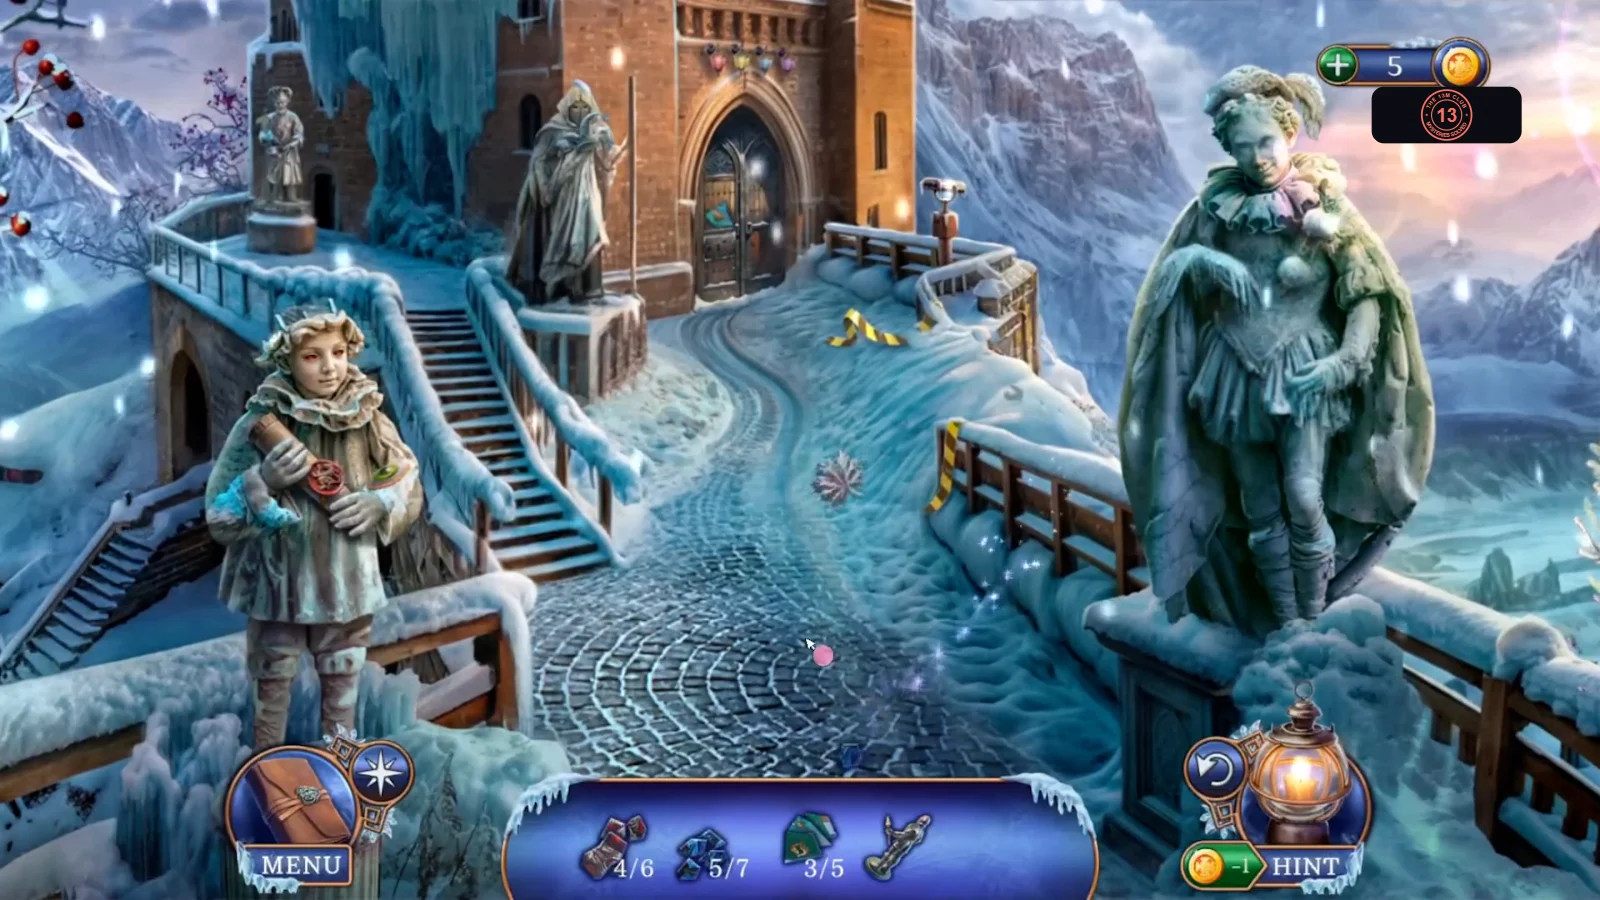
Start the cable car, then work on Castle Front. The gate panel stays shut until all four statues are restored.
- Open the control panel. Install the Buttons, Switch and Power Cell, then pull the lever. The cable car takes you to the castle. New task: Find a way to open the castle gate.
- At Castle Front, take the King Stained Glass Shard: the blue glass set in the railing on the right. Open the boy statue (the Page) on the left and take the Amulet Eye from his arm. Open the gate panel and take the Mosaic Piece lying on it. Then open the snow below the broken railing and take the Carabiner.
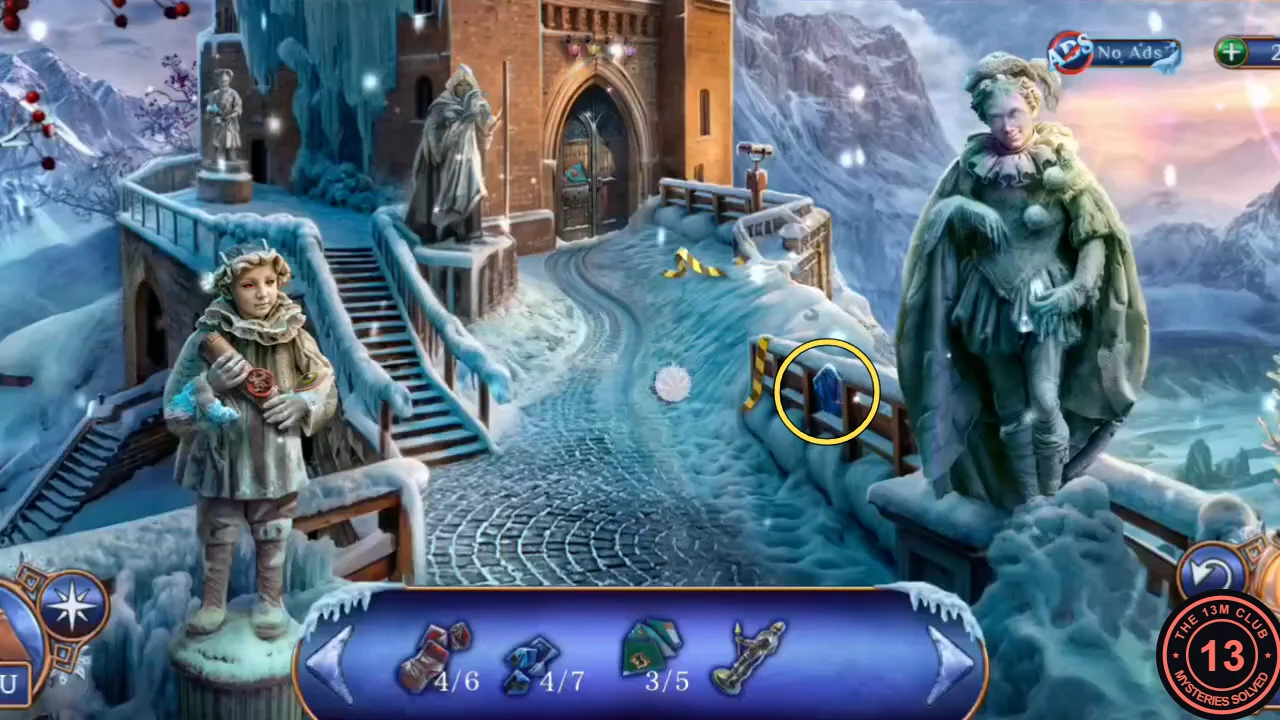
The fifth King shard is the blue glass set in the railing on the right. - Return to the Funicular Platform. Open the robot and use the Amulet Eye on the green box. Take the Restorer's Set and Cook's Ladle.
- At Castle Front, open the hooded Executioner statue by the gate and use the Restorer's Set on the snow in its hands. Take the curled Jester's Cap it was holding.
- Open the Cook statue and use the Restorer's Set on the ice. Give the Cook the Cook's Ladle and take the Executioner's Ax in exchange.
- Give the Executioner's Ax to the Executioner statue. Its eyes light up.
- Open the Jester statue, on the right, and use the Restorer's Set on the snow. Take the Page's Hat it was wearing, then put the Jester's Cap on its head.
- Put the Page's Hat on the boy statue. Its eyes glow and you can take the Chimera Scroll from its hands.
- Open the gate panel and use the Chimera Scroll on it. The button lock starts.
Chimera button lock
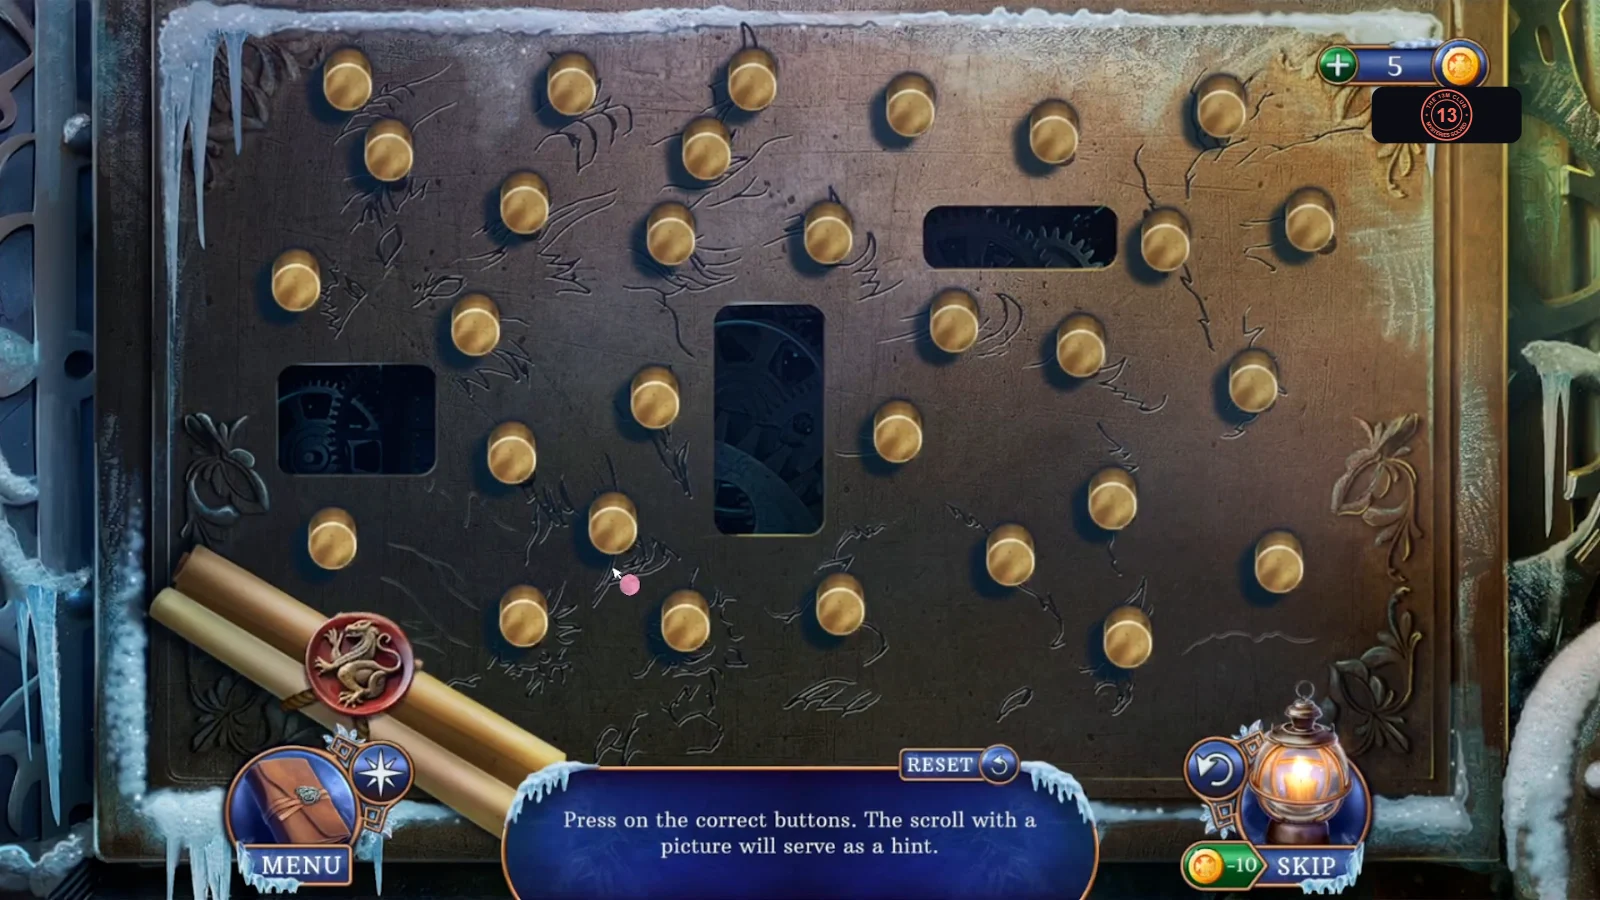
Goal: Press on the correct buttons. The scroll with a picture serves as a hint. Each snowflake on the scroll sits in the same position as a button on the panel.
- Tap the scroll to see the chimera covered in blue and black snowflakes. Close it and press only the 14 buttons in the positions of the blue snowflakes, leaving those under the black ones up. If you press a wrong button, use Reset. The gate opens when all 14 are down.
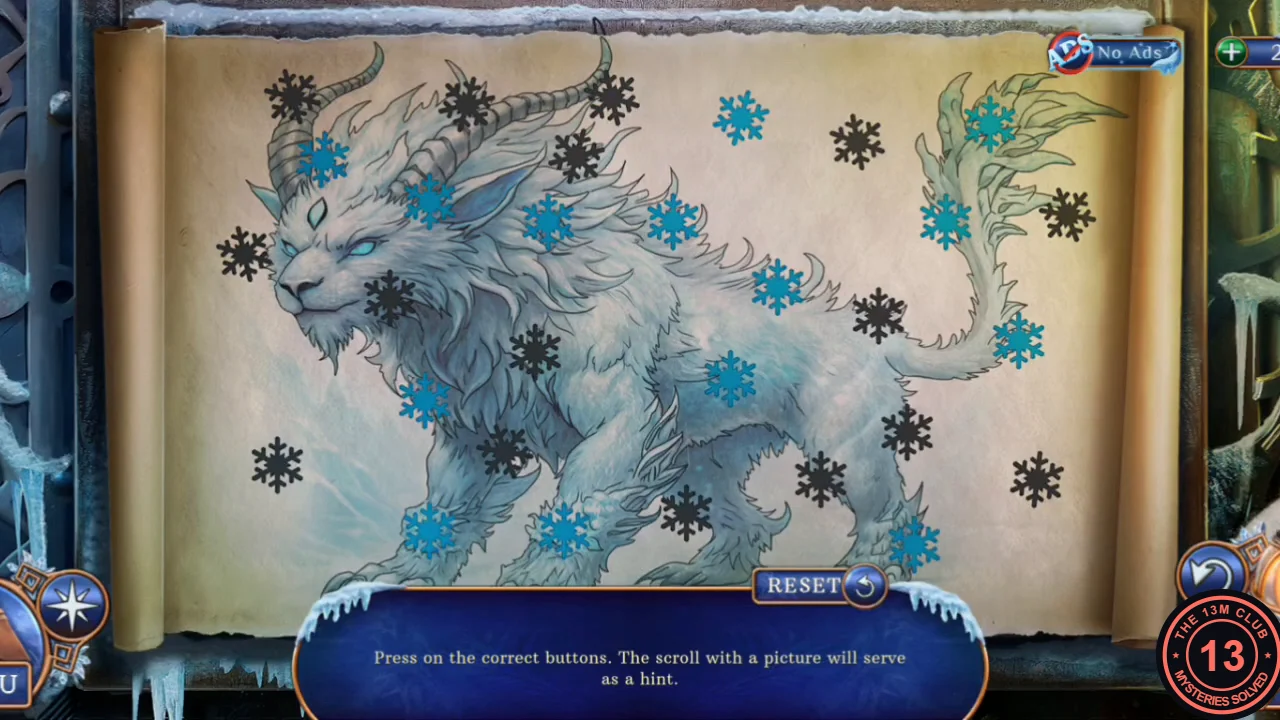
The clue: press the buttons in the positions of the 14 blue snowflakes. 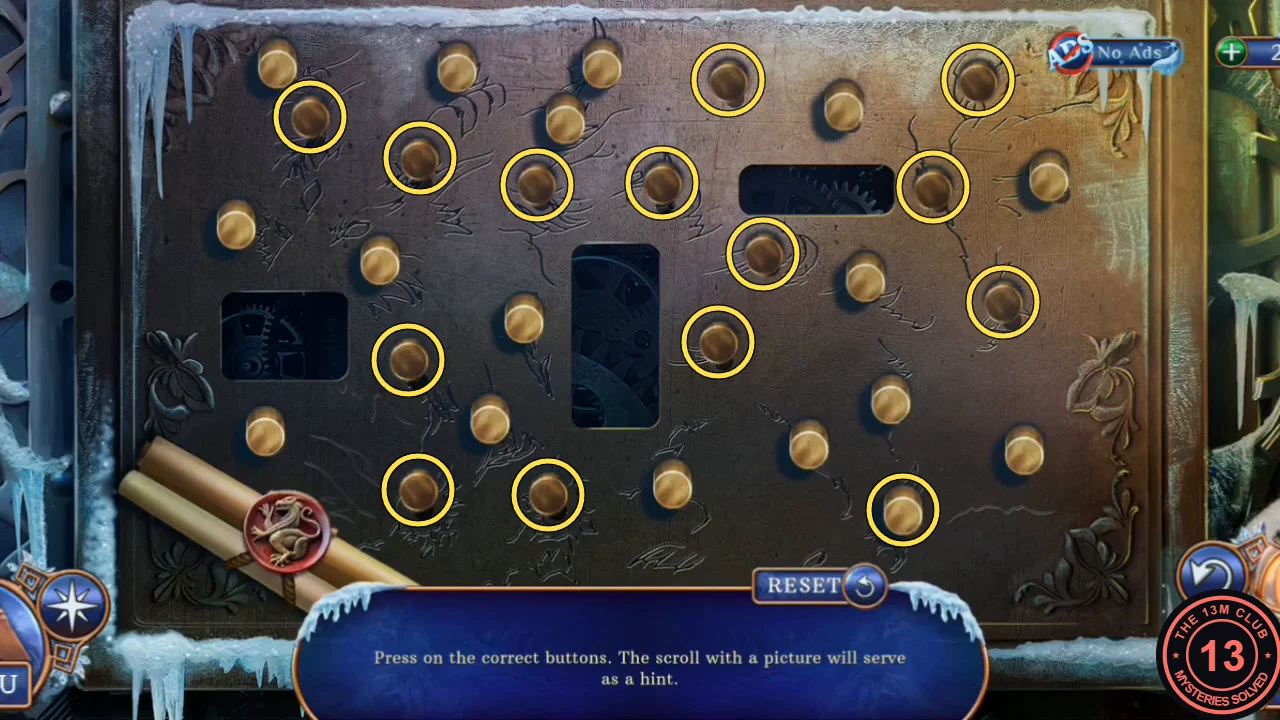
The 14 buttons to press, circled. They are in the same positions as the blue snowflakes on the scroll.
Main Hall displays and the Ice Chapel mosaic
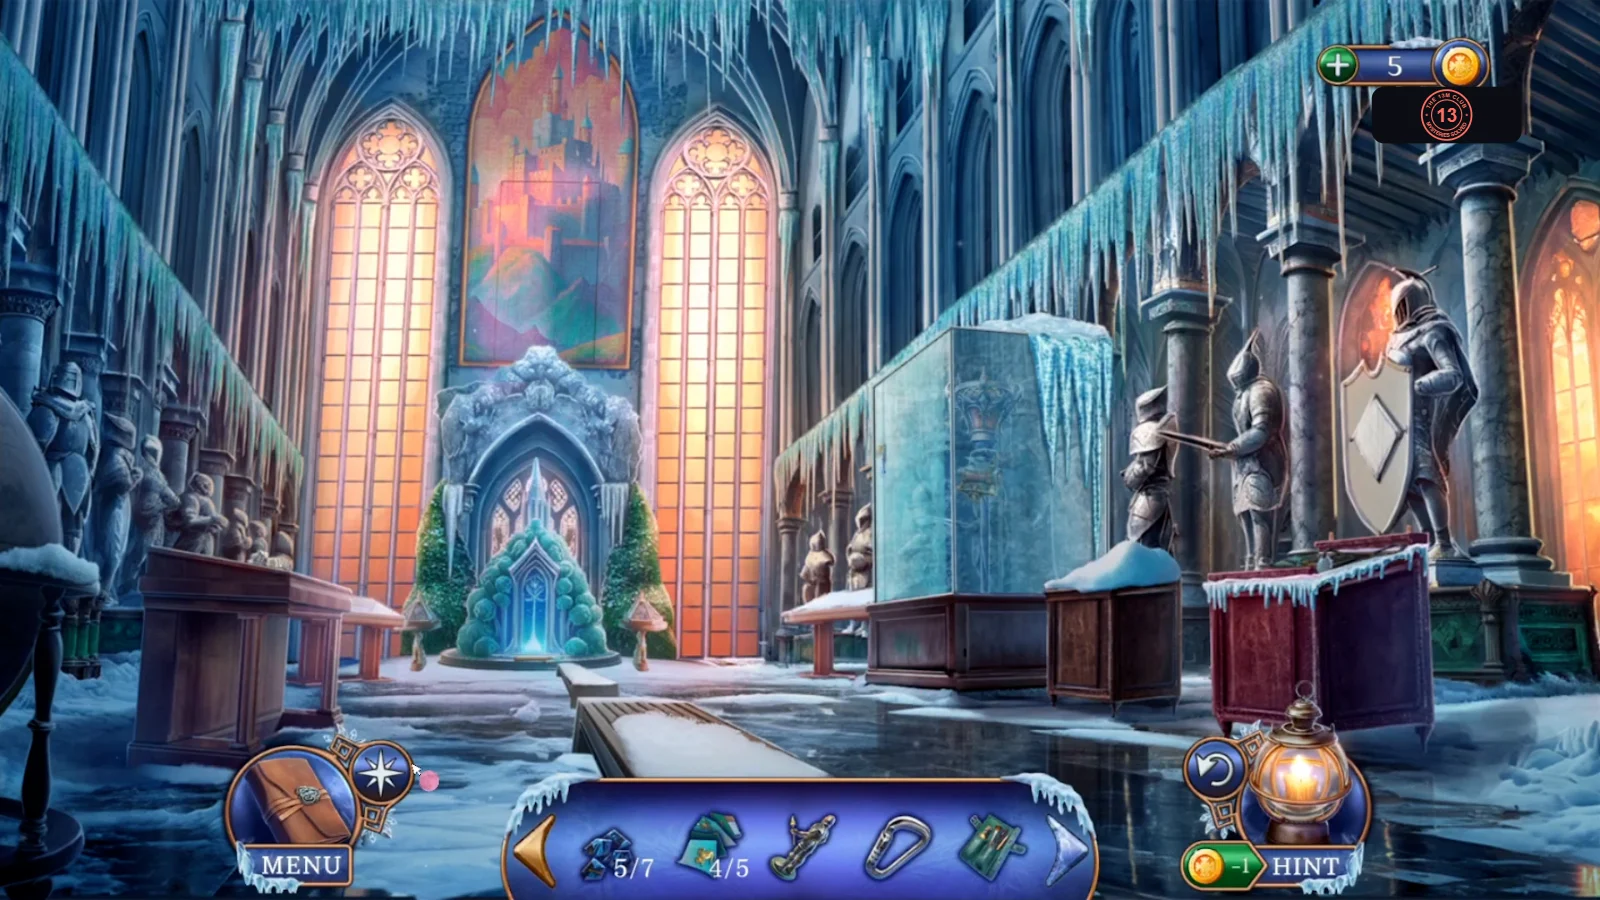
The gate opens onto the Main Hall. Collect what's on display, spend the Dollar at the robot and finish the Ice Chapel floor.
- Enter the Main Hall. Open the left display and take the Dollar. Check the fountain to see the floating key, and take the Rake Handle lying there. Open the glass case for a look at its lock and take the Ice Pendant hanging from it. Open the low stand with the plaque at the foot of the glass case, next to the red chest, and take the last Mosaic Piece.
- Back on the Funicular Platform, insert the Dollar in the robot. Take the Excursion Player and Rake Base.
- Go to the Ice Chapel and open the broken mosaic on the floor in front of the altar. Use the Mosaic Pieces on it. The crystal puzzle starts.
Ice mosaic crystals
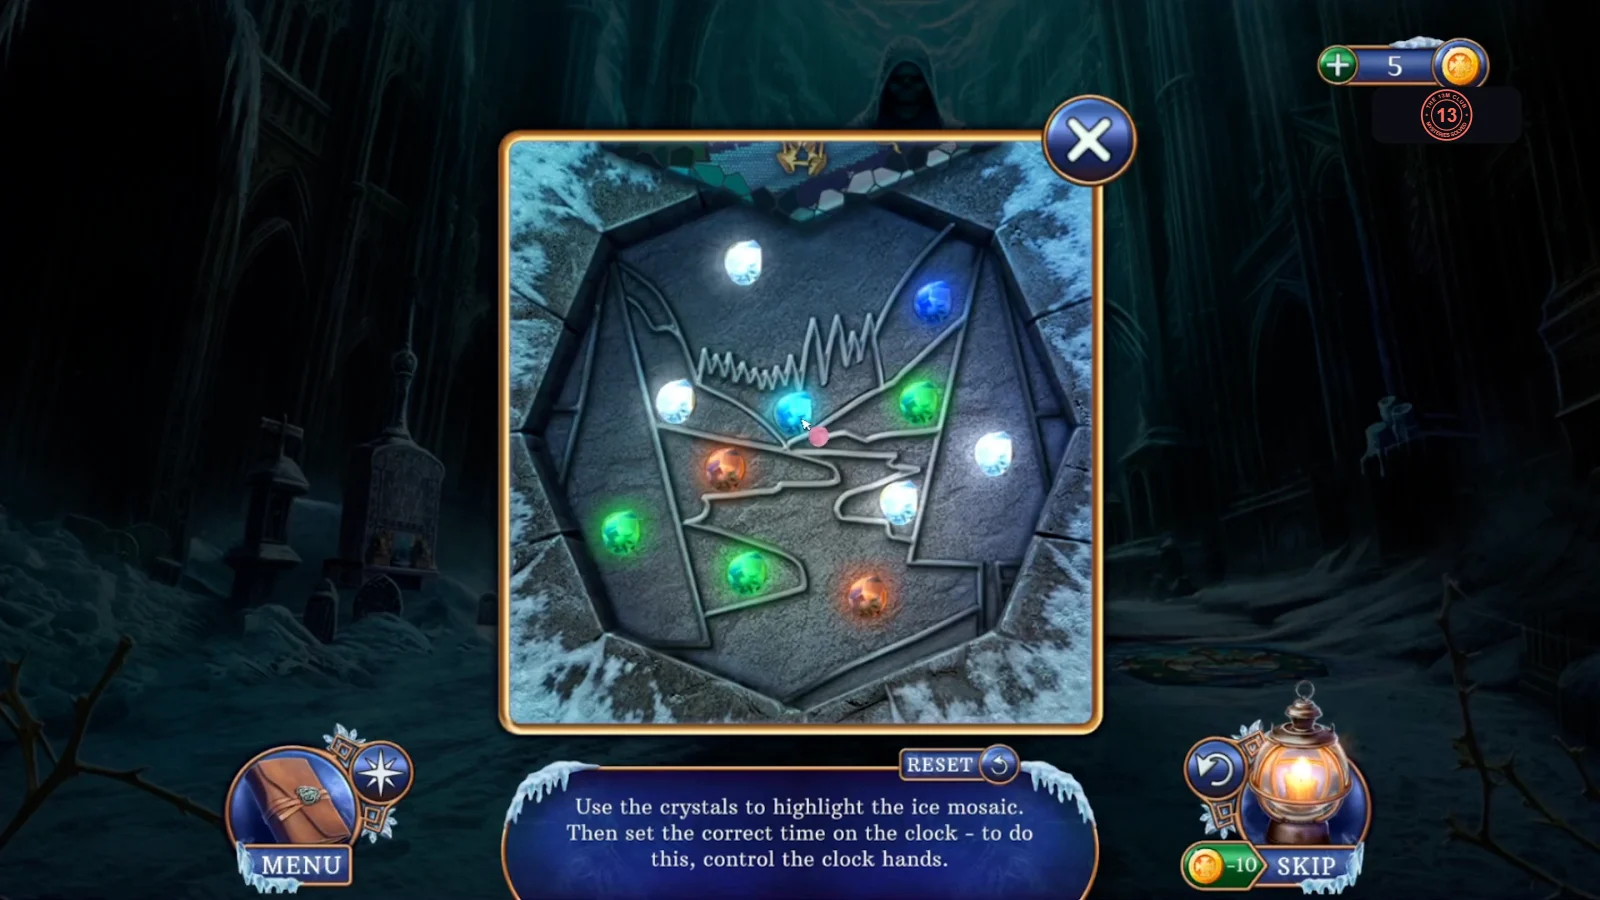
Goal: Use the crystals to highlight the ice mosaic.
- Tap two crystals to swap them, and match each crystal to the colour of its section: sky cyan; both mountains orange; the trees in the centre green; the two tall outer panels green; the lower-right water blue; and the remaining snow sections white. The mosaic lights up in colour when all crystals are correct.
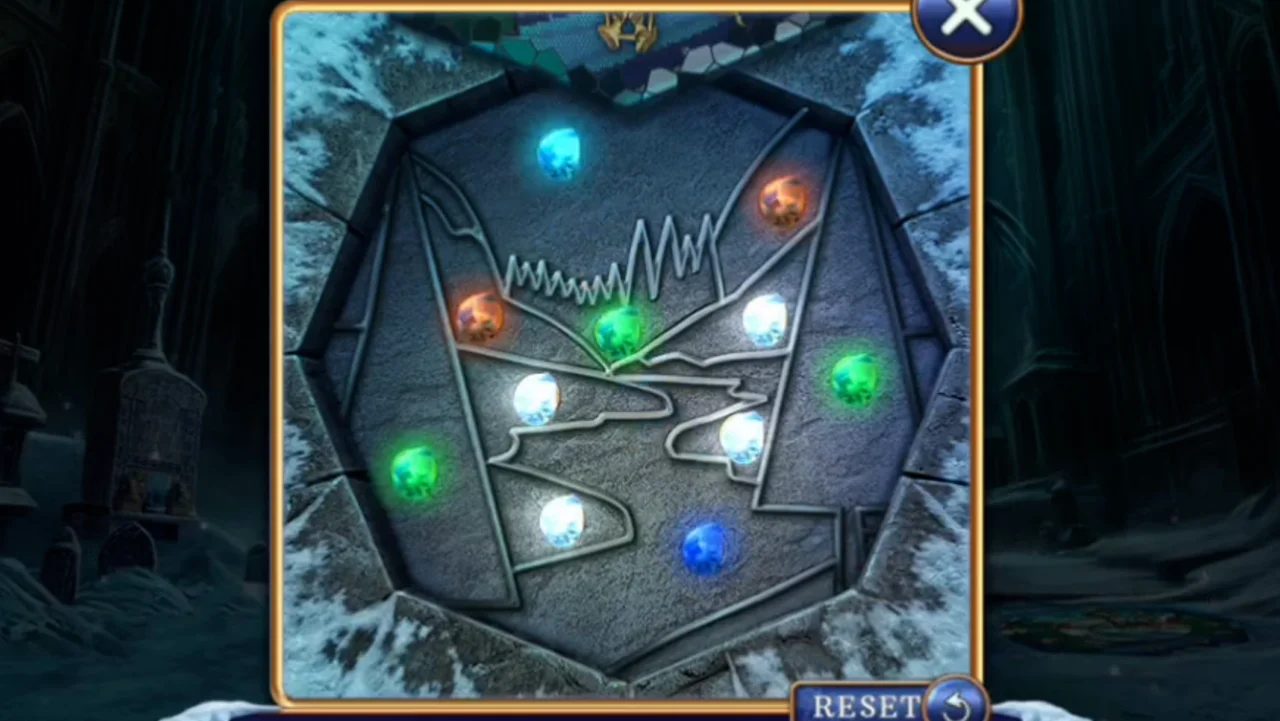
Solved: each crystal matches its section.
Zodiac clock rings
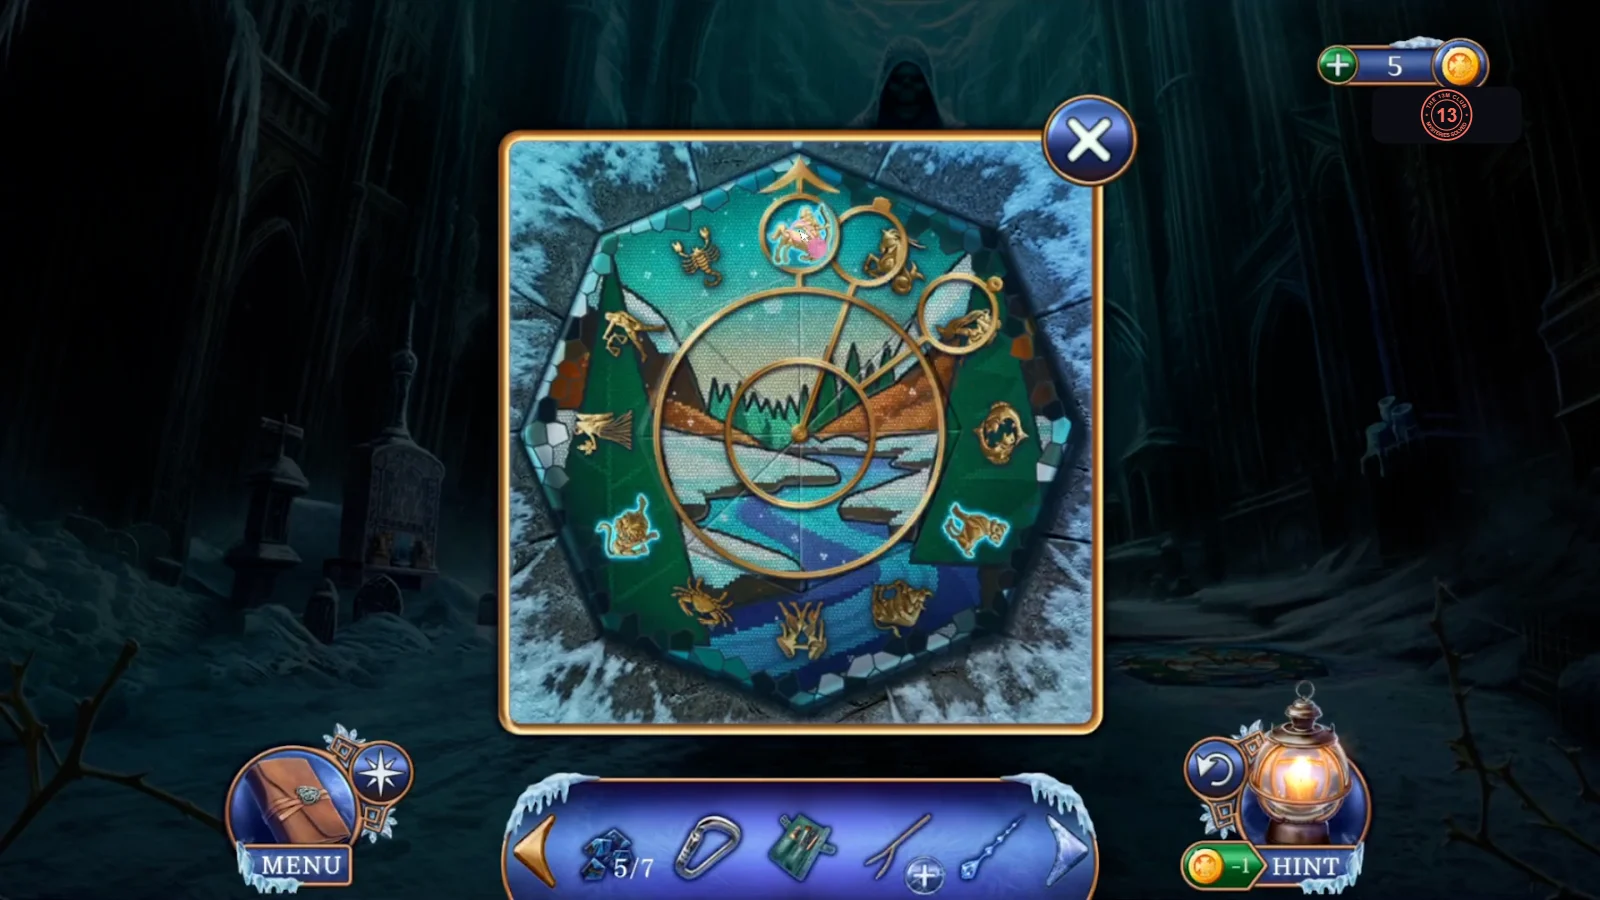
Goal: Set the correct time on the clock by moving its hands. This puzzle follows straight on from the crystals.
- Three of the zodiac signs glow blue: the archer at the top and the two big cats at lower left and lower right. Drag the three hand rings so each circles one glowing sign. The clock dissolves when all three are placed and the mosaic opens in a cross. The Ice Ghost figurine appears at the altar and goes to your inventory.
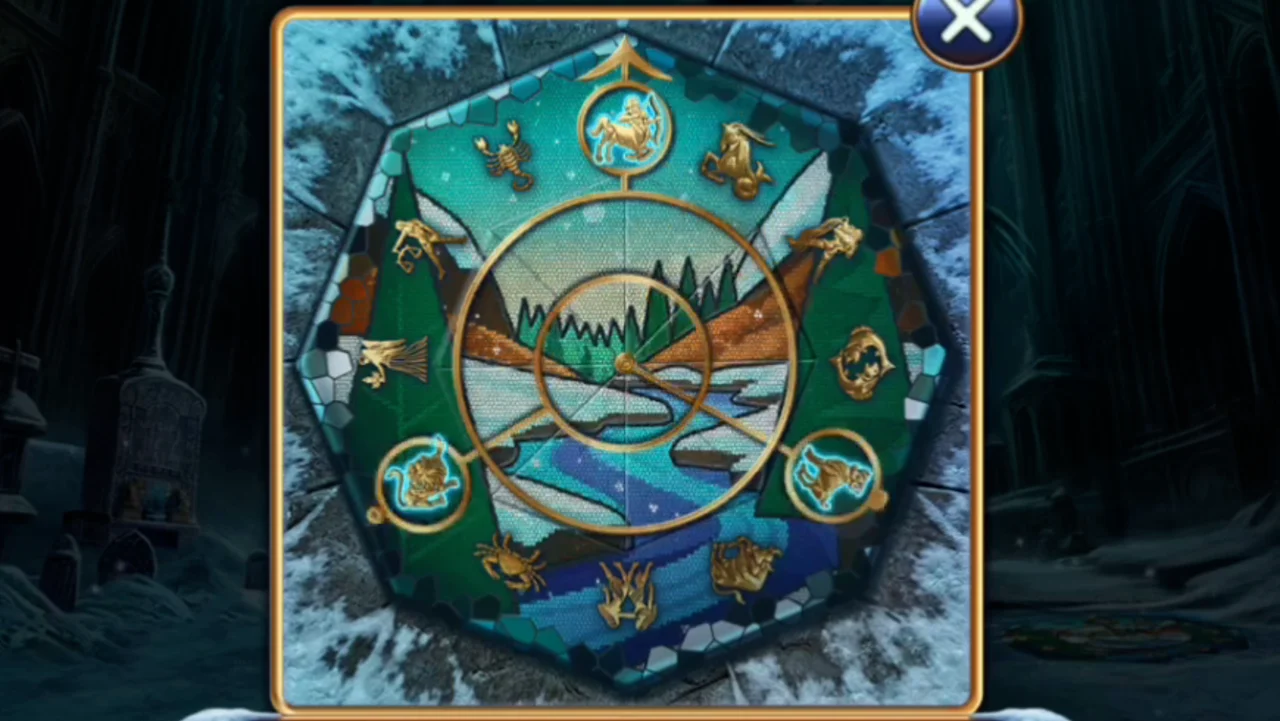
Solved: a ring around the archer at the top and the big cats at lower left and lower right.
Rake and the rock garden
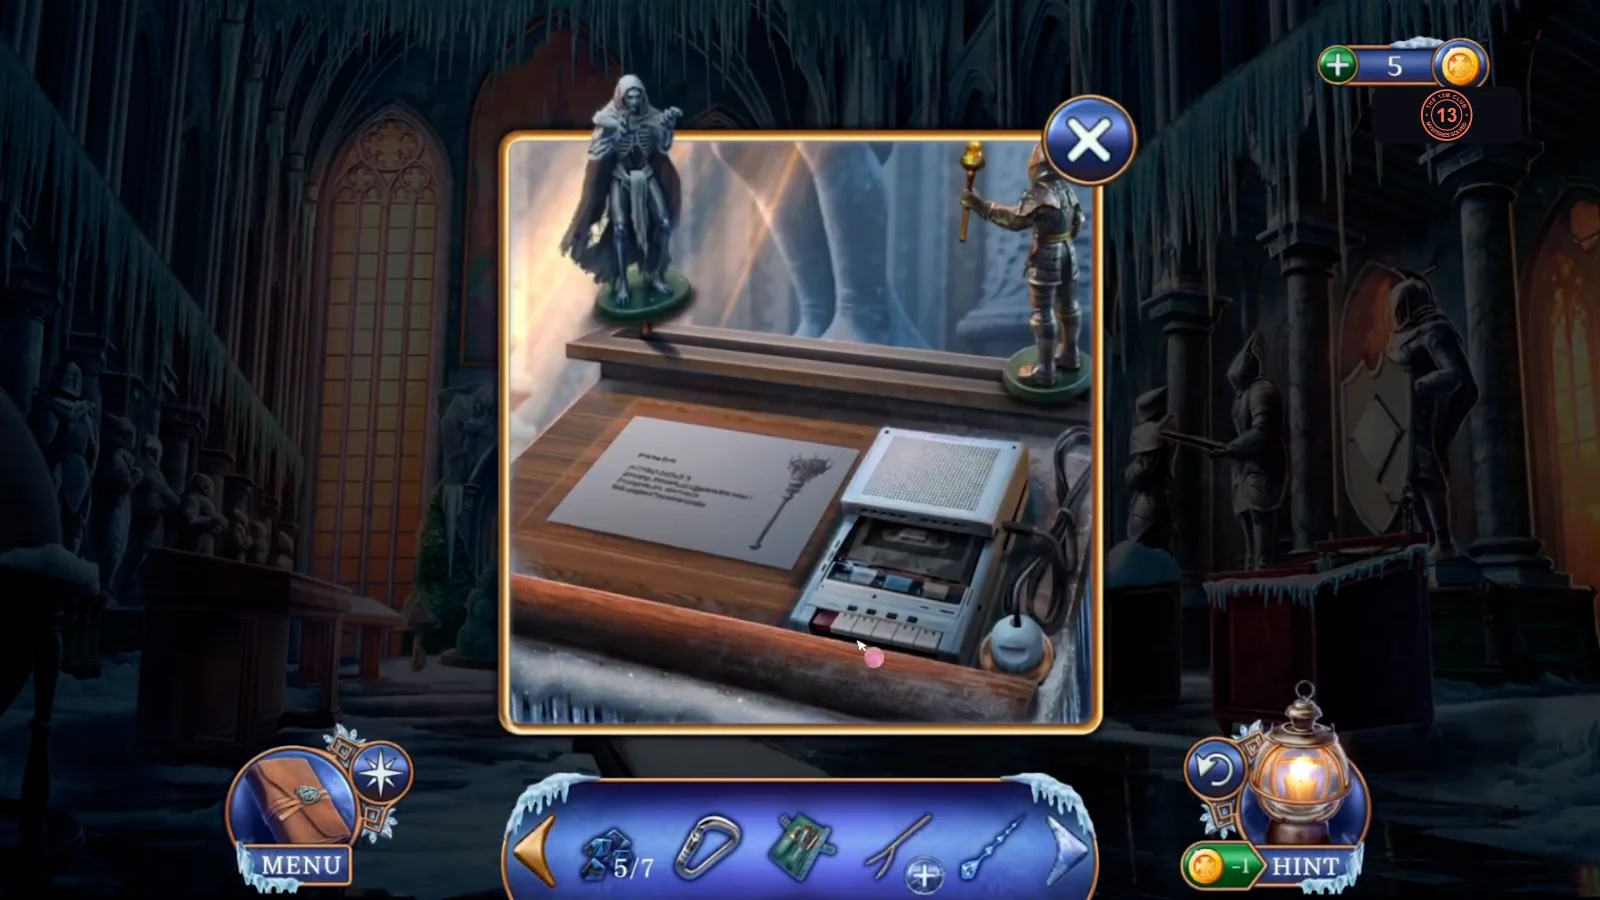
The Ice Ghost, the Knight Figurine and the Excursion Player go on the low stand. The reward completes a rake for the rocks at Castle Front.
- Back in the Main Hall, open the low stand with the plaque again. Place the Ice Ghost on the left of the shelf, the Knight Figurine on the right and the Excursion Player in the recess, and listen to the recording about the Ashbringer torch. A compartment opens: take the Wooden Pegs.
- Inspect the Rake Handle in your inventory. Add the Rake Base, then the Wooden Pegs, to build the Rake.
- At Castle Front, open the rocks below the broken railing and use the Rake. The stone puzzle starts.
Rake the stones
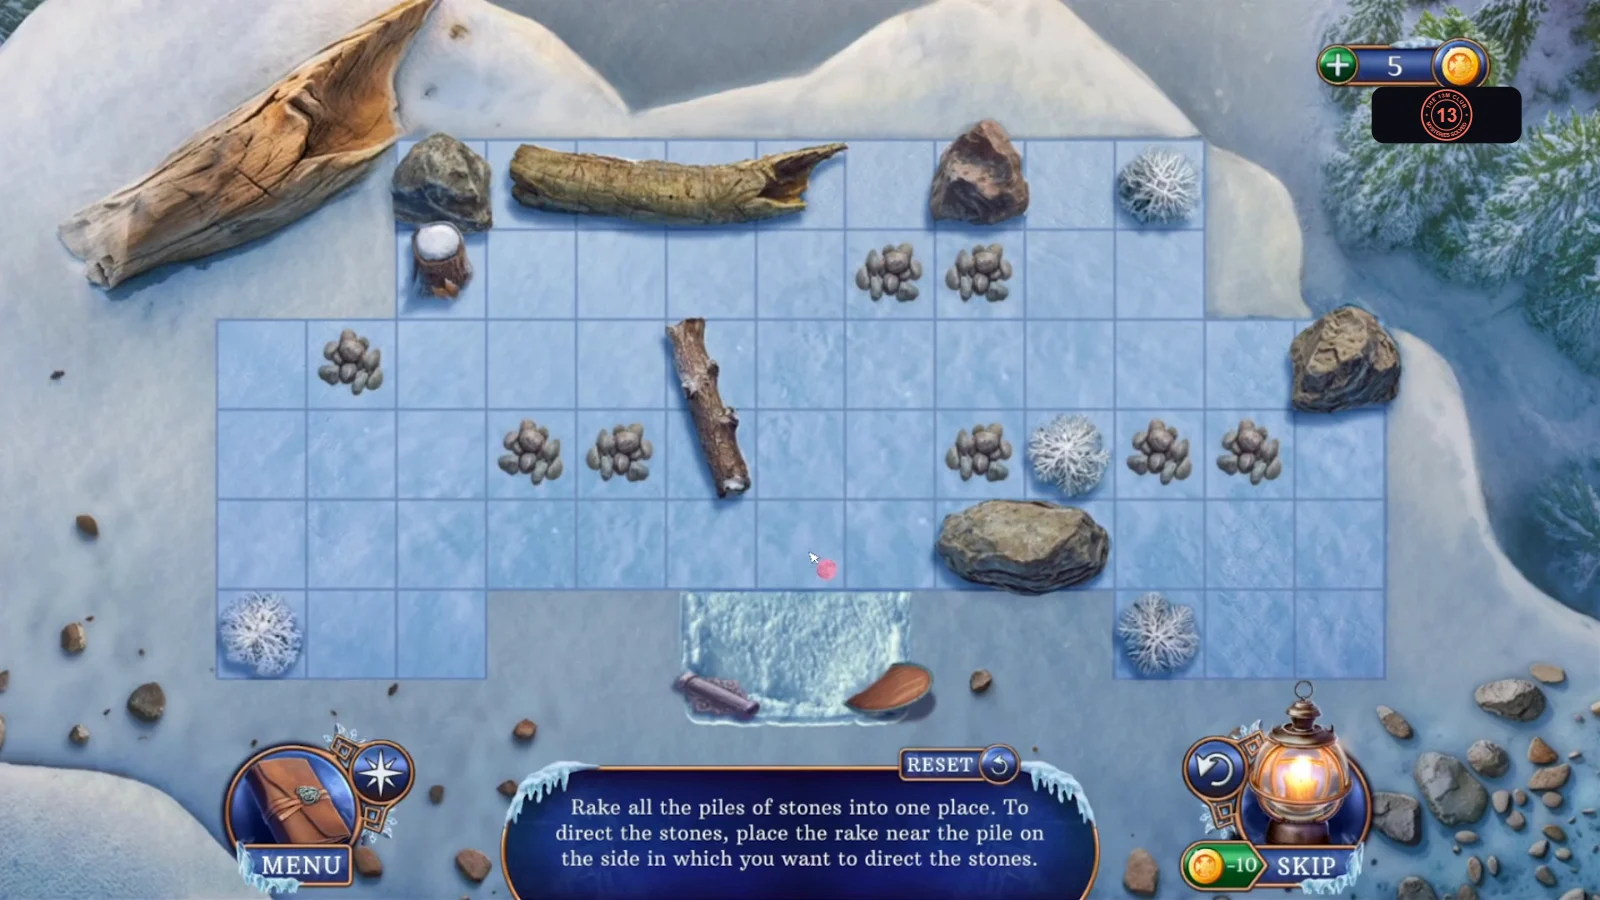
Goal: Rake all the piles of stones into one place. That place is the icy hollow at the bottom centre; a pile pushed into it disappears. Tapping a square pushes every pile touching that square directly away from it, including diagonally, by one or two squares. The steps below are one full solution. If your board stops matching them, use Reset or carry on with the same push rule.
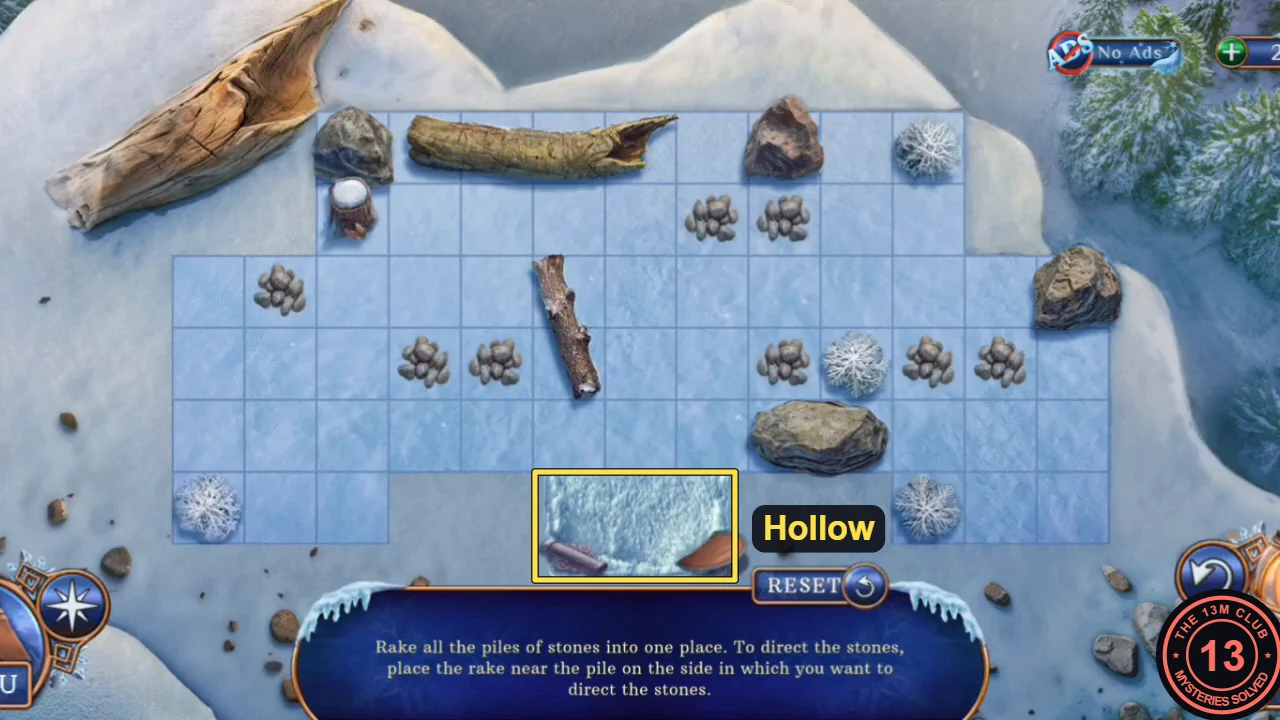
- Clear the left side first. Tap directly above the right pile of the pair left of the log, which also sends the left pile down and left. Tap directly left of the left pile twice; the pair ends side by side and moves right. Tap directly above the left one, and the right one drops into the hollow. Tap directly left of the remaining pile, then directly above it, to send it in. Next the far-left pile: tap directly left of it, directly above it, directly left of it again, then diagonally up-left of it. Now nothing remains left of the log.
- Now gather the right side. Tap diagonally down-right of the far-right pile, then diagonally down-right of the next pile: both move up a row. Tap directly right of the upper row of these two piles twice, sliding them left beside the top pair's column. Tap directly right of the top pair twice: the pair slides left and the two middle piles step down-left into the row with the last right-hand pile. Tap directly above the leftmost pile of that row to drop it into the hollow.
- Tap directly above the pile touching the boulder: it stays, and its neighbour steps down-left into the hollow. Tap diagonally up-right of the pile by the boulder, then diagonally up-right again to send it in. For the top pair, tap directly left of it. Tap above its right pile to drop it, tap diagonally up-right of it, then directly above it to send it in. Tap directly left of the last pile, then diagonally up-right of it twice, then directly above it. The puzzle ends when the last pile enters the hollow. You receive the Pebbles, the Amulet Scroll and the Rubber.
Restore the scroll and repair the fountain
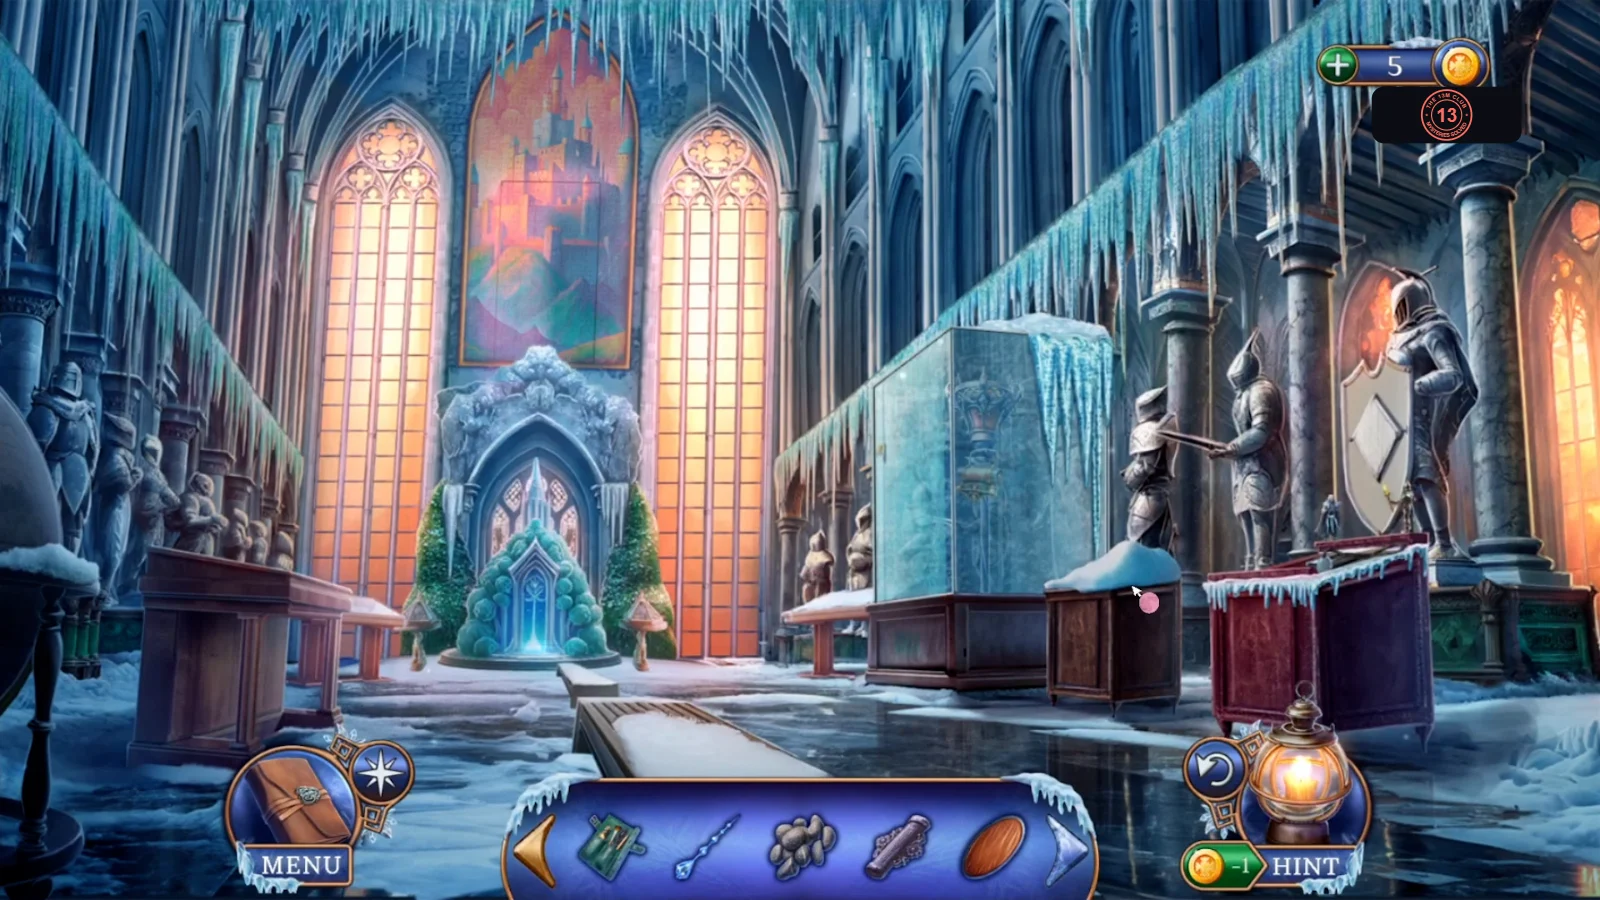
The rewards from the rock garden restore a damaged scroll and repair the fountain.
- In the Main Hall, use the Amulet Scroll on the left display, and take the Ancient Scroll from it.
- Inspect the Ancient Scroll in your inventory and use the Restorer's Set on it. Apply the pink solvent from the bottle, then wipe it away with the brush to bring back the drawing of a torch.
- Take the Restored Scroll to Librarian Thomas in the library. He studies it and hands you the Repair Amulet.
- On the Funicular Platform, use the Repair Amulet on the wall box beside the robot. Take the Screwdriver and Sealant.
- Open the broken pipe in the Main Hall fountain. Use the Rubber, then the Sealant, then the Pebbles. The lily pad puzzle starts.
Lily pads and the floating key
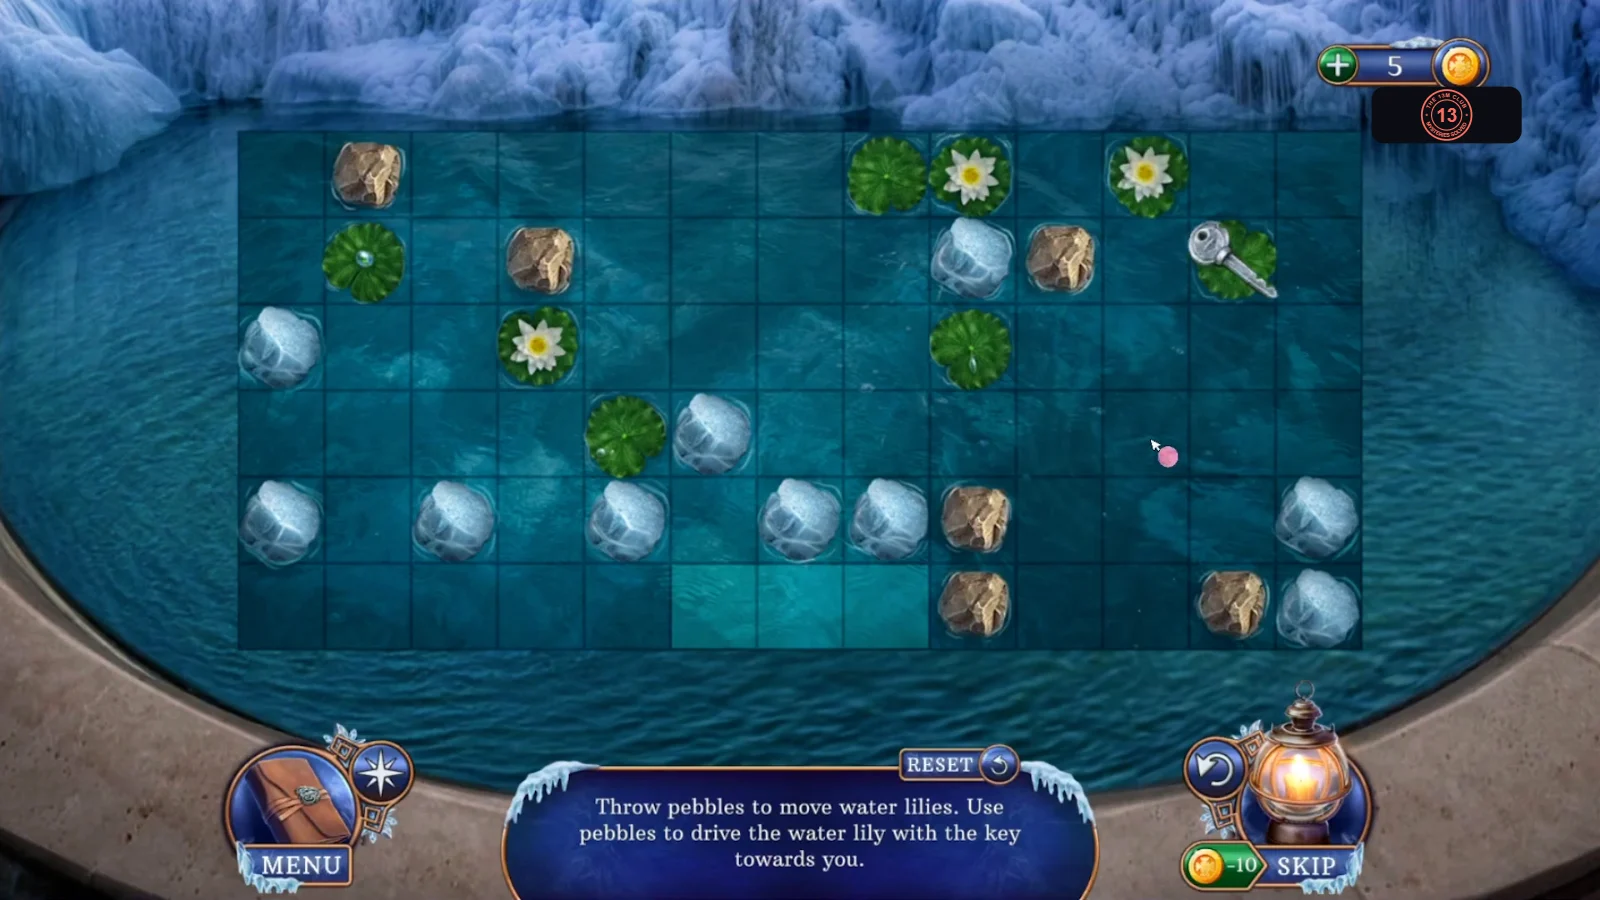
Goal: Throw pebbles to move water lilies. Use pebbles to drive the lily with the key towards you, into the bright squares at the bottom. A tap pushes any lily touching that square directly away from it, including diagonally. The steps below are one full solution. If your board stops matching them, carry on with the same push rule.
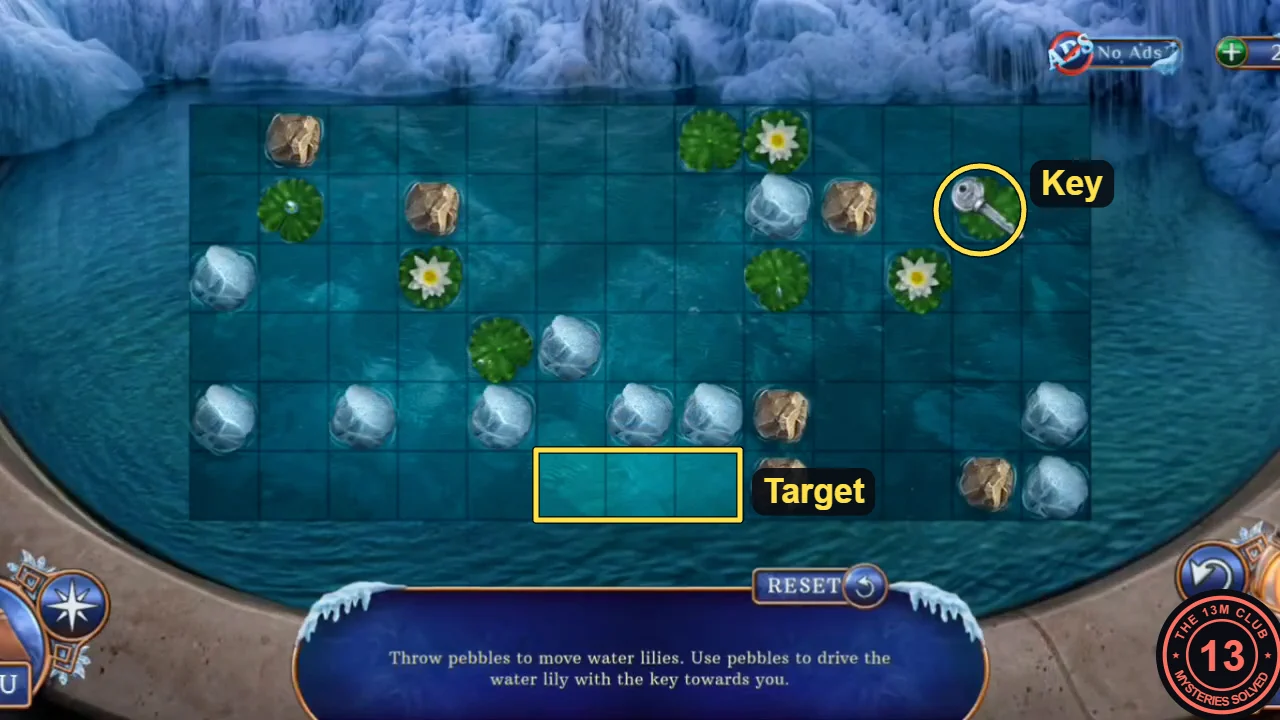
- All taps are relative to the key lily. Tap the square directly right of it, so it moves left against the rock. Tap diagonally up-right of it twice, so it steps down and left two times. Tap directly right of it, so it slides left to the ice block.
- Tap diagonally up-right of the key lily, so it steps down and left between two ice blocks. The green lily is now diagonally up-left of the key. Tap the gap between ice blocks to the down-left of that green lily, which pushes it away. Then tap the empty square where the green lily was: the key lily drops into the bright squares and you receive the Showcase Key.
The glass case and the Seer's plan
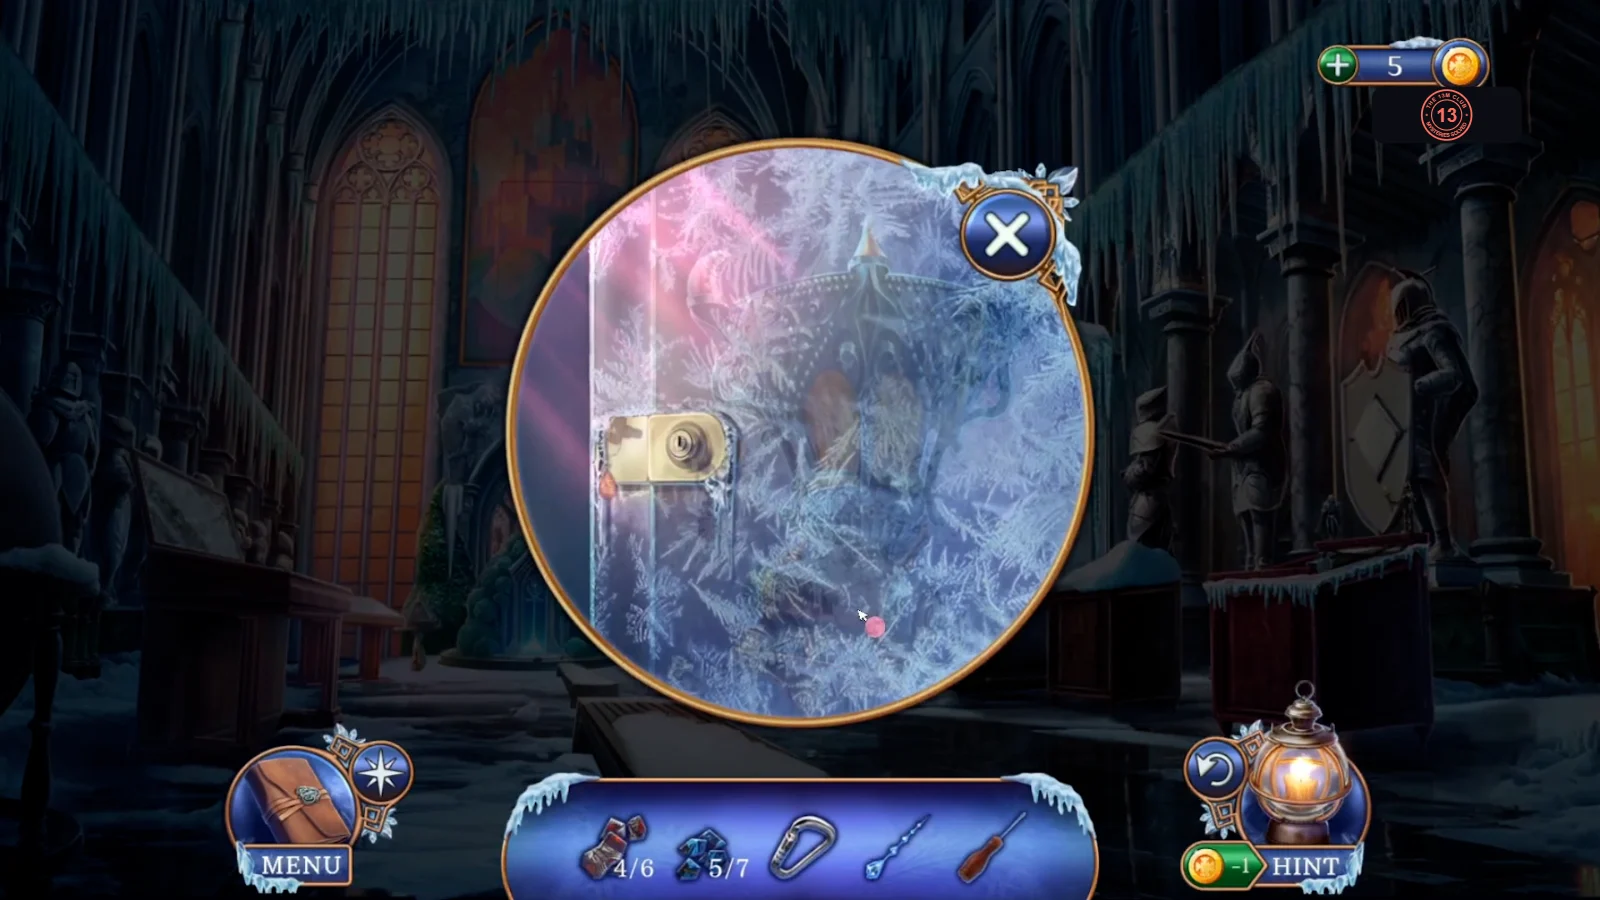
The Showcase Key opens the glass case in the Main Hall. What's inside sends you back to the Seer.
- Use the Showcase Key on the lock of the glass case. Take the Mysterious Torch Scheme, Scroll of Summon and Incinerator Torch. A scene plays, and a look at Castle Front confirms you must deal with the ghosts first.
- Go to the library and talk to the Seer. Hand over the Torch Scheme and Scroll of Summon. She suggests luring the ghosts to the old incinerator plant and using the torch there, so you head to the Industrial Zone.