Final puzzle 1: laser cubes
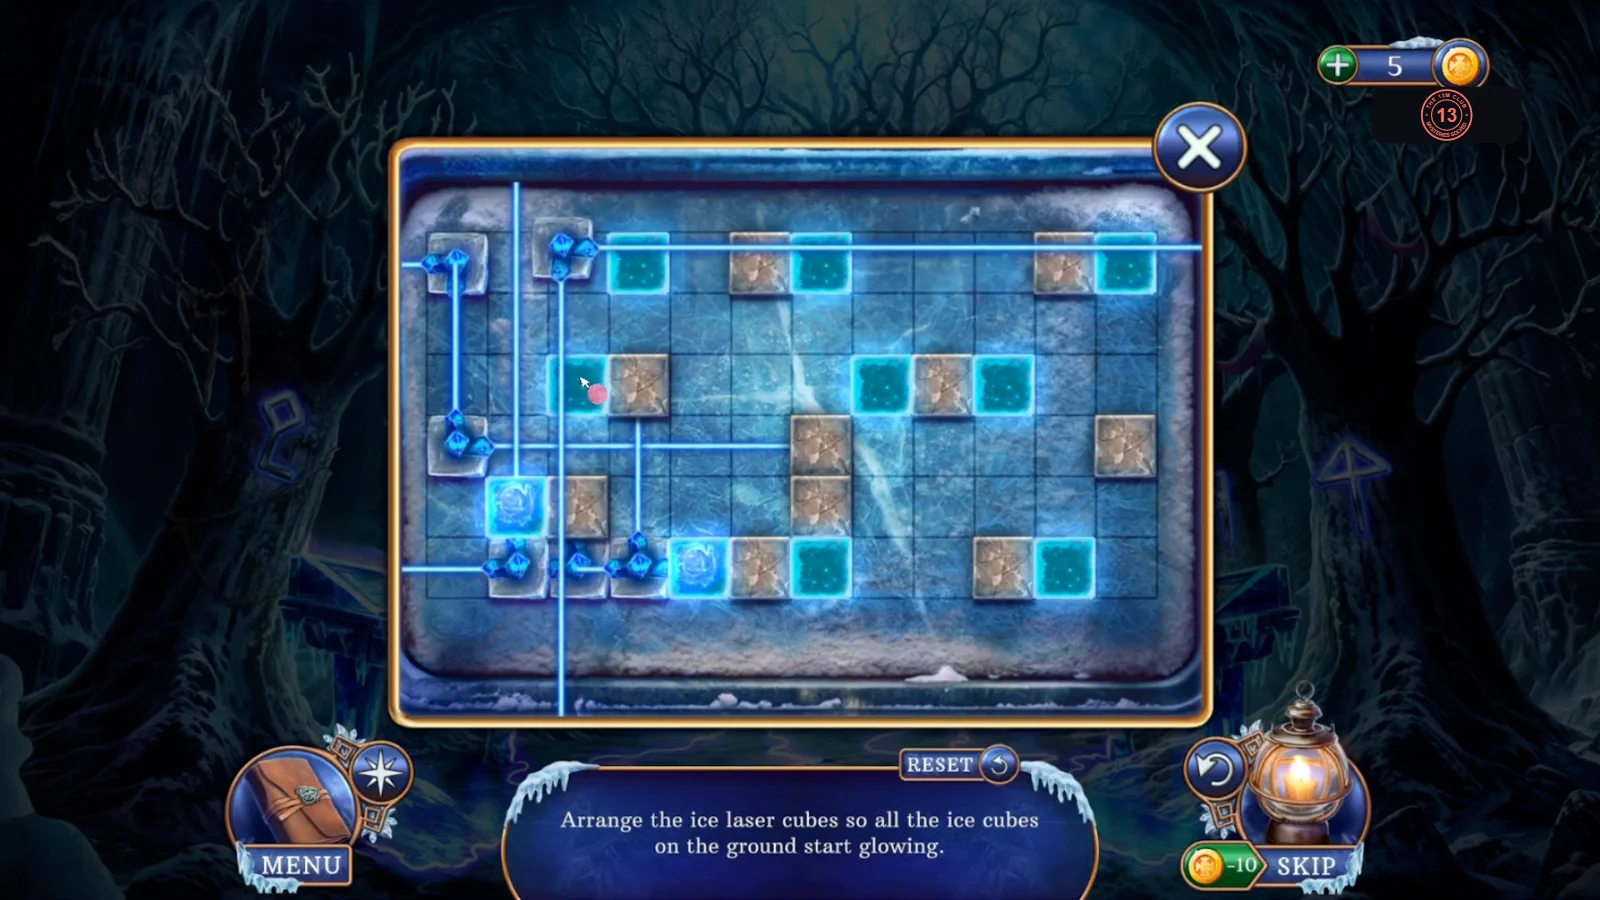
Six puzzles play one after another at the foot of the trees. The two laser boards have different layouts, so they're described by method. The two skull boards start the same way and share one solution. Goal: Arrange the ice laser cubes so all the ice cubes on the ground start glowing.
- Drag the laser cubes around the grid. Each one fires a beam along its row and column, and the stone blocks stop beams. Light the far corners first, since those squares have the fewest options. The puzzle ends when every ice cube on the ground glows.
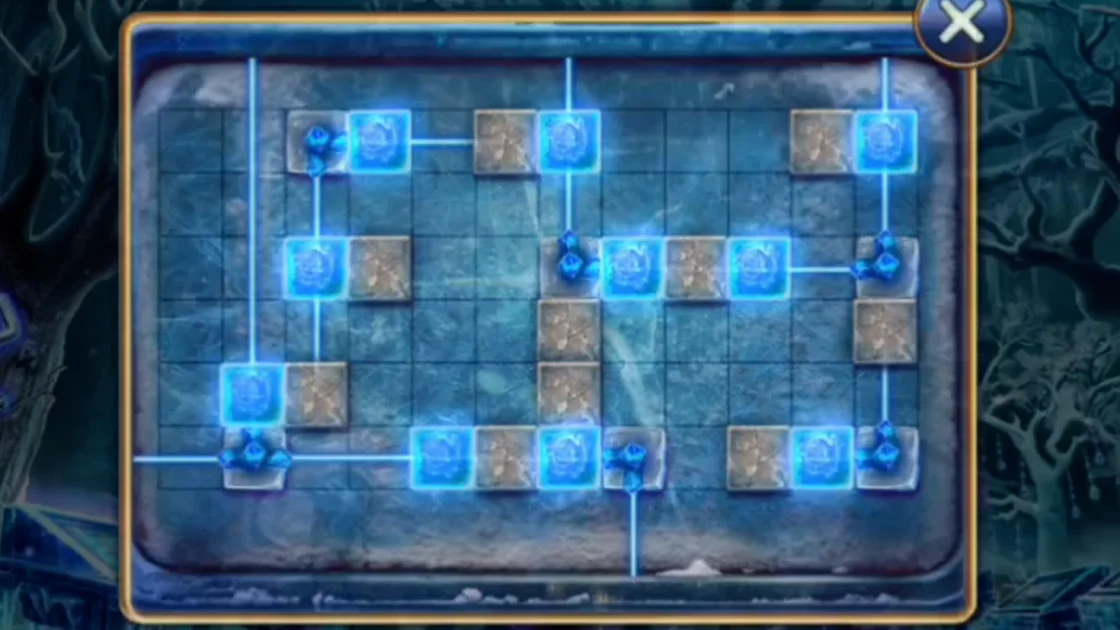
Example: one finished layout for the first laser board, just as it closes.
Final puzzle 2: ice skulls
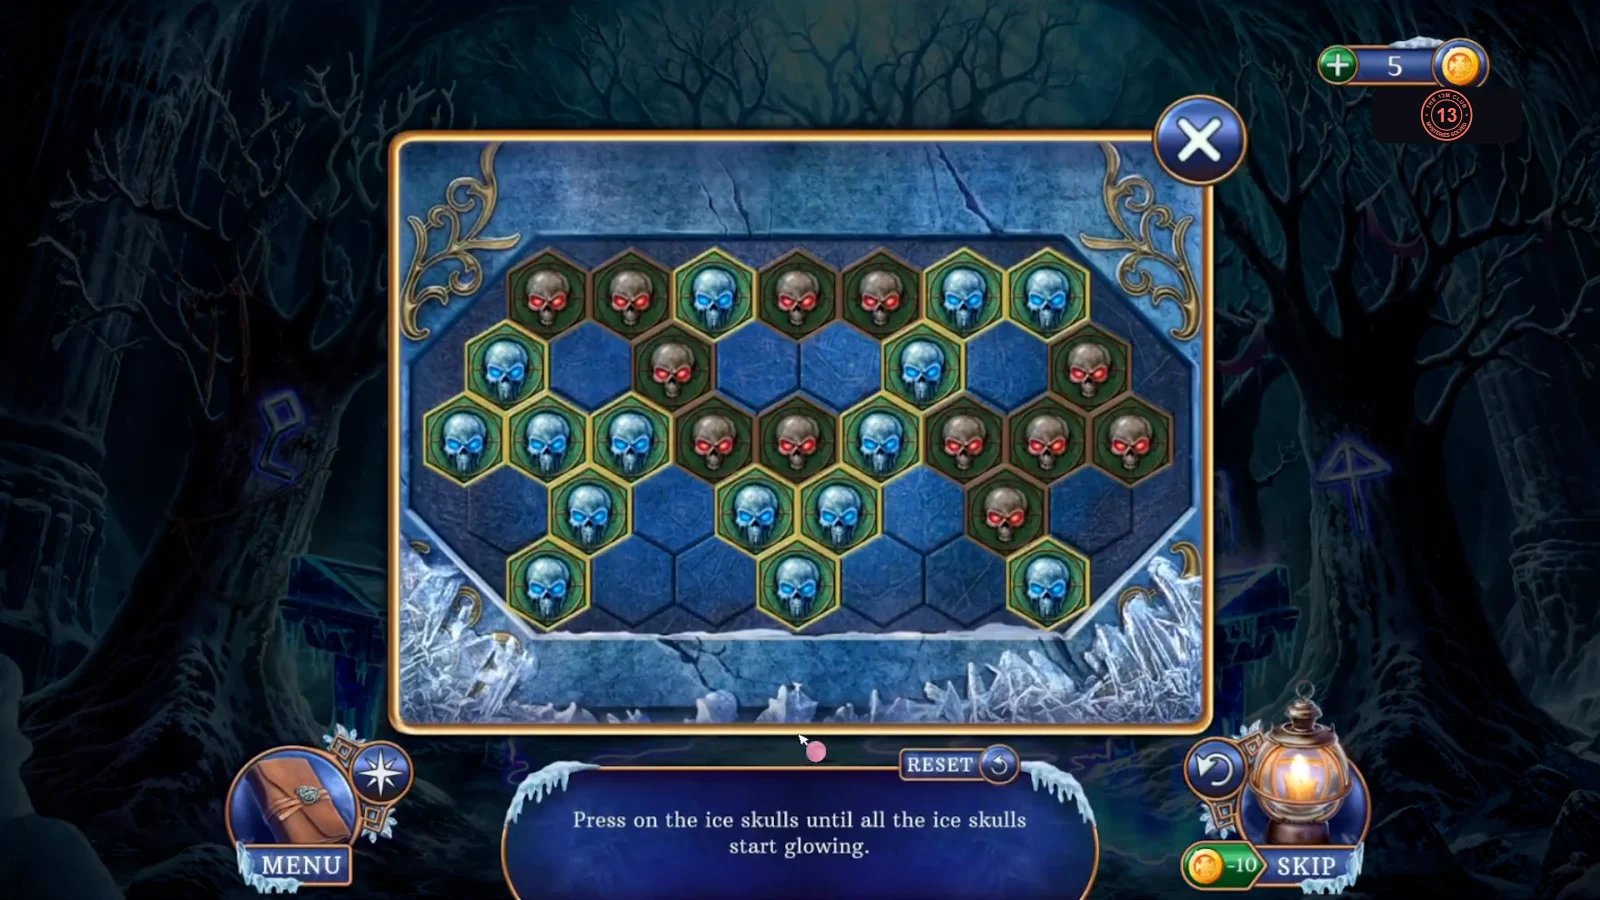
Goal: Press on the ice skulls until all of them start glowing.
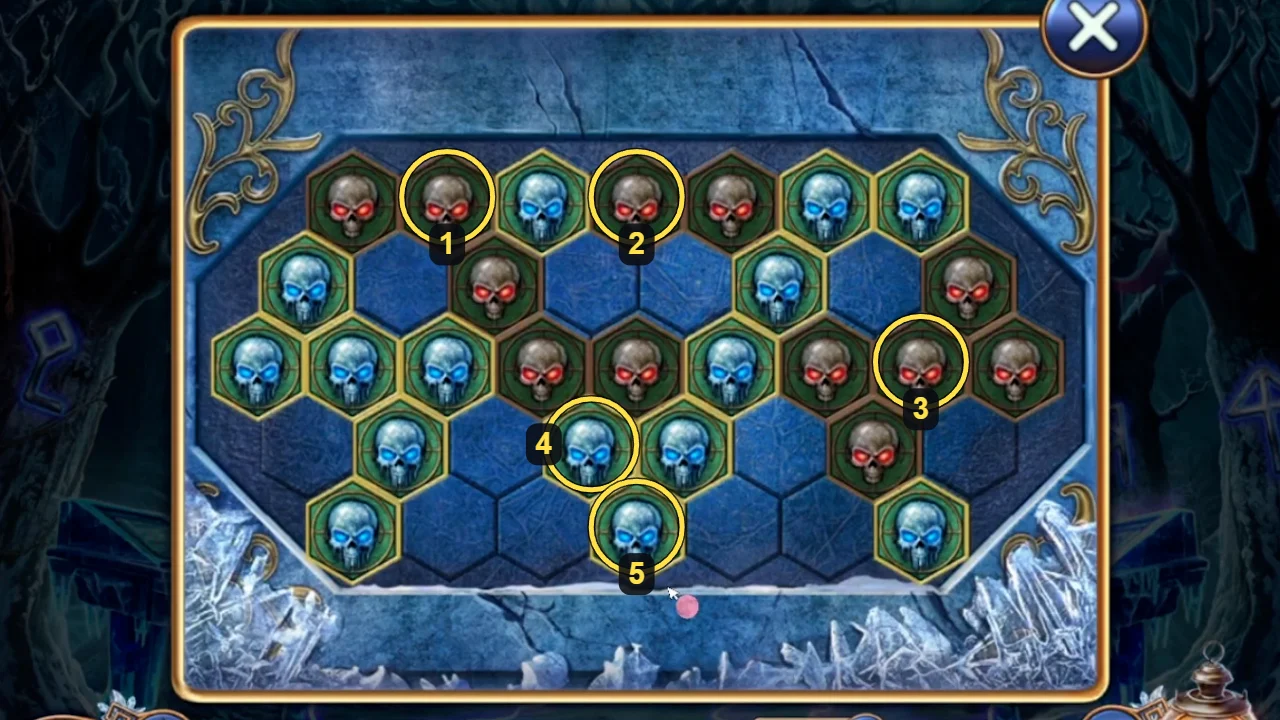
- Compare your board with the picture. A press flips that skull and every skull touching it, between dark and glowing. Pressing the same skull again undoes that press, so fix a wrong press straight away. If you've lost track, press RESET and compare the board again before starting the list. This start was the same in every playthrough we checked. If yours is different, the list below won't apply, and you'll need to clear the board by trial using the same flip rule.
- Press these five skulls once each, as numbered in the picture. 1: top row, second from the left. 2: top row, fourth from the left; the whole top row now glows. 3: long middle row, second from the right; only two dark skulls remain, side by side in that row. 4: the row of four skulls below it, second from the left; those two light up and three skulls at the bottom go dark. 5: bottom row, middle skull. Every skull now glows and the board closes.
Final puzzle 3: symbol cubes
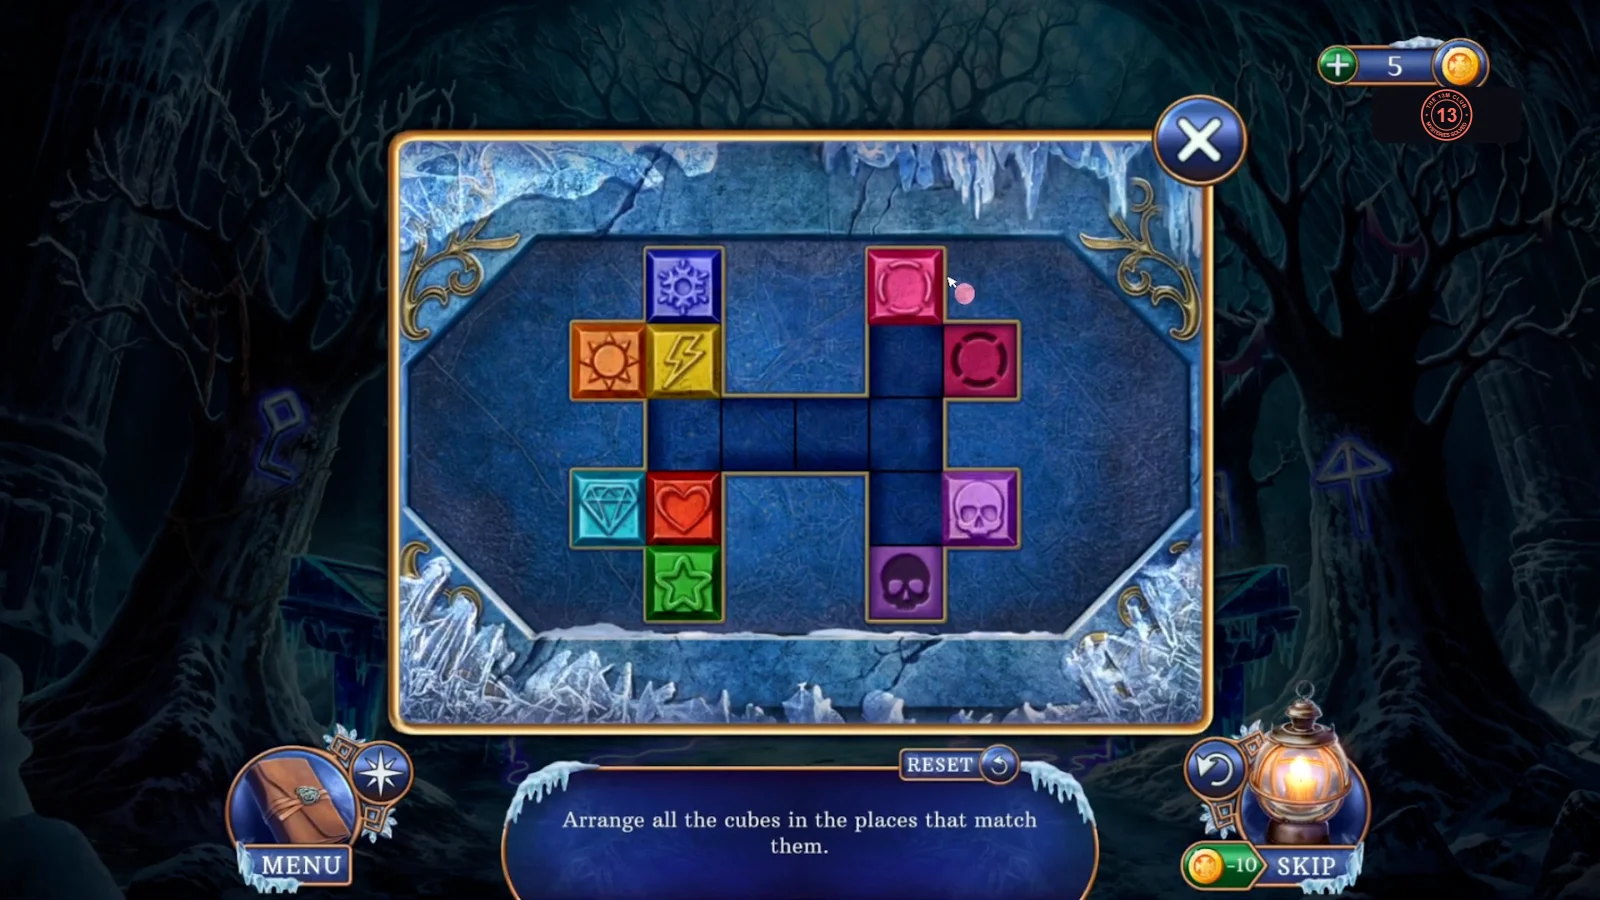
Goal: Arrange all the cubes in the places that match them.
- Slide cubes along the open squares in the middle of the board, using the empty squares as passing spaces, and park each one on the outline with the same symbol.
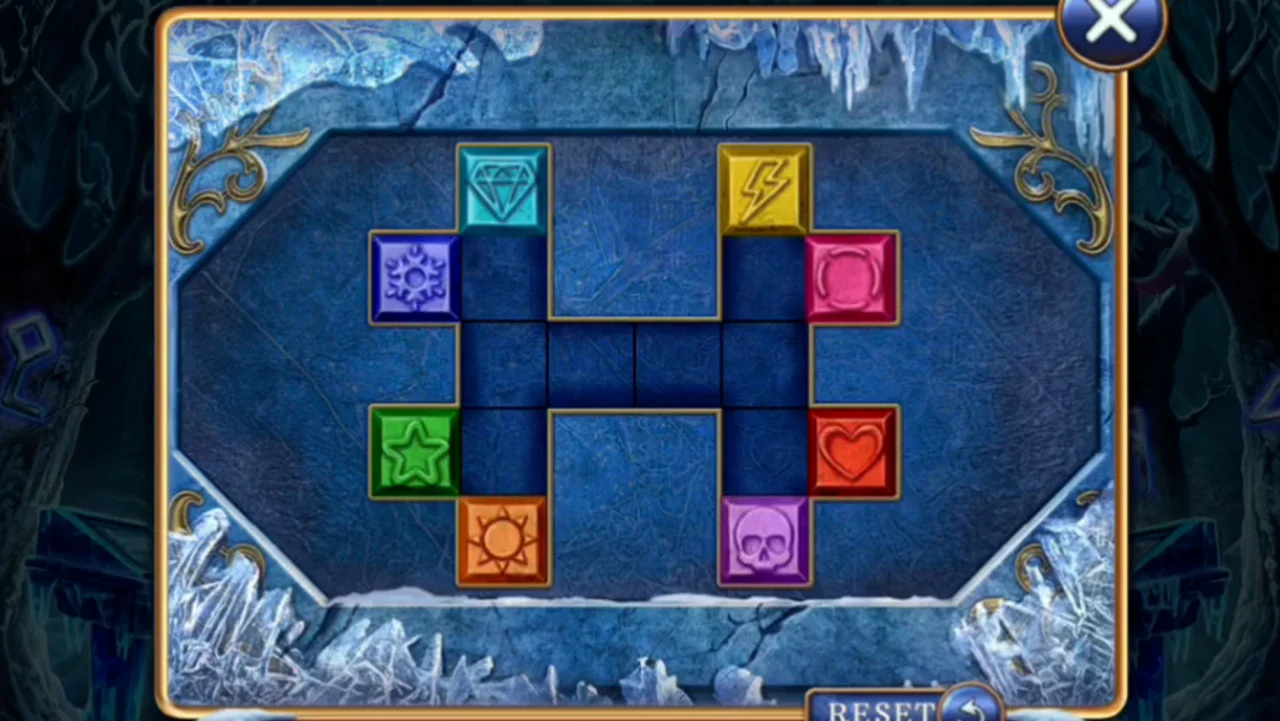
Solved: each cube sits on its matching outline.
Final puzzle 4: snakes
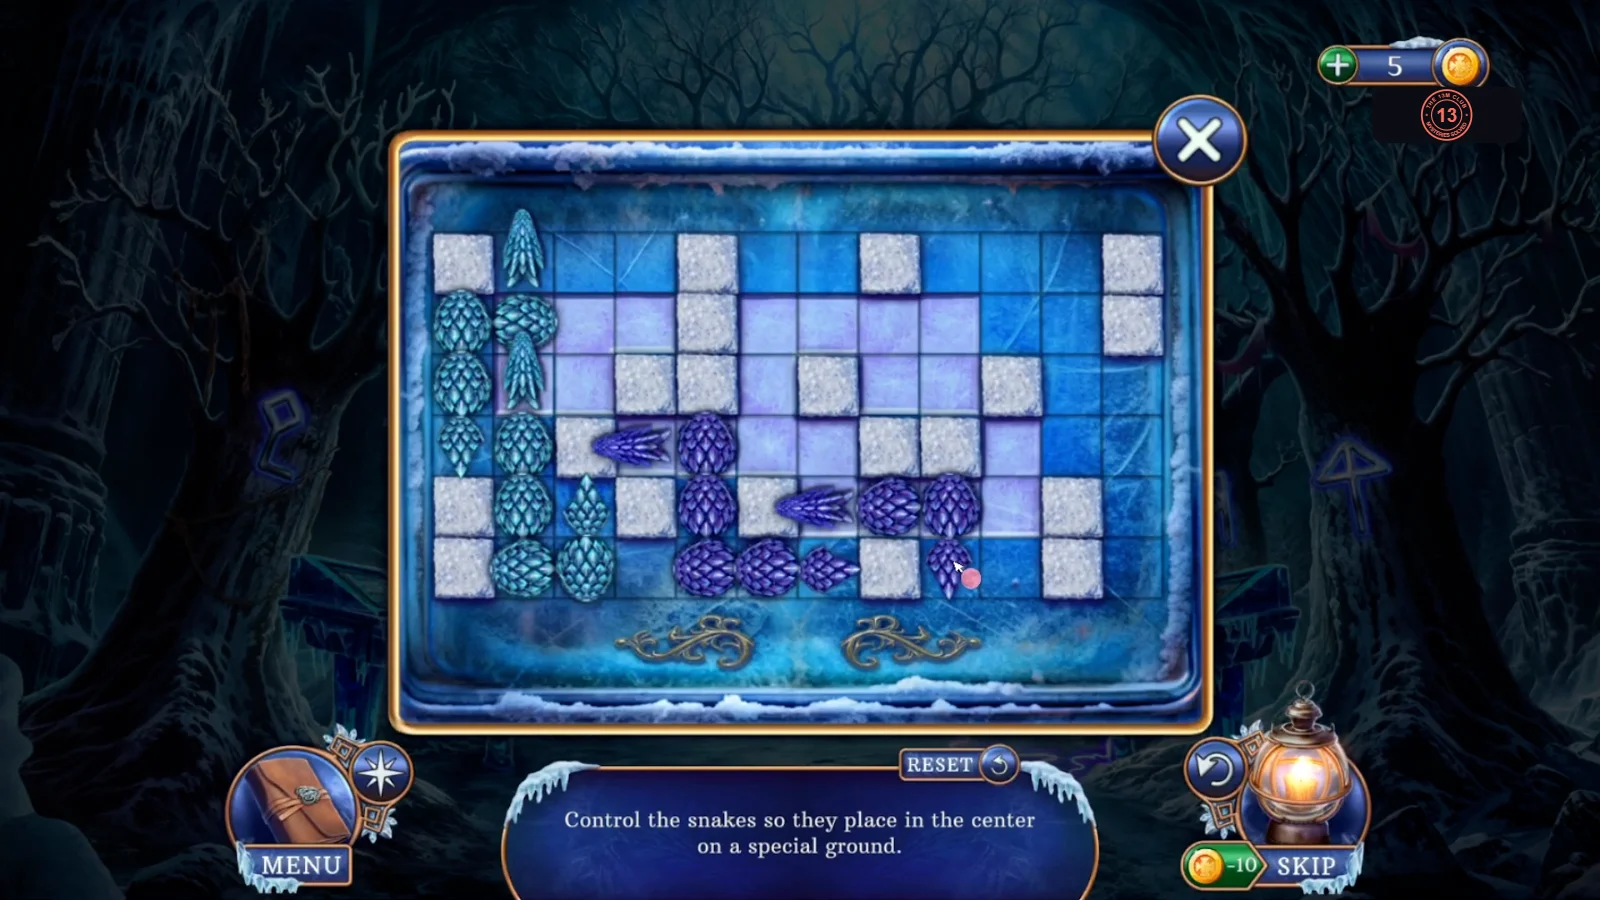
Goal: Control the snakes so they place in the centre on a special ground.
- The special ground is the patch of pale lilac squares; white stone squares block the way. Drag a snake by its head or tail and the body follows. Slide the snakes in until together they cover every pale square, using the long snakes for the long rows and the short ones for the gaps. The board closes when no pale square is left showing.
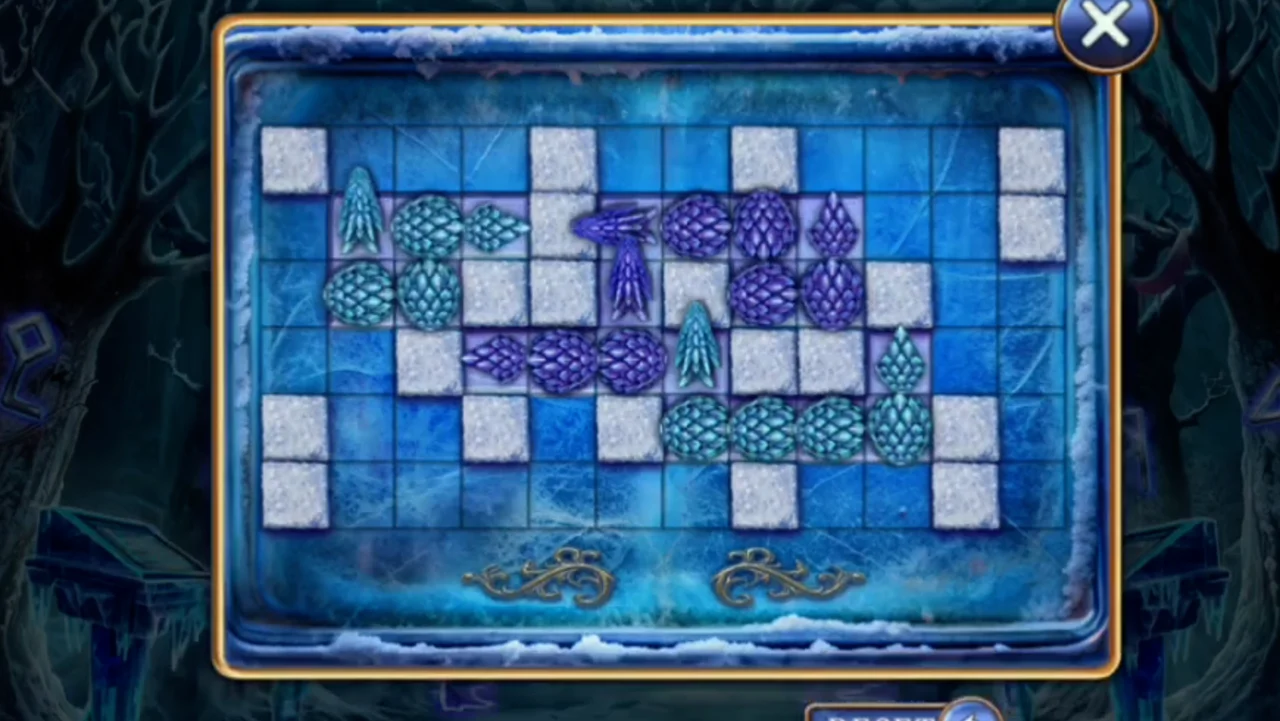
Solved: the snakes cover every pale square.
Final puzzle 5: ice skulls again
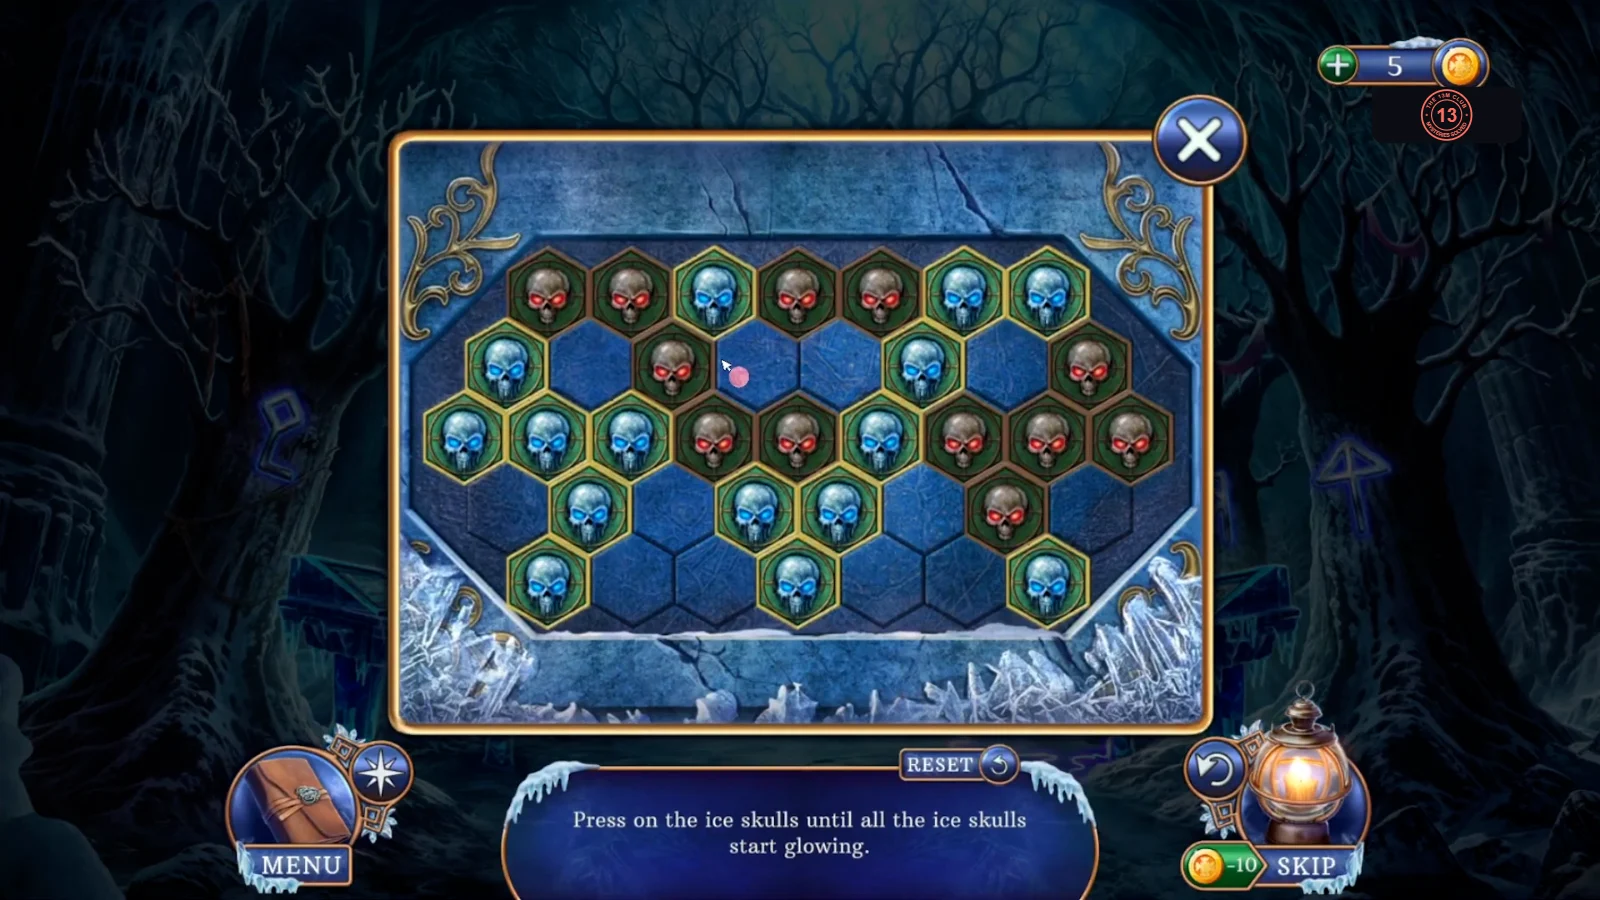
Goal: Press on the ice skulls until all of them start glowing. This board starts exactly like final puzzle 2, so the same five presses solve it.
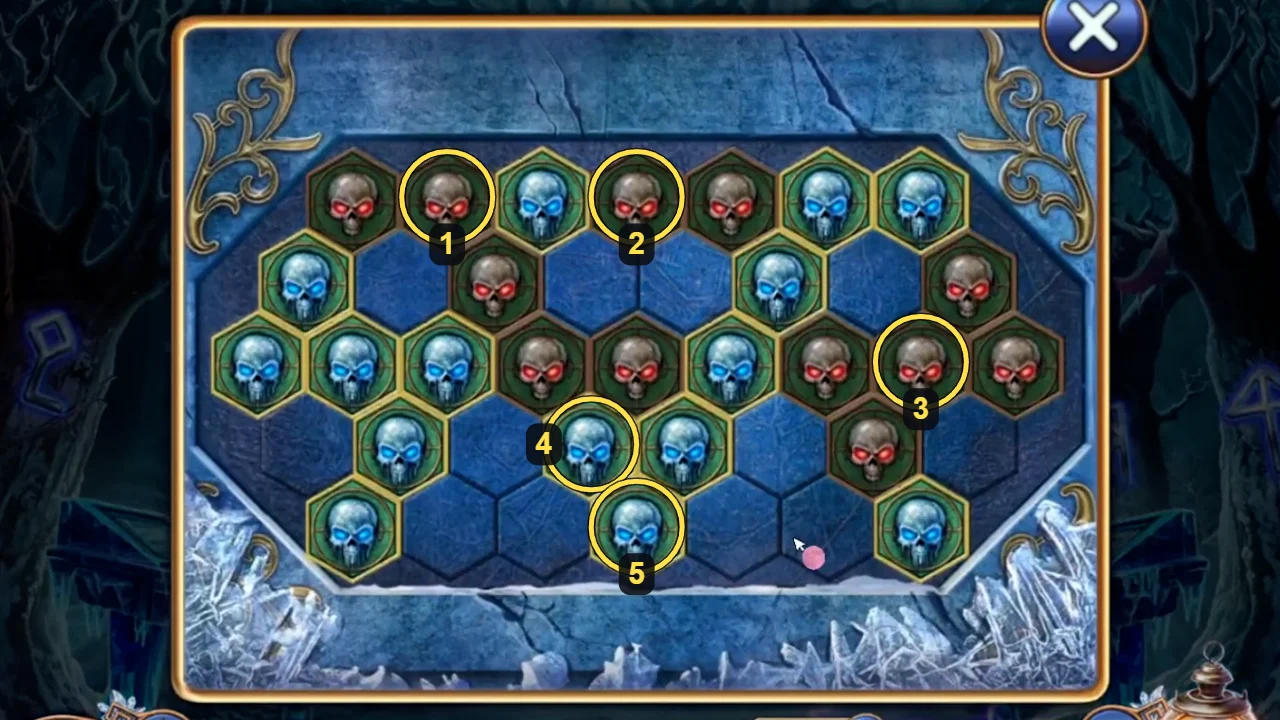
- Compare your board with the picture. A press flips that skull and every skull touching it, and pressing the same skull again undoes that press. If you've lost track, press RESET and compare the board again before starting the list.
- Press these five skulls once each, as numbered in the picture. 1: top row, second from the left. 2: top row, fourth from the left; the whole top row now glows. 3: long middle row, second from the right; only two dark skulls remain, side by side in that row. 4: the row of four skulls below it, second from the left; those two light up and three skulls at the bottom go dark. 5: bottom row, middle skull. Every skull now glows and the board closes.
Final puzzle 6: laser cubes again
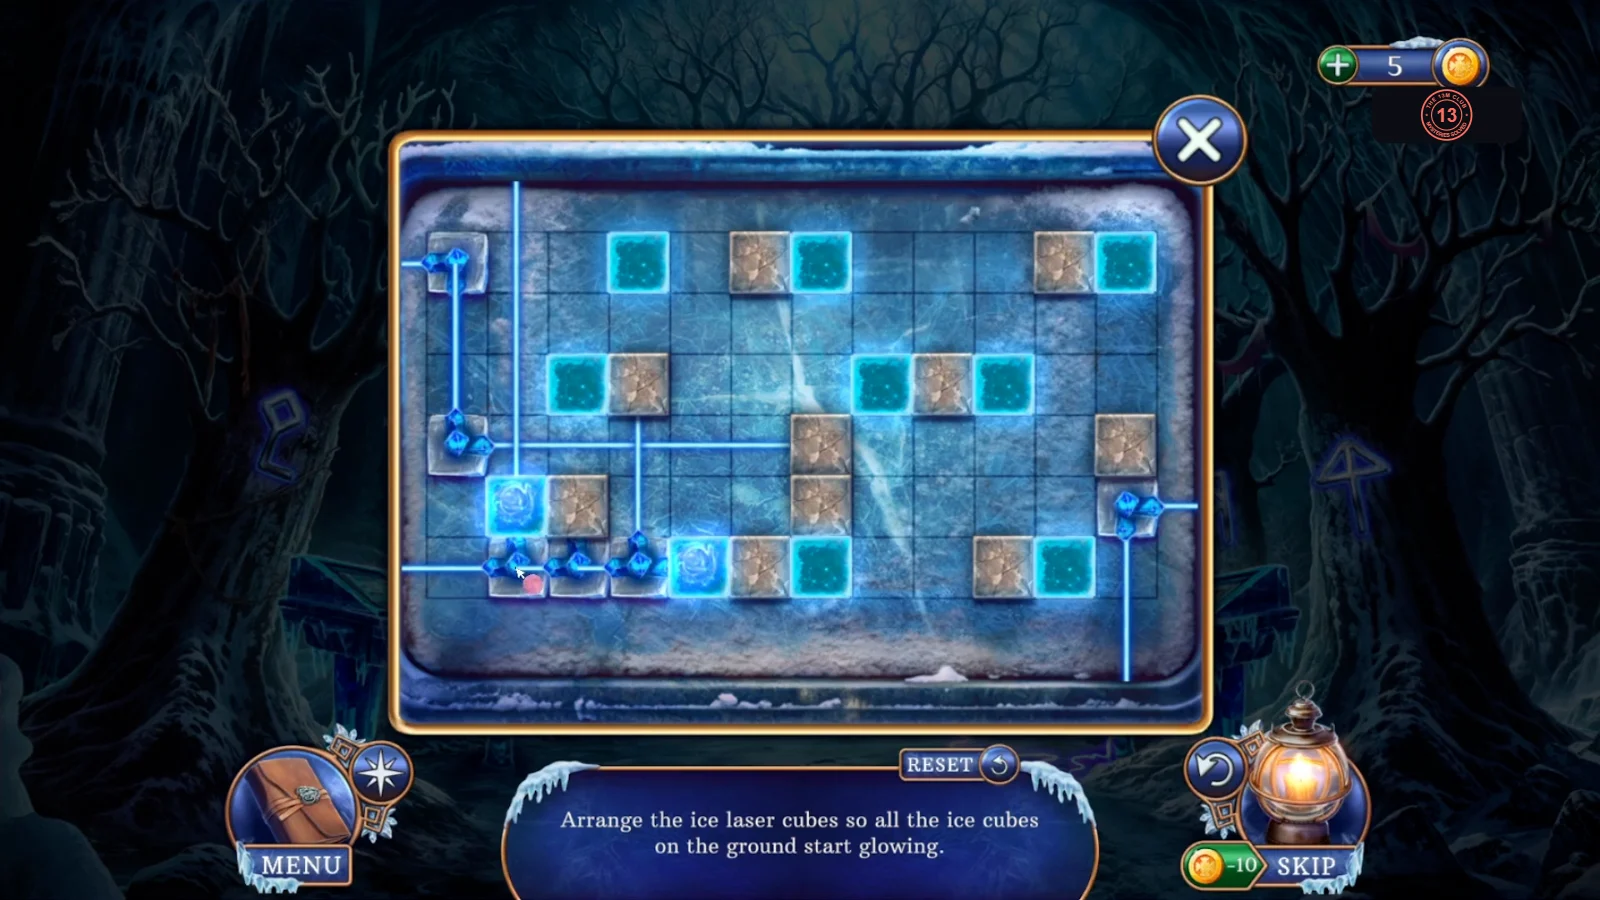
Goal: Arrange the ice laser cubes so all the ice cubes on the ground start glowing. The layout is new. This is the last puzzle of the story.
- Drag the laser cubes around the grid. Each fires a beam along its row and column until a stone block stops it. Solve the board with the same method as final puzzle 1: light the far corners first.
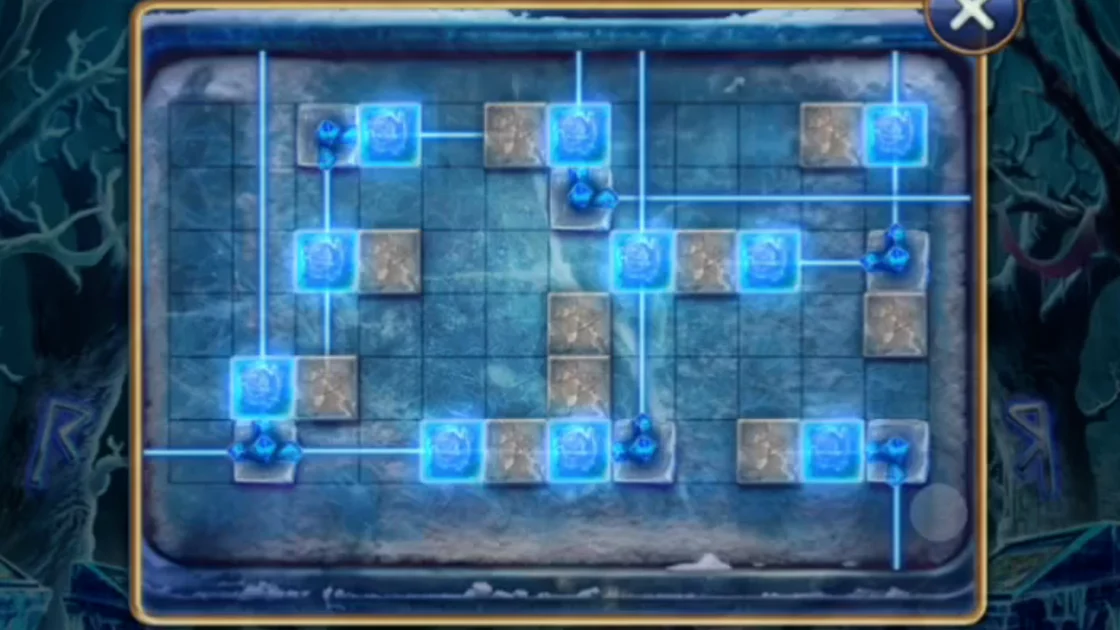
Example: one finished layout for the second laser board, just as it closes.
The ending
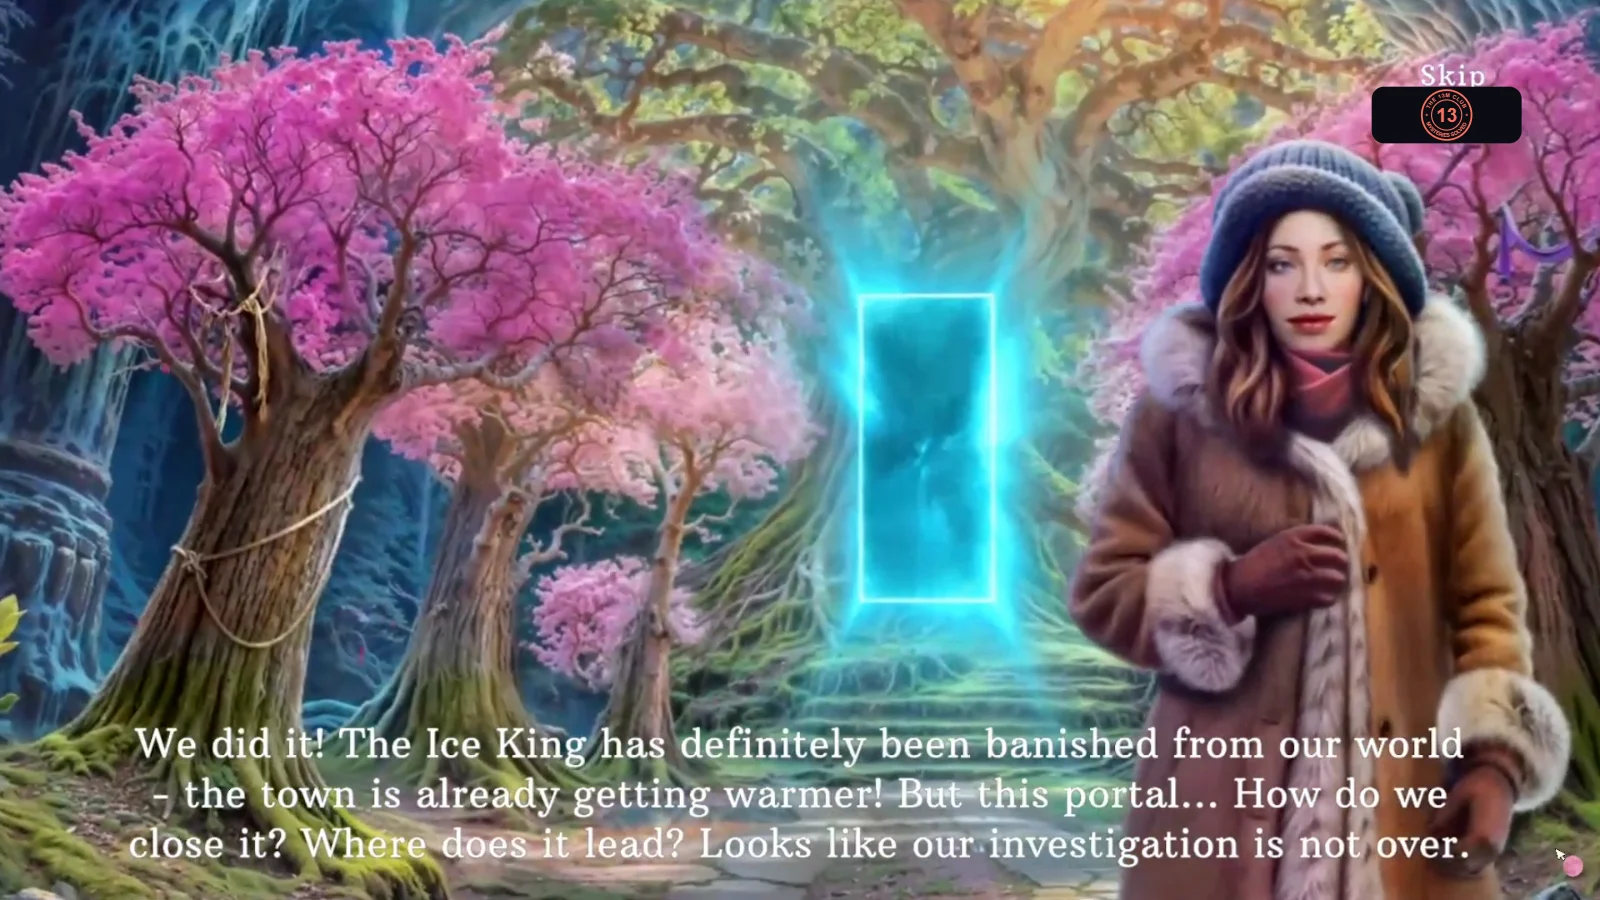
The last laser board leads straight into the closing scene, and there is nothing left to solve.
- Watch the ending. The tree's magic breaks, a portal opens and spring returns to Frostwood. After the final dialogue, a thank-you message closes the adventure. Press OK to return to the title screen.