Bridget's list
Bridget gives you a bag and a shopping list. Everything on it is in places you already know.
- In the TV Studio, use the Broken record on Bridget. She gives it back with the Repair bag and list.
- Open the bag in the inventory view and put in the Audio adapter. The list reads Blank records, Audio adapter, Glued records, Record stabilizer and Sound board.
- In the Apartment, use the Broken record on the desk beside the red pill box.
- In the Basement, read the Senior Engineer's note on the shelf, then tap the star-marked sleeve on the lower shelf. Take the Blank vinyl record.
- Put the Blank vinyl record in the bag.
- In the Apartment, use the Matches on the black wire running over the yellow dresser beside the bed. The wire falls. Take the next Wires.
- Use the Silver key on the right lock of the dresser and the Bronze key on the left. Take the Candle stub, Glue tube and Marker cap.
- Use the Marker cap on the hinge of the small red wall cabinet.
- Open the desk close-up and use the Glue tube on the Broken record. The tube stays beside it.
- Rub the Candle stub over the grey scribble on the cabinet. The hidden writing opens it. Take the Inventory map and Cotton swabs.
- Use the Cotton swabs on the Broken record and Glue tube on the desk. Take the Glued record.
- Put the Glued record in the bag.
- Use the Inventory map on the pile by the window.
Puzzle: Old equipment pairs
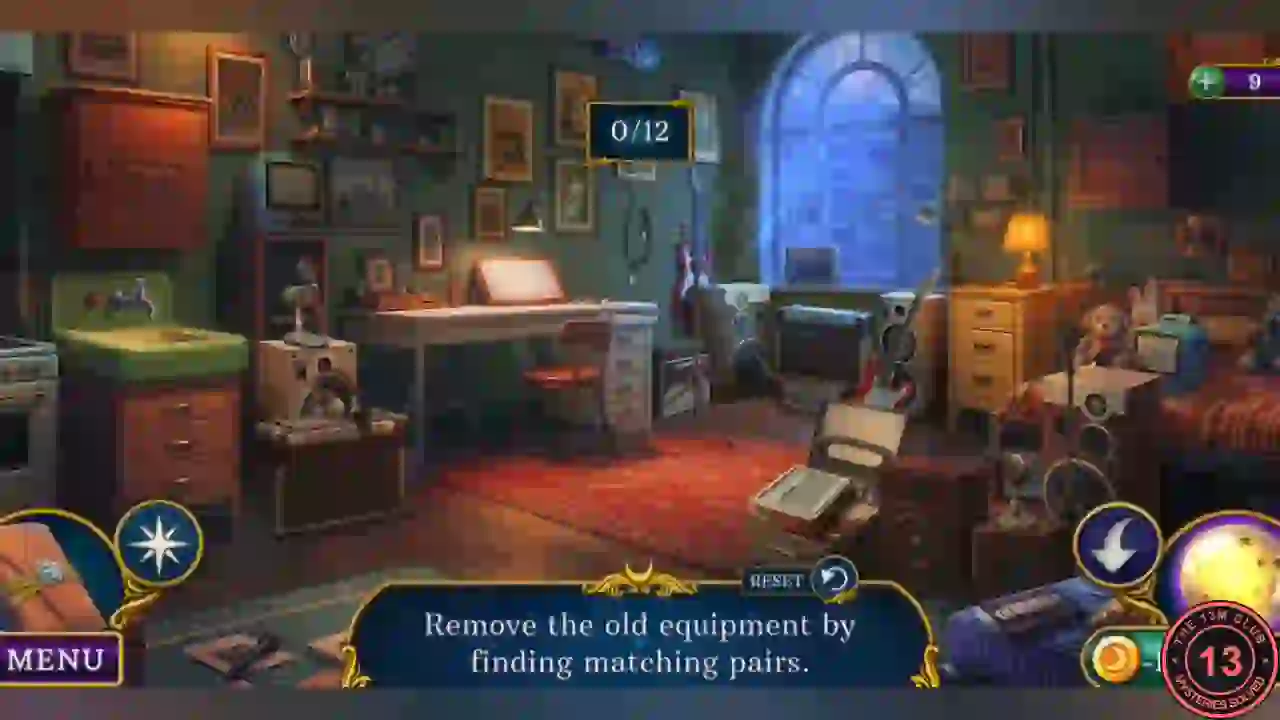
"Remove the old equipment by finding matching pairs." Old gear is scattered all over the room with a counter from 0/12. Tap two matching things to remove them. Removing one thing can reveal another underneath. RESET is below the counter.
- Match 12 pairs. They include TVs, guitars, speakers, microphones and amplifiers. Look under the items you clear for the partners you could not see.
- When the last pair goes, take the Dirty stabilizer and Sound board.
- Use the Dirty stabilizer on the sink to rinse it. Take the Record stabilizer.
- Put the Sound board and Record stabilizer in the bag to complete it. Take the Repair supplies.
Back to the soundboard
The last wire is with Bridget, and the desk still needs its supplies.
- In the Record Room, use the Repair supplies on the soundboard. New platters, a mixer, records and a cable appear. Keep the Repair supplies.
- In the TV Studio, use the Repair supplies on Bridget. Take the last of the Wires.
- In the Record Room, use the full set of six Wires on the soundboard. The wiring puzzle opens.
Puzzle: Power supply wiring
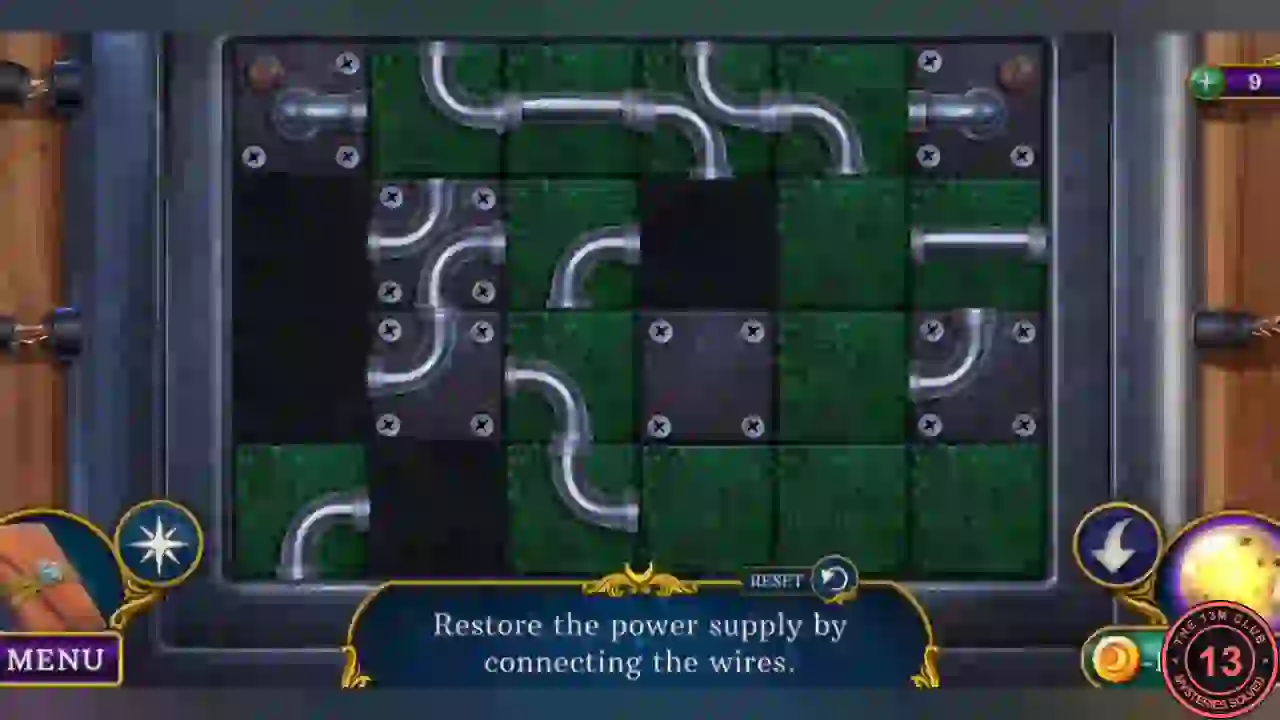
"Restore the power supply by connecting the wires." A 6 by 4 board. Green tiles slide into the black empty squares. Riveted metal tiles do not move. The aim is one unbroken pipe between the lamps in the top corners.
- Slide the green tiles to bring the wire pieces around the riveted tiles in the second column. The finished line leaves the top left, drops down the first column and rejoins through the second row.
- Run the second row across the middle to the fifth column, then loop down and back up through the right riveted tile to the top right lamp. Spare green tiles collect along the bottom row.
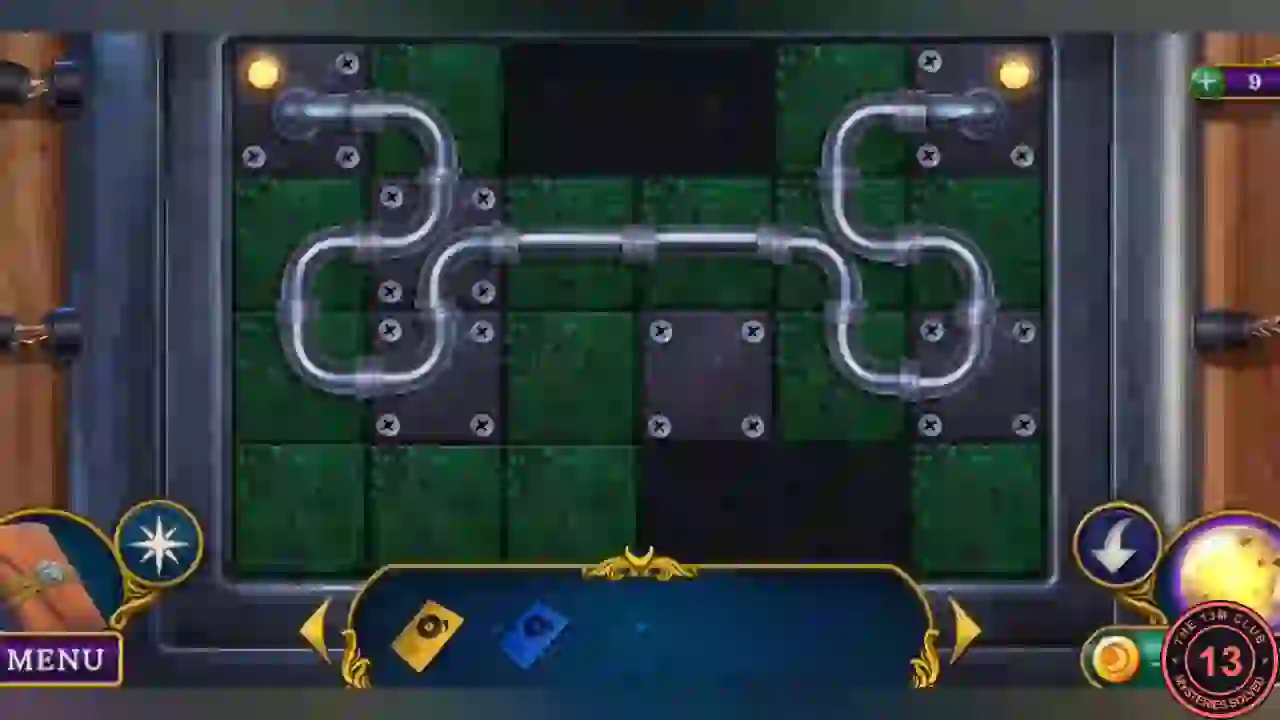
The finished wiring, with one unbroken pipe between the two lit lamps. - The console in the corner comes on.
- Use the yellow Access card on the upper console slot.
Puzzle: Laser controls
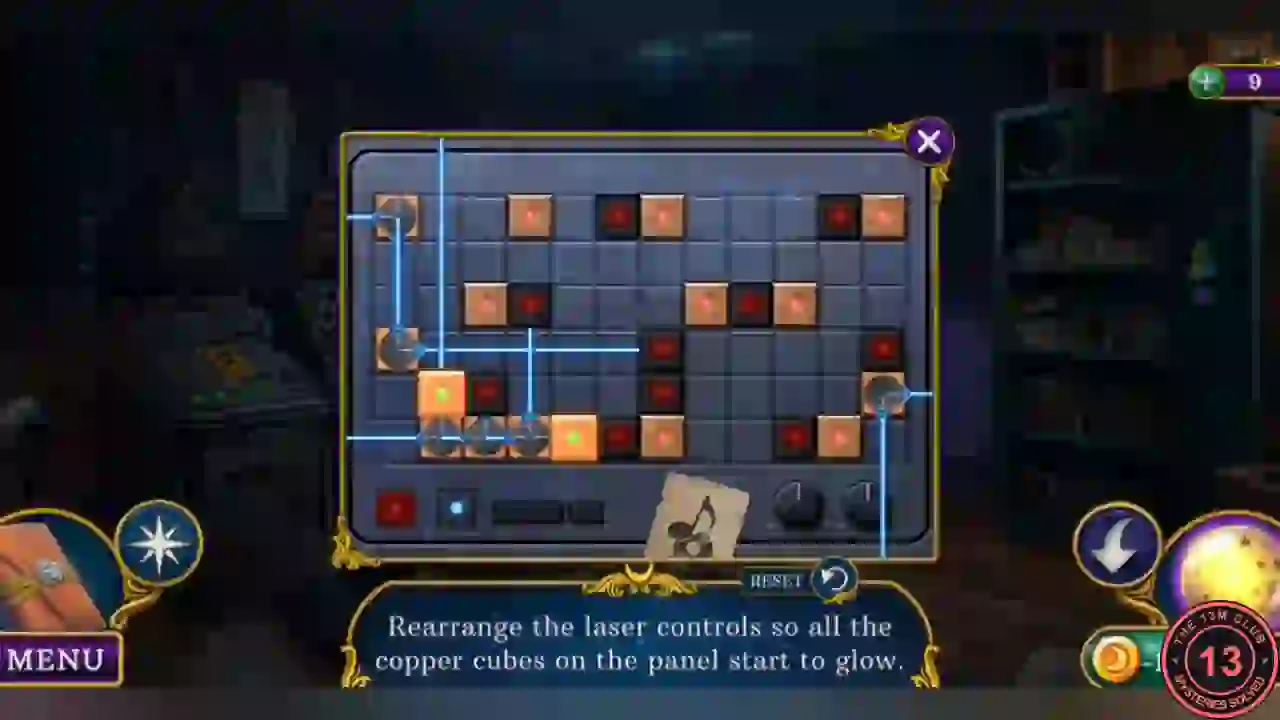
"Rearrange the laser controls so all the copper cubes on the panel start to glow." A 12 by 6 grid. Six round controls can be dragged to any free square. Each fires two beams in the directions of its arrows. A beam lights every copper cube it crosses, and dark red blocks stop it. There are ten cubes. RESET is below the panel.
- Count squares from the top left. Place the controls so that the down-and-right one is at row 1, column 3 and the down-and-left one is at row 1, column 8. The up-and-left controls go at row 3, column 12, row 6, column 9 and row 6, column 12. The up-and-right control goes at row 6, column 2.
- The last control, dropped on row 6, column 12, fires left into the last dark cube.
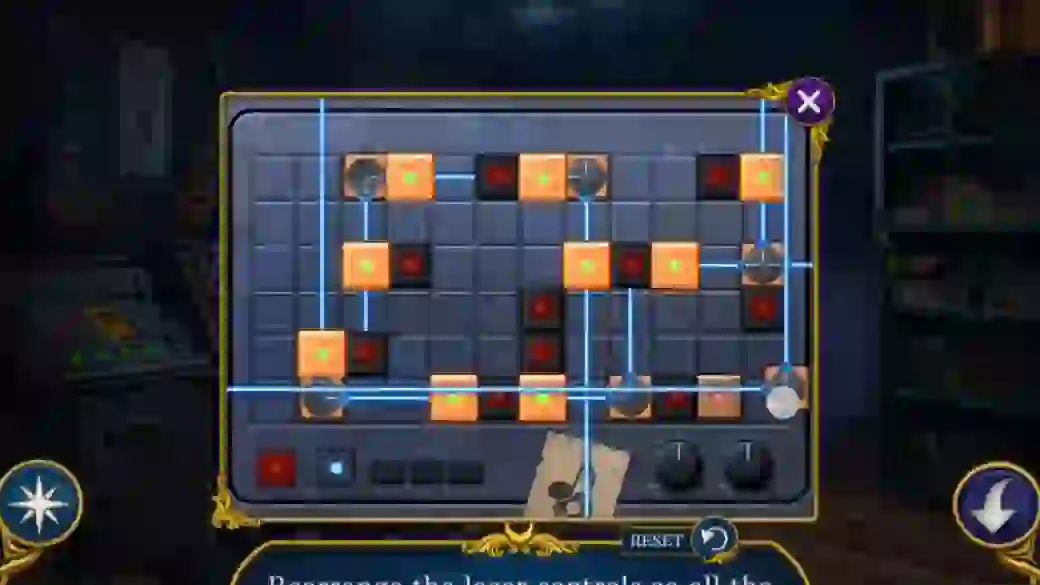
All six controls in place. The last cube at the bottom right lights a moment later and the panel closes. - Use the blue Access card on the lower console slot.
Puzzle: Music tiles
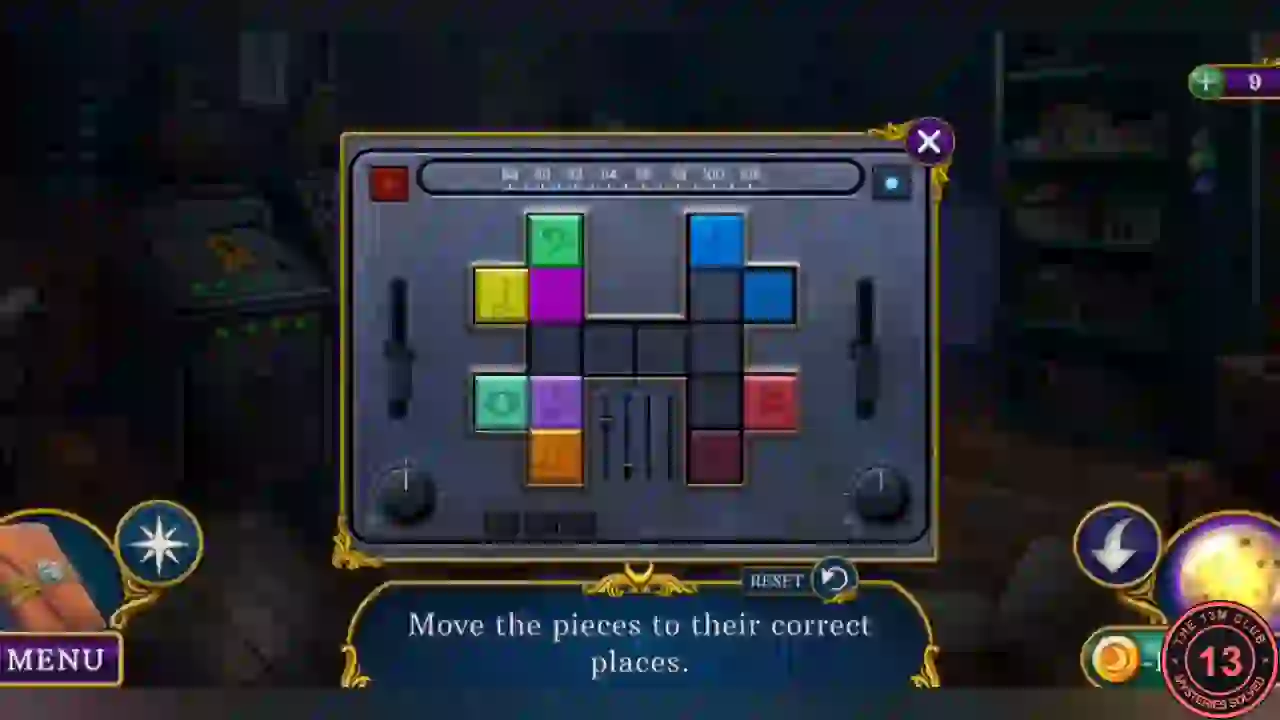
"Move the pieces to their correct places." Eight coloured tiles with music symbols sit in a double cross and slide along the dark squares. This is a short rearrangement, so only the final layout is given. RESET is below the panel.
- On the left arm, finish with the teal eye on top, green bass clef at the side, orange ff at the lower side and yellow note on the bottom. On the right arm, finish with the magenta tile on top, blue treble clef at the side, purple note at the lower side and red sharp on the bottom.
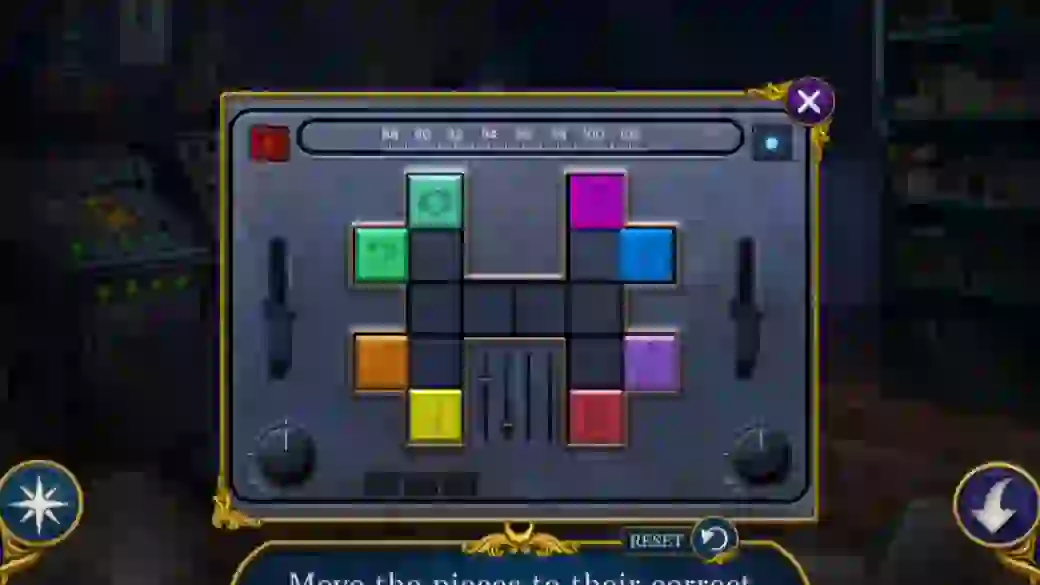
The final layout of the music tiles. - Take the Song of the Dawn from the console.
Play the Song of the Dawn
One last trip to the TV Studio.
- In the TV Studio, open the gramophone and use the Song of the Dawn on it.
- Watch the ending. The town brightens, the smoke lifts and the sleepers wake at the tables outside.