Puzzle: Star box
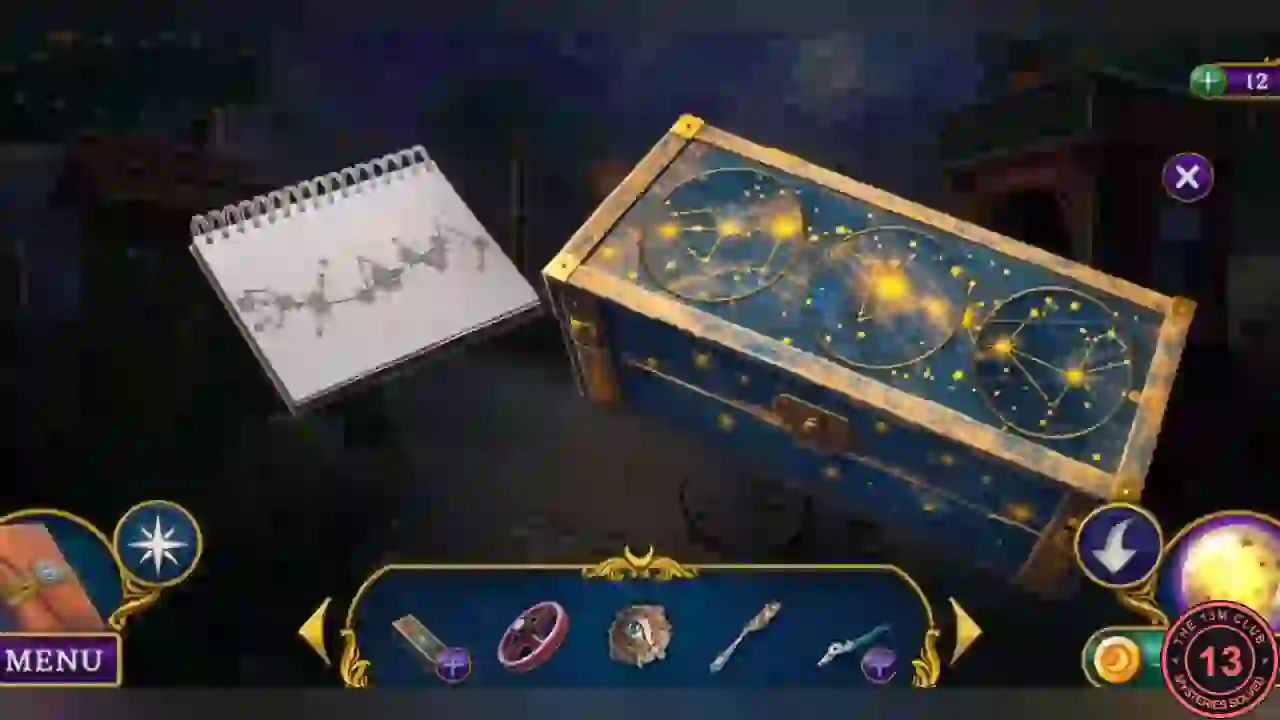
You land in Park Square. "This park looks huge. I'll need directions so I don't get lost." The map table is missing figurines and the Automaton booth needs a wind-up key, but the booth projector works now.
- Look around Park Square: the map table is missing figurines and the Automaton booth has a slot for a wind-up key.
- Use the Film on the projector in the booth and take the Stars drawing that appears.
- Open the Star box in the inventory view, fit the Constellation disc in the round slot and lay the Stars drawing beside it. Tap each of the three discs to rotate it until its lines match the drawing.
- Take the Kerosene, Worker figurine, Broken pruners and Dirty fork.
Signposts and the pruners
Open the way to the Rest Area and the Amusement Area, then assemble a working pair of pruners.
- At the Park Entrance, use the Fountain valve and then the Dirty fork on the statue fountain. Take the Two-pronged fork.
- Use the Two-pronged fork on the bench slats. Take the Signboard and Pruners half.
- In the Park Alley, use the Kerosene on the fallen tree and take the second Signboard from the burnt log. The Kerosene stays in your inventory.
- In Park Square, put both Signboards on the signpost. West leads to the Rest Area and east to the Amusement Area.
- In the Rest Area, take the Worker figurine beside the radio and the Grindstone from behind the red tent flap. The radio's dial is missing and the trailer needs a key.
- Check the generator behind the flap and the flower bed. Both need items you do not have yet.
- In the Amusement Area, take the Pruners bolt and Lightning rod base from the control console.
- Combine the Broken pruners, Pruners half, Grindstone and Pruners bolt in the inventory view to make the Pruners.
- Look at the red mutoscope. It needs a reel and a park token. Its number drum is your later door clue.
- In Park Square, use the Pruners on the ivy-covered panel. Take the Worker figurine and Copper tube. Keep the Pruners.
Puzzle: Park map table
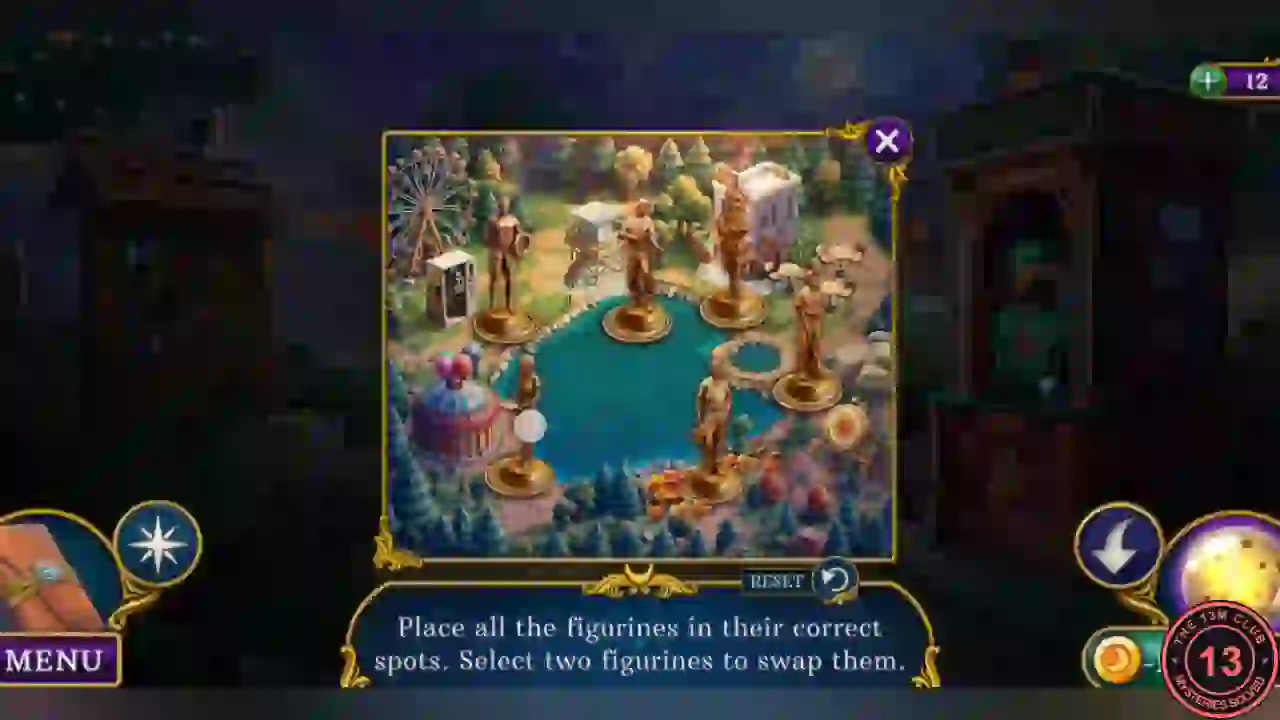
"Place all the figurines in their correct spots. Select two figurines to swap them." Six figurines stand around the lake among landmarks such as the Ferris wheel, watchtower, shop, cafe tables, target and circus tent.
- Use the three Worker figurines on the map table.
- Tap two figurines to swap them. Each figurine belongs at the landmark that suits it. Solved layout: the man carrying a case by the Ferris wheel (top left), the lifeguard with the life ring by the watchtower (top centre), the woman with a tray by the shop (top right), the man holding a tool at the right-hand pedestal by the cafe tables, the jester by the circus tent (bottom left) and the man with a long pole at the bottom of the lake.
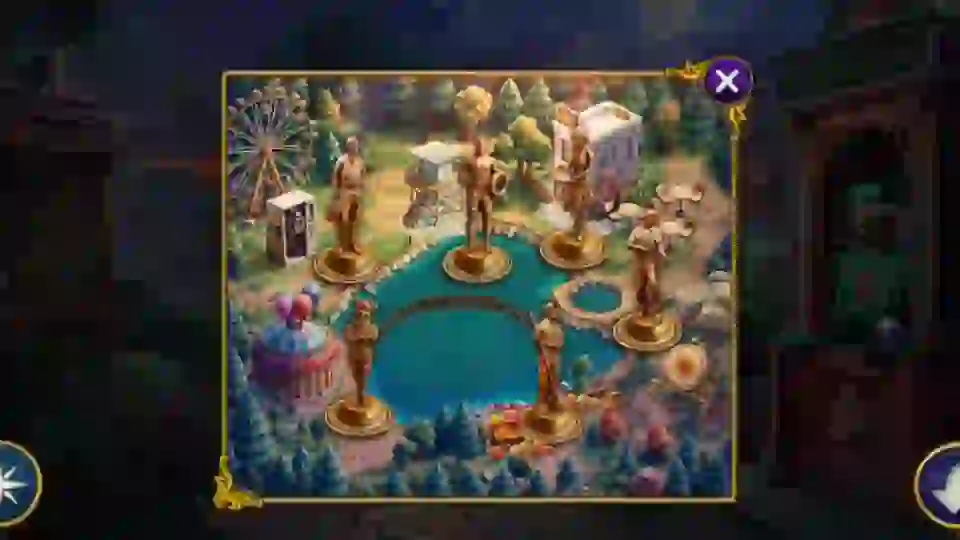
The solved map table, with every figurine at its landmark. - Take the Shovel and Drawer handle.
Lightning rod, ticket and console
Your task now reads "Get a ticket and start the Ferris wheel."
- In the Tent, use the Drawer handle on the luggage drawer. Take the Ghostly ring and Fuse.
- Use the Ghostly ring on the mirror hand. Take the Wind-up key and Coil of wire.
- Combine the Lightning rod base, Copper tube and Coil of wire in the inventory view to make the Lightning rod.
- In the Park Alley, use the Lightning rod and then the Shovel on the mound beside the burnt log. Take the Start lever and first Picture part.
- In Park Square, use the Wind-up key on the Automaton booth. Take the Ferris wheel ticket and Plane.
- In the Amusement Area, use the Fuse and Start lever on the control console.
- Use the Ferris wheel ticket on the gate to start the hidden-object scene.
Puzzle: Ferris wheel hidden objects
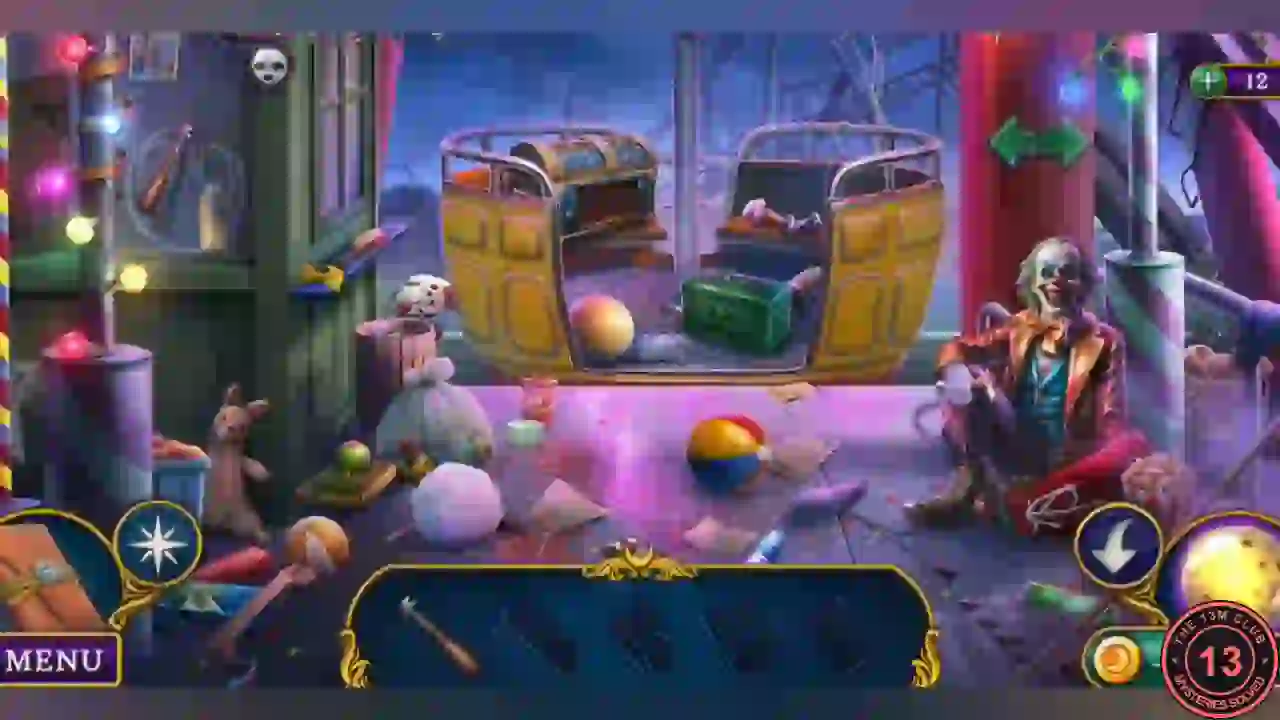
This is an item-use scene. The tray at the bottom shows silhouettes and the green arrows move between three carriages: one with a trunk and toolbox, one with the chained worker, and one with a target and dark compartment.
- Take the arrow and use it on the target. Use the deflated balloon on the green helium tank, then the inflated balloon on the pair of balloons up high to bring down the glass cutter.
- Use the glass cutter on the left window to reveal a figurine and spray can. Put the figurine on the blue pedestal in the target carriage. Use the moon template and spray can on the blue board at the worker's feet.
- Use the board on the chest in the trunk carriage. Give the jester hat from the chest to the clown, then use the flashlight on the dark compartment.
- Use the emblem tool on the green toolbox and take the pliers. Use the pliers on the worker's chain.
- Take the Picture part. The worker is still asleep.
The Trailer and the mutoscope
Peek into the worker's dream, then search the Trailer. Everything in this group leads to the five Picture parts for the token board.
- Use the Eye of Morpheus on the sleeping worker. Take the Trailer key and Park token.
- In the Rest Area, use the Trailer key on the door and go in. Take the Puppet amulet from the projector, which needs repair.
- Take the Mutoscope reel from the bookshelf, plus the Insulating tape and Picture part inside the Trailer. Note the gap on the shelf, the safe and the stove.
- At the Amusement Area, use the Puppet amulet on the eastern door by the puppet stage. Take the Plane propeller and Picture part.
- Use the Mutoscope reel and Park token on the mutoscope and watch the film. Take the Controller button and the Picture part.
- In Park Square, use the five Picture parts on the board to start the token puzzle.
Puzzle: Park token board
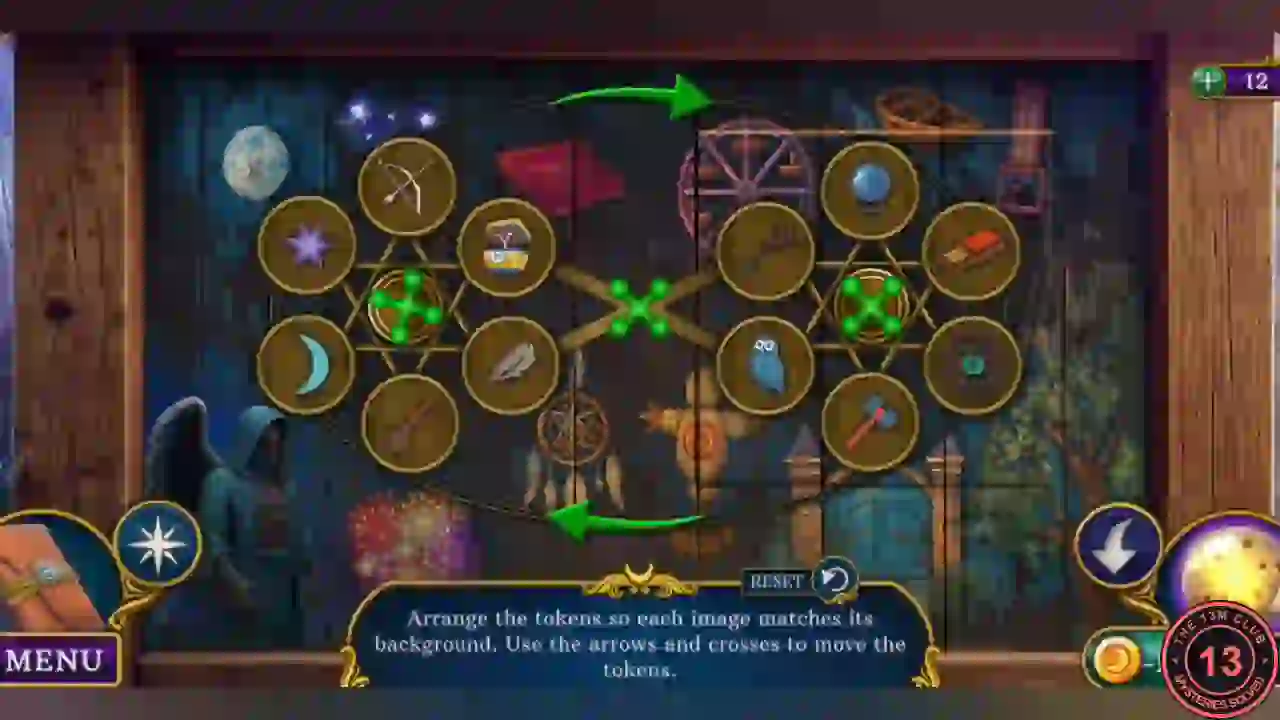
"Arrange the tokens so each image matches its background. Use the arrows and crosses to move the tokens." Each of the two wheels holds six tokens. Its green cross rotates that wheel, and the arrows at top and bottom swap tokens between the wheels.
- Spin the left and right wheels until the tokens to exchange sit by the green X, then swap them with the top and bottom arrows. A token lights up when it sits on its own background.
- Solved layout, clockwise from the top: left wheel star, bow, chest, matches, eye, crescent; right wheel paddle, hammer, owl, key, crystal ball, feather.
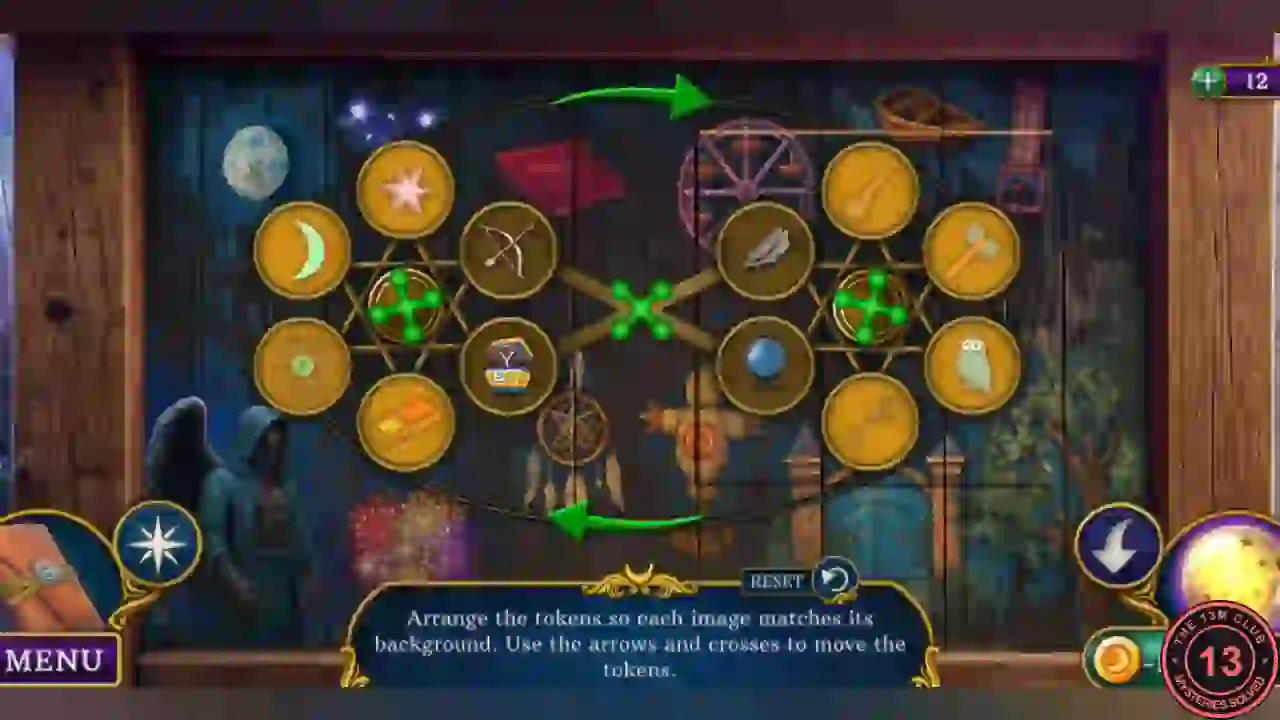
The solved token board. Each token sits on its matching background. - Take the Plane wing, Toggle switch and Puppet part.
RC plane, herbs and the Moon Garden
Gather the ingredients for the Awakening drink. Your task is "Find a way to wake the sleeping park worker."
- In the Rest Area, use the Toggle switch on the radio. Hear "Cease your resistance... and drift into slumber." Take the Batteries.
- Combine the Plane, Plane wing, Batteries, Plane propeller and Controller button in the inventory view to make the RC plane.
- Use the RC plane on top of the tall purple tower and go up. Read the note on the binoscope, then take the Guiding thread and Bookend.
- In the Trailer, use the Bookend on the gap in the bookshelf. Take the Silver pouch and List of ingredients.
- In the Rest Area, use the Pruners on the flower bed. Take the Healing herbs and Rubber gloves.
- Use the Insulating tape and Rubber gloves on the generator wire, then press its button. The tent lights up. Take the Coffee beans, Puppet part and Kerosene lamp.
- In the Park Alley, use the Guiding thread on the ivy path at the back to reach the Moon Garden.
- Take the Puppet part, Glass bottle and Coffee grinder in the Moon Garden. The owl altar, goose and broken bridge all wait for later.
- Use the Silver pouch on the glowing blue flowers for the Moon pollen.
- At the Park Entrance, use the Moon pollen and Glass bottle on the statue fountain to fill the Moon water.
- Combine the List of ingredients, Coffee beans, Healing herbs and Moon water in the inventory view to get the Set of ingredients.
- In the Trailer, put the Set of ingredients, Coffee grinder and Kerosene on the stove.
Puzzle: Cooking the Awakening drink
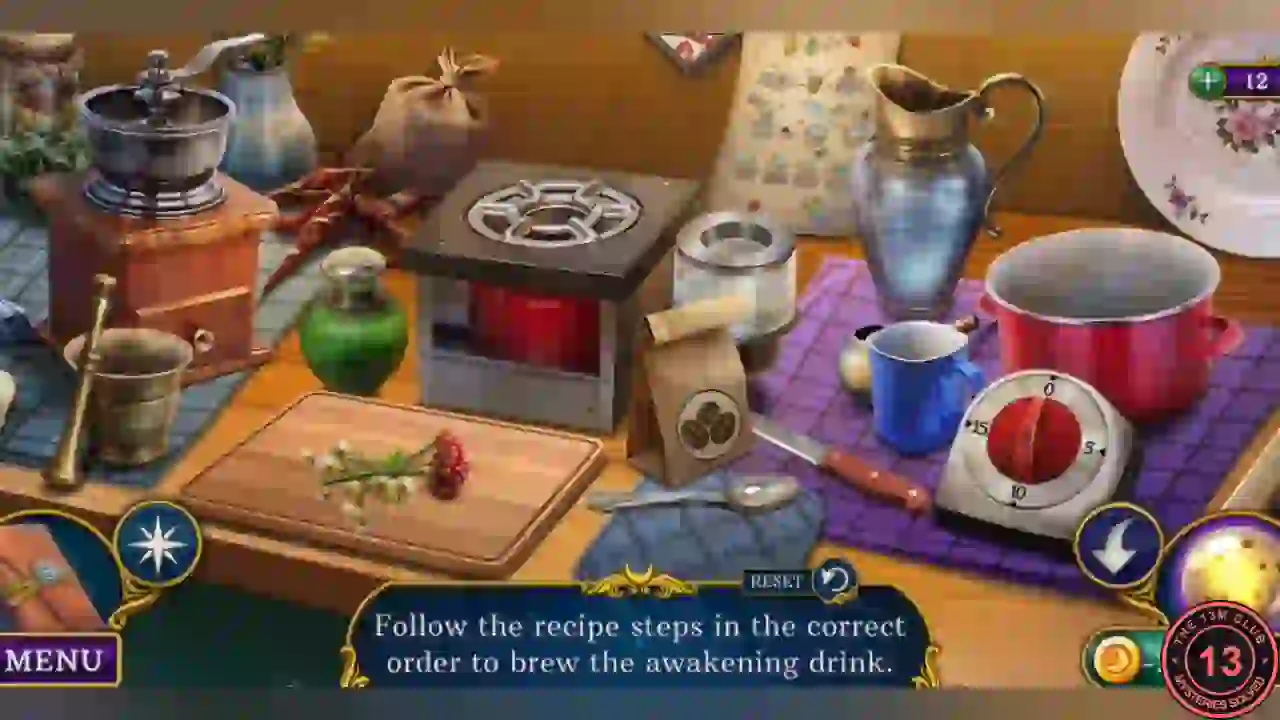
Follow the recipe sheet shown in the cooking view. A wrong move restarts the recipe, so do the stages in order.
- Cut the flowers with the knife on the board, put them in the mortar and crush them with the pestle. Put the mortar on the burner, light the flame and set the timer to 5 by tapping the 5 mark on its dial.
- Pour the coffee beans into the grinder and open its drawer. Pour water and then Moon water from the green bottle into the red pot. Add the ground coffee.
- Place the pot on the burner, stir with the ladle and tip the mortar of herbs in. Stir again.
- Set the timer to 10 by tapping the 10 mark on its dial. When the pot has boiled, pour it into the blue mug. Take the Awakening drink and Exhaust pipe.
Waking the worker and the fireflies
Wake the worker, repair the puppets' trapdoor and clear the goose out of the way for the Skull key.
- At the Ferris wheel, use the Awakening drink on the sleeping worker. Take the Puppet part and Switch.
- At the puppet stage, use the four Puppet parts. The trapdoor opens: take the Glass lamp shade and Stone rune.
- Combine the Kerosene lamp and Glass lamp shade in the inventory view. The lamp still needs a scent.
- In the Moon Garden, use the Exhaust pipe on the glowing orange flower, not the blue one, to collect nectar. Pour it into the lamp.
- Use the bait on the owl altar grate to gather the fireflies.
- Use the fireflies on the goose. Take the Skull key and Red wire from the empty basket.
- In the Amusement Area, use the Skull key on the ornate door lock.
Puzzle: Number door
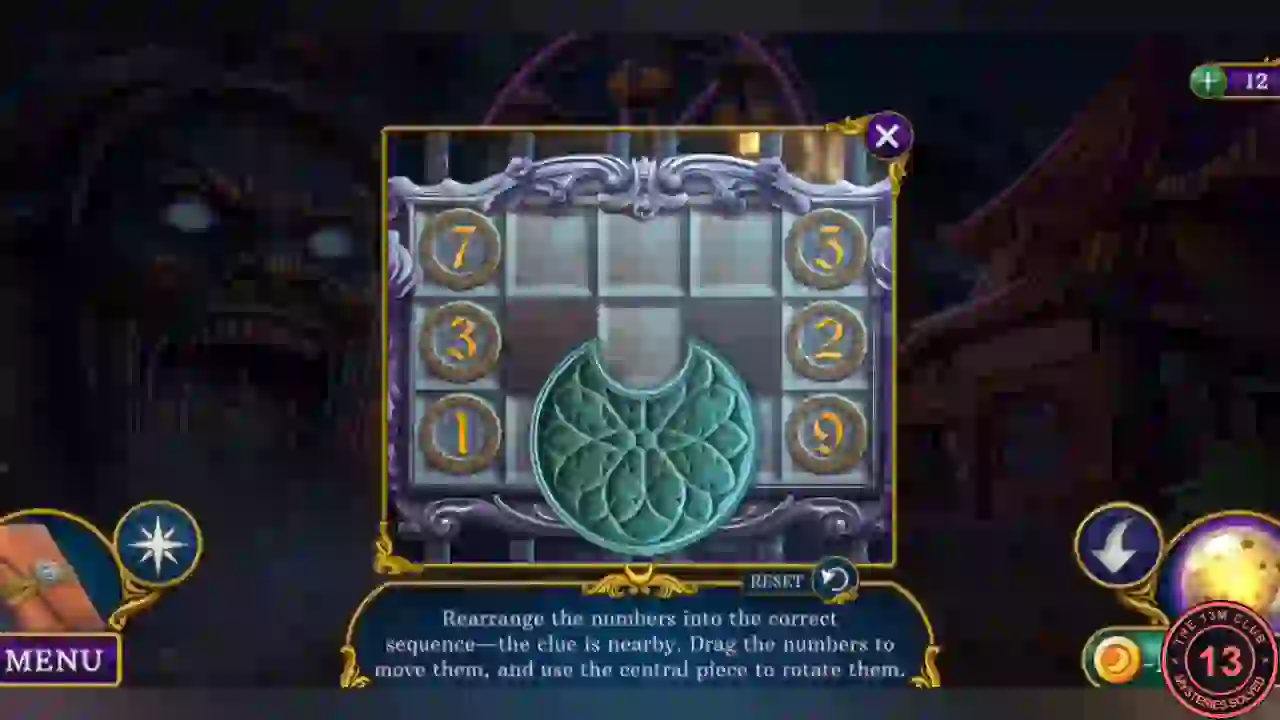
"Rearrange the numbers into the correct sequence-the clue is nearby. Drag the numbers to move them, and use the central piece to rotate them." The clue is the number drum on the red mutoscope: 39, 21, 57.
- Read the mutoscope drum if you have not already: 39 / 21 / 57, one line per row.
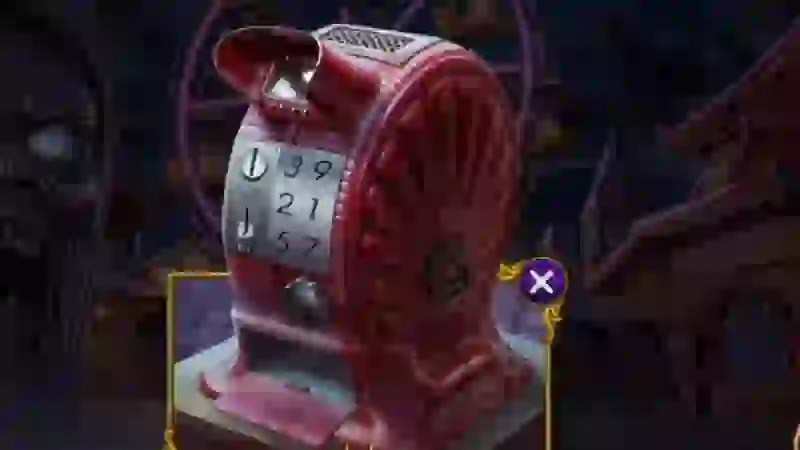
The number drum on the red mutoscope reads 39 / 21 / 57. - Drag tiles along the outer columns. Tiles pass through the centre disc, which you rotate to change their direction. A tile lights cyan when it is correct. Set the left column first to 3, 2, 5 from the top.
- Then set the right column to 9, 1, 7. Moving a number through the disc can flip it, so turn the disc to bring it back upright before you park it.
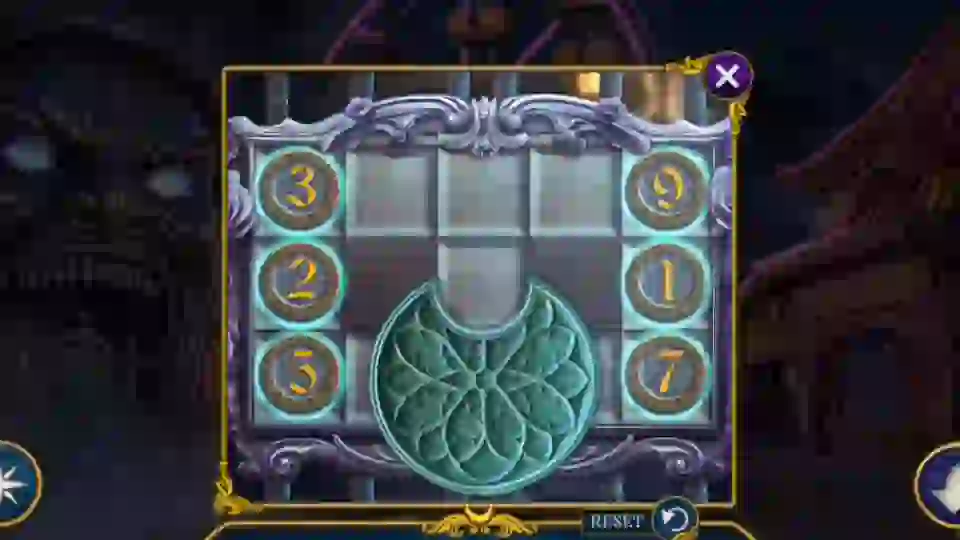
The solved door: 3, 2, 5 on the left and 9, 1, 7 on the right, all lit cyan. - The door opens.