Waking Bridget
The studio worker is asleep and a barrier covers the gramophone. She can help with the equipment if you brew her an awakening drink.
- Open the console and take the Kaleidoscope.
- Open the gramophone close-up and take the Glass globe. Do not touch the barrier yet.
- Climb the ladder close-up and look at the wall panel. It shows ACCESS DENIED.
- Use the Pruners on the vine round the picture of the town. The picture swings aside. Take the Donut amulet.
- In the Diner, use the Donut amulet on the glass cabinet lock. Take the Water bottle and Canned sardines.
- At Near TV Tower, use the Canned sardines on the cat. It moves off to eat. Take the Piano key, Broken jack and Decorative snowflakes.
- Open the Snow globe base in the inventory view. Use the Glass globe, Water bottle and Decorative snowflakes on it. It still needs glycerol.
- In the Diner, use the Kaleidoscope on the cash register as a lever. Take the Glycerol and Piano key.
- Finish the Snow globe in the inventory view by adding the Glycerol and closing the snowflakes in.
- On Town Street, use the Snow globe on the empty spot in the shop's globe row. Take the Candle, Piano key and Coffee machine portafilter.
- In the Diner, use the second Candle on the wall sconce and light it with the Matches. The wall opens onto the pantry.
Puzzle: Pantry hidden objects
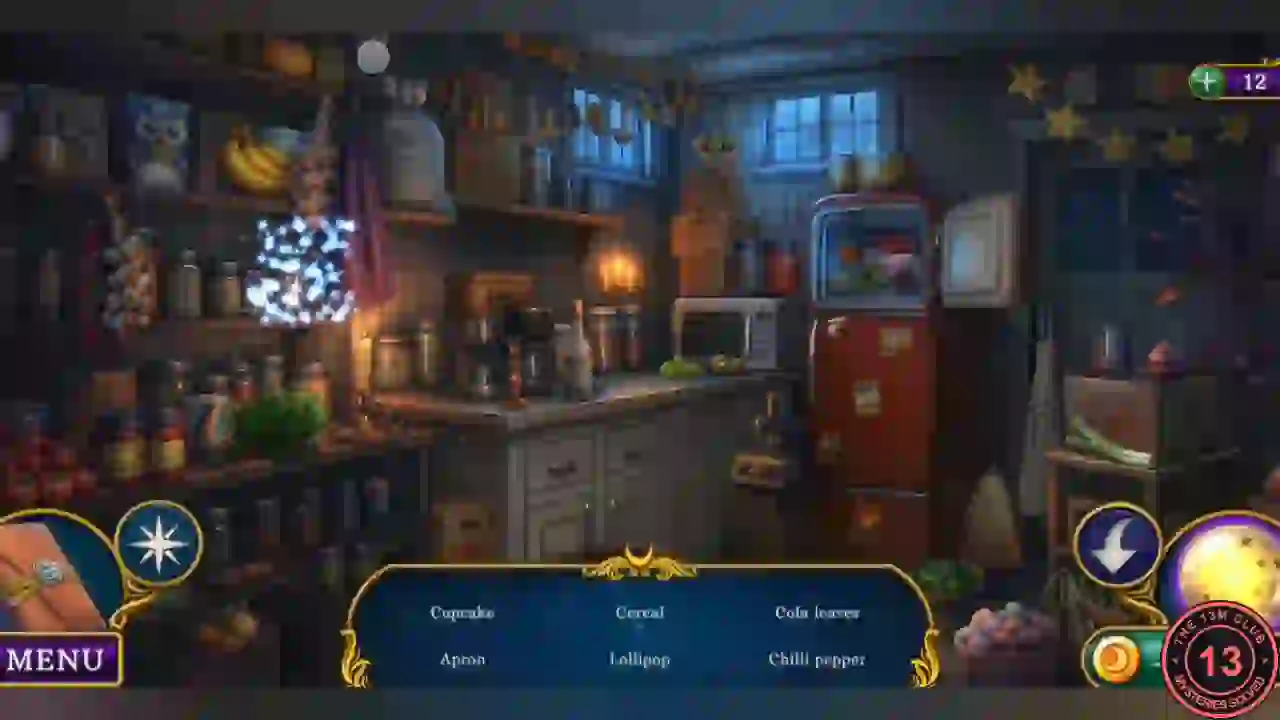
A hidden-object scene with word lists that change as you find things.
- Find the objects on the first list. It included Ginger root, Espresso maker, Cola leaves, Apron, Ice cube tray and Chili pepper.
- Find the rest, including Cupcake, Food processor, Lollipop, Cinnamon and Cereal.
Coffee for Bridget
The pantry gave you what the coffee machine needs.
- In the Diner, use the ingredients and Coffee machine portafilter on the coffee machine. Take the filled mug.
- In the TV Studio, use the mug on the sleeping worker. Bridget wakes. Take the Access card and Piano key.
- Use the Access card on the panel at the top of the ladder. This opens the Roof.
- On the Roof, take the Jack part from the console and the Cultist's portrait. Look at the green box too.
- On Town Street, use the Cultist's portrait on the shop's locked purse. Take the Piano key and Open-end wrench.
- Use the five Piano keys on the piano's five gaps.
Puzzle: Piano note panels
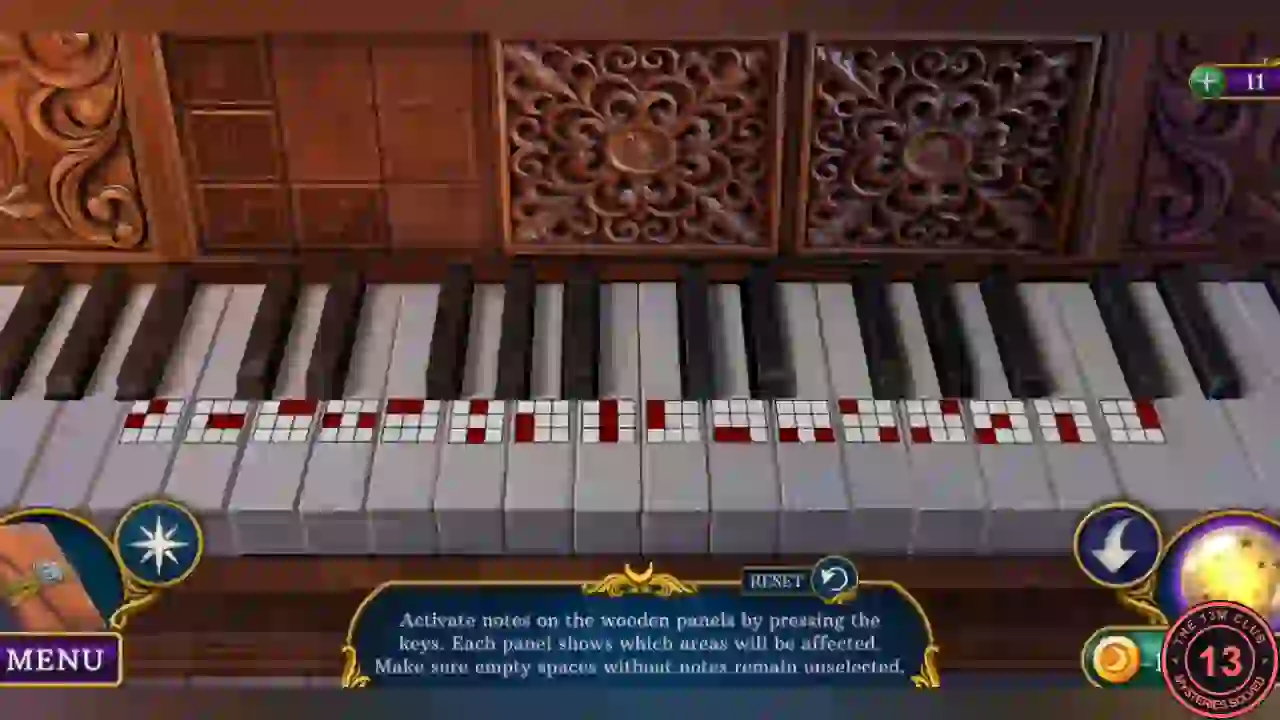
"Activate notes on the wooden panels by pressing the keys. Each panel shows which areas will be affected. Make sure empty spaces without notes remain unselected." Three carved panels above the keyboard open one at a time. Each hides a 3x3 grid, and some cells carry a note. Each white key has a small red pattern showing which cells it switches. Pressing a key flips those cells, so two keys that share a cell cancel it out. A green cell is correct. A red cell has no note and must be cleared. Keys below are counted 1 to 16 from the left.
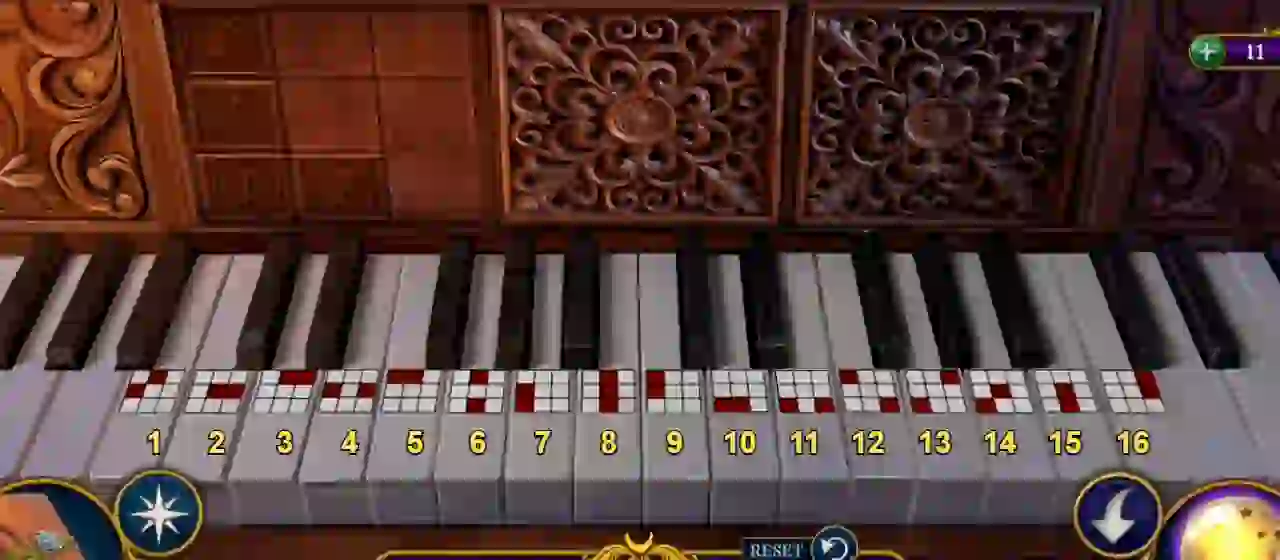
- First panel (notes in the whole left column and the bottom middle): press keys 9 and 10.
- Second panel (notes along the top left and top middle, the centre, and the bottom middle): press keys 5 and 15.
- Third panel (notes top left, top right, middle left, bottom middle and bottom right): starting from a clear panel, press keys 4, 5, 7, 8, 9, 12, 14 and 16 once each. Because each key toggles its cells, the order does not matter, and pressing a key a second time undoes it. Check that only those five note cells are lit and none are red.
Shutting down the dream relay
The piano's reward lets you finish the jack, and the jack frees what the studio console needs.
- Take the Jack lever and Master key from inside the piano.
- Open the Broken jack in the inventory view. Add the Jack part and Jack lever, then tighten it with the Open-end wrench.
- In the Diner, use the Jack on the fallen neon sign. Take the Empty flash drive and Baseball from under it.
- In the TV Studio, use the Master key and Empty flash drive on the console's slots. The screens wake.
Puzzle: Monitor silhouettes
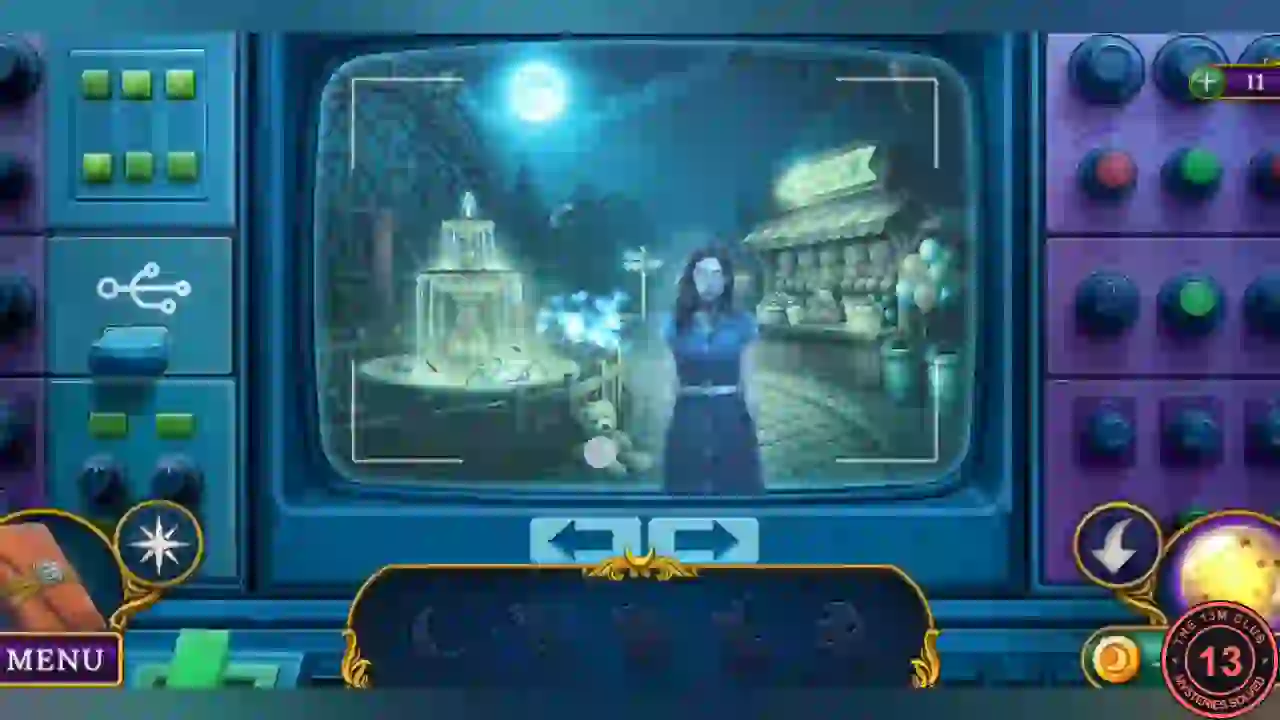
A hidden-object scene spread over three video feeds. The tray at the bottom shows silhouettes instead of a word list, and arrows switch between the feeds.
- Find each silhouette in the three feeds: the man in the white coat, the woman by the fountain and the man at the carousel. Use the arrows to change feeds when you run out of matches on one.
- The console downloads the program. Take the Flash drive and the Thermite bomb from the console's side compartment.
The safe and the roof console
Two short trips. One gets the clue for the gramophone, the other starts the relay shutdown.
- Use the Thermite bomb on the green safe door behind the picture, then light it with the Matches. Take the Scroll with clue.
- On the Roof, use the Flash drive on the console port.
Puzzle: Roof tile path
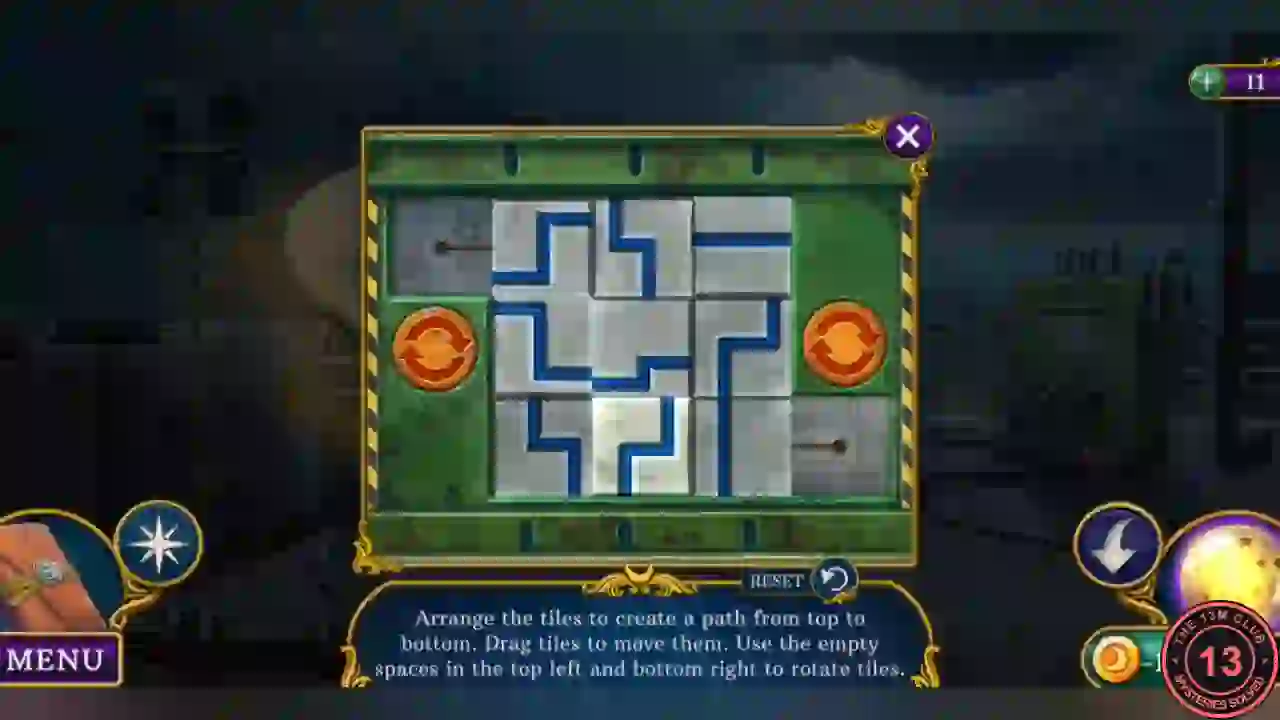
"Arrange the tiles to create a path from top to bottom. Drag tiles to move them. Use the empty spaces in the top left and bottom right to rotate tiles." The two orange buttons at the sides turn the tile in the matching spare corner. The layout does not need any one route, and this takes a long time by hand, so the steps give an approach, not a move list.
- Pick one column of the grid and start with the tile that connects to the top edge. Slide tiles into the spare spaces to get at the ones you need. Use the orange buttons to turn a tile before sliding it back in. Bright blue lines show a joined piece of the path.
- Keep extending the lit line downward until it reaches the bottom edge. The solved image shows one finished layout.
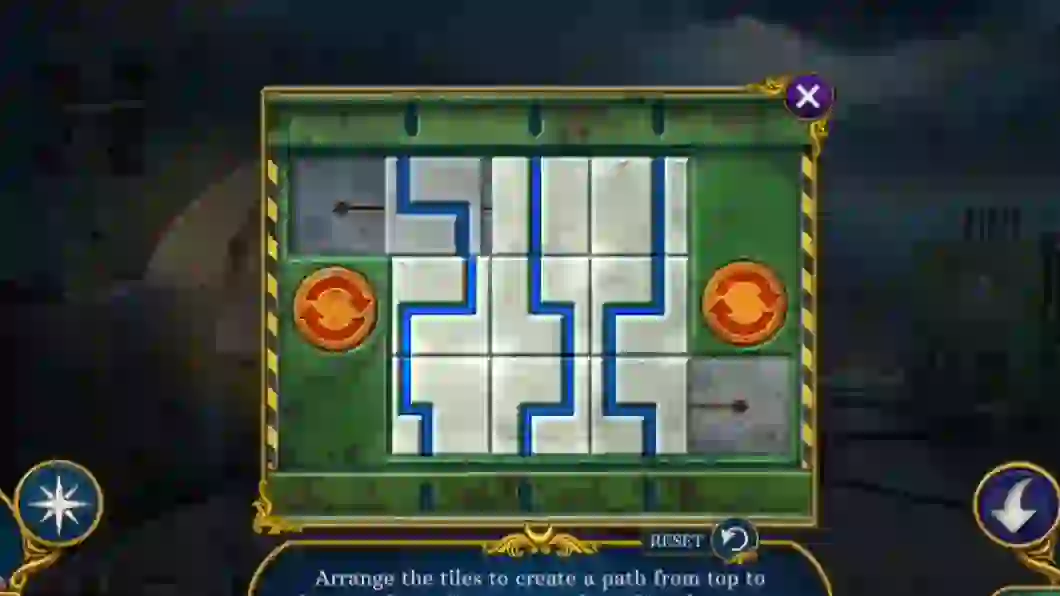
One finished layout: unbroken blue lines run from the top edge to the bottom.
Puzzle: Gramophone disks
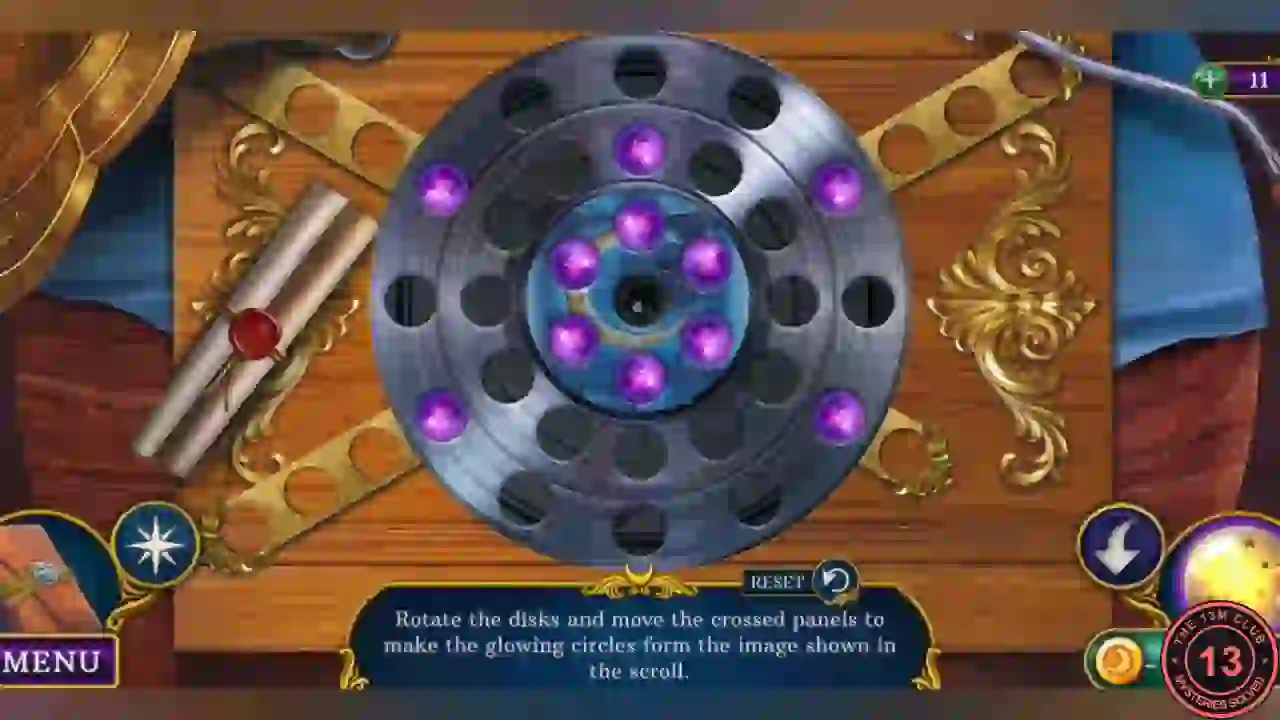
"Rotate the disks and move the crossed panels to make the glowing circles form the image shown in the scroll." Three rings hold glowing purple circles. Drag a ring to turn it. The two crossed gold bars slide along their diagonals and carry the circles they hold, which is how a circle moves from one ring to another. The scroll stays rolled up at the left of the board, so use the solved arrangement pictured here as your target.
- In the TV Studio, use the Baseball on the gramophone, then place the Scroll with clue.
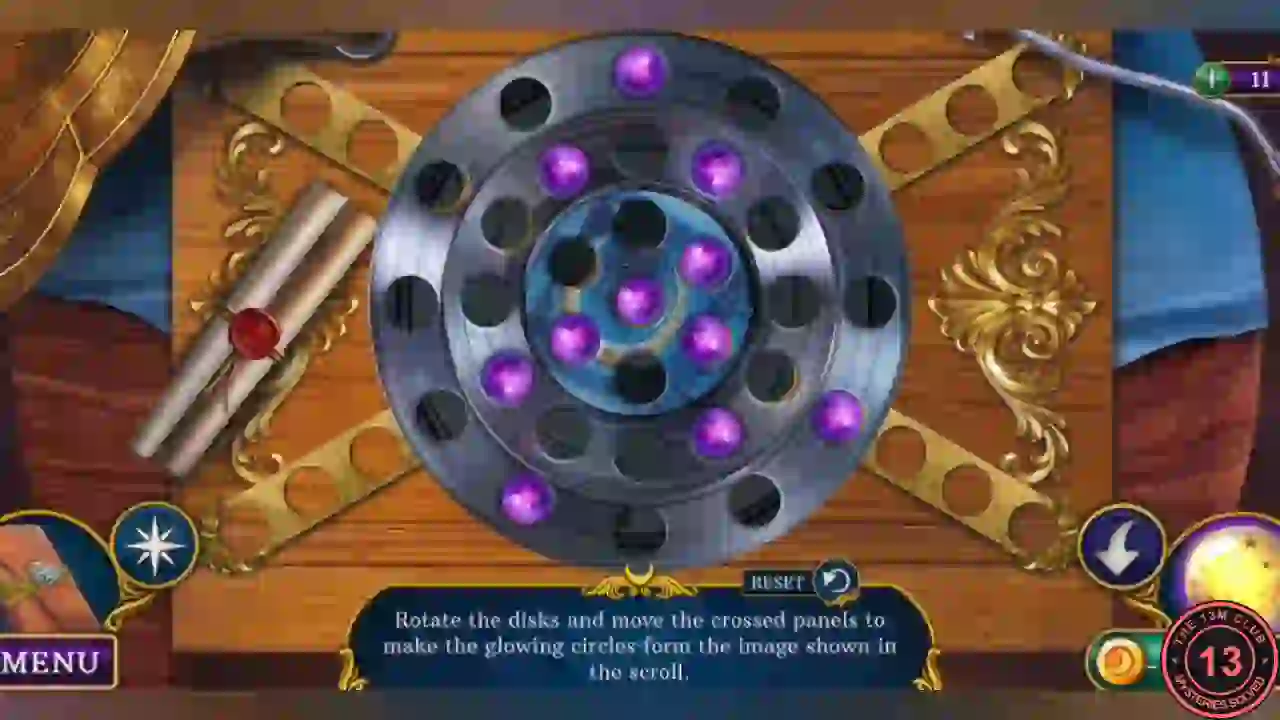
The solved arrangement of glowing circles to aim for. - Compare your board with the solved image. Turn the rings so that holes line up with a bar, then slide the bar to move a circle onto the ring that needs one more.
- Turn the rings until every circle sits where the solved image has it.
Morpheus answers
The cutscene plays straight after the gramophone.
- Watch the townspeople wake, then Morpheus's message. Talk to Bridget and take the yellow Access card she offers.