Into the Tunnel of Horrors
Behind the number door is a dark ride. Power it up, then make a loop through the Rest Area for parts of a second puzzle.
- Open the breaker box on the right and use the Red wire and Switch on it. The lights come on.
- Click the cart. It needs a wheel and a pedal. Take the Chisel lying beside it.
- Click the mannequin in the chair and take the Toy steering wheel and Torn sack. The hole in its chest and the hourglass on the chair come up later.
- Click the fire on the floor and take the Stone rune next to it.
- In the Rest Area, use the Chisel on the stone at the bottom of the flower bed. Take the Toy car and Park token.
- In the lit tent, use the Toy car and Toy steering wheel on the toy track. Take the Head scarf and Mask amulet.
- In the Trailer, use the Mask amulet on the recess in the floor at the back. The trapdoor opens: take the Stone rune and Binoscope lens.
- Go up the purple tower and use the Binoscope lens and Park token on the binoscope.
Puzzle: Binoscope sky words
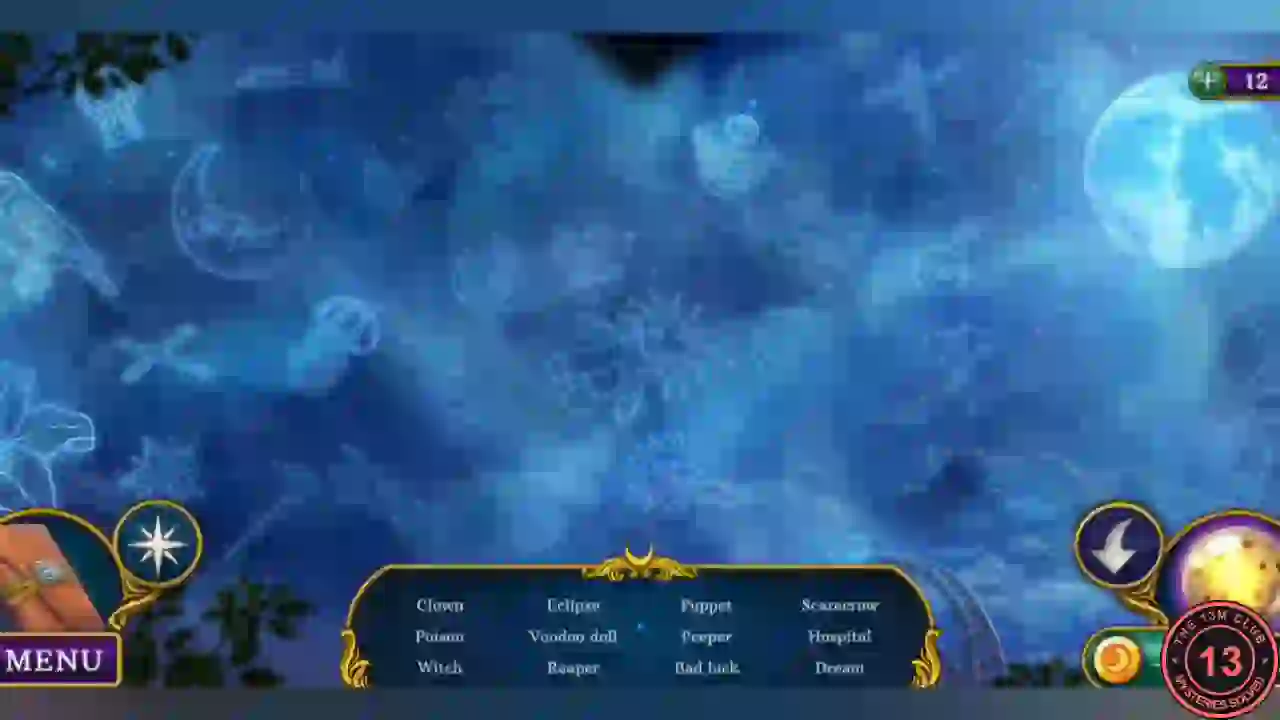
"Looks like I need to find both parts that together form a word from the list below." Outlines fill the sky. Pan as needed, then click the two outlines that make each word. Some outlines, such as the owl, jellyfish and flowers, are just decoys.
- Clown: clown make-up + balloon. Poison: bottle + snake. Witch: broom + witch hat. Eclipse: sun + moon.
- Voodoo doll: doll + pin. Reaper: scythe + skull. Puppet: head + crossed sticks. Peeper: eye + keyhole. Bad luck: broken mirror + black cat. Scarecrow: pumpkin + cross. Hospital: syringe + Rod of Asclepius. Dream: pillow + star.
- Take the Cart pedal and Electrical diagram.
Fixing the cart
Patch a sack, use the runes, and bring everything back to the cart.
- In the Tunnel, use the Electrical diagram on the breaker box. Leave the third breaker up as it is, raise the fourth, then raise the second. Leave the first one down.
- Click the green skeleton on the wall. Take the Stone rune and the Thread and needle.
- Combine the Torn sack, Head scarf, Thread and needle and Pruners in the inventory view to make the Sack. The Pruners stay with you.
- In the Moon Garden, use the four Stone runes on the owl altar. Take the Cart wheel and Hearing pipe from the compartment.
- In the Park Alley, use the Sack on the dug-up dirt by the Lightning rod. Take the Sack with earth.
- Back in the Tunnel, use the Cart wheel and Cart pedal on the cart and hang the Sack with earth on the red hook. Click the tunnel to start the next puzzle.
Puzzle: Tunnel cart
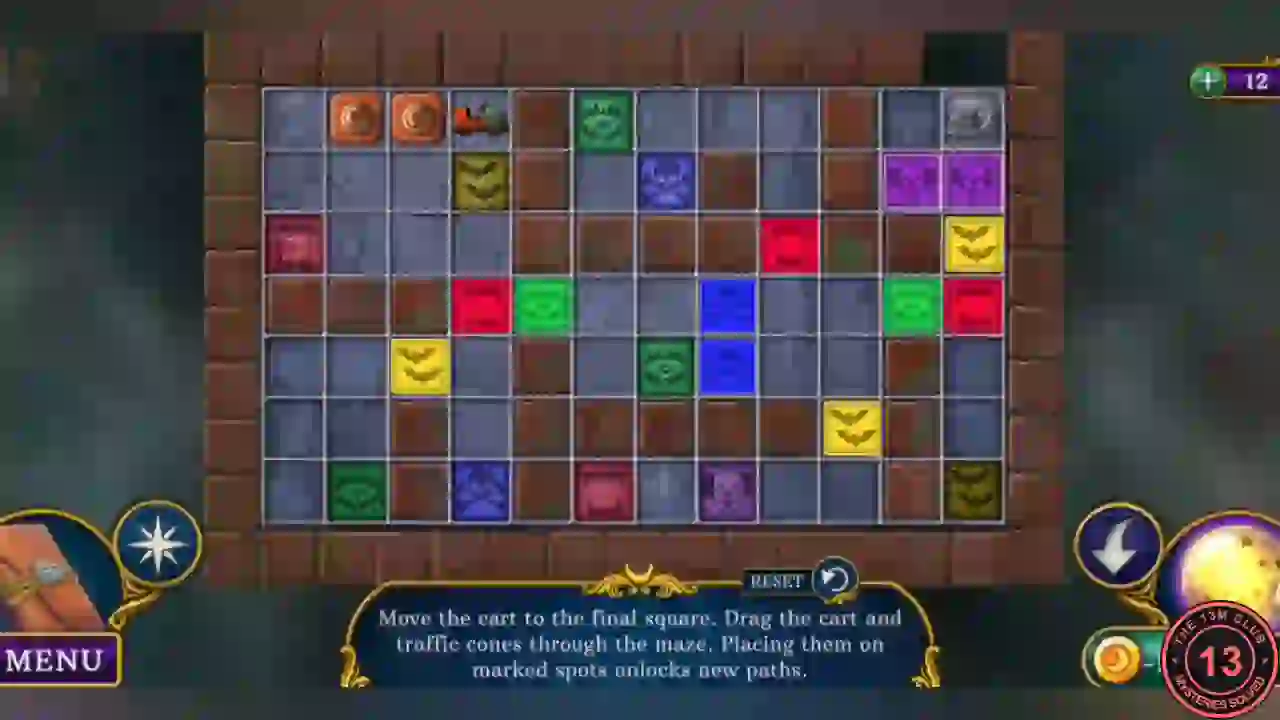
"Move the cart to the final square. Drag the cart and traffic cones through the maze. Placing them on marked spots unlocks new paths." Bright coloured squares block the way. While a cone or the cart stands on a marked square of one colour, every square of that colour dims and you can pass through it. The goal is the grey square at the top right. Several orders may work. The route below is one that works, counted as row and column from the top left of the 7-by-12 grid.
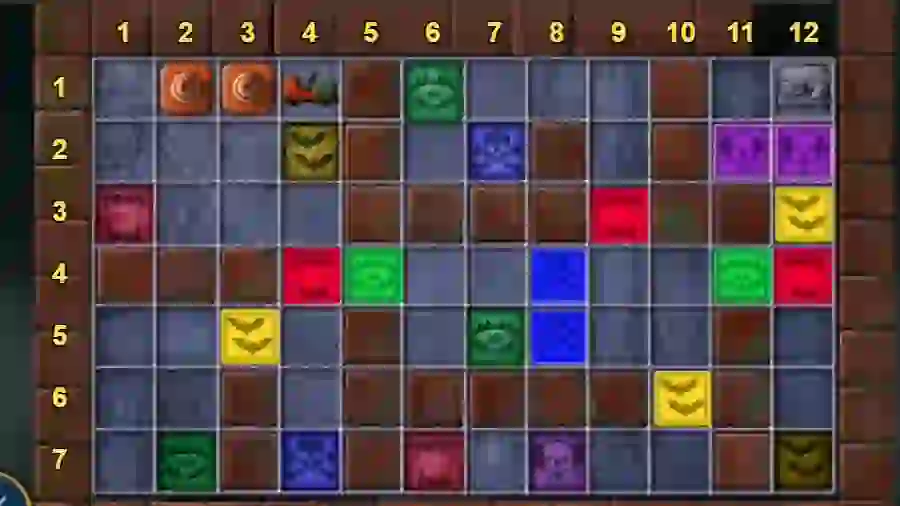
- Put one cone on the red mark at row 3, column 1 and the other on the yellow bat at row 2, column 4. Take the cart down column 4 to row 6. Move the second cone to the green mark at row 7, column 2.
- Take the cart to the green mark at row 5, column 7, then up to the green mark at row 1, column 6. Move the second cone to the blue skull at row 7, column 4 and take the cart to the blue skull at row 2, column 7.
- With cones on the yellow bat (row 2, column 4) and the red mark at row 7, column 6, take the cart along the top row to column 9. Then take it down column 9 to row 5, moving the cones as each colour blocks you.
- With cones on the red mark (row 3, column 1) and the green mark (row 1, column 6), take the cart to row 5, column 10 and then to the red square at row 4, column 12.
- Put one cone on the yellow bat (row 2, column 4) and the other on the purple clown face at row 7, column 8. Yellow and purple dim, so run the cart up the last column to the grey square.
- Watch the ride through the tunnel. You arrive in the Hall of Dreams.
Hall of Dreams and the Arcade
The Cultist has left clues all over this wing. Look at the eye door, doll shelf, model and statue first, then gather the projector details.
- Check the doll shelf ("There used to be two more totems.") and the eye door with its three slots. Take Projector detail 1/3 from the eye door.
- Look at the planetary model and the hooded statue. Neither is ready yet.
- Open the red box on the wall and take the Fire extinguisher (the game spells it "Fireextinguisher"). The rest of the box stays locked for now.
- In the Tunnel, use the extinguisher on the fire. Take the Limbo lock and Projector detail 2/3.
- Go through the purple door in the Hall to the Arcade. Take the Box with secret from the broken side panel of the pinball machine.
- Click the fortune teller booth and take the Fan from the table.
- Click the model town table and take the Saw chain lying over the red tape player.
- Look at the claw machine and Dream Machine. Both need tokens you do not have yet.
- Back in the Hall, use the Fan on the hand of the hooded statue. Take the Matches and Projector detail 3/3.
- In the Trailer, use the Hearing pipe and Limbo lock on the safe. Take the Film reel and Saturn figurine.
- Use the three Projector details and Film reel on the projector. The light shines on the sheet: note the poses of the three puppets.
Puzzle: Puppet poses
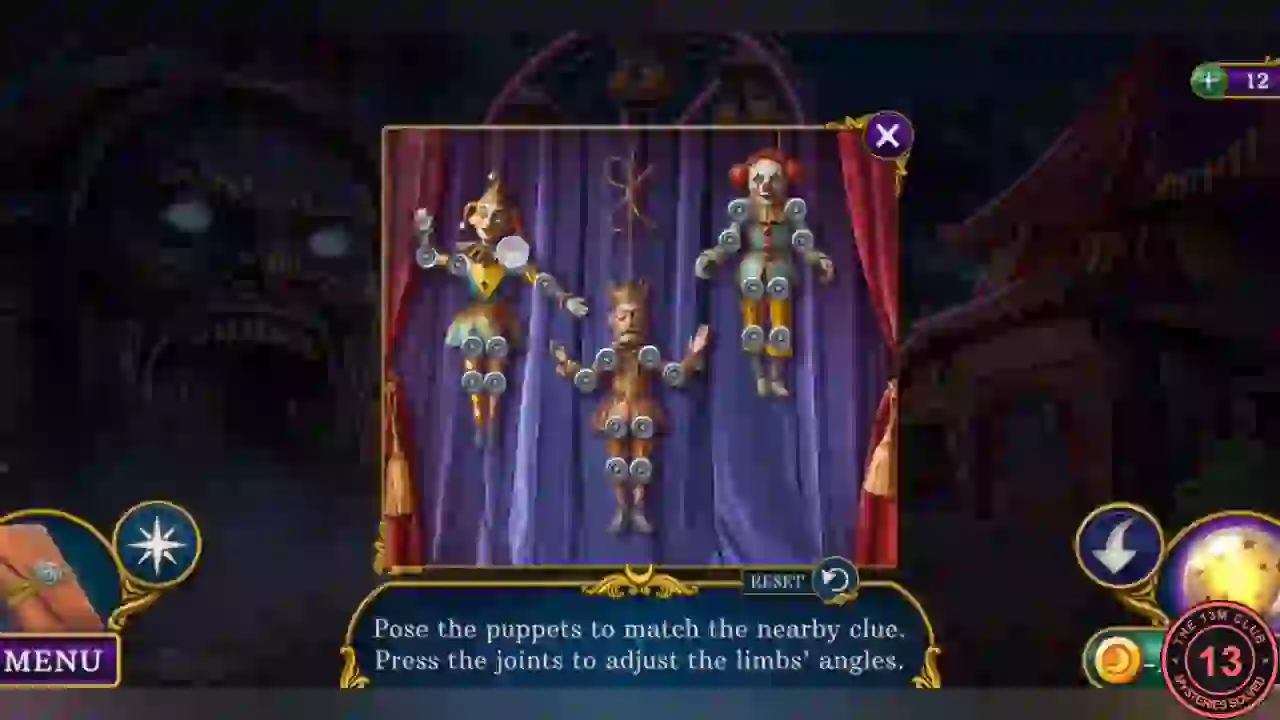
"Pose the puppets to match the nearby clue. Press the joints to adjust the limbs' angles." From left to right the three puppets are a jester, a king and a clown. The clue is the projection you just saw in the Trailer.
- At the Amusement Area, click the puppet stage.
- Press each joint until the limb points the way the projection shows. Work from the shoulder or hip outwards, one puppet at a time. Target poses: the jester holds both hands up beside his head with knees bent outwards; the king has his upper arms out to the sides, forearms pointing up and legs straight down; the clown stretches both arms up and out, with one leg kicked out to the side.
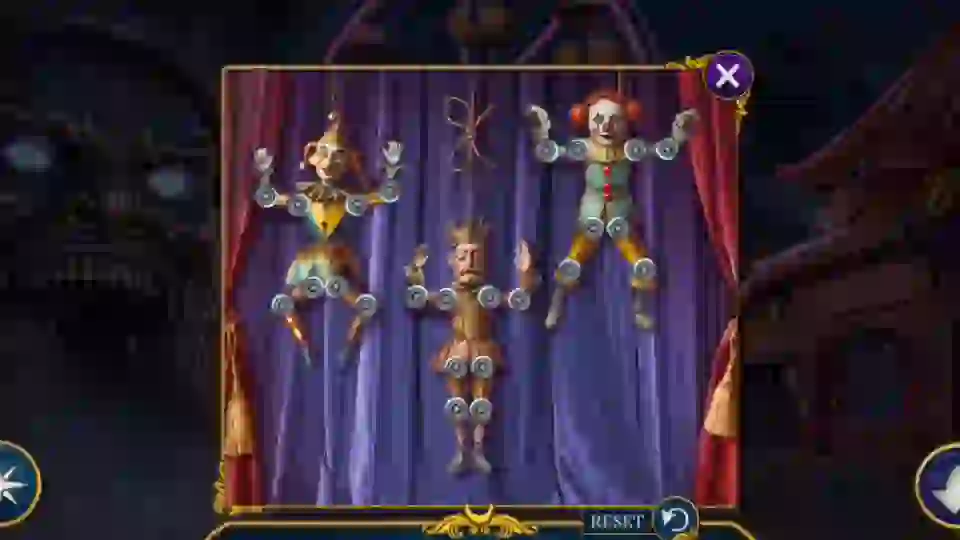
All three puppets in the correct poses. - Take the Crystal skull and Incense from under the stage.
The owl altar and the fortune teller
Two quick stops bring you the parts for the secret box.
- In the Moon Garden, use the Incense and Matches on the grate at the owl altar. Take the Old flare gun and Bronze statuette.
- In the Arcade, use the Crystal skull on the fortune teller and watch the vision. Take the Magnet key, Golden lever and Brush.
- Use the Magnet key on the Dream Machine. Take the Paints and first Saw ring.
- In the Hall, click the doll shelf and look at the picture leaning at the bottom. This is the hint for the next puzzle.
- Open the Box with secret in the inventory view and use the Brush and Paints on it.
Puzzle: Secret box colouring
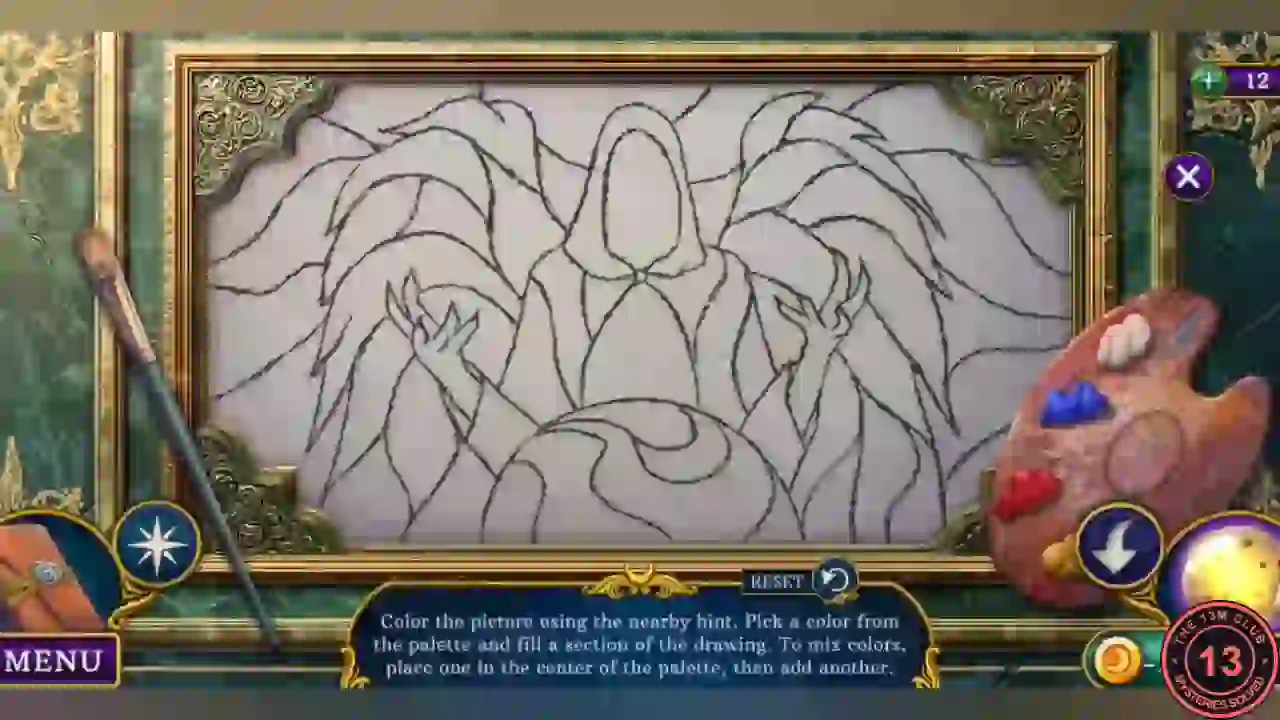
"Color the picture using the nearby hint. Pick a color from the palette and fill a section of the drawing. To mix colors, place one in the center of the palette, then add another." You start with red, blue, white and yellow. The palette slides out of the way while you paint, so you can compare your work with the hint picture.
- Paint the plain blue, yellow and red sections first, copying the hint.
- Mix green with yellow plus blue in the centre of the palette and fill the green sections. Then mix grey-blue with blue plus white and fill the sections around the edge.
- Mix the warm tan with red plus yellow and fill the sections that remain.
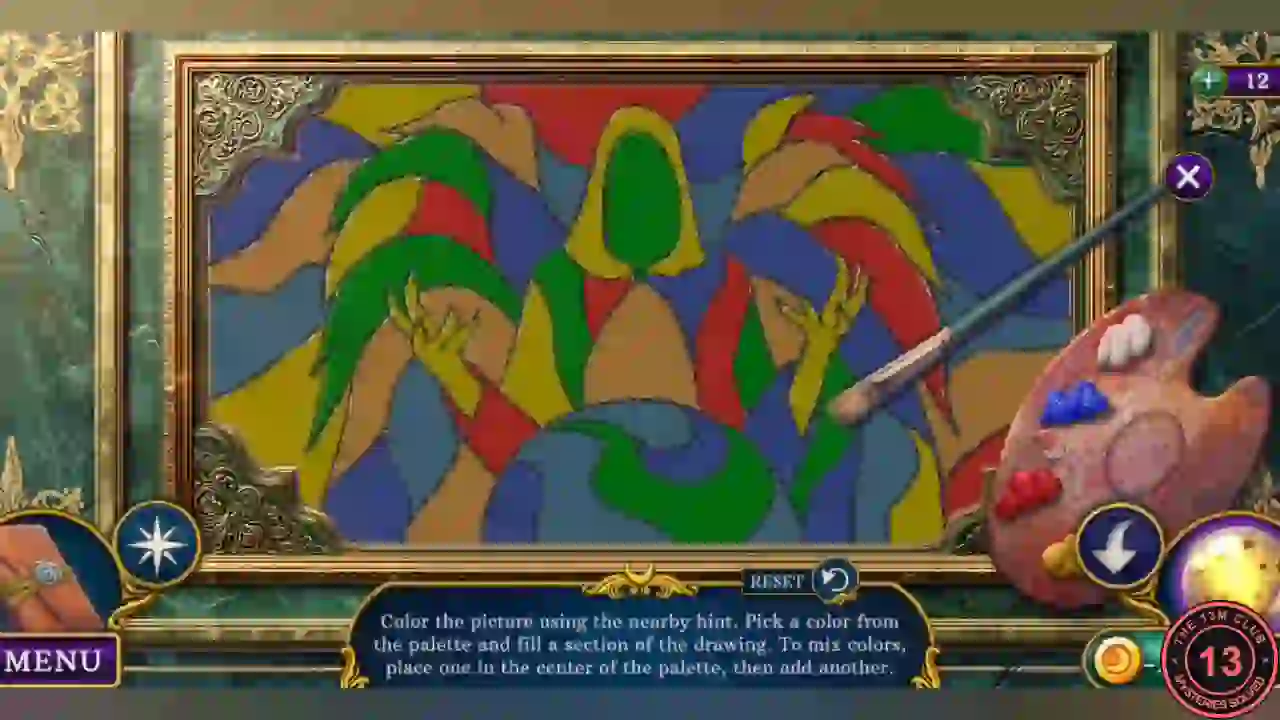
The finished drawing, just before the box opens. - Take the Mars figurine and second Saw ring.
Saw, bridge and the Open Stage
Repair the bridge in the Moon Garden to reach the last new area of this chapter.
- In the Hall, use the Saturn figurine, Mars figurine and Golden lever on the planetary model. Take the Nails and Antirust.
- Combine the Saw chain, two Saw rings and Antirust in the inventory view to make the Wire saw.
- In the Tunnel, use the Wire saw on the broken boards. Take the Boards.
- In the Moon Garden, use the Boards, Nails and Bronze statuette on the broken bridge, then cross to the Open Stage.
- Use the Pruners on the thorns around the moped. Take the Fire amulet and Audio tape.
- Take the Ritual needles at the fire hydrant.
- In the Hall, use the Fire amulet on the red wall box. Take the Torn hose and Rubber boots.
- Use the Ritual needles on the voodoo dolls. Take the Piece of rubber and UV lamp.
- In the Tunnel, use the UV lamp on the green skeleton on the wall to start the rail puzzle.
Puzzle: Green rails
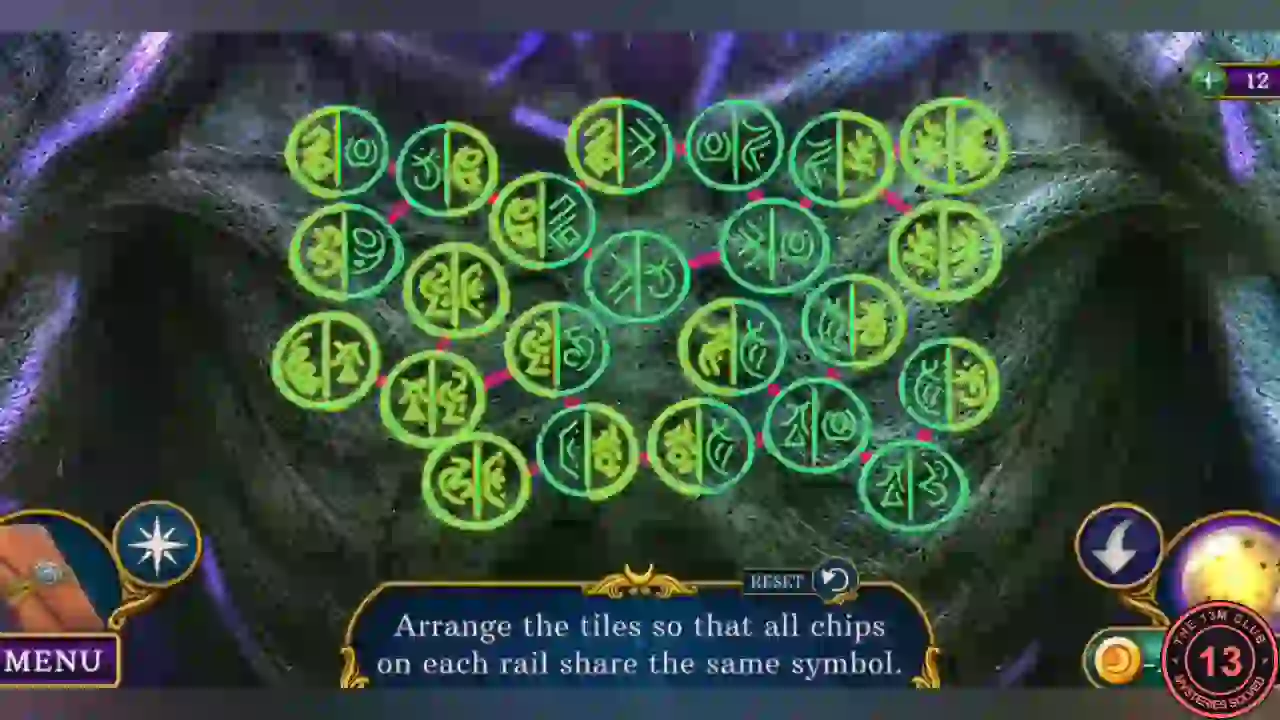
"Arrange the tiles so that all chips on each rail share the same symbol." Each rail is a group of round chips joined by pink links. There is no short fixed order to copy, so use this method.
- Swap two chips at a time. Read the symbols on a rail, find the odd one out and swap it with a chip on another rail that needs it. A chip's outline turns bright when it sits on the right rail.
- Keep going until no dull outline is left. The skeleton's chest opens. Take the Signal flare and Control panel.
- Combine the Old flare gun, Signal flare and Insulating tape in the inventory view to get the Loaded flare gun.
Puzzle: Cultist's story table
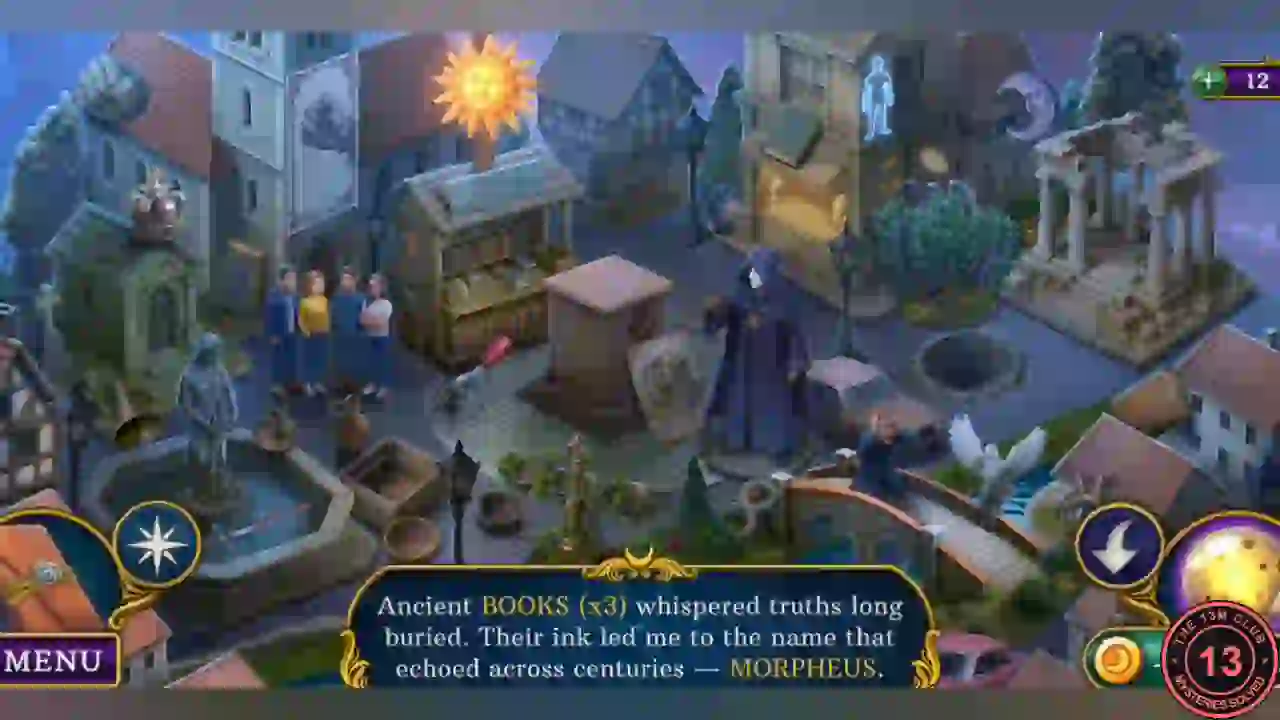
The Cultist's story plays out as a hidden-object scene on the Arcade's model town. Read each sentence at the bottom and click the object for each highlighted word. You move on to the next sentence when all its words are found.
- In the Arcade, use the Audio tape on the red tape player on the table.
- Find, in order of the sentences: Fear, Hope, three Books, Morpheus, Sacrifice, Souls, Abyss and Look. Morpheus is a winged statue, the Abyss is the dark hole in the street and Look is an eye.
- Then find Kingdom, Temple, Bargain, Power, Hollow, Echoes, Vessel, Control, Sleep and Eternal.
- Take the Glue. Combine it with the Torn hose and Piece of rubber in the inventory view to make the Fire hose.
Stopping the animatronic
The rabbit robot paces in front of the stage. Short it out with water and electricity.
- At the Open Stage, use the Fire hose on the hydrant. Water runs along the path to the animatronic.
- Use the Loaded flare gun on the power lines.
- Use the Rubber boots on the wet path so you can cross it, then click the sleeping technician on the stage and take the Morpheus symbol.
- Take the Spring from the bottom of the robot's cage.
- In the Hall, use the Morpheus symbol on the chest of the statue. Take the Key with eye and Box with recipe.
- Take the Salt crystals from the red wall box. They only become available around this point in the story.
- In the Arcade, use the Control panel and Spring on the pinball machine.
Puzzle: Pinball obstacles
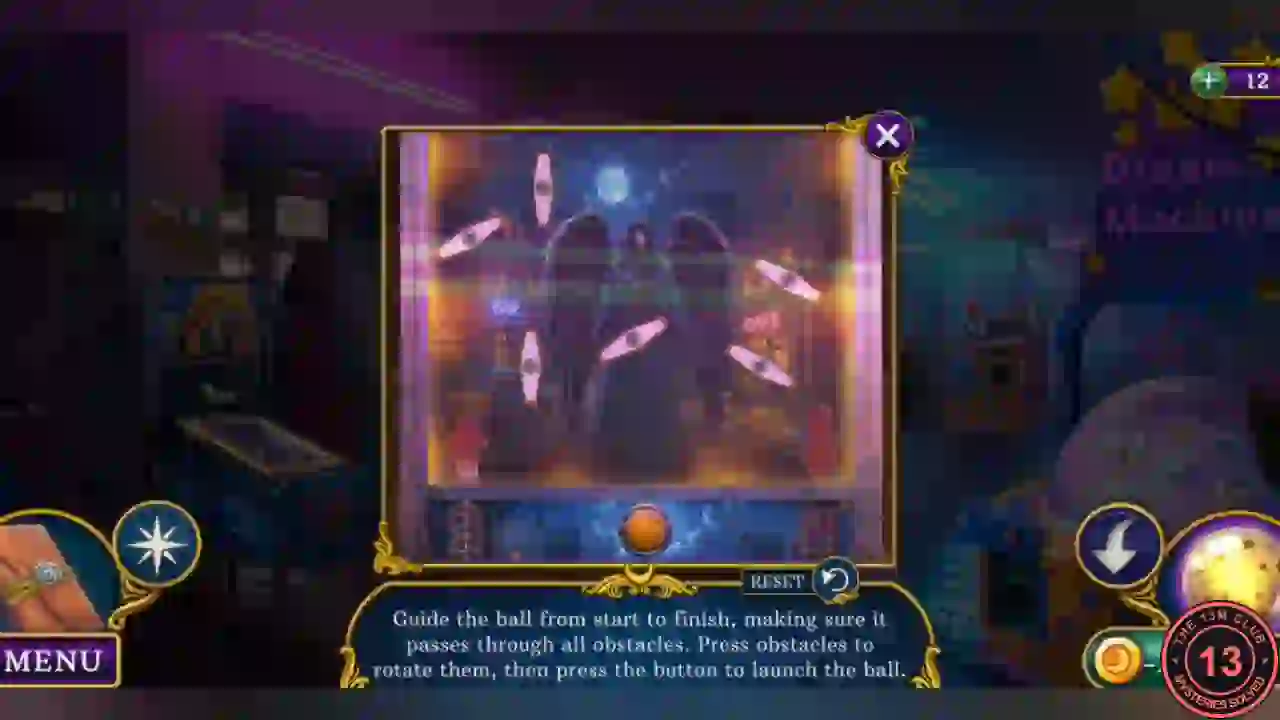
"Guide the ball from start to finish, making sure it passes through all obstacles. Press obstacles to rotate them, then press the button to launch the ball." The ball starts at the red up arrow at the lower left and has to reach the red down arrow at the lower right.
- Press the six white obstacles until they match this pattern. The two at the upper left both rise to the right. The one in the centre falls to the right, and the one below and left of it rises to the right. The two on the right both fall to the right.
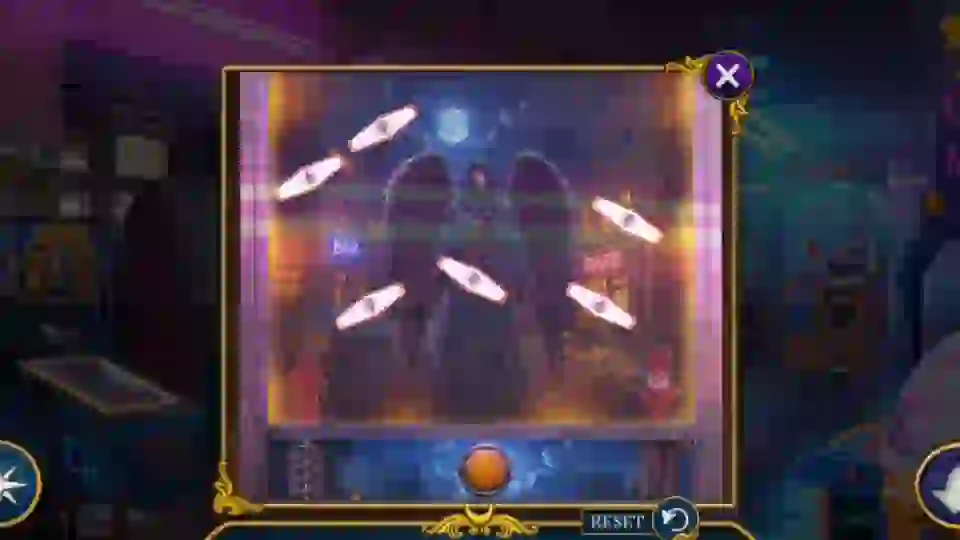
The obstacle pattern that works, set before launching. - Press the orange button. The ball touches all six and drops into the goal. Take the Key with eye and Woolen mitten.