Chapel Cabinet Right Dial
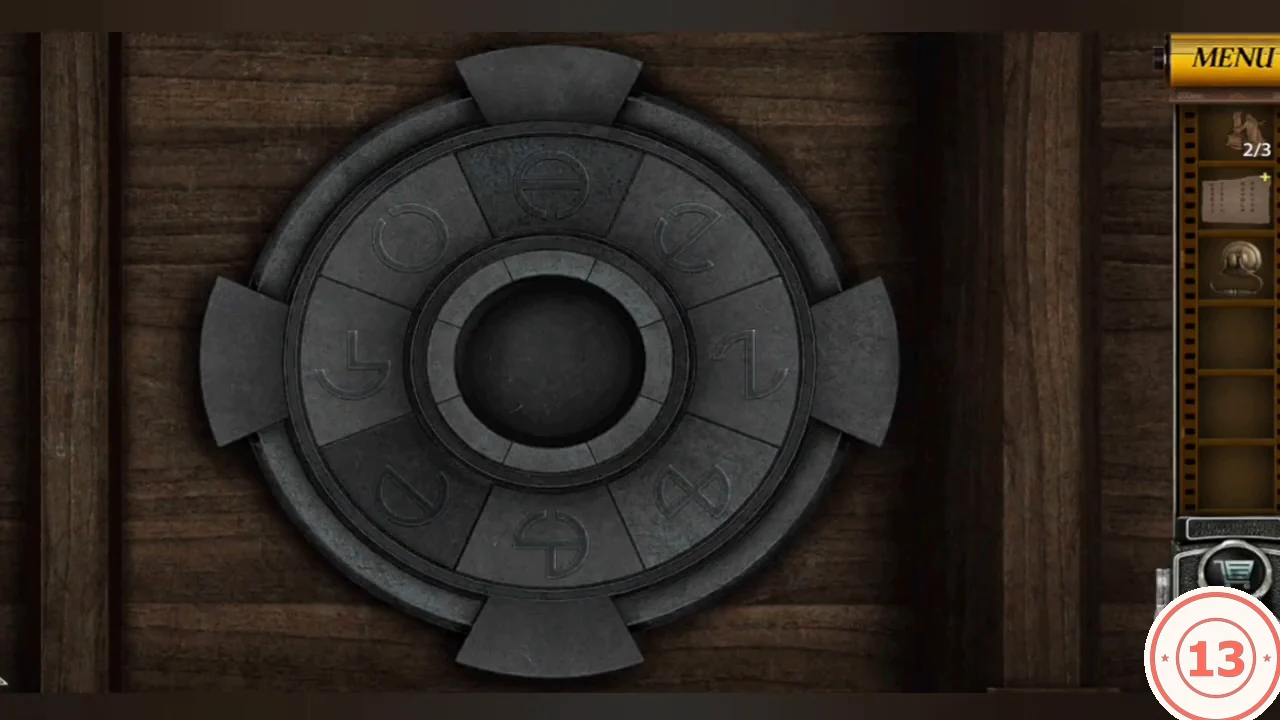
The iron Key opens the padlocked double door on the tower side of the town square, which leads to the chapel. The chapel's wooden cabinet holds two round dials; start with the right one.
- At night, use the iron Key on the padlocked wooden double door on the tower side of the town square. The chapel opens.
- Take the metal knocker ring from the mouth of the carved head over the left font.
- Place the orange flame tile (Sacred Flame Emblem) in the diamond socket of the wooden cabinet on the left wall. The doors open to a left ring dial and a right segmented dial with a missing piece.
- In the back altar room, take the dark stone fragment from the centre of the altar table. Place it in the right dial.
- The game clue for this order was not identified for this guide; the order below is the one the dial accepts. Press the eight carved segments in this symbol order: circle with bar (θ), reversed curl (ɘ), open C, circle with a cross stem (⊕), hook (1), d shape, L hook, figure eight (∞). With the ring in its starting position that is top, top right, top left, bottom, right, bottom left, left, bottom right. A wrong press releases every segment and spins the ring, so always follow the symbols rather than positions.CODEθ, ɘ, C, ⊕, 1, d, L, ∞
- Take the carved Eye Emblem from the cabinet's upper-right panel.
Lectern and Eagle Flip Door
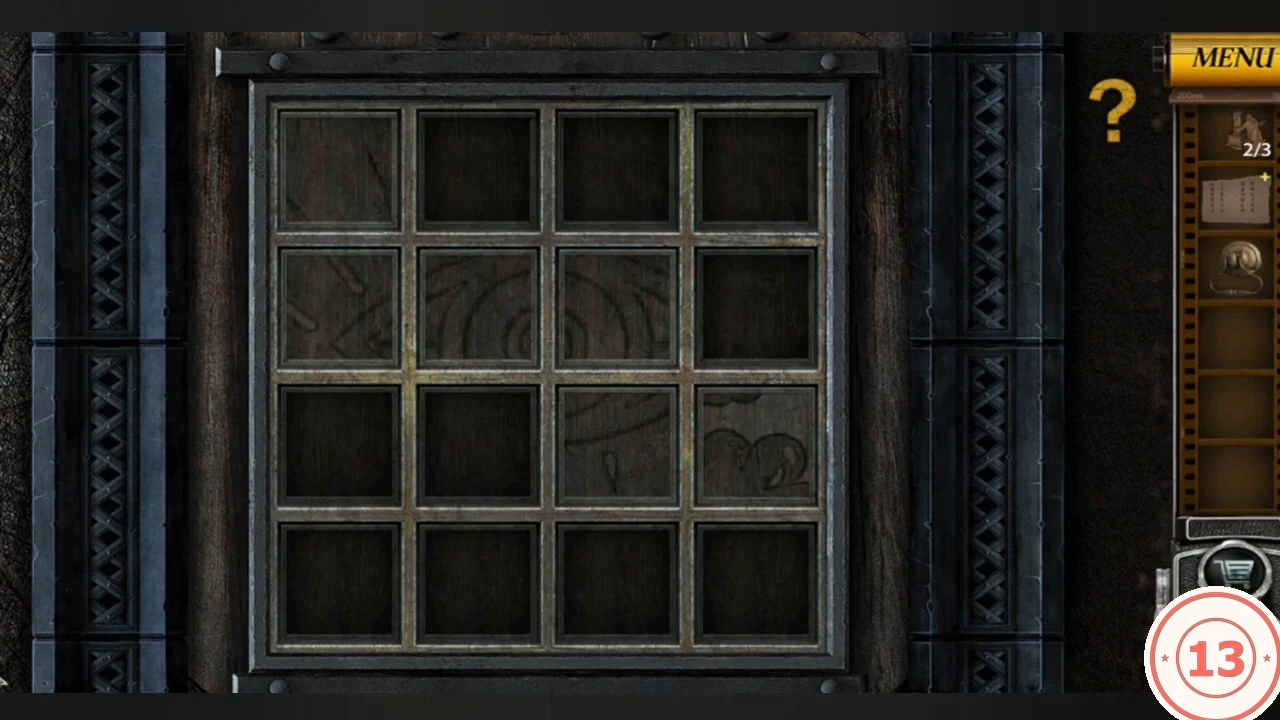
The side door right of the altar arch has a 4x4 grid behind a metal grille. Tapping a tile flips it and its up, down, left and right neighbours.
- Use the Eye Emblem on the right lectern. Take the Wooden Block from its side drawer.
- Lower the grille on the side door and place the Wooden Block in the empty top-right slot.
- Starting from this layout (P picture, D dark): row 1 P D D D, row 2 P P P D, row 3 D D P P, row 4 D D D D. Tap row 1 column 3, row 3 column 4, row 3 column 3 and row 4 column 1. Every tile shows the eagle picture and the door opens to the bedroom.CODEr1c3, r3c4, r3c3, r4c1
Bedside Cabinet and Flower Dials
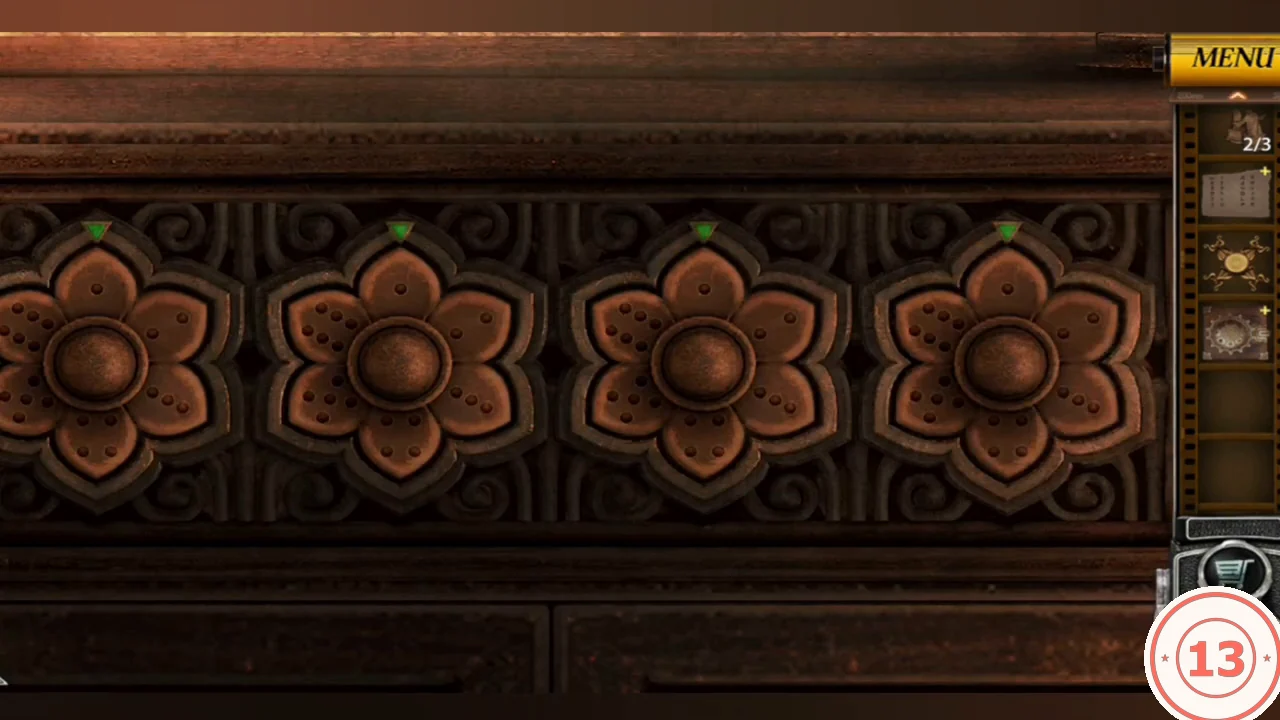
The side-table chest with the green lamp has four carved flowers on its front; one is missing. Each flower has six petals with one to six dots.
- Take the Carved Ornament lying on the carved pedestal at the back right. Leave the pedestal's round recess for later.
- Use the knocker ring (the game calls it Drawer Handle) on the lower cabinet of the bedside table under the window. Take the brass star piece and the Book.
- The Book's left page is a dot puzzle with arched tiles and is the clue for the flowers. Place the Carved Ornament in the empty fourth flower socket.
- Tap each flower to turn it so the petal at the green top marker shows, left to right, 5, 1, 6 and 2 dots.CODE5, 1, 6, 2
- Take the Corner of a Painting from the chest's central drawer.
Gem Wheel Box
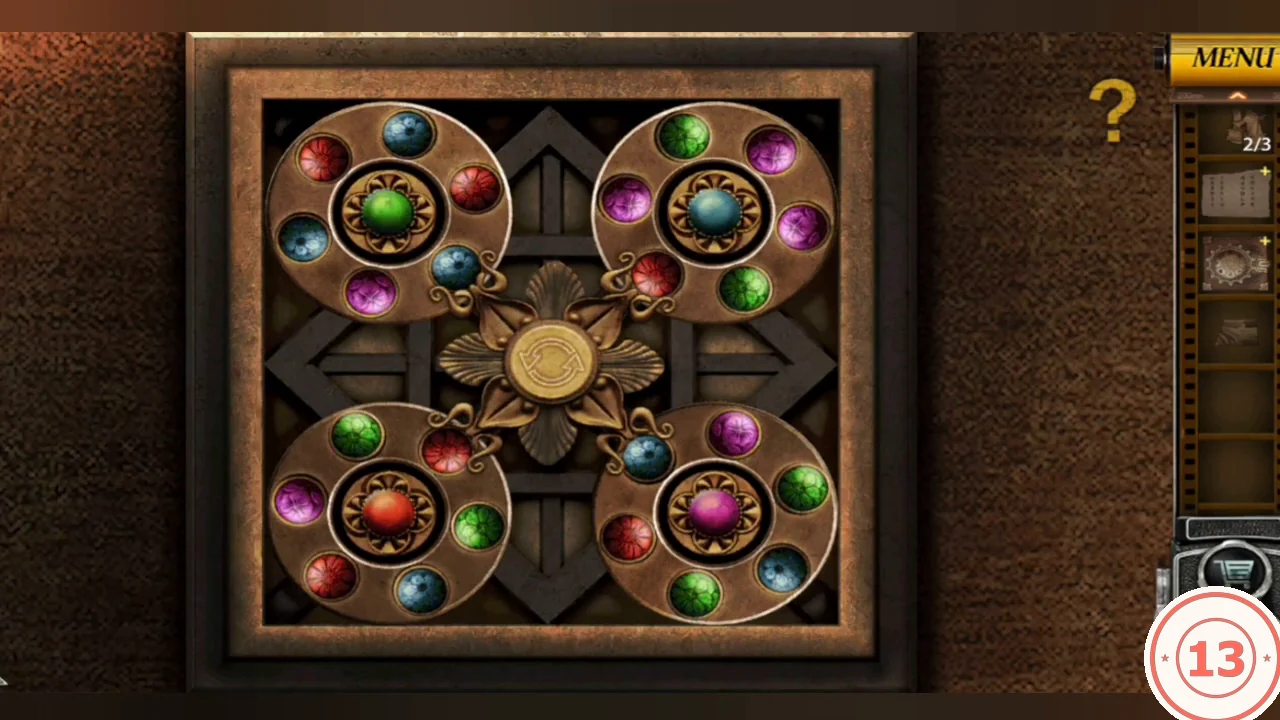
Below the flowers, the chest holds four gem wheels. Each has a centre gem (top left green, top right blue, bottom left red, bottom right purple) and six mixed outer gems.
- Place the brass star piece (Metal Piece) in the empty centre socket. It becomes a gold button with four clamps reaching into the wheels.
- Tap a wheel to turn its outer gems one step. Tap the centre button to pass the four gems held by the clamps on to the neighbouring wheels. Use the button to move gems between wheels until every outer gem matches its wheel's centre colour.
- Take the silver Stone Key from the bottom drawer.
Painting Letter Bar
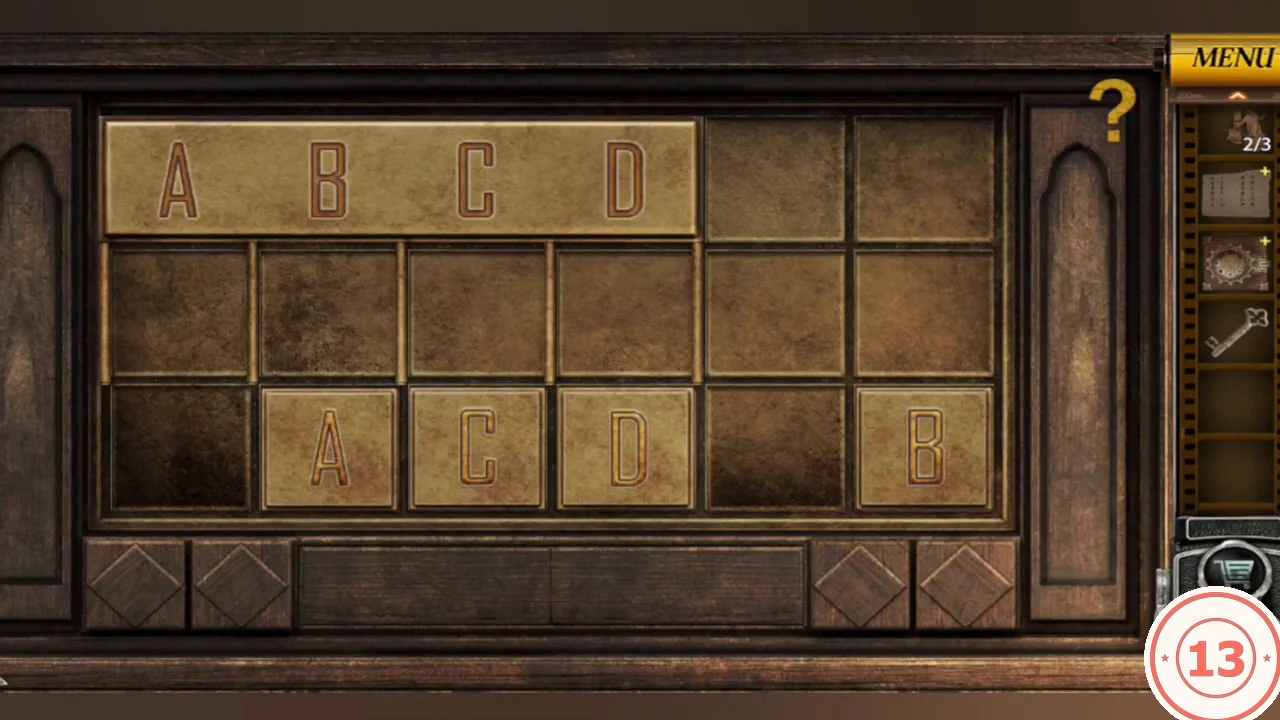
The eagle painting on the bedroom's left wall is missing its lower-right corner. Behind it is a 6x3 letter puzzle: an A B C D bar on top, an empty middle row and the tiles C, gap, gap, D, A, B on the bottom row.
- Use the Corner of a Painting on the torn eagle painting. It slides aside and the panel appears.
- Tap a bottom tile under the bar to raise it into the middle row; tap a raised tile to drop it back when the cell below is empty. Tap the bar's left or right end to shift it one column, carrying every raised tile with it. Finish with A B C D raised directly under A B C D on the bar.
- Take the pair of arrow discs (Arrow Button) from the drawer below.
Trunk Letters and Moon Phase Dial
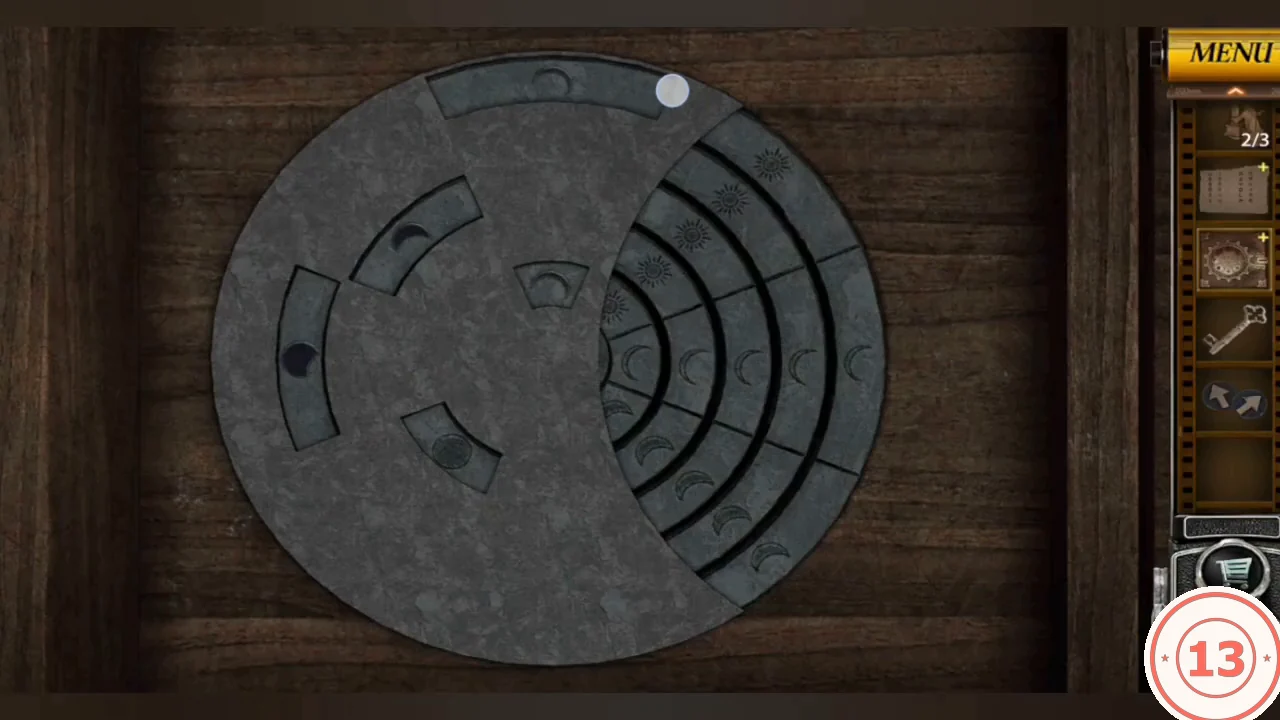
The trunk on the bed has a three-letter lock. The left chapel dial shows moon phases through five windows.
- Look through the arched windows on the green-lamp chest. The bottle labels read 'LorAtadIne' and 'RagWeeD'; the capitals spell LAI and RWD. RWD opens the trunk.CODERWD
- Take the blue stone crescent and the book from the trunk. The bottom of the book's page shows the five window shapes, and its cover shows the moon phases around a sun.
- Put the blue crescent in the left dial of the chapel cabinet. Rings on the right half rotate when tapped; the fixed windows on the left half show the phase beneath. Turn the rings until the windows show: top a dark new moon, upper left and left thin crescents, lower left a mostly dark gibbous, centre a dark full disc.
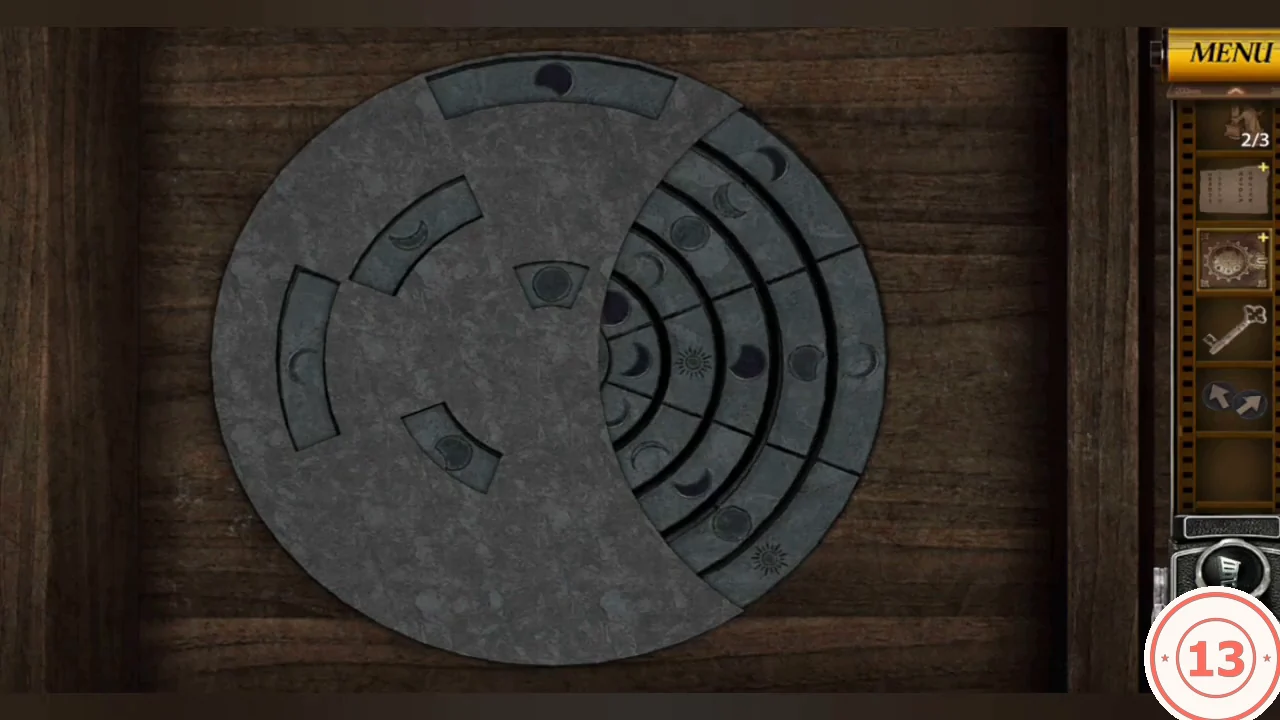
Solved: the five windows show the moon phases from the book. - Take the Ornamental Piece from the cabinet's upper-left compartment.
Buried Brick Box
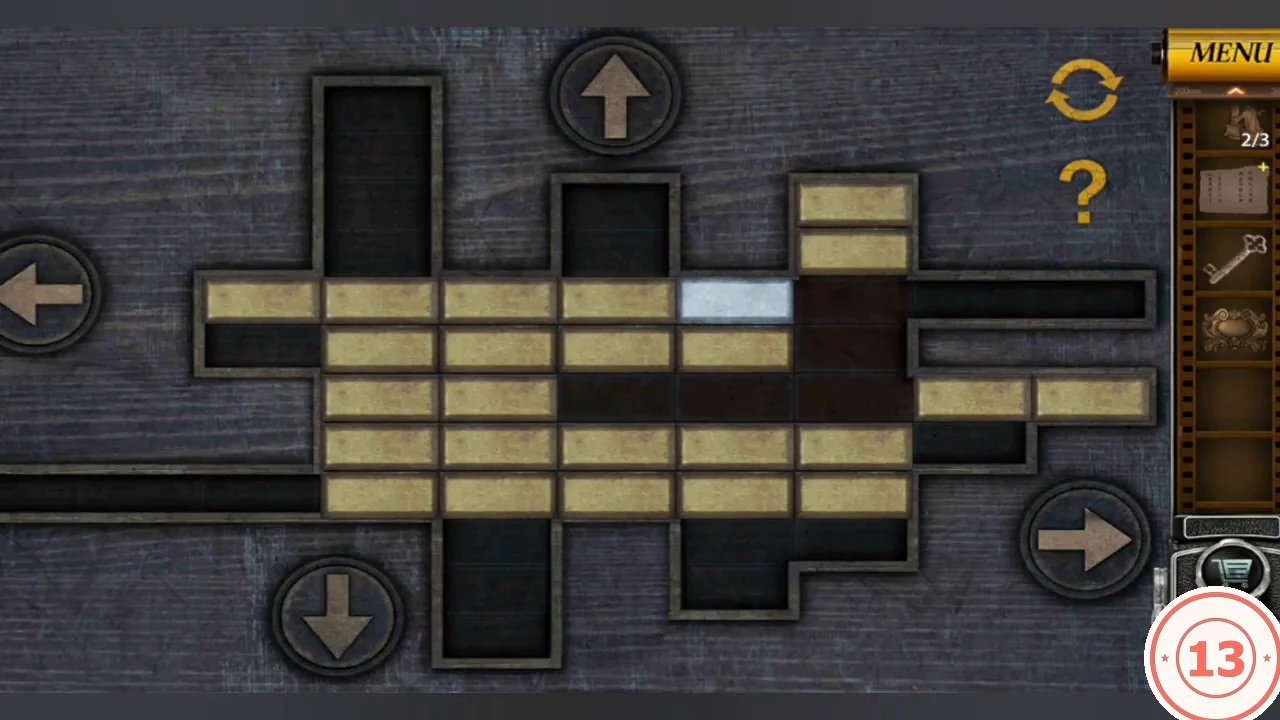
Return to the buried box you uncovered beside the boulder at the burial ground. It holds a 5x5 block of bricks with a white brick in the centre and channels around it.
- Place the Arrow Button discs on the box.
- Each arrow press moves the white brick one cell, shoving bricks ahead into the channels. From the start press: right, right, up, up, left, down, down, down, right, down, left, left, up, up, up, left, down, down, down, left, up, up, up, up, right, right, right, right (28 presses). The block empties.CODER R U U L D D D R D L L U U U L D D D L U U U U R R R R
- Take the Eagle Emblem from the box. In the chapel, use it on the lectern and take Tower Figurine 3/3.
Crest Pusher Cabinet
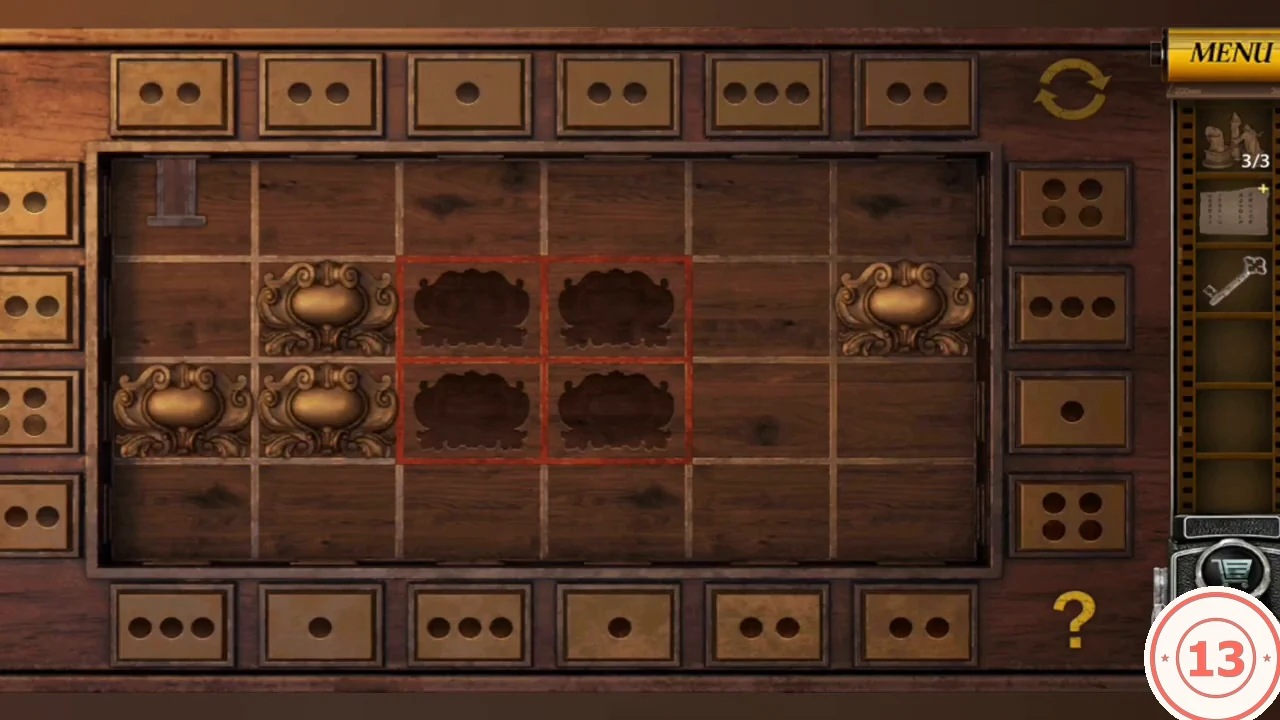
The lower cabinet of the study bookcase is a 6-column by 4-row board with four crests and a red 2x2 target (rows 2–3, columns 3–4). Every row and column has a pusher on the edge; its pips show how many cells its rod reaches, and the rod shoves any crests in its line to just beyond its tip, pushing crests ahead of them along. If the crests hit the far wall, the rod stops short.
- Place the Ornamental Piece on the cabinet. The crests start at row 2 columns 1, 2 and 6, and row 3 column 2.
- Press the pushers in this order: top of column 1, left of row 3, top of column 2, left of row 3, right of row 2, right of row 3, bottom of column 3, bottom of column 5, top of column 5, right of row 4, left of row 4, top of column 3, bottom of column 4. All four crests fill the red square.
- Take the T-shaped bronze handle from the compartment.
Wall Safe Sliders
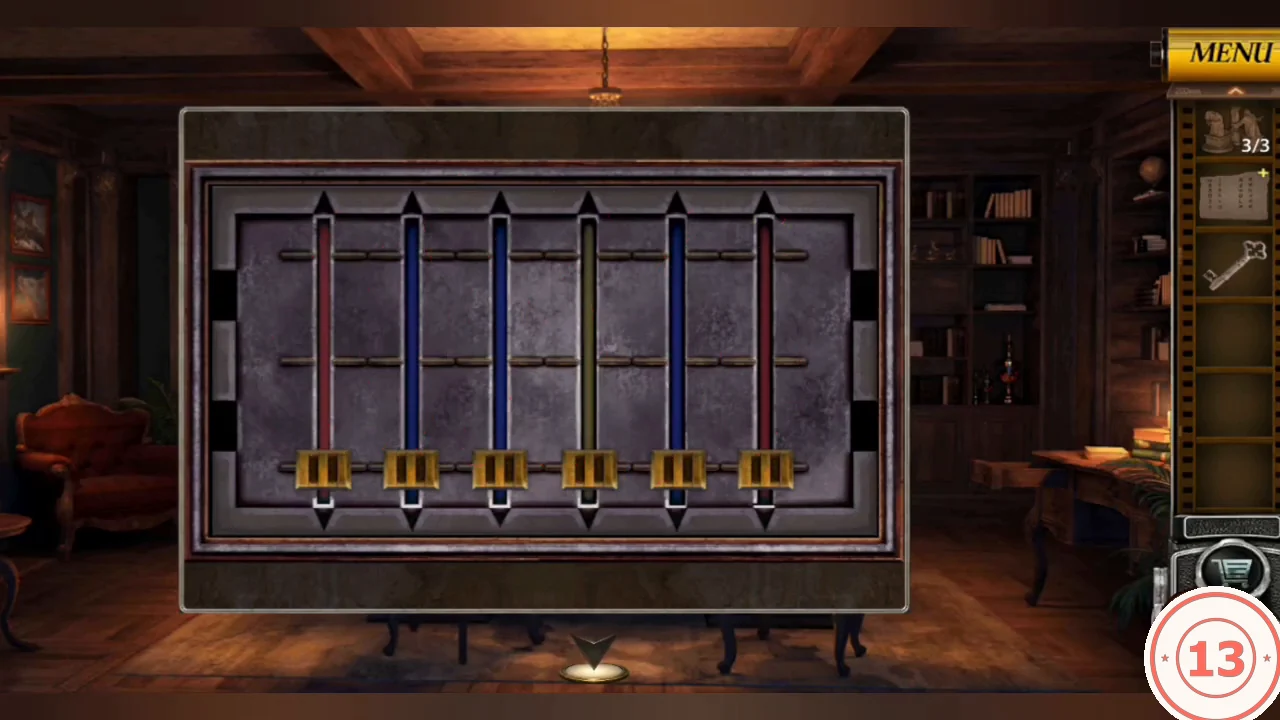
The safe behind the sunflower painting has six slider tracks coloured, left to right, red, blue, blue, yellow, blue and red, each with three notches.
- Fit the T-shaped handle to the wall safe.
- The bookcase beside it has red books on top, blue in the middle and yellow at the bottom. Move red sliders to the top notch, blue to the middle and yellow to the bottom: top, middle, middle, bottom, middle, top.CODETop, middle, middle, bottom, middle, top
- Take the Stone Button. The letter in the safe is story only.
Compass Statues
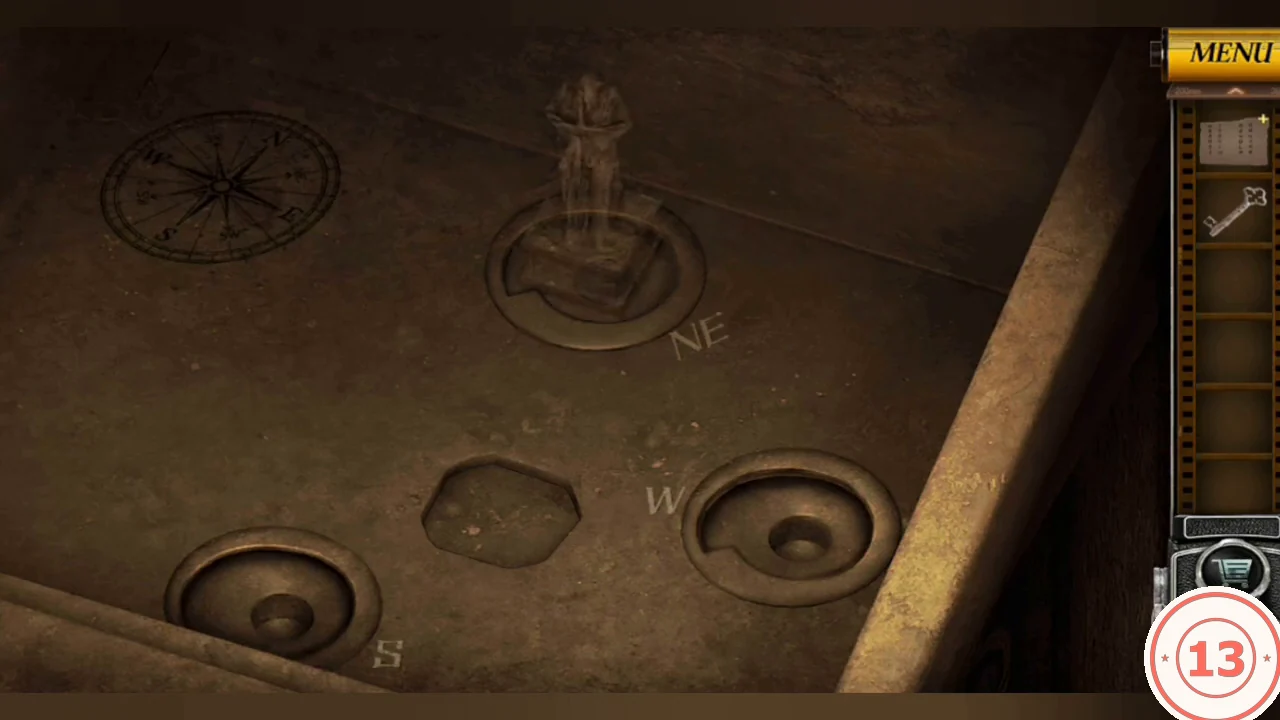
The carved pedestal in the chapel bedroom opens to a compass floor plate with sockets marked NE, W and S.
- Place the Stone Button in the pedestal's round recess. The top slides open.
- Place the three tower figurines (Stone Statue). Tap a statue to turn it; make each face the direction written by its socket: hooded NE statue toward the upper right, raised-arm W statue toward the upper left; the kneeling S statue already faces the lower left.
- Use the Stone Key on the keyhole in the octagon plate. A hatch opens to the cellar.