Numeral Drum Chest and Tavern Door
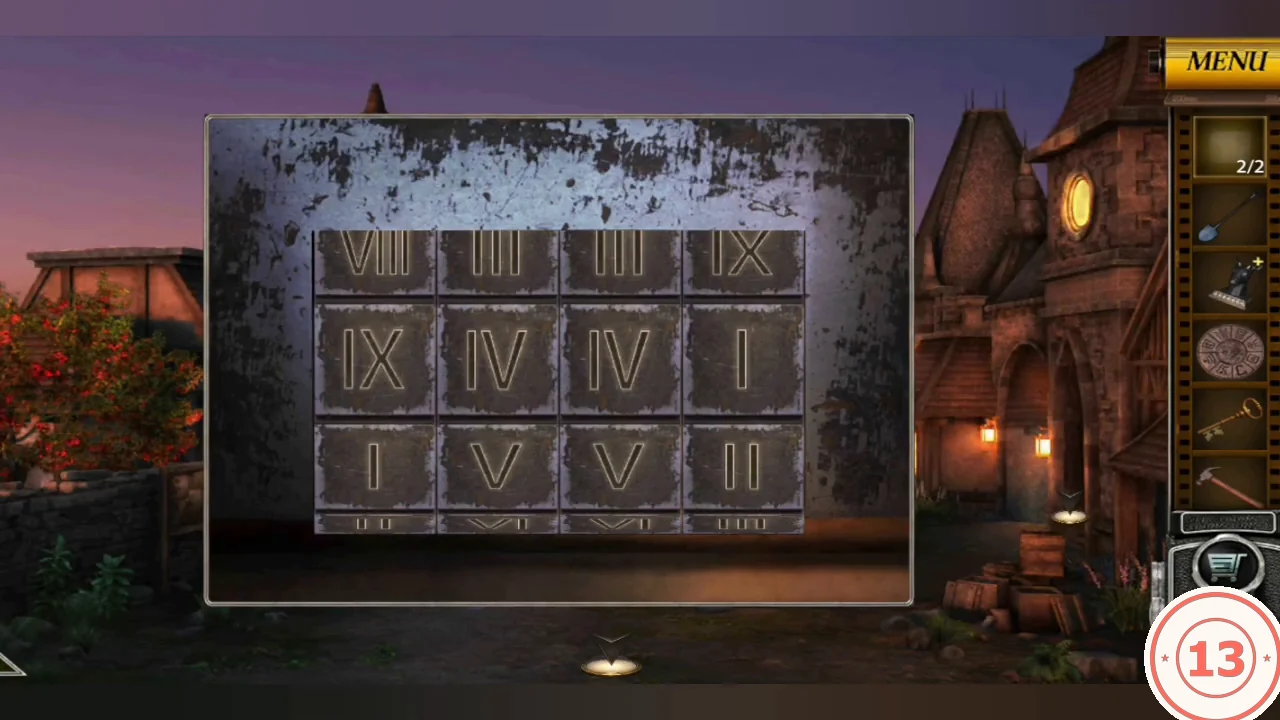
The iron chest in the pedestal niche has four Roman-numeral drums. Only the middle row counts. The torn note's dot shapes and the dot grid on the SACRED BURIAL GROUND sign are the clue.
- Compare the four shapes on the torn note with the dot grid on the SACRED BURIAL GROUND sign.
- At the iron chest in the pedestal niche, turn the drums so the middle row reads IX, IV, IV, I. The chest opens; take the blue metal plate (Patterned Block 1/2).CODEIX, IV, IV, I
- At the burial ground, use the Knife on the thorny vines wrapped around the dead tree's root hollow. The Knife is used up. Take the Wooden Board.
- Use the Wooden Board on the sliding bolt of the tavern door in the town square, then enter.
Tavern Arrow Padlock
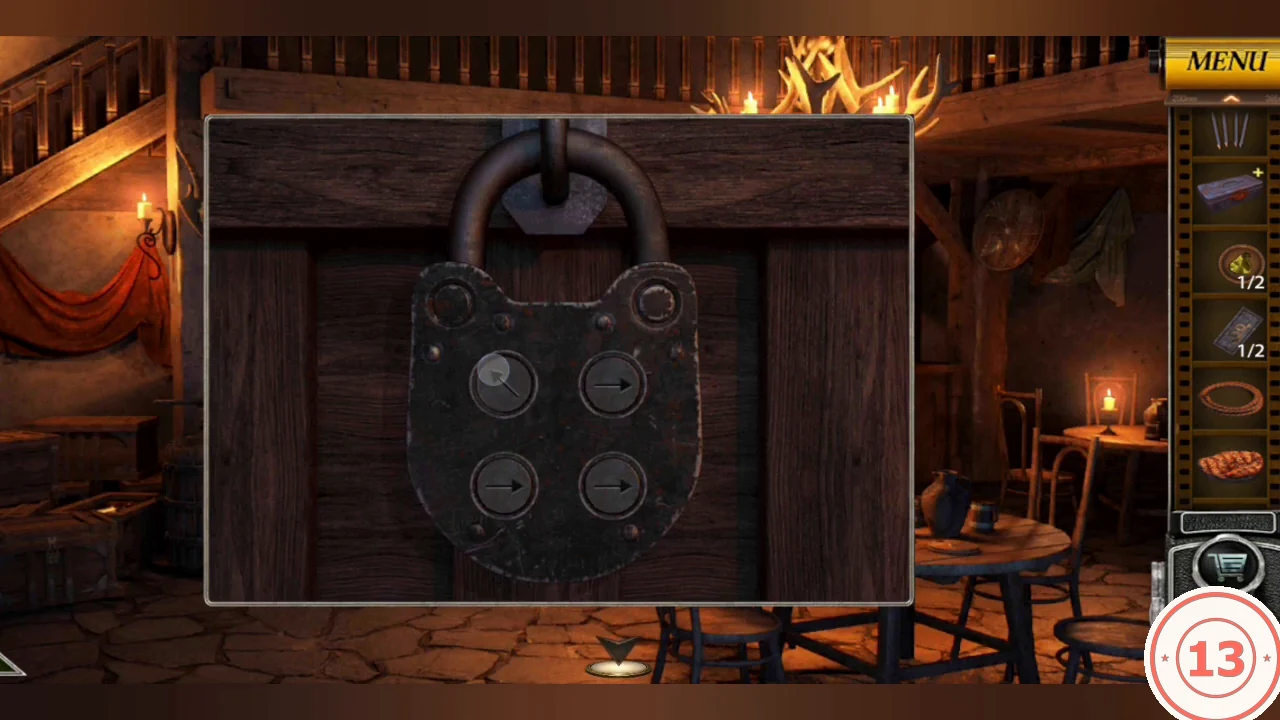
The innkeeper will trade an artifact for three gold coins. First open the crate chest, whose padlock has four arrow buttons.
- Talk to the innkeeper, who mentions Mr. Chris, the priest, and offers an artifact for three gold coins.
- Take the Coiled Rope from the crates on the left.
- Tap the plate on the round table to take one Steak.
- Study the wall shield (four carved leaf and petal emblems around a cross) and the disc on the table. Turning the table disc's arrow reveals one emblem through its cutout for each direction: up shows the fan, left the leaf, right the bell-shaped leaf and down-right the curled petals.
- Open the padlock on the crate chest (all four buttons start pointing right; tap to rotate). Set top left UP, top right DOWN-RIGHT, bottom left RIGHT and bottom right LEFT. Take the Circular Saw Blade and the Hand Drill.CODETL up, TR down-right, BL right, BR left
Dog and Floral Tile Chest
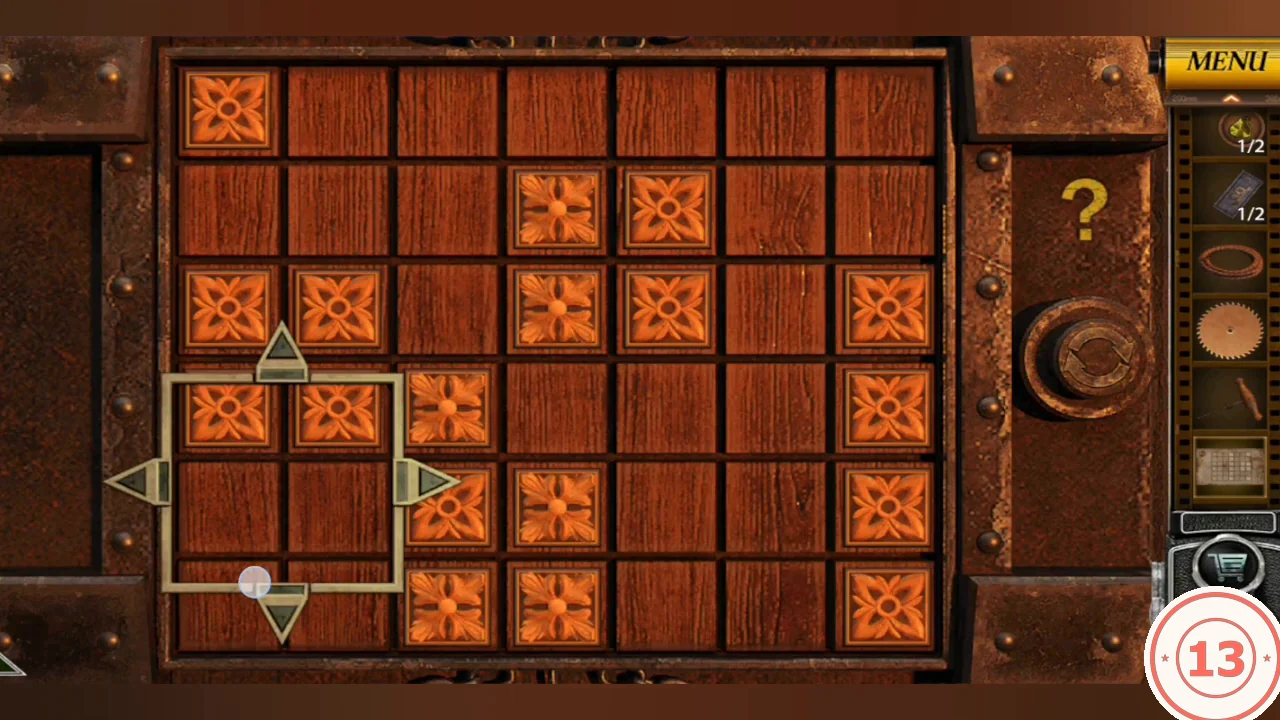
The dog in the courtyard is lying on a clue. The chest on the cart is a board of floral tiles with a movable 2x2 frame.
- Give the Steak to the dog under the lean-to. It moves away.
- Take the Clue Note with the paw print. It shows which tiles in the grid should be carved.
- Open the chest on the cart. The arrows move the 2x2 frame; tapping inside the frame rotates its four tiles clockwise. Rotate carved tiles into place until the board matches the note (X = carved tile, read left to right): row 1 X..X..X, row 2 ...X..., row 3 XX.X.XX, row 4 XX.X.XX, row 5 ...X..., row 6 X..X..X.
- Take the Ram's Horn and the Butterfly from the chest.
- Place the Butterfly in the butterfly-shaped recess on the barn door in the courtyard. The door opens to the workshop.
Saw Table and Ladder Repair
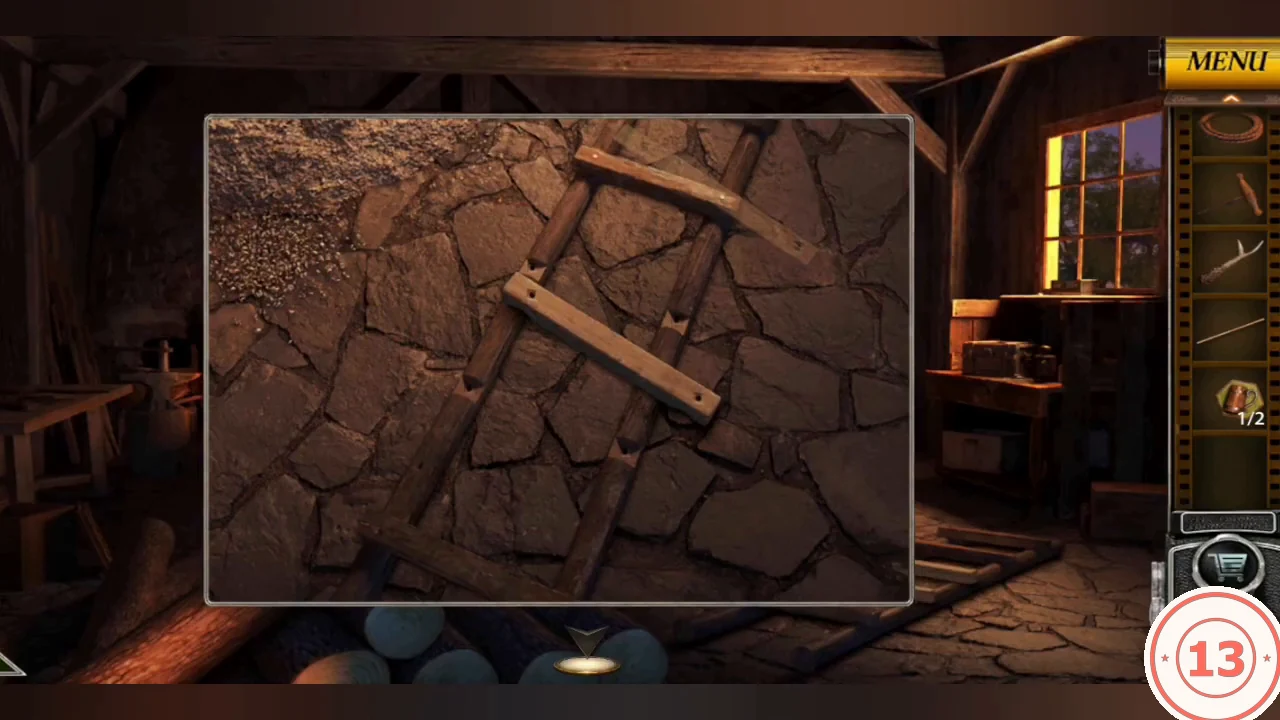
Fix the saw, cut new rungs and repair the broken ladder lying on the workshop floor.
- Take the Broom beside the saw table. Open it in the inventory to separate its handle; you now have a Wooden Stick.
- Fit the Circular Saw Blade to the saw table.
- Take the copper mug token (Hexagonal Piece 1/2) from the lit workbench at the back. The box on the bench is solved later.
- Take the Long Piece of Wood from the logs at the lower right and use it on the saw table to cut a Wooden Block of rungs.
- At the broken ladder on the floor, place the Wooden Block, then use the Nails and the Hammer. Take the repaired Wooden Ladder.
- In the tavern, attach the Ram's Horn to the ram skull on the left wall by the stairs.
Hexagonal Mug Board
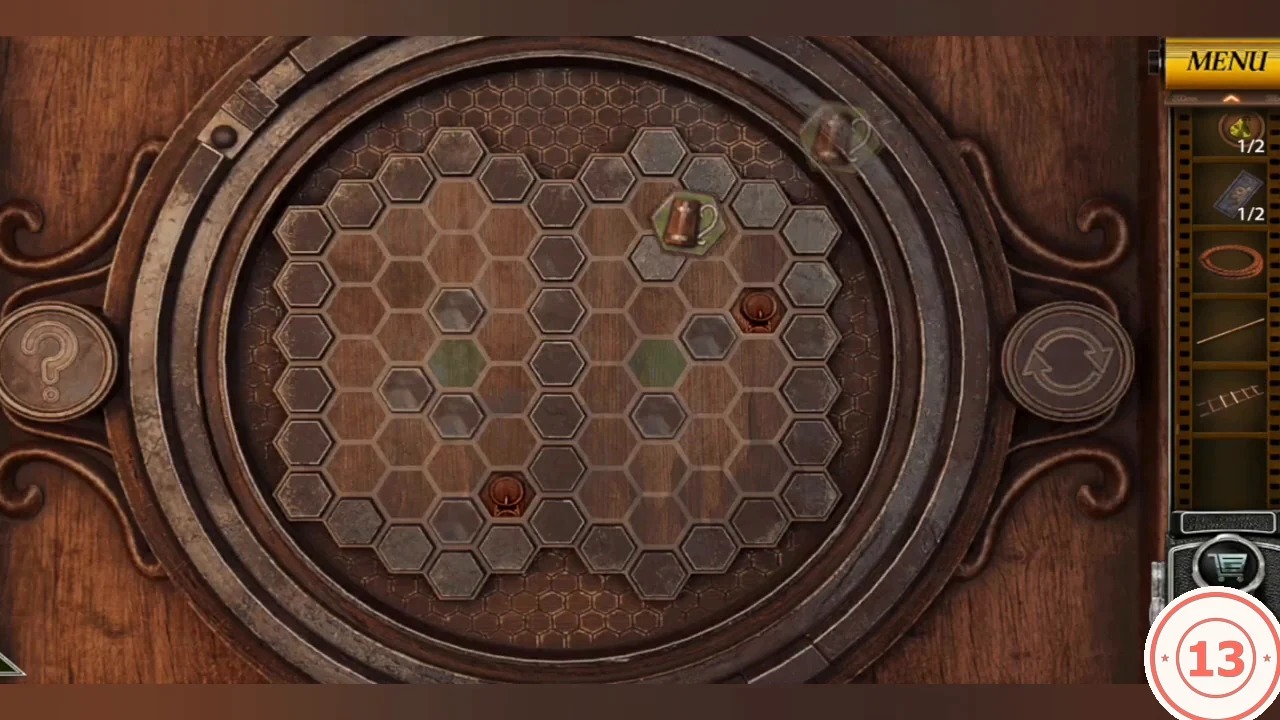
A tavern cupboard holds a hexagonal board for the two copper mug tokens.
- In the town square, use the Hand Drill on the left barrel by the steps (left of the statue). Wine drains out; take Hexagonal Piece 2/2.
- Place both Hexagonal Pieces on the round hex board in the back-left tavern cupboard.
- Tap a mug, then a direction: it slides until something blocks it. Grey stone hexes are blockers. Goal: each mug must stop on the hex directly above a red barrel hex (left mug above the lower-left barrel, right mug above the upper-right barrel). Use the stones and the other mug as stops. The guide gives the target rather than a move list: before each slide, check where the mug will stop.
Ram Skull Blueprint and Angle Dial
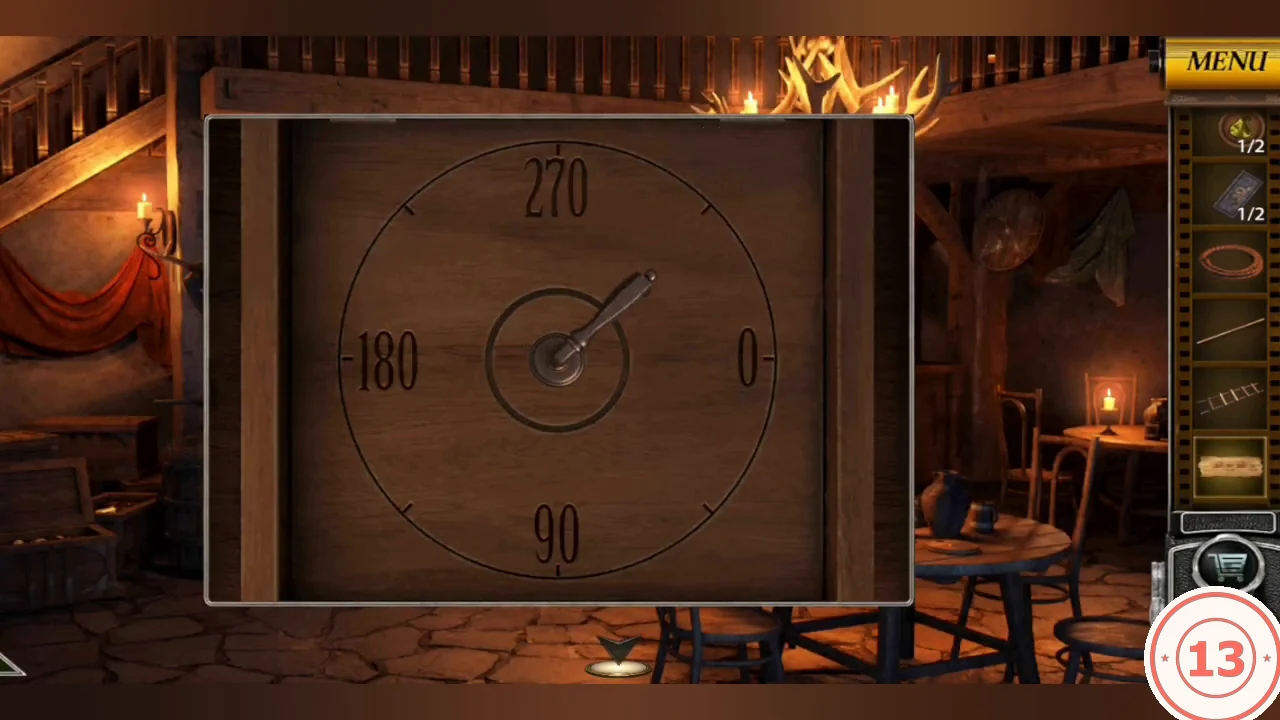
The opened cupboard reveals a box with an angle dial marked 0 at the right, 90 at the bottom, 180 at the left and 270 at the top.
- At the ram skull (now with both horns), drag the left horn down, then the right horn down. The mount drops; take the Blueprint from the niche.
- Use the Blueprint on the angle dial in the cupboard. Its five arrows are turns of the handle, starting from 0: clockwise 45, clockwise 135, counter-clockwise 90, clockwise 225, counter-clockwise 180. Turn the handle in those directions so it stops in turn at 45, 180, 90, 315 and 135. For the fourth turn, go clockwise from 90 through 180 and 270 to 315, not the short way back through 0. The box opens.CODECW 45, CW 135, CCW 90, CW 225, CCW 180 (stops 45, 180, 90, 315, 135)
- Take the Brass Weight and Grapes 1/2.
Workshop Weights Cabinet
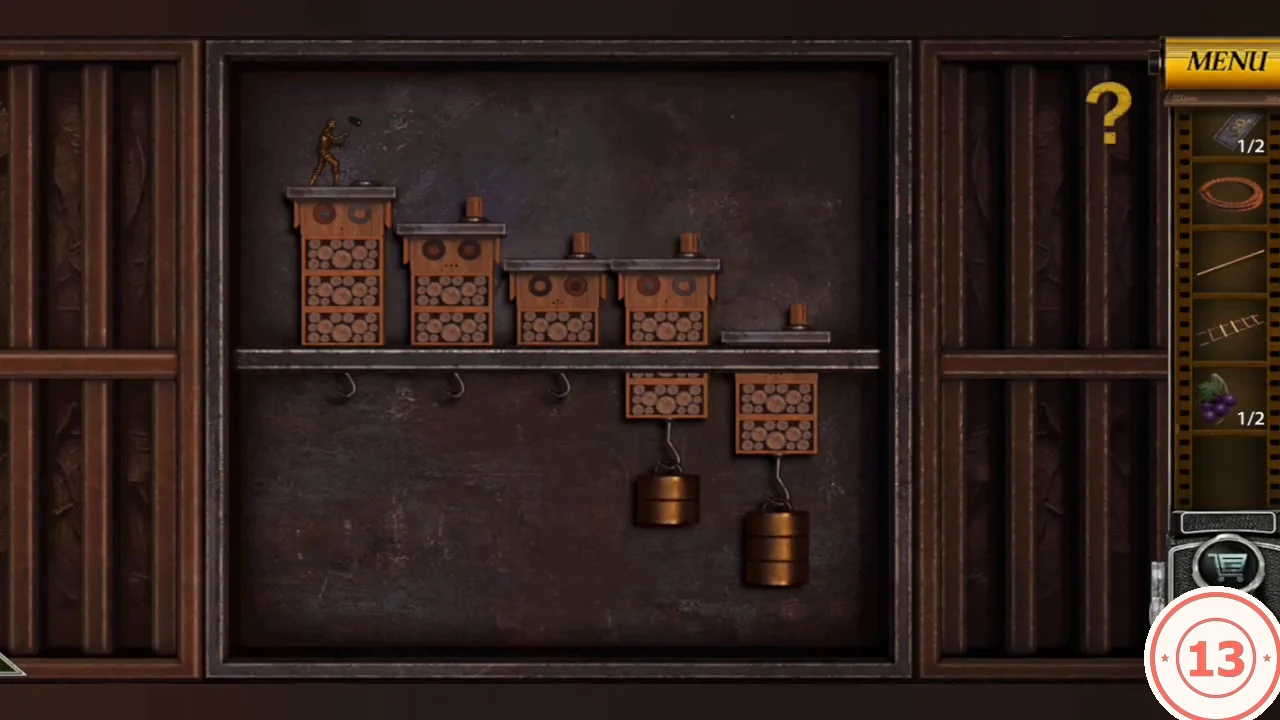
The barred wall cabinet in the workshop holds five log stacks with hooks below and a small worker figure. A weight pulls its stack down; the worker can only step to a neighbouring stack whose top is level with his.
- Hang the Brass Weight on hook 4. The large two-tier weight is already on hook 5. The large weight lowers a stack by three levels and the Brass Weight by two.
- Move the weights in this order, letting the worker walk each time: (1) large weight to hook 1 and Brass Weight to hook 2, then walk from stack 1 to stack 2; (2) Brass Weight to hook 3, then large weight to hook 2, walk to stack 3; (3) Brass Weight to hook 4 (large stays on 2), walk to stack 4; (4) Brass Weight to hook 5, then large weight to hook 4, walk to stack 5. The cabinet opens.
- Take the Hook. Combine the Hook, the Wooden Stick and the Coiled Rope in the inventory to make the Long Hook.
- At the dead red-leaf tree at the burial ground, use the Long Hook on the branch. The Pocket Watch falls.
- Open the Pocket Watch in the inventory: it holds a photo and a Folded Paper. Open the paper to get a Clue Note with a vegetable pyramid and the number 15 at the top.
Market Stall Vegetable Lock
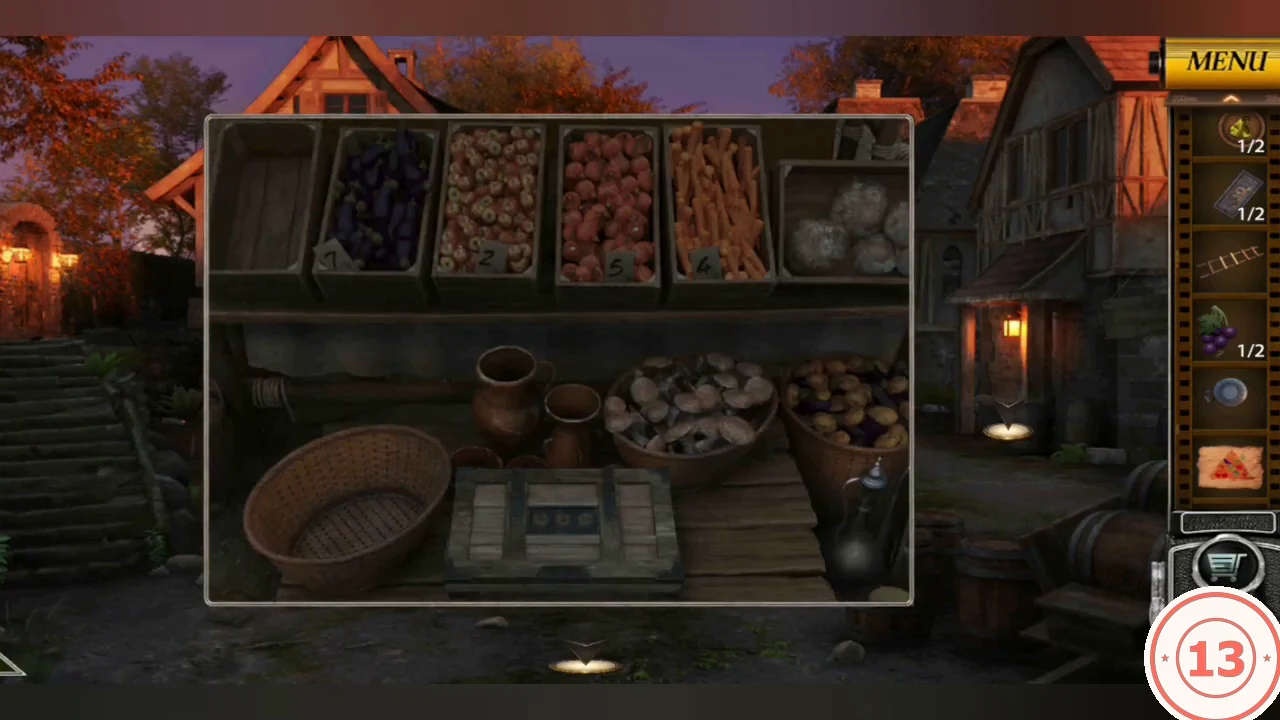
The locked box on the market stall has three push dials with symbols. The crate tags (eggplant 7, carrots 4, tomatoes 5, plus a pale crate 2) and the vegetable pyramid are the clue.
- Tap the price tags on the market stall crates to read them, then examine the box with three push dials.
- Tap the left dial 8 times, the middle dial 3 times and the right dial once. The box opens; take the Key.CODE8, 3, 1
- Use the Key on the house door on the left near the stall to enter Aunt Mary's house.
- Give the Pocket Watch to Aunt Mary. She explains that Sophia was handed to the priest and left a diary; finding it is your next goal.