Arrival in Maureen Town
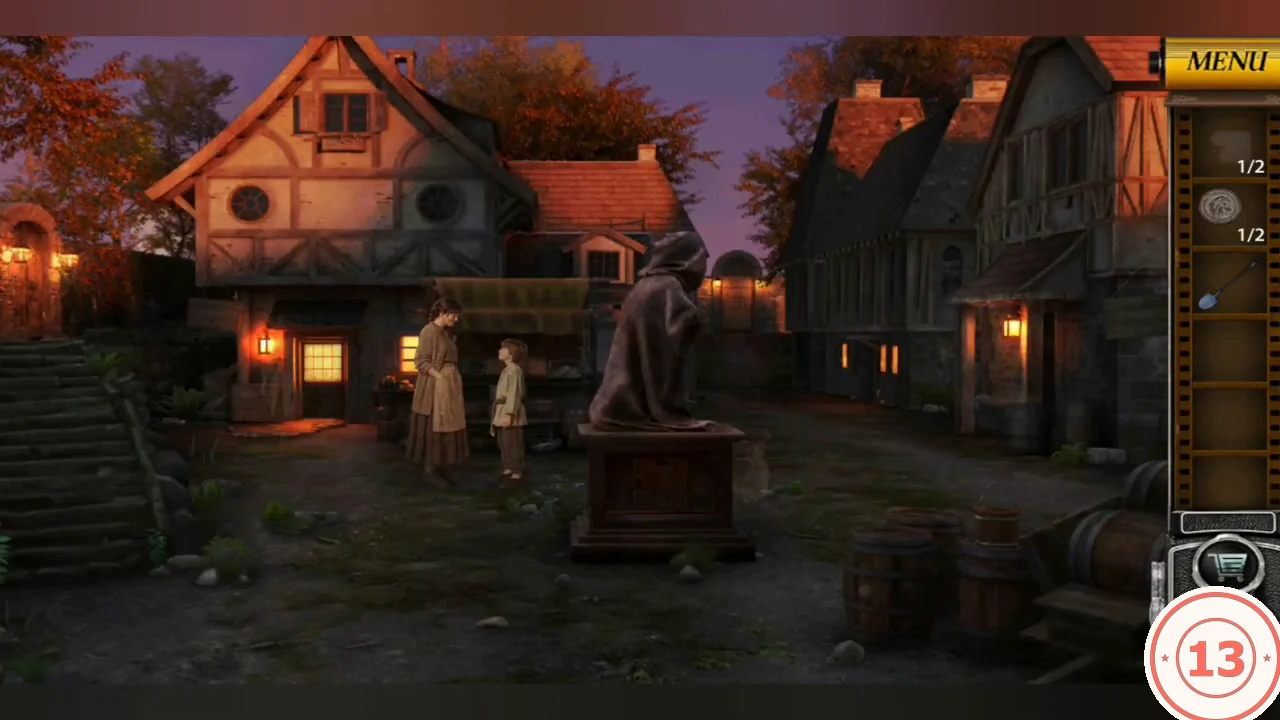
Collect the first items around the stone cottage, then meet the people in the town square. In the dialogue, the town is called Maureen Town.
- Near the logs and cart outside the stone cottage, take the Wooden Toy (a small horse toy).
- In the stone niche with three coloured bottles, take the torn paper (1/2).
- Open the wall lantern and take the carved animal Stone Disc (1/2).
- Go to the town square and give the Wooden Toy to Taya, the Mayor's son.
- Take the Shovel leaning by the notice-board wall. It is reused several times.
- Watch the scene with Aunt Mary. Your task is to find her pocket watch, which holds a photo of Sophia.
Buried Rune Stone and Pillar Relief
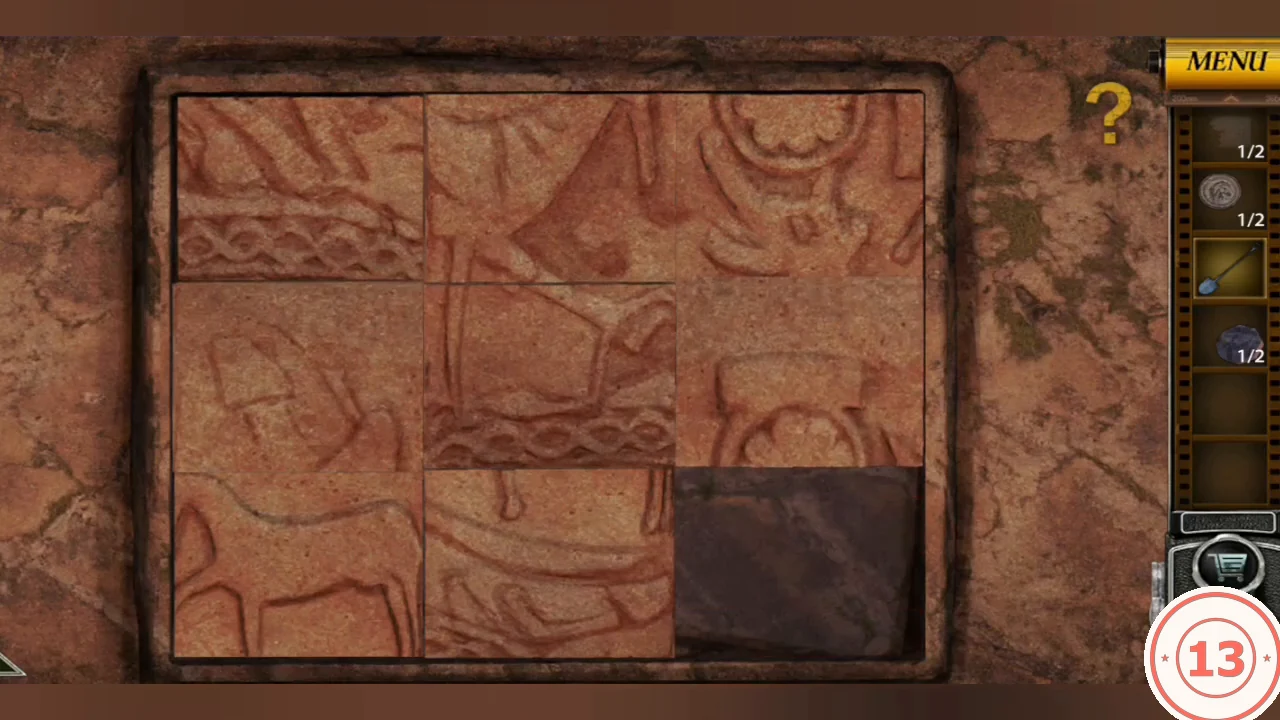
Follow the path to the sacred burial ground with its altar, standing pillar and large boulder.
- Read the text on the boulder, then use the Shovel on the ground beside it. Take the Rune Stone (1/2). A buried box with a lock is also exposed; leave it for later.
- Examine the standing pillar on the right. It is a 3x3 sliding stone relief: slide the stones through the gap until the carving is whole. A compartment opens; take Skull 1/2.
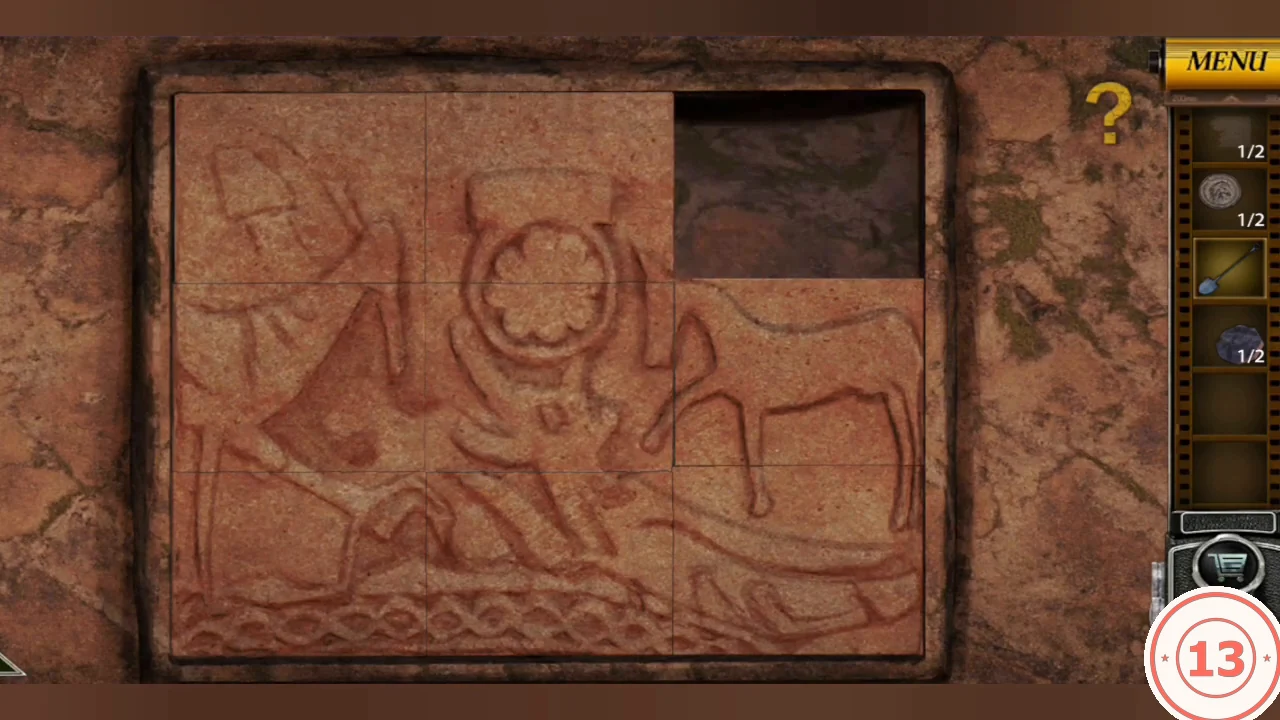
The completed pillar relief, with the gap in the top-right corner. - Examine the altar: a wheel with Roman numerals I–VIII holds skulls at every position except IV and V. Take Stone Disc 2/2 from the altar rim near IV.
Animal Disc Pedestal
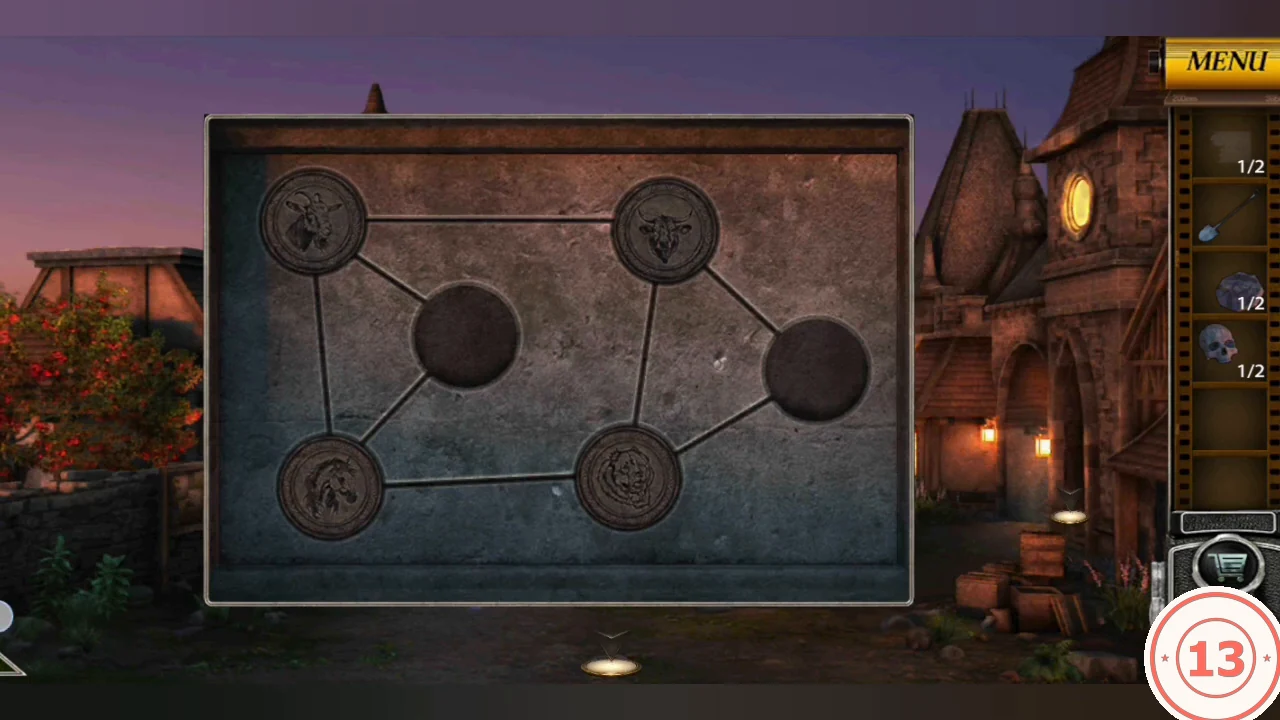
The statue pedestal in the town square holds a board of six linked nodes. The four notices on the town notice board show the animals to arrange: horse, goat, dog and bull.
- Place both Stone Discs into the empty nodes on the statue pedestal.
- Slide the animal discs along the lines until the horse is top left, the goat centre left, the dog top right and the bull far right. Both bottom nodes stay empty. The panel drops.
- Take Rune Stone 2/2 from the opened niche. An iron chest with four Roman-numeral drums also sits there; it is opened later.
Rune Mural Octagons
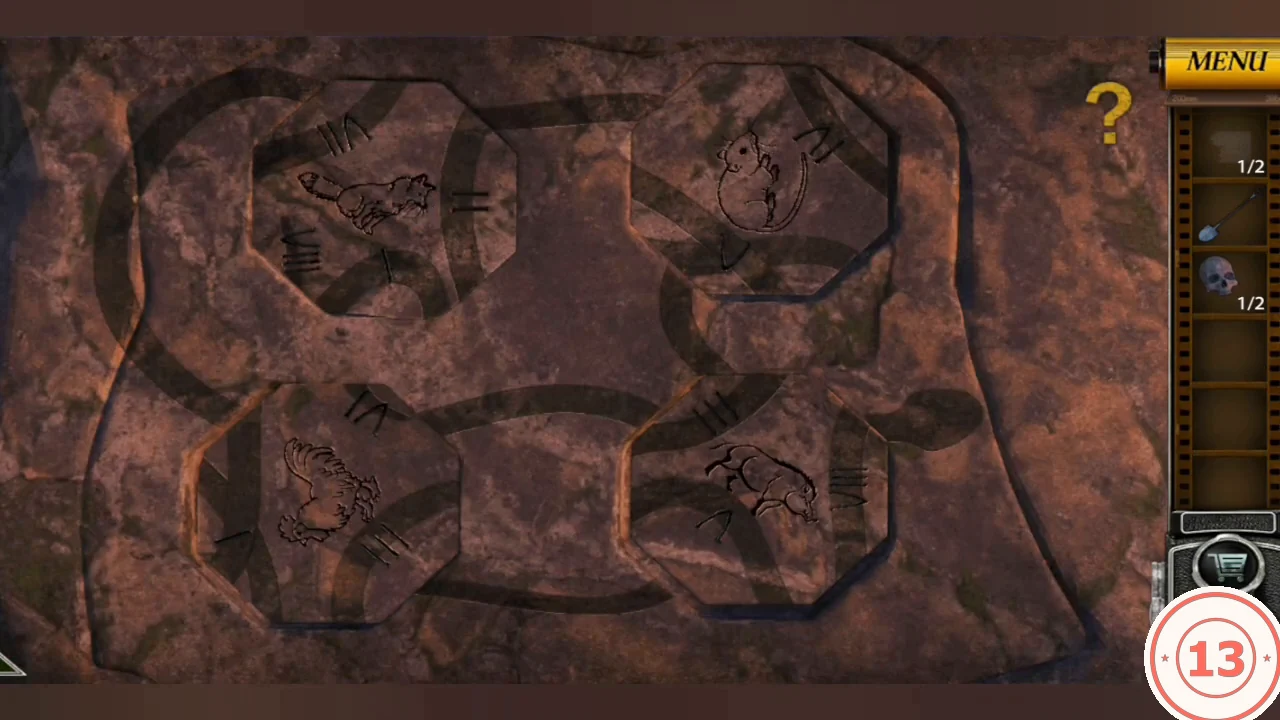
The stone base under the burial-ground altar shows four octagon slabs (rat, boar, fox and rooster) crossed by a snake band.
- Place both Rune Stones in the two empty slots at the top of the mural.
- Tap a slab to rotate it; slabs can also exchange places. Arrange them so the snake band runs continuously: rat (curled) top left, boar (upright, facing right) top right, fox (head up) bottom left, rooster (facing right) bottom right. The solved mural is photographed automatically; its animal orientations are the clue for the stone cottage discs.
- Take Skull 2/2 from the niche that opens.
Altar Skull Wheel
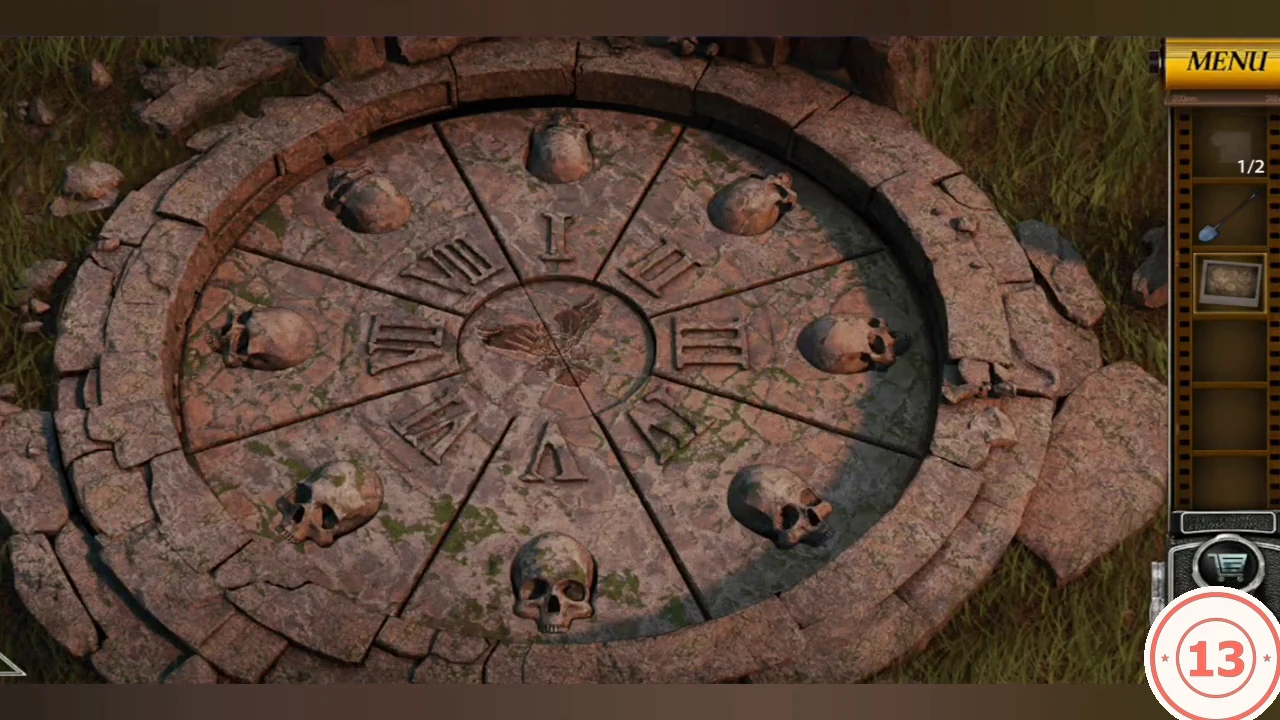
Put the two skulls in the empty altar sockets, then turn the correct skulls. Tapping a skull rotates it.
- Place the skulls into the empty sockets IV and V on the altar wheel.
- Tap the skulls at VIII, III, II, IV, V and I once each. Leave VI and VII untouched. The altar lid slides open to a pit with a robed skeleton. These six taps open the altar. How the mural encodes them is not obvious, so follow the list exactly.CODEVIII, III, II, IV, V, I
- In the pit, take the black Deer Carving Piece and the engraved round stone disc (later called the Sun-Engraved Stone).
Stone Cottage Animal Discs
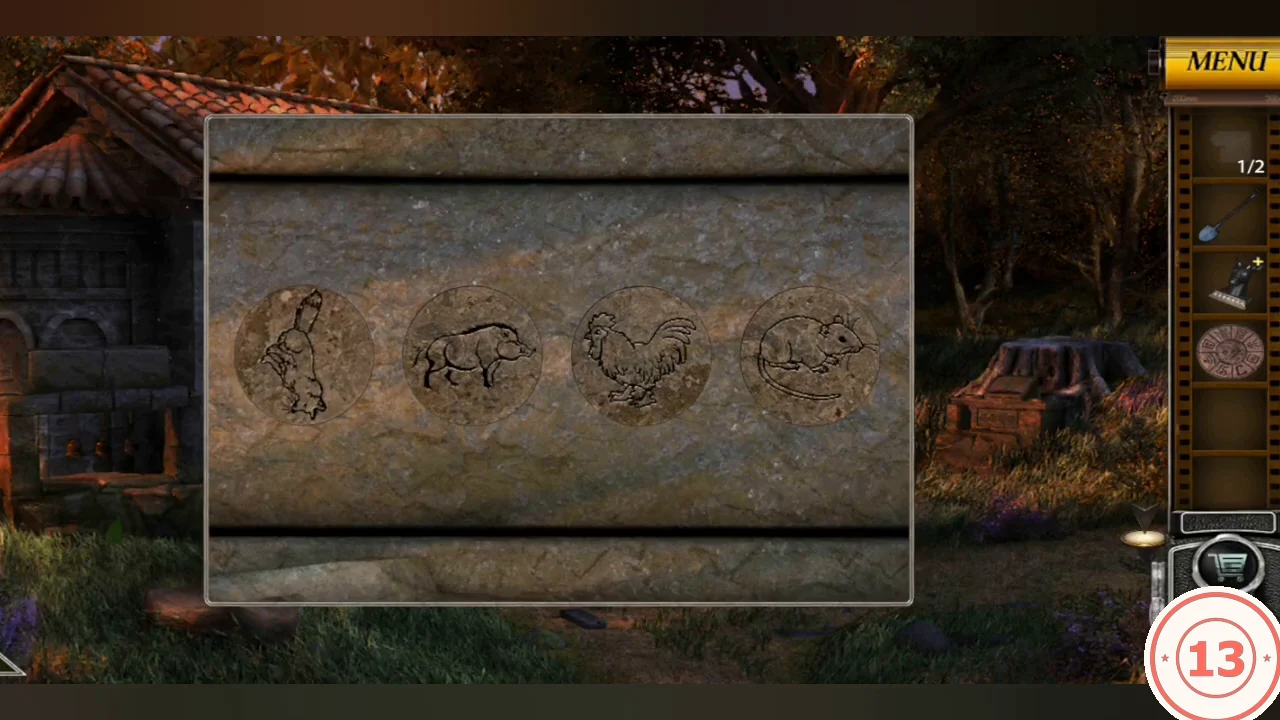
The stone pedestal with a carved book at the stone cottage has four rotating discs: fox, boar, rooster and rat. Use the mural photo as the clue.
- Tap each disc to rotate it until it matches the mural: fox head up, boar vertical with its head down, rooster upright and rat curled with its head at the lower left. A compartment opens; take wooden diamond token 1/2.
- At the cottage's lower window with three bells, take wooden diamond token 2/2 from the ledge.
Diamond Gate and Rail Puzzle
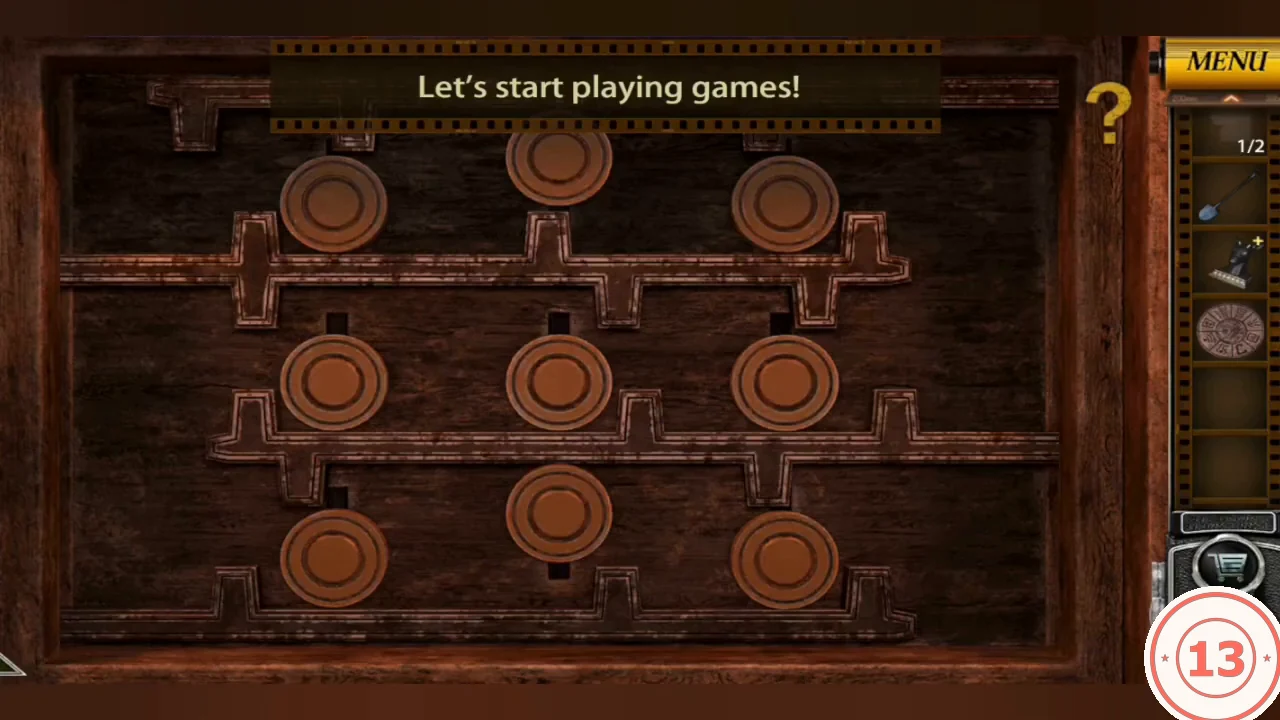
The wooden gate to the right of the statue leads to the courtyard. It needs the two diamond tokens and a mechanical rail puzzle.
- At the gate right of the statue, place both diamond tokens at the top of the two arrow slots and drag each token down along its arrow. A panel opens.
- Rail puzzle: nine discs sit in short vertical slots between three horizontal bars with raised and lowered teeth. Tap a disc to move it up or down in its slot. Tap a bar to slide it sideways; its teeth can only pass a disc that has been moved out of their way. When nothing blocks a bar, it slides off the board. Clear all three bars, one at a time, by moving the discs that block each bar; the puzzle is complete when the nine discs stand in a plain 3x3 grid. It is usually solved by trial and error in about a minute, so no fixed move list is given.
- Go through the gate (right of the statue) to the courtyard. Talk to Taya by the well to receive the key to Taya's house.
- Take the Hammer beside the chest on the cart. The chest itself is opened later.
- Back in the town square, take the Wooden Bucket from the barrels.
Well, Crates, Tree Panel and Window
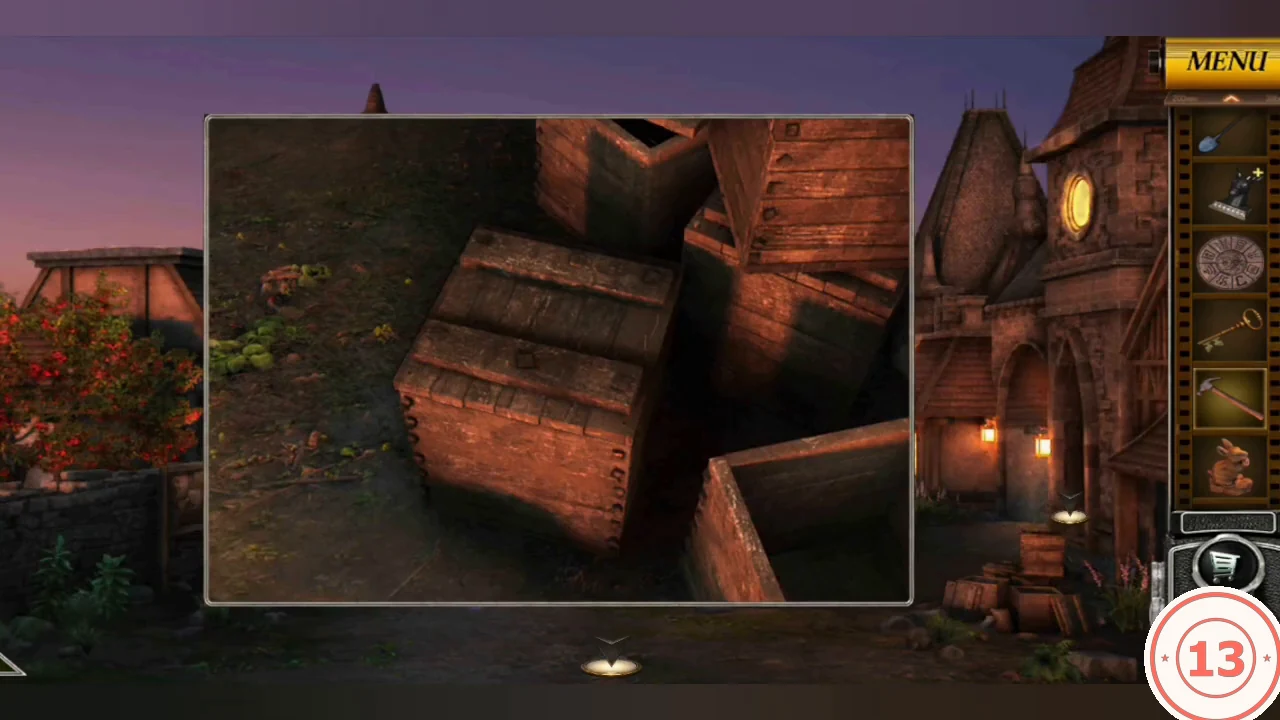
Use the bucket, hammer and knife to collect the next set of items.
- At the courtyard well, open the wooden lid and use the Wooden Bucket on the rope. It brings up the Rabbit Wood Carving.
- In the town square, turn toward the clock tower and use the Hammer on the crate stack to pull the nails. Take the Nails, the Knife and the metal Iron Box.
- At the stone cottage, look at the signpost reading SACRED BURIAL GROUND (it carries a dot grid). Use the Knife on the carved oval panel on the tree trunk below it and take Fruit Emblem 1/2 (pear).
- At the cottage's lower window, use the Knife on the knife-shaped groove in the lintel. Take torn paper 2/2. Together the halves show four dot shapes: a small square, a 3x3 square, a diamond with a centre dot and a tilted square with inner dots.