CRIME SCENE
Crime Scene: Clues and the Long Hook Tool
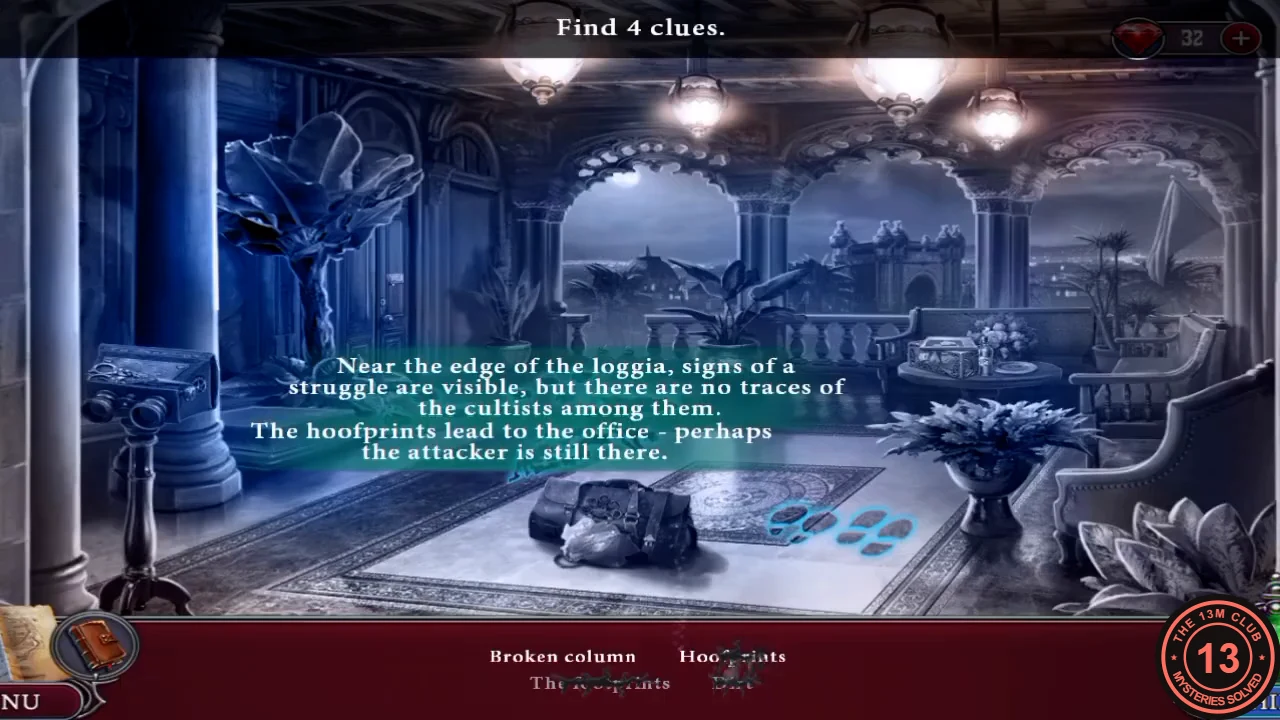
Antoni Riba has been attacked on his loggia. Your first job is to reach the key caught on a palm frond.
- Optional pickups. Collectibles: a flat plaque on the floor between the carpet and the small bench; a picture set among the spindles of the right bench railing. Morphing objects: a raven just right of the middle flower pot; a small hanging figure high on the wall between the arches, above the large-leaved plant and left of the broken railing.
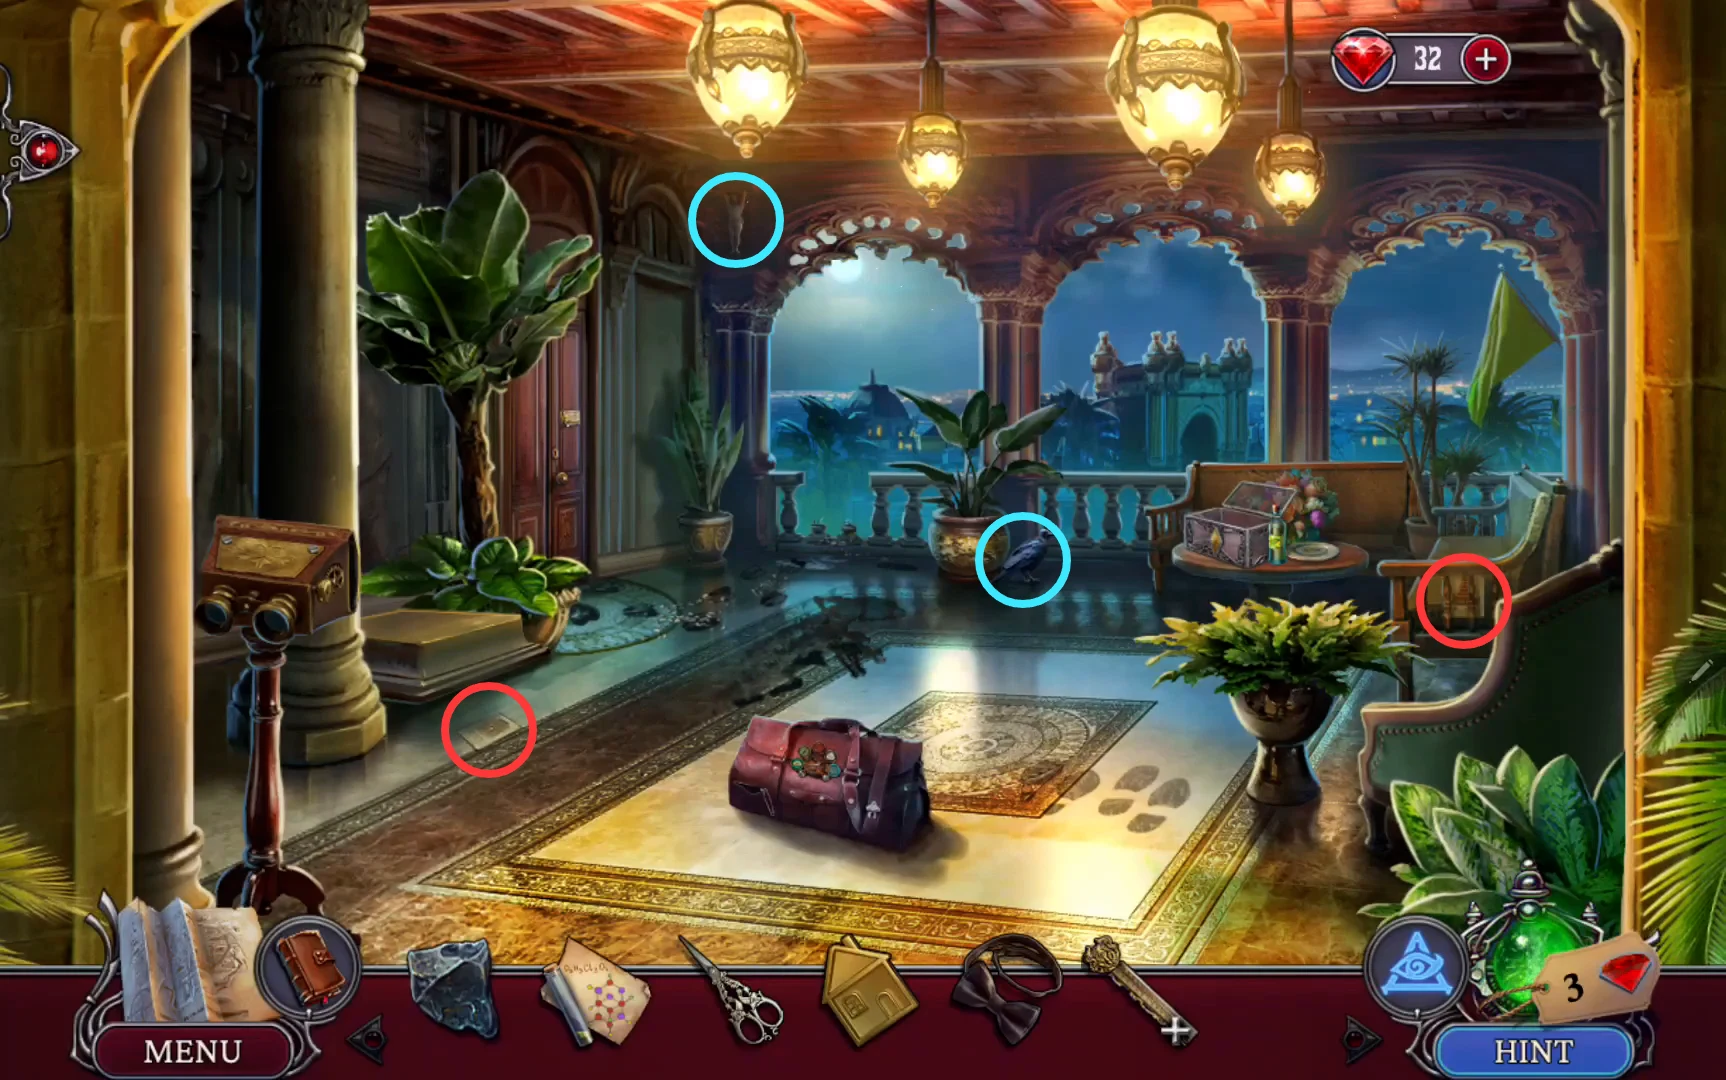
Optional pickups: red rings mark the collectibles, cyan rings the morphing objects. - Watch Sofia and Bernardo arrive at Riba's loggia with the invitation and get arrested. Officer Ramirez invites you to examine the scene.
- Tap the blue eye and find 4 clues: Broken column, Hoofprints, The footprints and Dirt. The task becomes "Get to Riba's Office".
- At the railing, click the boot footprint, the dirt, the filed broken column and the police line. You spot the key on a palm frond, out of reach.
- At the side table, take the clipping from the casket to get the Yellow House Figure. The green bottle's cork is blocked and the casket has a diamond socket; both come back later.
- At the door, take the bent wire hook. At the stereoscope stand, take the Scissors. On the bag, read the blueprint and take the Bow tie, then use the Pin from Deduction 3 on the broken zipper to get the Casket Token. The bag's main lock is rusty, so leave it for now.
- Use the Casket Token on the casket and take the Folded Ruler.
- In your inventory, unfold the ruler, hook the wire on its tip, cut the bow tie ribbon with the Scissors and tie it on. You now have a long hook tool.
CRIME SCENE
Crime Scene: Hooking the Key
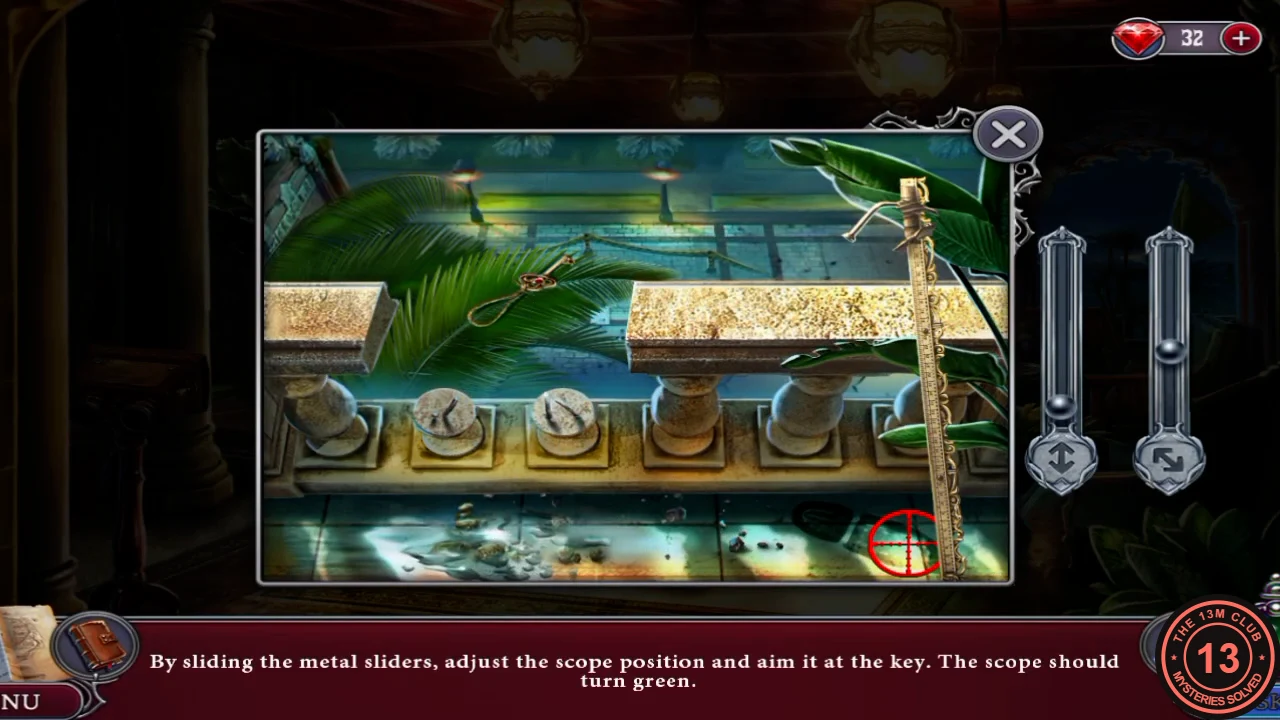
Use the long hook tool to reach the key on the palm frond.
- Use the long hook at the railing. Move the metal sliders until the scope turns green on the key, then take the Office Key.
- Use the Office Key on the door and turn on the lamp inside to enter Riba's Office.
RIBA'S OFFICE
Riba's Office: Bust and Model Search
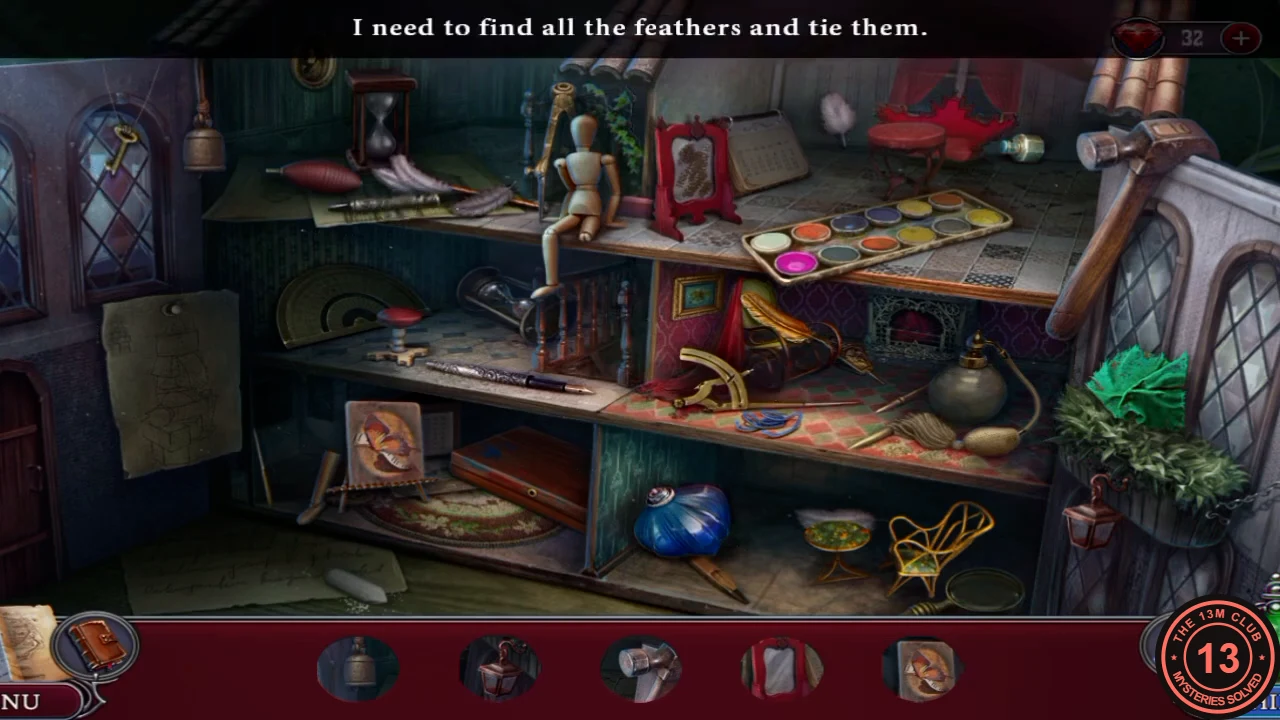
The architectural model on the right table holds a small search.
- Optional pickups. Collectibles: a small red card on the wall in the corner below the light fixture; a small grey panel just right of the top right corner of the blue cathedral picture between the windows. Morphing objects: a small framed building picture below the large one in the right-hand column of the picture wall; a teal cushion-like object on the floor by the drawers, next to the red books.
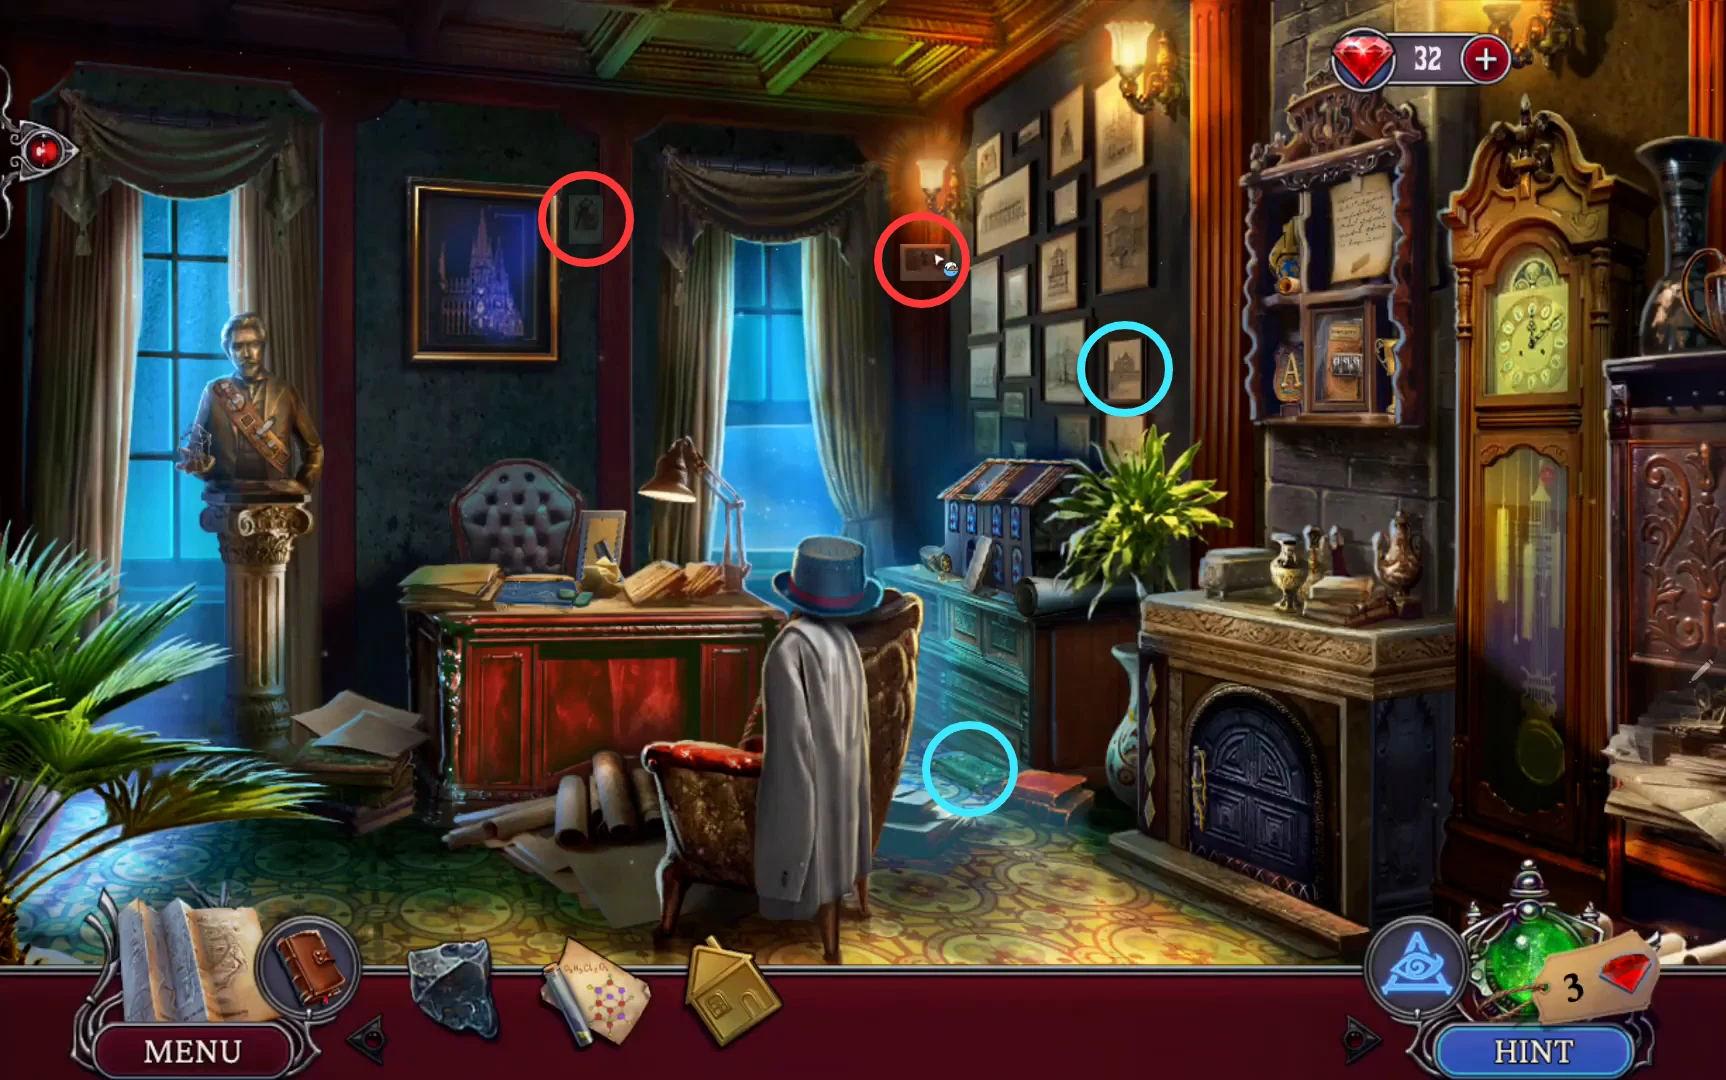
Optional pickups: red rings mark the collectibles, cyan rings the morphing objects. The morphing objects can look like ordinary things until they change. - Place the Yellow House Figure on the sash of the Bust. Take the wire house from its hand and the key for the model. The task becomes "Check Riba's desk".
- At the model on the right table, read the note and take the Medal pinned to it, a ribbon with a coin. Take the measuring tape, then use the key in the model's door.
- Find the silhouette items in the model. Collect the feathers and cord, then attach the mannequin leg to assemble a duster. Use the duster on the dirty mirror to get the Desk token.
RIBA'S OFFICE
Riba's Office: Fireplace Mechanism
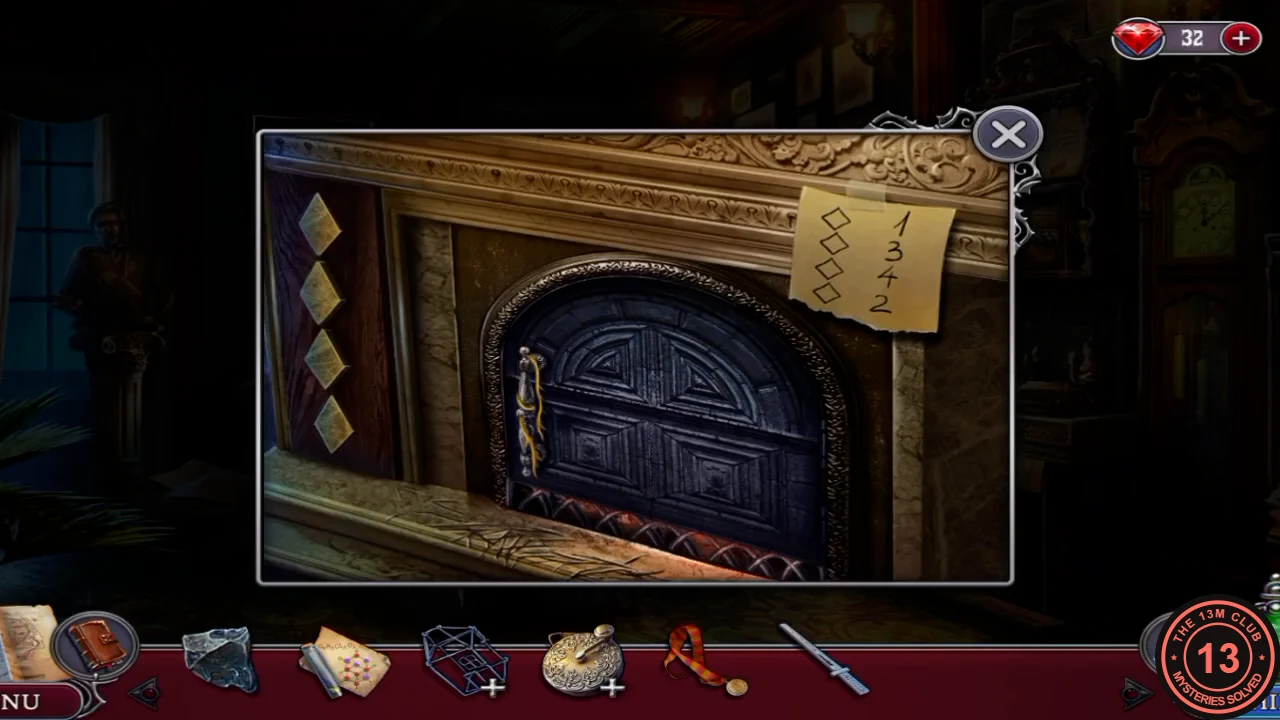
The photo in the desk gives a press order for the wall behind the fireplace.
- Open the desk drawer with the Desk token. Read the photo note (1-3-4-2, the Fireplace Solution) and the Barcelona News, and take the Red House Figure.
- Put the Red House Figure on the sash of the Bust and take the long thin tool it releases. The fireplace now sparkles.
- At the fireplace, find the suspicious marks: Yellow threads, Scratches on the stone and A strange wall.
- Put the Fireplace Solution on the wall and press the diamonds, numbered top to bottom, in the note's order: 1, 3, 4, 2. A bull costume slides out, and the task becomes "Get the costume measurements".CODE1, 3, 4, 2
RIBA'S OFFICE
Riba's Office: Measuring the Costume
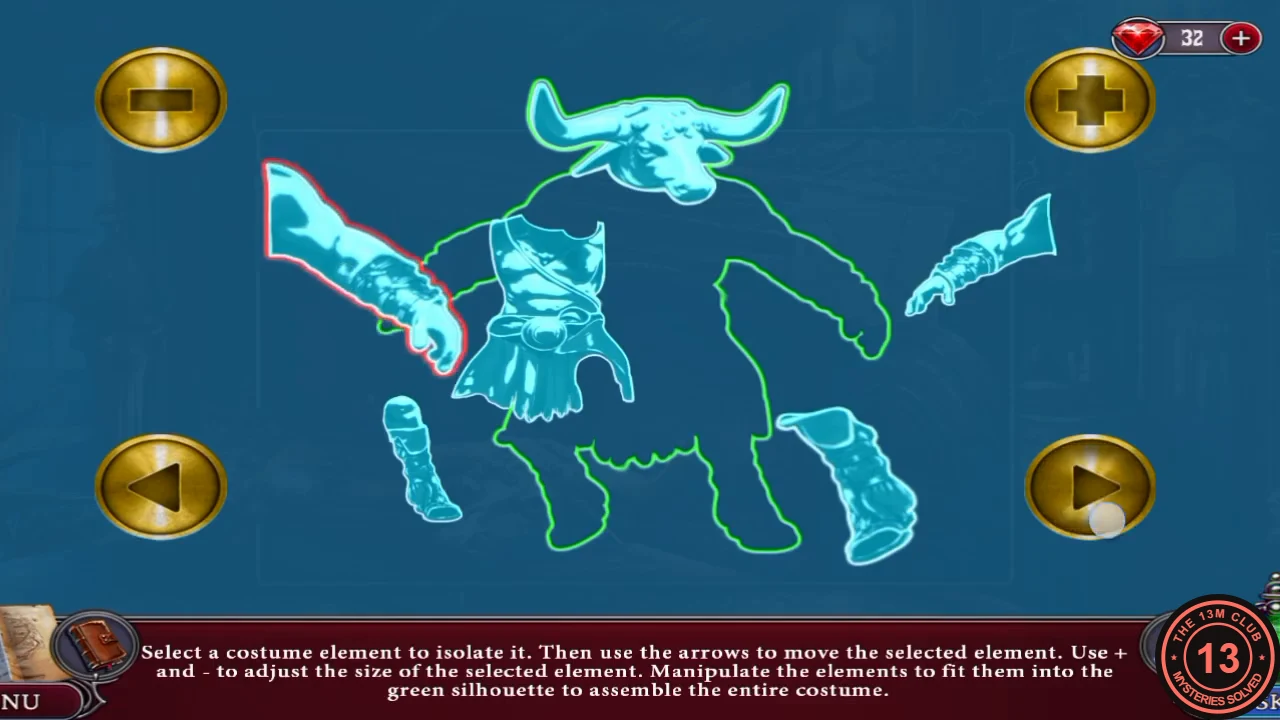
Build a measuring kit, then fit each costume piece to its outline.
- Take the Bull Statue from the costume ledge. Open the grate and read the burnt letter. The coals are still hot, so use the long thin tool to get a piece of Coal.
- On the shelf to the right of the desk, take the Paper and read the purchase note. Note the trophies and the code panel for later.
- Combine the measuring tape, Paper and Coal into a measuring kit.
- Use the kit on the costume. With the + and - and arrow buttons, bring each piece to its green outline. The note then reads Length 165, Width 85, Height 20. Take the Carving Chisel.
RIBA'S OFFICE
Riba's Office: False Drawer Bottom and Six Pairs
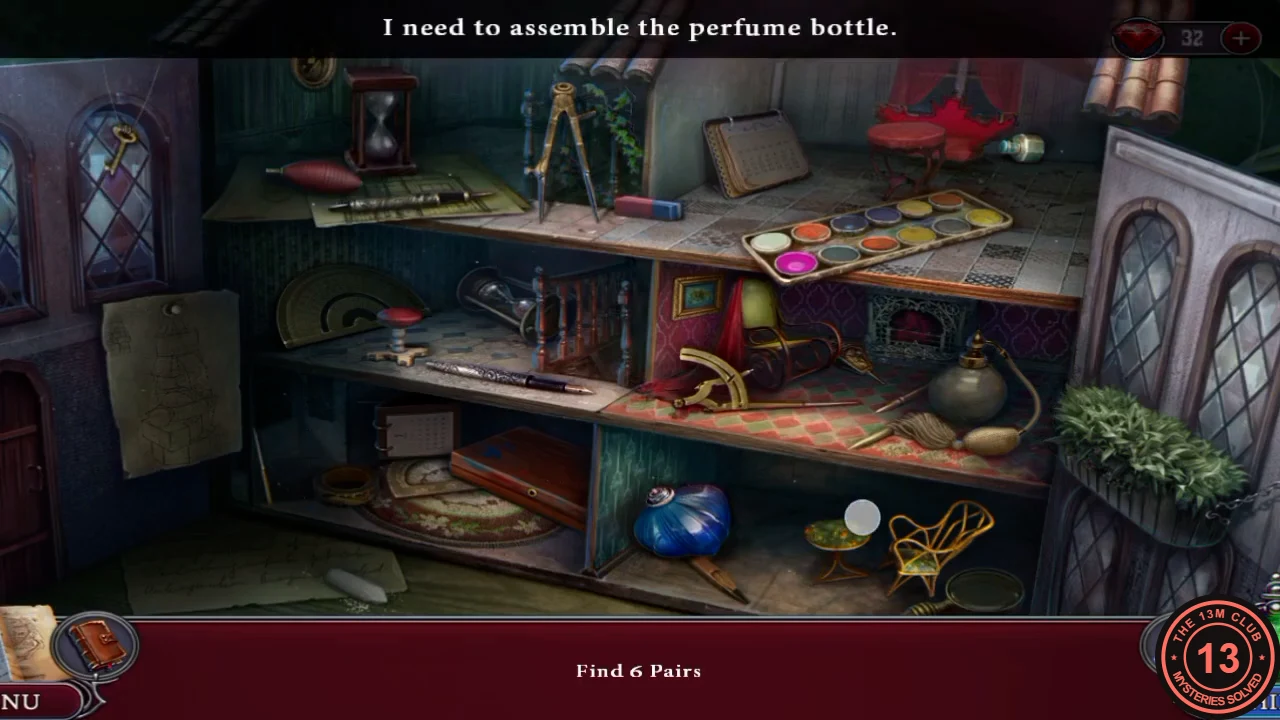
A second search inside the model.
- Use the Carving Chisel on the false bottom of the desk drawer. Read the list of tools and take the Protractor and the Gear.
- Fit the Gear to the model and find 6 pairs. Assemble the perfume bottle, and use the small key on the drawer inside. Your reward is the Drawing Compass.
- Combine the wire house and the Drawing Compass into a Bottle Opener. Use it on the green bottle on the side table to get Oil.
RIBA'S OFFICE
Riba's Office: The Bag's Sphere Lock
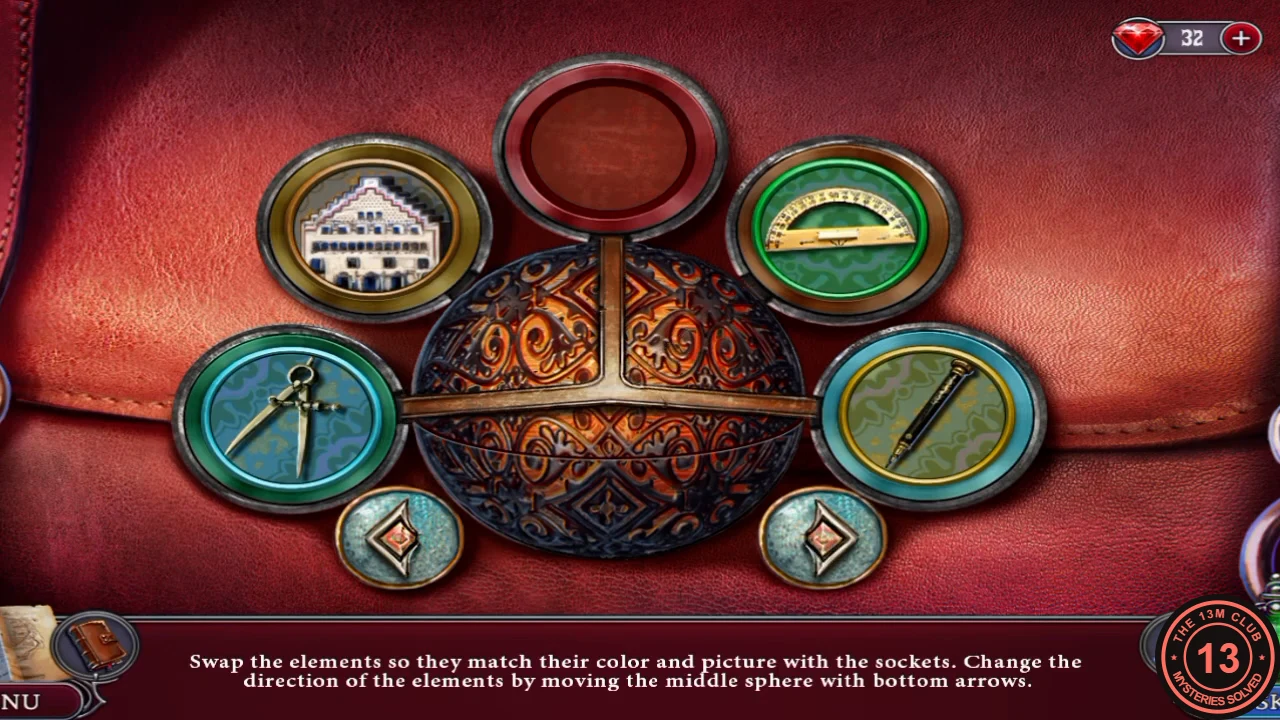
Rotate the sphere to choose which two sockets are connected, then move the tools until each sits on its own colour.
- Oil the rusty bag lock to open the puzzle. Rotating the sphere's ridge selects which two sockets connect, and a tool can then move into the empty one. The starting layout is: upper left House, top empty, upper right Protractor, right Pencil, left Compass.
- Make these moves in order: Compass from left to top; Protractor from upper right to left; House from upper left to upper right; Pencil from right to upper left; Compass from top to right. The final layout is upper left Pencil (olive), upper right House (brown), right Compass (teal), left Protractor (green), with the top (red) empty. The bag opens: take the Ink Remover.
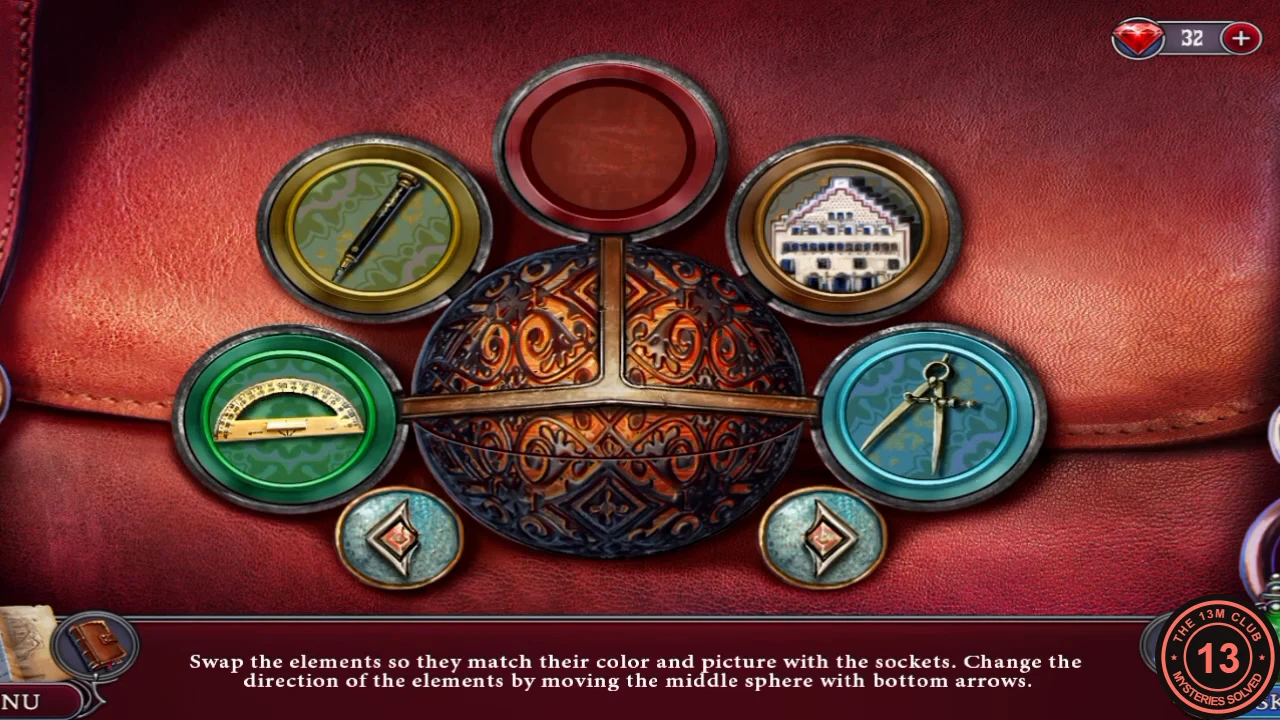
The final layout, with each tool on its own colour and the top empty.
RIBA'S OFFICE
Riba's Office: Diary, Lens, Trophy Shelf and Folder
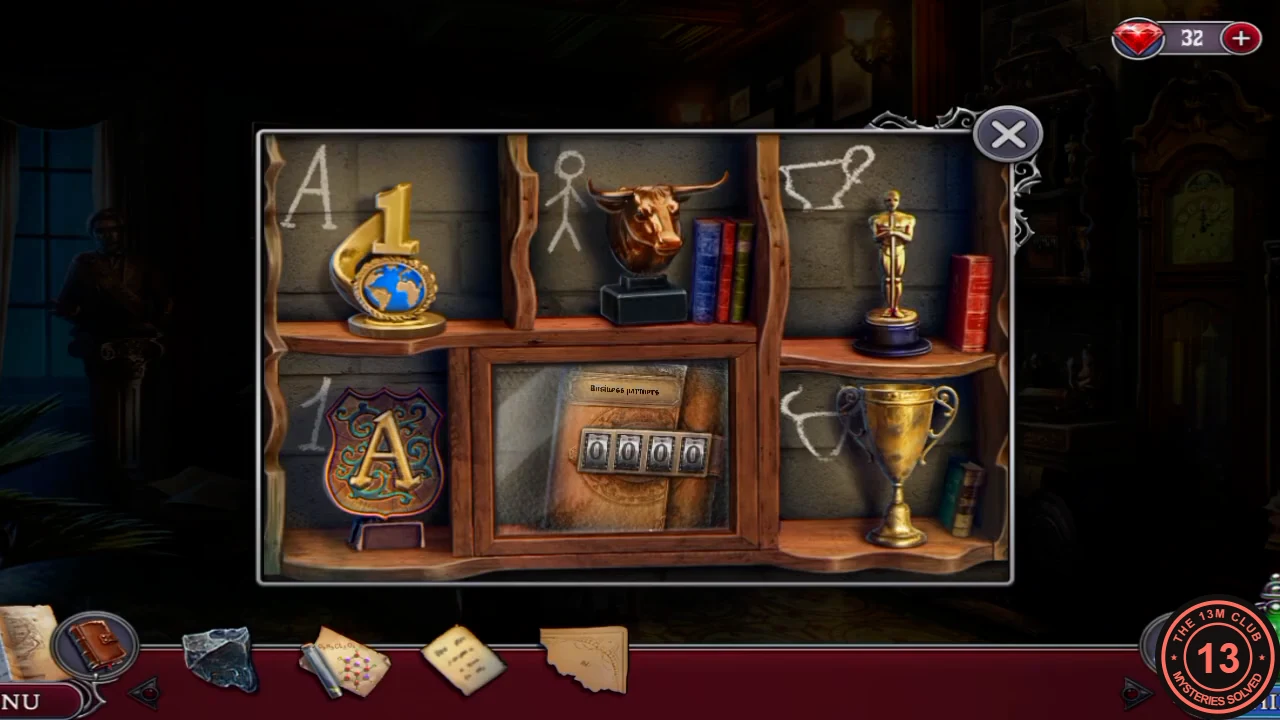
Reveal the diary's hidden text and open the business partners folder.
- On the desk, open the diary and use the Ink Remover on both ink pages. Take the Glove. The restored text mentions Carlos and tells you to check the folder.
- At the stereoscope, unscrew the plate with the Medal's coin and use the Glove to take the glass lens. Use the lens on the diary's right page to read the code 1889. The task becomes "Check business partners folder".
- On the shelf, place the Bull Statue, then swap the trophies to match the chalk outlines: A shield to top left; statuette to top middle; cup to top right; globe "1" to bottom left; bull to bottom right. The glass opens.
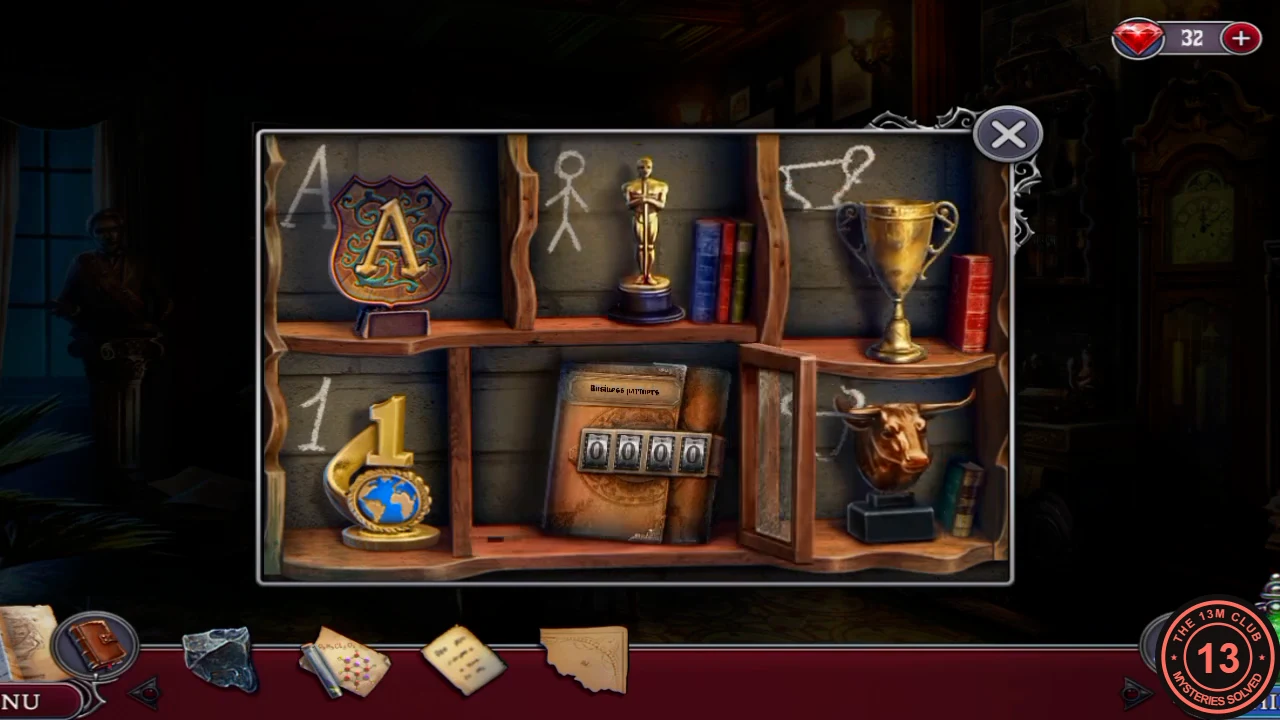
The sorted shelf, with the glass door now open. - Enter 1889 on the folder and read the profiles to learn about Carlos.CODE1889
RIBA'S OFFICE
Riba's Office: Deduction 4
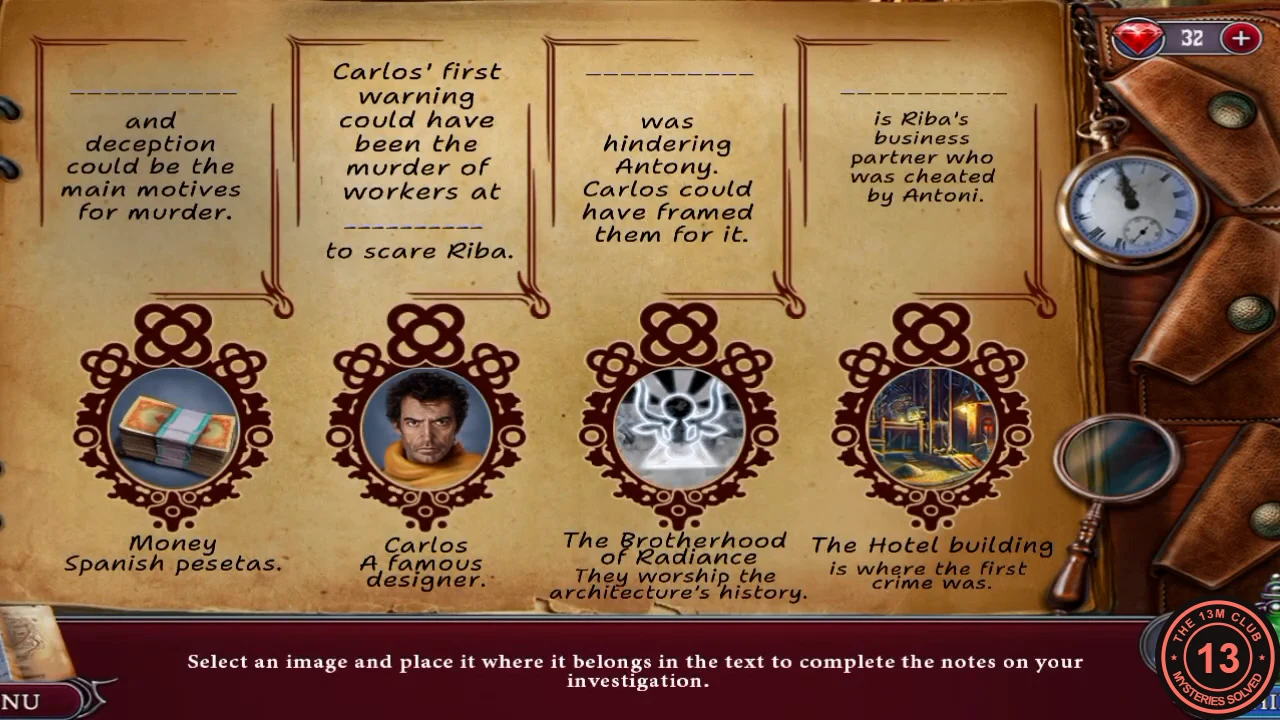
Conclude that Carlos is the main suspect.
- Solve Deduction 4. Fill the blanks left to right: Money; The Hotel Building; The Brotherhood of Radiance; Carlos. Left question: "Carlos might have tried to kill Riba out of revenge". Right question: "Carlos wanted to blame all the murders on the cultists". Centre question: "Carlos is the main suspect now". Your reward is the Sharpener.
RIBA'S OFFICE
Riba's Office: Finding Carlos's Address
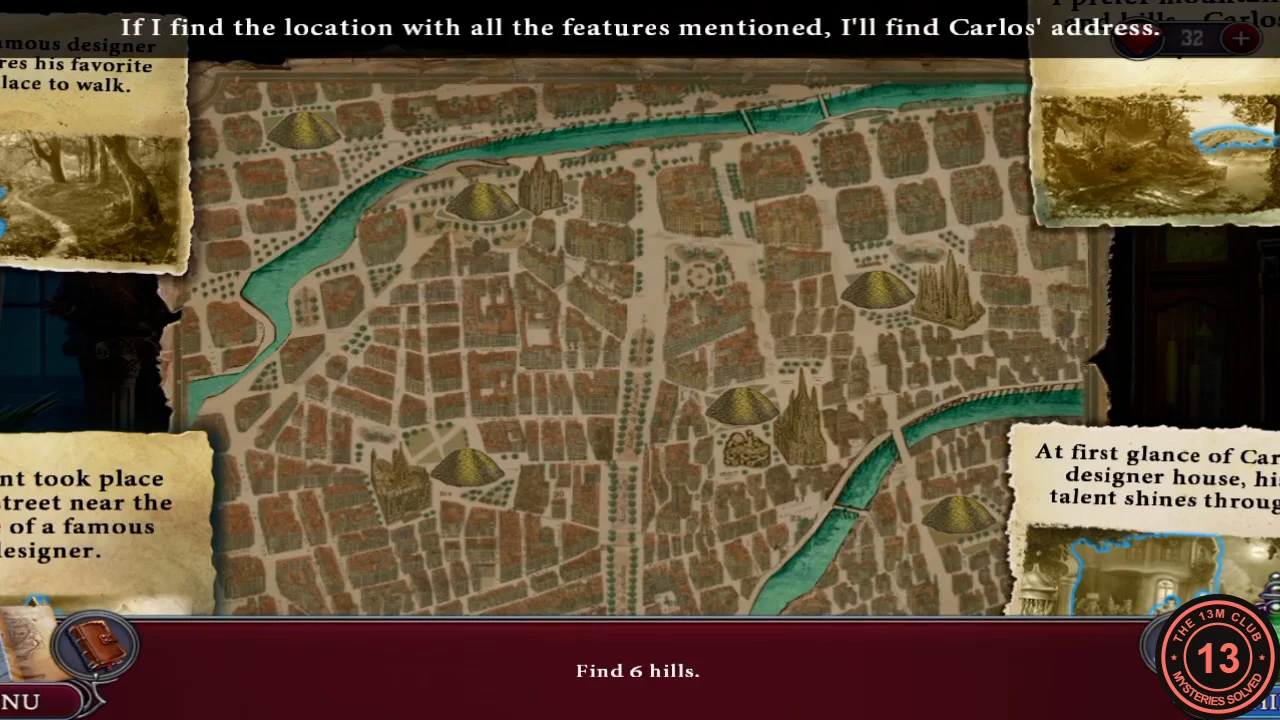
Search the map for his house.
- The task is "Find Carlos' address". Label the cards: Big river top left, Hill top right, Historical building bottom left, House bottom right. On the map, find 6 hills, 4 historical buildings and 2 rivers, then Carlos's house. The scene moves to his courtyard.