Starting the Game
Dark City: Barcelona has a main game and a Bonus Chapter. You choose between them in a dialog that appears after you press Play.
- Press PLAY on the title screen, then choose OK beside Main Game. The Bonus Chapter entry stays locked and reads "You must complete the main game first".
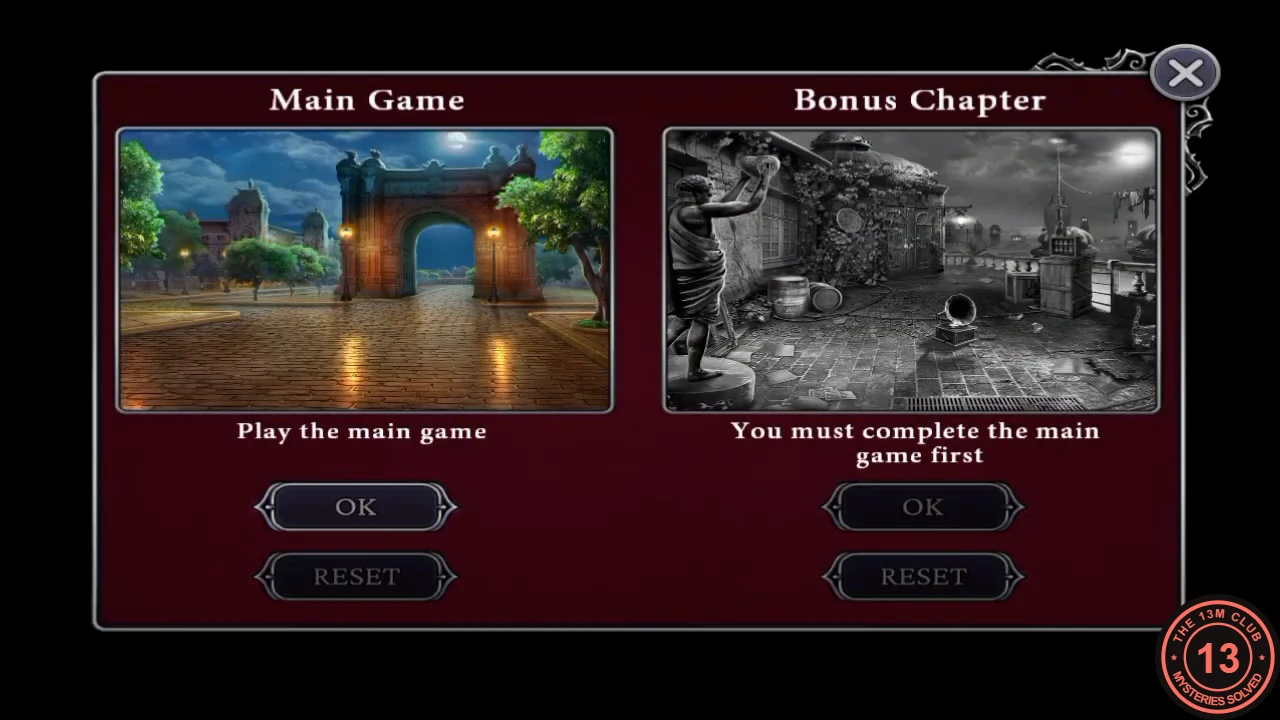
The chapter dialog on a new game. Choose OK under Main Game; Bonus Chapter stays locked for now. - Most locations open with a popup at the top left saying how many collectibles and morphing objects are hidden there. Both are optional. A morphing object does not always look like the small figurine it finally becomes: it can pass as an ordinary item such as a candle holder, a cushion or a little picture until it changes. Each location below starts with an "Optional pickups" step listing them, and anything you miss can be recovered later through Extras (see the last section of this guide).
Hotel Entrance: Lift Panel and Purse Lock
Talk to Senora Costa, then get the lift down after the accident.
- Optional pickups. Collectible: the poster below the red notice on the left column of the hotel entrance. Morphing object: above the entrance, on top of the left column.
- Talk to Senora Costa. In the cutscene a worker falls onto the lift, and the task "Lower the elevator" appears.
- Open the metal repair kit on the ground by the lift. Read the manual, which says to check the internal components and then cut the safety counterweight, and take Riba's Logo.
- Use Riba's Logo on the wall panel beside the lift. The gear box opens. Take the bolt and the green-handled glass cutter from the tray. A gear is missing and the rope still has to be cut, so you will come back here.
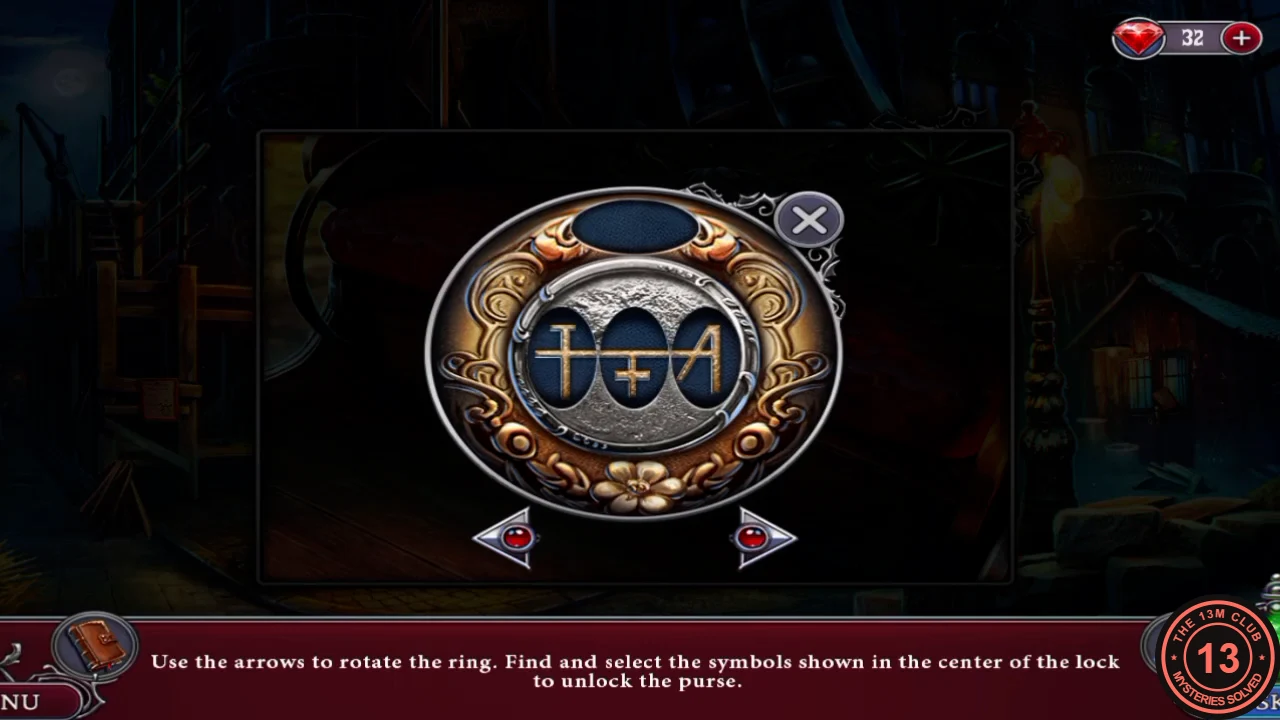
- Tap the purse on the carriage to start its lock. Rotate the ring with the arrows and select each of the three symbols shown in the centre of the lock. The purse opens.
- Inside the purse, read the newspaper. Use the bolt on the broken scissors to get working Scissors, then take the Hand mirror.
Hotel Entrance: Workshop Window Mirror Maze
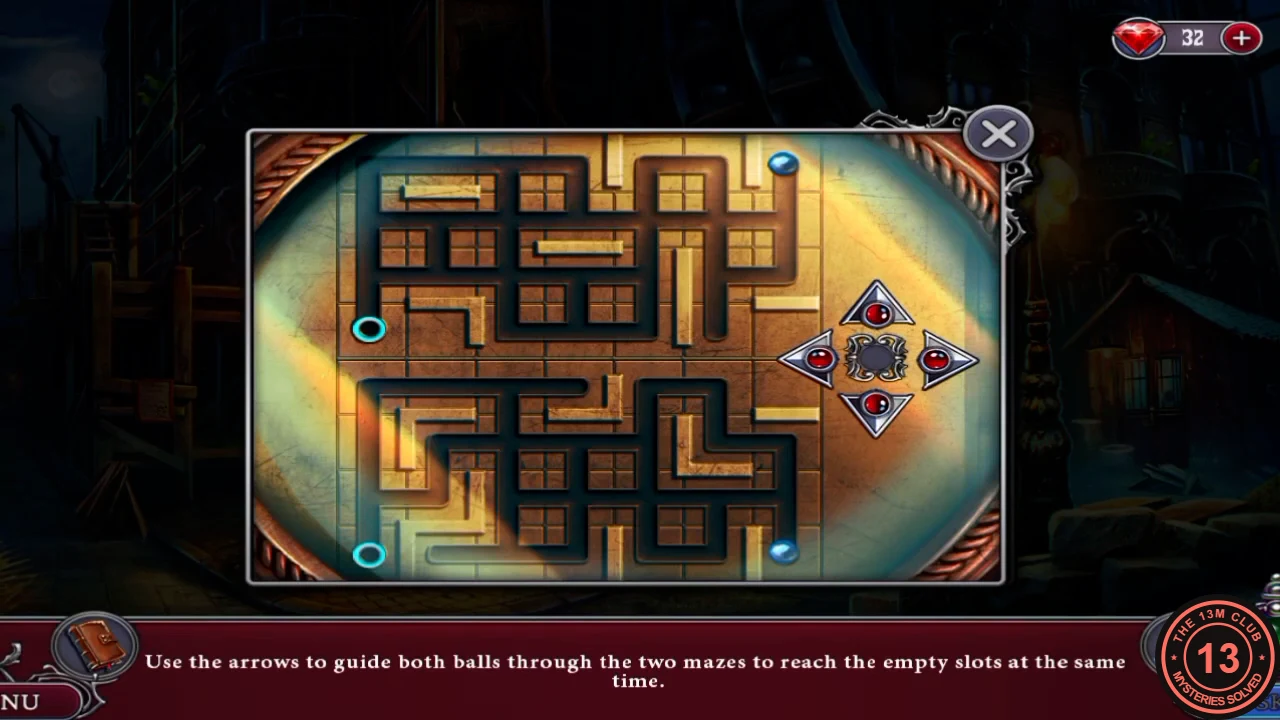
Guide two balls through a double maze to unlock the workshop door from the inside.
- Go to the workshop window to the right of the lift door. Remove the threatening note, use the glass cutter on the pane, then use the Hand mirror on the hole to start the maze.
- Both balls move on every arrow press and must reach their empty slots at the same time. Each press moves a ball one cell if its channel allows, and a blocked ball stays where it is, which is how the two get lined up. The input order below solves the maze from its starting position, with the upper ball in the top right corner and the lower ball in the bottom right corner. If you have already moved the balls, steer by sight toward the two ringed slots on the left instead.CODEUp, Up, Down, Left, Left, Left, Left, Up, Up, Left, Left, Down, Down, Down
- The workshop is now open. Read the Expo newspaper, then move it to reveal a map. Take the Salt, a two-part item whose counter shows 1/2, and the Gear underneath.
- Back at the lift panel, place the Gear and use the Scissors on the rope. The lift comes down, and Agatha says "Finally. Now to check on the worker!"
Hotel Entrance: Saving the Worker
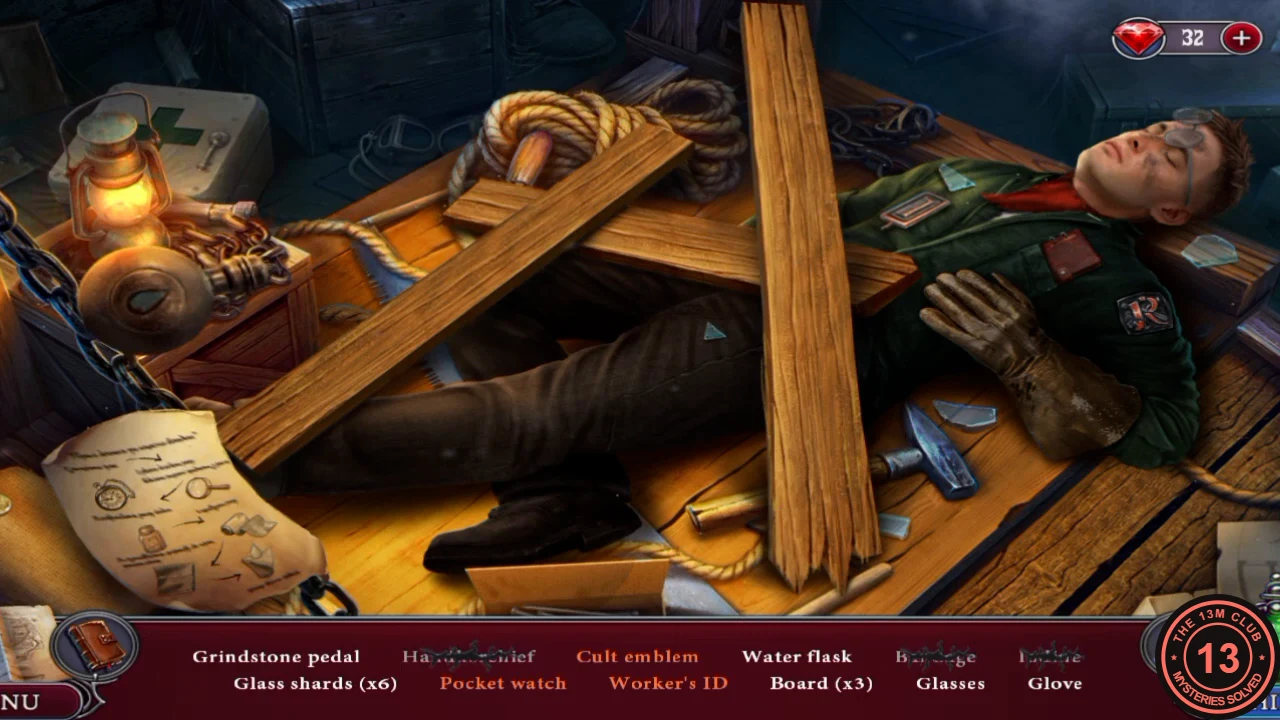
A hidden-object search followed by a first-aid sequence.
- Use the Hand mirror on the worker's face to check his breathing. This opens a hidden-object list: Grindstone pedal, Handkerchief, Cult emblem, Water flask, Bandage, Iodine, Glass shards x6, Pocket watch, Worker's ID, Board x3, Glasses and Glove. Finding them all opens the first-aid kit with a First-Aid Tips scroll.
- Follow the First-Aid Tips in this order: Pocket watch on the wrist; Glasses on the wound, then pull out the two shards; Iodine; Bandage; Water flask on the Handkerchief; wet Handkerchief on his face. The worker wakes and mutters about the statue and the bull. The Grindstone pedal joins your inventory.
- Listen to Riba and Costa. Costa hands you the Car token and tells you the key is in her carriage. The task becomes "Explore the hotel".
- Use the Car token on the carriage seat, read the police report and take the golden Key.
- Use the Key on the lift keyhole to ride up to the hotel roof.
Hotel Roof: Investigating the Fall
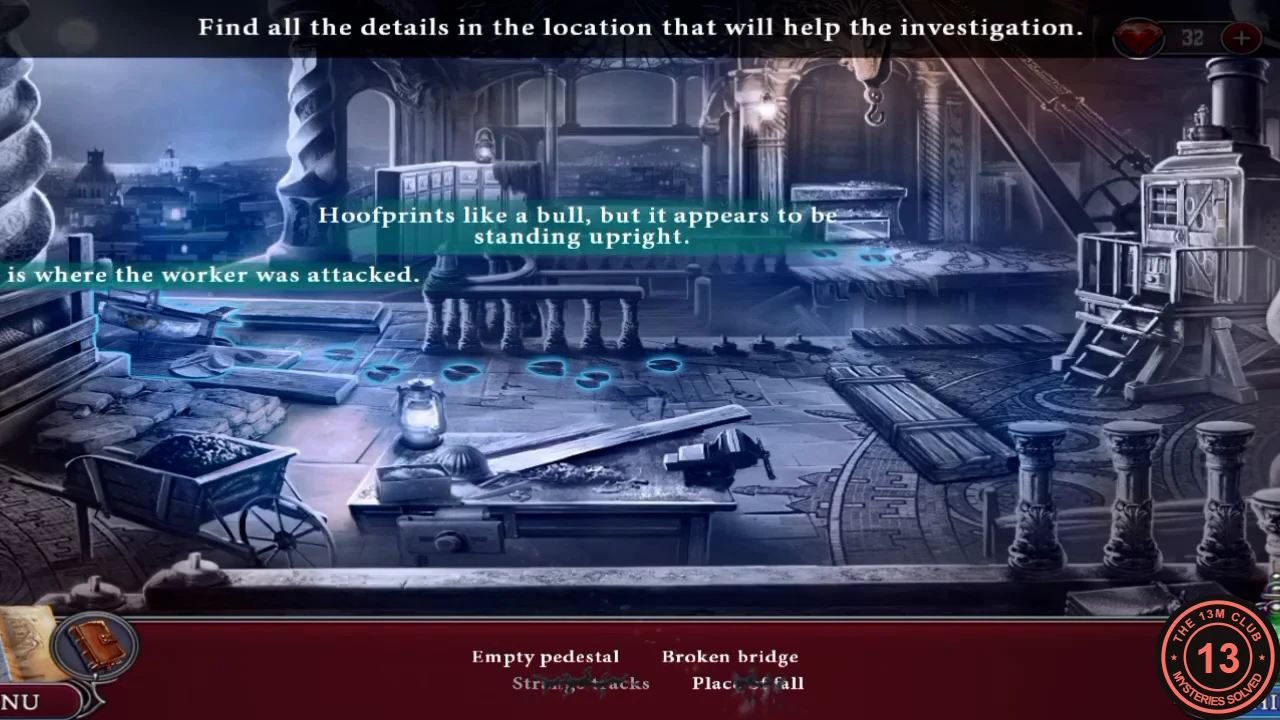
Two short investigation scenes reconstruct what happened to the worker.
- Optional pickups, on the near and far sides of the roof. Collectibles: a small card lying on the mosaic floor on the right, just below the fallen wooden beam; a small framed panel on the wall just right of the green column on the far side. Morphing objects: a figurine standing in the arched window between the two window columns on the far side; a figurine standing on the near railing in the middle of the roof.
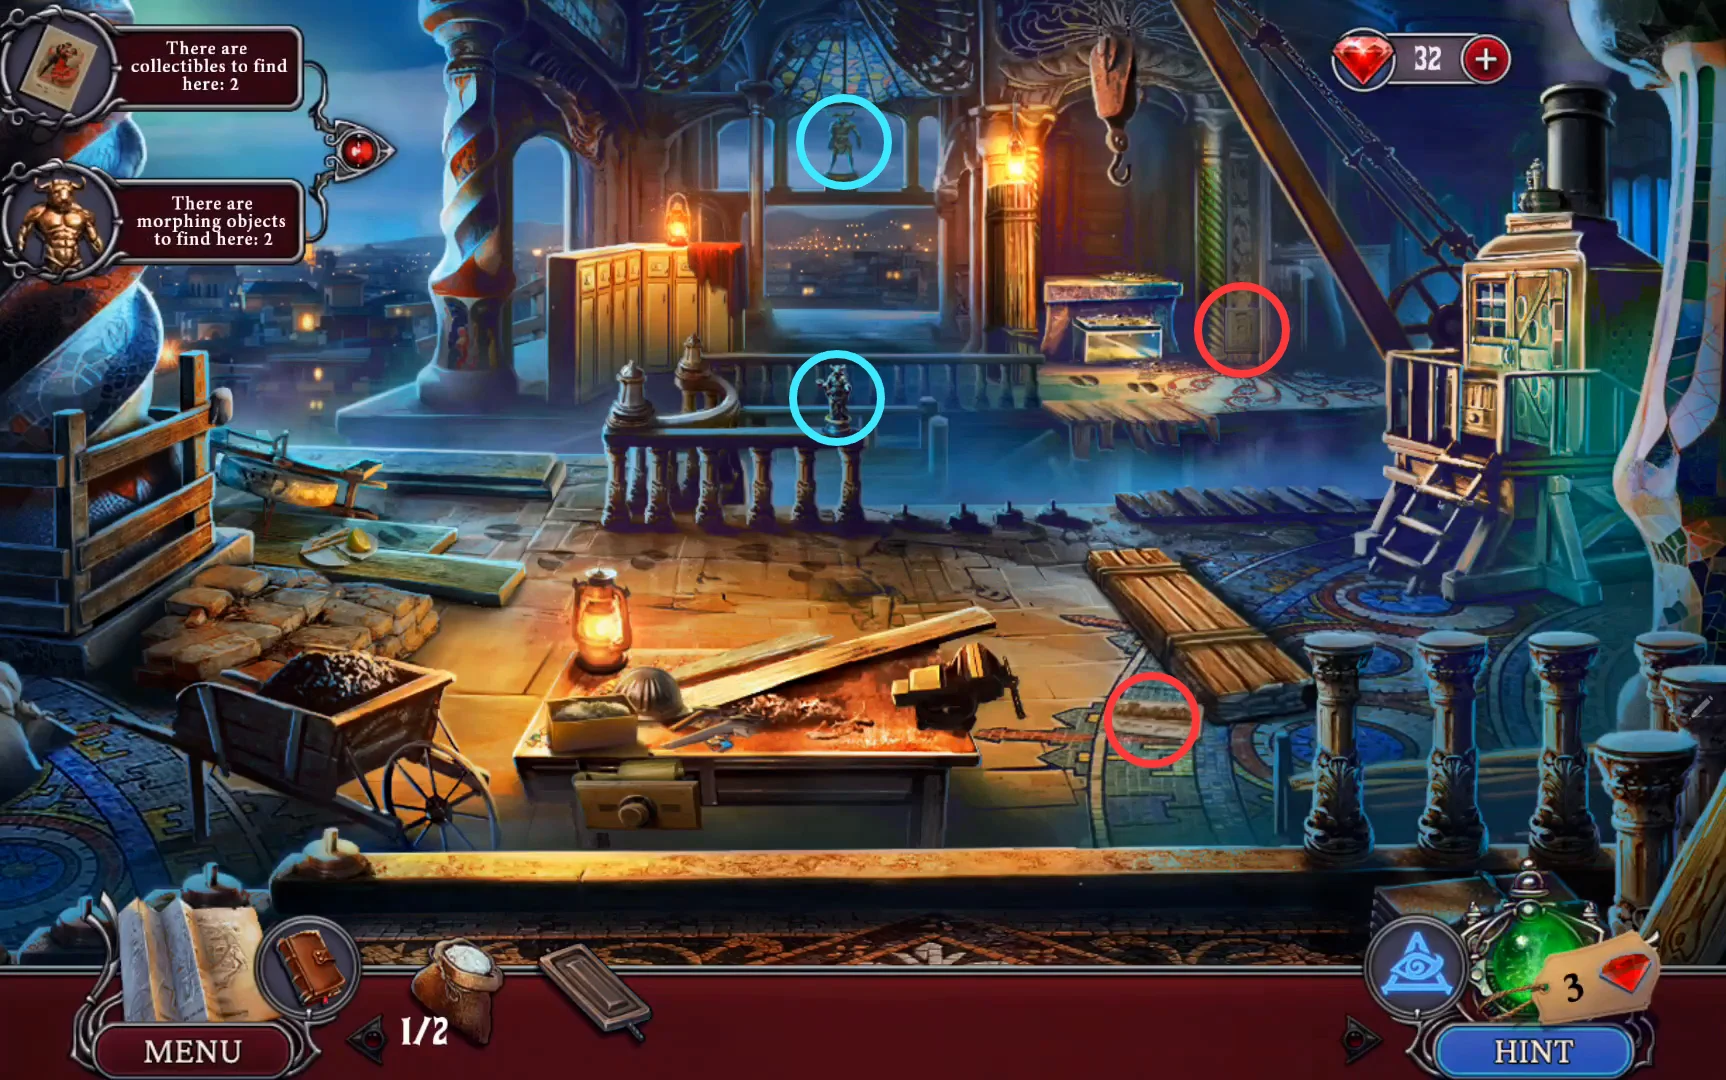
Optional pickups: red rings mark the collectibles, cyan rings the morphing objects. - Tap the marked clues (Empty pedestal, Strange tracks, Broken bridge and Place of fall) and watch the reconstruction.
- Go to the edge scene for the task "Investigate the site of the fall". Tap the clues: sawn wood, footprint, broken barrier, pebbles, stone chips and the handprint on the machine.
- At the board on the edge, take the lemon from the plate, which brings the Salt counter to 2/2, and the Mitt (the glove on the post). Read the photo of locker 315. Alicia arrives and hands you her dossier, with pages on Ignacio Torres, Jordi Puch and Ramon Gutierrez, and the tasks "Investigate a suspicious locker" and "Identify a suspect" appear. Page through the dossier: a round Door part joins your inventory.
Hotel Roof: Crane Door Symbol Lock
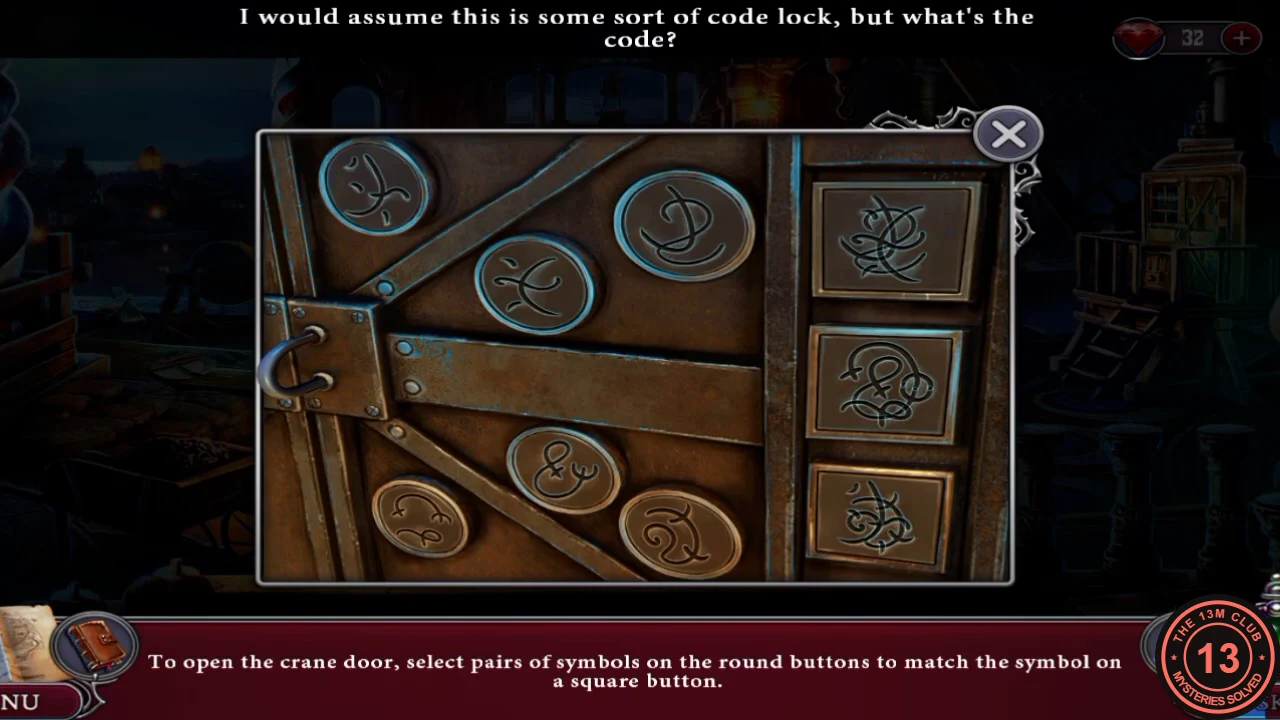
Combine pairs of round symbols to build the symbol on each square button.
- At the crane door, place the Door part in the empty round socket so that all six round buttons are present. The game asks you to select pairs of symbols on the round buttons to match the symbol on a square button.
- Press these pairs of round buttons: centre and upper right (orange, top square); lower left and lower middle (green, middle square); upper left and lower right (blue, bottom square). All three squares light up and the crane door opens.
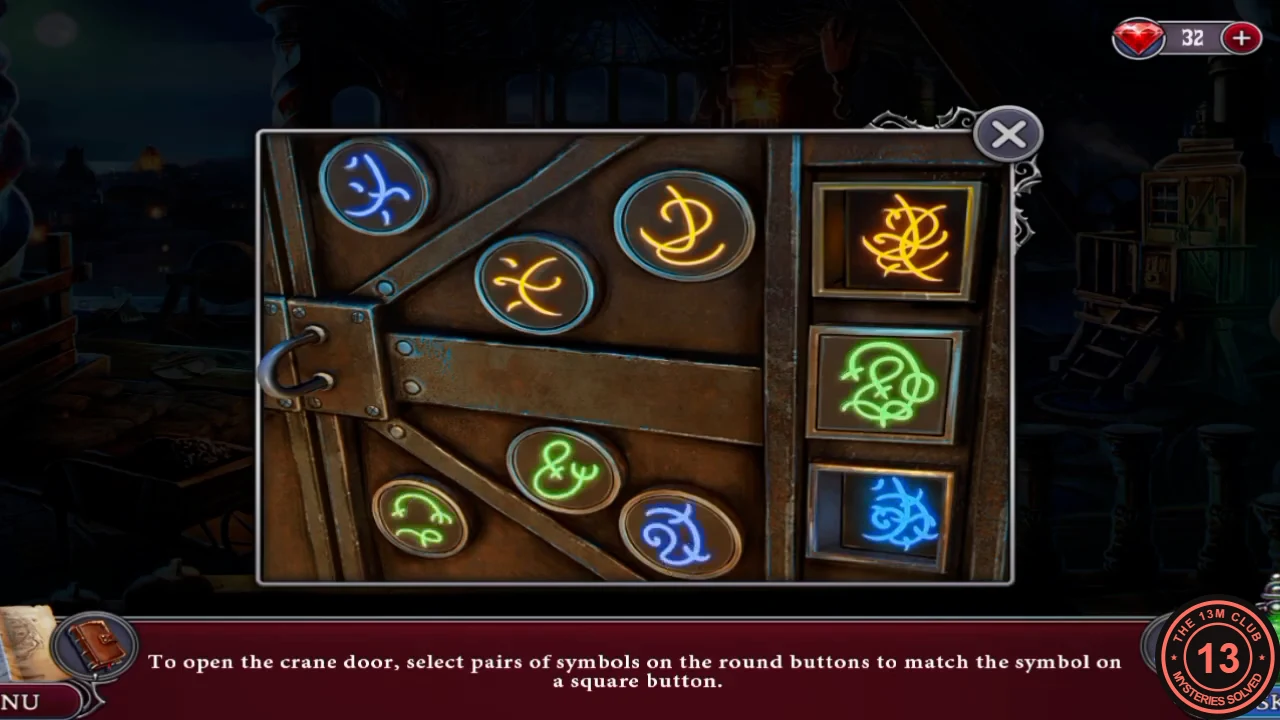
Solved: the orange, green and blue pairs light their matching square buttons.
Hotel Roof: Grindstone and Crane Furnace
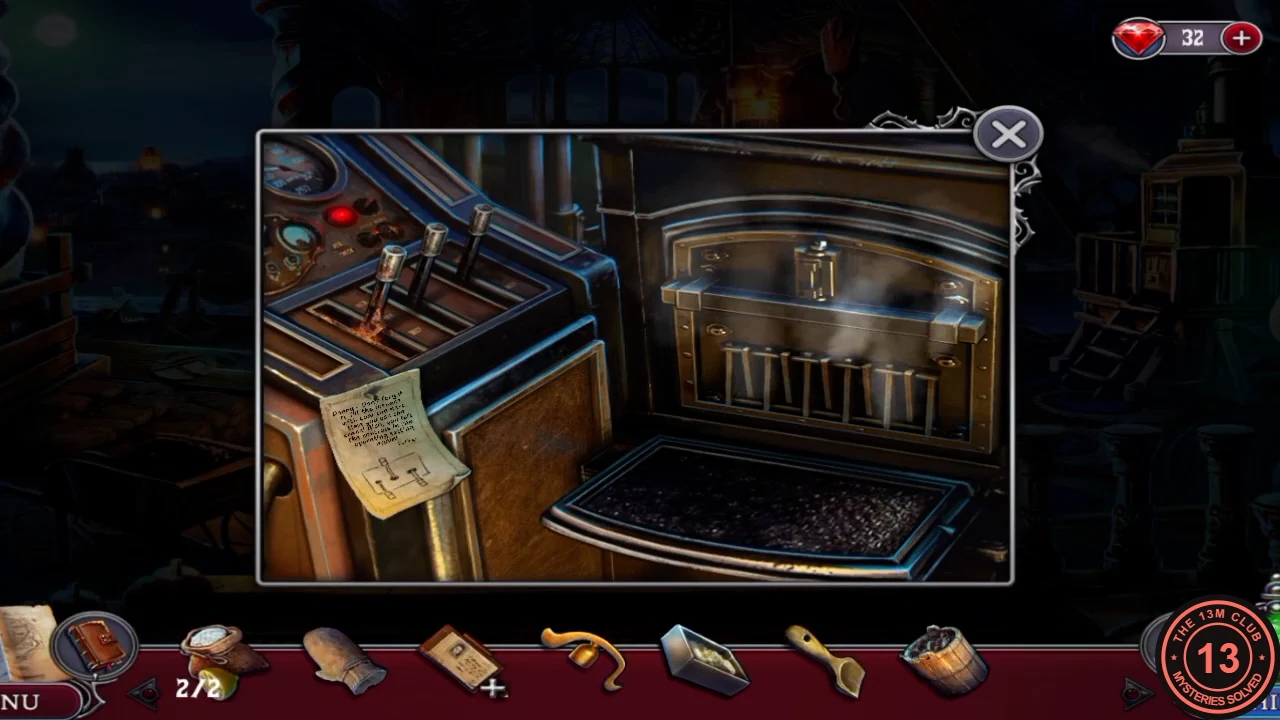
Make a shovel, collect coal and fire up the crane furnace.
- In the crane cabin, read Mathias's note about filling the furnace with coal, and look at its sketch of three levers. Take the Bucket, the curved Lighter Cap lying on the note, and the bag of nuts. You need the Lighter Cap in the temple.
- At the workbench, lift the metal dome and take the small box of powder beneath it; you will need it in the temple. A parrot lands on the bench holding a chisel. Give it the nuts so it drops the chisel, then take the dull chisel. Note the wood block in the vice ("If I had a carving tool, I could make a shovel with this").
- At the grindstone by the edge, place the Grindstone pedal. Tap the pedal until the green bar is full, then hold the dull chisel to the wheel to get a sharp chisel.
- Use the sharp chisel on the wood block on the workbench to carve a shovel. Use the shovel on the coal wheelbarrow to fill the Bucket.
- The left of the three levers on the furnace panel "is jammed because of the rust". Use the Salt (salt with lemon) on it. Then set the levers as Mathias's sketch shows, which the note calls the operating setting: left lever down, centre lever up, right lever down. The light turns from red to green.
- Open the hot furnace door with the Mitt. Clear the ash with the shovel three times, read the burnt note and take the Bull Emblem.
- Put the Coal in the furnace. The crane starts moving and the bridge puzzle begins.
Hotel Roof: Rolling Block Bridge
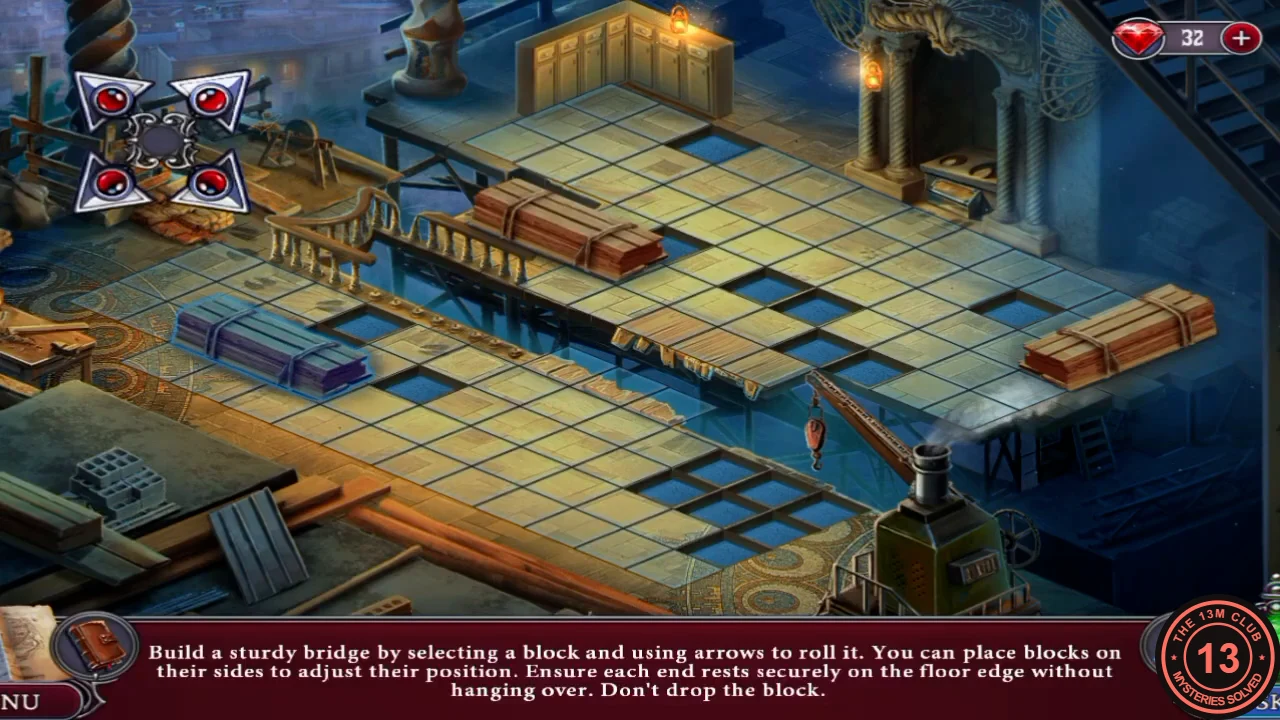
This is a lengthy rearrangement puzzle, so this guide gives the rules, the target and a working method rather than every move.
- Select a block and use the arrows to roll it end over end. Blocks may lie on their sides to adjust their position, but they must not hang over an edge or drop into a gap. Each end of a bridge has to rest on solid floor.
- The target is the broken plank bridge in the middle of the long water channel. All three blocks finish lying flat, side by side with their long sides parallel, spanning that one channel as in the completed image. The square holes in the floor are obstacles, not targets, so roll around them. Bring one block at a time to the plank bridge and stand a block on end when you need to shift its position. If a move is refused the game says "I can't move the block any further in this direction" and the block stays put, so try another direction. When the last block is placed the game says "Great! That should make a sturdy bridge!" and you can reach the far side of the roof.
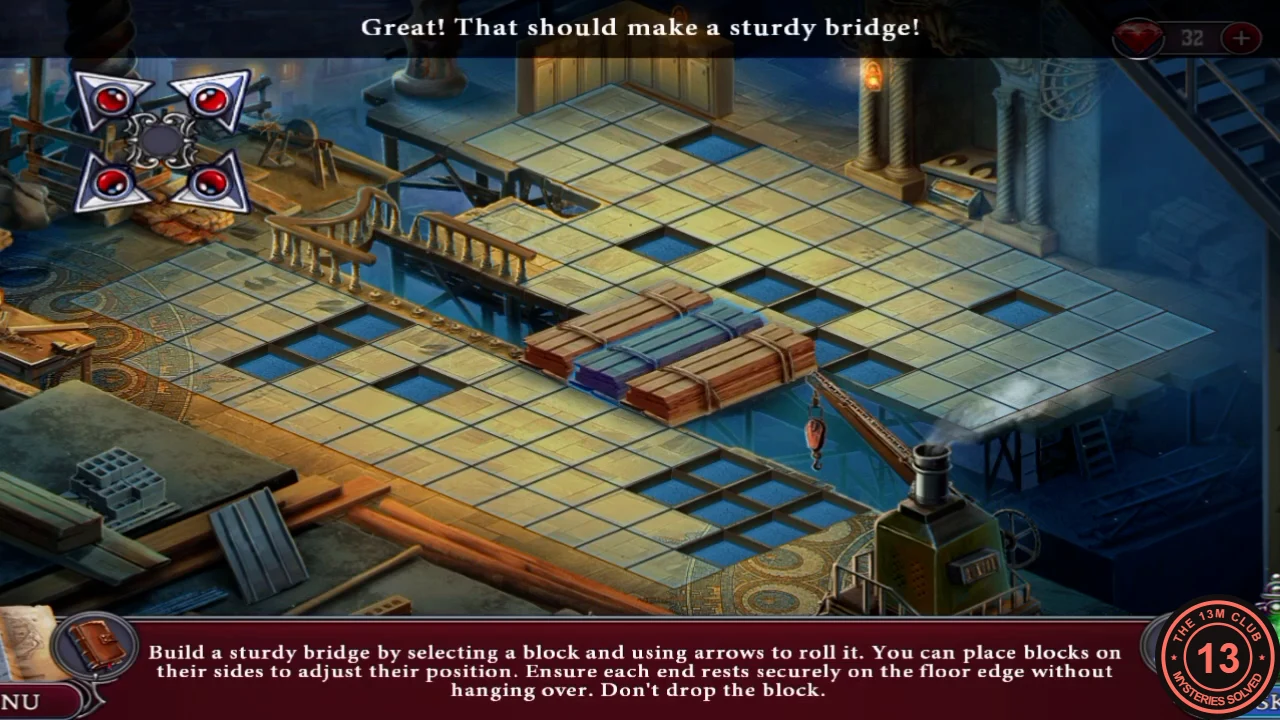
Completed bridge: all three blocks lie side by side across the gap.
Hotel Roof: Locker 315
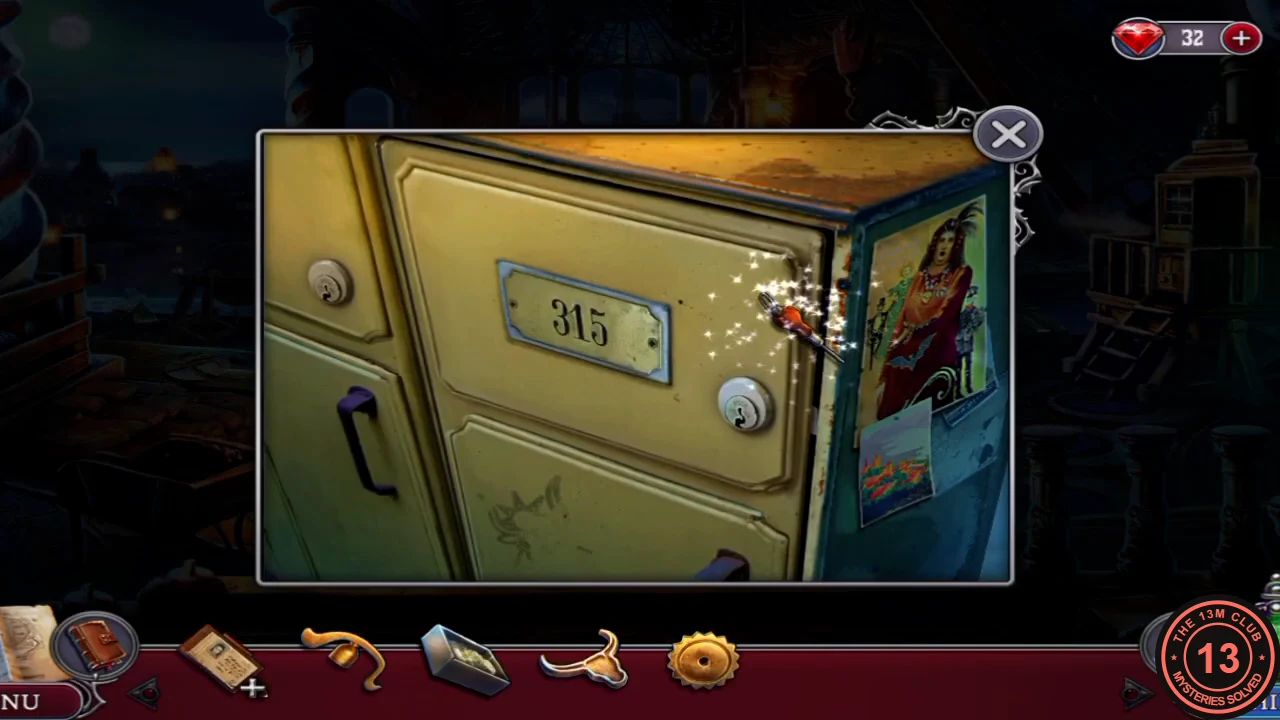
Open the locker on the far side and draw your first conclusions.
- Cross the bridge. Clear the rocks from the slab, read Riba's note to Alicia and take the Flint, a small gold cog, from under the seal. A short scene with a red cloth and a parrot follows.
- Take the red-handled Screwdriver from the side of locker 315; the locker itself needs a thin tool. At the slab, undo the four screws with the Screwdriver and take the Compass.
- Use the Compass on locker 315. Take the plans, cloak and Brotherhood medallion, and read the blueprint note about an ancient shrine. The first deduction becomes available.
Hotel Roof: First Deduction and the Street Hatch
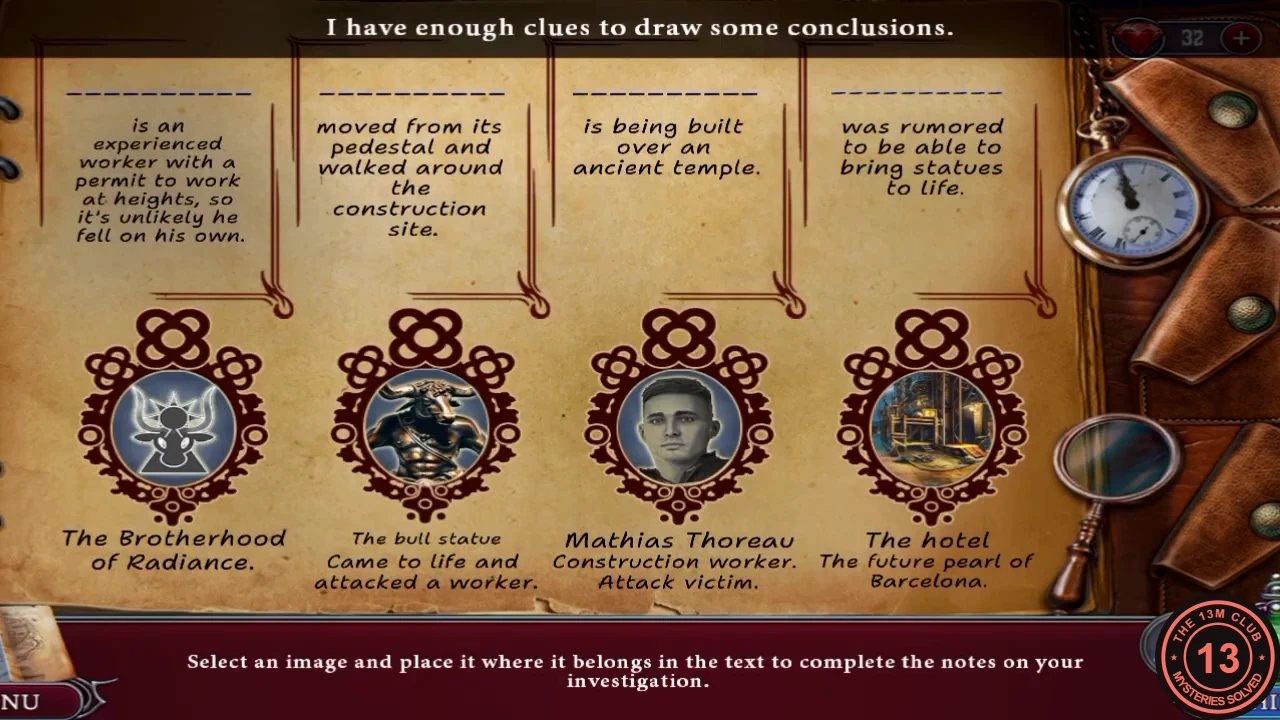
Put together what the evidence means, then leave the roof.
- Solve the deduction. Fill the blanks with Mathias/the permit, the bull statue, the hotel and the Brotherhood. Answer the left question with "Statues appear to come to life and attack construction workers", the right question with "The Brotherhood wants to stop the construction of the hotel above their temple", and the centre question with "The temple is under the hotel". Your reward is the Brush.
- Back on the street, sweep the hatch in the cobbles with the Brush, fit the Bull Emblem and climb down the ladder into the Brotherhood Temple.
Brotherhood Temple: Collecting Eight Clues
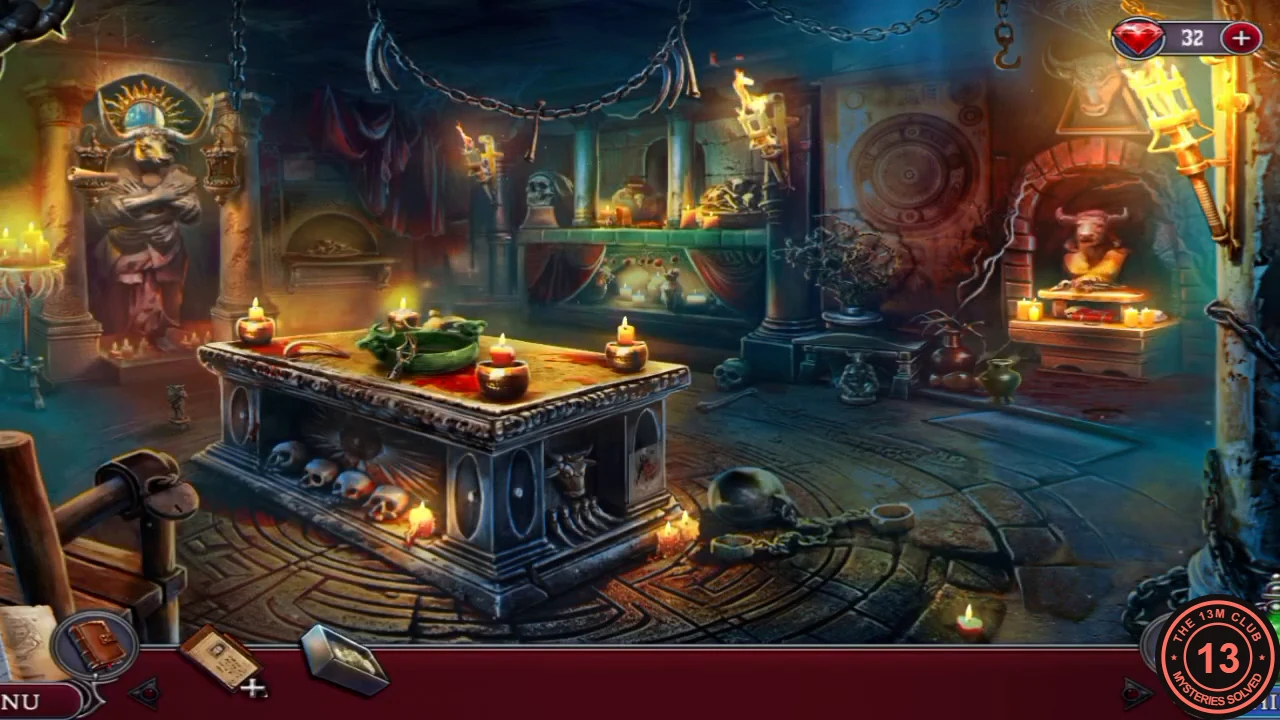
Light the room, then gather eight clues for the comparison puzzle.
- Optional pickups, visible once the room is lit in the next step. Collectibles: a small card with a yellow disc on the right side of the island, facing the ball on the floor; a small grey framed panel on the wall to the right of the statue, above the little arch. Morphing objects: a small dark figure on the floor between the statue and the island; a small dark figure under the low bench on the right, below the big circle on the wall.
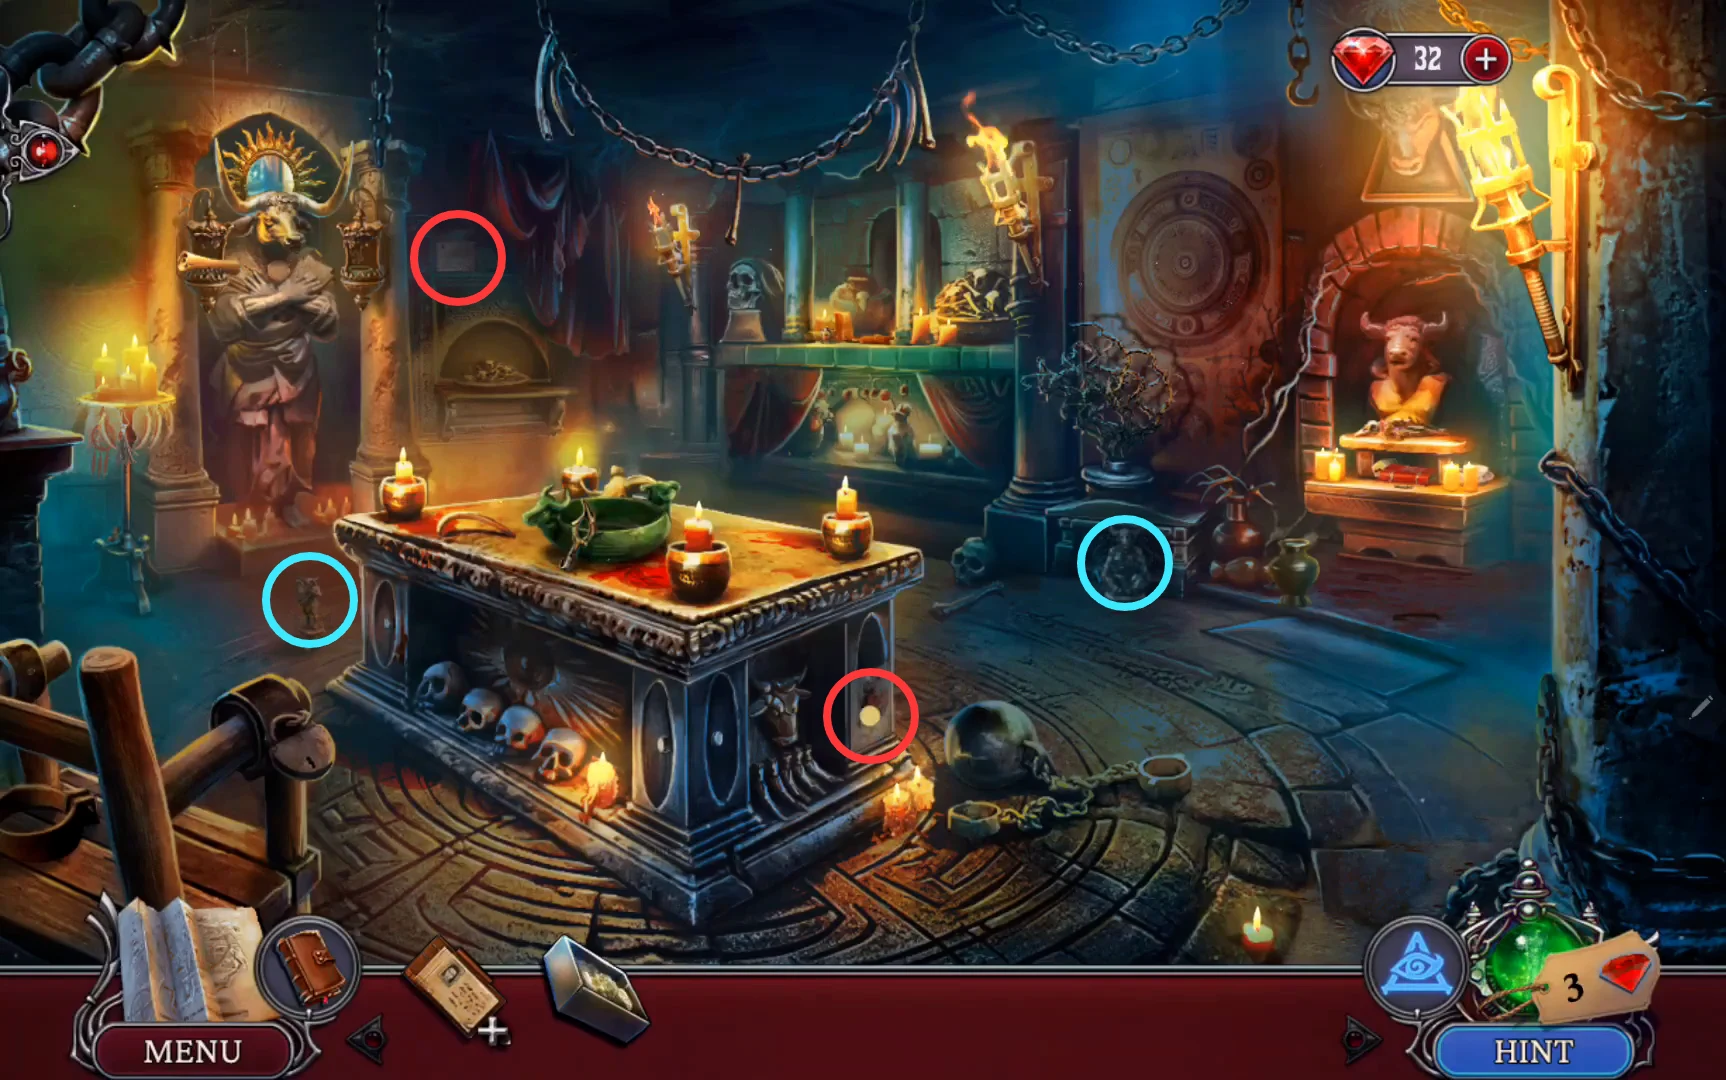
Optional pickups: red rings mark the collectibles, cyan rings the morphing objects. - Take the broken lighter from the floor at the lower left of the dark room. Open it from your inventory and fit the Lighter Cap, then the Flint; the game says a part is missing until both are in. Use the working Lighter on the dark room. The task "Search temple for evidence" appears.
- Zoom in on the footprint on the floor by the side altar, which needs a cast, and take the Jar of water at the lower left of that view. On the island, note the green bull bowl ("I could use this to mix plaster") and pick up the Curved blade lying on its rim. On the side table, cut the cord of the leather roll with the Curved blade and take the tools from it; you need the brush, pestle and tweezers next.
- Brush the wax on the side table. This frees the Triangle candle and the key with a left thumbprint (clue 1/8): take both, then take the vial of Resin at the lower left of the table. At the altar, read the scroll and take the fabric patch with Riba's logo (2/8). Use the tweezers on the blood to get a long dark hair (3/8).
- Pour the box of gypsum powder from the roof into the green bowl, then add the Jar of water and finally the Pestle. The Resin is not part of this mix, so keep it for later. Lift out the bowl of plaster and read the racetrack ticket under it (4/8). Pour the plaster on the footprint to get a shoe cast (5/8), and pick up the cigarette (6/8).
- Read the red book and take the pale five-sided candle from the top of the side altar. On the minotaur relief, fit the five-sided candle into the right lantern and the Triangle candle into the left lantern. The matching shapes are marked on the pillars. The statue opens its hands: take the bitten pencil (7/8) and the newspaper (8/8).
Brotherhood Temple: Compare the Clues
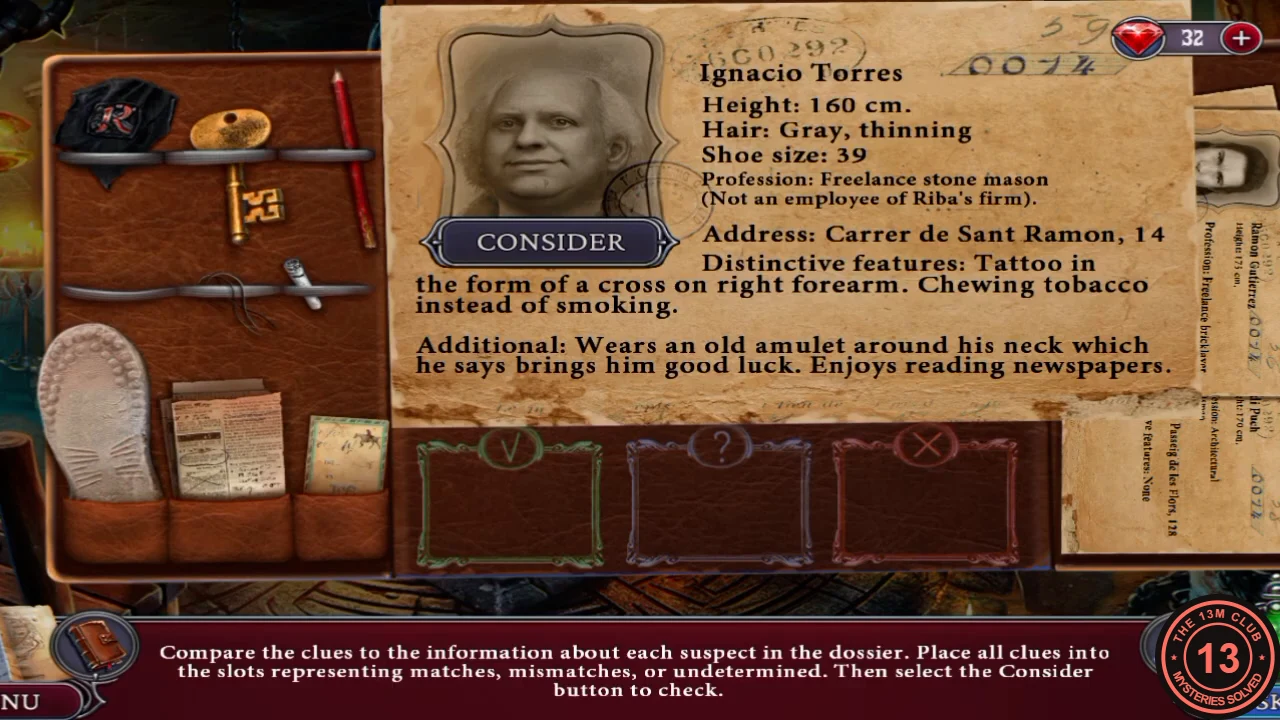
Sort every clue into Match or Mismatch for each suspect, and press CONSIDER after each one.
- Ignacio Torres: Match = newspaper; Mismatch = all others. Press CONSIDER, and Ignacio is ruled out.
- Ramon Gutierrez: Match = shoe cast and hair; Mismatch = all others. Press CONSIDER, and Ramon is ruled out.
- Jordi Puch: Match = uniform patch, hair, pencil and newspaper; Mismatch = all others. Press CONSIDER, and Jordi is ruled out.
- Bernardo Lopez: all eight clues Match. Press CONSIDER. His address is Avinguda de l'Arc 9. A key pinned to the dossier joins your inventory and the task becomes "Interrogate Bernardo".