Bernardo's Apartment: Finding the Clues
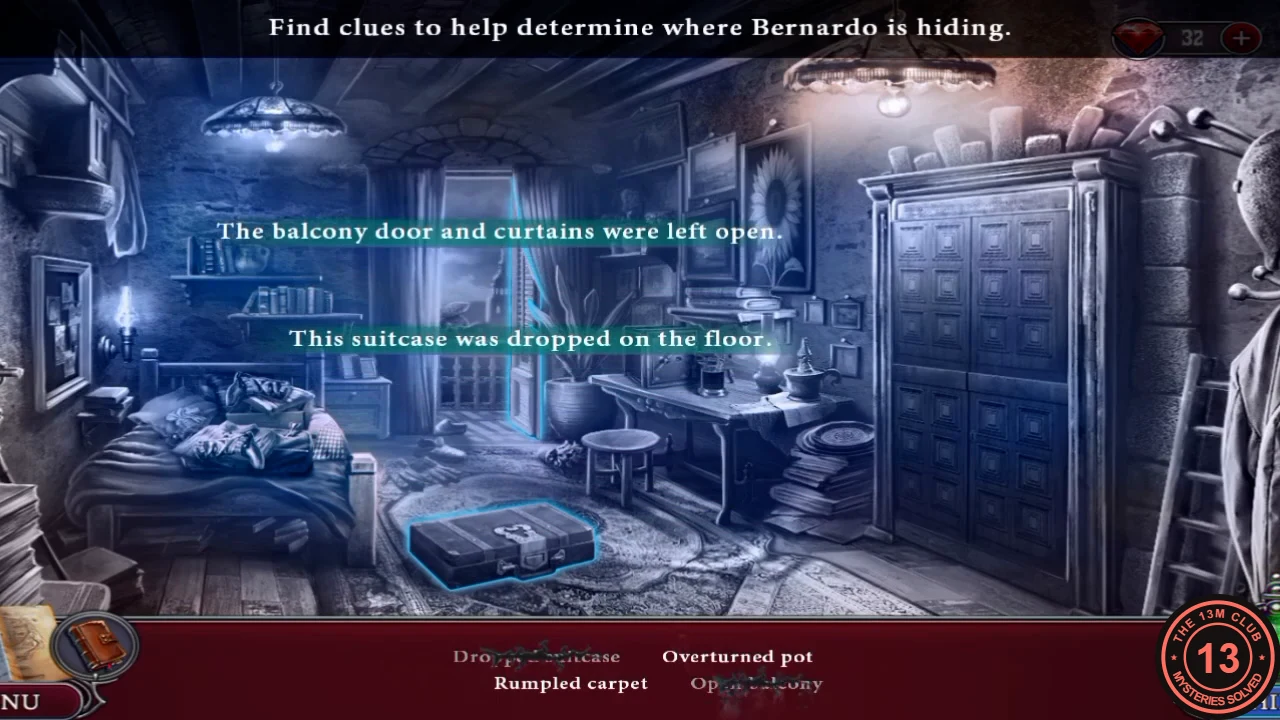
Bernardo has vanished. Find out where he went.
- Optional pickups. Collectibles: a small card with a tree on it at the right end of the bottom shelf left of the balcony; a small framed picture on the wall just right of the sunflower picture. Morphing objects: a figurine on the floor under the table, right of the stool; the top shelf left of the balcony, beside the jug, where the object can look like a small framed book before it shows as a figurine.
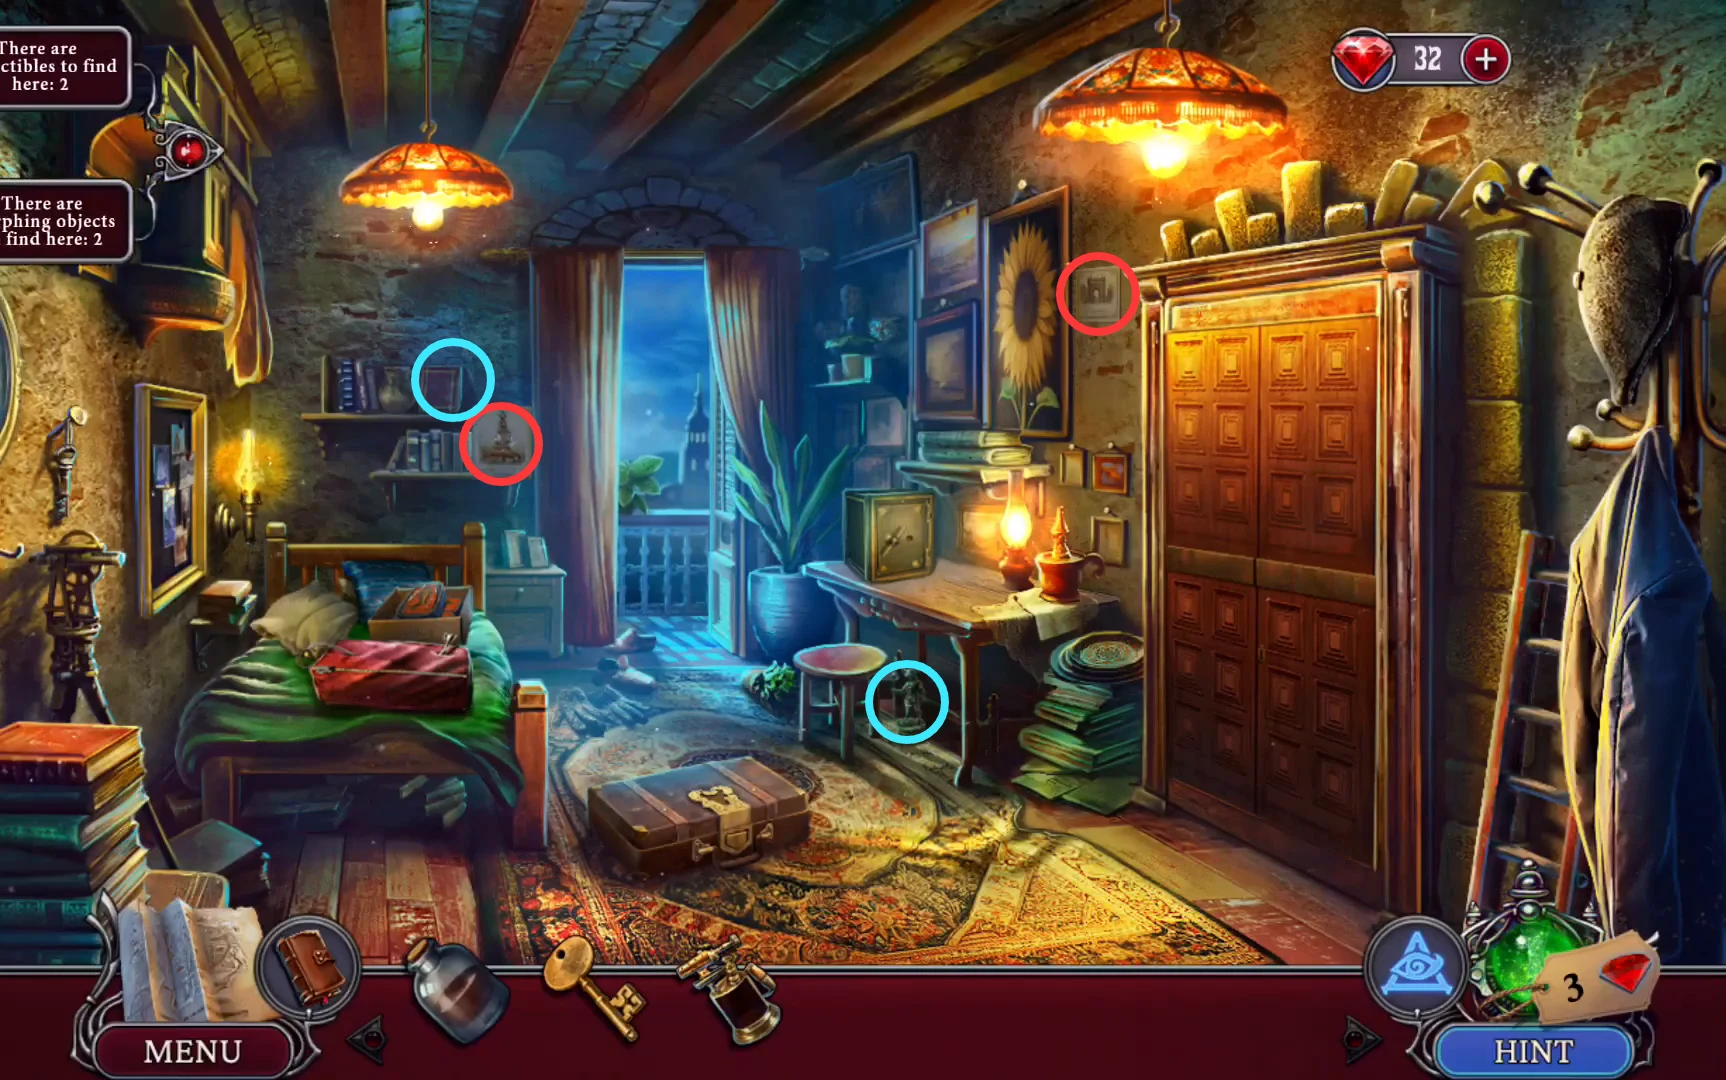
Optional pickups: red rings mark the collectibles, cyan rings the morphing objects. The top-shelf object can look like a small framed book. - Enter and tap the four clues: Dropped suitcase, Open balcony, Overturned pot and Rumpled carpet. Agatha concludes he is hiding in the closet, and the task becomes "Find Bernardo".
Bernardo's Apartment: Closet Searches
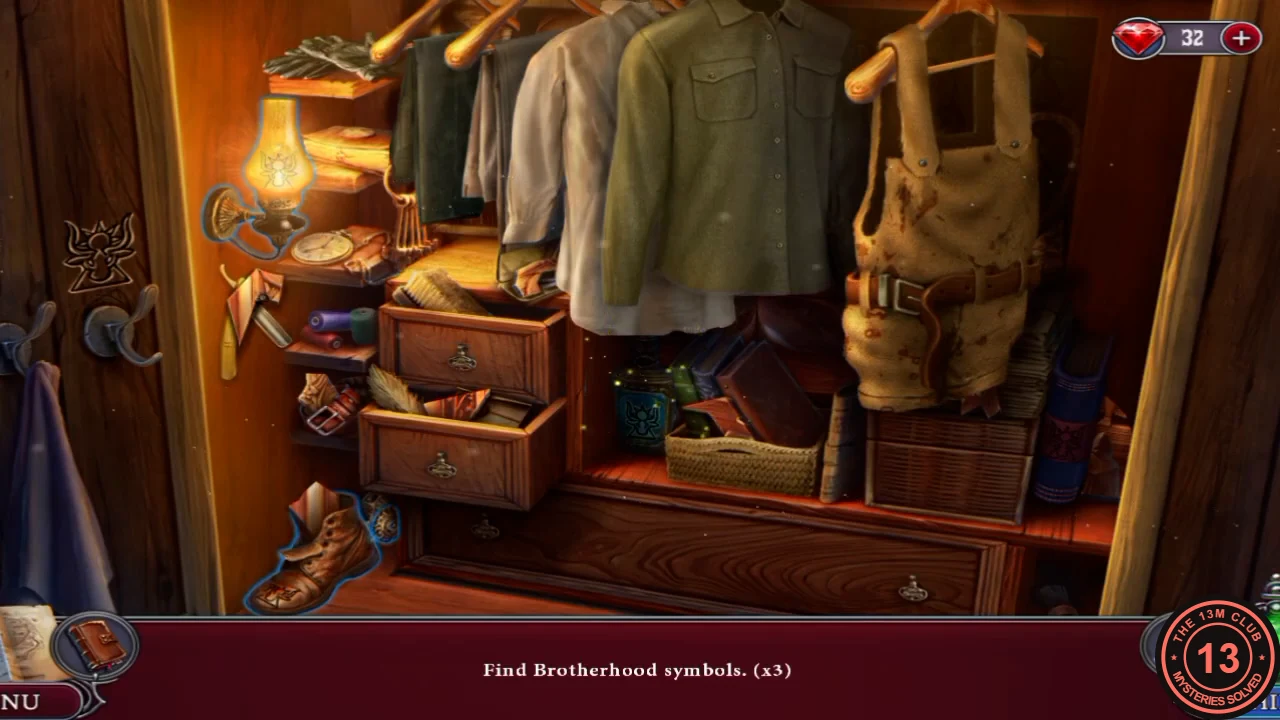
Open the closet and work through its two searches.
- Use the key from the dossier on the closet. Find the 5 Brotherhood symbols in the scene to open a hidden panel.
- Find the 12 picture parts in the second search.
Bernardo's Apartment: Minotaur Picture Puzzle
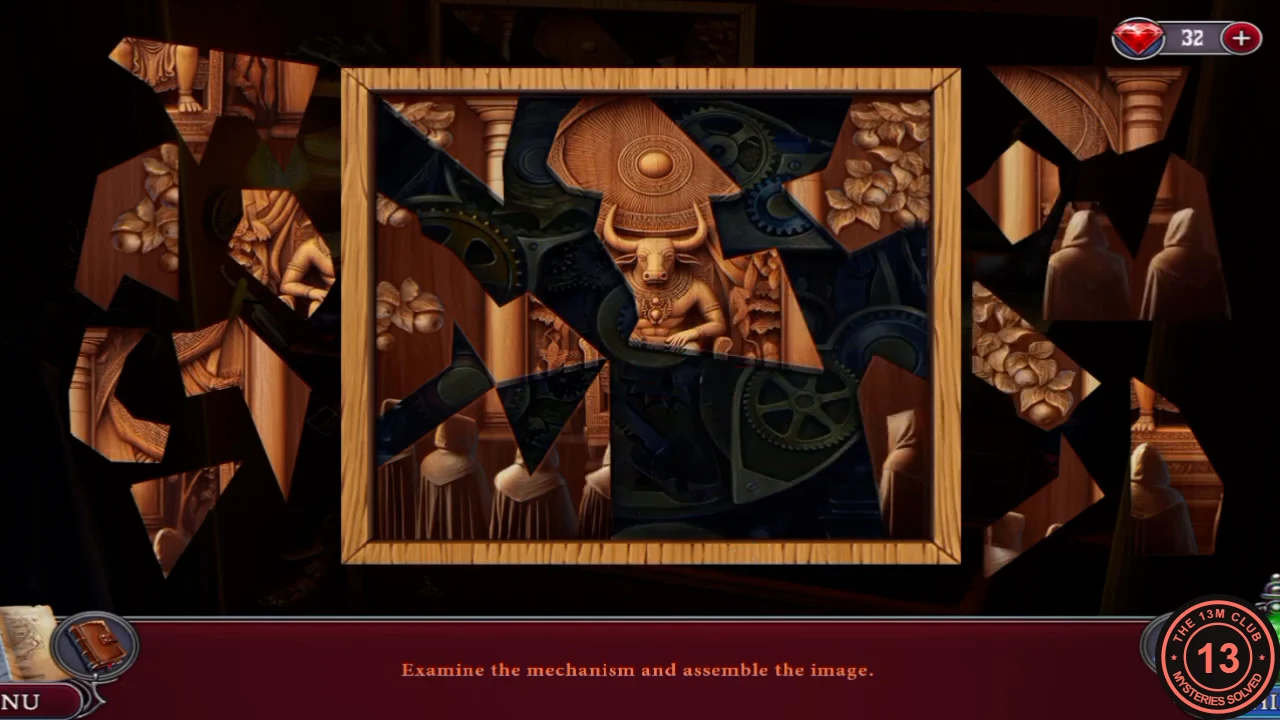
Put the 12 picture parts together in the frame.
- Assemble the picture in the frame, which shows a minotaur on a throne. Drop each piece where its outline and image continue. Your reward is the Broken Control Panel, and the task becomes "Open the panel in the cupboard".
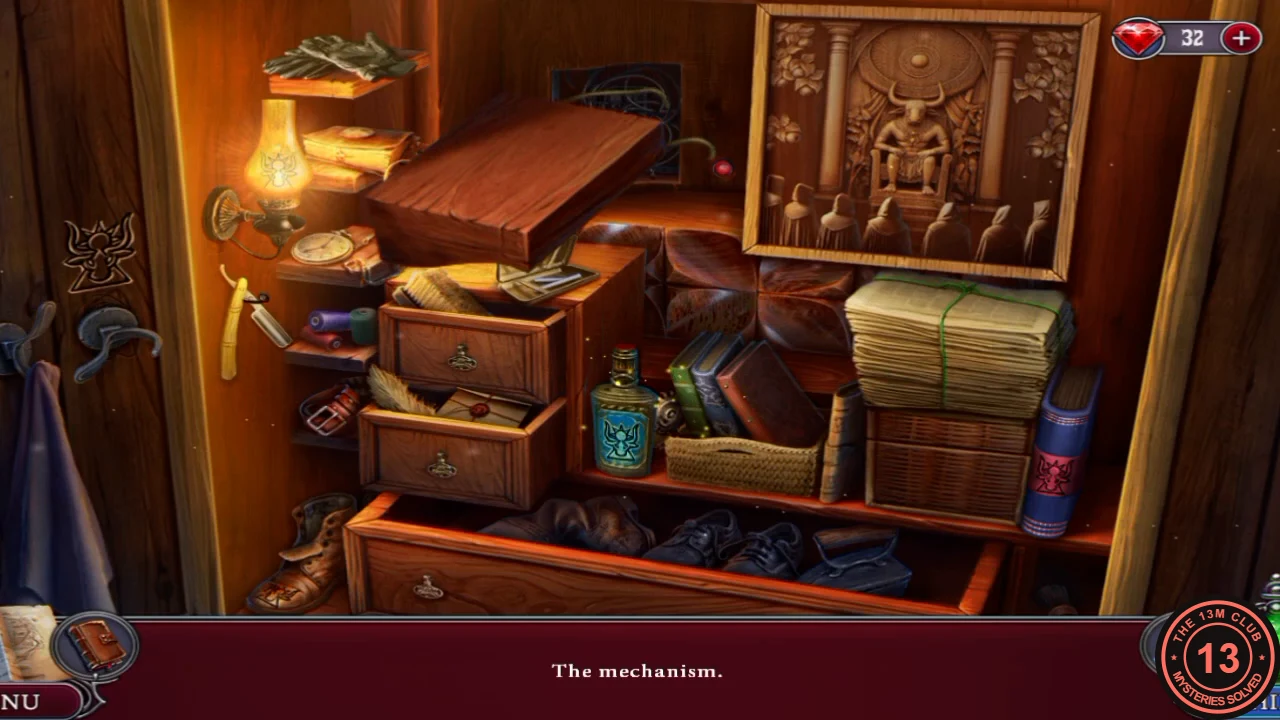
The completed minotaur picture in its frame.
Bernardo's Apartment: The Cat and the Suitcase Box
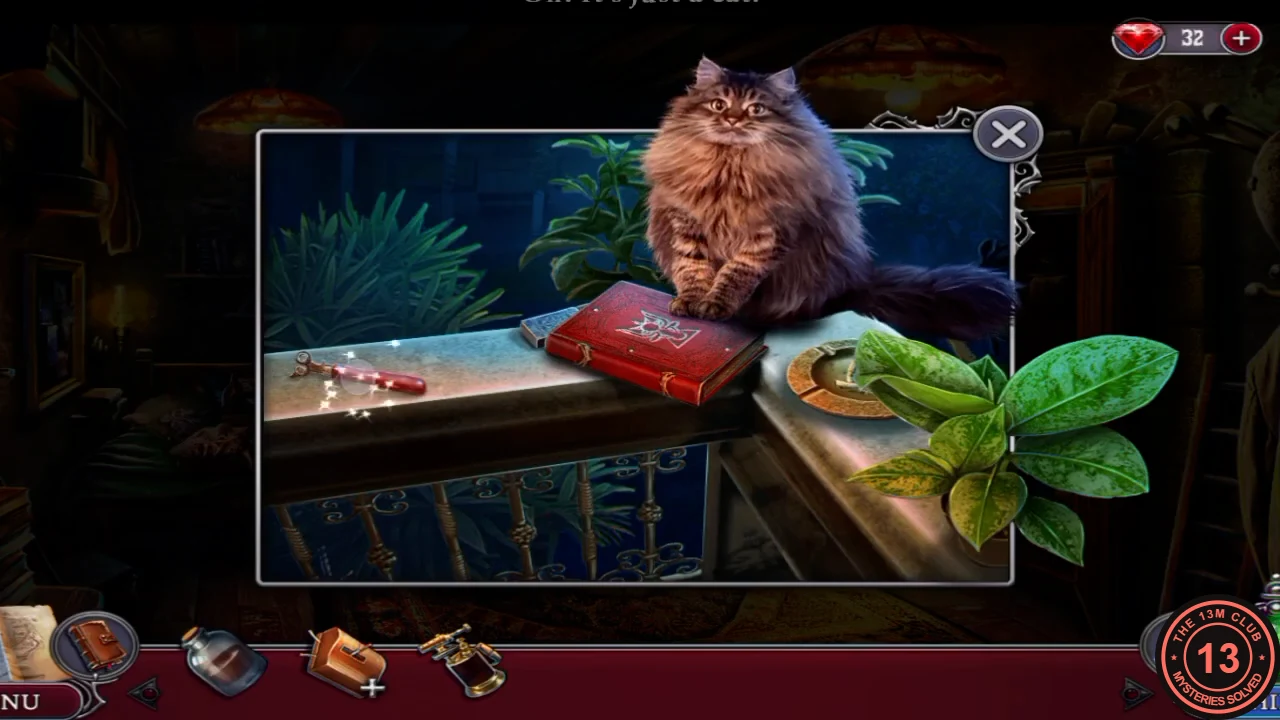
Collect two suitcase tokens, then open the six-button box.
- At the safe, whose dial is missing, take the brass Blowtorch from the floor at its foot. On the balcony railing, take the red-handled can opener; a cat then settles beside the red book. On the bed, move the clothes aside to uncover a boxed tin. The red bag beside it still needs a zipper pull.
- Use the can opener on the tin to get a sardine. Give it to the cat on the railing and pet it three times to get Suitcase Token 1/2. When the cat leaves, take the red book and the matches.
- Tap the + on the Broken Control Panel in your inventory to bring up the wooden box, and use the Blowtorch on it. The lid opens, and Agatha notes she may have to solder it. Take Suitcase Token 2/2.
- Use the token on the suitcase. Take the Horn; you need it at Plaza Real. Read the notebook and take the Zipper pull. The six-button box inside is missing one button.
- Put the Zipper pull on the red bag and open it. Take the stethoscope, look at the student ID, read the note and take the Button.
- Fit the Button in the box and press the three most-worn buttons: 2, 4 and 5. The box opens, holding the Safe Dial and the soldering instructions.CODE2, 4, 5
Bernardo's Apartment: Listening Safe and Soldering
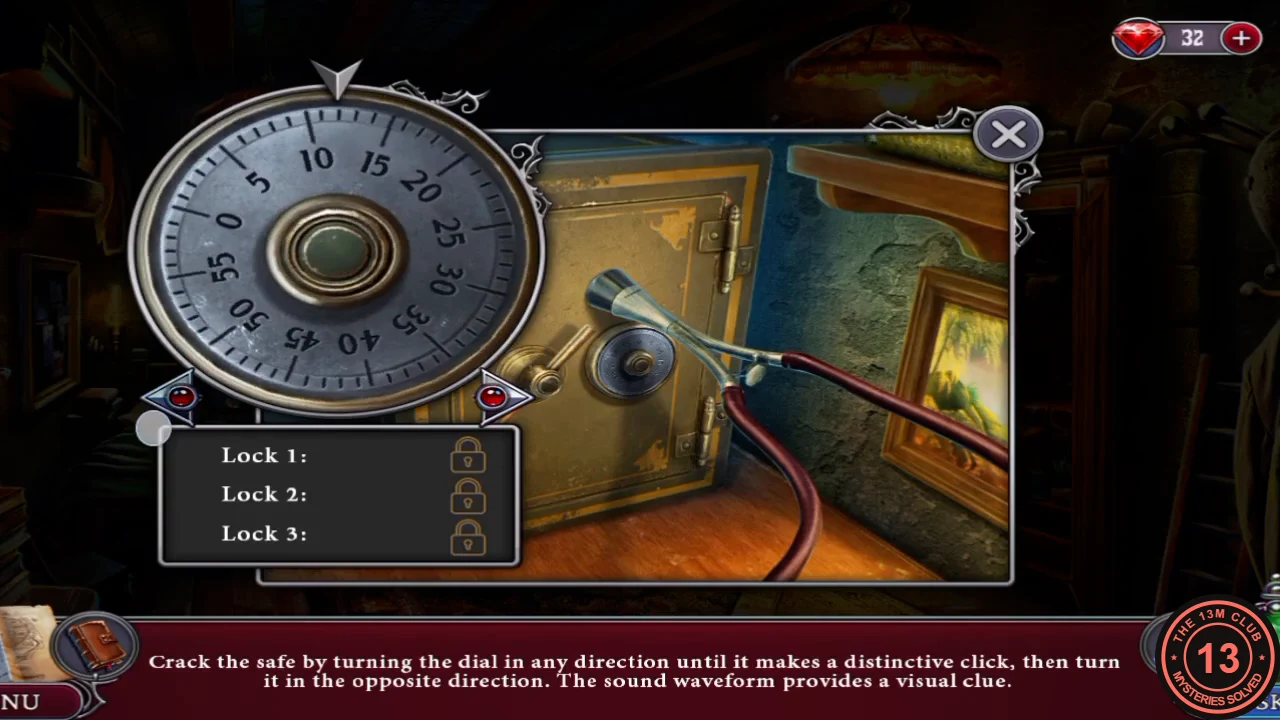
Crack the safe by reading its waveform, then repair the control panel.
- Fit the Safe Dial on the safe and use the stethoscope to bring up the waveform. Press the left arrow until the signal fills the screen and Lock 1 records 15. Agatha says to turn the other way: press the right arrow until Lock 2 records 45, then the left arrow until Lock 3 records 20. One press moves the dial by 2.5, so that is about 6, then 12, then 14 presses.CODE15, 45, 20
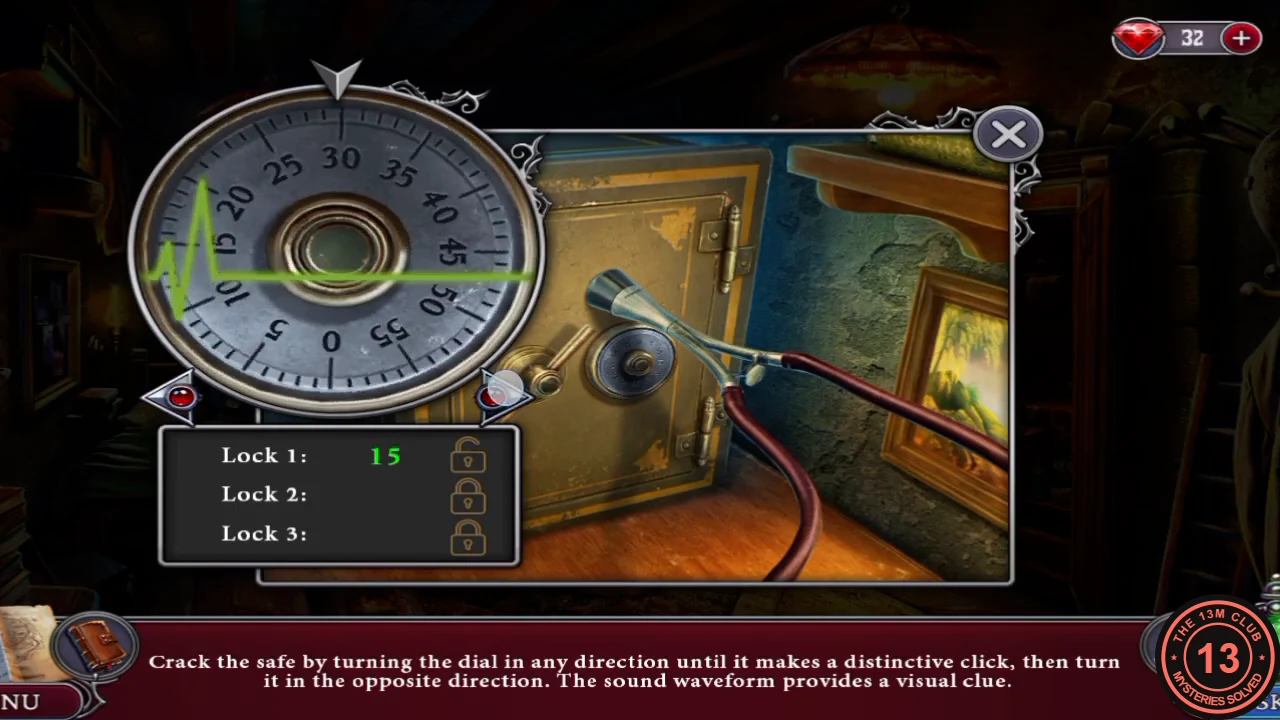
Example of the signal on the dial, with Lock 1 already found at 15. - Read the note, then take the red-stoned Ring, the Tin and the blue bottle of Fuel from the safe.
- Back in the control panel close-up, place the soldering instructions. Set down the Blowtorch, pour the Fuel into it and light it with the matches. Then add the Tin and the Resin you kept from the temple. Follow the prompt: "Using the blowtorch, melt the tin until the metal becomes red in all three parts. Do not let it solidify." The control panel is now repaired.
- Use the repaired panel on the cupboard. A secret room opens and Bernardo tells you the next meeting is at Plaza Real, where the scene moves.
Plaza Real: Fountain Investigation
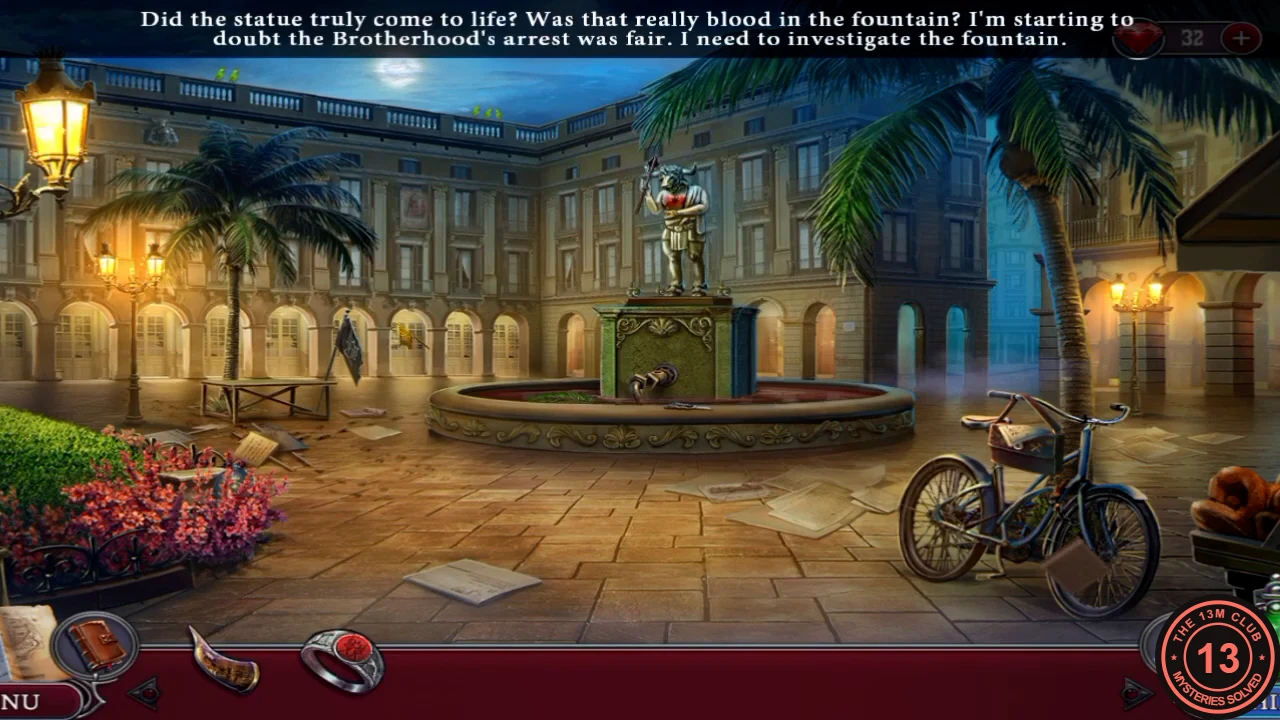
After the gas attack, drain the fountain for a closer look.
- Optional pickups. Collectibles: within the papers on the ground by the bicycle; the second-floor window right of the palm tree. Morphing objects: the column right of the black flag; top left of the palm tree, below the railing.
- Watch the cutscene; the task becomes "Investigate the fountain". On the fountain rim, take the pruning shears. A pipe piece fits the outlet but needs fastening.
- Cut the red foliage on the flower bed by the left gate with the pruning shears. A bull head wearing a police helmet appears. Read the note for the Sergeant and take the key from the bull's ear.
- Open the bicycle satchel with the key. Read the papers and take the Wrench. A locked pocket holding a notebook needs a token, which comes later.
- Use the Wrench on the fountain pipe and valve, and turn it to drain the water. You find a paint sprayer and powder, but Agatha needs a better sample.
Plaza Real: Second Deduction
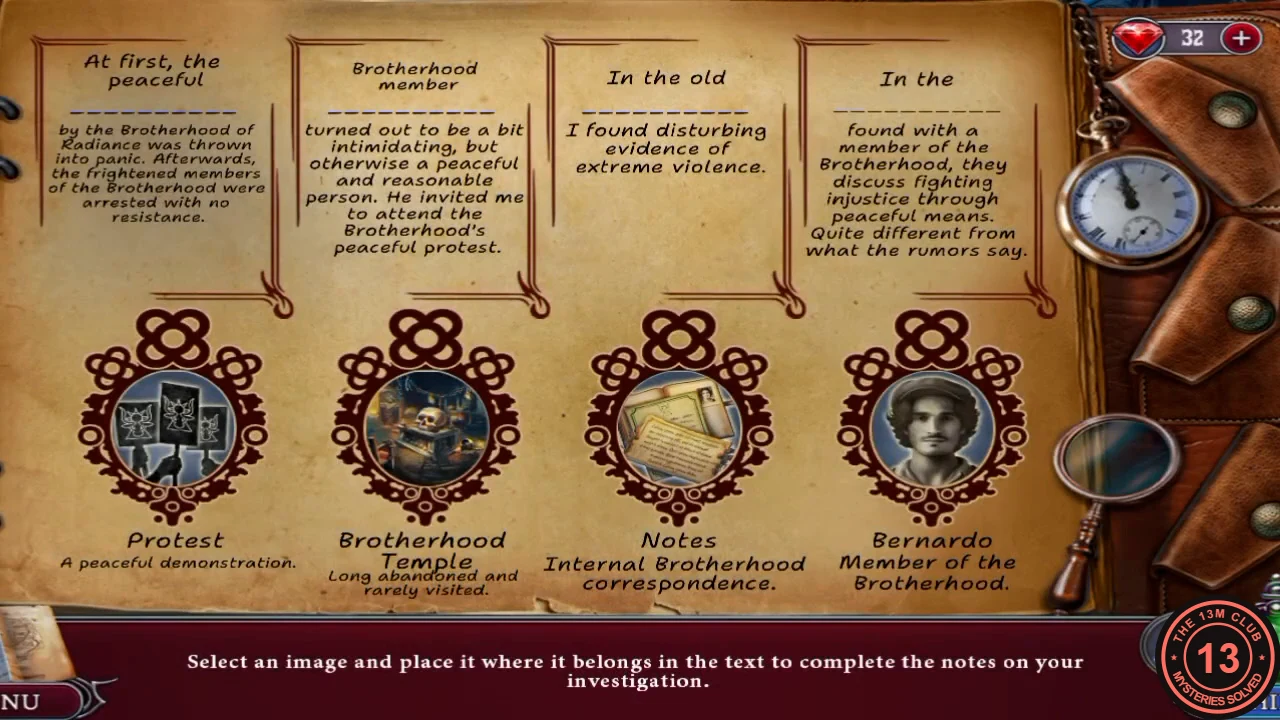
Link the protest, Bernardo and the Brotherhood.
- Solve Deduction 2. Fill the blanks left to right: Protest, Bernardo, Brotherhood Temple, Notes. Left question: "Members of the Brotherhood of Radiance oppose violence." Right question: "Claims about the violent nature of the Brotherhood of Radiance are lies." Centre question: "Someone is trying to frame the Brotherhood of Radiance." Your reward is the Whistle.
Plaza Real: Protest Signs, Powder Sample and Bag Token
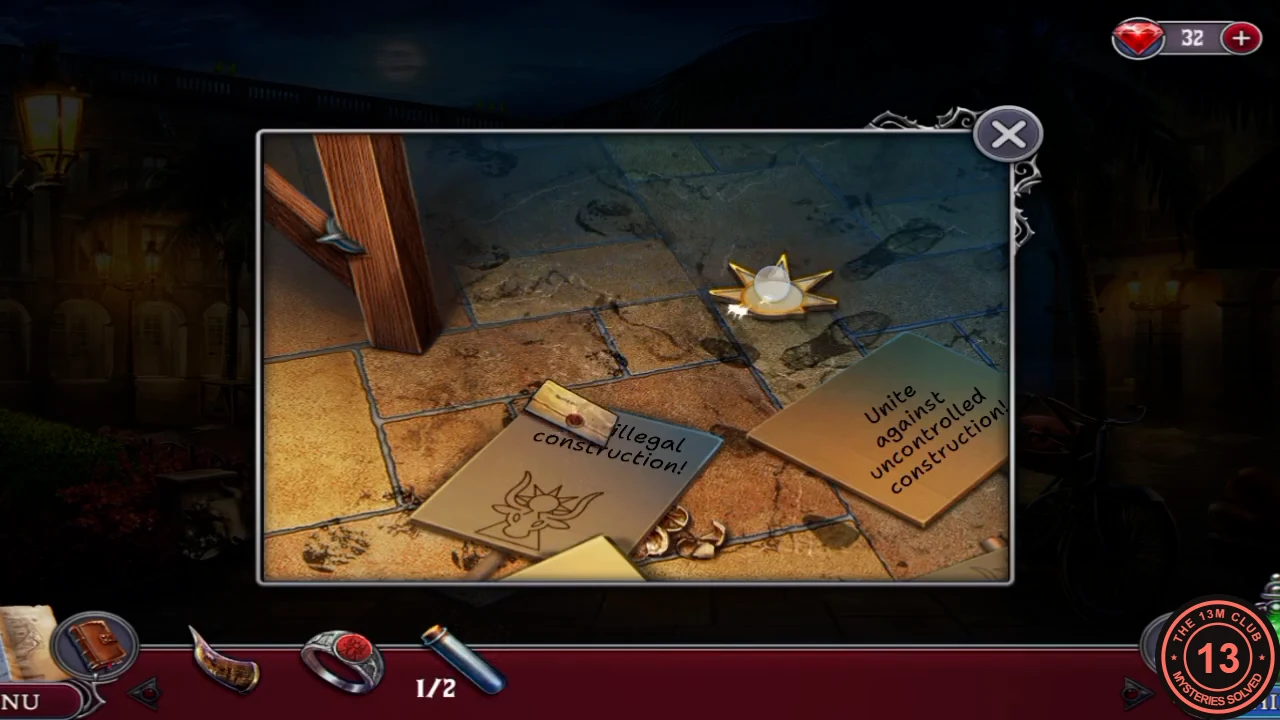
Use the whistle to clear the signs, then work through a short chain of locks.
- Blow the Whistle at the signs on the ground to scare off the crow. Tap the clues: Tracks leading away, Tracks leading to signs and Hidden envelope. The task becomes "Investigate protesters' belongings".
- Under the signs, take the Test tube (part 1/2 of a sampling kit) and the wedged sun-shaped Emblem part.
- Open the envelope marked "For Agatha". Take the Ring and the letter. The task becomes "Decipher the letter".
- Go to the bull head in the flower bed. Fit the Horn from Bernardo's suitcase in its empty socket, then put the open Ring from the envelope through its nose. The scraper drops out (part 2/2 of the sampling kit).
- At the Minotaur statue, use the combined scraper and test tube on the red powder in its chest and take the Powder sample. Agatha notes a piece of the emblem is missing, so place the Emblem part in the star-shaped hole. The chest lights up and the statue lets go of its Mace: take it. The task becomes "Examine the suspicious powder".
- Break the loose paving by the signs with the Mace to get the Bag Token. Use it on the locked pocket of the bicycle bag and take the blue cipher Notebook.
Plaza Real: Deciphering the Letter
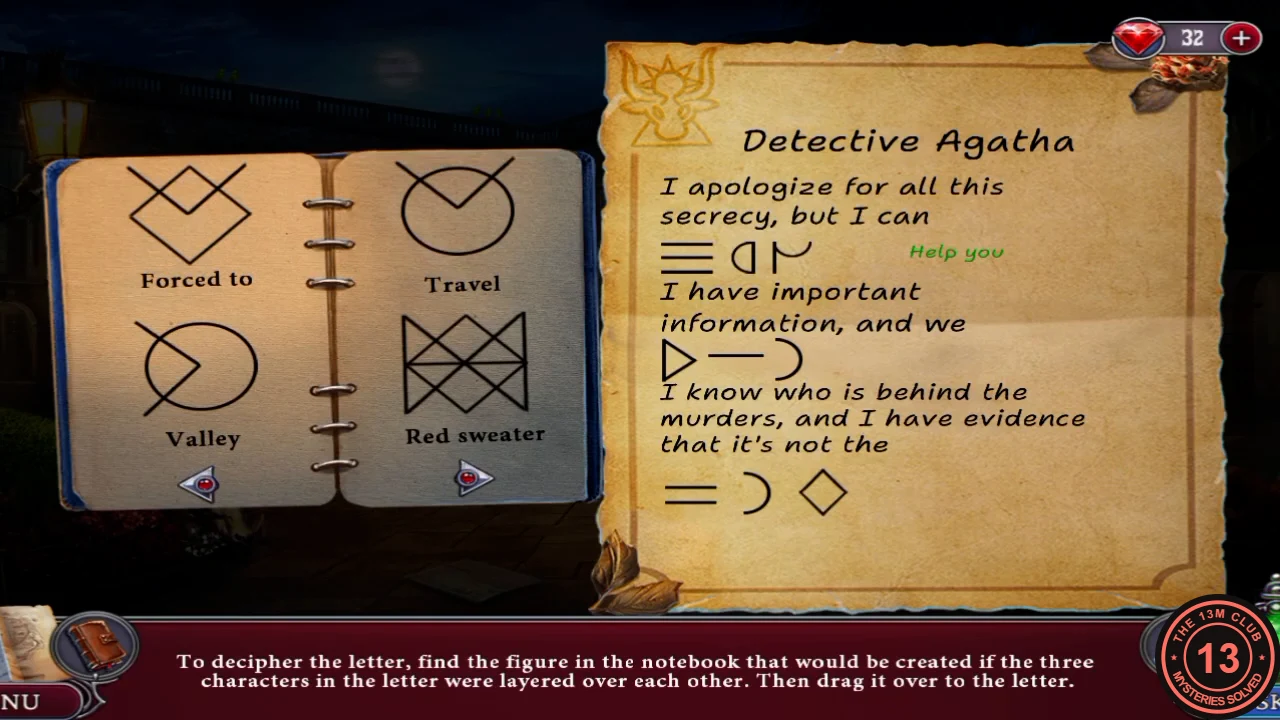
Overlap three figures from the letter to match a figure in the notebook.
- Lay three characters from the letter over one another until the overlay matches a figure in the notebook, then pick the word it stands for. Repeat for each group. In order, the message reads as shown below.CODEHelp you - Need to meet - Brotherhood - Police - Danger - Brown cloak - Market
Plaza Real: Tailing Through the Market
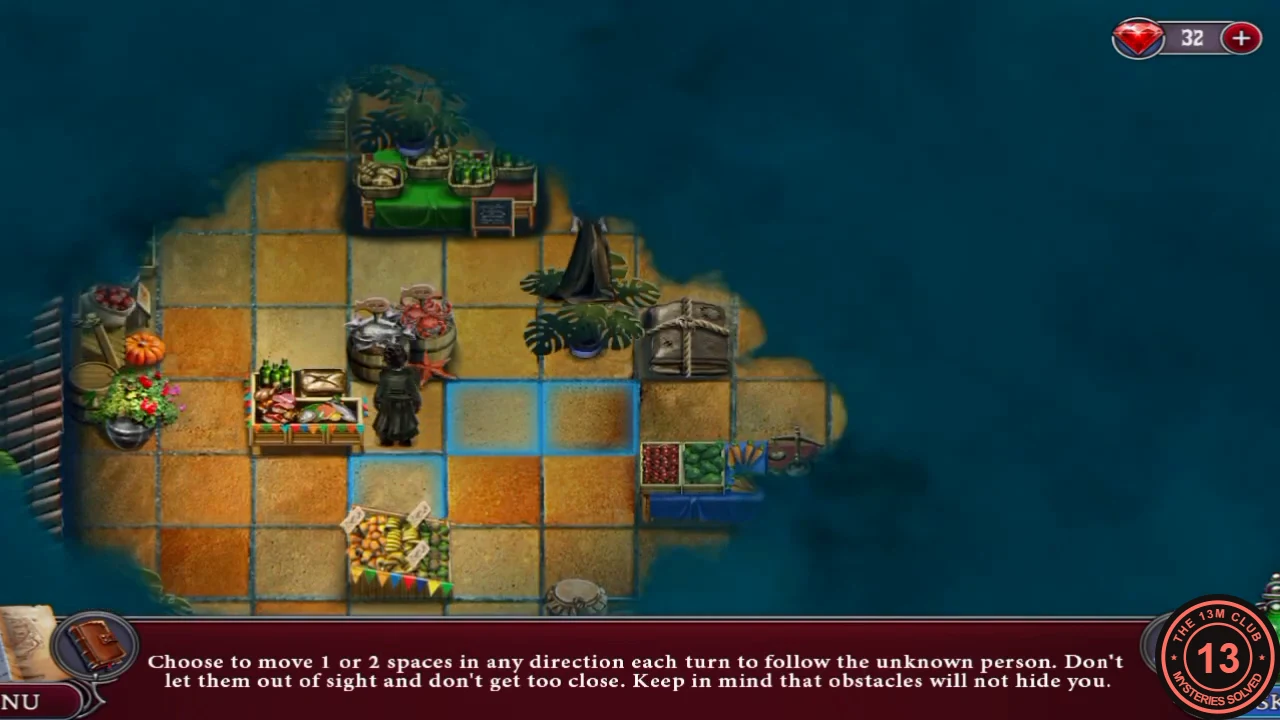
A movement puzzle. This guide gives the rules and a method rather than a list of moves, because you steer each turn yourself. The recording never shows a failed tail, so what happens if you lose the target is not covered here.
- The task is "Find the letter's writer". Blue squares show where you can step, one or two spaces per turn in any direction. Keep the cloaked figure in sight without getting close; obstacles do not hide you. Three things block or endanger you: an angry dog ("I can't go that way"), scattered oranges ("I should avoid walking on them") and a police officer ("I shouldn't approach him"). Choose another square when you see these.
- After each of the figure's moves, step so that you stay about two or three squares behind them. When they stop to chat, the game tells you to pass by unnoticed while keeping them in sight, so go around at a distance rather than walking up to them. Keep going until the writer stops and calls "At last! Over here". This leads you to the Brotherhood Base.