Observation Post: The Power Terminal Pipes
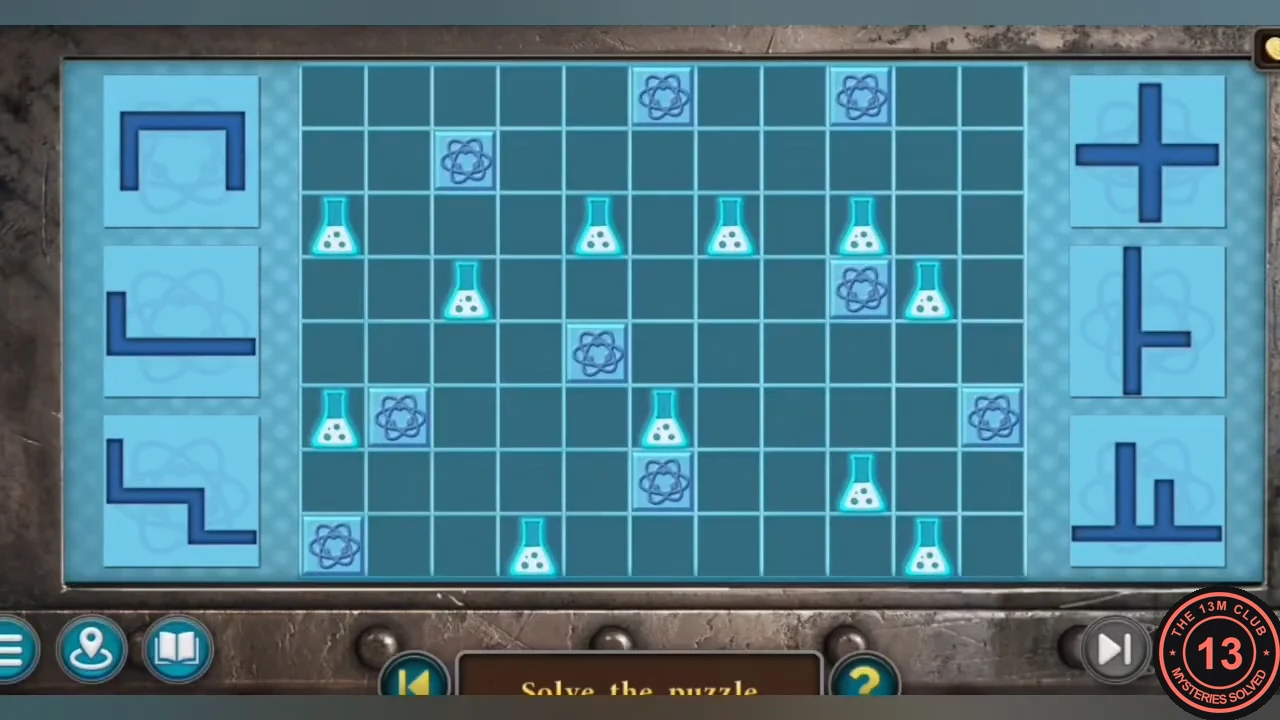
Power the terminal on the observation post's right pillar to open the bulkhead door.
- From the green waste basket right of the desk, take the HANDWHEEL (a ship's-wheel valve) and the PIPE. Collectible: Soda can 5/8 is on the floor right of the control desk. A morphing object (red fan) is high on the left wall above the green door. The power terminal on the right pillar has an empty battery slot.
- Take the elevator up to the machine hall. Put the BUTTONS in the button box on the right yellow pillar and press them to move the hoist with the hanging metal crate. Take the BATTERY from the crate lid.
- Insert the BATTERY in the empty slot of the power terminal on the observation post. The screen lights up with a pipe puzzle.
- Pipe puzzle: drag the six pipe pieces from the side trays (an upside-down U, an L, a stepped S, a cross, a T and a comb shape) onto the blue grid. Every flask square must be covered by a pipe (a covered flask turns into a pink fitting), no pipe may cover an atom square and the pieces may not overlap. One order that works: the L, the S, the U, the cross, the T and then the comb. See the solved-state image.
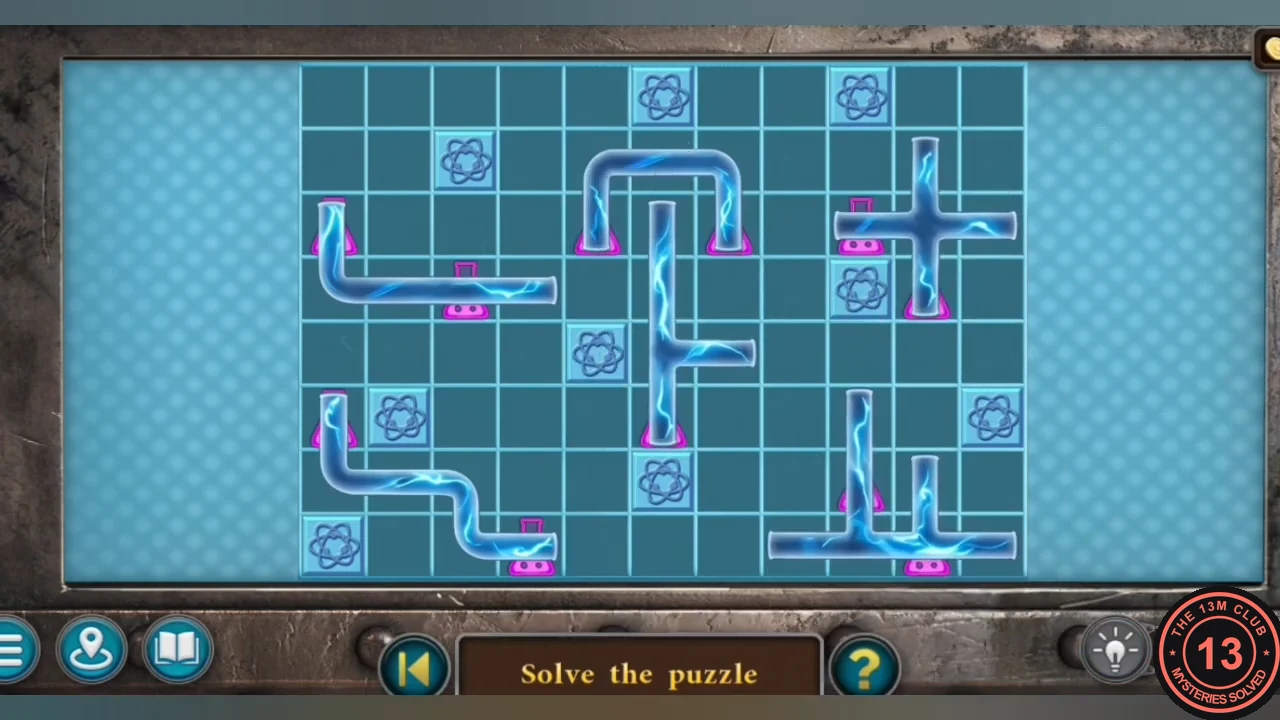
Solved: every flask is covered (now pink fittings) and no pipe sits on an atom square.
The Sunken Vessel: The Sea-Creature Door
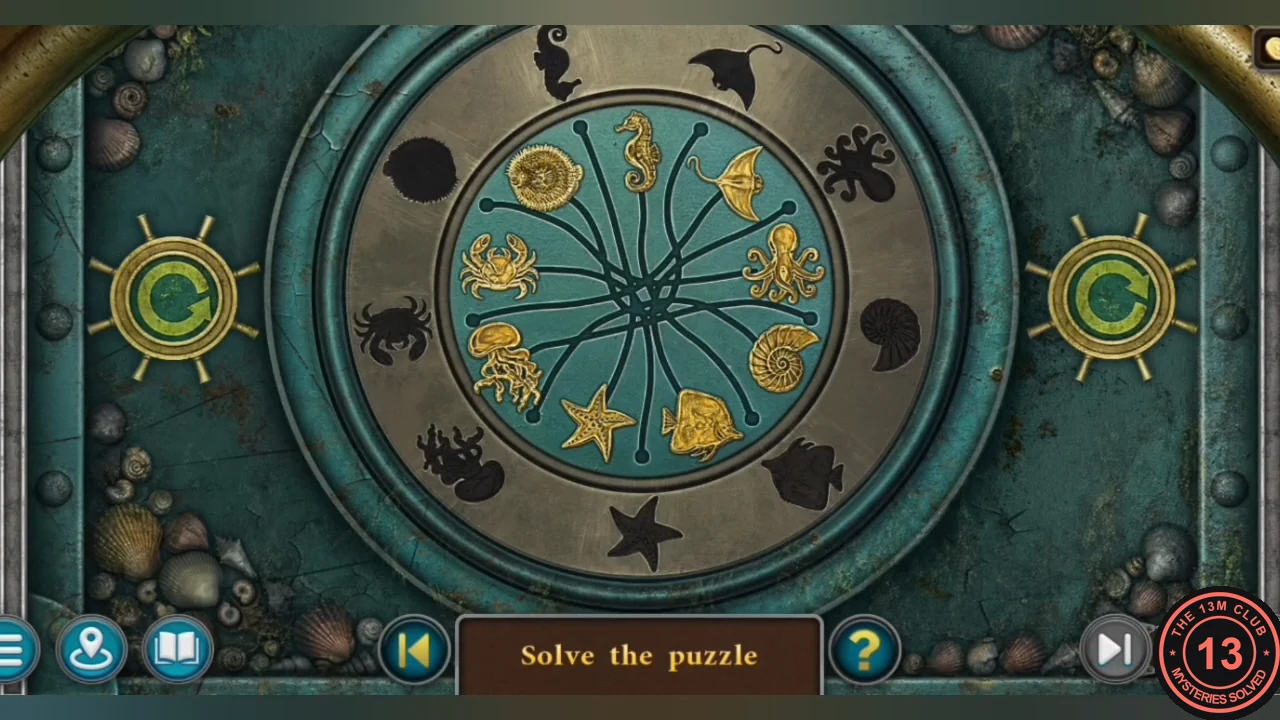
Learn about the gas cargo in the ventilation room, assemble diving gear and dive to the sunken vessel.
- In the ventilation room, Collectible: Soda can 6/8 is on the big pipe at the right. Jam the PIPE into the spinning wall fan on the right, then take TRANSISTORS (3/4) from behind the blades and the HACKSAW hanging on the pipe.
- Take the KEY HANDLE (a brass six-spoke star) from the wall blueprint on the left and open the star lock of the desk drawer with it. Read the shipment note: vessel V-204 sank off the Red Wells shore carrying a cyclopropane cylinder, and the stamp shows 2 3 4 1. Take the HAMMER. A morphing object is on the pipe above the blueprint.
- In the control room, take the DIVING BOOTS from the grated locker.
- On the observation post, knock the stuck bolt of the green locker on the left with the HAMMER. Take the DIVING SUIT and the CROWBAR.
- In the machine hall, pry the lid of the metal crate with the CROWBAR and take the AIR TANKS and BALL (2/5).
- On the shore, take the DIVING HELMET from the buried chest. Combine the DIVING SUIT, DIVING BOOTS, AIR TANKS and DIVING HELMET in your inventory to make the DIVING GEAR.
- Use the DIVING GEAR at the edge of the dock to dive to the sunken vessel. Collectible: Life ring 7/8 is at the lower left.
- Fit the HANDWHEEL in the ship's-wheel socket of the cabin door to start the ring puzzle.
- Sea-creature puzzle: nine gold creatures (seahorse, manta ray, octopus, nautilus, fish, starfish, jellyfish, crab and sea urchin) sit on an inner disc, each at the end of a tangled line leading to one spot on the outer ring. The outer ring carries nine black silhouettes and turns with the green arrow buttons. Turn the ring until a creature's own silhouette is at the end of its line, then click the creature to send it there; placed creatures ride with the ring. Place all nine. See the solved-state image.
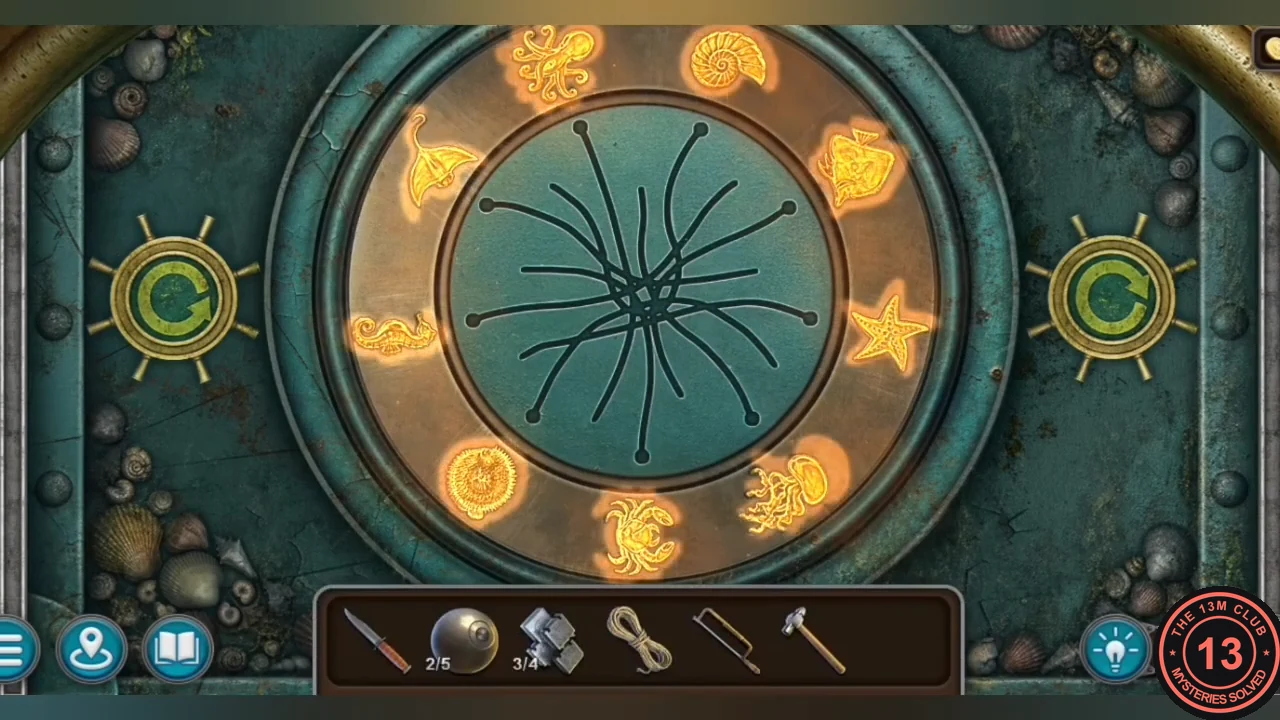
Solved: all nine creatures sit on their own silhouettes and glow. - In the cabin, take the FLARE and BALL (3/5) from the shelf. A morphing object glints on the deck near the wheelhouse.
The Sunken Vessel: The Slider Chest
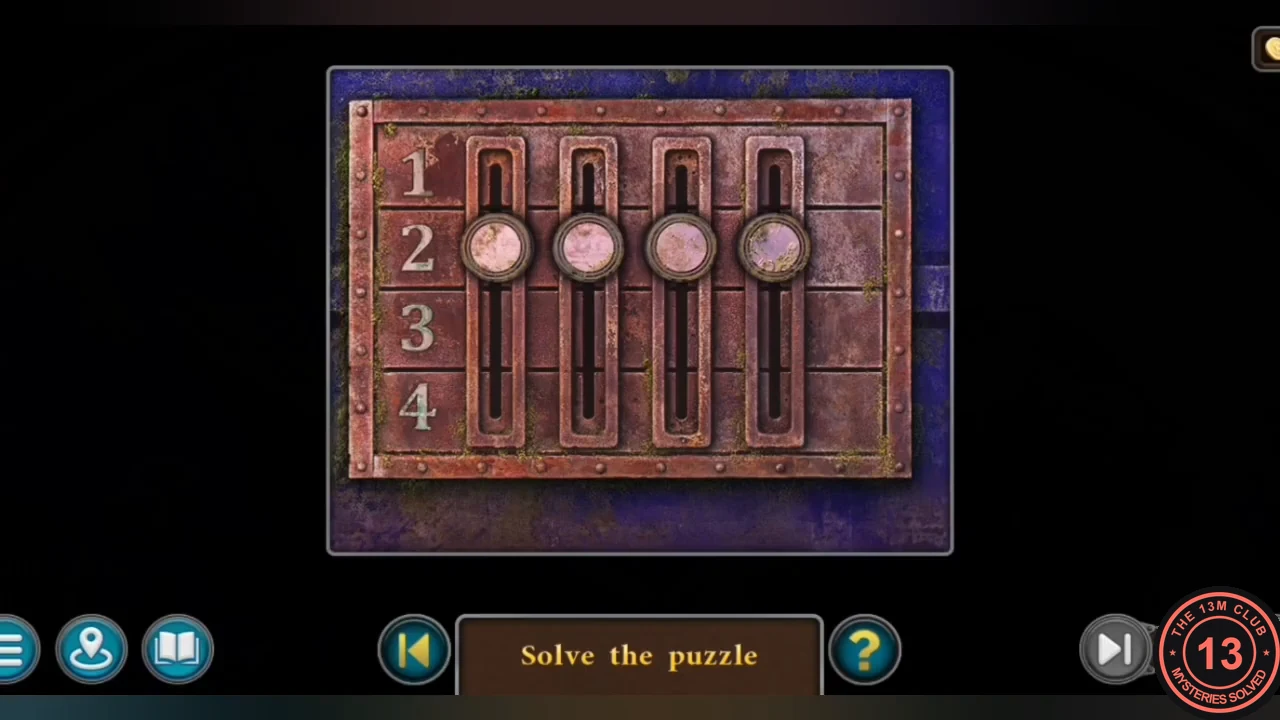
Open the cargo hold and recover the gas cylinder from the blue chest.
- Cut the hasp of the deck hatch with the HACKSAW, open it and drop the FLARE in to light the hold.
- In the hold, click the fallen beams to clear them away from the blue chest.
- Slider lock: four sliders in slots marked 1 to 4 all start at 2. Set them to 2, 3, 4, 1 (the stamp on the shipment note). The sliders are linked in pairs, so moving one also moves another by the same amount, and a slider stops at the end of its slot while its partner keeps moving. Adjust by trial. For example, the readings 1-3-3-1, 2-4-3-1 and 2-4-4-2 lead to 2-3-4-1 in three moves. See the solved-state image.CODE2341
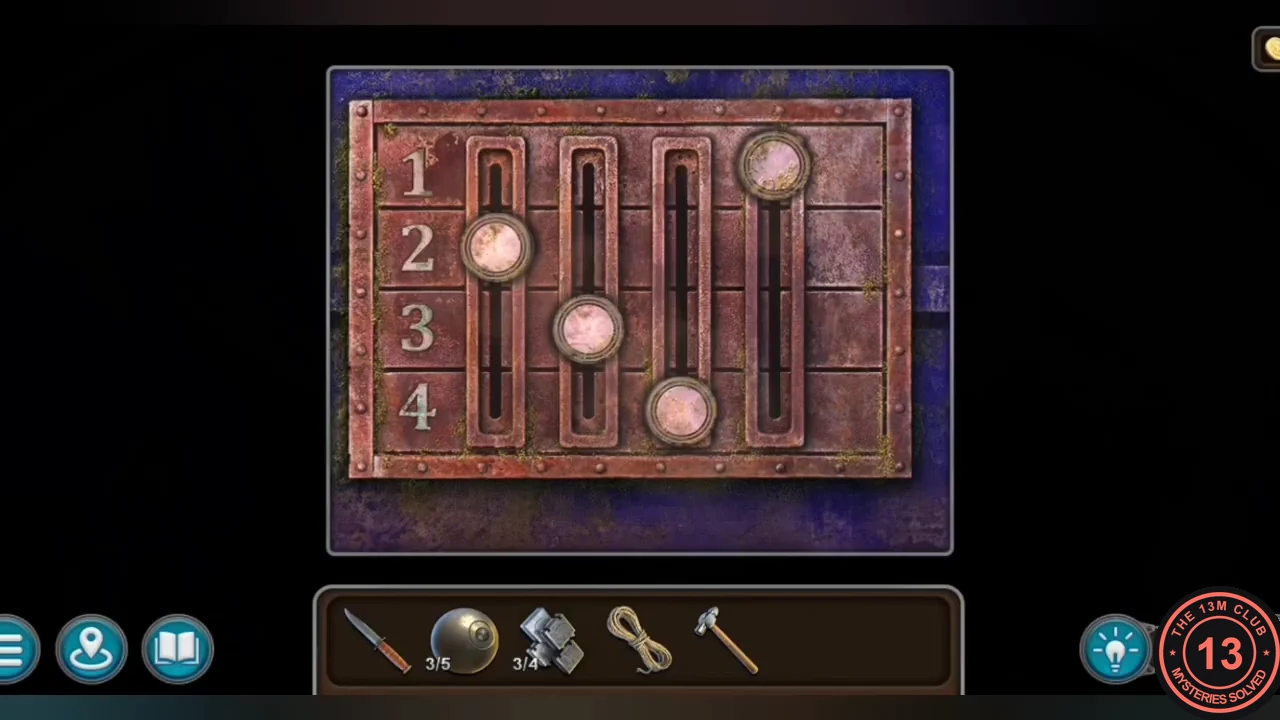
Solved: the sliders read 2, 3, 4, 1 from left to right. - Take the GAS CYLINDER (cyclopropane) and TRANSISTORS (4/4) from the chest.
Ventilation Room: The Number Grid Box
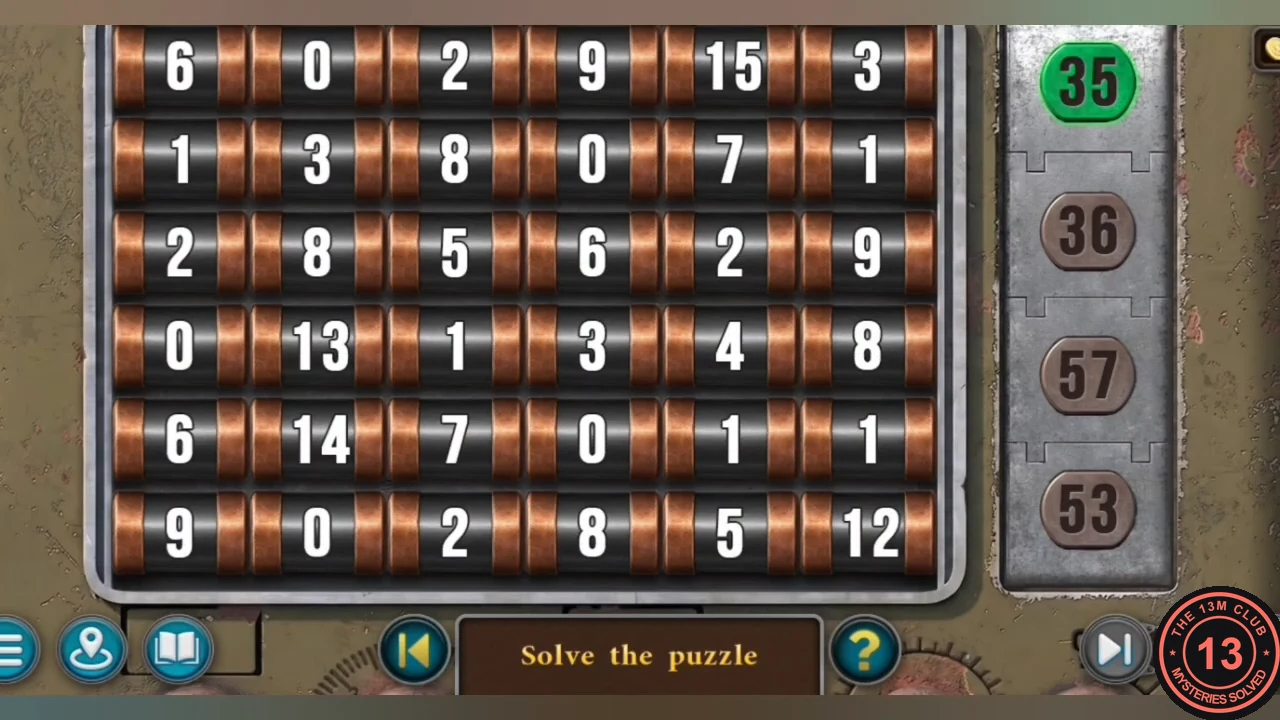
Open the yellow wall box that controls the ventilation system.
- In the ventilation room, put the TRANSISTORS in the yellow wall box on the left to open its grille.
- Number grid: a 6x6 grid of numbers sits beside four target counters (35, 36, 57 and 53). The active counter is green; selecting cells counts it down to 00. Split the whole grid into four connected groups whose numbers add up exactly to the targets; every cell is used. Example for the numbers shown in the overview image: 35 – the top-right block of rows 1-2, columns 4-6; 36 – the whole bottom row; 57 – row 1 and row 2 of column 3 plus rows 3-5 of columns 3-6; 53 – rows 1-5 of columns 1-2. Check that your grid shows the same numbers before copying this.
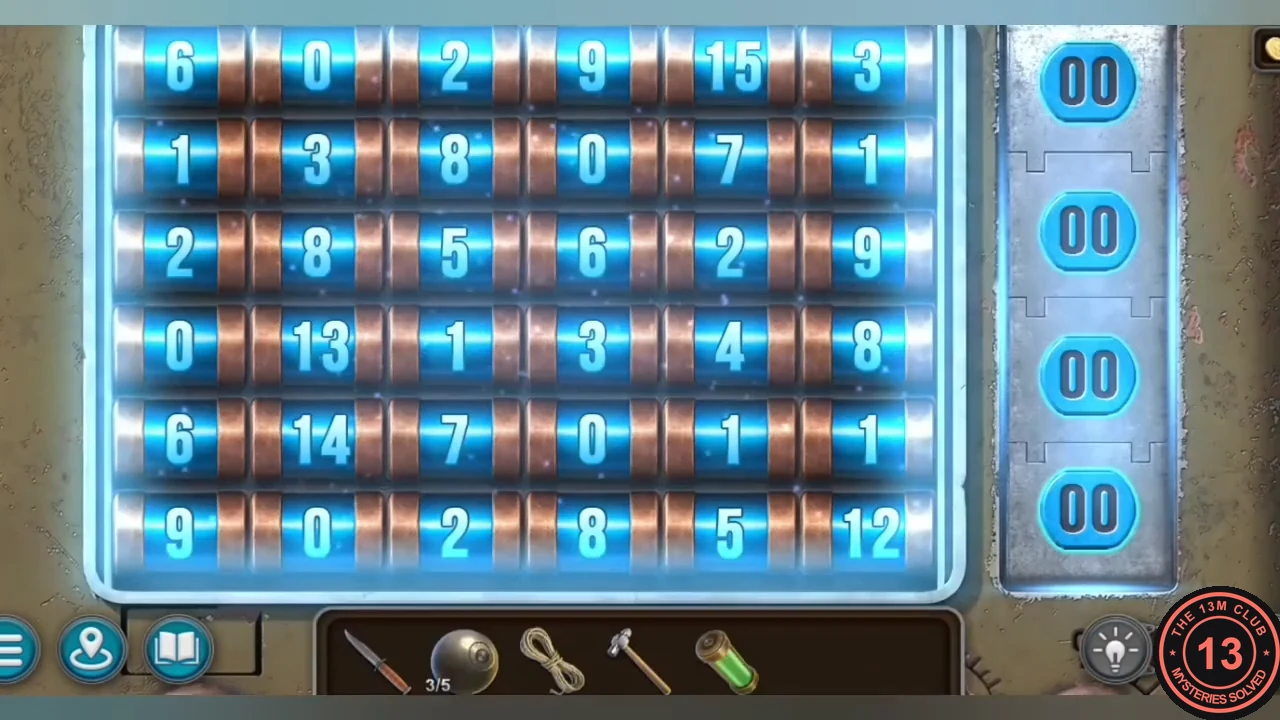
Solved: all four counters show 00.
Ventilation Room: Gassing the Laboratory
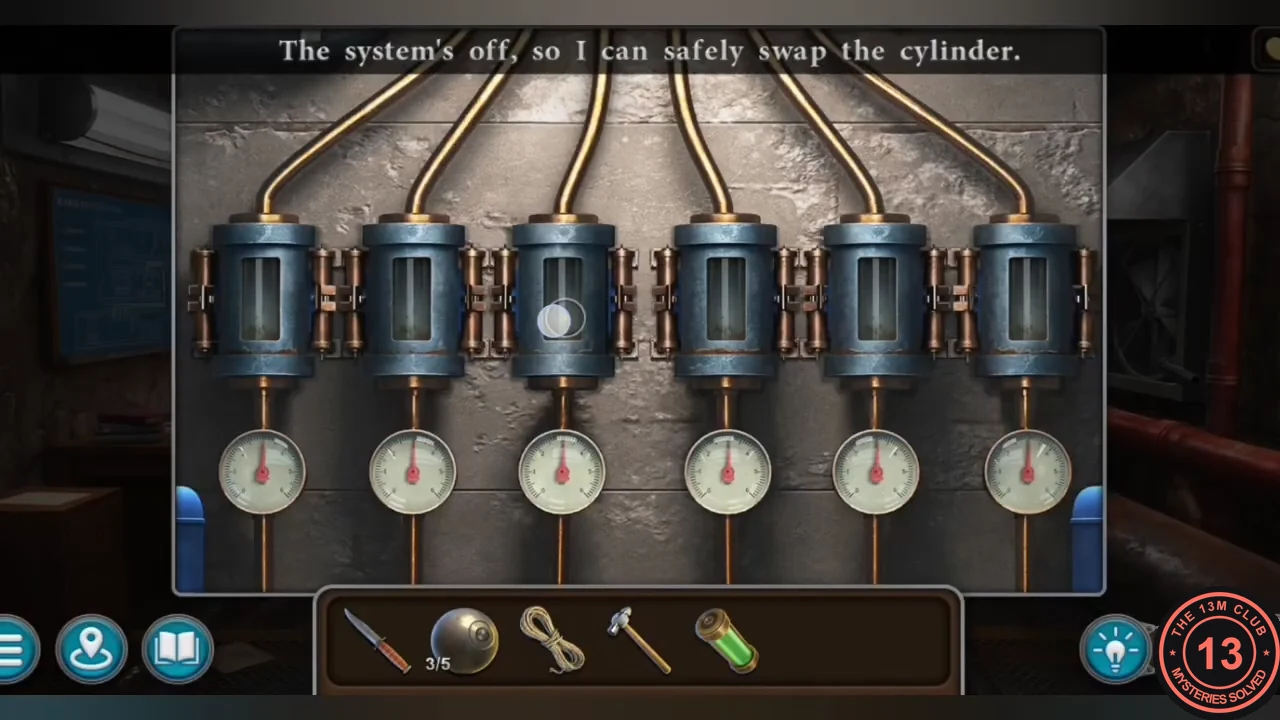
Pump the cyclopropane into the laboratory to knock out the vampire, then clear the air.
- At the six-cylinder gas manifold in the centre of the ventilation room (the system is off, so it is safe), remove the third cylinder and insert the GAS CYLINDER.
- In the wall box, flip the red knife switch down. The gas drains into the laboratory.
- Look through the observation-post window: the lab is full of gas and the vampire is unconscious.
- Back at the manifold, remove the empty gas cylinder. In the wall box, flip the knife switch back up, then press the red TURBO button. The air in the laboratory is clear.
- On the observation post, pull the green lever on the right door frame to open the laboratory. The gas has started a fire. Collectible: Life ring 8/8 (achievement Lifeguard) is on the far-left wall of the lab; a morphing object is on the lab floor at the right, beside the top of the yellow stair railing in front of the folding screen.
Dam Laboratory: The Coloured Snakes
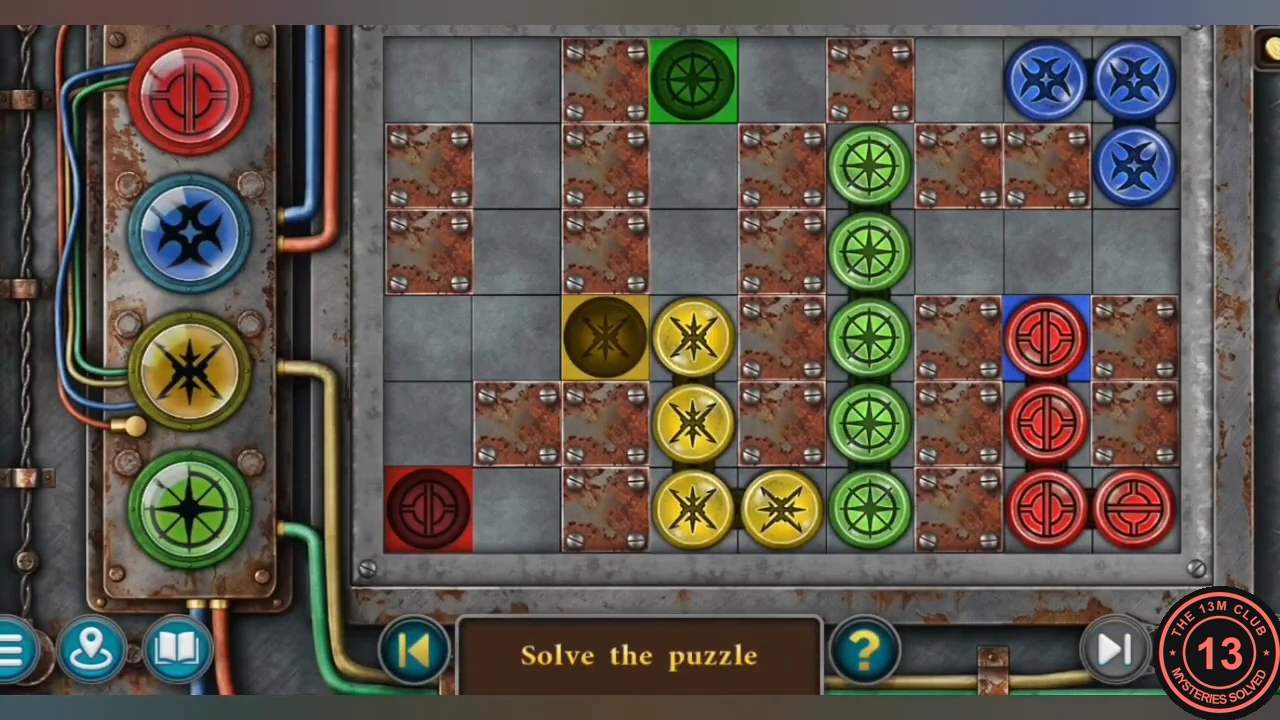
Put out the fire, tie up the scientist and open the lab's metal door.
- Break the glass of the red fire-extinguisher cabinet on the observation post with the HAMMER and take the FIRE EXTINGUISHER. Put out the sparking cable fire on the lab floor with it.
- Tie up the unconscious scientist on the floor with the ROPE and take RELIEF PIECE (1/4). New task: get the suppressant.
- From the lab table at the left front take BALL (4/5) and RELIEF PIECE (2/4). Take RELIEF PIECE (3/4) from the body on the left bed, the PIPETTE from the IV stand and RELIEF PIECE (4/4) from the bed by the hand.
- Place the four RELIEF PIECES in the cross-shaped recesses of the lab's metal door.
- Snake puzzle: four snakes (red, blue, yellow and green) lie on a 9x6 grid with rusty blocked plates, and each colour has a target square. Drag a snake by its end token; the body follows through open grey cells. Move every snake onto the target square of its own colour (the dials on the left light up). In the example shown, the targets are green at the top, yellow at the left middle, blue on the right and red at the bottom left. This guide gives the targets rather than a full move list; move one snake at a time out of the others' way and compare with the solved-state image.
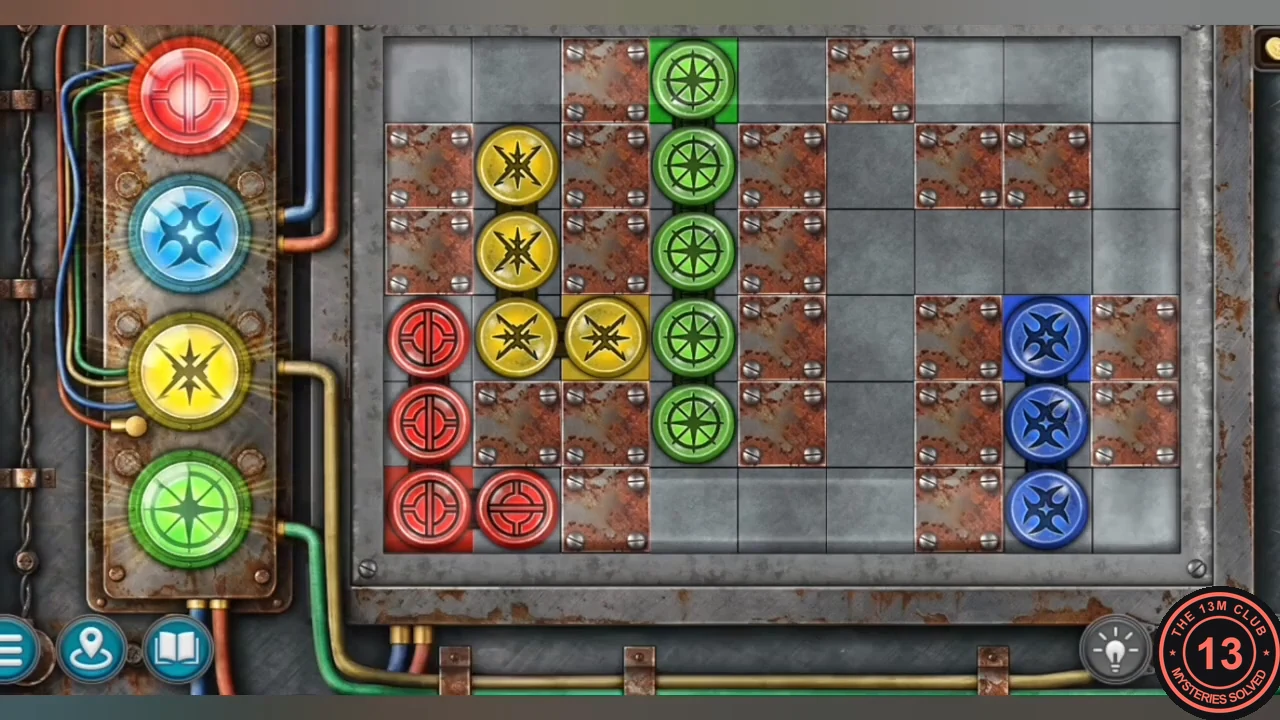
Solved: each snake ends on its own coloured square and all four dials on the left are lit.
Dam Laboratory: The Nine-Point Star Vault
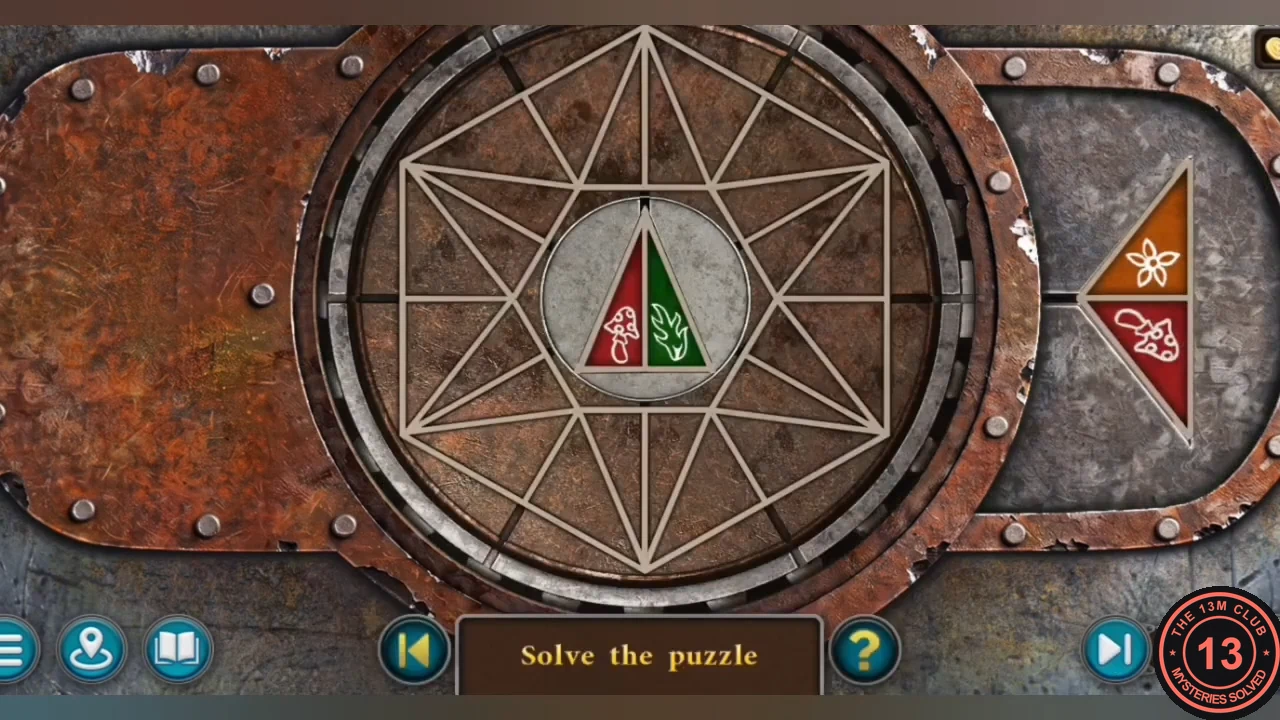
Free information from the caged scientist, collect the last balls and open the vault.
- In the prison corridor, talk to the scientist in the left cell. He gives you the FORMULA.
- Pry the loose brick with the graffiti "PLAC..." in the cell wall with the KNIFE and take the GLOVES. Remember the message. Take the HOSE from under the lifted mattress of the cell bed.
- Take BALL (5/5) from the guard desk. Collectible: Soda can 7/8 glints at the upper left of the corridor; a morphing object is on the stone pillar just right of the scientist's cell, at head height. The barred door at the end of the corridor is missing its handle.
- Put the five BALLS in the empty eye sockets of the vault door (eye-tree emblem) in the lab.
- Star puzzle: each point of a nine-point star takes a two-colour triangle piece. The current piece sits in the centre circle and the next one waits in the right tray. Drag the outer ring to turn the star so an empty point is at the top, then click the centre piece to drop it there. Complete the star so that neighbouring halves always show the same symbol and colour (the star glows green). See the solved-state image.
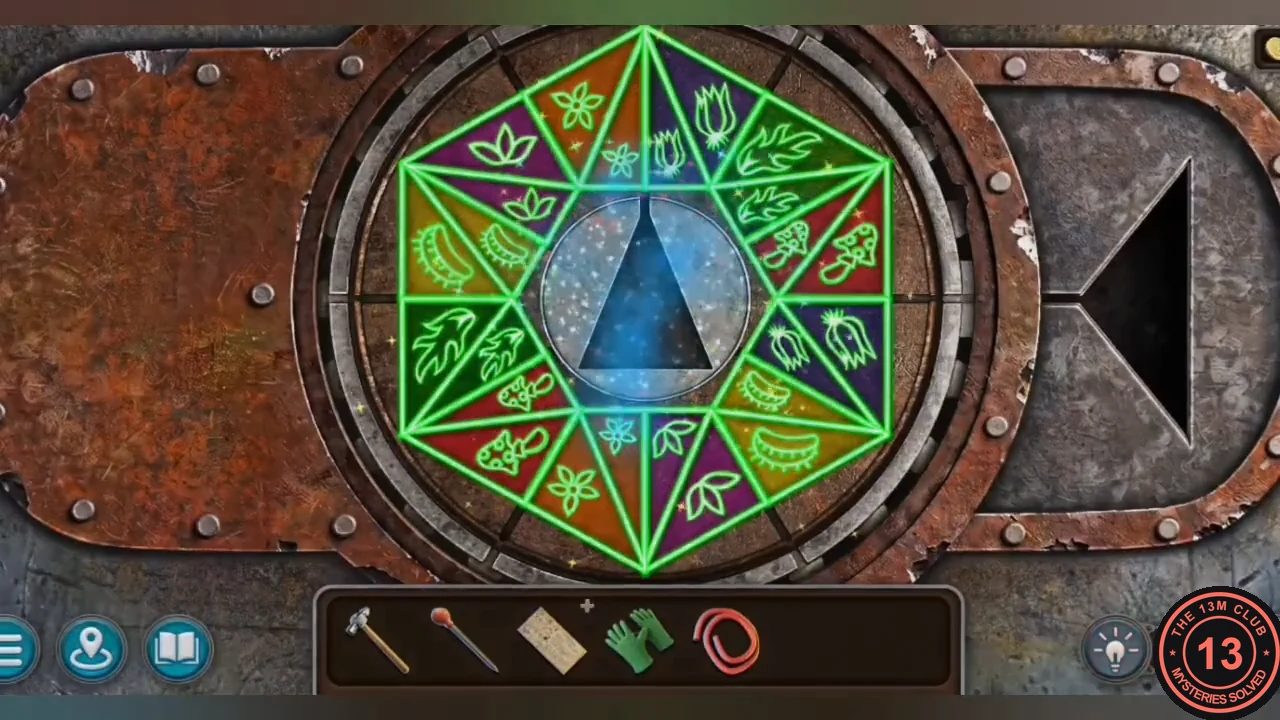
Solved: every pair of touching halves shows the same symbol and colour, and the star glows green.
Plant Laboratory: The PLACEBO Freezer
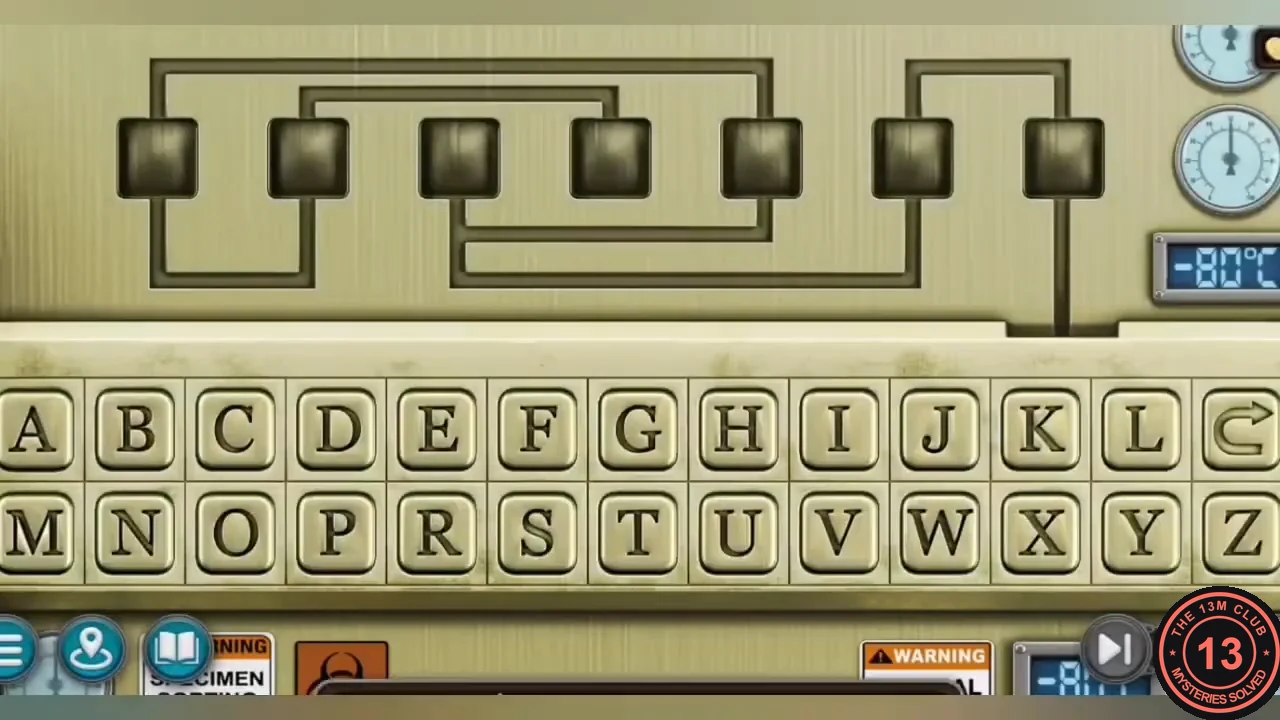
Search the plant laboratory and open the -80°C freezer with the password from the graffiti and the recipe book.
- In the plant lab, take the HANDLE (a hooked rod) from the desk on the left. Collectible: Soda can 8/8 (achievement Explorer) is on the floor in front of the central tank. The last morphing object (47/47, achievement Master of Detail) is the old radio on top of the cabinet at the far left, beside the small green tank under the red hanging lamp.
- Smash the cracked small tank right of centre with the HAMMER. Take the PIPE CLAMP and LEAVES (1/2).
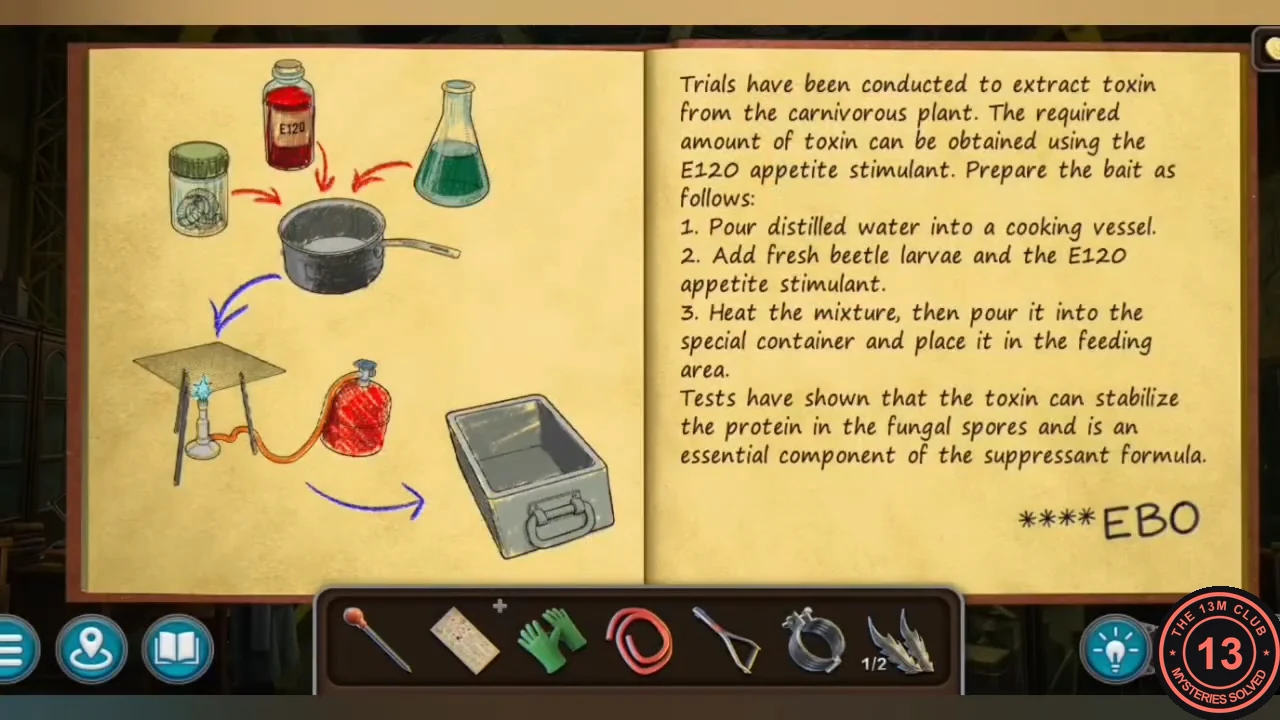
The recipe book in the plant lab ends with ****EBO; the prison graffiti supplies PLAC. - Freezer terminal: the password combines the prison graffiti "PLAC..." with the end of the lab recipe book "...EBO" – PLACEBO. The seven slots are joined by wire paths. Each letter you type enters at the right and pushes the earlier letters further along the paths, so the letters are not typed in spelling order. Type C, L, P, E, A, B, O; the slots then read PLACEBO from left to right and the freezer opens.CODEC L P E A B O
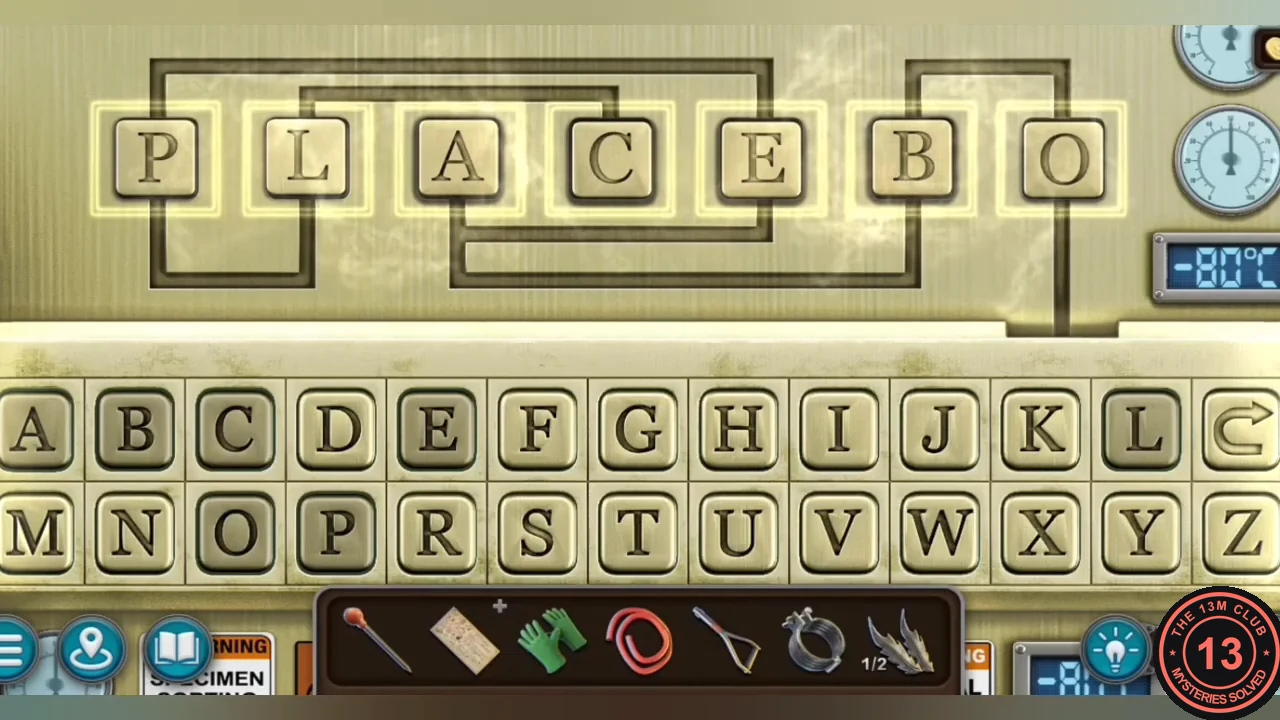
After typing C, L, P, E, A, B, O the slots read PLACEBO. - Take the BEETLE LARVAE and the CONTAINER from the freezer.
Prison Storeroom: Finding the Appetite Stimulant
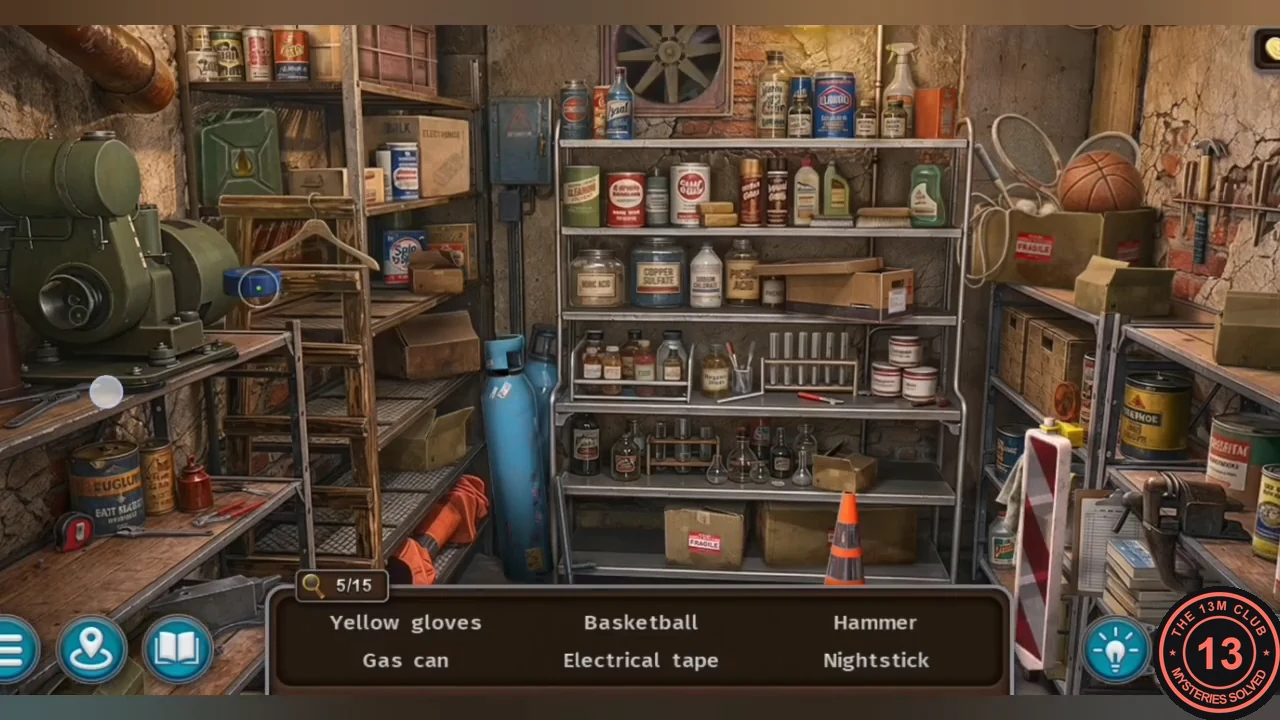
Collect fungus from the glovebox and search the storeroom behind the barred door.
- At the toxin bench in the plant lab (cooking pot, metal tray, flask and red gas burner), place the BEETLE LARVAE.
- In the main lab, put the CONTAINER in the pass-through tray of the glovebox on the right. The built-in arms place a piece of fungus in it; take the FUNGUS.
- Fit the HANDLE on the barred door at the end of the prison corridor and enter the storeroom.
- Storeroom: find the 15 listed items – mop, gas can, radio, electrical tape, saw, nightstick, yellow gloves, handcuffs, hammer, basketball, walkie-talkie, appetite stimulant, matches, flashlight and whistle. The walkie-talkie and flashlight are inside the electrical panel on the left wall, the appetite stimulant (the red E120 bottle) and the matches are in the chemicals cabinet, and the whistle is in the wall fan at the top. You receive the APPETITE STIMULANT.
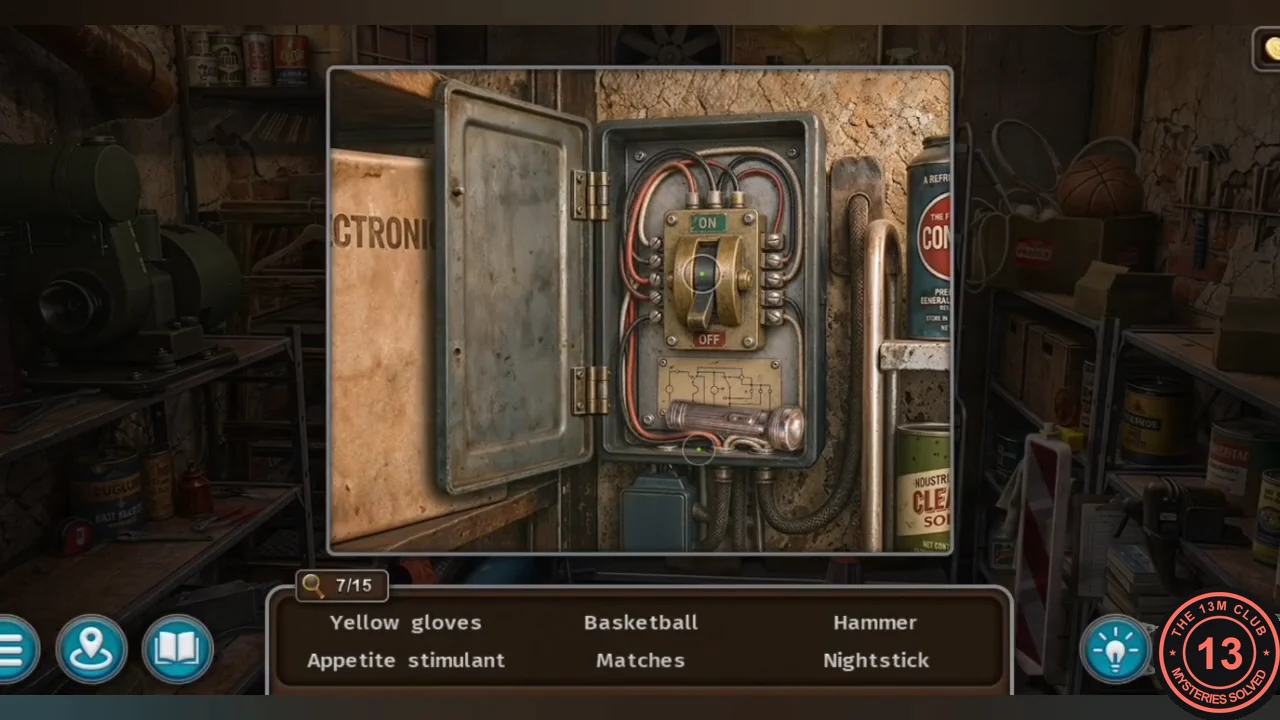
The electrical panel on the left wall opens; the flashlight is inside it.
Plant Laboratory: Cooking the Bait
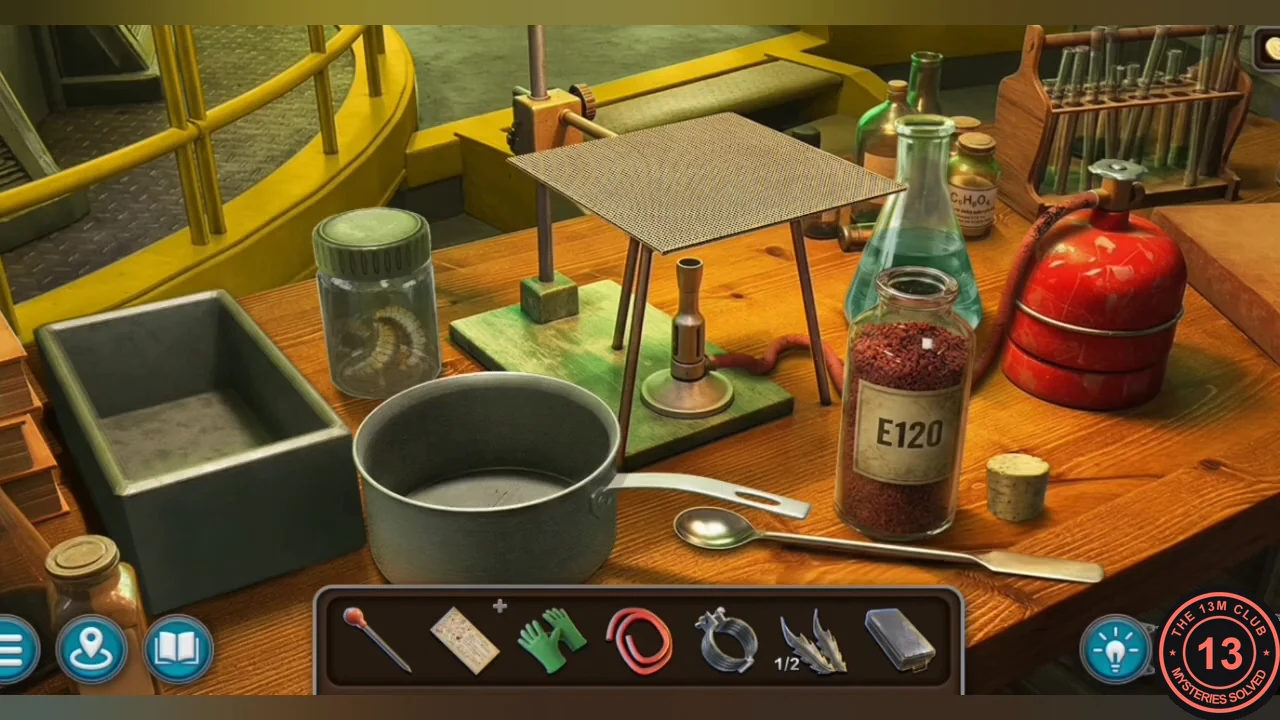
Cook bait for the carnivorous plant at the toxin bench.
- Place the APPETITE STIMULANT on the toxin bench in the plant lab.
- Cook in this order: pour the E120 into the pot, pour in the flask of water, then add the beetle larvae (adding the larvae first is rejected). Put the pot on the stand over the burner. Connect the red gas cylinder to the burner with the HOSE so it lights, stir with the spoon and pour the result into the metal tray at the left. Take the BAIT.
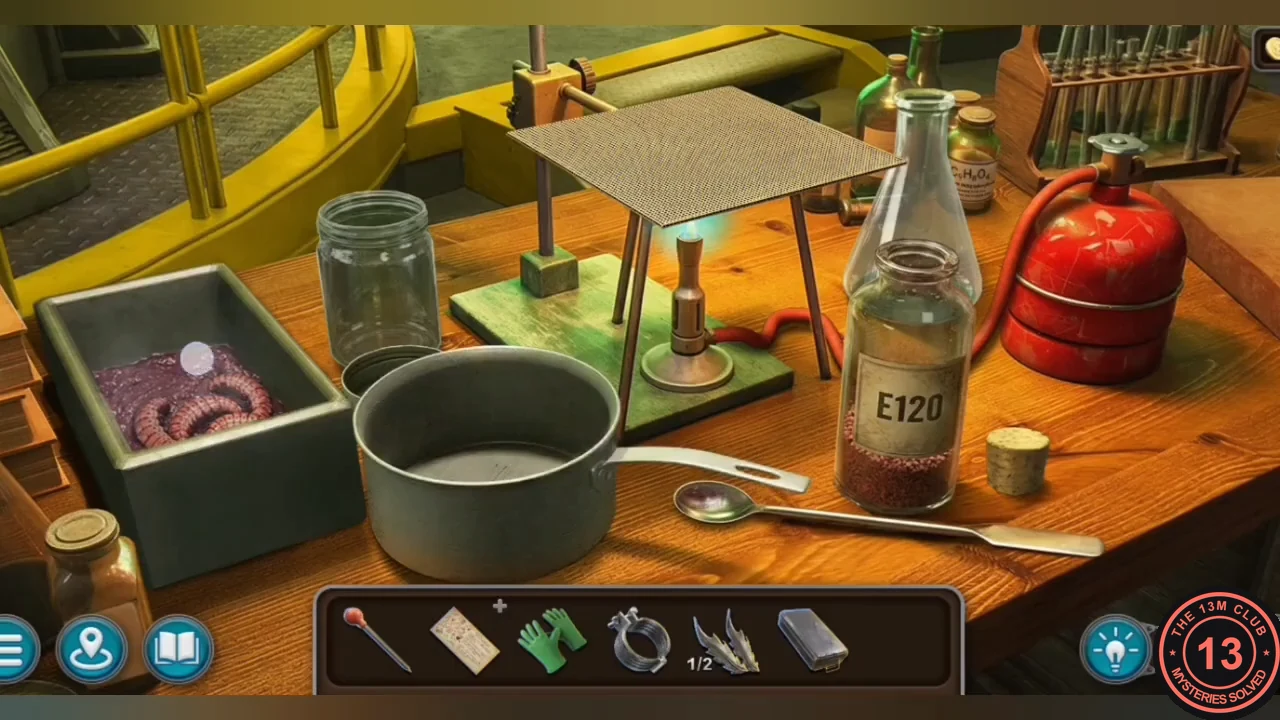
Done: the bait is in the metal tray, ready to take.
Plant Laboratory: The Plant and Mouse Network
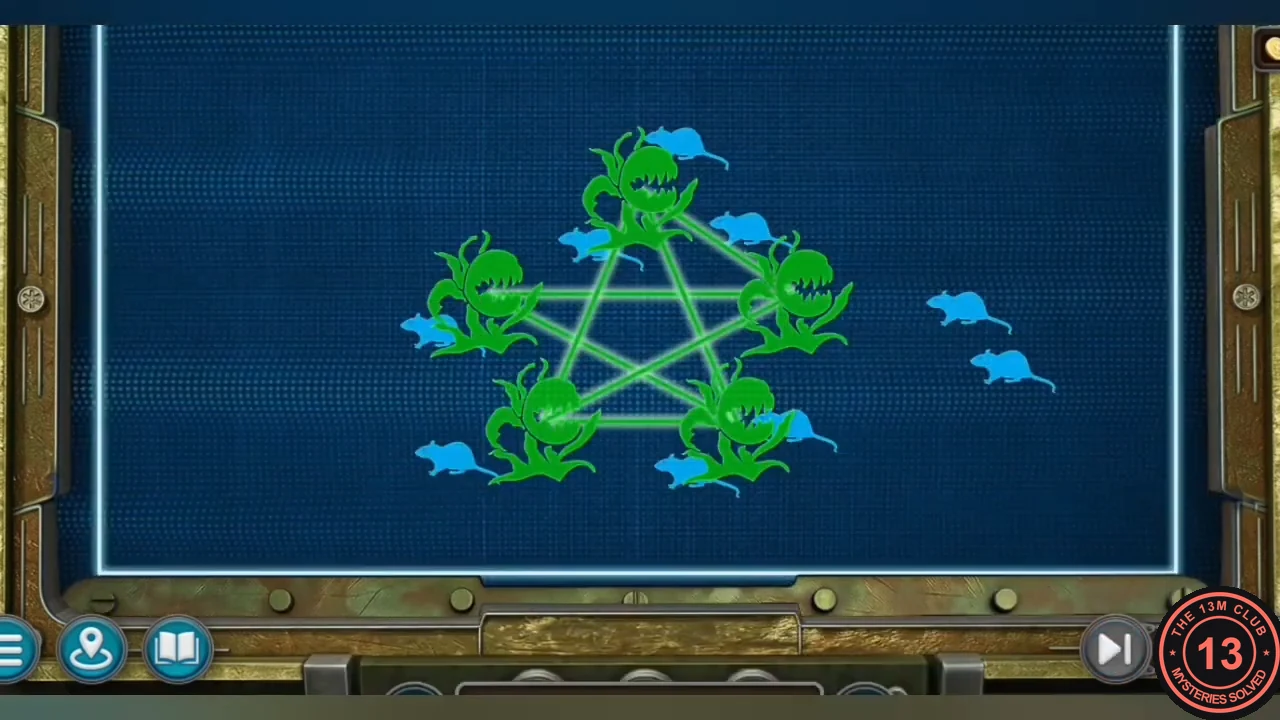
Fix the steam leak for the last leaves, then feed the carnivorous plant to collect its toxin.
- In the machine hall, fit the PIPE CLAMP on the leaking steam pipe beside the catwalk. Turn the valve wearing the GLOVES; the steam stops. Take the KEY and LEAVES (2/2) from the vent grille behind it.
- In the plant lab, fit the LEAVES into the carnivorous-plant relief on the green panel below the central tank.
- Network puzzle: five green carnivorous plants are joined by green lines in a five-pointed star, and blue mice are scattered around. Drag the plants (the lines move with them) until every mouse lies on a green line. In the solved state the plants sit at the top centre, far left, far right, bottom left and bottom right. See the solved-state image.
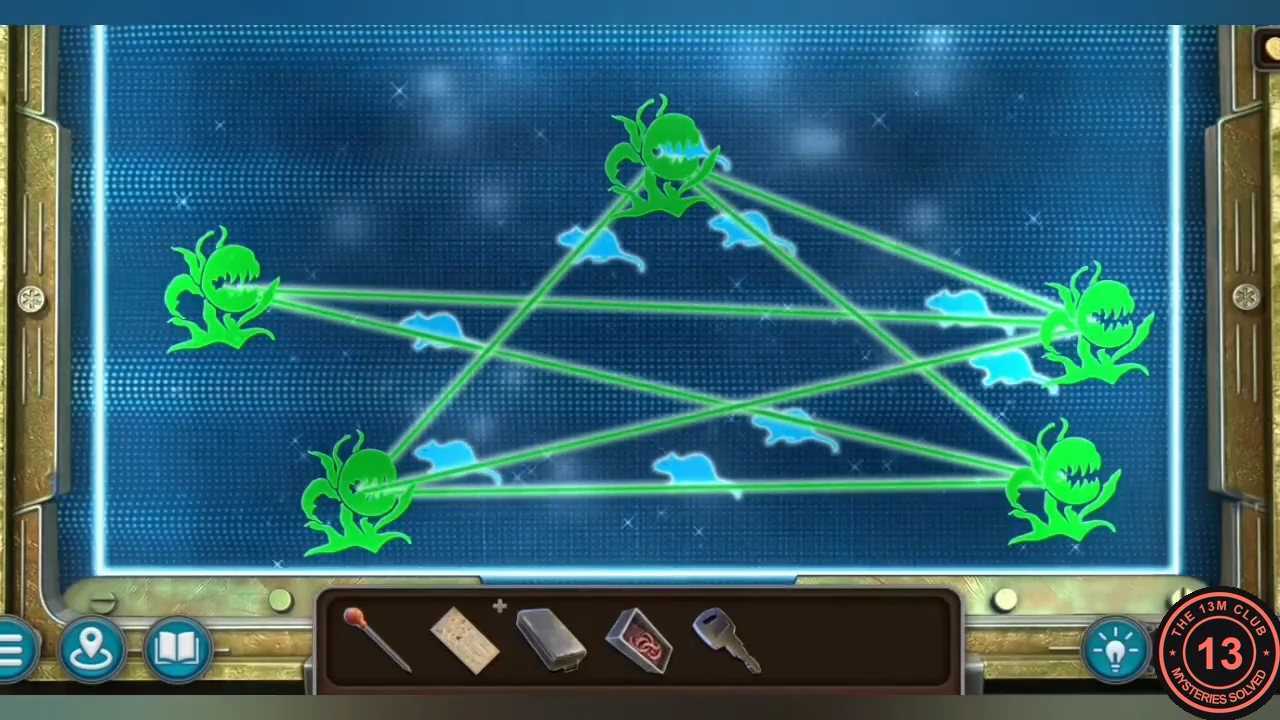
Solved: plants at top centre, far left, far right, bottom left and bottom right, with every mouse on a line. - Place the BAIT in the feeding drawer at the base of the central tank and let the plant eat. Reopen the drawer and collect the PLANT TOXIN with the PIPETTE.
Dam Laboratory: Synthesising the Suppressant
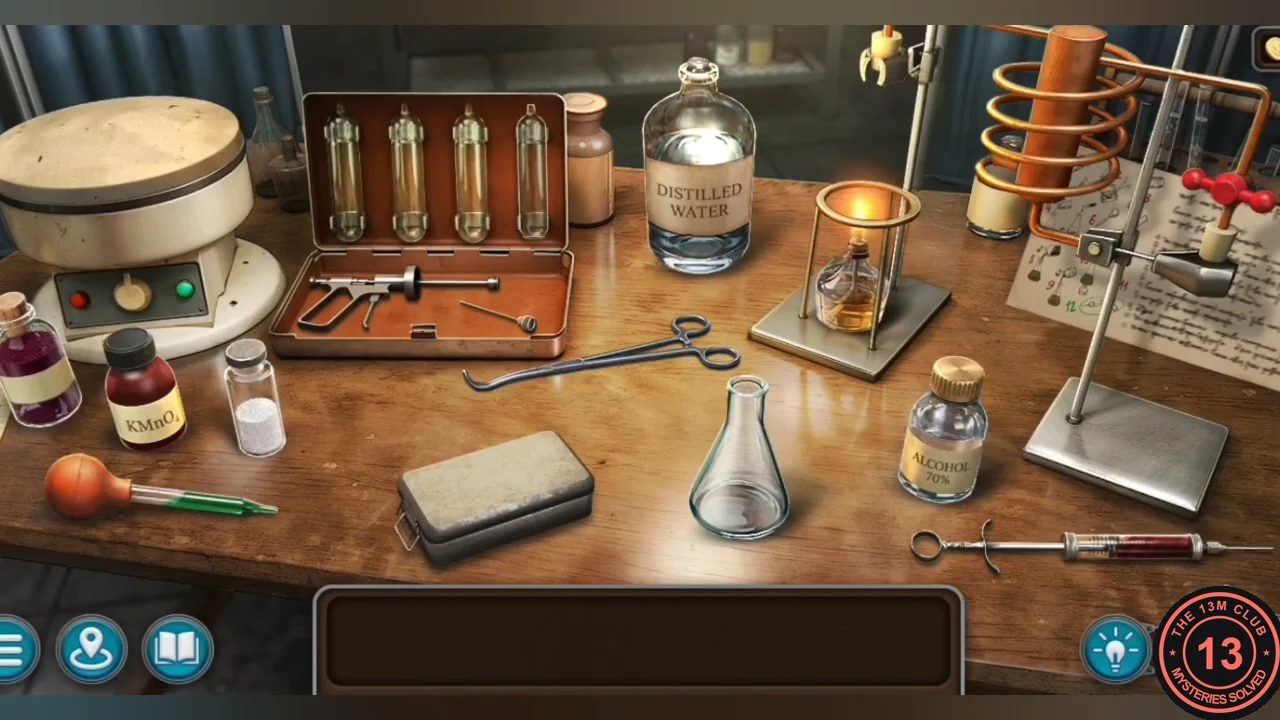
Gather the reagents and follow the scientist's formula exactly.
- Unlock the first-aid cabinet (white cross) in the prison corridor with the KEY and take the SYRINGE and the ALCOHOL 70%.
- In the main lab, draw blood from the bags on the IV stand with the SYRINGE to get the BLOOD SAMPLE.
- Open the FORMULA in your inventory and add the FUNGUS, the PIPETTE with plant toxin, the ALCOHOL and the BLOOD SAMPLE. You get the REAGENTS.
- Place the REAGENTS on the synthesis table in the main lab.
- Follow the formula in this exact order: 1) put the blood syringe in the centrifuge on the left and run it; 2) open the fungus tin and use the clamp to put a fragment in the empty flask; 3) add distilled water; 4) add the 70% alcohol; 5) add the plasma tube from the centrifuge; 6) add the plant toxin from the pipette; 7) add salt; 8) add the powdered mummy blood (purple jar); 9) add the potassium permanganate (KMnO4); 10) put the flask on the burner ring so it distils through the coil into the test tube on the right; 11) load the capsule injector. You receive the MUTATION SUPPRESSANT.
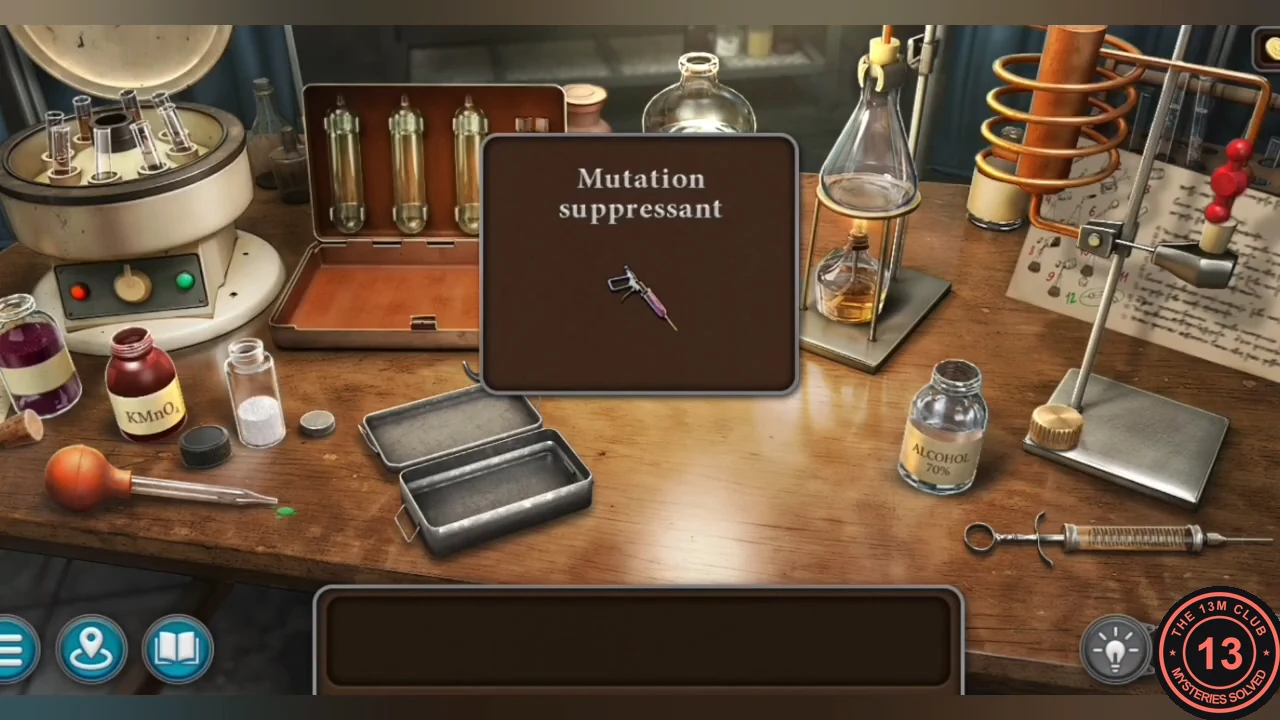
Done: you receive the mutation suppressant.
Prison Corridor: The Cell Window and the Ending
Cure the scientist, open the cells and free the prisoners.
- Inject the tied-up scientist on the lab floor with the MUTATION SUPPRESSANT. He recovers and gives you the code six, eight, three for the cell block.
- At the guard desk in the prison corridor, set the three dials of the box to 6, 8 and 3 from left to right. The lamps light and the box opens.CODE683
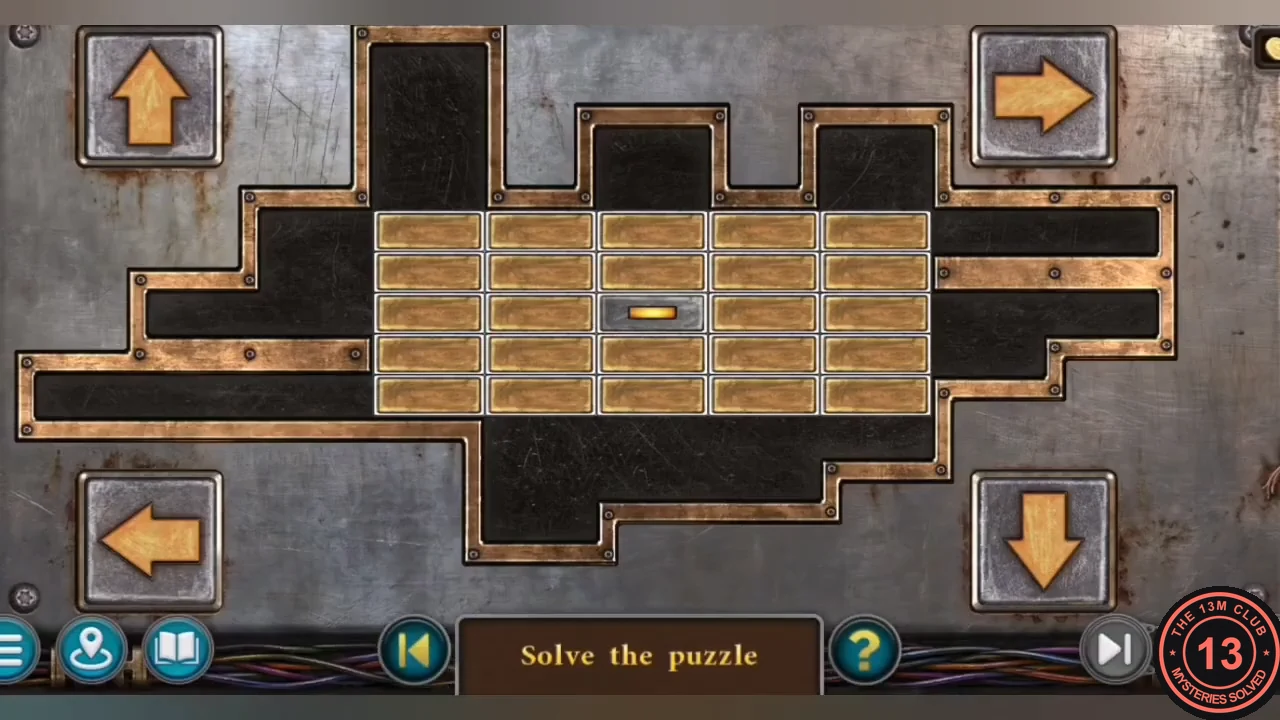
- Window puzzle: a 5x5 window of wooden slats hides a picture of the cells. The lit slat starts in the centre; the arrow buttons at the corners move it one square, pushing the slats ahead aside and uncovering the square it leaves. The puzzle is solved when the whole picture is uncovered apart from the square where the lit slat stops (the top-right square with the sequence below). One working sequence of 28 moves: Right, Right, Up, Up, Left, Down, Down, Down, Right, Down, Left, Left, Up, Up, Up, Left, Down, Down, Down, Left, Up, Up, Up, Up, Right, Right, Right, Right.
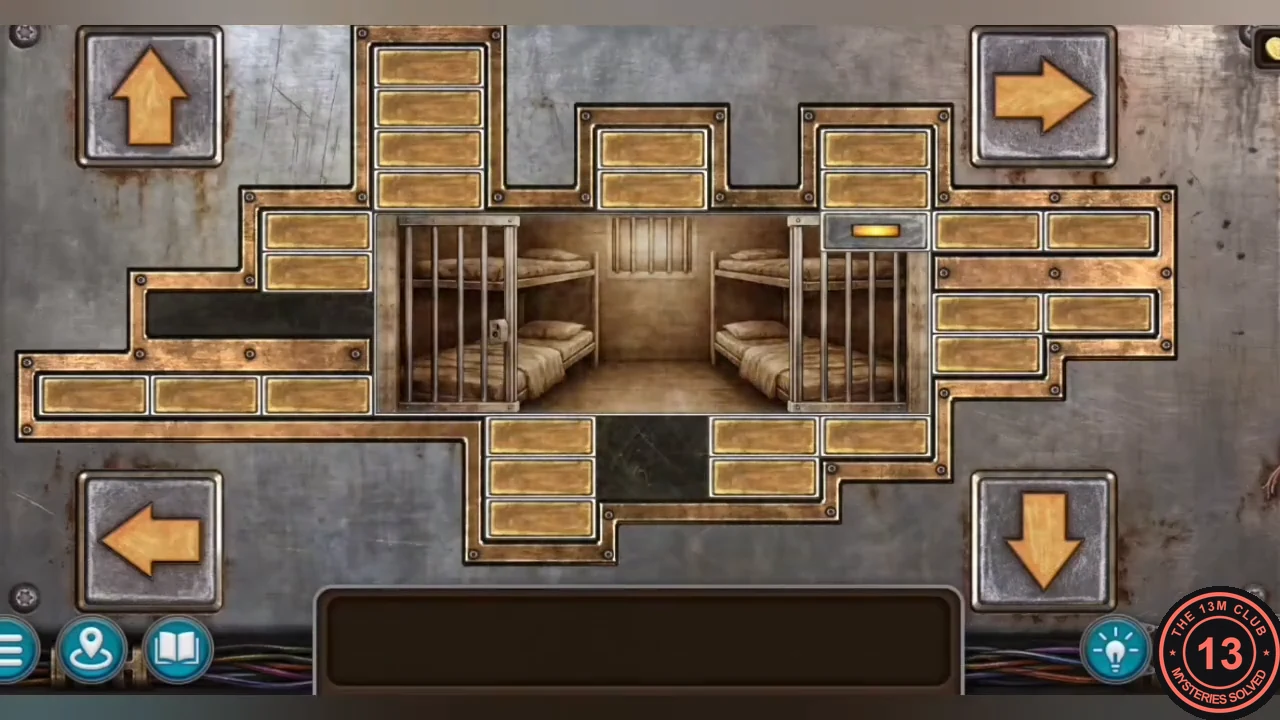
Solved: the picture of the cells is uncovered and the lit slat stops in the top-right square. - Press the big red button in the opened box. The cell doors open and the ending plays: the prisoners escape through the old tunnels, the vampires are neutralised with the suppressant, and Laura visits Lucas Bishop's grave. There are no further choices.