7th Avenue: The Letters Mailbox
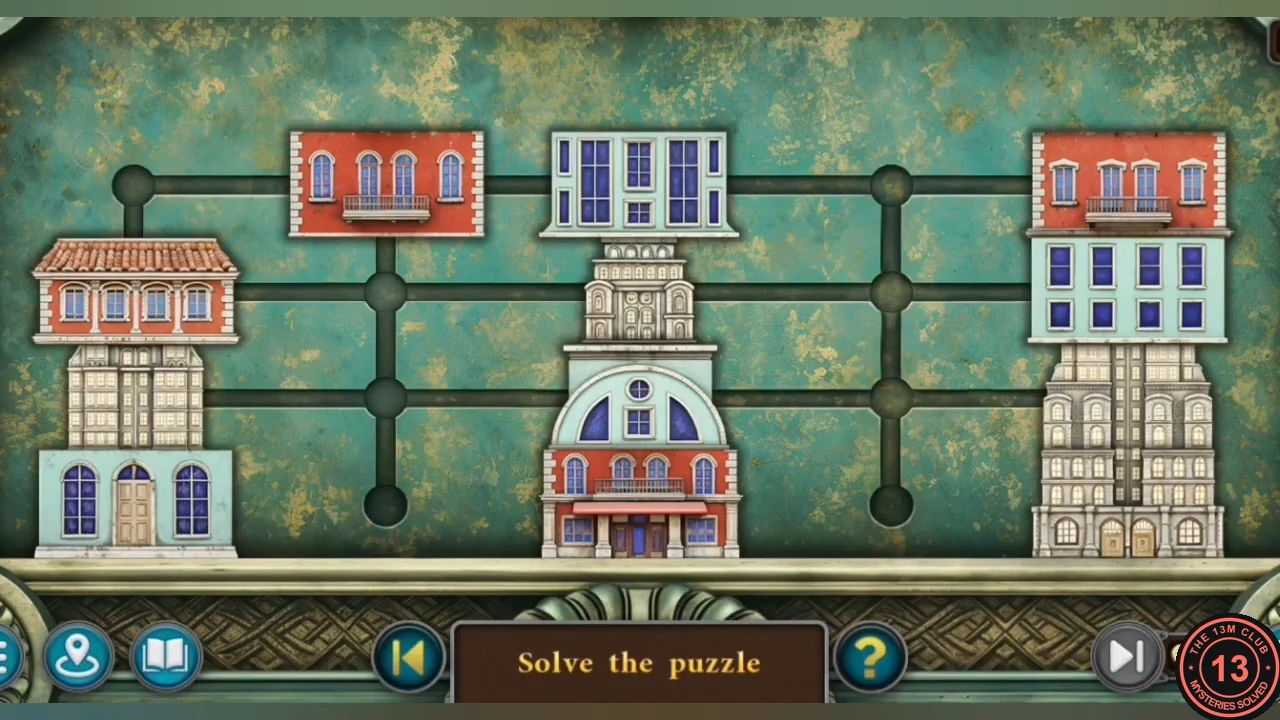
Laura James arrives at Carnegie Hall in November 1966 to meet Rosenthal. Collect the pigeon pieces, then solve the building puzzle on the green mailbox outside the hall.
- On 7th Avenue, the snowy street outside Carnegie Hall, zoom into the snowy bench at lower left and take PIGEONS (1). Collectible: Lyre 1/7 on the wall above the red phone booth.
- Enter Carnegie Hall and talk to Rosenthal in the lobby. Your new task is to search the auditorium, and the street to the left opens.
- Go left to the gallery street. In the debris pile at lower left, move the board and the framed picture, then take the LEVER.
- Click the yellow triangular warning sign on the wooden construction fence left of the parked car: it is the first morphing object. Zoom into the Residential building door at the end of the street. Open the door directory panel (Edward Donnelly is listed) and take GRAPES (1/5) from the crack in the wall. Collectible: Record 1/9 at the upper right of the gallery street.
- Back in the Carnegie Hall lobby, find the morphing object on the left side and Lyre 2/7 on the upper-left wall. Take PIGEONS from the statue base left of the stairs and GRAPES (2/5) from the left wall sconce.
- Zoom into the coat-check counter on the right. Take the KNIFE beside the apples; the wooden box there has a clover-shaped keyhole.
- Outside, use the KNIFE on the latch of "The Gilded Cage" poster case on the Carnegie Hall facade and take the CLOVER KEY.
- Return to the coat-check counter (the attendant is now there). Use the CLOVER KEY on the wooden box and take PIGEONS and the PAPERCLIP.
- Place the PIGEONS on the green "LETTERS" mailbox on 7th Avenue to start the puzzle.
- Building puzzle: building floors sit on a network of rails. Click a floor (it gets a yellow outline) and move it along the rails to another stop. Stack three complete three-storey buildings on the bottom bases. In the solved state the pale-blue building with the dome is on the left, the red building with the tiled roof is in the middle and the cream ornate building is on the right. Each building is ground floor, middle floor and roof, in that order.
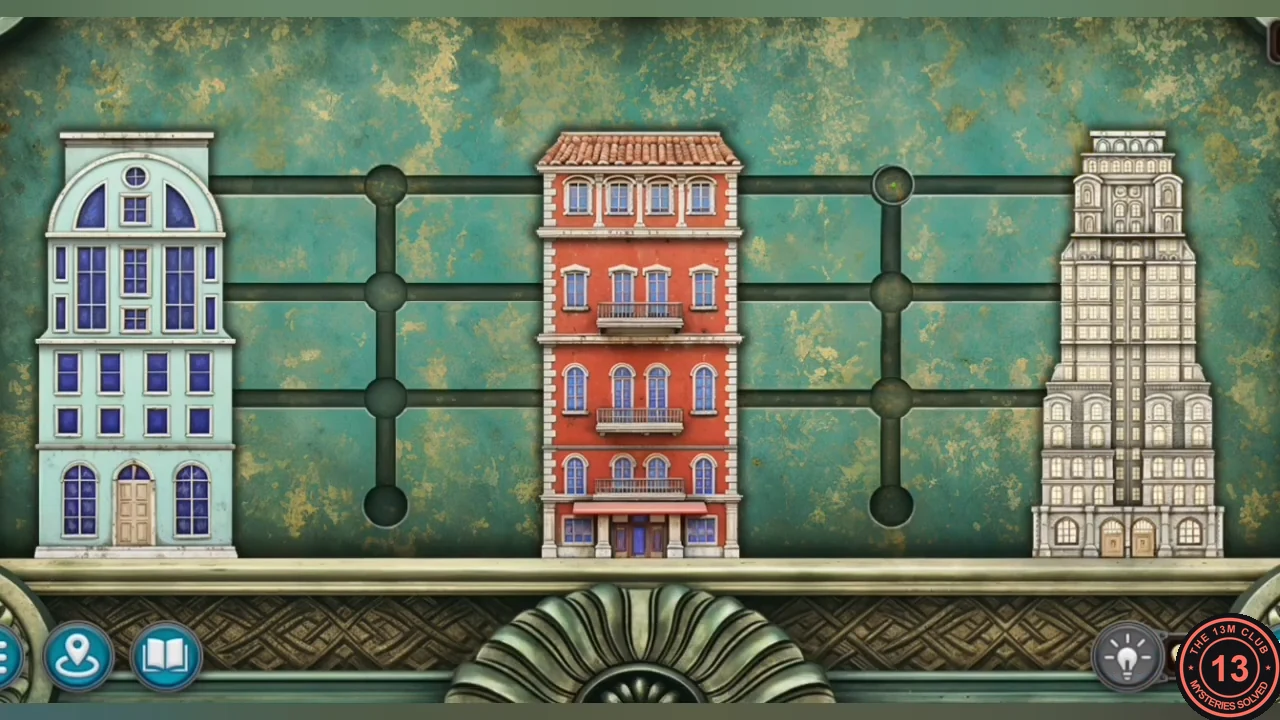
Solved: pale-blue domed building left, red tiled-roof building middle, cream ornate building right. - Take the FUSE (1/3) and the KEY from the opened mailbox.
Carnegie Hall Auditorium: The Piano Lock
Open the auditorium, raise the curtain and complete the piano's music-rack lock.
- Use the KEY on the lobby double doors to enter the auditorium. A morphing object is at the lower left.
- Zoom into the stage control console on the right, place the LEVER and pull the levers. The curtain rises.
- The piano's music-rack lock needs two notes and a treble clef. At the red chair on stage, take the UMBRELLA (initials VD).
- Take a NOTE from the broken chessboard and another NOTE from the green cushions on stage.
- In the lobby, use the UMBRELLA on the framed landscape painting on the left wall and take the TREBLE CLEF.
- Place both NOTES and the TREBLE CLEF on the piano's music rack to open the grid puzzle.
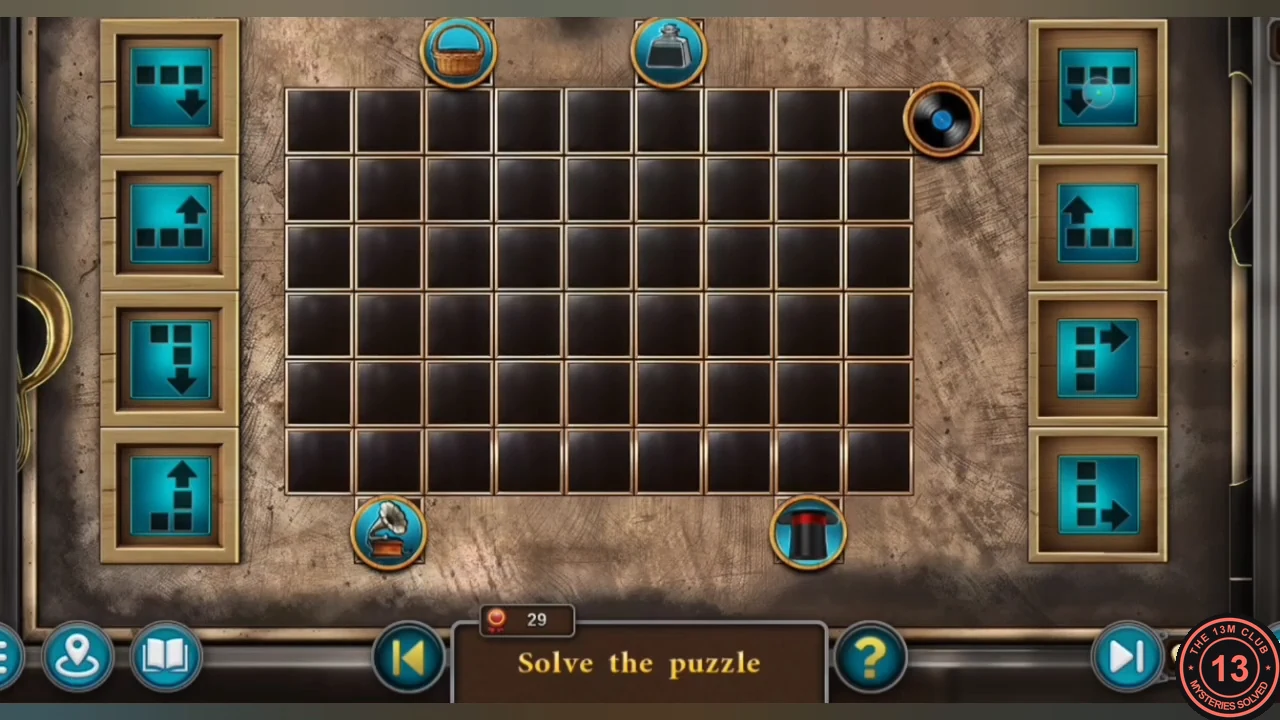
- Piano grid: tokens appear one at a time at the top-right corner of the board. Each of the eight side buttons moves the current token in the pattern drawn on it. Send each token to its matching receiver on the edge: the record to the gramophone at bottom left, the bird to the receiver at bottom right, and the bread and the apple to the two receivers along the top. The counter at the bottom starts at 30 moves, so plan each token's route before you press.
- Take the KEY from the piano. Your next task is to discuss the find with Rosenthal, whose office is in the Gallery building.
Gallery Building Hallway: The Armchair Buttons
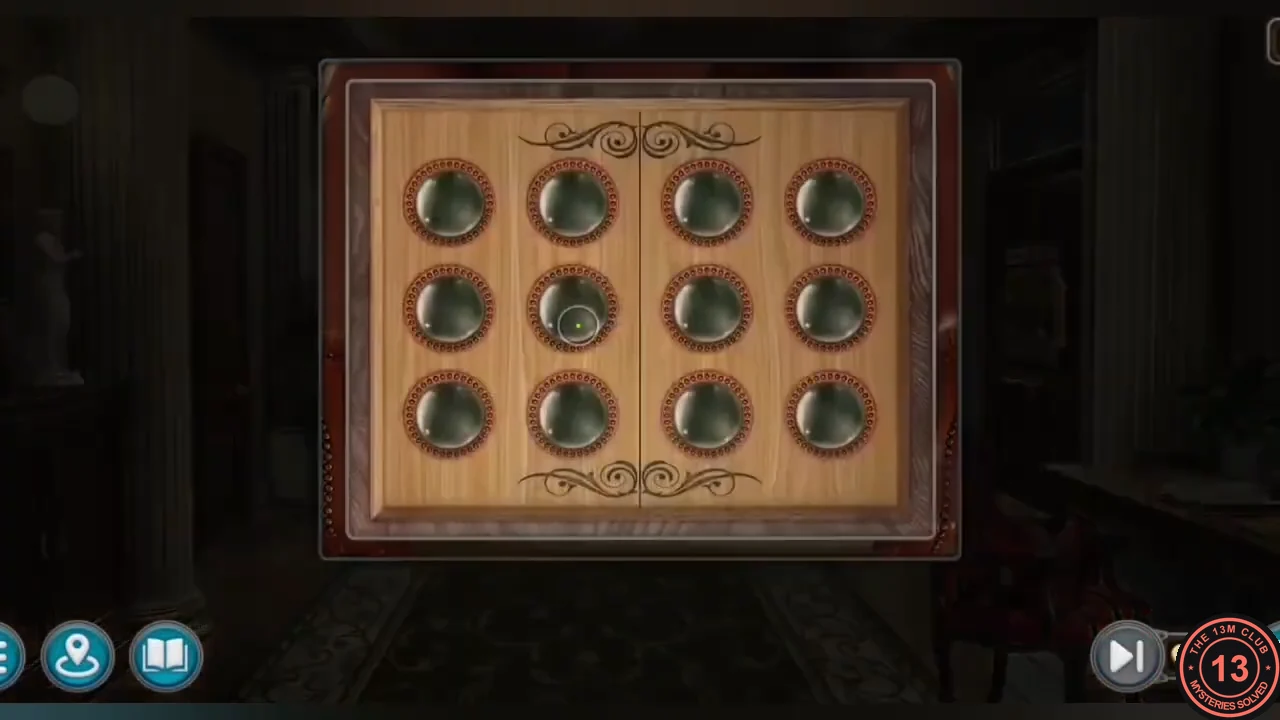
Search the Gallery building hallway, copy the mailbox hole pattern onto the armchair panel and meet Rosenthal.
- Use the KEY on the mesh door of the Gallery building to enter the hallway. Collectible: Lyre 3/7 on the left by the statue.
- Open the red striped bag on the chair at right with the PAPERCLIP and take the FUSE (2/3) and the CAR KEY.
- Take GRAPES (3/5) from the plant pot on the left and click the morphing object on the far wall of the hallway, a fan shape above the small painting right of the end doorway.
- Zoom into the seat of the red armchair: it hides a 3x4 panel of green buttons. The clue is the panel of holes inside the opened lower compartment of the LETTERS mailbox on 7th Avenue.
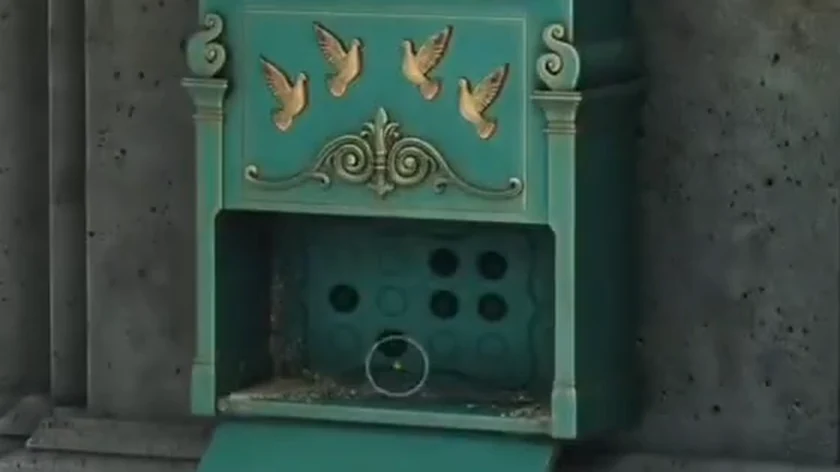
The clue in the opened mailbox compartment on 7th Avenue: light the buttons where this panel has dark holes. - Light the buttons that match the dark holes. Rows from top, buttons from left: row 1 – off, off, ON, ON; row 2 – ON, off, ON, ON; row 3 – off, ON, off, off.
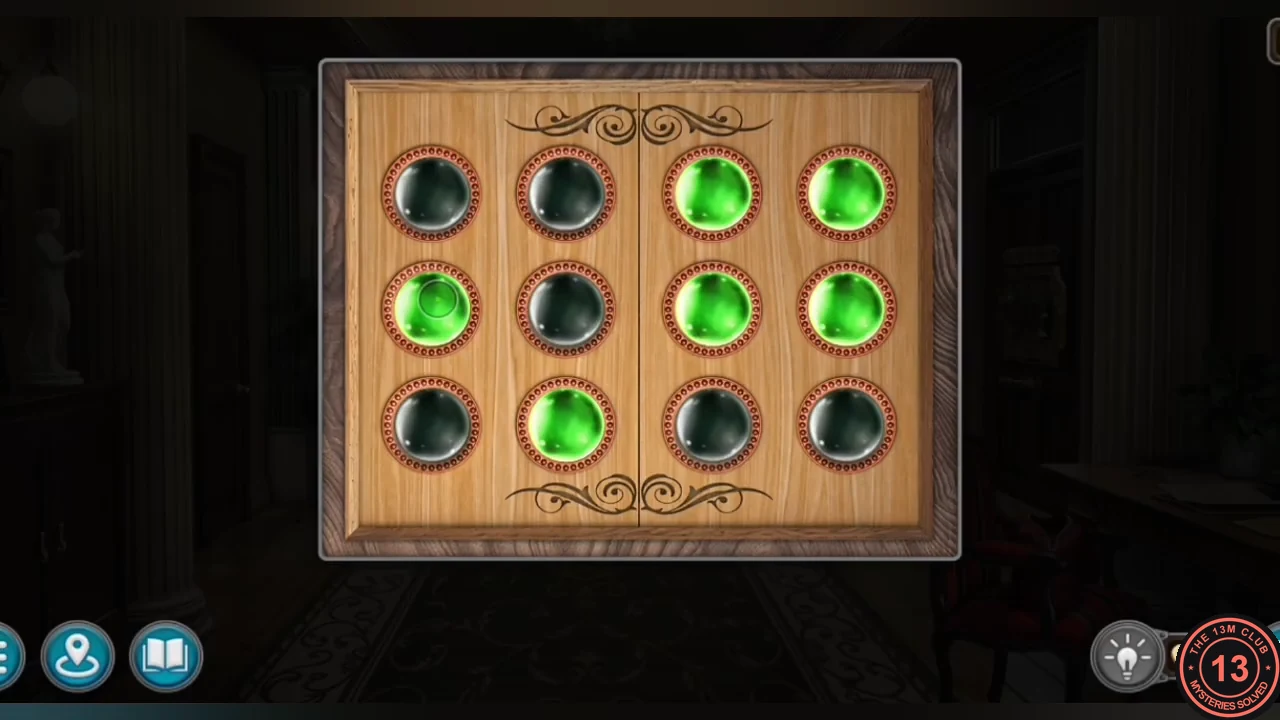
Solved: the lit buttons match the dark holes of the mailbox panel. - Take the STATUETTE from the compartment under the seat.
- Enter Rosenthal's office through the door at the end of the hallway and talk to him. New task: check Harper's Gallery. A morphing object is on the upper wall; Collectible: Record 2/9 on the left side.
- Open the IMPORTANT folder on the desk: the notepad shows the number 2568 (needed later). Use the KNIFE on the side panel of the chest of drawers at right and take GRAPES (4/5).
Harper Art Studios: The Rotating Maze
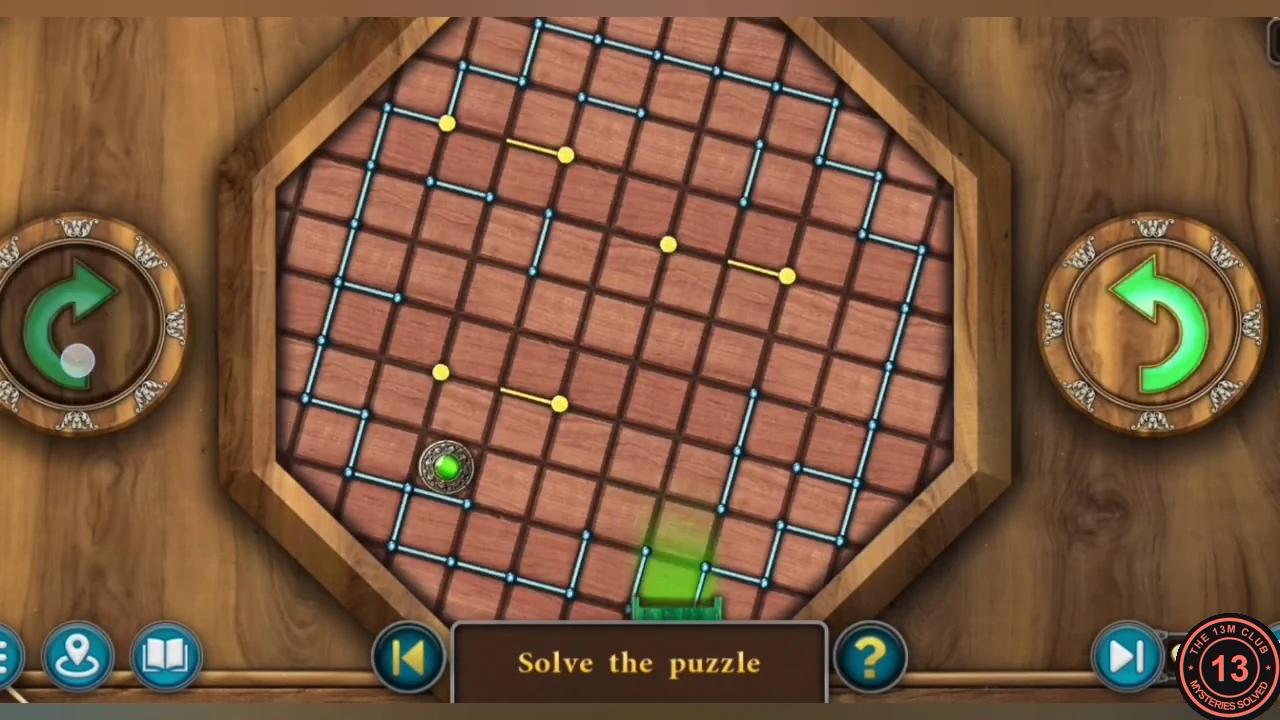
Gather the last grapes and open the door to Harper Art Studios with the rotating maze.
- On the gallery street, open the trunk of the black car with the CAR KEY and take the TONGS, the NAIL PULLER and the HORN (inside the spare tyre).
- Use the TONGS on the burning barrel at left to lift out a brass bird. Let it cool in the snow, then take the PEACOCK.
- Use the UMBRELLA to pull down the fire-escape ladder on the left building. Cut the tape on the "P.O. Box 1221" carton with the KNIFE and take the CARVED FLOWER and the ELECTRICAL PANEL KEY.
- In the Carnegie Hall lobby, place the HORN on the satyr head carved on the staircase balustrade and take GRAPES (5/5).
- In the Gallery building hallway, place the GRAPES on the Harper Art Studios door plaque.
- Rotating maze: use the left and right arrows to turn the octagonal board. The green ball always rolls downward, so tilt the board one step at a time and let the ball drop through the gaps in the walls until it falls into the green exit at the bottom. This puzzle takes many small turns; work backwards from the exit to see which gap the ball must reach next.
Rosenthal's Office: The Moon Diorama
Disable the gallery alarm, read the hidden combination and restore the lights.
- Harper's gallery is dark and its alarm is active. In the hallway, place the CARVED FLOWER on the glass cabinet on the left. Inside, study the US map – remember the marked states – and take the EAGLE.
- In the dark gallery, open the alarm box on the display case with the ELECTRICAL PANEL KEY and cut the red wire with the KNIFE. The alarm light turns green.
- Take the FIGURINE from the display case. The number 260689 is engraved beneath it.
- Open the closet nook in the hallway and enter 260689 on the blue electrical box keypad, then press OK. The fuse panel inside needs three fuses.CODE260689
- In Rosenthal's office, place the FIGURINE in the glass diorama case on the desk.
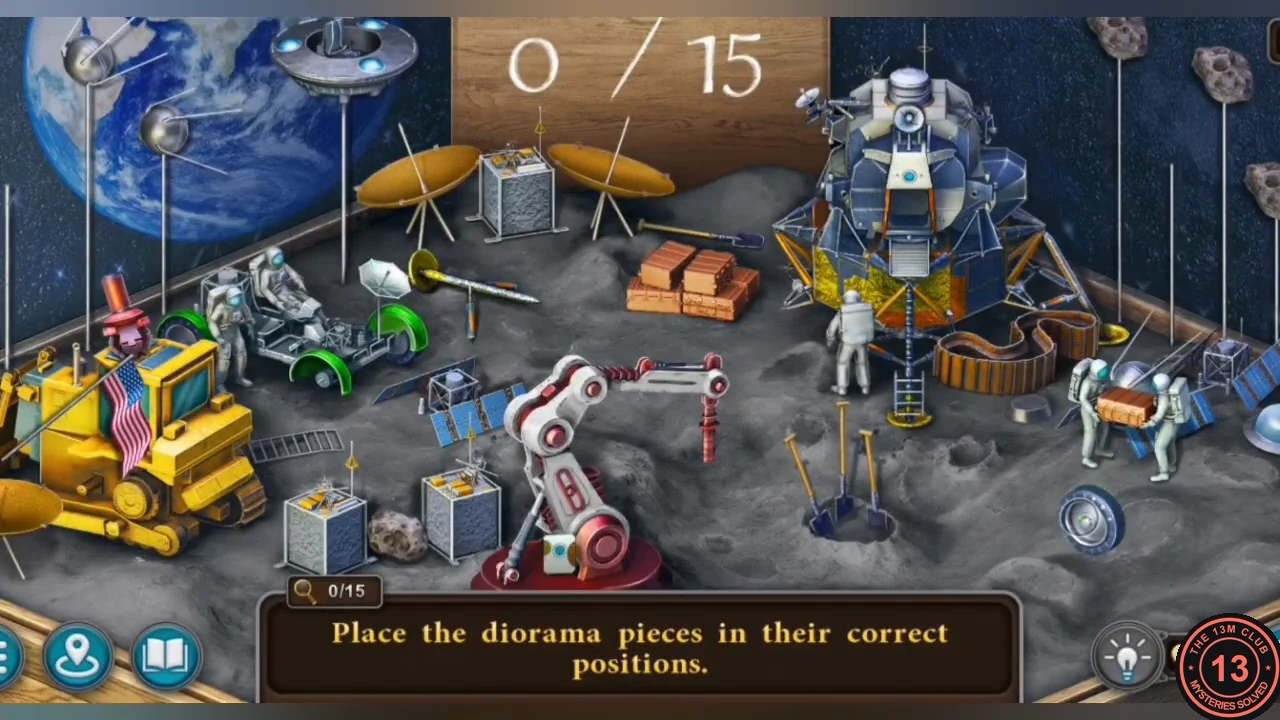
- Moon diorama: put the 15 loose pieces on their matching outlines on the moon landscape. The counter shows progress (0/15 to 15/15). Match each piece's shape and colour to its outline.
- Take the FUSE (3/3) and the green ROTARY SWITCH from the diorama drawer.
- Insert the three FUSES in the hallway fuse panel. The switch row turns green and the gallery lights come on.
Harper's Gallery: The Peacock Door
Search the lit gallery, open Rosenthal's briefcase and solve the rope puzzle on the peacock door.
- In the lit gallery, click the morphing object on the right side. Collectible: Lyre 4/7 under the centre-left display table.
- Cut the rope around the wrapped package with the KNIFE. Take the MASK (1/3) and the HORSE (1/2) from the paintings.
- Take the TWEEZERS from the display case on the left. Use them on the hole in the cracked amphora and take the DIAL.
- In Rosenthal's office, put the DIAL in the empty wheel slot of the red briefcase lock and set the wheels to 2568 (from the notepad). Take the OAK LEAVES (1/4) and the red EYE.CODE2568
- On the gallery street, insert the EYE in the gargoyle on the pedestal and take the COLORED STONES from its compartment.
- Zoom into the peacock panel on the gallery's right-hand door. Place the PEACOCK in the centre, then the COLORED STONES.
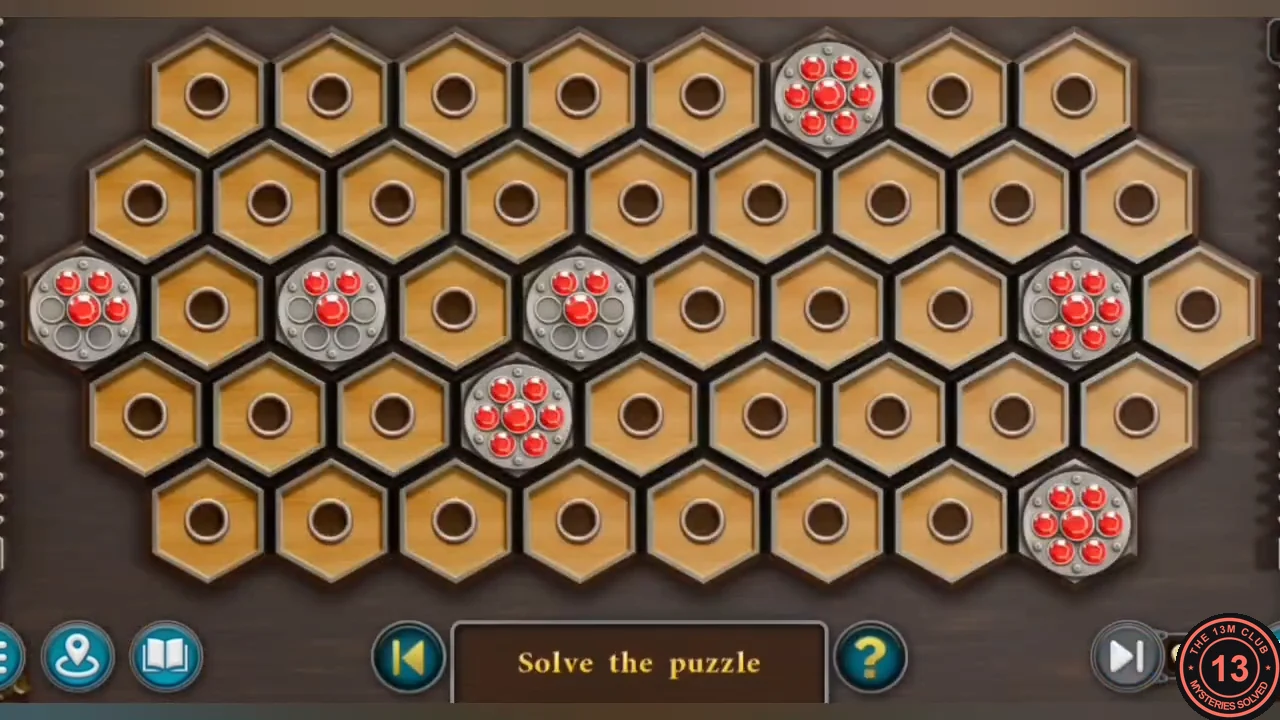
- Rope puzzle: seven silver nodes sit among empty holes. The red studs on a node show how many holes its ropes must cover. Click a node: the holes in straight lines from it light up. Click one to stretch a rope there; the holes it crosses fill with red beads and the node's stud count drops. Fill every hole on the board and use up every node. Nodes in corners or along the edges have the fewest options, so start with them. When it is solved, the door opens into Harper's workshop.
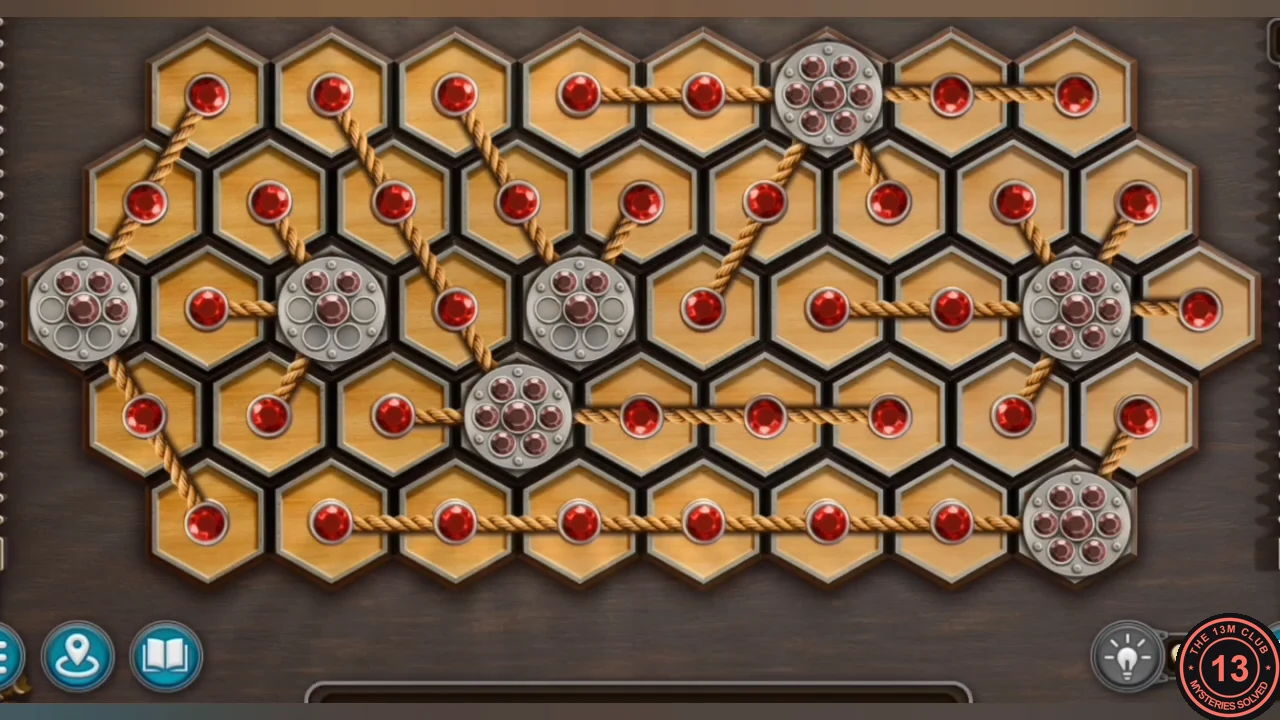
Solved: every hole is covered by a rope and every node is used up.
Harper's Workshop: The Still-Life Box
Find the counted objects on the still-life table to learn the box code.
- In the workshop, look at the armchair on the round platform: a carousel box from Donnelly sits there, missing its horses. Click the morphing object on the front of the dark wooden cabinet at the lower right, below the tall vase.
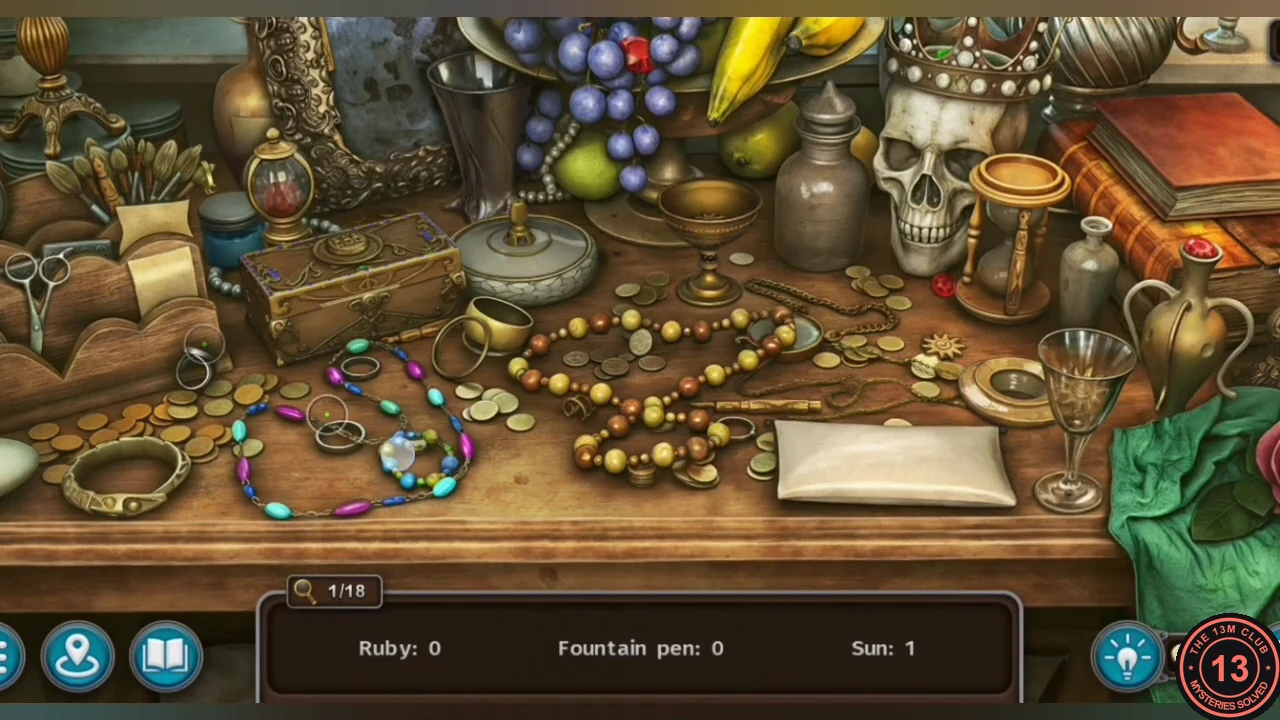
- Zoom into the still-life table to start a find-the-objects scene. Find every ruby, fountain pen and sun among the clutter: 5 rubies, 6 fountain pens and 7 suns. The box lock shows the same three symbols, so set the ruby (diamond) to 5, the pen to 6 and the sun to 7.CODE567
- Take the HORSE (2/2) from the box. Collectible: Record 3/9 at centre right by the chair.
Harper's Gallery: The Five Statues
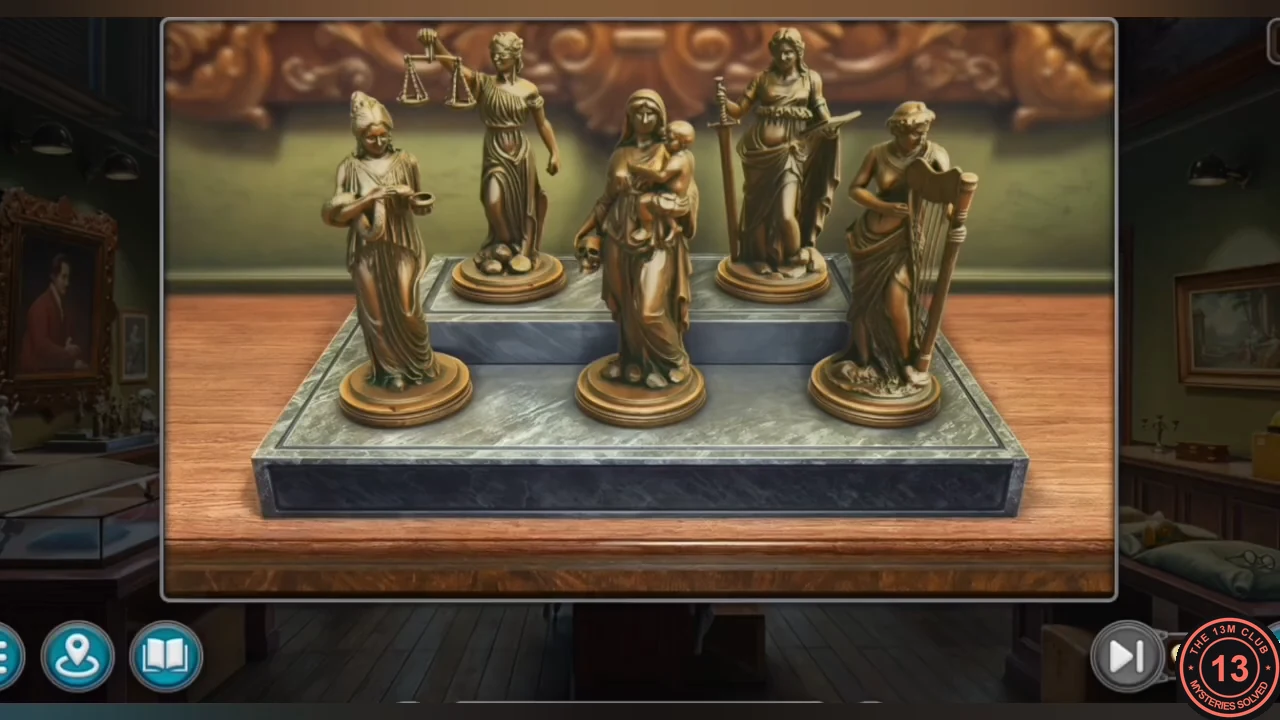
Reveal the sketch behind the portrait, complete the figurine stand and wind the carousel.
- Use the NAIL PULLER on the corner nail of the portrait on the right easel. The canvas peels back to reveal a sketch of five statues – note which way each statue faces.
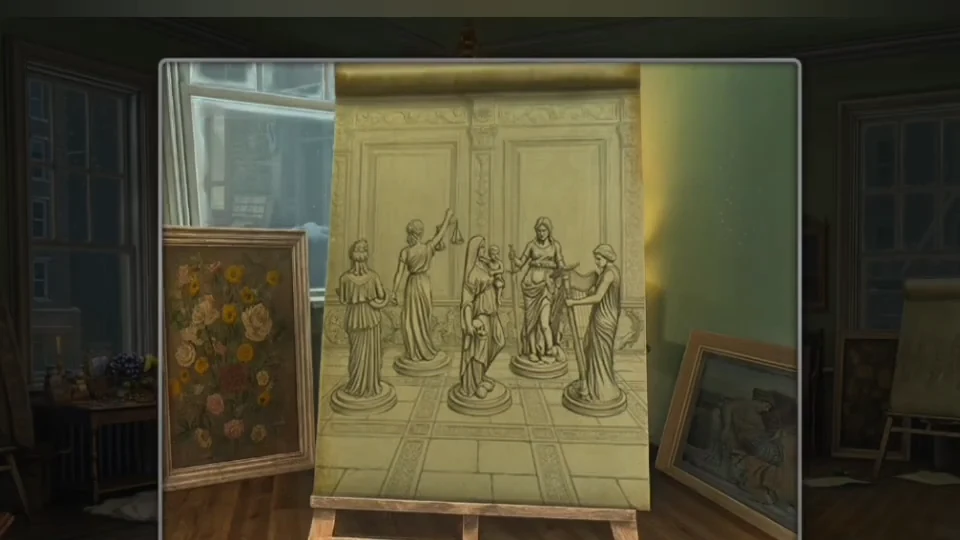
The sketch behind the portrait shows which way each statue must face. - Place the HORSES on the carousel.
- Use the KNIFE on the curved base of the platform. Take the FIGURINE from the drawer.
- Go to the figurine stand in Harper's gallery and place both FIGURINES (the armchair statuette and the platform figurine) on the empty plinths.
- Statue puzzle: the statues stay on their plinths. Tap a statue to turn it on the spot, and keep tapping until it faces the way it does in the sketch. Front left, plain robed woman: turned right round, so her back faces you. Back left, Justice: also with her back to you, her raised scales on the right. Front centre, woman holding a child: turned to face left, with the child on the right-hand side. Front right, woman with a harp: turned to face left, with the harp in front of her. Back right, woman with a sword: leave her facing you. When all five match, they glow and the drawer in the stand opens.
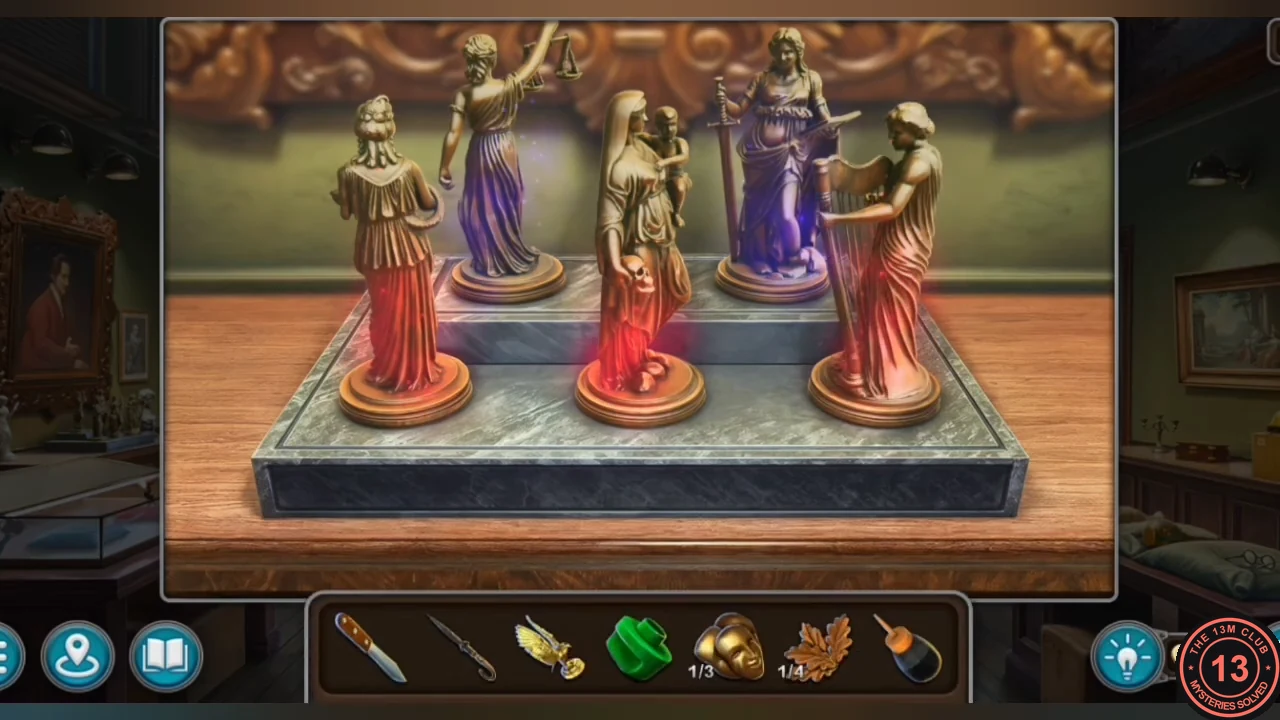
Solved: every statue faces the way it does in the sketch, so they all glow. - Take the OAK LEAVES (2/4) and the WINDING KEY from the drawer.
- Use the WINDING KEY on the carousel. Harper arrives and threatens to call the police. New task: visit Donnelly.
Donnelly's Office Door: The Oak Leaf Lock
Collect the remaining oak leaves and open Donnelly's office at Carnegie Hall.
- On the Carnegie Hall stage, place the ROTARY SWITCH on the control console and turn it: the cherub prop lowers. Use the KNIFE on the prop and take the OAK LEAVES (3/4).
- Visit the Residential building lobby. The concierge will not let you upstairs. A morphing object is on the rug; Collectible: Lyre 5/7 at the red armchair. Take the OAK LEAVES (4/4) from the sofa cushion.
- Place the OAK LEAVES on Donnelly's office door on the left side of the Carnegie Hall lobby.
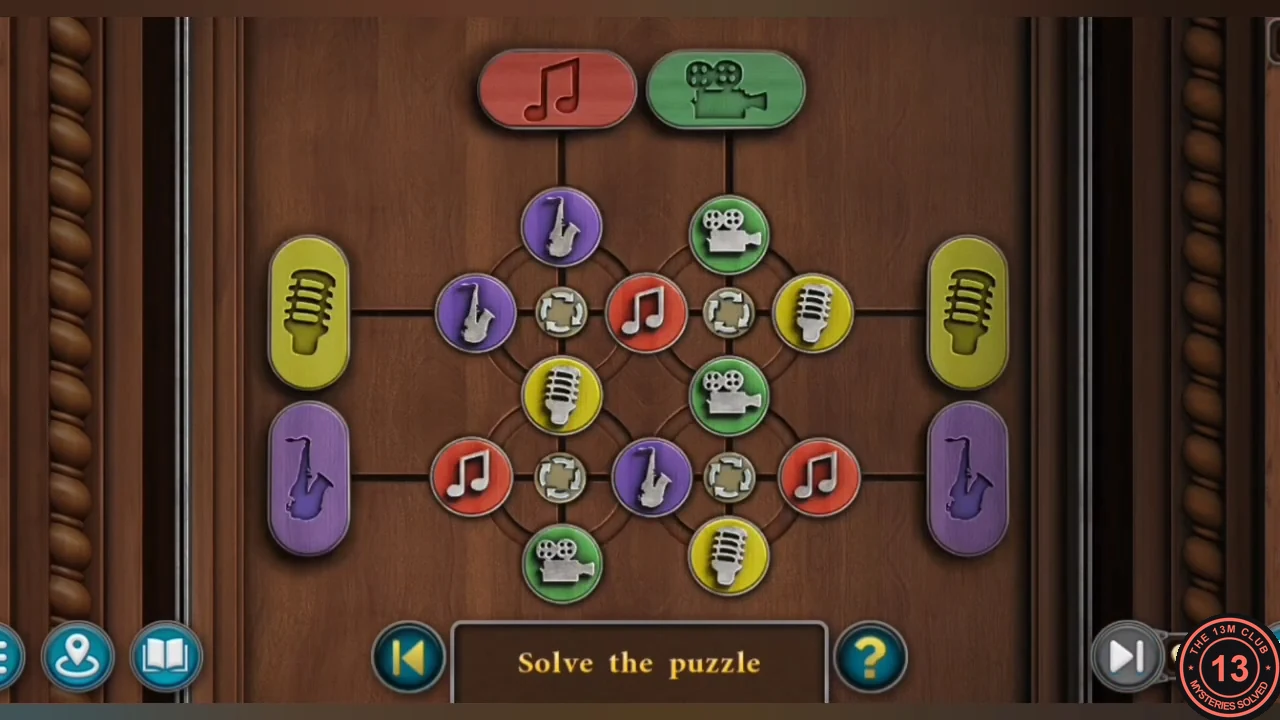
- Rotation puzzle: four hubs each rotate the symbols around them. Gather the symbols into lines of one type. The left vertical line holds the red notes (under the red note cap), the right vertical line the green cameras, the middle horizontal row the yellow microphones and the bottom row the purple saxophones.
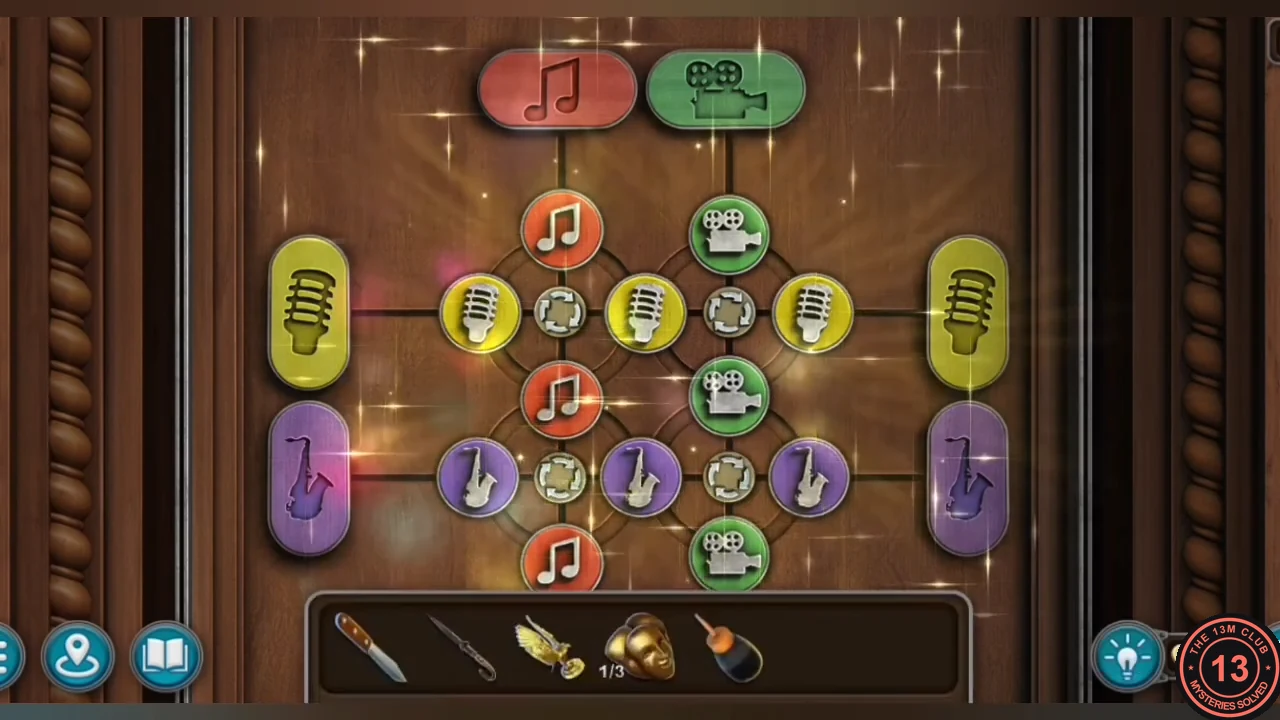
Solved: each line holds one symbol type, matching the end caps.
Donnelly's Office: The Map of States
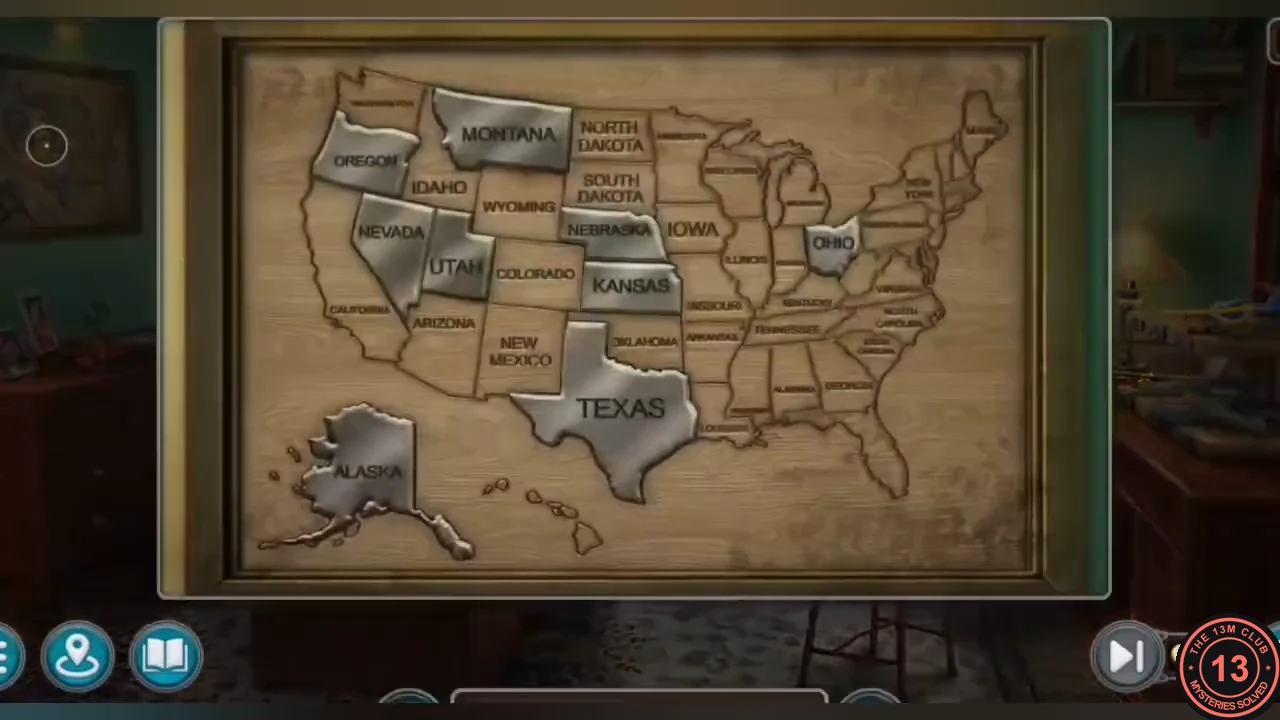
Search Donnelly's office and select the states marked on the hallway map.
- Lift the rug, pry up the floorboard with the KNIFE and take the MASK (2/3). Collectible: Lyre 6/7 at the top right by the window.
- Zoom into the US map on the wall: you must select only the states marked on the map in the Gallery building hallway cabinet.
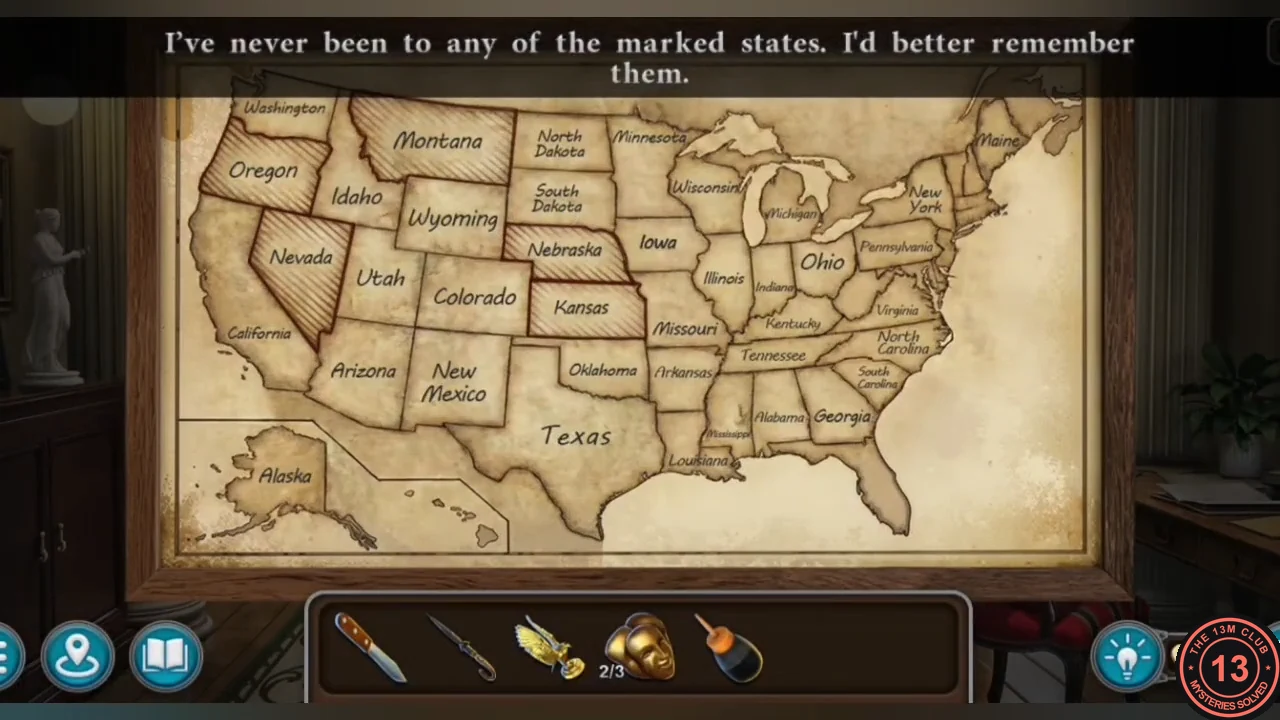
The clue in the Gallery building hallway cabinet: the hatched states. - Select Oregon, Montana, Nevada, Nebraska and Kansas.
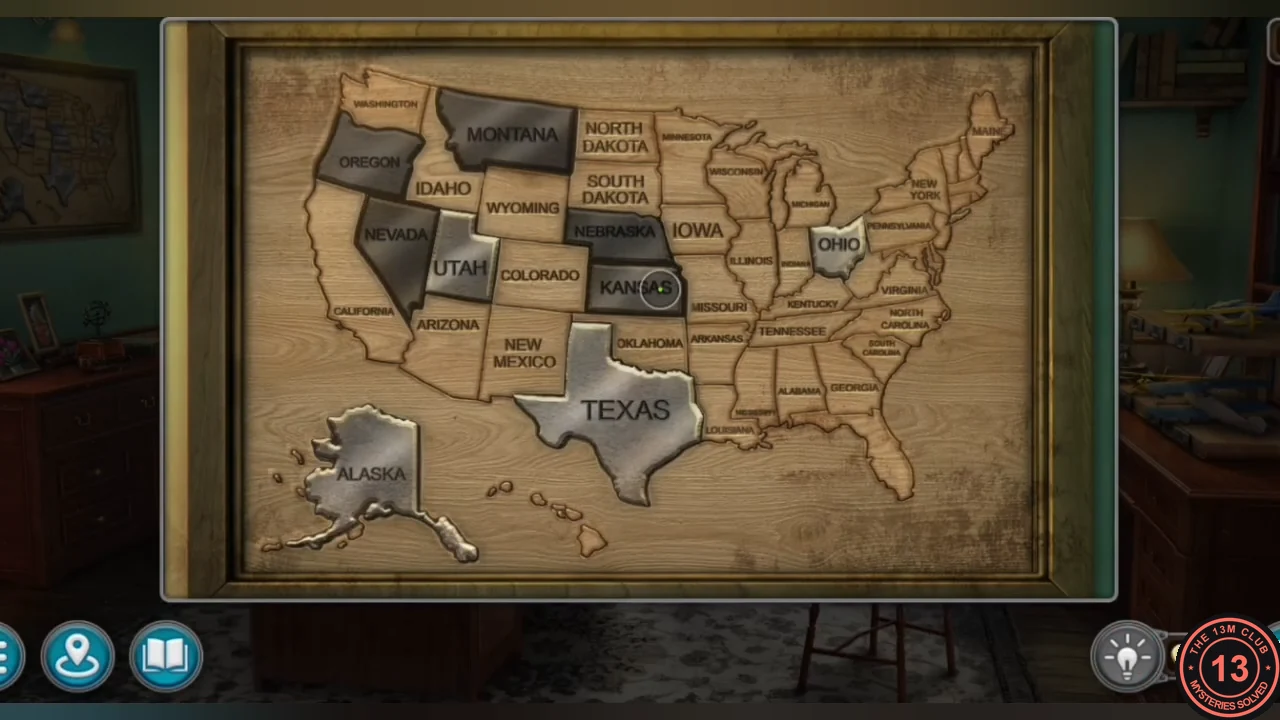
Selected states turn dark; Utah, Texas, Alaska and Ohio stay raised. - The map opens onto a wall safe. Click the morphing object on the left shelf.
Donnelly's Wall Safe: The Sliding Medallions
Open the winged case on the desk, then guide the three medallions into their sockets.
- Read the missing-person notice on the desk. Place the EAGLE in the centre of the winged case on the desk; take the safe HANDLE and the LOTUSES (1/3).
- Put the HANDLE on the hub of the wall safe to open the medallion puzzle.
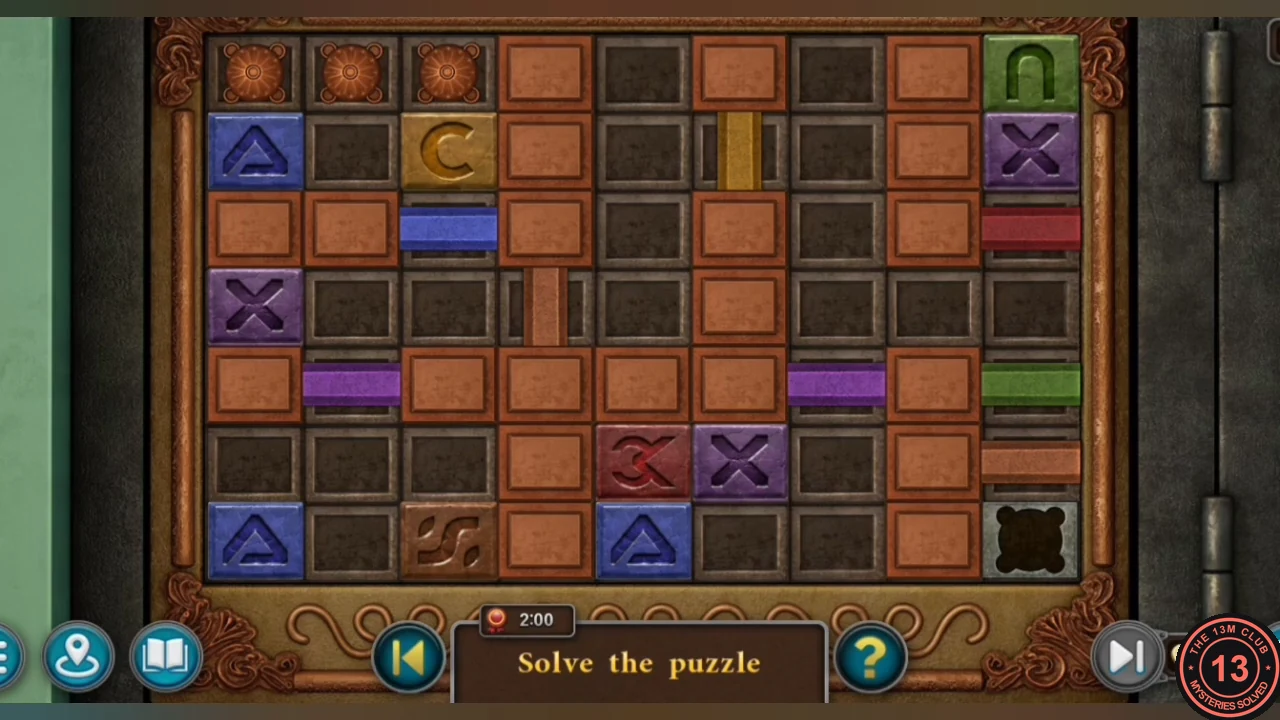
- Medallion puzzle: three medallions start at the top left. They move only along dark squares. When a medallion stops on a coloured symbol tile (blue triangle, purple X, gold C or red "3"), all bars of that colour retract and open new paths. Move the medallions into the three sockets: the green arch at the top right, the swirl at the bottom of the third column and the black quatrefoil at the bottom right. Don't worry about the 2:00 timer: letting it reach zero did not fail or reset the puzzle.
- Read the Arclight Holding Company letter. Take the PACKAGE (a wooden crate) and the MASK (3/3). Laura decides to pose as a mail carrier, so she needs a uniform.
Carnegie Hall Dressing Room: The Uniform
Open the dressing room, put together the mail carrier disguise and get past the concierge.
- On the Carnegie Hall stage, place the three MASKS on the side door to open the dressing room.
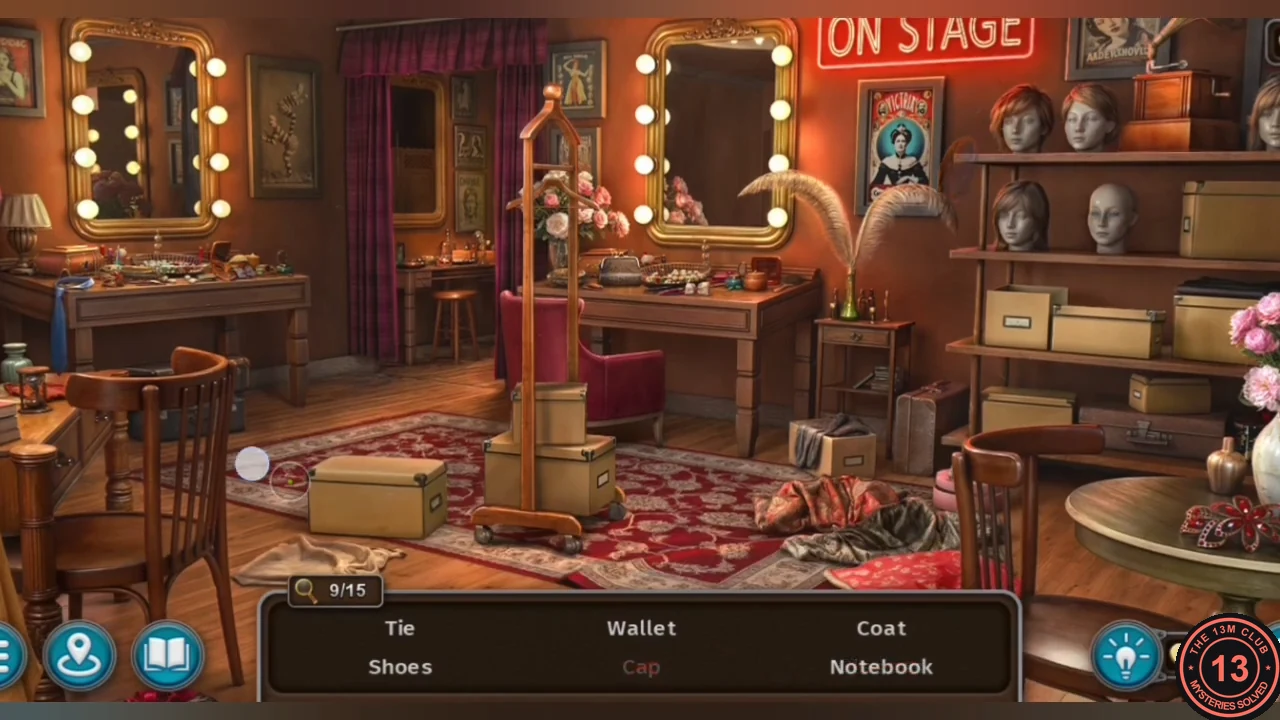
- Find the 15 listed items in the dressing room (clothing and accessories such as the tie, wallet, watch, shoes, makeup bag, skirt, belt, glasses, cap, coat, gloves and notebook). This gives Laura the uniform.
- In the Residential building lobby, give the PACKAGE to the concierge. He leaves the desk to deliver it.
- Take the SPOON from the floor beside the blue vending machine in the lobby.
- In Donnelly's office at Carnegie Hall, take KEY 14 from the jacket on the chair.