Bauer Mansion Grounds: The Garage Wires
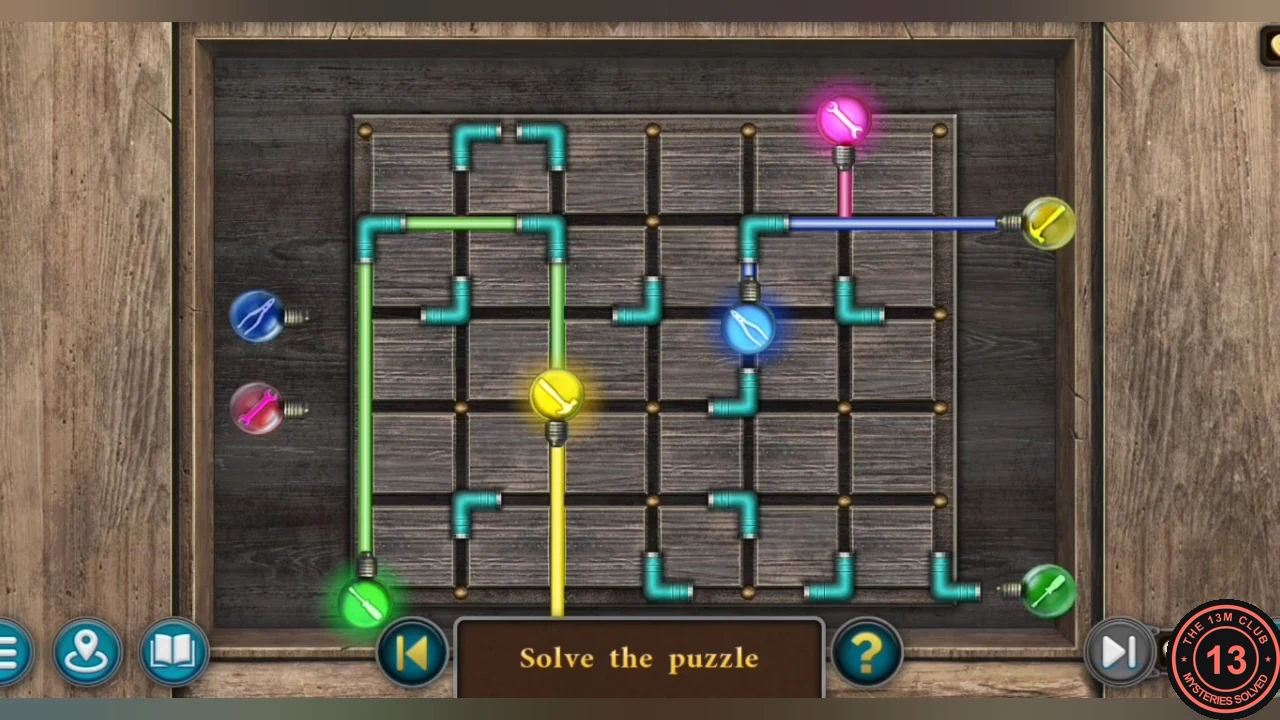
Guard dogs block the mansion path. Search the grounds and the utility room, open a shortcut to town and solve the wiring cupboard in the hotel garage.
- In the mansion grounds, a morphing object glows at the lower left; Collectible: Goblet 5/8 is at lower left-centre near the path. Take BUTTONS (1/3) from the fountain.
- On the right-hand path, two unchained Dobermans guard the way – you need a sedative. Take the KEY from the path.
- Unlock the shed (the cottage on the left) with the KEY to enter the utility room. Take the SAW from the wheelbarrow. Cut the cloth around the pot on the window sill with the KNIFE and take the LIGHT BULB FIGURINE. A morphing object glows at the lower left by the bucket.
- Smash the padlock of the chest freezer on the floor with the HAMMER and take the MEAT. Collectible: Goblet 6/8 is on the upper-right shelf.
- In the grounds, cut through the hedge on the right with the SAW. This opens a shortcut between the mansion grounds and the town.
- In the pharmacy, take the RECIPE from the table (the "Powerful sleep aid").
- Go to the hotel garage and place the LIGHT BULB FIGURINE in the recess of the cupboard on the left wall.
- Wire puzzle: connect each pair of bulbs of the same colour – blue (left edge) to blue (middle), pink (left edge) to pink (top), yellow (middle) to yellow (right edge) and green (bottom left) to green (bottom right). Drag the teal elbow joints to other grid intersections; a coloured wire runs between joints that line up. All four pairs must light up. See the solved-state image.
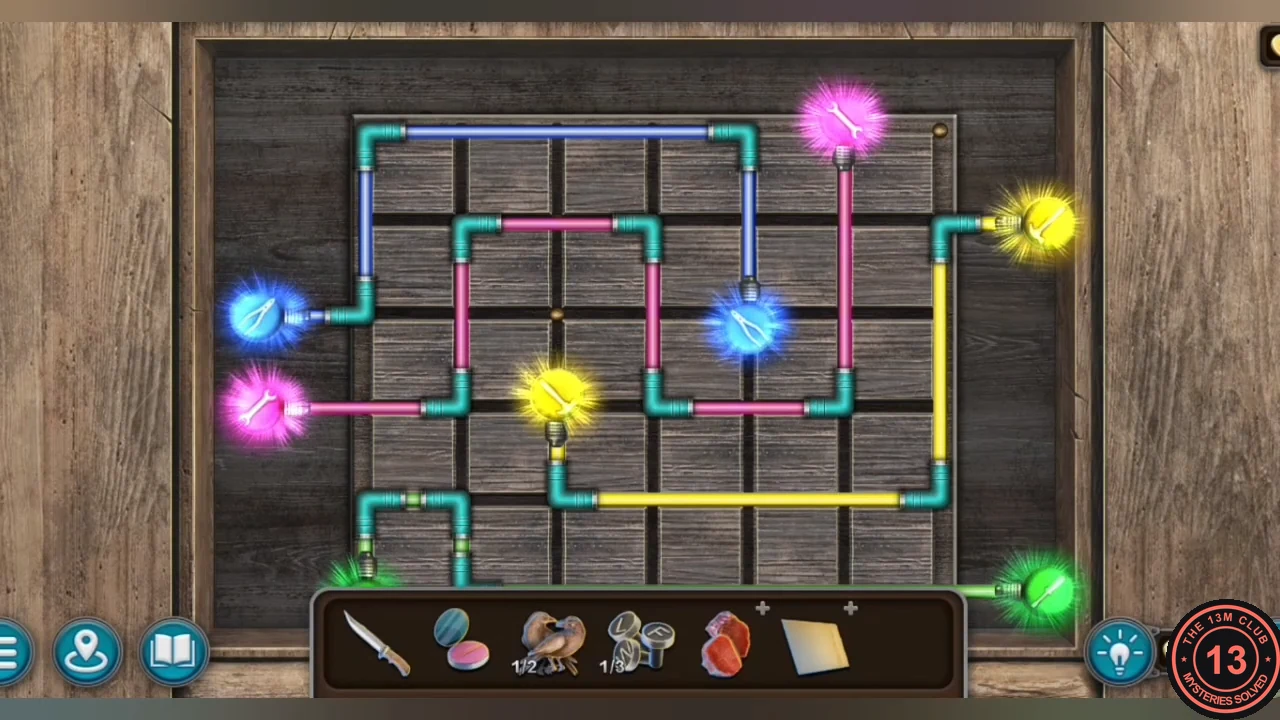
Solved: all four pairs light up. The green wire goes up from the lower-left bulb, one square right, down and along the bottom edge (behind the inventory bar) to the lower-right bulb. - Take BUTTONS (2/3) and the WIRE CUTTERS from the cupboard.
The Old Woman's House: The Rose Box
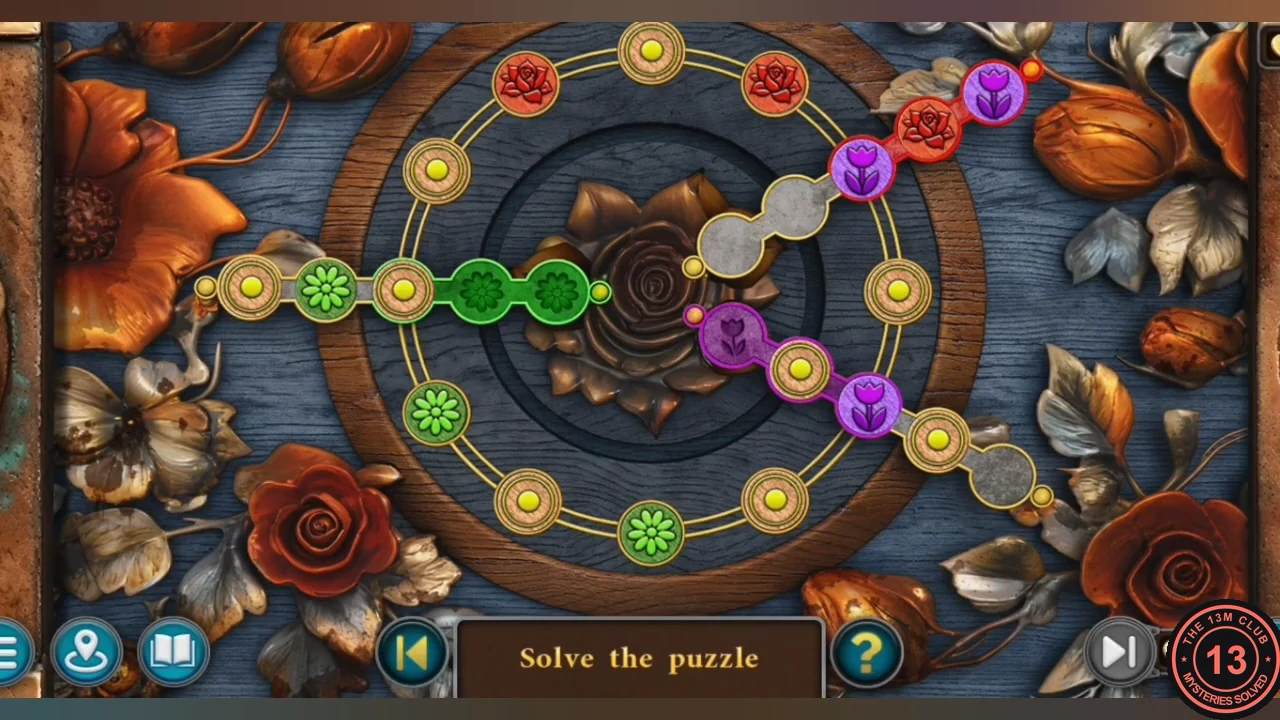
Pick a metal rose from the mansion grounds and open the rose box on the old woman's table.
- In the utility room, cut the twisted wire on the cupboard on the right with the WIRE CUTTERS and take the GARDENING GLOVES.
- In the mansion grounds, use the GARDENING GLOVES on the snowy rose bush in the foreground right of the fountain. Take the ROSE HIPS and the metal ROSE.
- In the old woman's house, zoom into the box on the round table and place the ROSE in the empty right-hand recess.
- Rose puzzle: three straight tracks (left, upper right and lower right) meet at the centre and cross a ring of holes. Tap a track to slide its beads along it; tap the ring to turn it and carry beads from one track to another. Finish with the three green flowers on the left track, the three red roses on the upper-right track and the three purple tulips on the lower-right track. This puzzle is long; see the solved-state image.
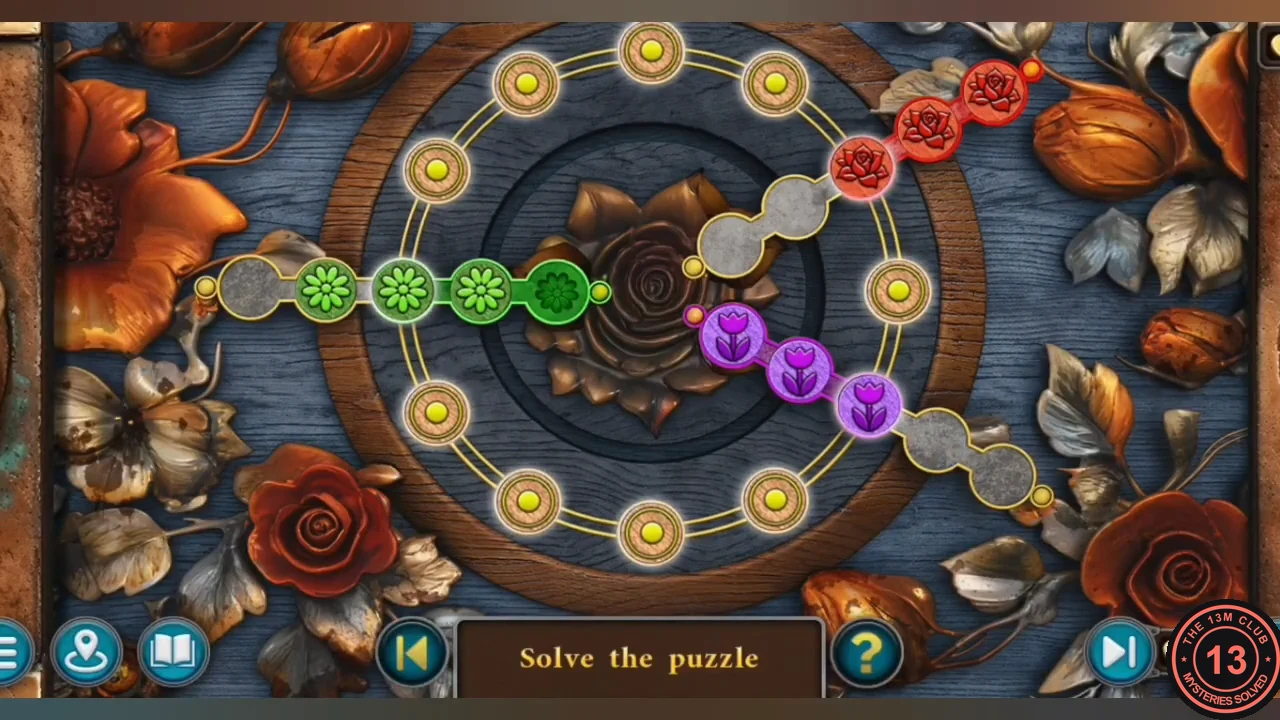
Solved: green flowers on the left track, red roses upper right and purple tulips lower right. - Take the VALERIAN TINCTURE and BUTTONS (3/3) from the box.
Mapleford Pharmacy: The Cash Register
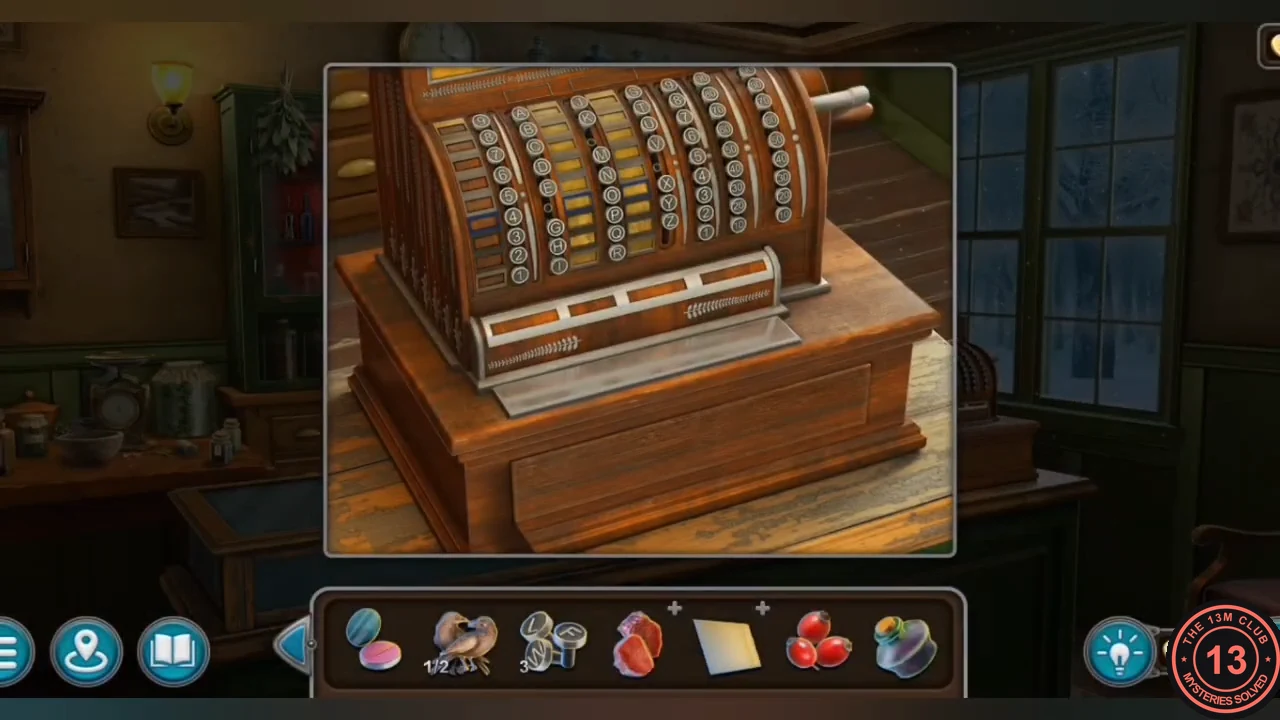
Repair the pharmacy cash register and use powder to see which keys were pressed.
- In the pharmacy, zoom into the cash register. Three keys are missing; place the BUTTONS.
- Dust the keys with the POWDER COMPACT. Fingerprints appear on 14 keys: numbers 6 and 3 in the left column; letters B, D, F, K, L, N, P, U and W; numbers 8, 7 and 5 in the right column. Press all of them. One order that works is column by column from left to right, top to bottom: 6, 3, B, D, F, K, L, N, P, U, W, 8, 7, 5.CODE6 3 B D F K L N P U W 8 7 5
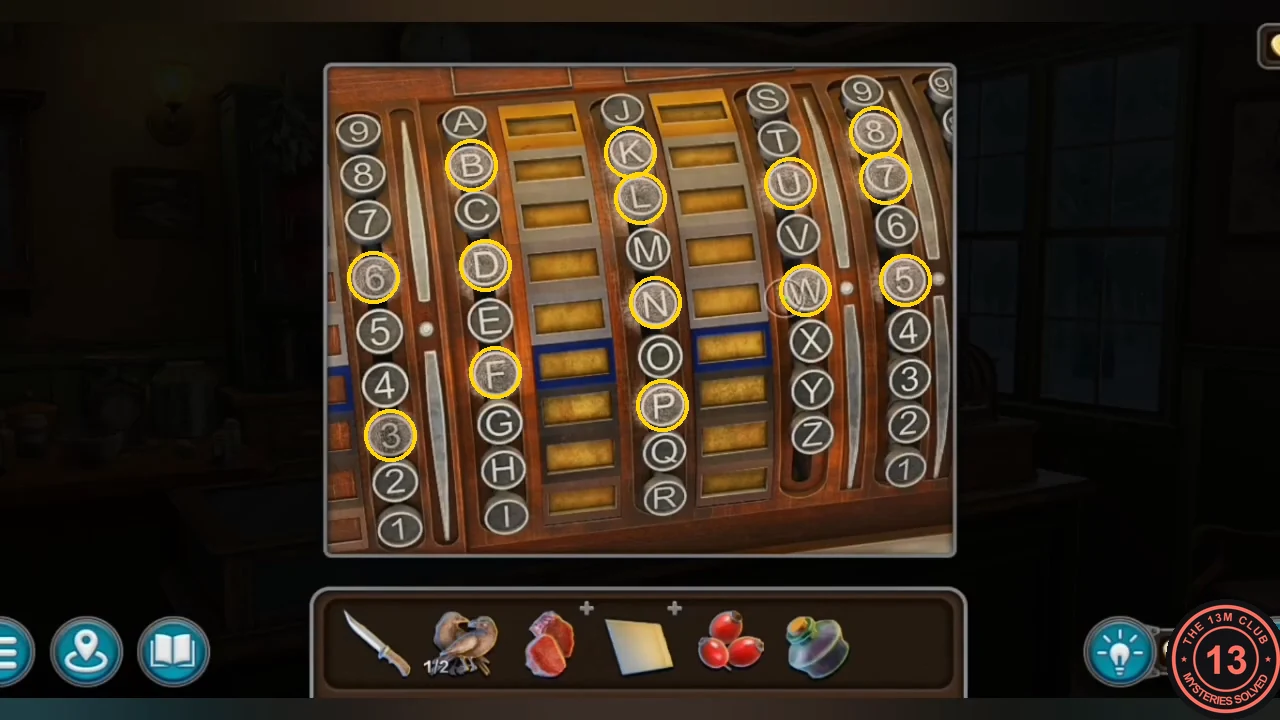
After dusting: the fingerprinted keys are 6 and 3, B, D, F, K, L, N, P, U, W, then 8, 7 and 5. - Take the CROSS-SHAPED HANDLE and the BOWL OF HYGIEIA from the drawer.
Mapleford Pharmacy: The Hop Cones
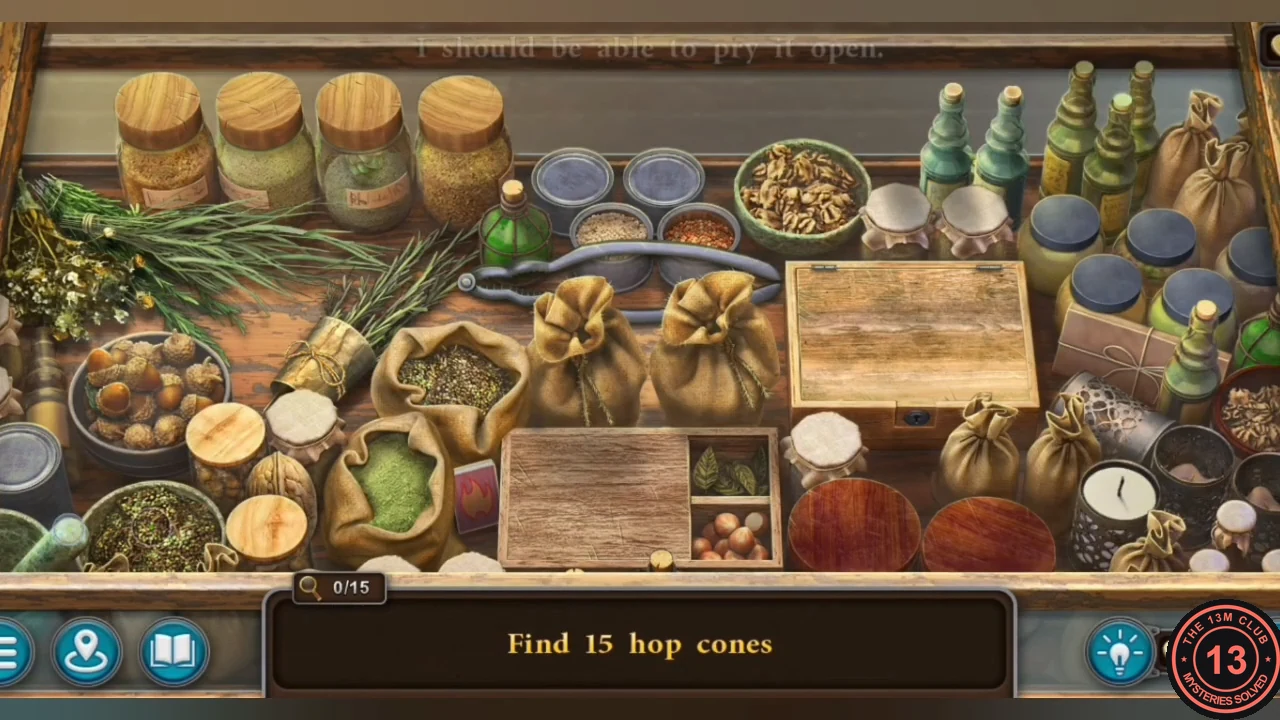
Open the glass display cabinet and collect the hop cones for the sleep aid.
- Place the BOWL OF HYGIEIA in the right-hand recess of the glass display cabinet on the front counter.
- Find all 15 hop cones scattered over the herb table. The wooden box on the right opens part-way through the search – look inside it as well. You receive the HOP CONES.
- In the church, turn the CROSS-SHAPED HANDLE in the wooden box on the stone column base at the left. Take the LAVENDER EXTRACT and a BUST.
Mapleford Pharmacy: Mixing the Sleep Aid
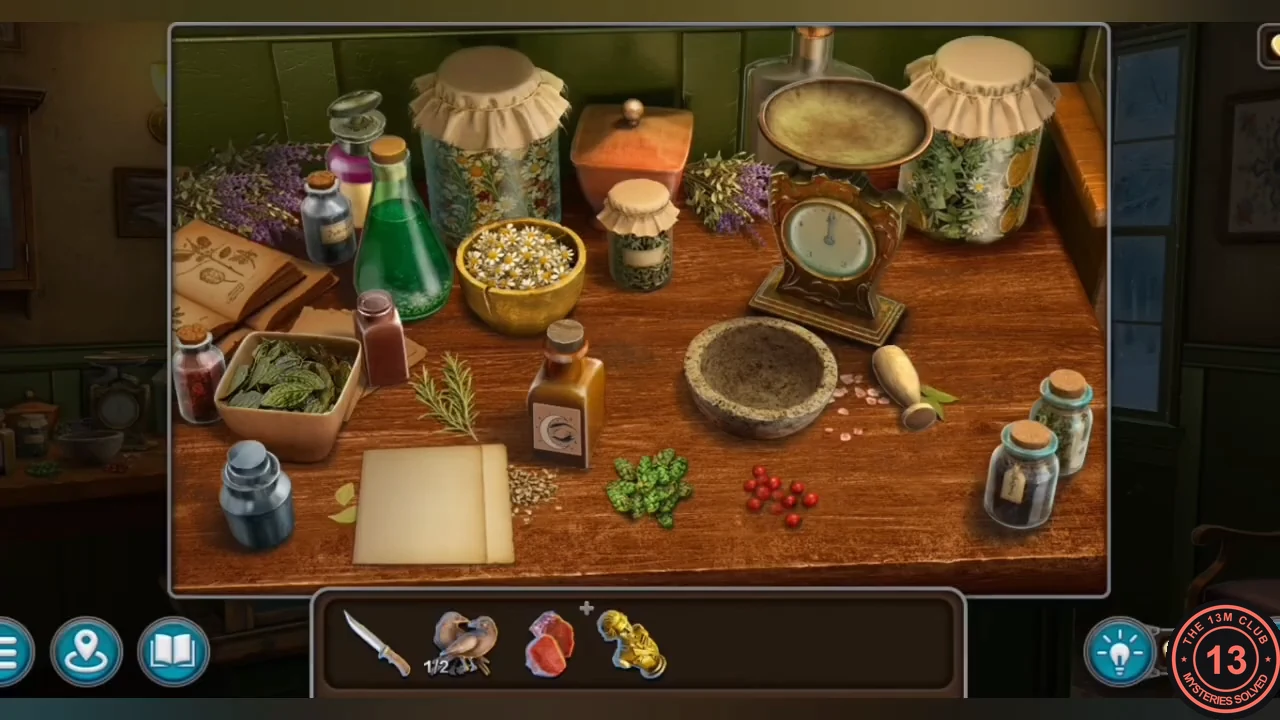
Follow the pharmacist's recipe to make a sleeping aid for the guard dogs.
- Open the RECIPE from your inventory and add the ROSE HIPS, VALERIAN TINCTURE, HOP CONES and LAVENDER EXTRACT. You get the INGREDIENTS.
- Place the INGREDIENTS on the pharmacy table to start mixing.
- Follow the recipe in this order: weigh 12 g of hop cones on the scale and tip them into the mortar; add 3 chamomile flowers; weigh 7 g of rose hips and add them; add a sprig of lemon balm; grind everything with the pestle; add the valerian tincture, then the motherwort tincture, then the lavender extract, then the linden extract; finally transfer the mixture into the glass jar. You get the SLEEPING AID.
- Combine the MEAT with the SLEEPING AID in your inventory to make DRUGGED MEAT.
Bauer Mansion: The Bat Door
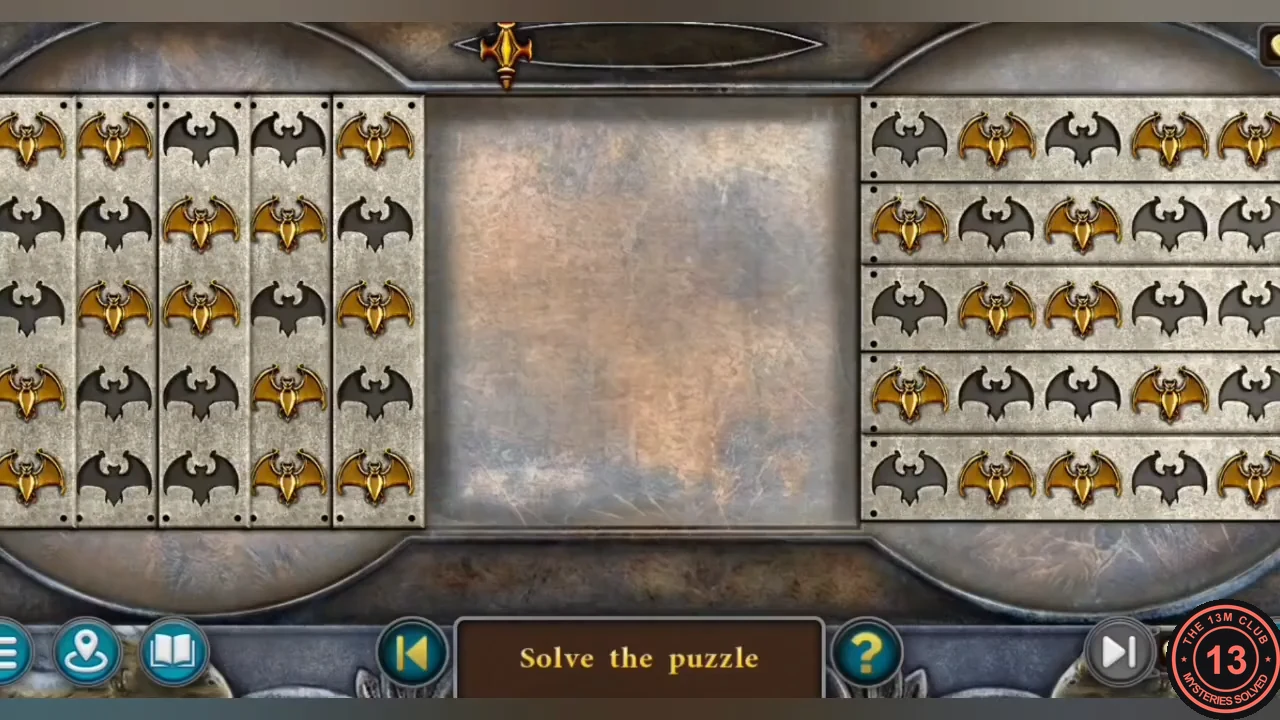
Put the dogs to sleep and open the mansion door with the bat panel.
- On the mansion path, give the DRUGGED MEAT to the dogs. When they fall asleep, take the WING (a bat-wing tag) from a dog's collar.
- Place the WING on the bat relief of the mansion door to start the tile puzzle.
- Bat puzzle: the left panel has five vertical strips and the right panel five horizontal strips of gold and dark bats; the centre is empty. Click a strip and then another strip in the same panel to swap them. The goal is for the right panel to be the exact negative of the left: every square that is gold on one side must be dark in the same position on the other. The two panels then slide together in the centre and the door opens. See the solved-state image.
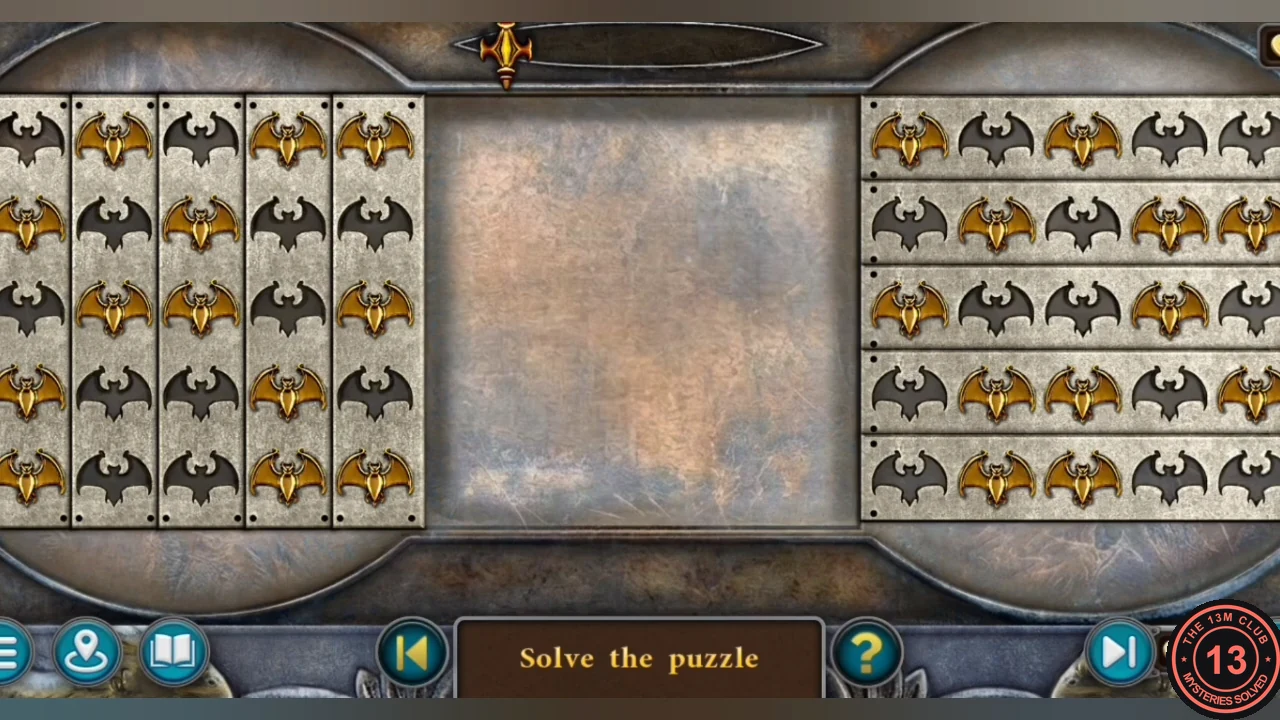
Solved: every right-hand row is the negative of the same left-hand row (gold where the left is dark, dark where it is gold).
Mapleford Pharmacy: The Heart Cabinet
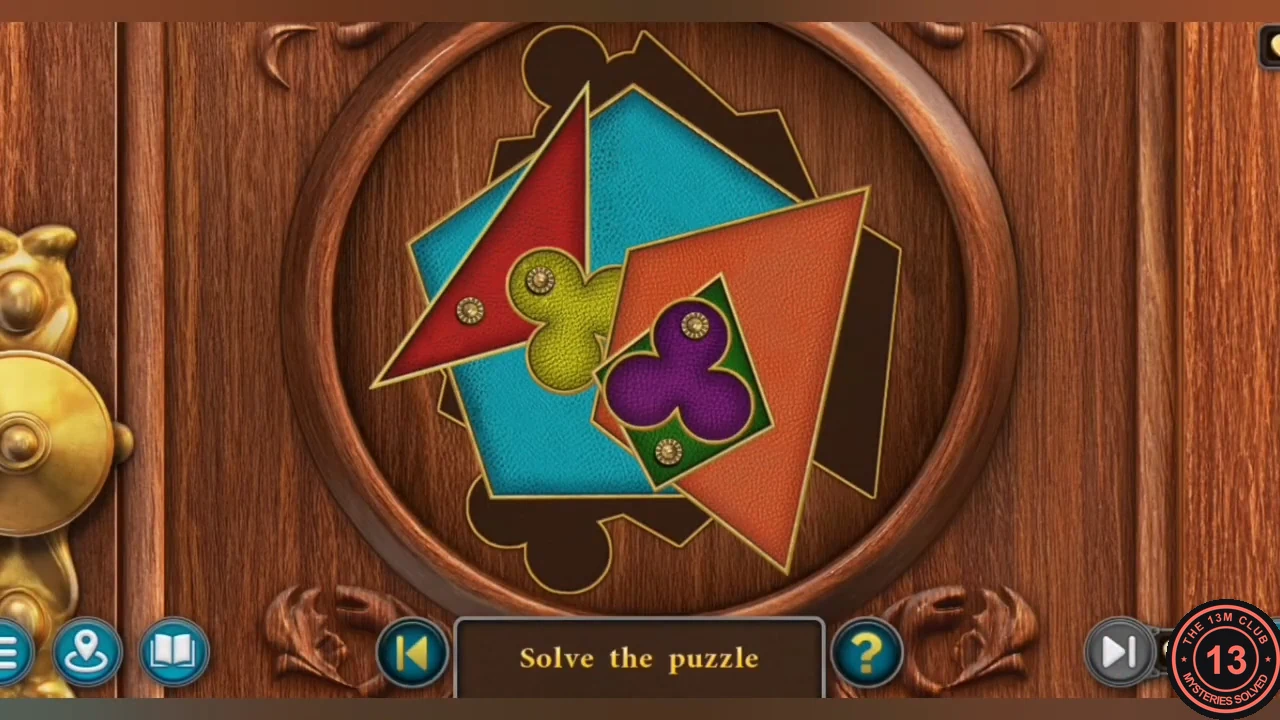
Meet Vivian Bauer, search the living room and trophy room and open the pharmacist's cabinet.
- Enter the mansion living room and talk to Vivian Bauer on the sofa. New task: find the suppressant.
- Zoom into the sofa cushions and take the HANDLE from beside the embroidered crest cushion. Read the book on the side table and take the LIGHT BULB. Collectible: Maple leaf 7/7 (achievement Florist); a morphing object is at the lower left of the living room.
- Go to the trophy room. Fit the HANDLE on the window, open it and take the HEART from the snowy sill.
- Cut open the sack with the KNIFE to reveal a statuette of Diana the Huntress with her deer – the weapon in her hands is missing. A morphing object is on the left by the statue; Collectible: Goblet 7/8 is on the right by the wolf.
- Take the POKER leaning beside the locked study doors. In the living room, stir the fireplace embers with the POKER and take EYE (1/2), a red gem.
- In the pharmacy, place the HEART in the lock of the green back cabinet to start the shape puzzle.
- Shape puzzle: the coloured pieces (orange, blue, red and green, plus a purple and a yellow clover) are joined by small gold rivets, and dragging a piece turns it around its rivet. Behind them is a dark recess with a clover-shaped notch at the top and another at the lower left. Turn the pieces until together they cover the whole dark recess, with the purple clover in the top notch and the yellow clover in the lower-left notch. The pieces may overlap each other. See the solved-state image.
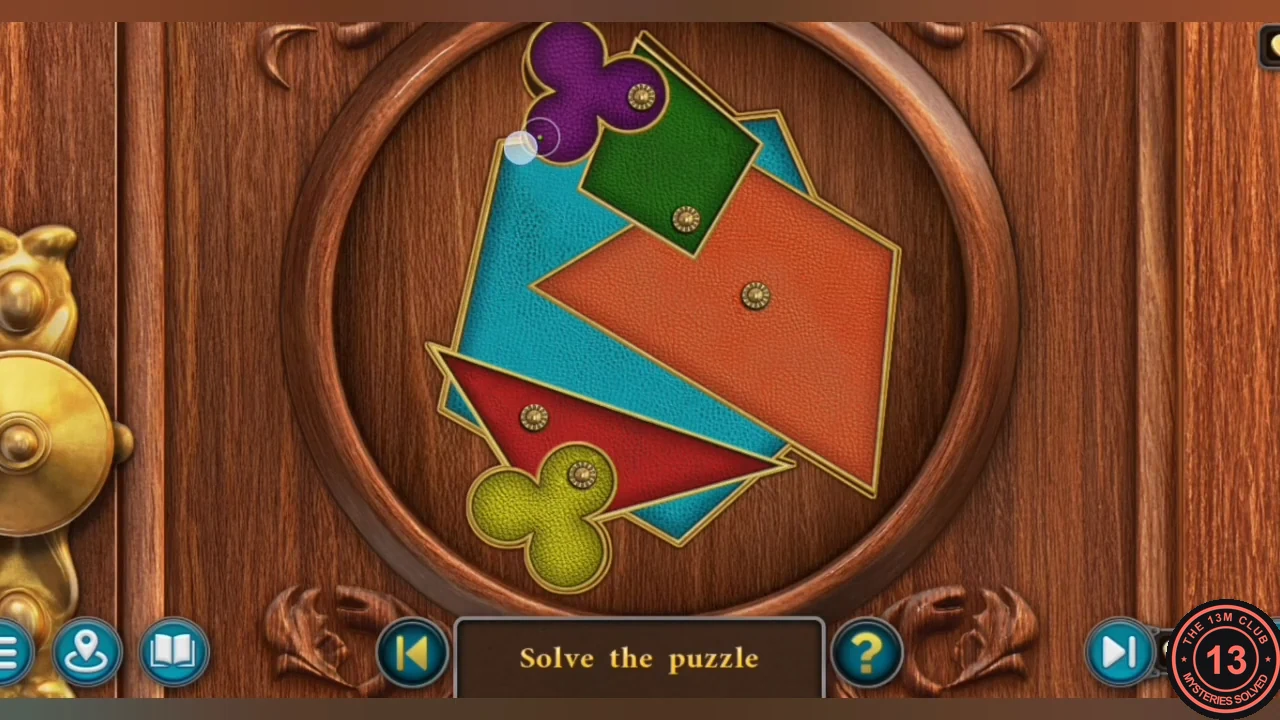
Solved layout: the overlapping pieces cover the whole recess, with each clover in its notch. - Read the pharmacist's journal about Mr. Clark and take the second BUST.
Church Crypt: The Shield Drums
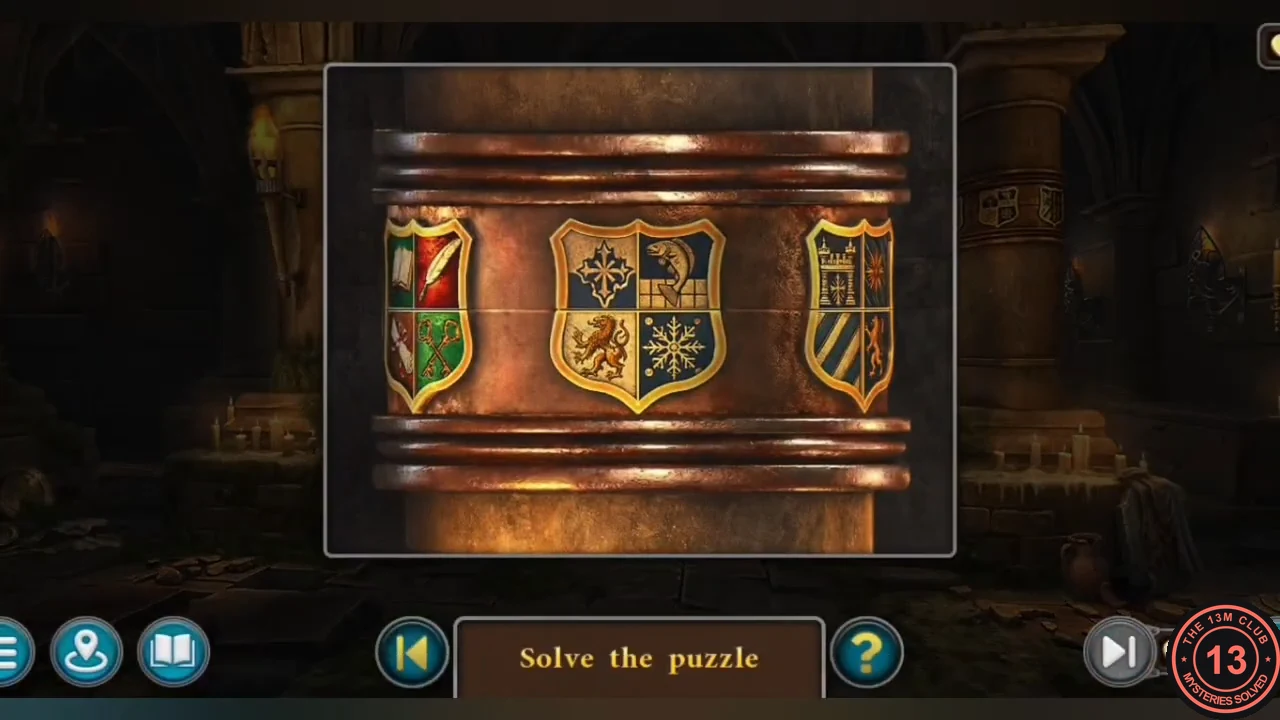
Read the scratched symbols under the utility room floor and set the shield drums in the crypt.
- In the utility room, put the LIGHT BULB in the lamp by the hole in the floor. In the lit hole, note the scratched symbols – lion, tree, ivy and crossed keys – and take EYE (2/2).
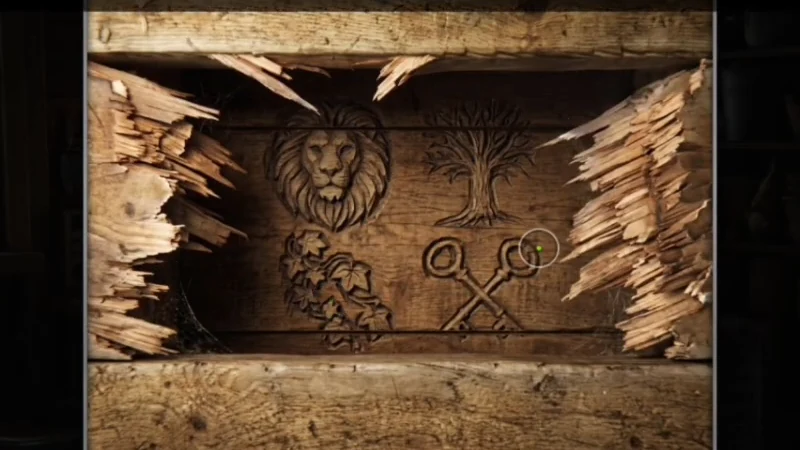
The clue in the floor hole: lion (top left), tree (top right), ivy (bottom left) and crossed keys (bottom right). - In the crypt, zoom into the column with three rotating shield drums. Turn the drums so the shield shows the lion at top left, the tree at top right, the ivy at bottom left and the crossed keys at bottom right.
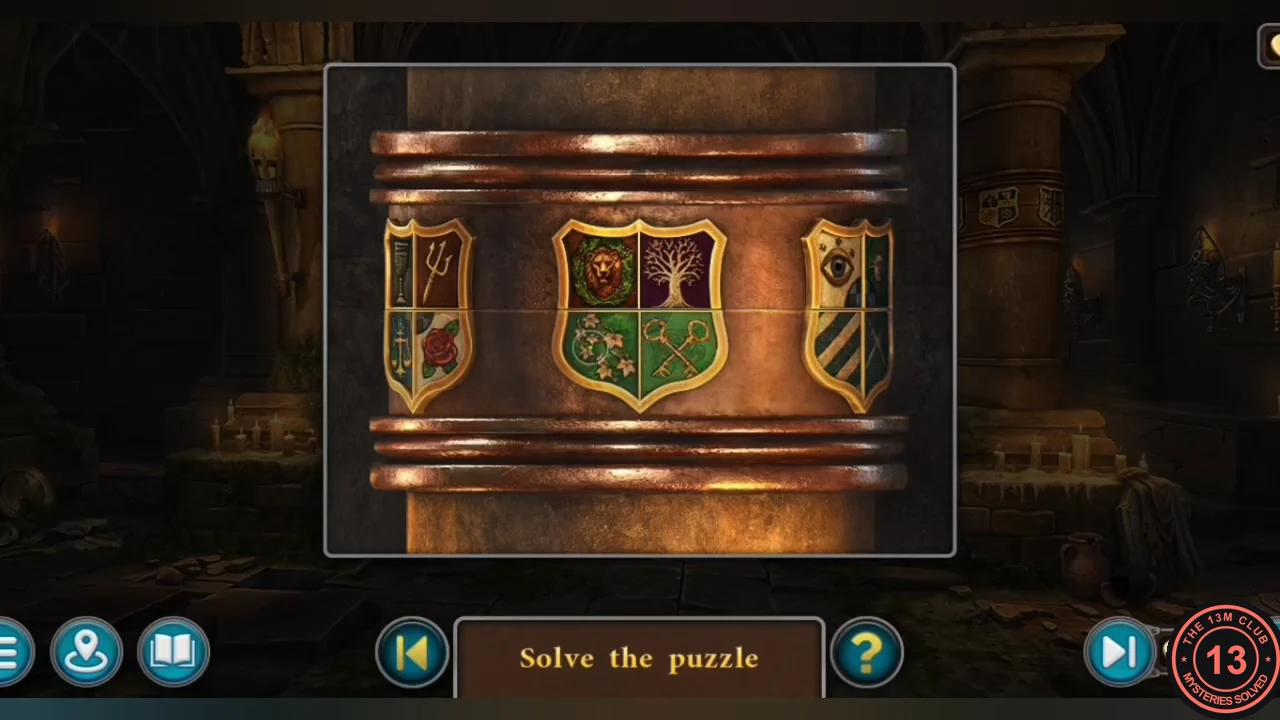
Solved: lion top left, tree top right, ivy bottom left, crossed keys bottom right. - The sarcophagus now shows a bat-shaped recess; you need a bat seal for it later.
- On the living-room mantel clock, place both BUSTS on the two pedestals and take BIRDS (2/2).
- In the trophy room, set both EYES in the bat plaque on the wall. The eyes glow and the plaque lifts to reveal a number-tile panel (you need a code for it later).
Bauer Mansion: The Crow Door Rings
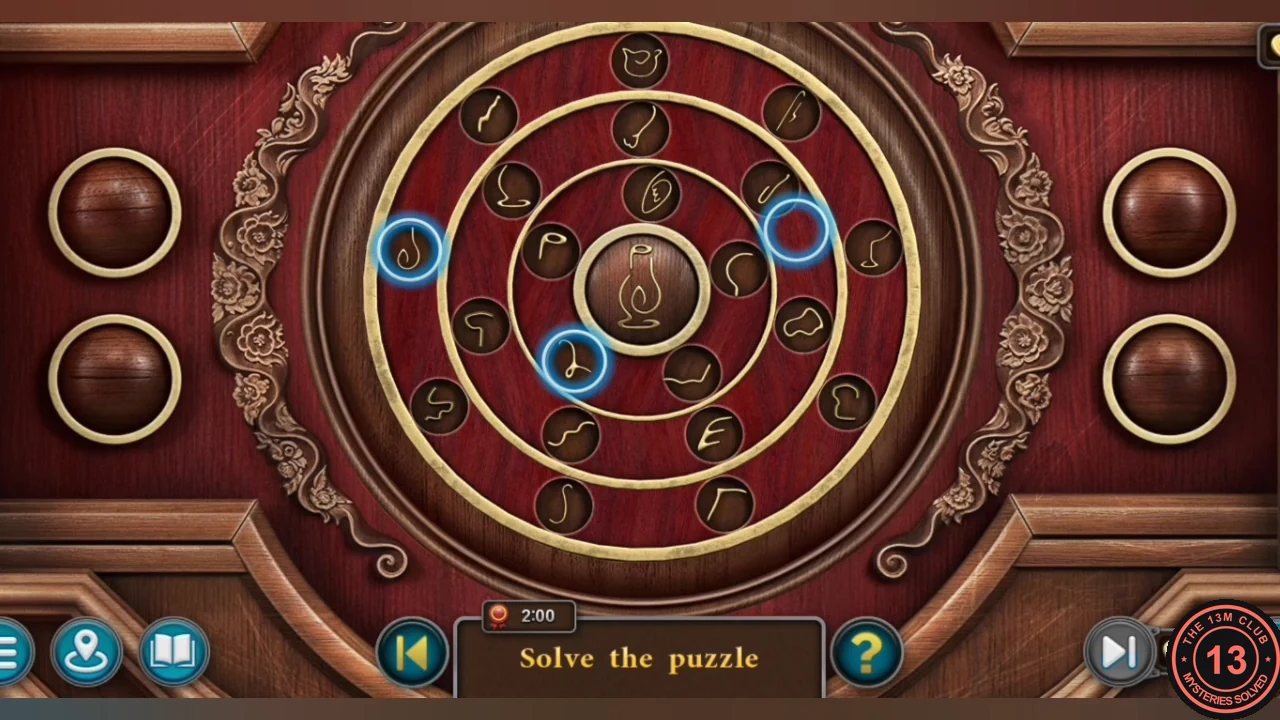
Open the carved crow door to the study with the two birds.
- Place the BIRDS on the carved door with the two crows in the living room.
- Ring puzzle: three concentric rings carry tokens with line fragments, and each ring has one position marked by a glowing blue circle. Turn the rings until the three tokens in the blue circles together form the silhouette shown in the centre. The tokens vanish, the picture fills a corner slot and new targets appear. Build all four pictures – a lantern, an owl, spectacles and a goblet – to fill the corner slots and open the door (achievement Skilful).
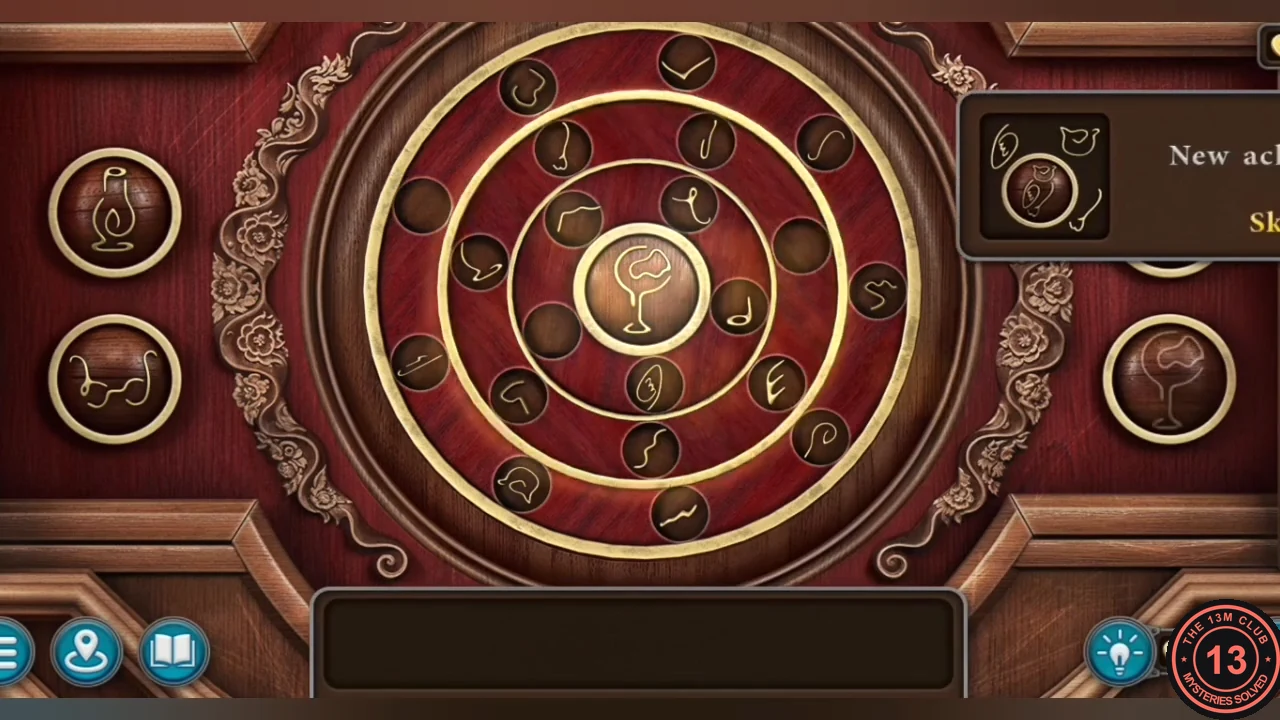
Completed: all four pictures fill the corner slots (the achievement popup covers the owl at the upper right).
Bauer Study: The Portrait Flowers and the Orrery
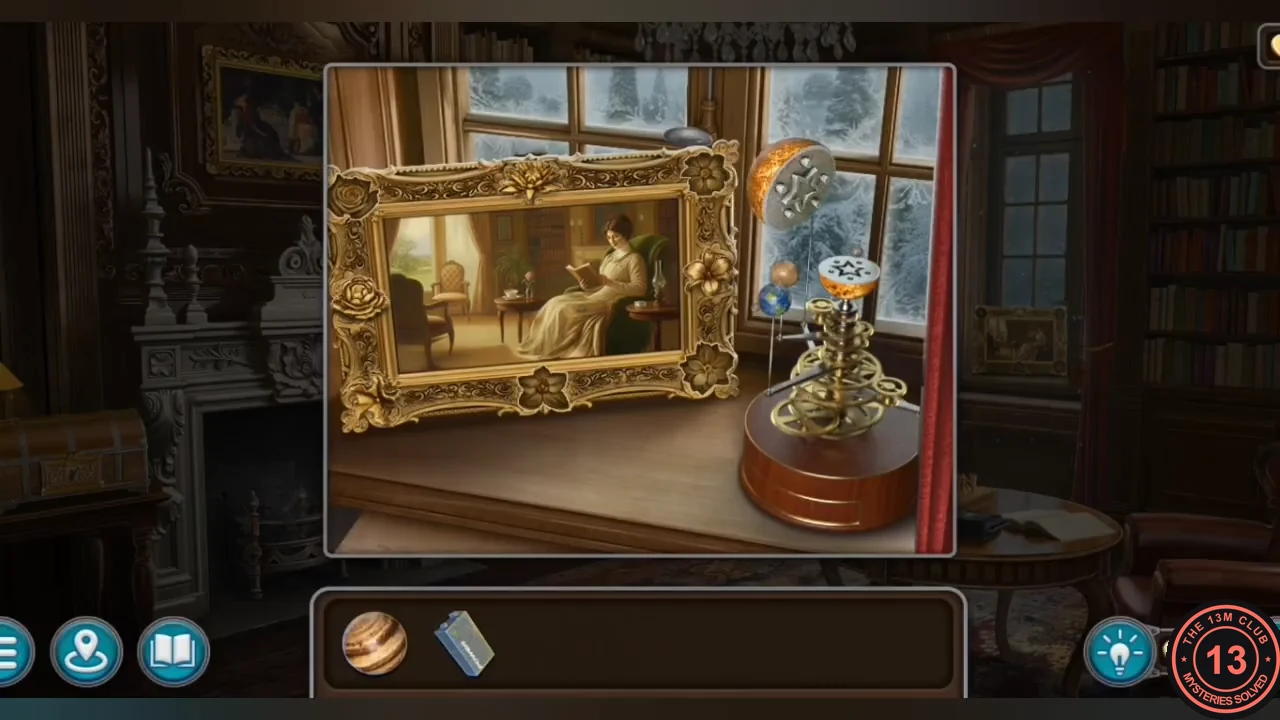
Read Delambert's letter, find the missing planets and open the crypt sarcophagus.
- In the study, zoom into the fireplace grate on the left: read the letter from V. Delambert to P. Bauer about serum research and take JUPITER. Collectible: Goblet 8/8 (achievement Antique Dealer) is up near the fireplace shelves. A morphing object is just left of the fireplace mantel.
- Look at the painting by the study window: some flowers on its frame are pressed in. The orrery is missing the Sun and Jupiter.
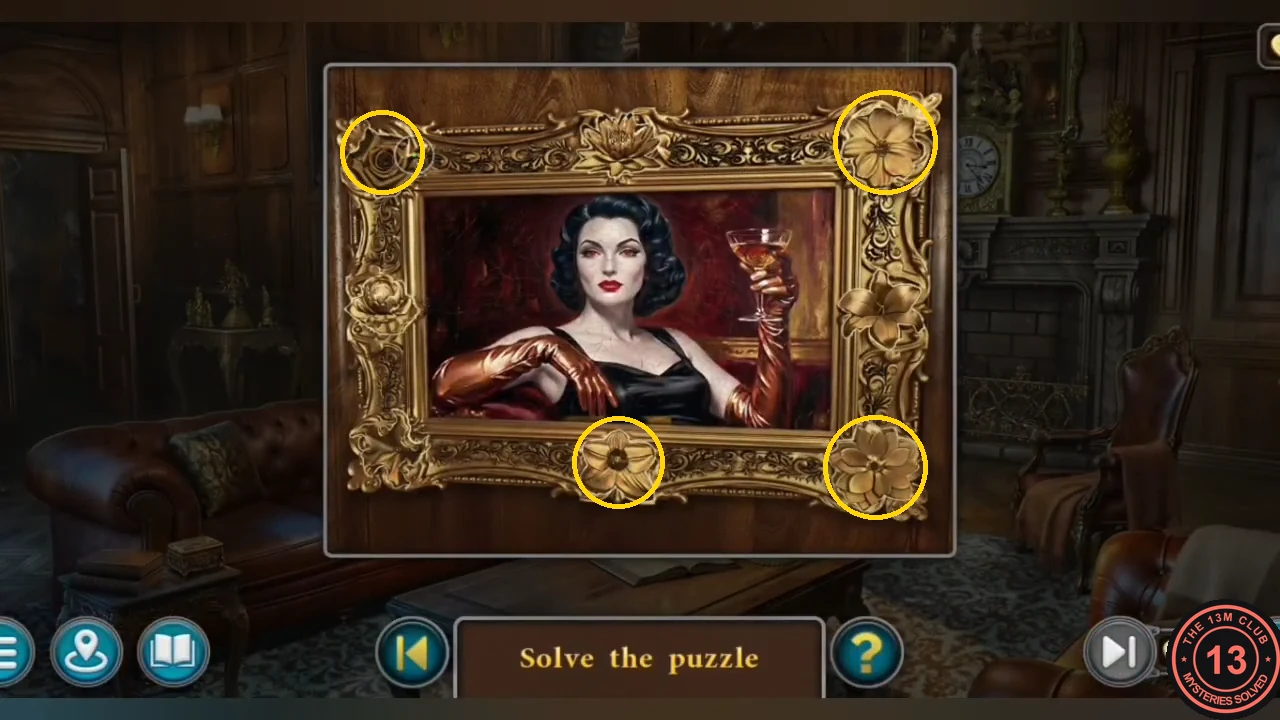
Press these four flowers on the living-room portrait: top-left rose, top-right flower, bottom-centre flower and bottom-right flower. - In the living room, press the same flowers on the frame of the portrait of the woman with a glass: the top-left rose, the top-right flower, the bottom-centre flower and the bottom-right flower. The frame lifts; take the SUN and the BATTERY from the niche.
- Place the SUN and JUPITER on the orrery in the study. It turns and a drawer opens; take the SIGNET (a bat seal).
- In the crypt, press the SIGNET into the bat recess of the sarcophagus and take the BOW.
Trophy Room: Diana's Stags
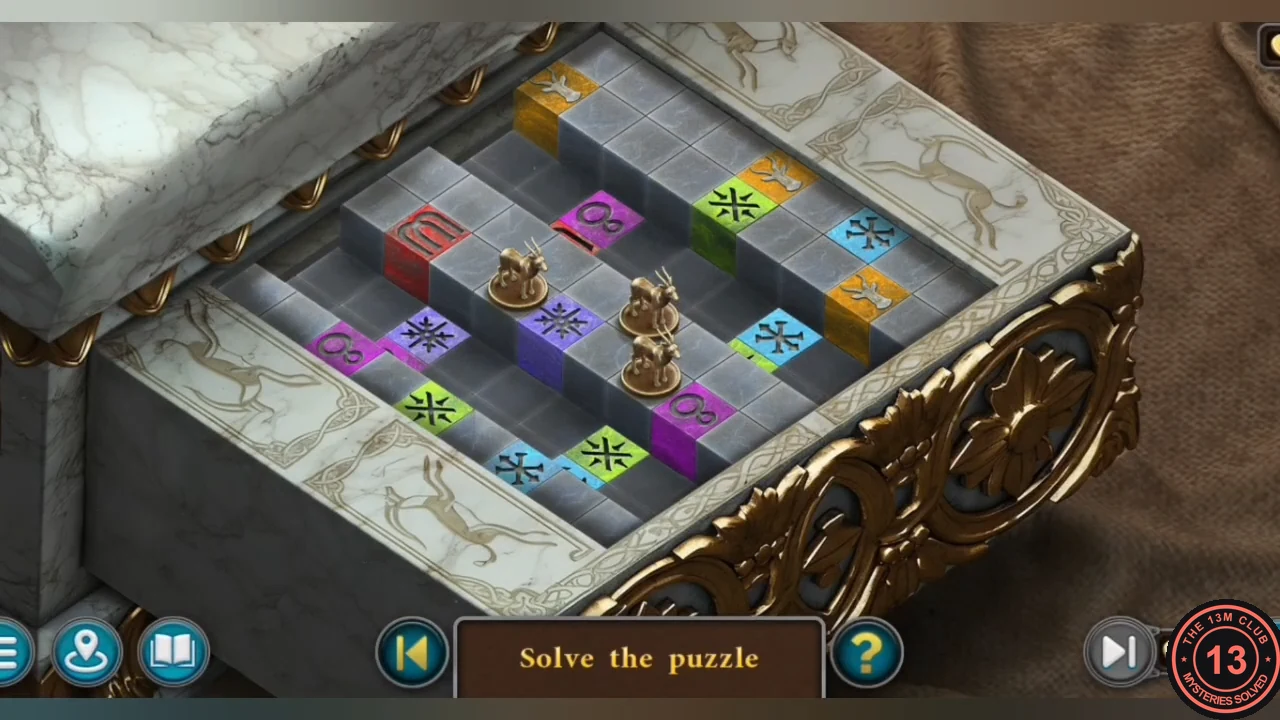
Give Diana her bow and guide the three bronze stags in the pedestal puzzle.
- Place the BOW in the hands of the Diana statuette in the trophy room. Her pedestal opens.
- Stag puzzle: three bronze stags stand on a stepped grid of grey blocks with coloured symbol blocks and three gold stag blocks. Click a stag to show blue arrows, then click an arrow to move it. Moving a stag makes some coloured blocks rise or sink, which changes the heights and opens or blocks paths. Bring one stag onto each gold stag block. See the solved-state image.
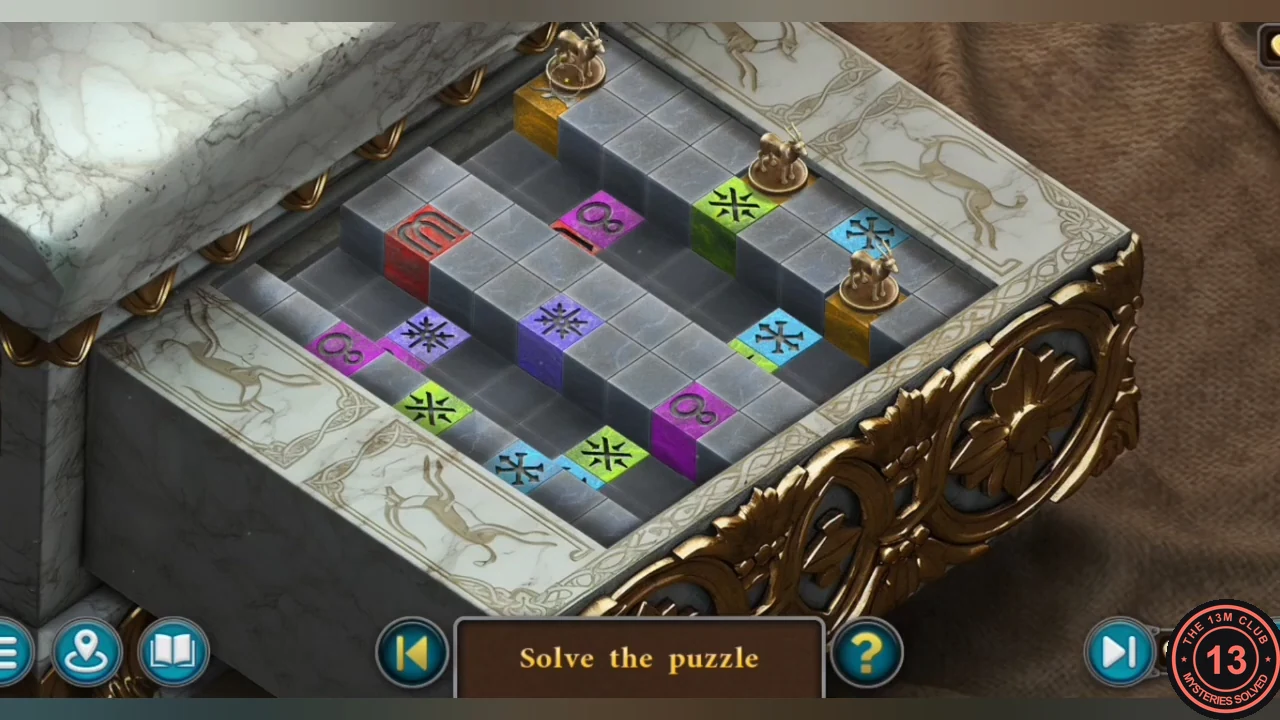
Solved: one stag on each gold block. - Take the CASSETTE TAPE from the pedestal.
Trophy Room: The Number Safe
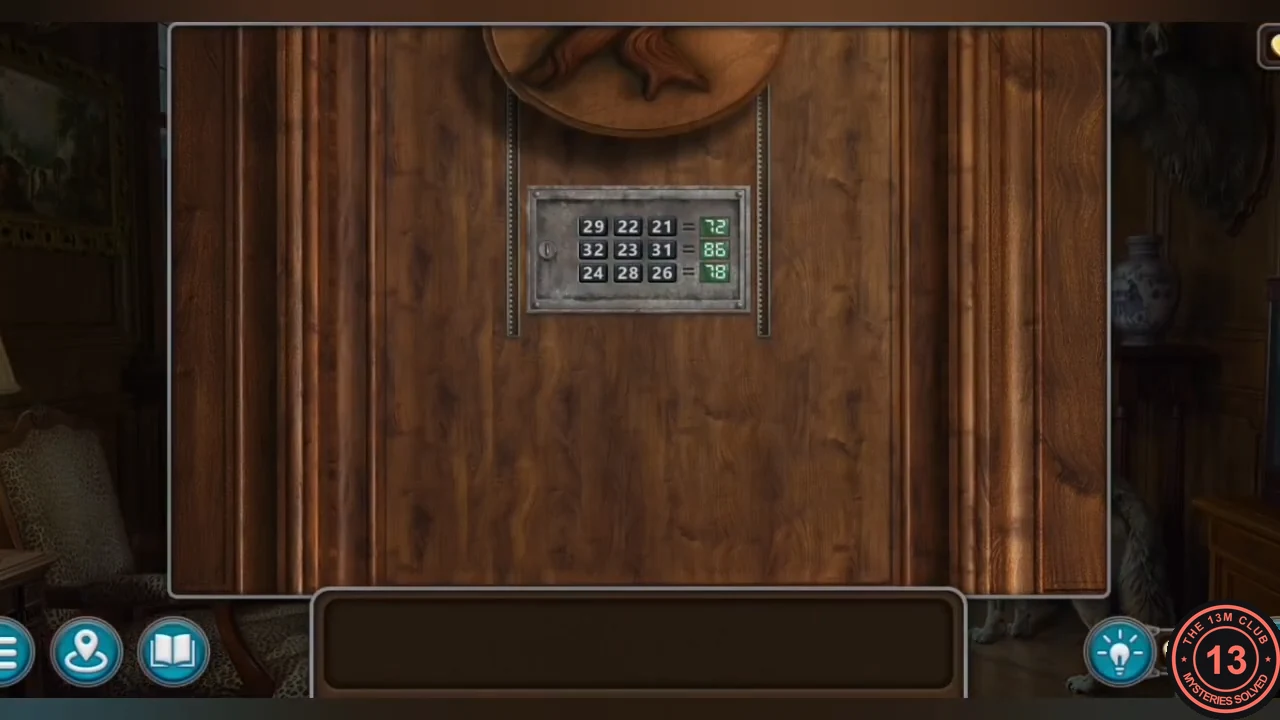
Play the cassette to learn the day's code and open the bat-plaque safe.
- At the desk left of the study fireplace, put the BATTERY and the CASSETTE TAPE in the cassette recorder. It says: "Today's code is 83 74 79."
- At the trophy-room panel, swap the number tiles so the rows add up to 83, 74 and 79. Solution: top row 32, 28, 23; middle row 24, 21, 29; bottom row 31, 22, 26.CODE32 28 23 / 24 21 29 / 31 22 26
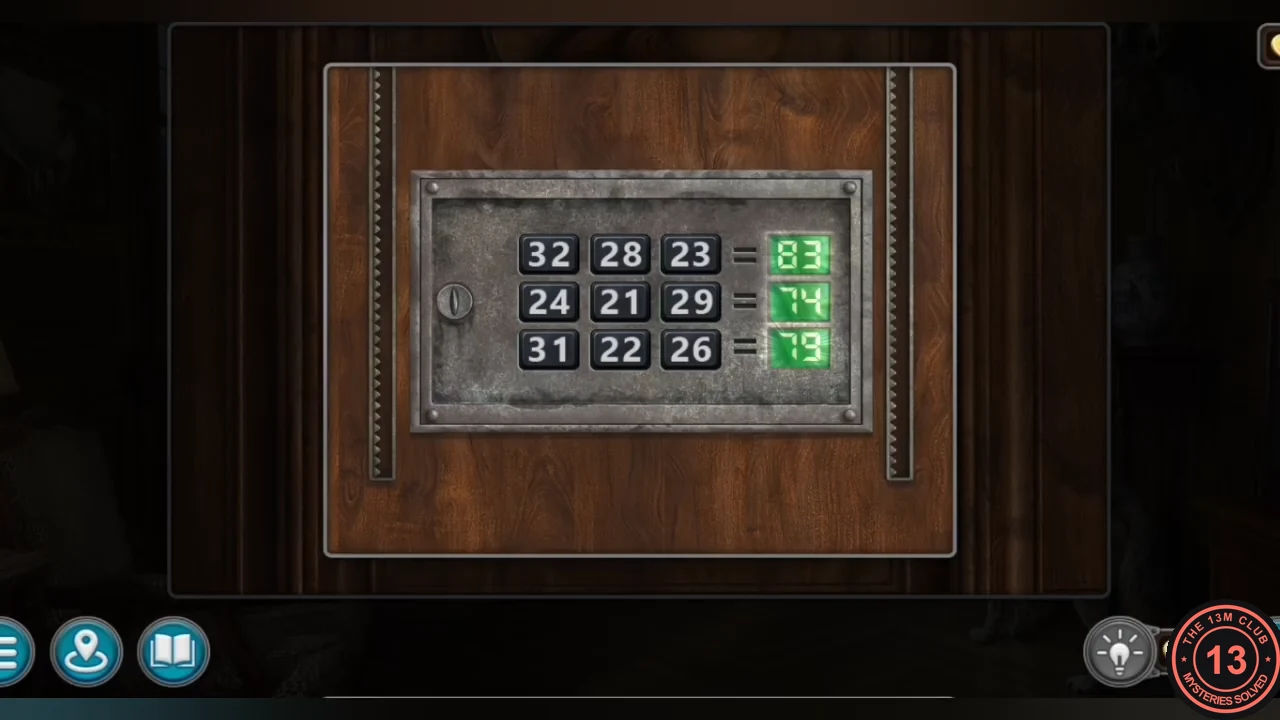
Solved: rows 32 28 23 (83), 24 21 29 (74) and 31 22 26 (79). - Take the confidential DOCUMENTS about Delambert and the INKWELL AND PEN from the safe.
Bauer Study: The Butterfly Chest
Open the chest on the study table and finish Chapter 2.
- Place the INKWELL AND PEN in the silhouette on the lid of the chest on the study's round table.
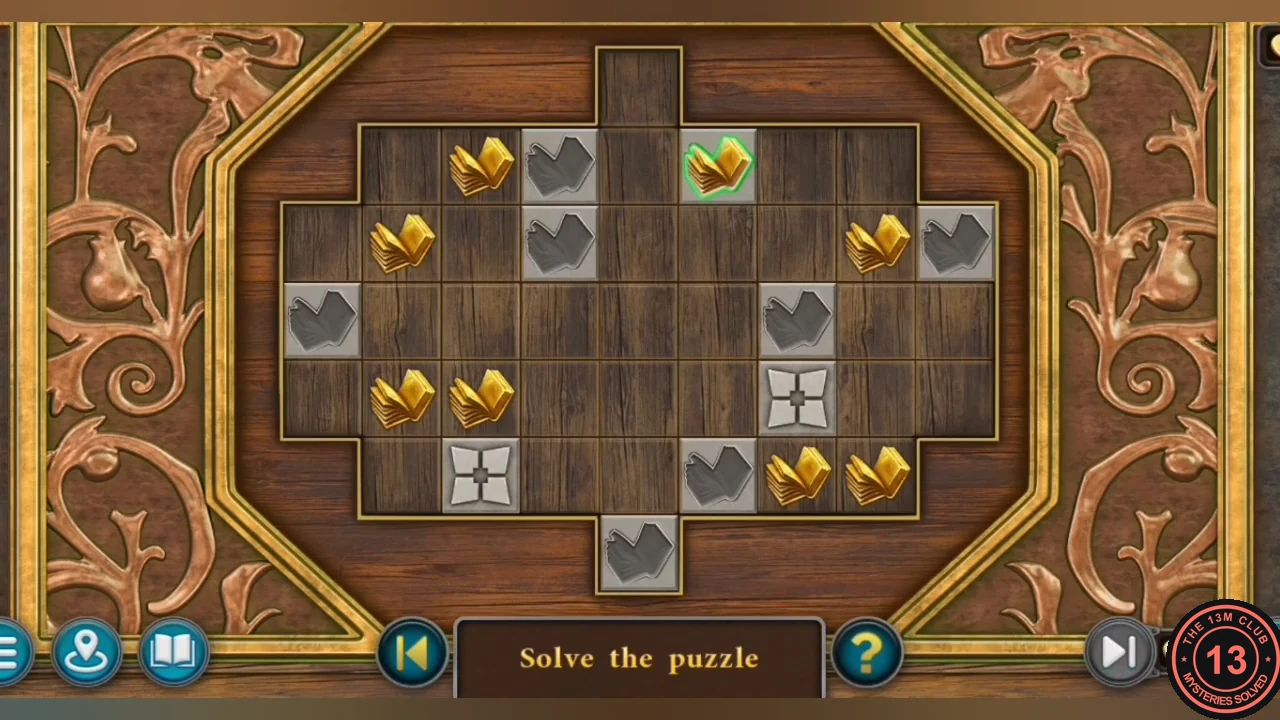
- Butterfly puzzle: gold butterflies slide in the chosen direction until they hit the edge, another piece or a fixed four-petal stone. Fill all eight grey butterfly silhouettes (they glow green when covered). Use the stones and the butterflies already in place as stoppers. See the solved-state image.
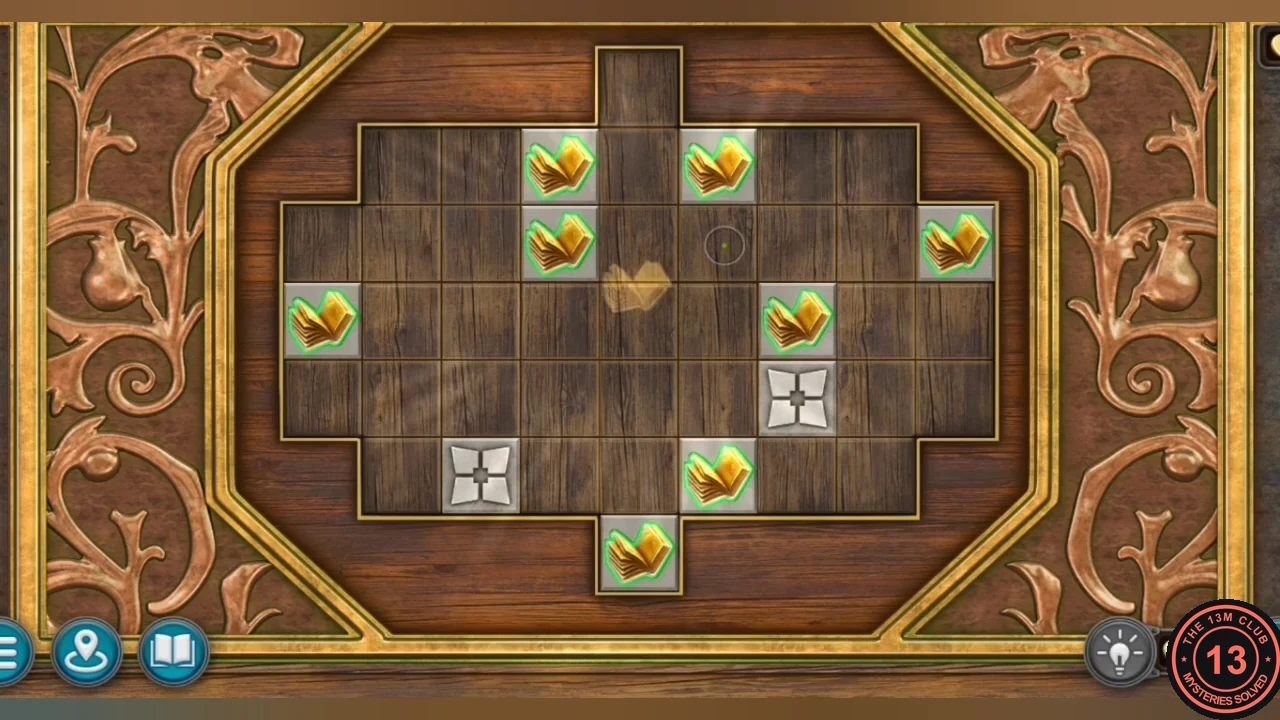
Solved: all eight silhouettes are covered and glow green. - Read the letter to Mr. Hayes about the suppressant sample. Cutscenes follow: Vivian in the study, Lucas back in the hotel, and Petra Bauer attacking him. The chapter's plot is complete; choose CONTINUE if you still need collectibles.
- Collection cleanup: these three morphing objects are easy to miss on the way through – in the study, just left of the fireplace mantel; in the church interior, on the far right pillar half-way up; and in the old woman's house, on top of the staircase newel post. With 15/15 morphing objects and 15/15 collectibles, choose NEXT EPISODE.