Eugene Perry's Yard
Half an hour later you play as Howard at Eugene Perry's abandoned house. New task: find the special varnish. The yard has a metal brazier on the left, a stone winged-beast statue on a pedestal in the centre and a boarded-up front door at the top of the porch steps.
- Zoom into the brazier: take the FIRE IRON hooked on it and PATTERN PART (1/3). Tap the grill to lift it off the brazier.
- The statue pedestal has a carved half-disc lock with an empty slot in the centre; it needs a stone tile. Prise the planks off the front door with the FIRE IRON and go in.
The Ruined Room
Howard looks for the way to the basement. An ornate cabinet stands on the left, a white door on the right.
- Lever up the fallen beam in the centre-left with the FIRE IRON and take the BUCKET from the rubble.
- Open the oven of the old stove on the back wall: MATCHES and OIL. Take the WAX tin below the dial of the radio on the right table.
Brazier, Puddle and Vase
Back in the yard.
- Light the brazier with the MATCHES; the grill drops onto it. Put the WAX tin on the grill: the wax melts and frees PATTERN PART (2/3).
- Fill the BUCKET at the puddle on the reddish ground at the right edge, below the drainpipe right of the porch: WATER.
- Zoom into the foot of the porch railing left of the steps: a narrow metal vase stands in the ivy. Pour the WATER into it and the STONE TILE washes out.
- Put the STONE TILE in the centre slot of the statue pedestal to start the puzzle.
Statue Pedestal Half-Disc
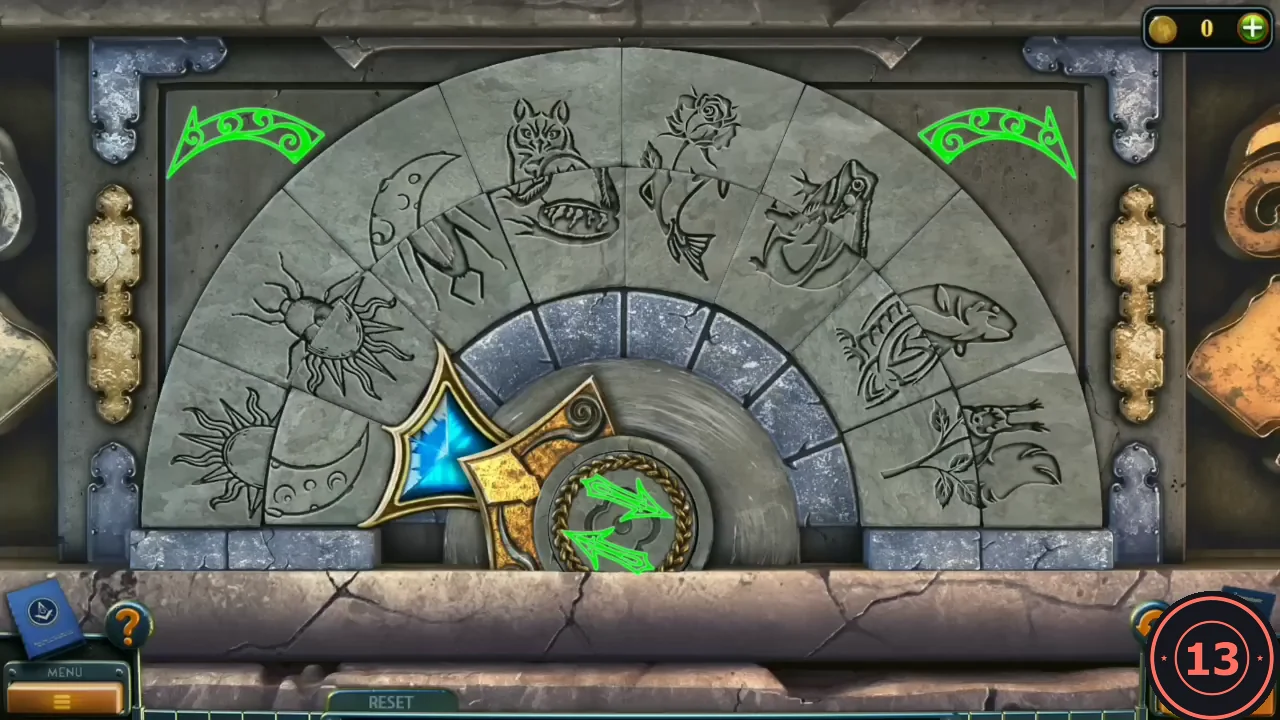
The half-disc has a fixed outer band of eight half-pictures and a middle band of eight movable halves. A gold arm covers two neighbouring middle cells. The green ornament at the top left moves the arm one cell left, the one at the top right one cell right. Tapping the centre lifts the pair under the arm, swaps the carried pair with the pair under the arm, or drops the carried pair into the empty cells. Matched pictures glow green.
- Outer band, left to right: sun, beetle, moon, owl, rose, frog, fish, fox. Middle band at the start: moon, sun, beetle, frog, fish, fox, owl, rose, with the arm over the first two cells. If your start differs, use the swap idea below.
- Taps (L = left ornament, R = right ornament, C = centre): R R R R C, R R C, L L C, L L C, R R C, L L C, L L C, R R C, R C, L L L C.CODERRRRC RRC LLC LLC RRC LLC LLC RRC RC LLLC
- What this does: owl and rose move to the middle, then to cells 3 and 4; moon and sun are lifted and parked; sun and beetle are lifted from cells 4 and 5 and dropped at the far left. Every picture is then whole.
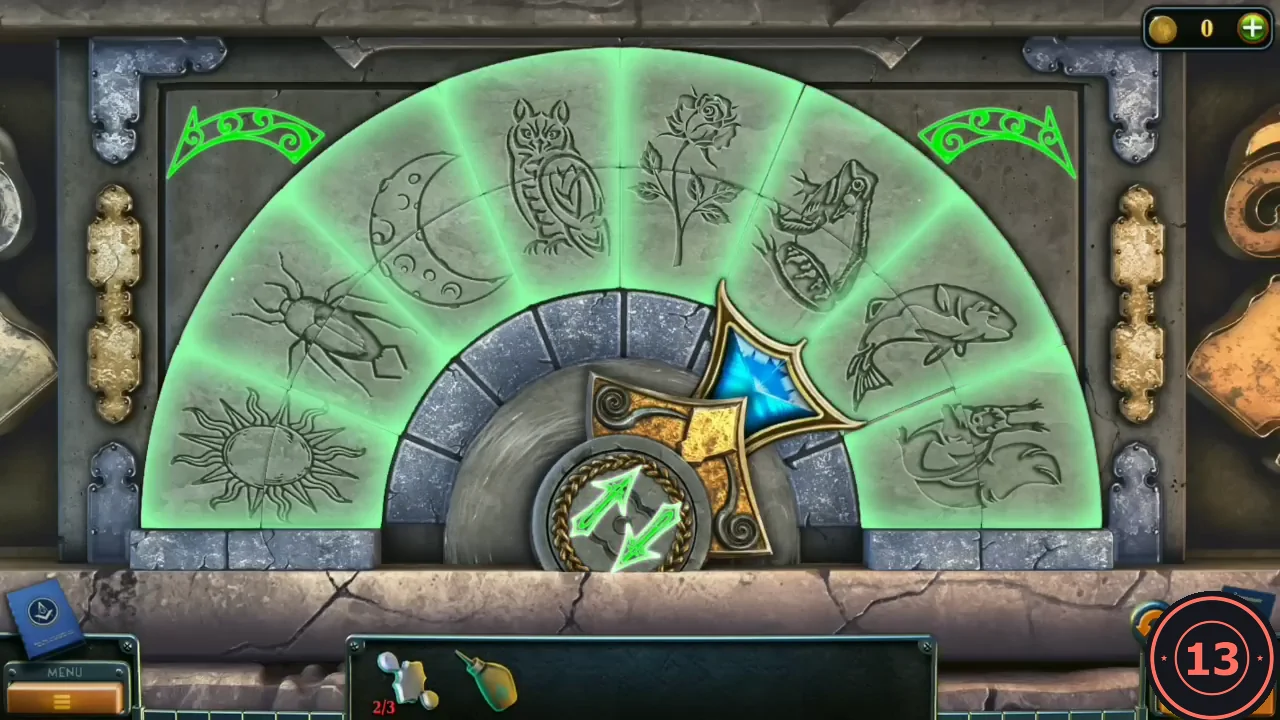
Solved: every picture is whole and glows green. - A compartment in the pedestal opens: RADIO RECEIVER KNOB and HINT.
Cabinet Vases
The radio in the house is missing its second knob, and the ornate cabinet has a carved pattern with three missing parts.
- Fit the RADIO RECEIVER KNOB on the right of the radio. It opens: PATTERN PART (3/3) and KEY.
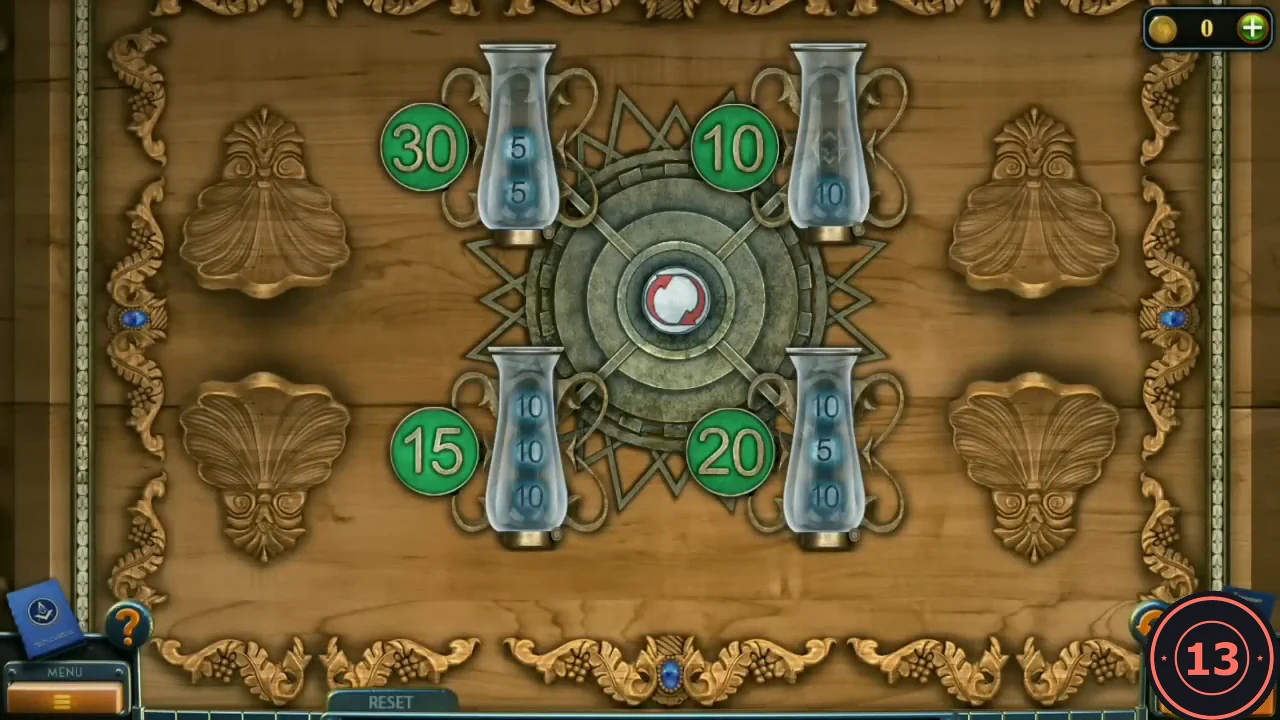
- Put the three PATTERN PARTS on the ornate cabinet door. Four vases each have a green target number and hold portions of 5 and 10. Start: top left (30) 5 and 5; top right (10) 10; bottom right (20) 10, 5, 10; bottom left (15) 10, 10, 10.
- Rules: tap a top vase to pour its lowest portion into the vase directly below it. The centre button turns the whole ring of vases, with their numbers, a quarter turn anticlockwise. A vase holds at most three portions. Goal: every vase holds exactly its number. Check that your start matches the one above before using the moves below.
- Fourteen taps (C = centre, TL = top-left vase, TR = top-right vase): C, TL, C, TL, TL, C, TL, TR, C, TL, C, TL, C, TR. The cabinet opens: HANDLE and TWEEZERS.CODEC TL C TL TL C TL TR C TL C TL C TR
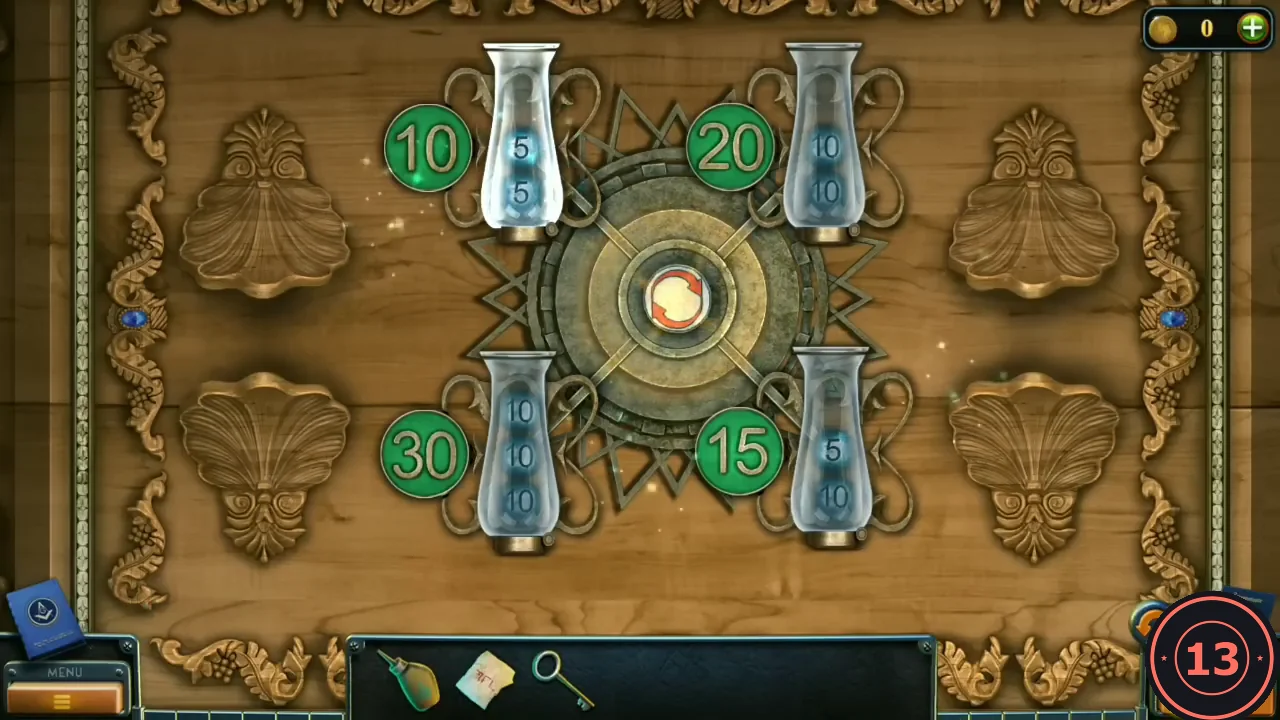
Solved: every vase holds its number and the centre lights up.
Perry Basement
The special varnish should be hidden behind the closet in the basement.
- Unlock the white door at the right of the room with the KEY and go down to the basement. Open the wooden closet doors on the right: there is a wall safe inside.
- The small iron stove under the stairs is rusted shut. Put the HANDLE on its door, oil it with the OIL and turn it: CORKSCREW.
- Behind the bars of the gold-framed window on the back wall stands a green bottle. Pull the cork with the CORKSCREW and take the paper out with the TWEEZERS: the second HINT.
- Put both HINTS on the wall safe in the closet to start the cipher lock.
Pigpen Cipher Safe
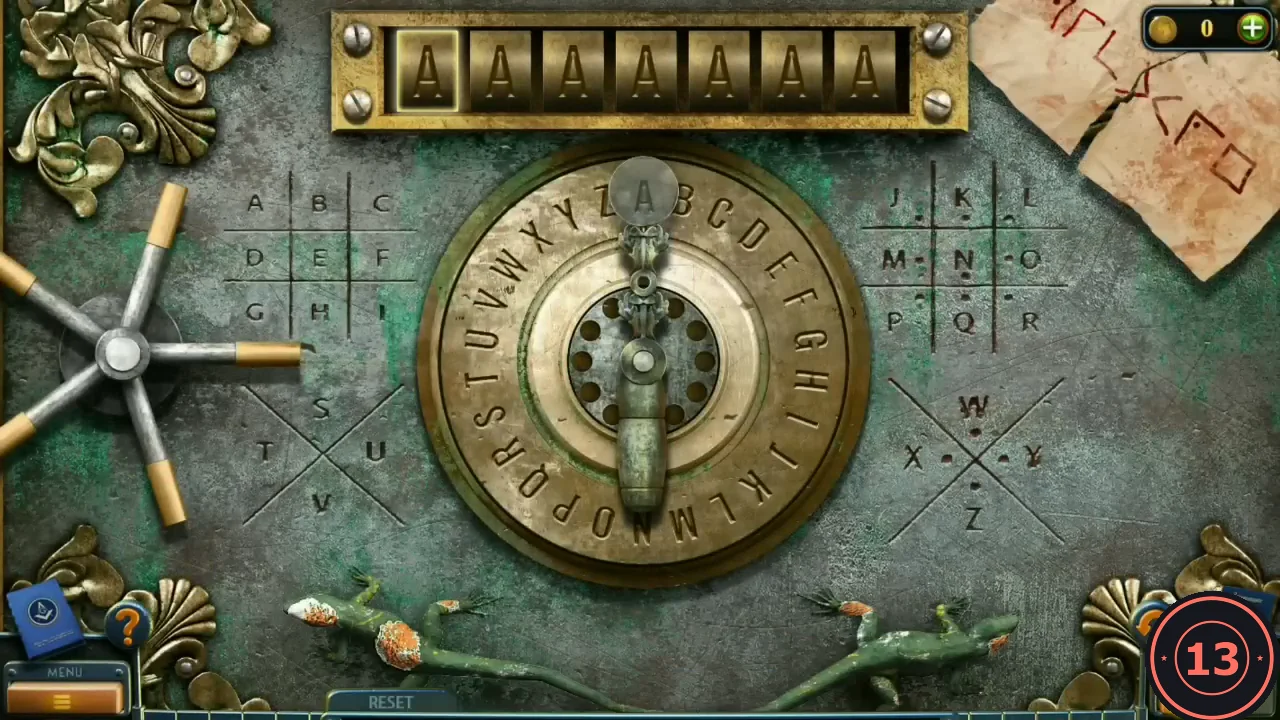
The safe has seven letter drums, a central dial with a lever that points to A to Z, and two pigpen keys engraved on the door: a plain grid for A to I, a dotted grid for J to R, a plain X for S to V and a dotted X for W to Z. The two hint halves join into seven pigpen symbols.
- Decode the symbols with the keys on the door: P I C T U R E. Turn the lever to each letter in turn to enter PICTURE.CODEPICTURE
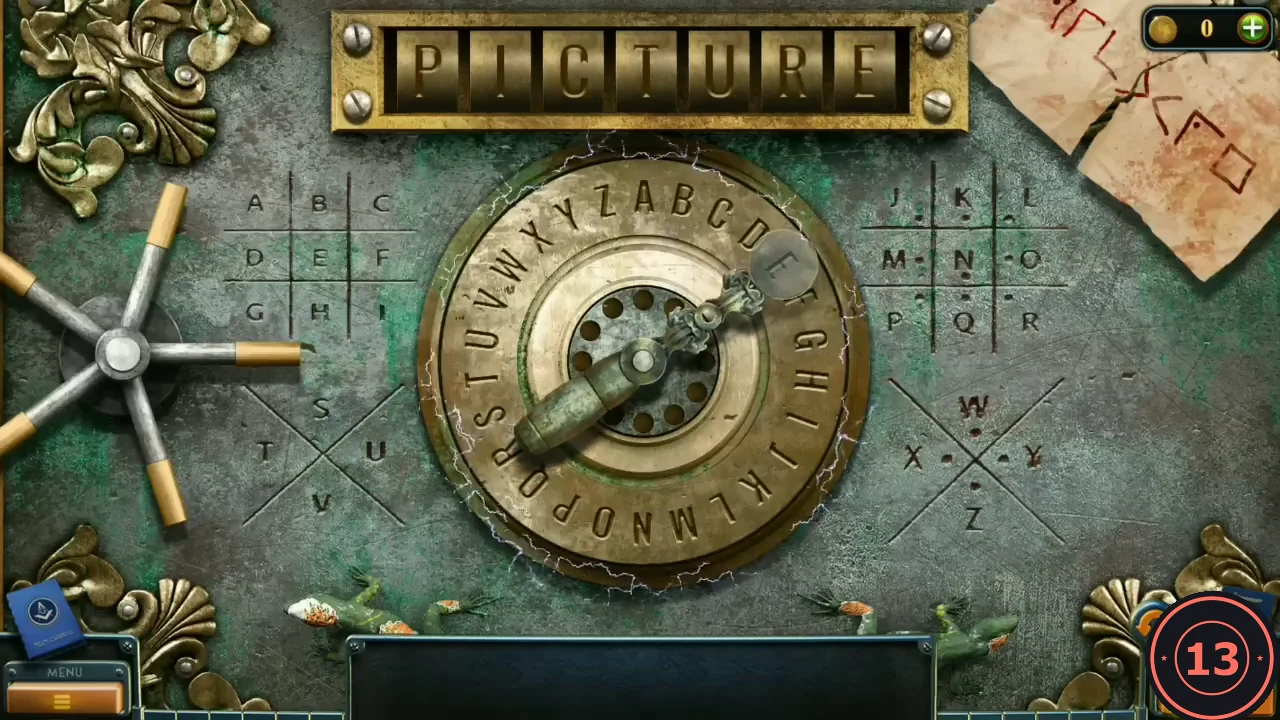
The drums read PICTURE. - The safe opens: take the VARNISH. Task complete. Howard joins Laura in the bunker prison. New task: bring back the monsters.
Prison and Boat Tunnel
The prison hall has cages, a control desk with a big red button and a red hand truck. The boat tunnel lies past the bunker corridor: a moored speedboat, two unconscious guards, a generator by the gate and a container booth upper right. The boat's tank is empty.
- Take the BUTTON from the control desk in the prison hall.
- Go through the bunker corridor to the boat tunnel. On the boat, take the second BUTTON and the CANISTER.
- Open the small grey door of the generator by the gate: the electrical panel has one empty fuse slot.
- In the container booth, take the KEY lying beside the suitcase. Put both BUTTONS in the latch sockets of the suitcase and take the FUSE.
- Put the FUSE in the empty generator slot and pull the lever down. The generator runs and the tunnel grate behind the boat rises.
Bring Back the Monsters
Howard and Laura need a fuelled boat and a painting that can draw the monsters back in.
- Take the CRYSTAL lying on the cloth wrapping of the crate at the foot of the stairs on the right. Cut the ropes of the wrapping with the KNIFE and take the small framed PICTURE from the side of the crate.
- In the prison hall, zoom into the rusty mesh cabinet on the upper-right balcony. Open its door with the HANDLE and take the HOSE.
- In the bunker corridor, use the CANISTER and HOSE on the gasoline barrel: GASOLINE. Pour it into the boat's fuel cap. Now there is an escape route.
- Put the PICTURE on the hand truck in the prison hall: it becomes a full-size painting. Turn the KEY in the keyhole plate left of the big red button on the control desk; the button lights up.
- Brush the VARNISH over the painting: it turns into a glowing portal. Put the CRYSTAL on it. In the final cutscene the cages open, the monsters are drawn into the painting and the heroes escape by boat. The game is finished (Puzzle Lover achievement), and the main menu now offers Extras.
Chapter 3 Collectibles
Chapter 3 has cassettes 6 to 10, billiard balls 5 to 9, baseball cards 7 to 11 and Morphing Objects 28 to 42. Completing a set gives Detective (cassettes), Player (billiard balls) or Fan (baseball cards). Finding all 42 Morphing Objects gives Master of Detail and unlocks the 20 Bonus Game levels in Extras.
- Cassettes: on the grass in front of the crashed green car's front wheel at the bridge; in the leaves on the right of the village street; on the study desk at the right; in the bunker on the right by the gasoline barrel; upright on the cloth-covered table at the lower left of the prison hall.
- Billiard balls: on the roof of the red van in the garage; on the pot at the right of the library; on the tree stump at the left of the Perry yard; on the dome in the middle of the Perry room; on top of the overturned rusty barrel at the lower right of the boat tunnel. Baseball cards: on the box at the left of the mansion courtyard; on the little side table right of the mansion bed; on the upstairs hall floor in front of the desk; on the fire extinguisher at the top left of the elevator room; on the floor at the right of the Perry basement by the cupboard.
- Morphing Objects 28 to 34: bridge, by the tree stump centre-left; village street, the house-number plaque on the left house; garage, the white star on the stacked tyres at the far left; mansion courtyard, the round sign on the booth at the left; mansion bedroom, the top left of the headboard; upstairs hall, the ornament on the wall at the upper right; library, the crescent hanging left of the chandelier.
- Morphing Objects 35 to 40 and 42: study, on the desk blotter right of the open book; elevator room, the hourglass shape in the lattice panel left of the gate above the covered box; bunker, the yellow radiation sign on the left wall by the blast door; Perry yard, the moon in the sky at the upper left; Perry room, on the floor at the right near the radio; Perry basement, on the cushions at the lower left; boat tunnel, on the floor by the crates left of the yellow-black pillar next to the lying guard.
- Morphing Object 41: prison hall, the round pressure gauge on the upper-left wall under the big pipe, left of the red box.