Grandfather's Yard
Chapter 2 opens after Chapter 1 is finished (Chapter 2 is the Collector's Edition bonus chapter of the PC release; on mobile it is part of the chapter menu). You play as Noah, who visits his grandfather Eugene after receiving a letter. Hats are this chapter's collection items; see the Chapter 2 collectibles section.
- In the backyard, zoom into the fuse box on the right wall (a fuse has blown) and take NUMBERS (1/4). Take the FIREWOOD BASKET on the right.
- Pull back the rug on the back-door steps and take NUMBERS (2/4). The back-door lock is a number grid with numbers missing.
- Zoom into the workbench by the blue fence and take the SCREWDRIVER. Then tap the loose wooden pieces on the bench one after another to put the bird feeder together: the base, the back panel and the uprights. The roof is still missing ("I need another detail"), and the chest under the bench is locked.
- Open the mailbox on the front door with the SCREWDRIVER. Take the letter, NUMBERS (3/4) and the KEY.
- Open the padlock of the backyard shed with the KEY and go inside.
Garden Shed
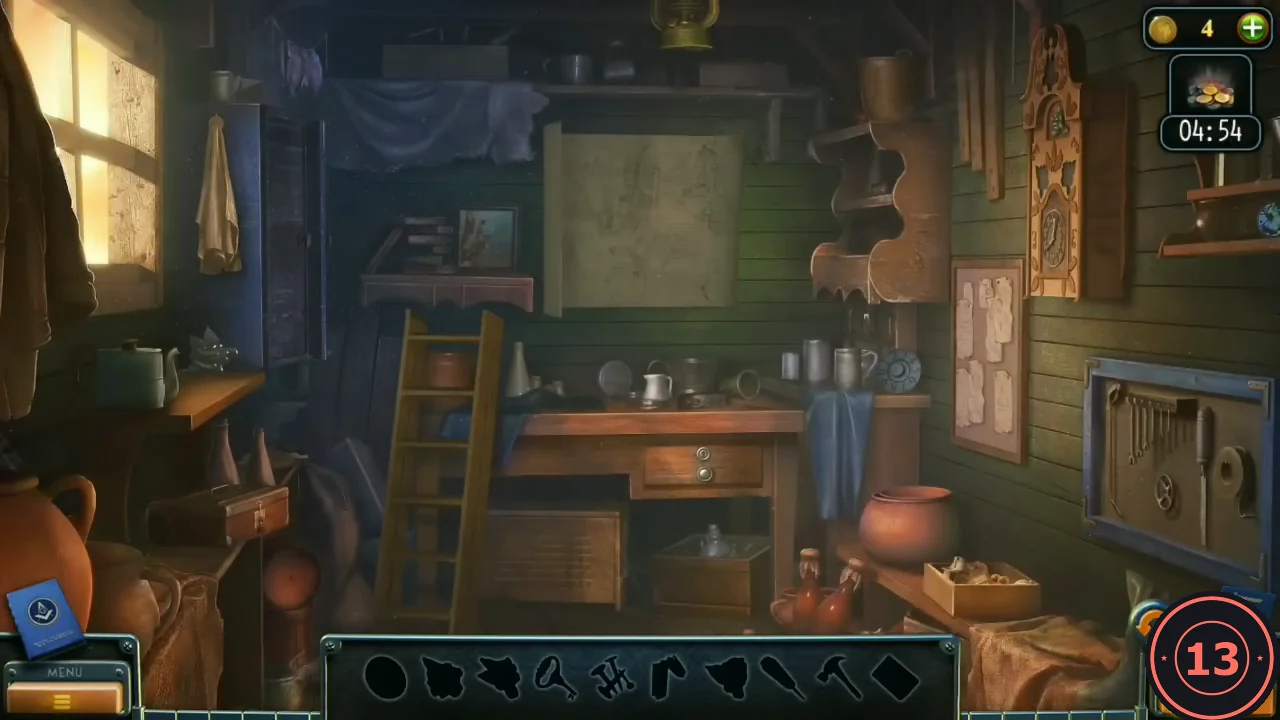
An interactive hidden-object room: the bar at the bottom shows the silhouettes to collect, and several are found by using items on parts of the shed. The goal is a working ladder.
- Take the carved LEAF from the small shelf on the left wall, just right of the green kettle below the window. Zoom into the ladder joint (one hinge is missing) and take the second LEAF there. Move the blueprint poster to find a wall SAFE. Take the DIAL from the shelf right of the mugs and the SCREWDRIVER below the cuckoo clock.
- Unscrew the four corner screws of the chest on the left shelf with the SCREWDRIVER from below the clock and take the ROSE and the HAMMER.
- Put the ROSE and the two LEAVES into the empty sockets of the cuckoo clock. The bird pops out with the code 3054.CODE3054
- Put the DIAL on the wall safe and turn it to 3, 0, 5, 4. Take the KEY, open the workbench drawer with it and take the HINGE and the NAILS.CODE3054
- Repair the broken ladder with the HINGE, the NAILS and the HAMMER and take the LADDER.
Lantern, Bird Feeder and Statue
The ladder reaches the lantern on the front path.
- Put the LADDER against the lantern post on the right of the front yard, open the lantern and take the stone LEGS and the DETAIL. The LEGS belong to a statuette you will find much later; keep them.
- At the backyard workbench, put the DETAIL on the chest under the bench. Take the PLUNGER and the GARDEN SHEARS, then tap the roof board to fit it onto the bird feeder frame you assembled and take the BIRD FEEDER.
- In the front yard, cut the ivy on the post behind the statue with the GARDEN SHEARS (three cuts) and take the FLOWER. Put the FLOWER in the recess of the statue pedestal and take NUMBERS (4/4).
- Put all four NUMBERS into the back-door lock to start the light-beam puzzle.
Back Door Light Beam
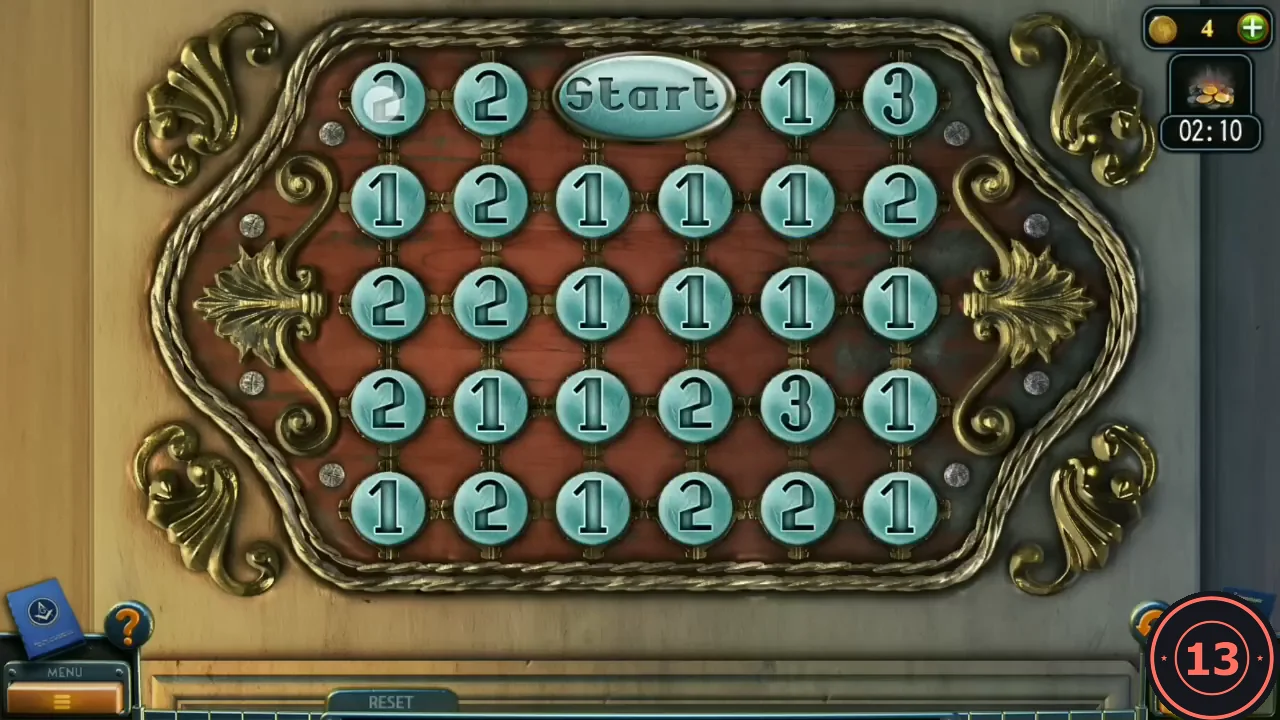
In-game rule: select buttons to move the light beam a specified number of moves until all cells are covered. The board has five rows of six number buttons; the top row holds the START between columns 2 and 5. Rows are counted from the top (row 1 = START row), columns from the left. The beam lights every cell it passes over.
- Send the beam from the START left to row 1, column 1, then down column 1 to row 5, then right along the bottom row to row 5, column 6.
- Go up to row 4, column 6, left along row 4 to column 2, then up column 2 to row 2.
- Zigzag through the remaining cells: row 2 column 3, row 3 column 3, row 3 column 4, row 2 column 4, row 2 column 5, row 3 column 5, row 3 column 6, row 2 column 6, row 1 column 6 and finally row 1 column 5.
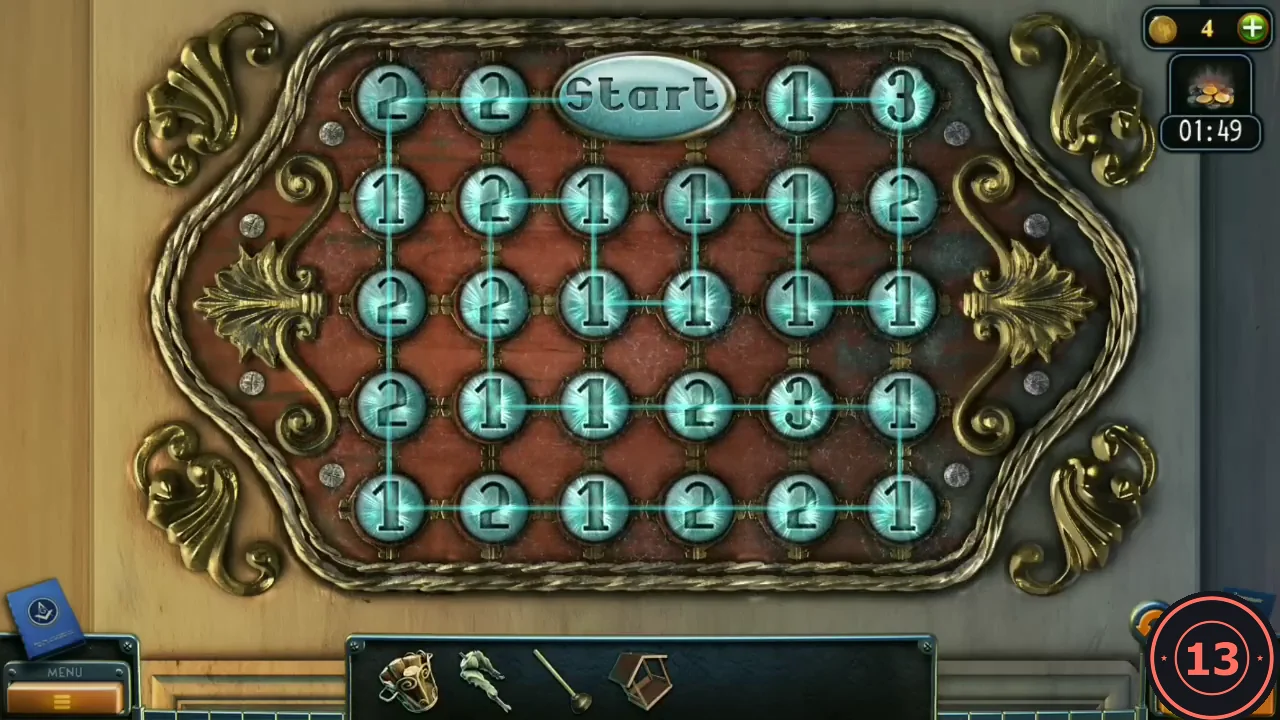
Solved: the beam has passed over every button. - The back door opens. Go into the living room; Grandpa is cold: kindle the fireplace and make hot tea.
Living Room and Kitchen
The bedroom light is out because of the fuse, and Grandpa cannot remember where the spare is.
- Take the PATTERN hanging on the light-switch cord at the bedroom doorway. Take the MATCHES from the pocket of the blue coat on the coat rack.
- In the kitchen, unblock the bathtub with the PLUNGER and take DETAIL (1/3).
- Take the MEAT from the right side of the stove. Light the gas burner with the MATCHES and take the KETTLE WITH BOILING WATER.
- Put the KETTLE on the trivet of the tea table and take the CUP OF TEA. Give it to Grandpa by putting it on the round table next to his armchair.
Owl, Gramophone and Fuses
The owl in the front-yard tree is guarding a record.
- Hang the BIRD FEEDER on the tree in the front yard and put the MEAT in it. When the owl flies over, take the VINYL RECORD from the tree hollow.
- Put the VINYL RECORD on the gramophone in the living room. Put the PATTERN in the slot that appears on its side, then take the stone HEAD and the PAPERCLIP from the small drawer. Keep the HEAD for the statuette later.
- Pick the drawer lock of the dresser near the gramophone with the PAPERCLIP and take the FUSE SET.
- Replace the fuses in the backyard fuse box with the FUSE SET. The bedroom light works now.
Bedroom Fireplace
The fireplace works and only needs wood.
- Take the PALETTE from the fireplace. Put the FIREWOOD BASKET in the fireplace and light it with the MATCHES.
- Take the red BOOK from the bed.
- Zoom into the wooden mannequin on the nightstand right of the bed to start the pose puzzle. No item is needed (the stone LEGS stay in your inventory).
Mannequin Pose
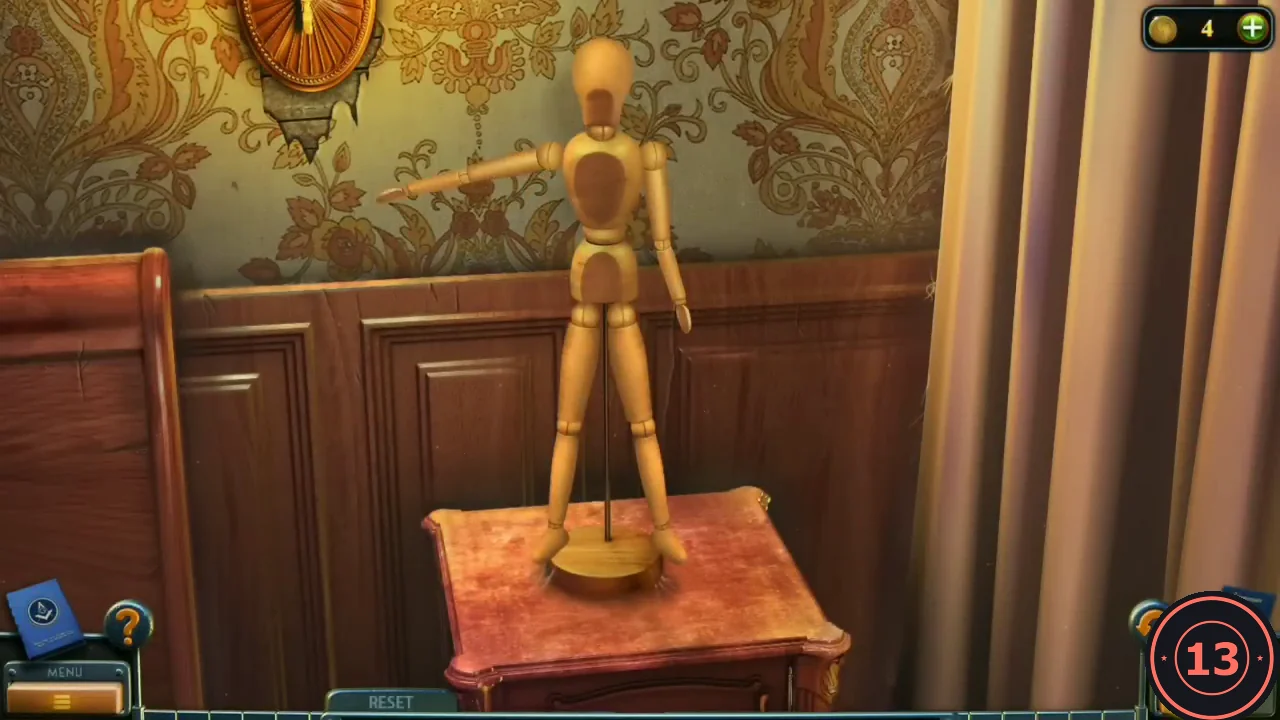
Pose the mannequin like the ballerina in the painting above the fireplace. Tap a limb to change its position; RESET restores the start.
- Raise both arms straight up above the head.
- Leave one leg standing and bend the other (the leg on your right) so its foot rests against the standing knee, as in the painting.
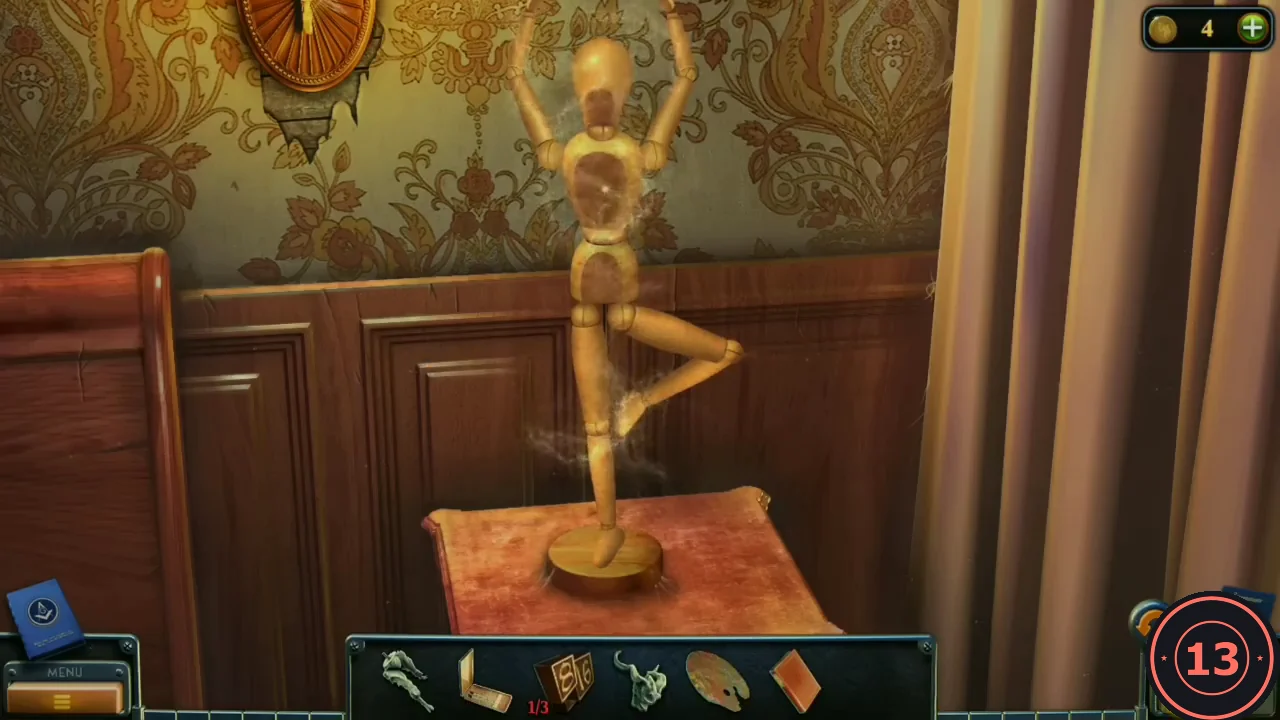
The correct pose: both arms up, one leg bent with the foot against the standing knee. - The nightstand door opens: take DETAIL (2/3). Grandpa then tells you the picture to finish hangs in the basement and the basement key is hidden in the clock; you receive DETAIL (3/3).
Grandfather Clock Numbers
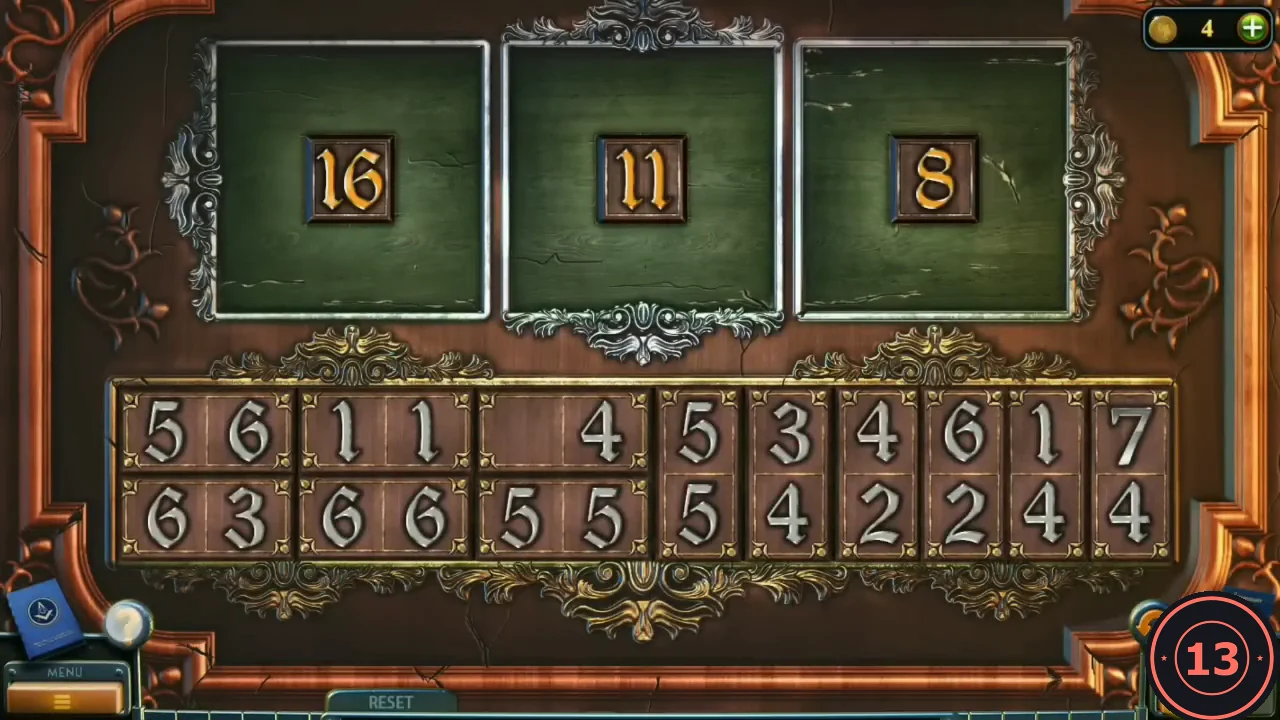
In-game rule: arrange the pieces so that the sum of the numbers in the rows and the columns would be equal to the number in the centre of each box. The clock has three 3 x 3 boxes with the centre numbers 16, 11 and 8; the pieces are two-number tiles.
- Put the three DETAILS on the grandfather clock in the living room to open the puzzle.
- Box 16, row by row: 5 6 5 / 7 [16] 5 / 4 6 6.CODE5 6 5 / 7 16 5 / 4 6 6
- Box 11, row by row: 1 5 5 / 4 [11] 4 / 6 3 2.CODE1 5 5 / 4 11 4 / 6 3 2
- Box 8, row by row: 6 1 1 / 2 [8] 3 / blank 4 4 (the empty half of the blank tile goes in the bottom-left corner).CODE6 1 1 / 2 8 3 / _ 4 4
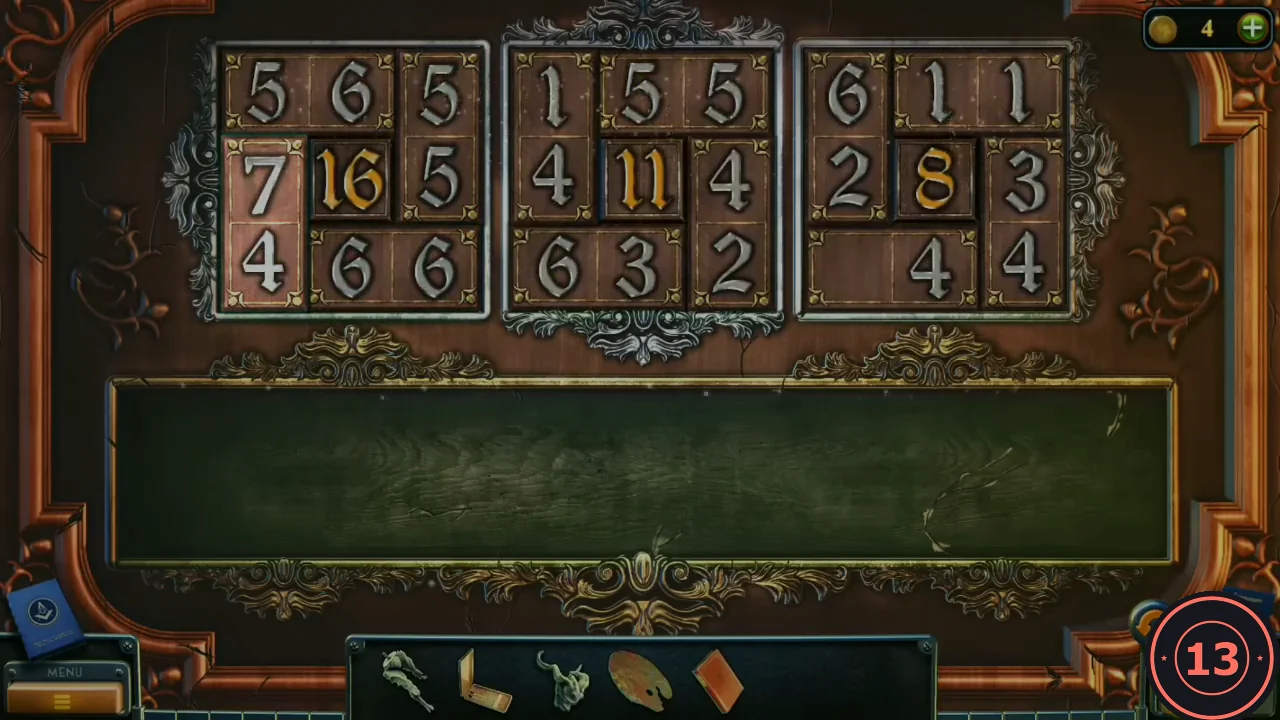
All three boxes filled. Each row and column adds up to the number in its centre. - Take the KEY from the clock compartment.
Basement and Antler
The painting Grandpa wants finished stands in the basement, next to an empty paint box.
- Put the BOOK into the gap of the left bookcase in the living room and take the BRUSHES.
- Unlock the right-hand kitchen door with the KEY and go down to the basement. Take the OIL from the paint box on the chair; the box needs a palette, brushes and paints.
- Free the rusty oven handle in the kitchen with the OIL, open the oven and take the ANTLER.
- Put the ANTLER on the deer plaque on the bedroom wall by the fireplace and take the KEY.
- Open the basement wardrobe with the KEY to start the paint-jar search.
Wardrobe Paint Jars
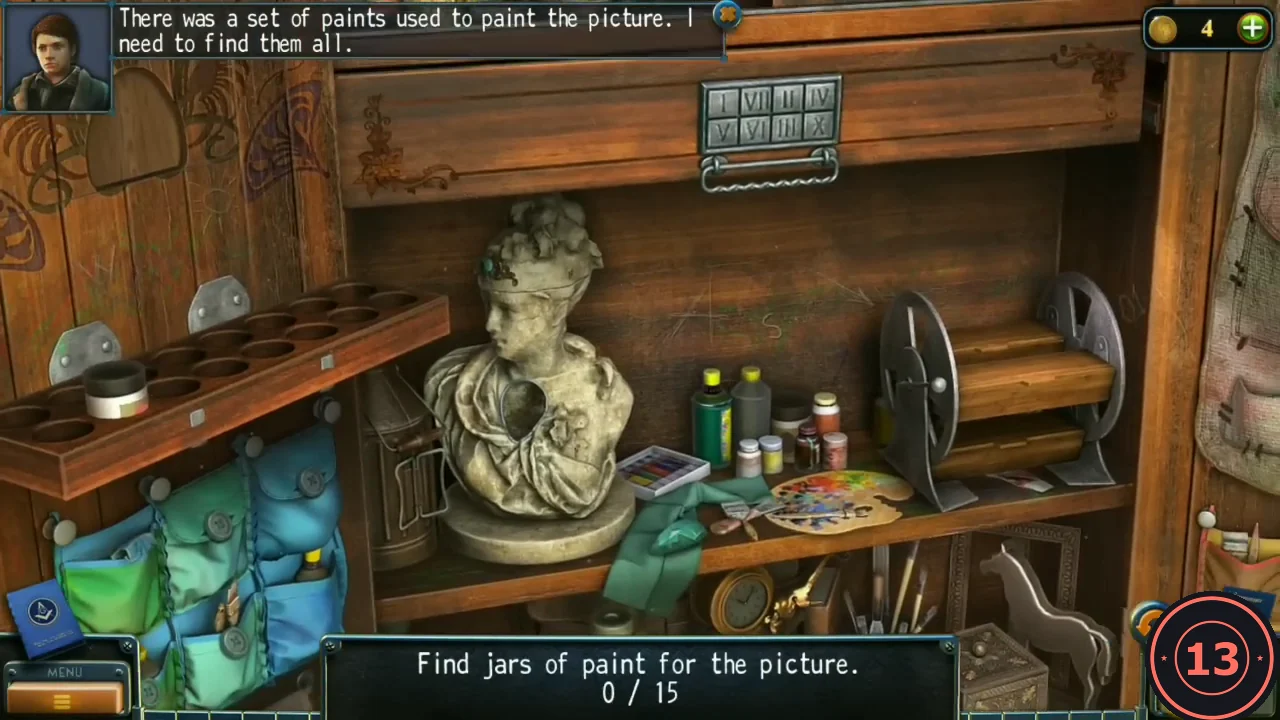
In-game task: find jars of paint for the picture (0/15). The wardrobe scrolls sideways; found jars go into the wooden rack on the left. Some jars are behind flaps, inside containers or in a locked drawer.
- Jar 1 is in the right pocket of the blue hanging organiser on the left. Jar 2 is the brown jar among the paint bottles to the right of the bust. Fold down the flap of the canvas bag on the right: jar 3 is in the red pocket behind it and jar 4 in the orange pouch below.
- Take the green gem piece lying on the green cloth beside the bust and put it into the hole in the bust's chest. Tap the carved wooden oval on the left wall to uncover a hidden niche: jar 5 is the cream jar with the blue label beside the green and purple bottles. Tap the second green gem piece in the niche; it completes the gem in the bust, the top of the bust's head lifts off and jar 6 is inside the head.
- Jars 7 to 9: zoom into the film-reel drum right of the shelf. Lift the pink rag for jar 7, turn the drum for jar 8 under the crumpled paper, and turn it again for jar 9 in the compartment below.
- Jars 10 to 13: on the top shelf in the upper middle shelf zoom, inside the yellow floral vase on the left, inside the leather satchel, and inside the skull on the right of the shelf zoom.
- The upper drawer has a lock of Roman-numeral tiles (I, VII, II, IV / V, VI, III, X). Press I, VII and X; the drawer opens.CODEI, VII, X
- Take jar 14 from among the paint tubes in the drawer, then open the blue tin with the palette knife for jar 15. You receive the PAINTS.
Finishing the Painting
With paints, palette and brushes the picture can be finished.
- Put the PAINTS, the PALETTE and the BRUSHES in the paint box on the basement chair. Noah finishes the painting.
- Talk to Grandpa in the living room. The bedroom lights went out again: check the fuse box in the backyard.
- After the cutscene the house is ransacked and Grandpa is gone. Follow the green slime to the basement; the painting glows and Noah falls into the painted world.