Outside the Gallery
Laura arrives outside the art gallery to look for Michael. Collection items and Morphing Objects are listed scene by scene in the Chapter 1 collectibles section at the end of the chapter.
- Use the KEY from your inventory on the keyhole of the car door to open the car.
- Look inside the car and take the HAIRPIN from the floor under the rusty seat.
- Open the phone booth door and take the MOSAIC PIECES (1/4) from the payphone.
- Zoom into the green electrical box, open its padlock with the HAIRPIN and take the MOSAIC PIECES (2/4). Tap the panel inside to start the circuit puzzle.
Electrical Box Circuit
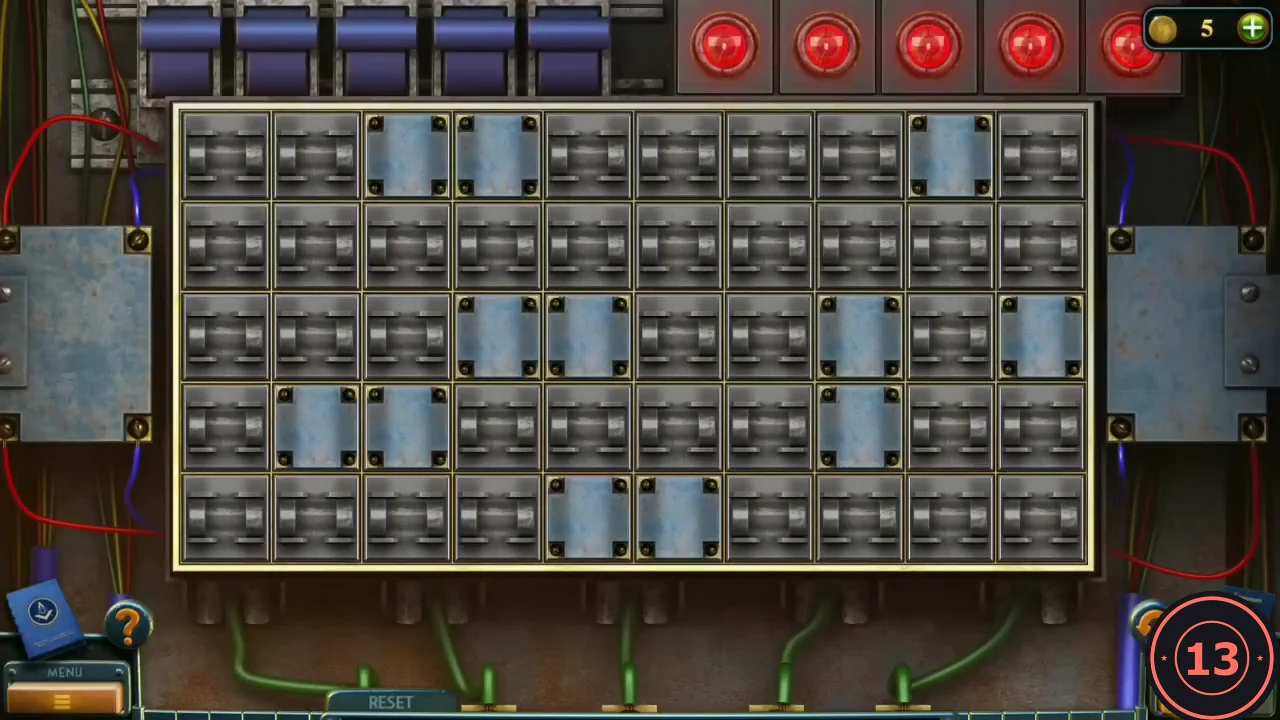
Light every open square of the 5 x 10 board with one continuous line. The twelve riveted plates are blocked and cannot be used. Tap a square to start, then extend the line one neighbouring square at a time (up, down, left or right). When all 38 open squares are lit, the row of red lamps above the board turns green. Rows are counted from the top, columns from the left.
- Blocked plates: row 1: columns 3, 4 and 9; row 3: columns 4, 5, 8 and 10; row 4: columns 2, 3 and 8; row 5: columns 5 and 6.
- Start on row 2, column 6. Go down to row 4, left to column 4, down to row 5, left along row 5 to column 1, up column 1 to row 1, then right to row 1, column 2.
- Continue down column 2 to row 3, right to row 3, column 3, up to row 2, right along row 2 to column 5, up to row 1, right along row 1 to column 8, down to row 2 and left to row 2, column 7.
- Finish down column 7 to row 5, right along row 5 to column 10, up to row 4, left to row 4, column 9, up column 9 to row 2, right to row 2, column 10 and up to row 1, column 10, the only open square beside the blocked top-right plate.
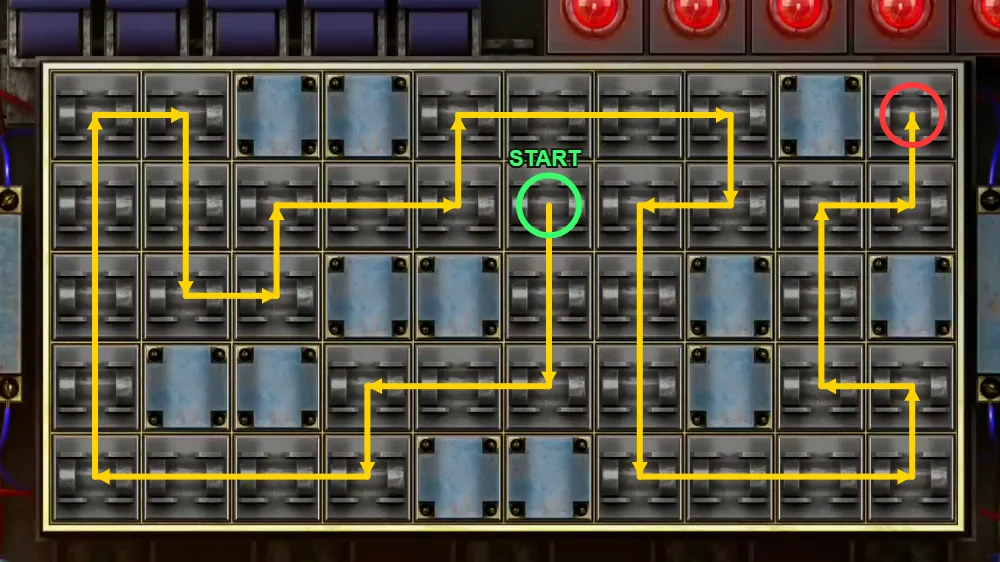
The complete line: start at the green circle (row 2, column 6), follow the arrows and finish at the red circle (row 1, column 10).
Gallery Hall
With the power restored, the gallery door is lit and you can go inside.
- Enter the gallery through the lit door. Take the FLASHLIGHT from the reception counter on the left.
- Zoom into the broken floorboards in the middle of the hall and take the FLOWER lying among them.
- Zoom into the damaged wall and take the MOSAIC PIECES (3/4).
- Go to the dark stair passage on the right, light it with the FLASHLIGHT, open the box and take the UTILITY KNIFE.
- Zoom into the red curtains, cut them with the UTILITY KNIFE and take the MOSAIC PIECES (4/4) from the broken window.
Mosaic Cabinet
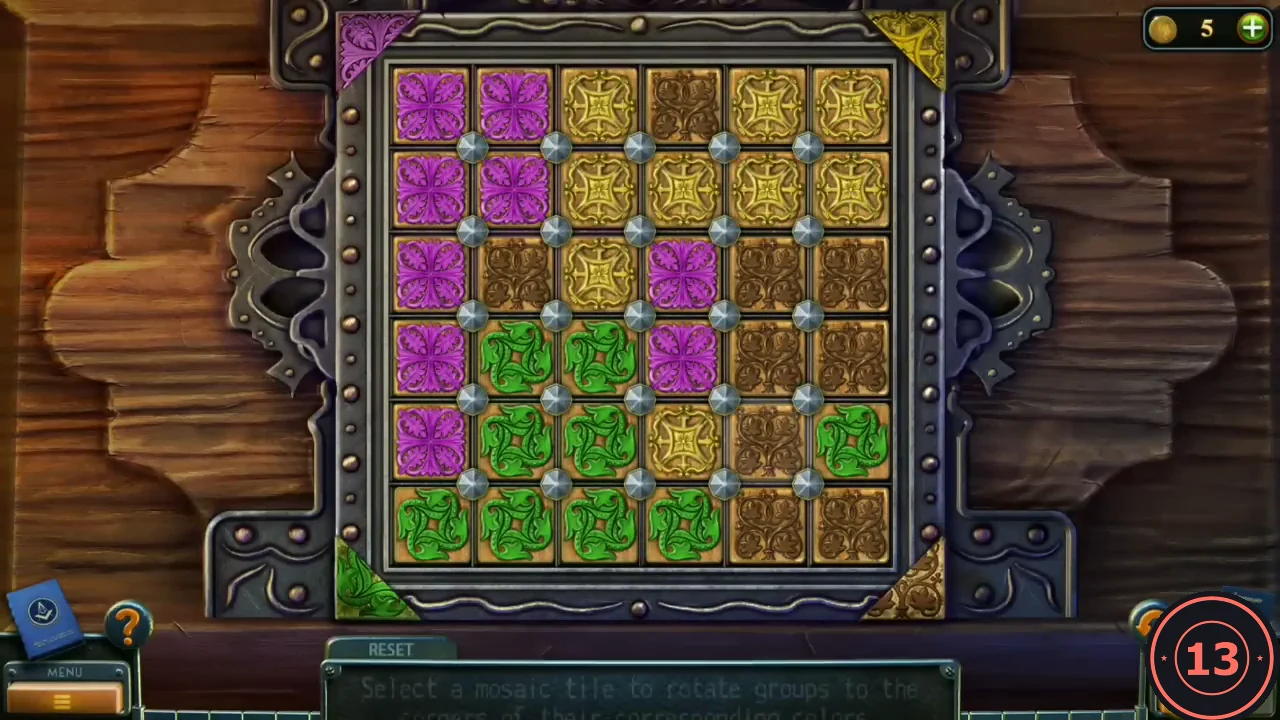
The cabinet left of the reception counter holds a 6 x 6 mosaic with four empty sockets. Tapping a tile turns the ring of eight tiles around it one step. Goal: purple tiles fill the top-left 3 x 3 quarter, yellow the top-right, green the bottom-left and brown the bottom-right. This is a long rearrangement, so no move list is given; RESET restores the start.
- Zoom into the cabinet and place the MOSAIC PIECES in the empty sockets.
- Build one quarter at a time. Rotate rings centred inside the unfinished area so finished tiles stay in place, and complete the last two quarters together, because a ring always touches several quarters.
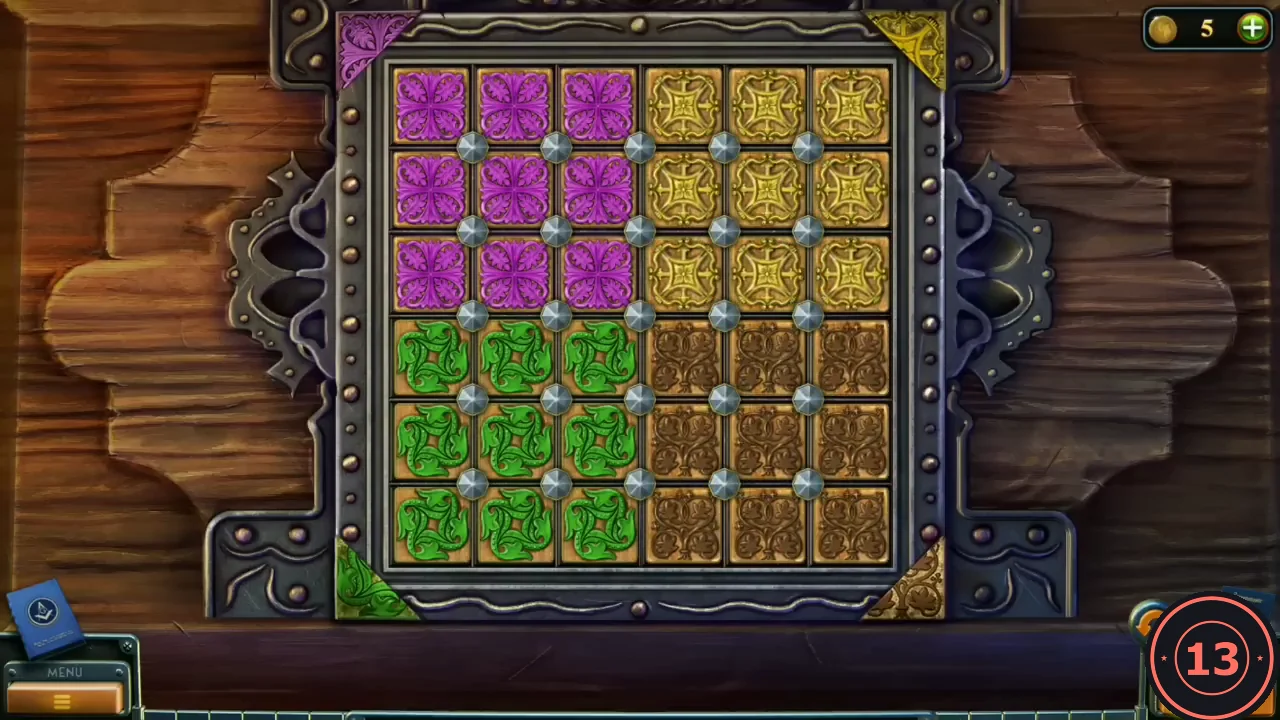
The target: each 3 x 3 quarter filled with one colour. - When the four colour quarters are complete, the drawer opens. Take the KEY.
Security Room
The carved wooden door in the gallery hall leads to the security room.
- Use the KEY on the carved door to enter the security room. Take the LADDER.
- Zoom into the door panel and pry off the wooden board with the UTILITY KNIFE. Take the KEYCARD.
- Take the STAR from the blue jacket and the FIRE EXTINGUISHER. The cabinet with two star-shaped slots stays locked for now.
- Open the power box with the yellow warning sign and press the switch.
Michael's Workshop
The red side door on the street has a card reader.
- Return to the street and use the KEYCARD on the reader of the red side door. Enter the workshop and talk to Michael.
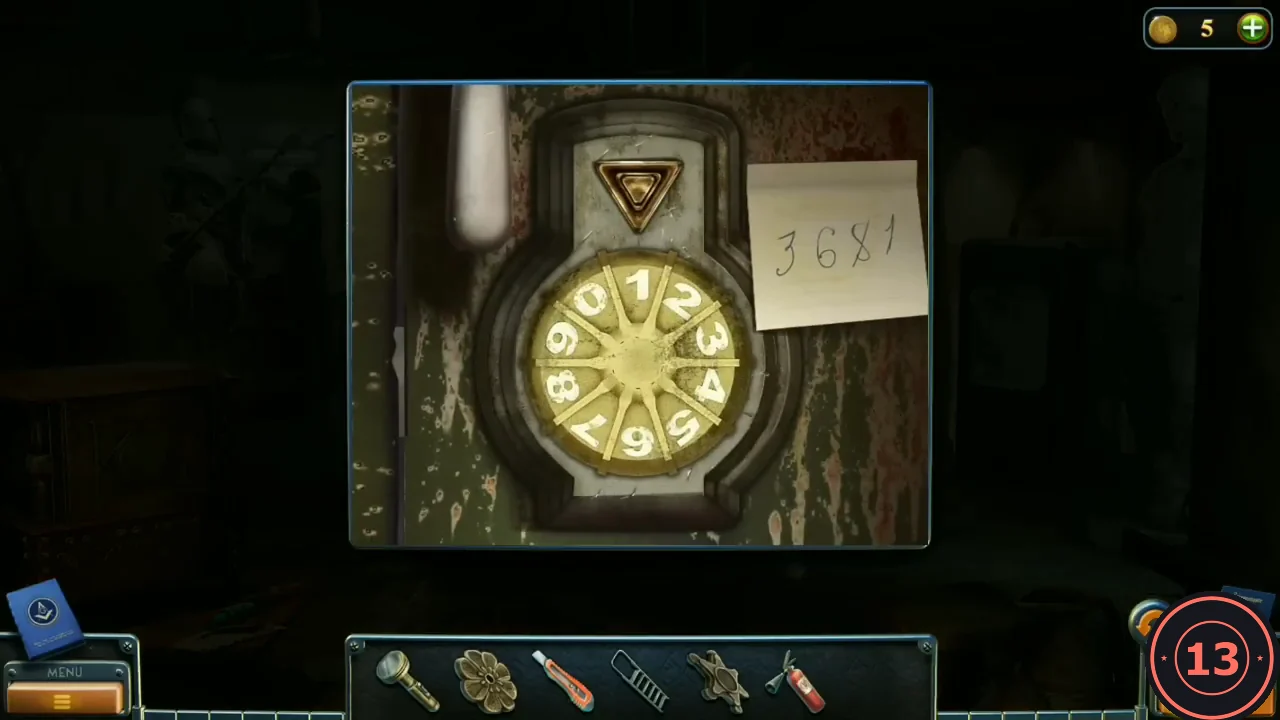
- Zoom into the desk and read the note with the code 3681.
- Open the locker's dial lock by entering 3, 6, 8, 1. Take the WRENCH, the STAR and PETAL (1/3).CODE3681
- Take the CART. The fridge cannot be opened without a handle.
Star Cabinet and the Painting
Two stars open the cabinet in the security room.
- In the security room, place both STARS in the cabinet. Take the PICTURE and the METAL FLOWER.
- In the gallery hall, use the CART on the large painting and take the PAINTING.
- Go to the end of the dark stair passage and place the PICTURE on the cabinet panel to start the gem puzzle.
Gem Cabinet
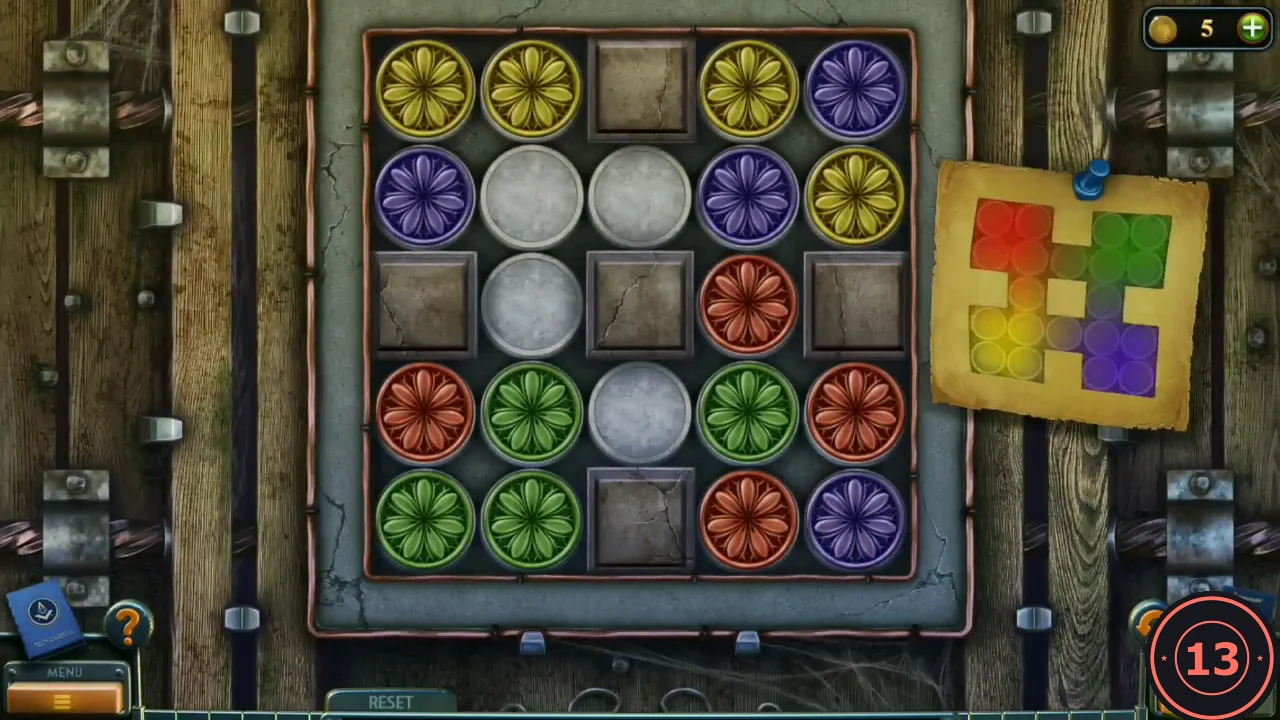
The 5 x 5 board holds red, green, yellow and purple gems, a few empty white sockets and fixed grey square plates. Move gems into empty white sockets until the colours match the PICTURE pinned beside the board: red gems in the top-left area, green in the top-right, yellow in the bottom-left and purple in the bottom-right. This is a long rearrangement, so no move list is given; RESET restores the start.
- Tap a gem next to an empty socket to move it there. Fill one corner at a time, starting with red at the top left, and keep the empty sockets in the unfinished part of the board so finished gems stay in place.
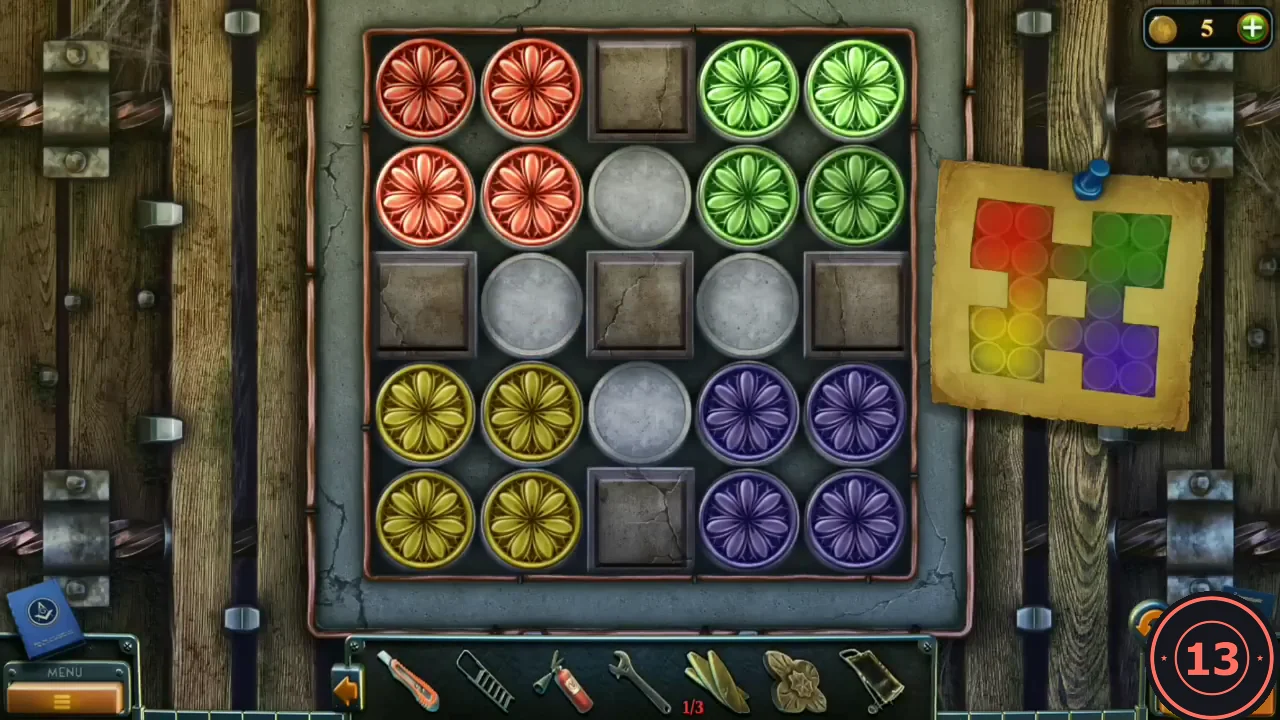
The finished board matches the pinned picture: red top left, green top right, yellow bottom left, purple bottom right. - When all four quarters match, the door at the end of the passage opens to the boiler room.
Boiler Room
A cramped basement room behind the gem cabinet.
- Open the green toolbox with the WRENCH. Take the INSULATING TAPE and the LUBRICANT AEROSOL.
- Open the floor hatch, place the LADDER and climb down to the cluttered desk with light bulbs.
Light Bulb Desk
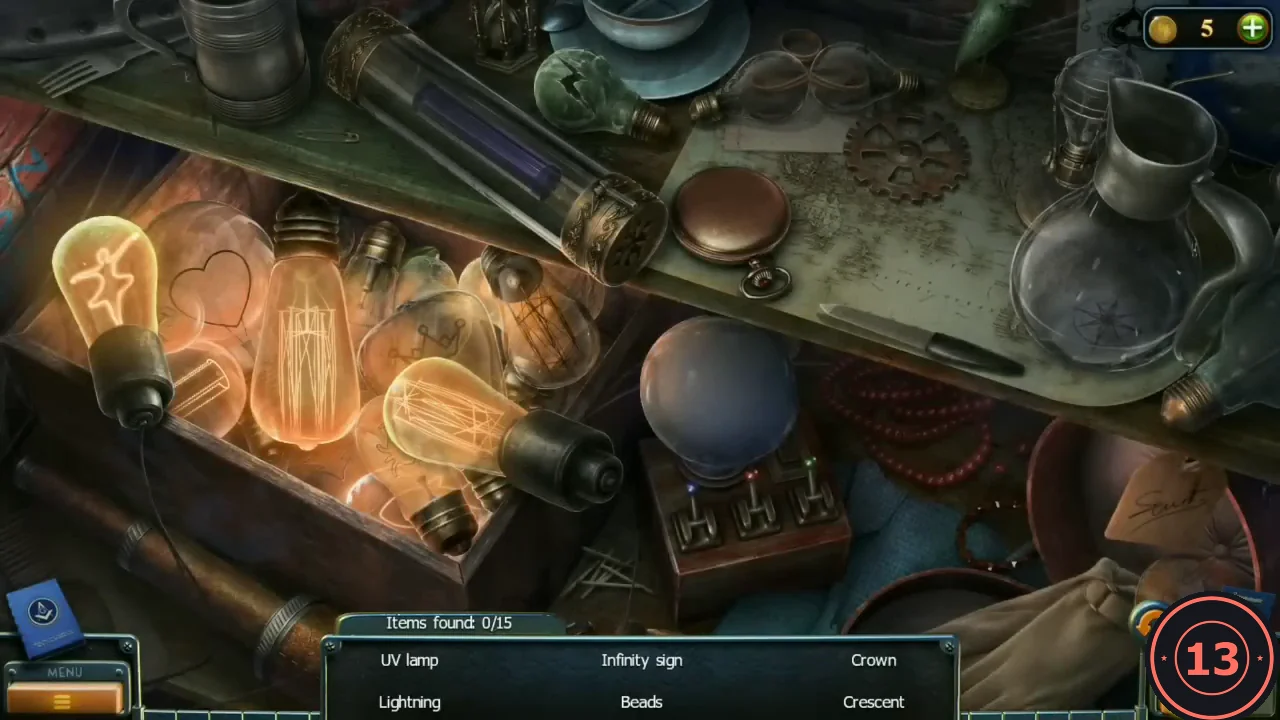
Find the 15 listed items (Items found x/15). Several are shapes that only appear when something lights up. Finding all items in under two minutes earns the Supersonic achievement.
- Tap the light bulbs in the box on the left to light them. Their glowing filaments form listed shapes such as the Heart and the Lightning; tap each shape when it appears.
- Flip the three switches under the glass plasma ball. Each switch changes the ball's colour and shows a different symbol inside it, such as the Crescent in blue; tap the symbol each time.
- Find the remaining ordinary objects, for example the Gear on the map and the Signature on the paper tag at the lower right. After the last item you receive the UV LAMP.
Checking the Painting
Michael needs the painting, a developer and the UV lamp.
- Back in the boiler room, search the boxes in the bathtub and take the HANDLE. The valve is blocked with wire for now.
- In the security room, wrap the bare wires in the power box with the INSULATING TAPE.
- In the workshop, attach the HANDLE to the fridge, open it and take the DEVELOPER.
- On Michael's desk, place the PAINTING, apply the DEVELOPER, switch on the UV LAMP and examine the signature with the magnifier. Take PETAL (2/3).
Car, Valve and Third Petal
Use the lubricant on the rusty car seat and free the blocked valve.
- At the car, spray the LUBRICANT AEROSOL on the rusty seat hinge so the seat folds. Take the PURSE and the GLOVE BOX HANDLE from under the seat.
- Attach the GLOVE BOX HANDLE to the glove box, open it and take the WIRE CUTTERS. Open the PURSE in your inventory and take BISHOP'S BUSINESS CARD from the notebook.
- In the boiler room, cut the wire on the valve with the WIRE CUTTERS, spray the FIRE EXTINGUISHER on the valve and turn it.
- Zoom into the honeycomb cabinet on the back wall and place both flowers you have: the FLOWER from the gallery floor and the METAL FLOWER from the star cabinet. The cabinet has three flower spots, so it stays closed for now.
- Zoom into the honeycomb cabinet again and tap its upper-right corner, at the right edge just below the honeycomb grille, to take PETAL (3/3).
Flower Box Triangles
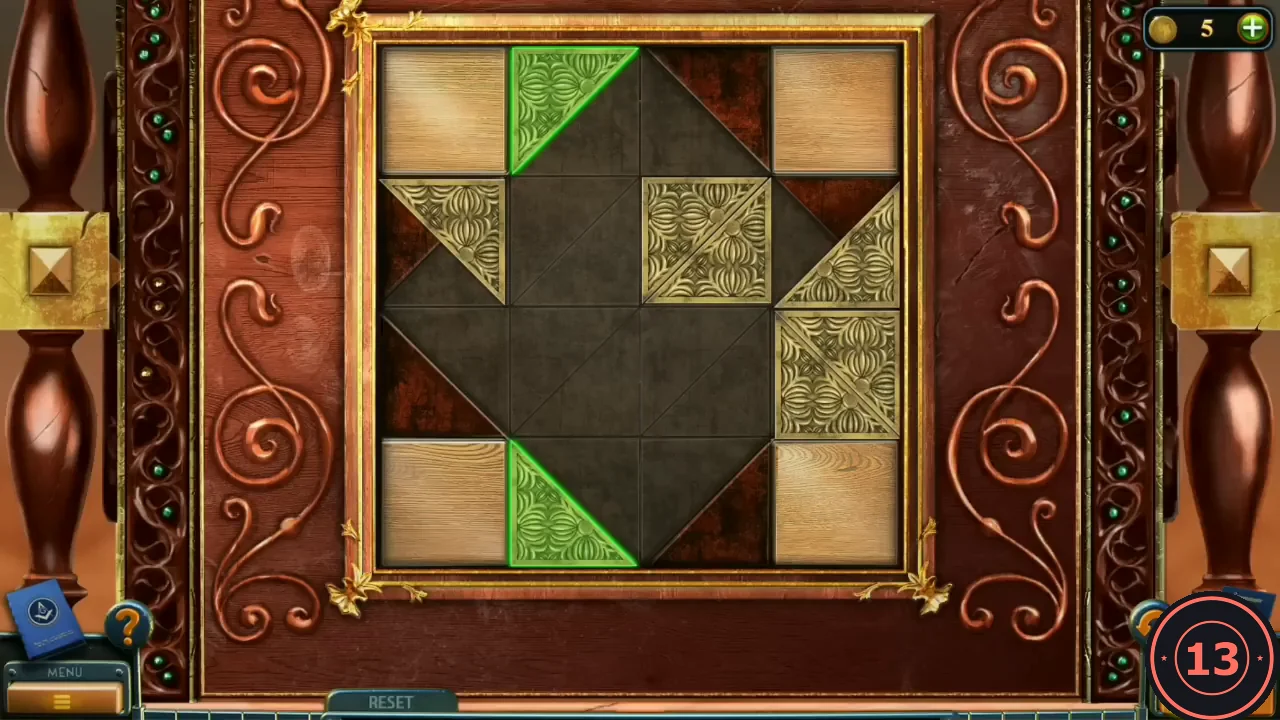
In-game rule: move the triangles to the places that match their shape; a triangle turns green when it is placed correctly. Each placement is checked on its own, so you can solve it by trial.
- In the dark stair passage, place the three PETALS on the box with the flower emblem.
- Drag each triangle onto an outline with the same shape. When every triangle is green, the box opens. Take the SPOOL (film reel).