The lab: the microscope flowers
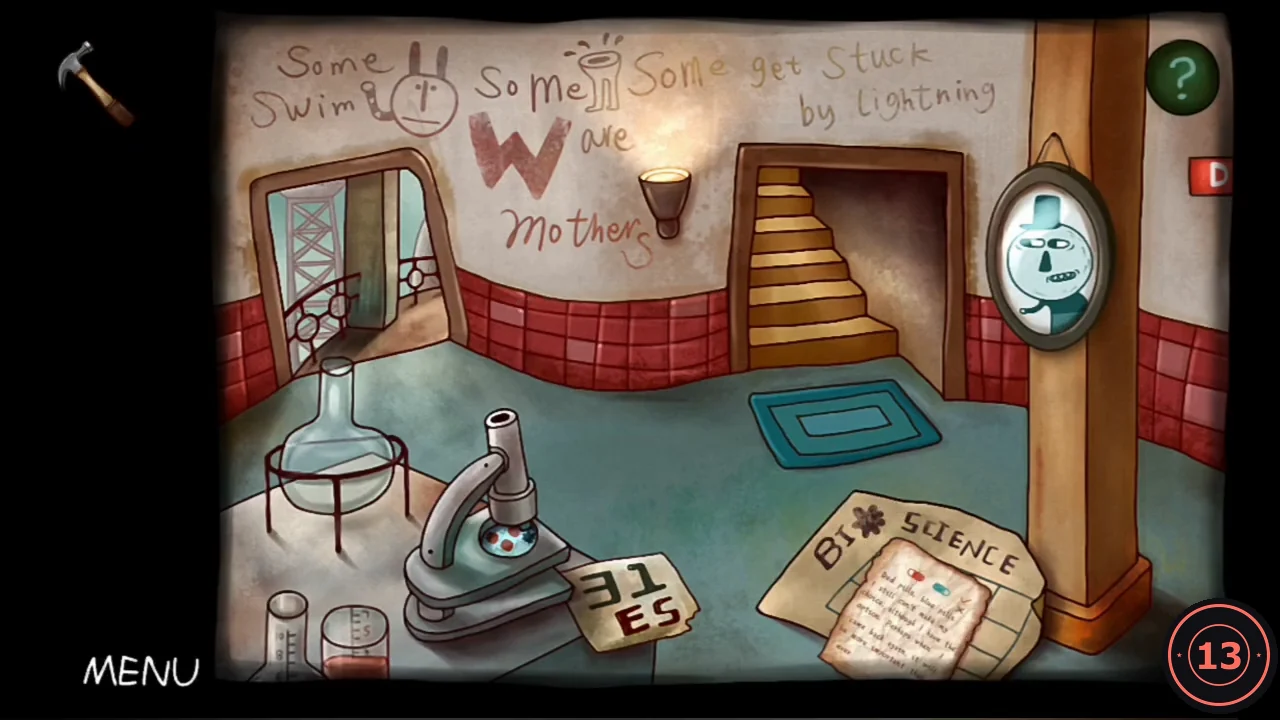
The rooms run from left to right: the lab, the FATE room, the SOME ARE ARTISTS robot room and the chalkboard room with door 31. The microscope in the lab opens a grid of 5 columns × 3 rows of flowers. Each arrow around the edge pushes its row or column one cell in the arrow's direction. Flowers slide only where there is space ahead; a touching group moves together and stops at the edge. R resets the grid.
- In the lab, take the hammer at the bottom right. Diary piece 1 of 4 is the note lying on the BI SCIENCE paper on the floor. The paper underneath shows the target flower pattern.
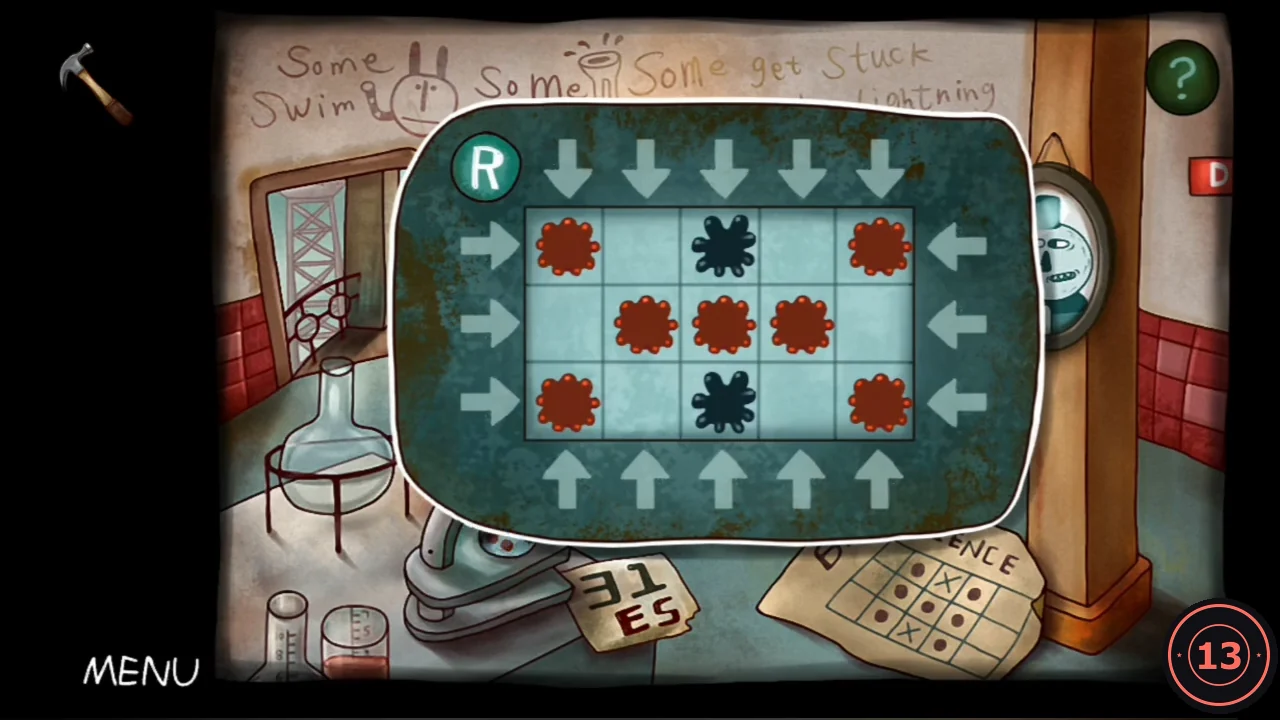
The microscope at the start shown in the guide. - Open the microscope. The target, with R for a red flower, D for a dark flower and . for empty, is: row 1 . R D R . / row 2 . R R R . / row 3 . R D R . From the start the game gave (row 1 R . D . R / row 2 . R R R . / row 3 R . D . R), nine pushes do it: up column 4; down column 2; right row 1; left row 3; up column 1; down column 5; left row 2; left row 2 again; right row 2.
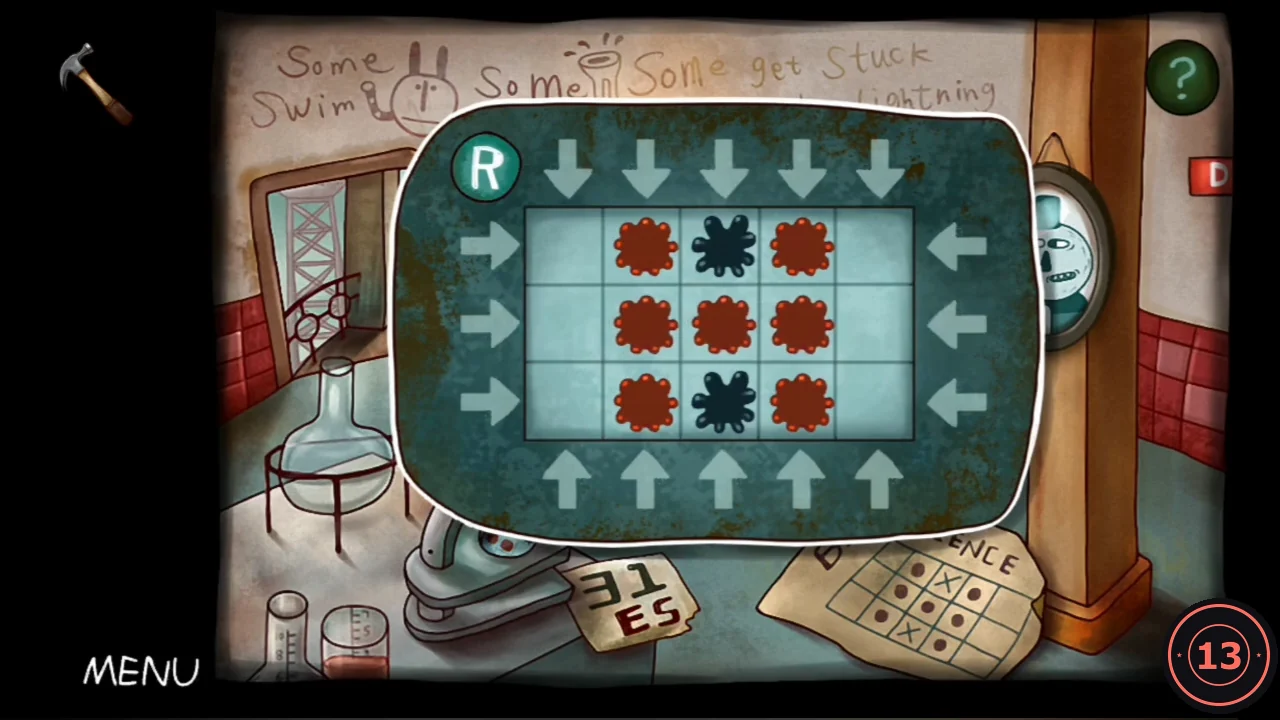
The finished pattern, matching the BI SCIENCE paper.
The lab: the chalkboard dials
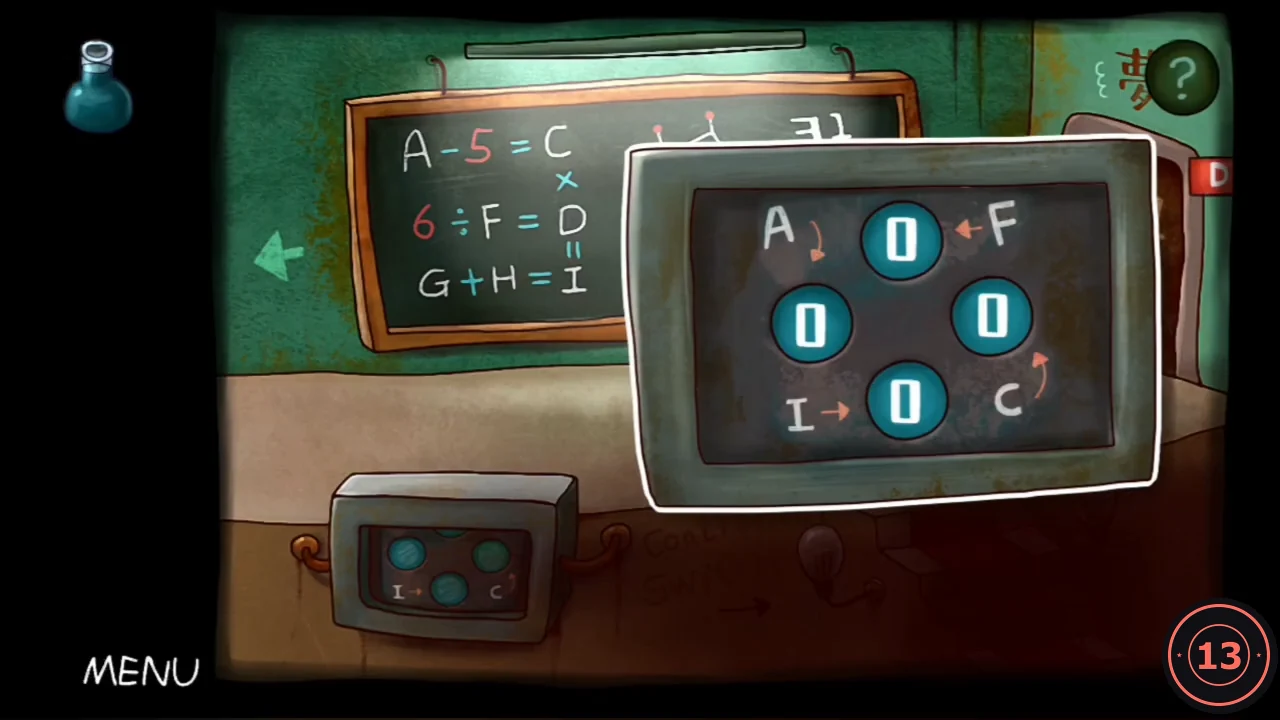
The chalkboard reads A − 5 = C, 6 ÷ F = D and G + H = I, linked so that C × D = I. The device at the bottom left has four dials labelled with letters: A on the left dial, F on the top, C on the right and I on the bottom. The values that open it are A 9, F 3, C 4 and I 8: 9 − 5 = 4, 6 ÷ 3 = 2 and 4 × 2 = 8.
- In the FATE room, smash the wooden box with the hammer and take the blue flask. Diary piece 2 of 4 is the paper at the top right.
- In the chalkboard room, tap the dials to count them up. Set the left dial (A) to 9, the top dial (F) to 3, the right dial (C) to 4 and the bottom dial (I) to 8.CODE9 3 4 8
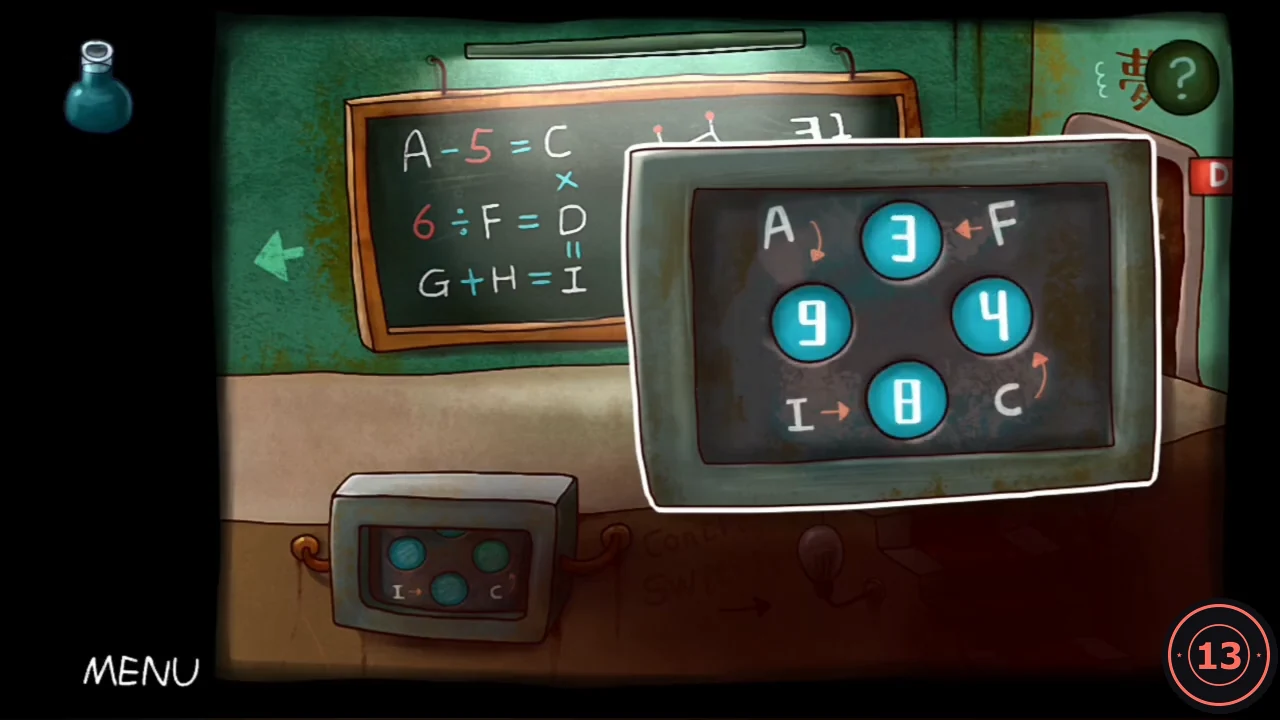
The dials set to A 9, F 3, C 4 and I 8.
The lab: door 31
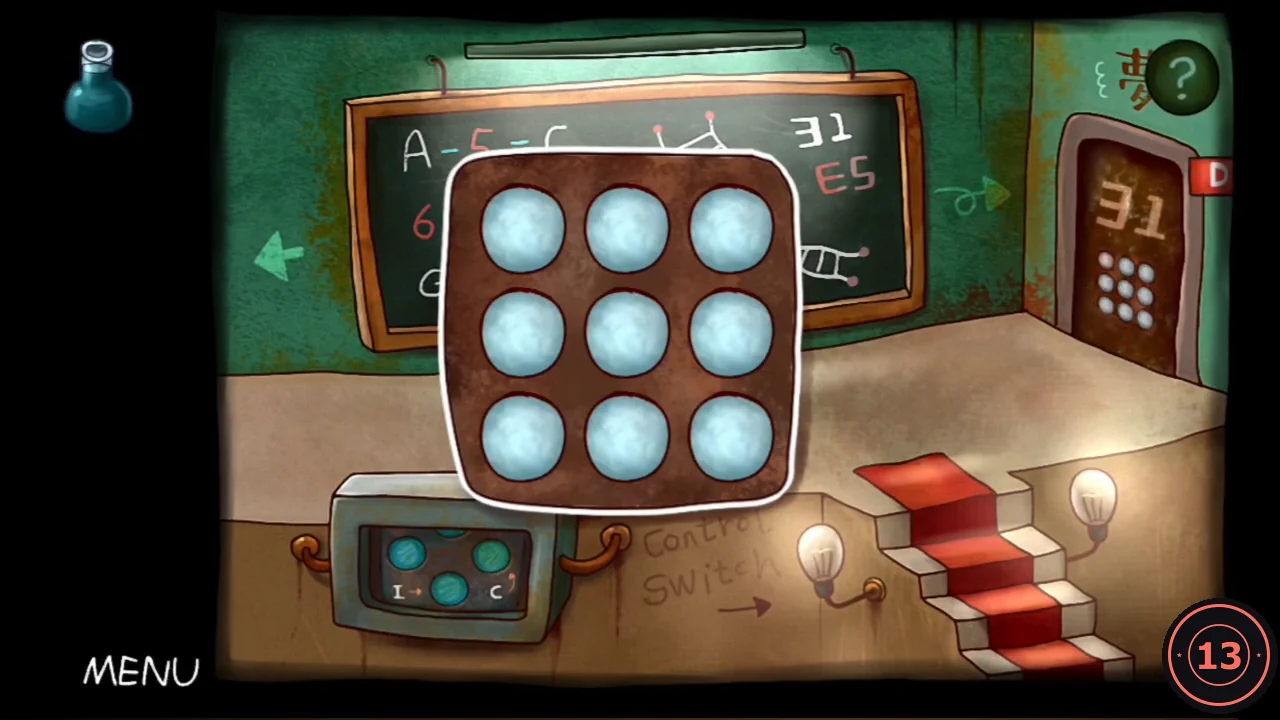
Solving the dials opens the red cabinet in the chalkboard room, revealing red stairs. The 3×3 light panel on door 31 copies the molecule from the microscope. Once the flower puzzle is solved, its seven flowers turn into a molecule of five red balls joined by bonds, so it no longer matches the flower pattern. Look in the microscope again: in its three middle columns, the balls sit at the left and right of the top row, the left and middle of the middle row, and the right of the bottom row. Each ball is one lit light on the door.
- Tap the lights to turn them red so the panel reads: top row on, off, on; middle row on, on, off; bottom row off, off, on.
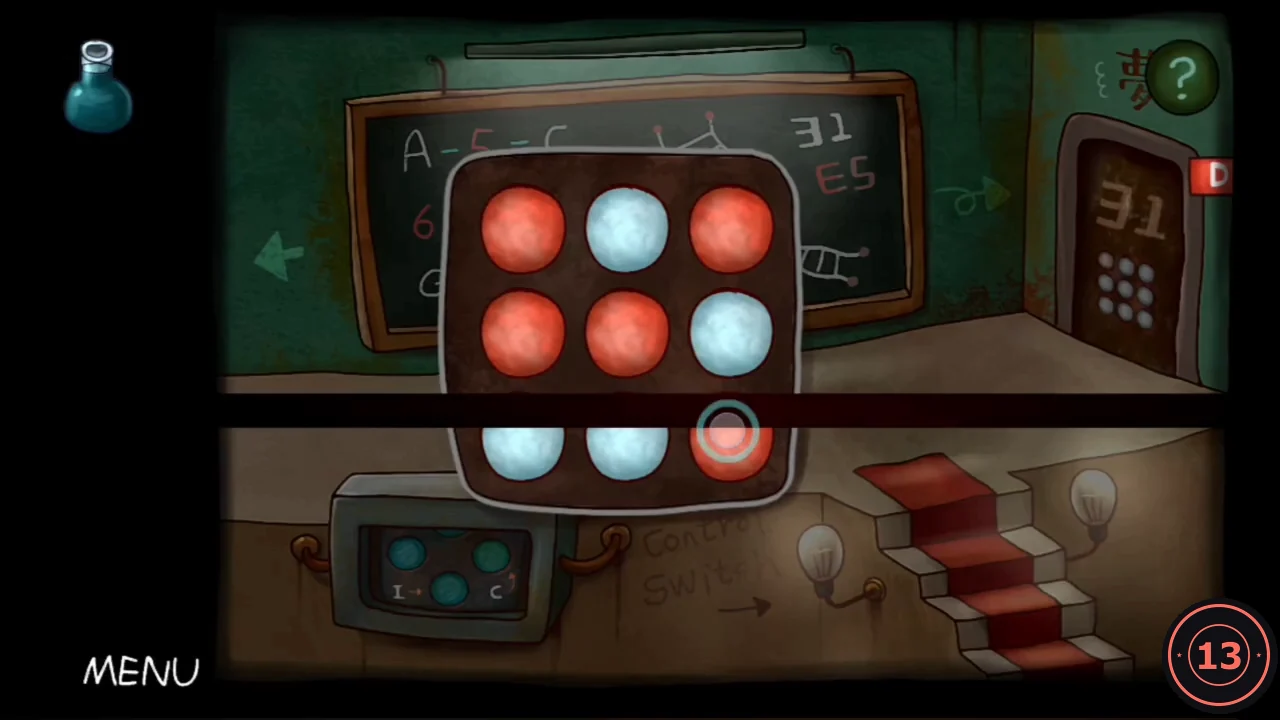
The solved panel: on-off-on, on-on-off, off-off-on. - In the red room behind door 31, take diary piece 3 of 4 at the top left. The board here reads V = ✱ + ⊙/10, and the watermelon jar's pedestal reads ÷ = △. Both are clues for later.
- Follow the orange arrow at the bottom right to the WELCOME room. Take the photo marked 40 pinned at the top left of the DREAMER board. The pink scientist is thinking about a flask.
- With the red cabinet open, continue from the chalkboard room to the bedroom where Mr. Pumpkin lies on the bed. Diary piece 4 of 4 is the paper at the top left.
The lab: the flask, the photo and the printing robot
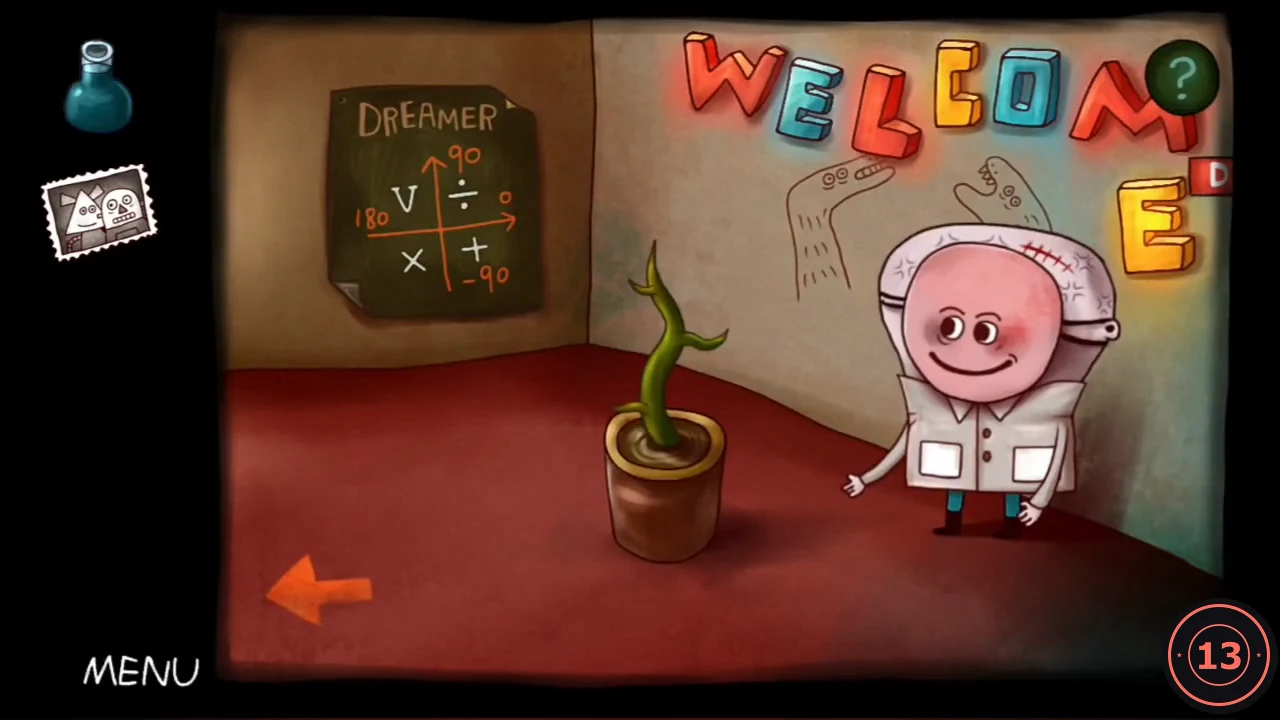
Three item hand-overs. The blue flask gets you the white flower and the 40 photo gets you a wind-up key; the key makes the cone-hat robot print the symbol count for the voltage formula.
- Give the blue flask to the scientist in the WELCOME room. Using it on the plant yourself does nothing. He waters the plant, which blooms; take the white flower.
- Give the 40 photo to the robot in the SOME ARE ARTISTS room. It draws, and a wind-up key drops; take it.
- Fit the wind-up key into the side of the cone-hat robot in the FATE room. It prints a paper strip of symbols. Count the symbols: there are four ✱ (stars) and five ⊙ (circles with a dot).
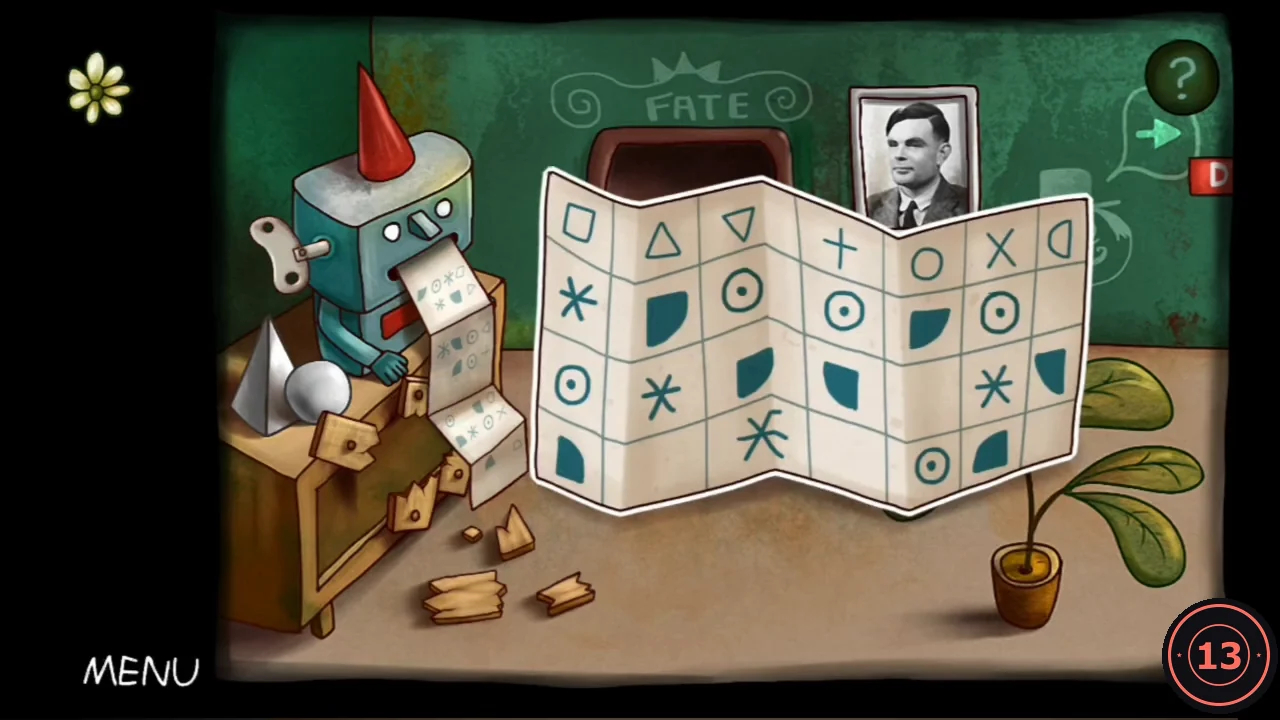
The robot's printout. Count four ✱ and five ⊙.
The lab: the voltage panel
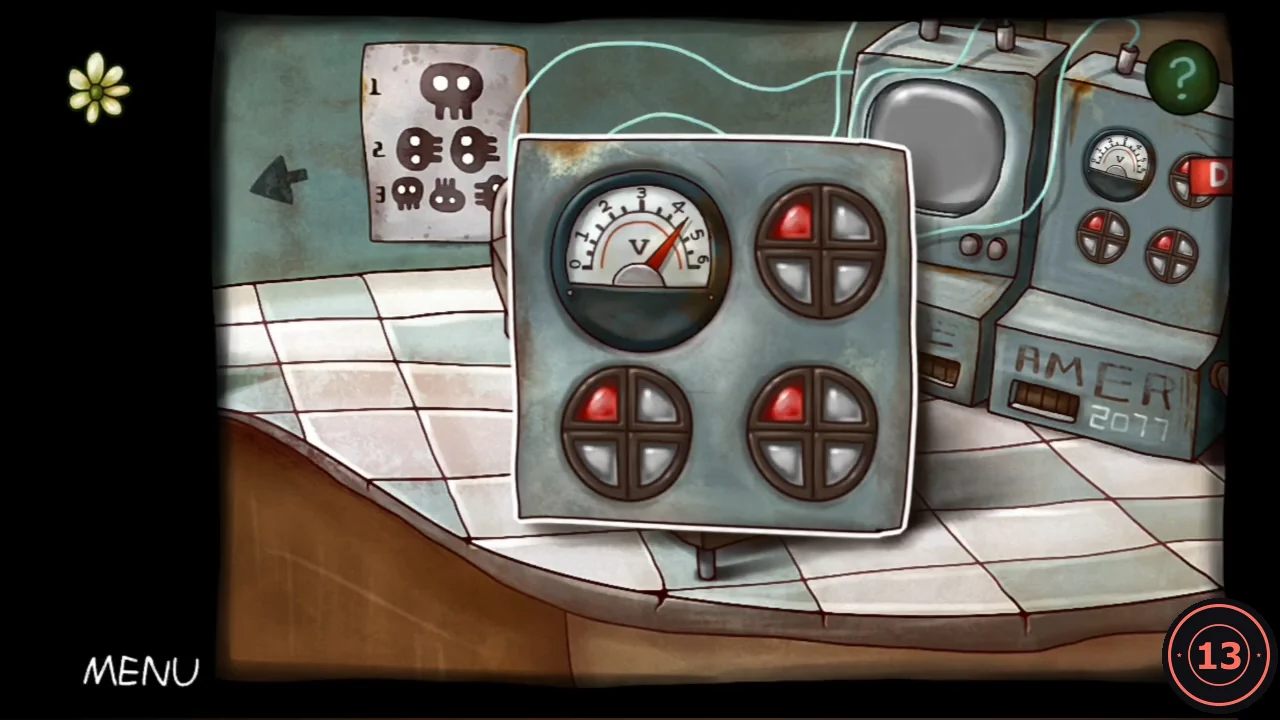
Use the red room formula V = ✱ + ⊙/10 with the printout counts: V = 4 + 5/10 = 4.5. The panel has a V gauge and three cross-shaped dials, each with one red quarter. Tapping a dial moves its red quarter one step clockwise. All three red quarters start at the top left.
- Go to the bedroom (chalkboard room, then the right door marked 夢) and tap the small panel on the stand in front of the bed. Drag the V gauge needle to 4.5.CODE4.5
- Tap the top-right dial twice so its red quarter is at the bottom right. Tap the bottom-right dial three times so its red quarter is at the bottom left. Leave the bottom-left dial with red at the top left.
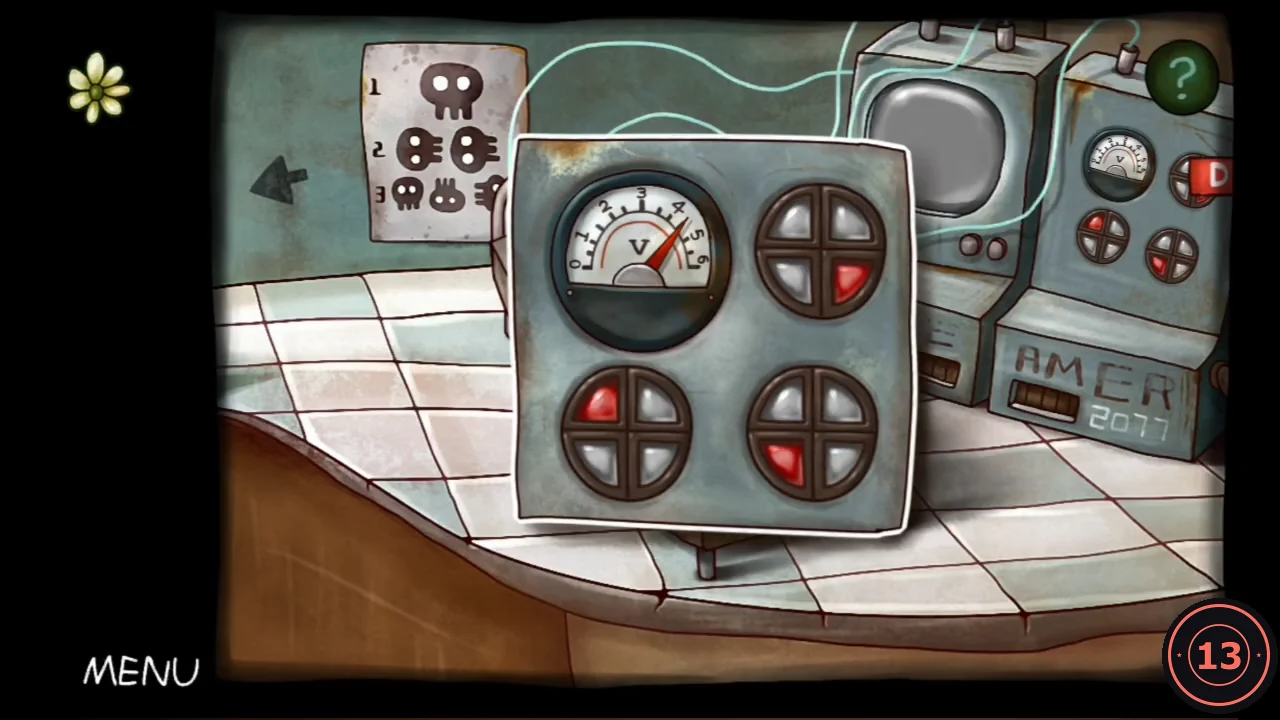
The solved setting: needle at 4.5 and the three red quarters as shown.
The lab: the blue pill (Ending B) and the red pill
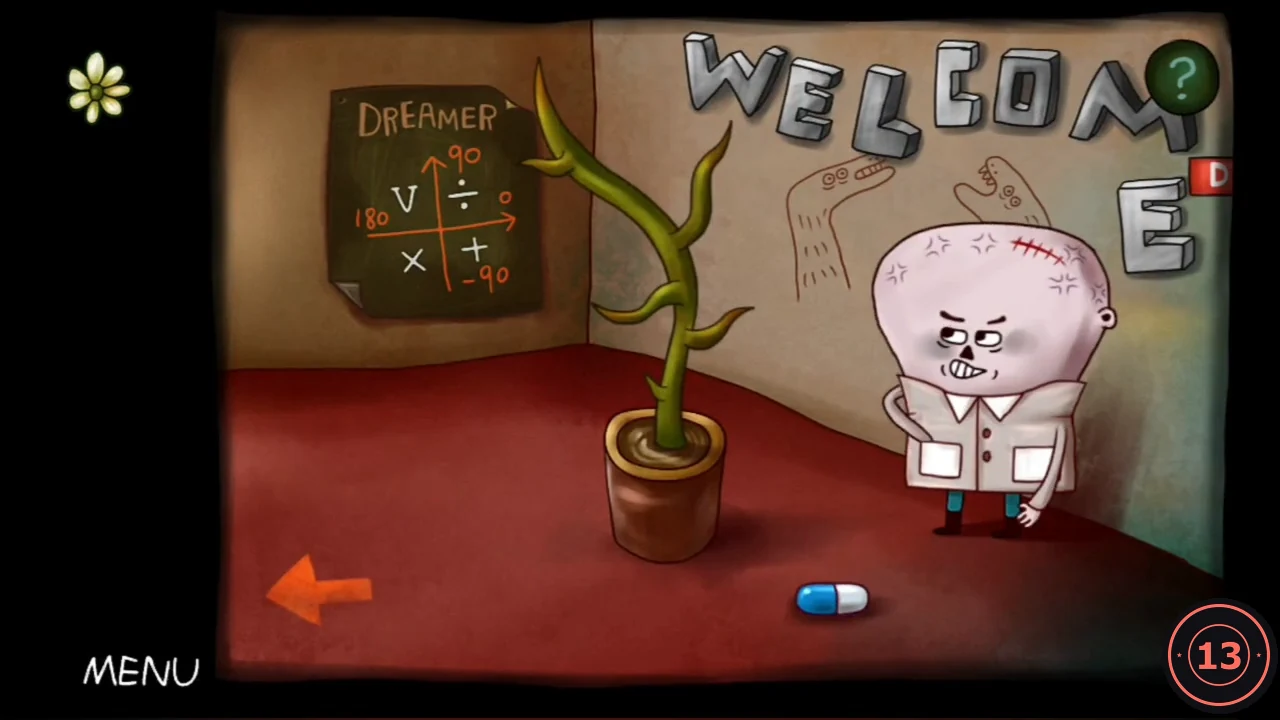
The scientist offers a blue pill and a red pill. The blue pill leads to Ending B (achievement Astronaut). The red pill leads on to Chapter 8 and Ending C. After Ending B the game returns you to the WELCOME room with the red pill still in your inventory, so take the blue pill first and then the red one.
- With the voltage panel solved, the DREAMER monitor shows cycling faces. Go back to the WELCOME room. The scientist drops a blue pill and then a red pill; take both.
- In the bedroom, drag the blue pill onto Mr. Pumpkin on the bed. A smiley bottle drops onto the floor; take it.
- In the WELCOME room, drag the bottle onto the potted plant. The scientist pours it in, and a huge vine grows through the building. A rocket launch follows, then Ending B and the START OR END? desk (achievement Astronaut). The game returns you to the WELCOME room.
- Walk to the bedroom and drag the red pill onto Mr. Pumpkin. The monitor turns to static and Chapter 8 begins.