The metro: the light machine in the dark room
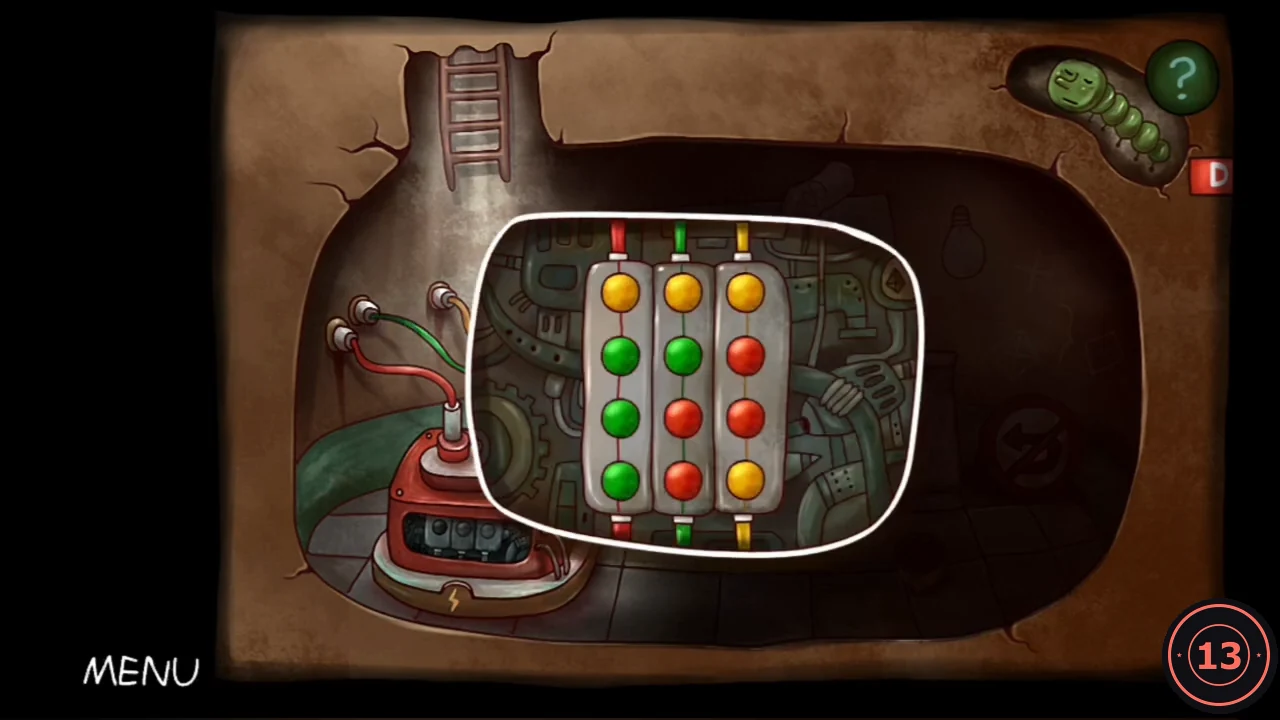
The chapter starts in a dark underground room with a red machine holding 12 lights in 3 columns and 4 rows. Tap the point where four lights meet to rotate those four lights one step clockwise. Each column must end up the colour of the wire above it: left column all red, middle all green and right all yellow. The guide does not establish whether the starting colours are always the same. If yours differ, work from the top row down. Use the top junctions to bring the right colours into row 1, then the lower junctions to fill each column. Avoid turning a finished upper square again.
- Reference start, rows top to bottom: yellow yellow yellow / green green red / green red red / green red yellow. From that start, tap these junctions in order: rows 1–2 cols 1–2; rows 1–2 cols 2–3; rows 1–2 cols 1–2; rows 2–3 cols 2–3; rows 1–2 cols 1–2; rows 3–4 cols 1–2; rows 3–4 cols 1–2 again.
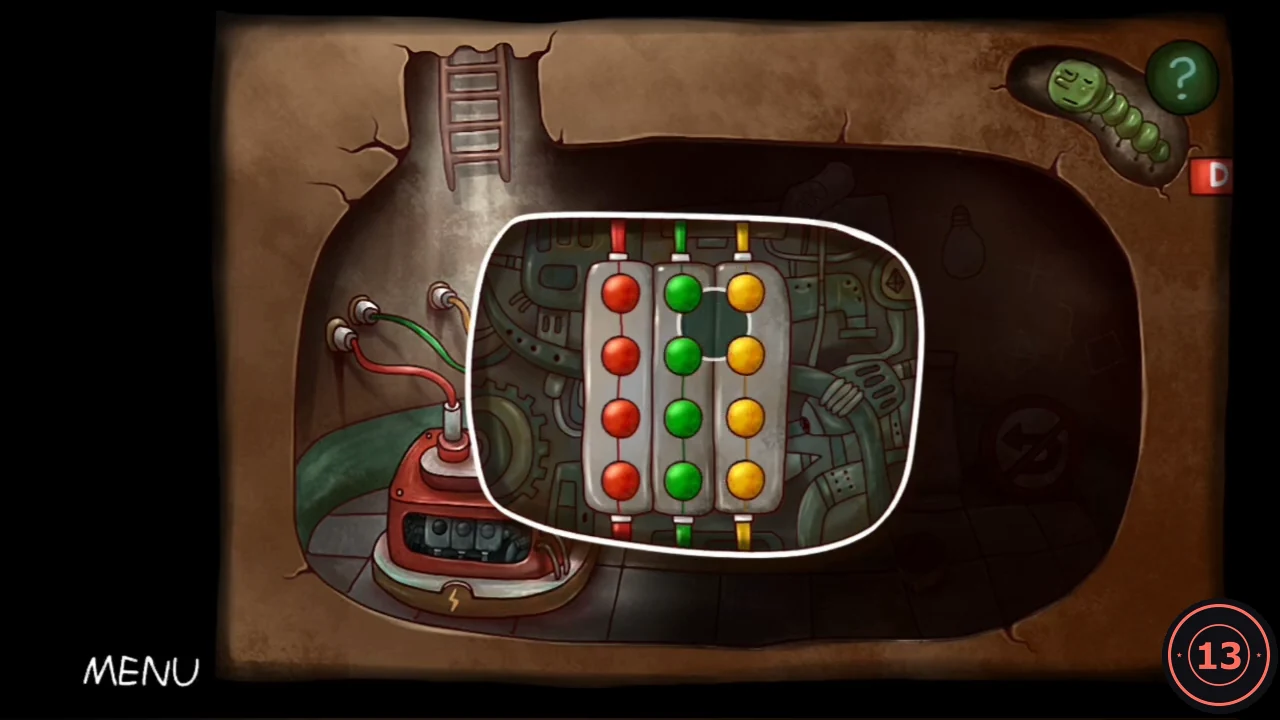
The solved machine: each column matches its wire.
The metro: the HERO statue and the octopus
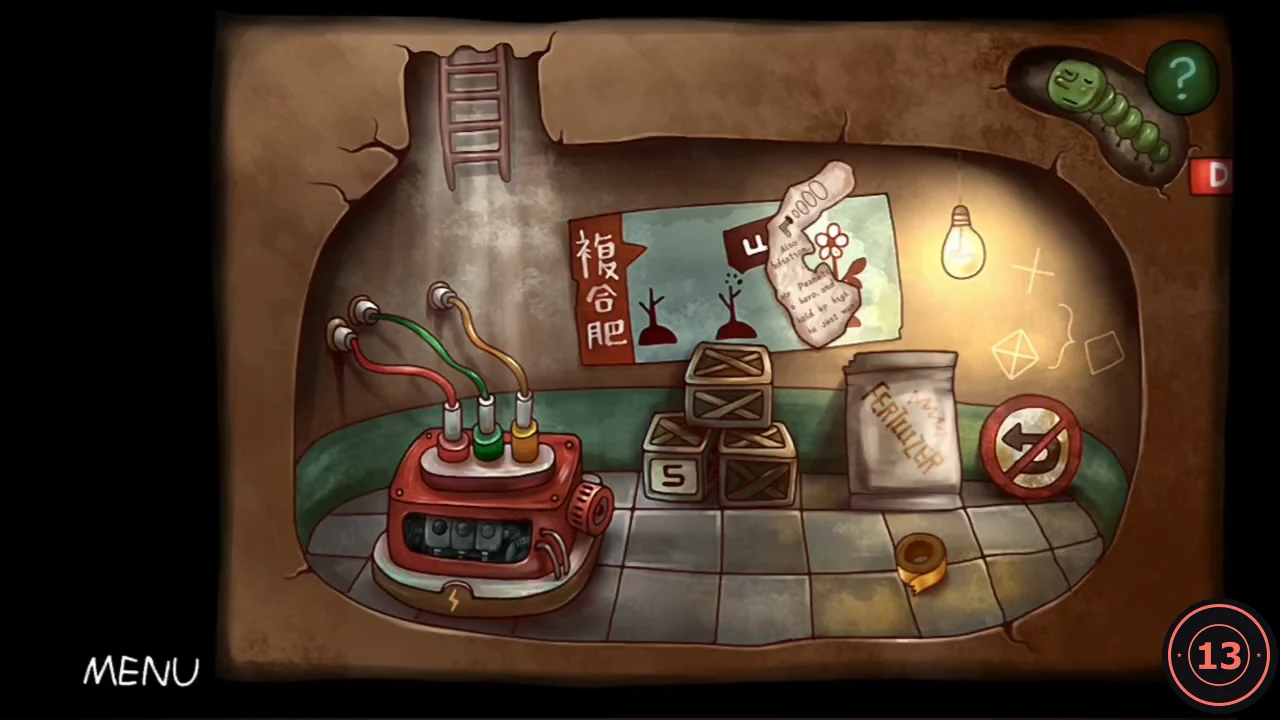
With the lights on, collect the tape, the fertilizer and the first diary piece. Then get the W cap for the octopus to open the metro, and pick up the MIND IN MIND grid in the computer room.
- With the lights on, take the roll of yellow tape from the floor at the bottom right. Take diary piece 1 of 4 from the top of the flower poster, and the FERTILIZER sack beside the crates.
- Climb the ladder up to the city and tap the grey round disc at the left to reach the metro plaza. The octopus here wants a cap with a W on it.
- Tap the top of the spiral stairs to reach the HERO statue. Take diary piece 2 of 4 from the statue base. Tap the W cap on the statue's head so that it falls, then take it.
- Give the cap to the octopus. The metro entrance opens. Inside the station, a big strawberry is thinking about a flower.
- Go through the station's left door into the computer room. Take the paper hanging on the wire: the MIND IN MIND grid of 16 symbols, with columns a–d and rows 1–4.
The metro: the VEM maze
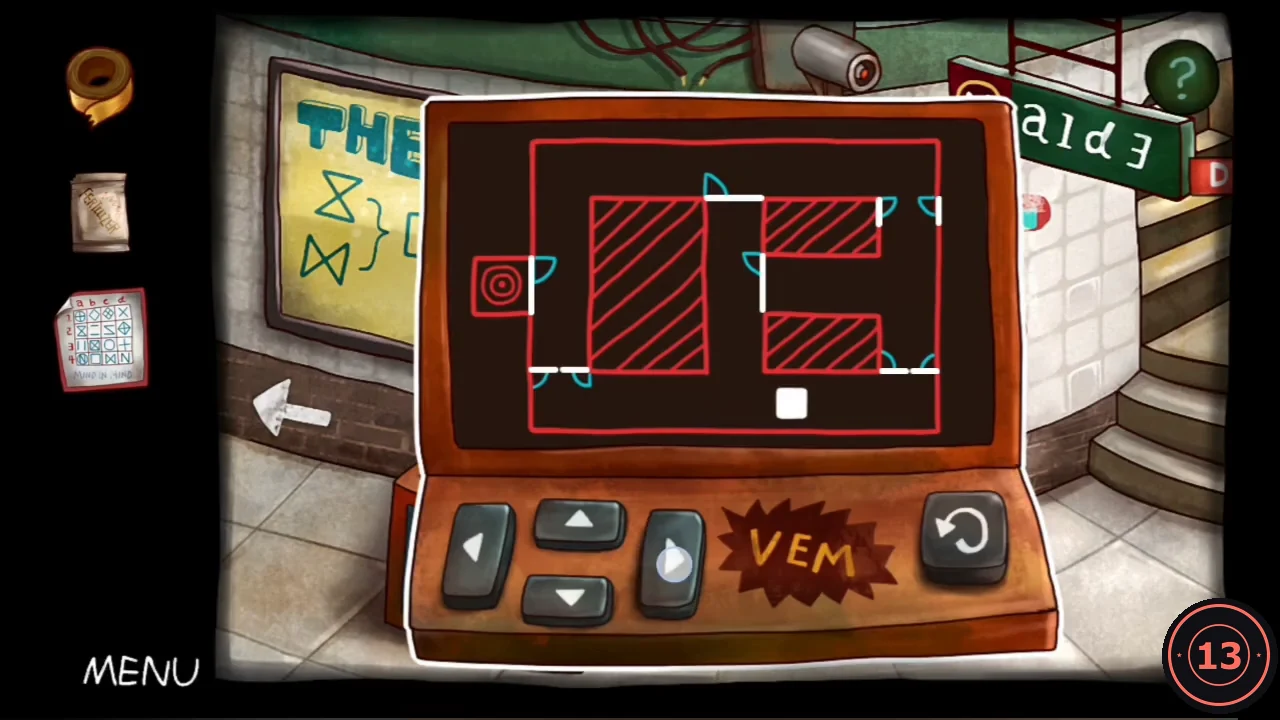
The VEM arcade is down the stairs at the lower right of the station. Move the square with the four arrow buttons; ↺ resets the maze. The maze has swinging doors. You can push a door only by moving into the cell it swings into, and you cannot pass back through it the same way. When you leave that cell through another side, the door swings shut behind you. The exit door beside the target also has to be swung flat first: move down into the cell next to the target, then come back up. Below is a full working route from a fresh start (R right, L left, U up, D down; each letter is one press). Press ↺ first if you have already moved.
- Enter this 83-move route: RRUUUU LLLLLL DDDD RRR UUUU RRR DD LLL RRR DD LLL UUUU DDDD RRR UUUU LLLLLL DD UU RRRRRR DDDD LLLLLL UU L.
- Take the wooden mallet that drops into the machine's tray.
The metro: the camera wires, the codes and a flower
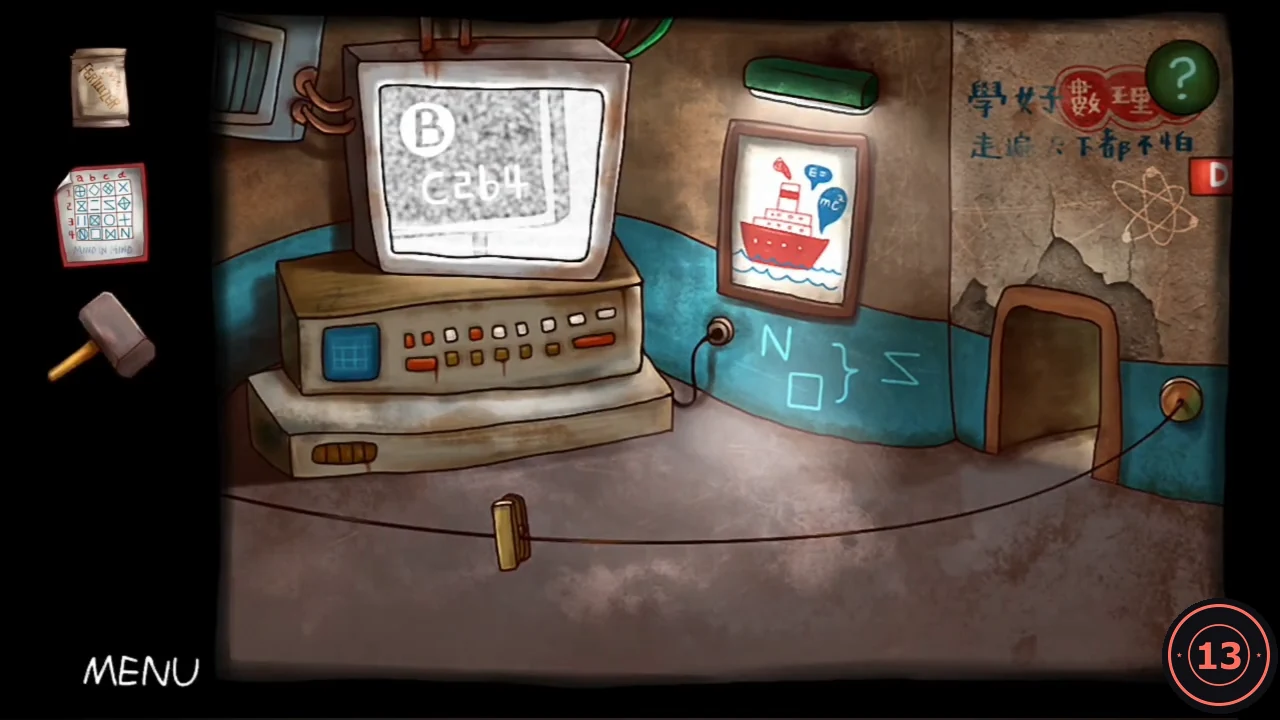
The train panel at the end of the chapter needs four letter codes: B, N, I and T. Each code names two cells of the MIND IN MIND grid.
- Go left from the VEM machine to the subway platform. Diary piece 3 of 4 is on the graffiti wall at the upper right. The peanut man is thinking about a peanut, and the cab of train 12 has a locked keyhole.
- On the landing by the VEM machine, drag the tape onto the cut red wires to the left of the security camera.
- The computer-room monitor now cycles two codes: B = c2 b4 and T = b3 c4. The sign on the landing gives a third: N = a1 d3.
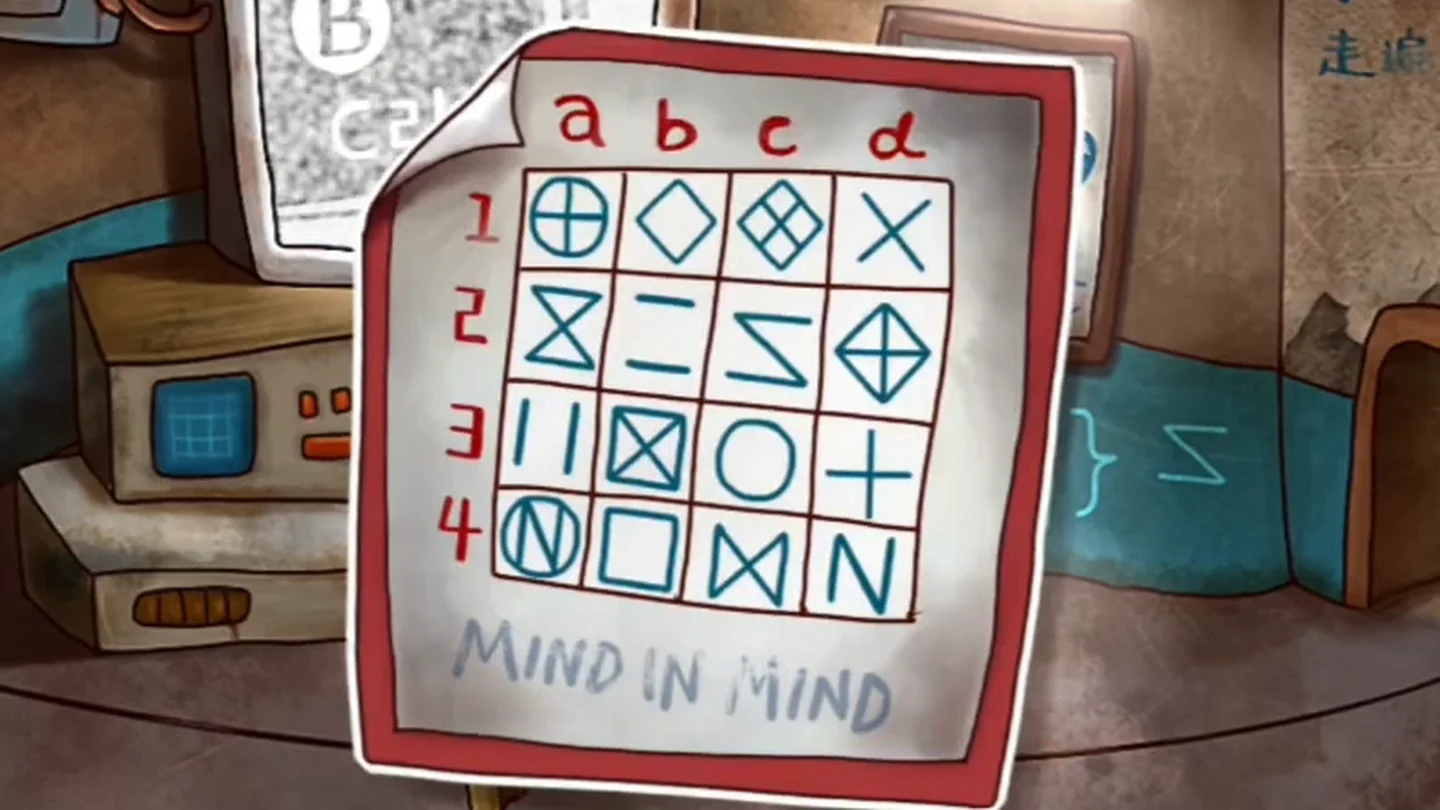
The MIND IN MIND grid. Columns a–d run across the top, rows 1–4 down the side. - At the HERO statue, hit the head with the mallet and take the round stone head that falls. Drag the fertilizer sack onto the open neck. Vines grow and a flower blooms; take the flower.
- Give the flower to the strawberry. It shrinks and uncovers a wall map with the last code, I = d2 b1. Diary piece 4 of 4 is to the right of the map.
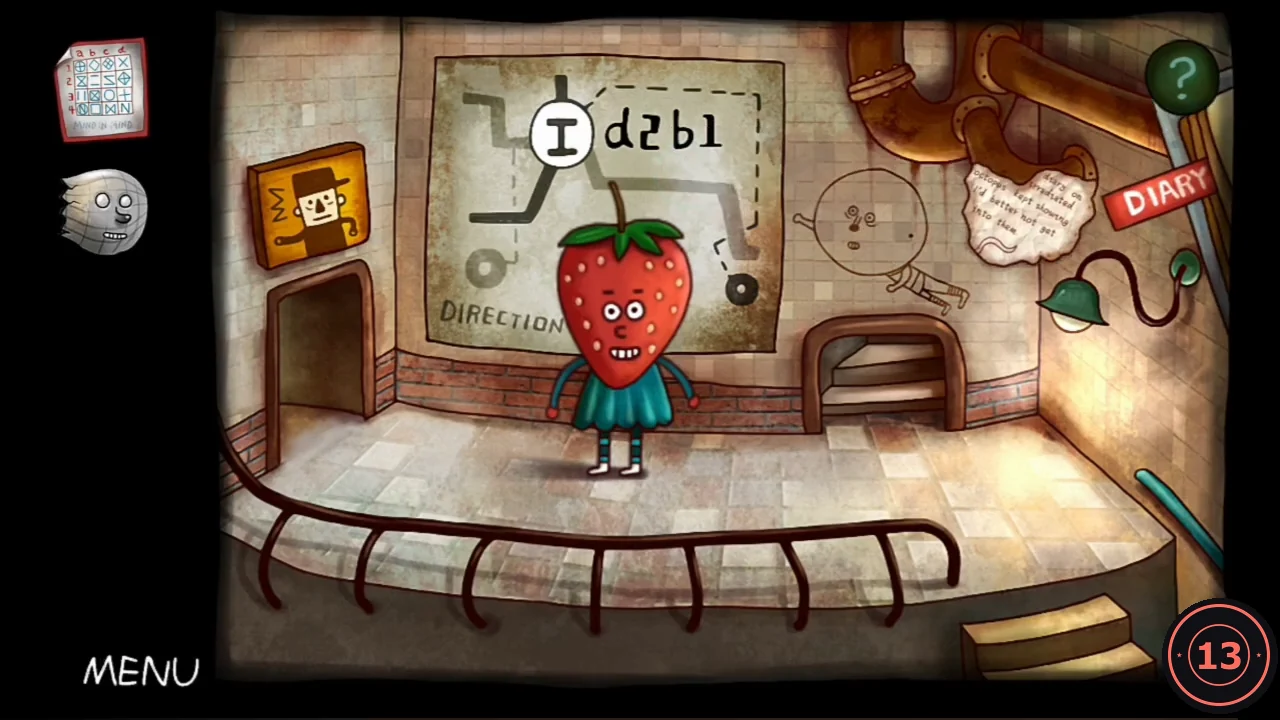
The uncovered wall map gives I = d2 b1. The diary piece is at the right.
The metro: the B N I T train panel
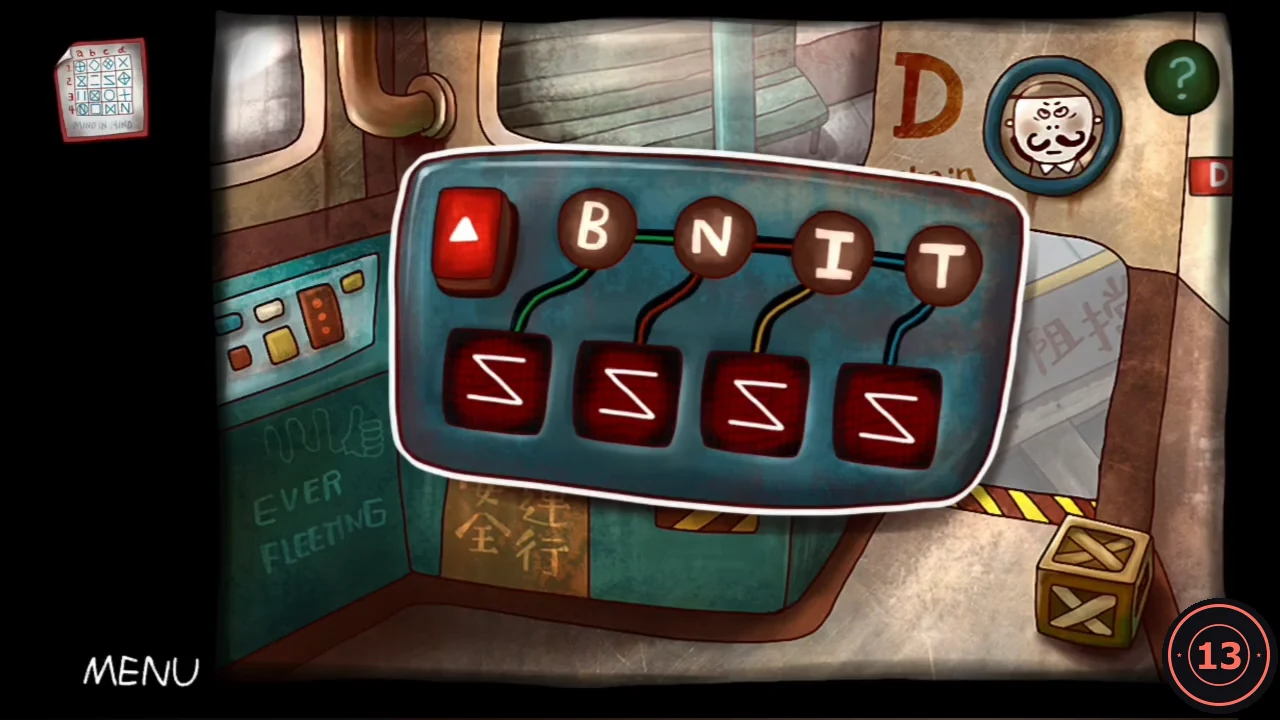
For each letter, look up its two cells on the MIND IN MIND grid and lay one symbol over the other. Keep only the lines that are not in both symbols. For B, c2 is a Z and b4 is a square. Their top and bottom lines cancel, leaving the two sides and the diagonal: an N shape. N combines a1, a circle with a plus, and d3, a plus, which leaves a circle. I combines d2, a diamond with a plus, and b1, a diamond, which leaves a plus. T combines b3, a square with an X, and c4, a bow-tie, which leaves two horizontal lines: an equals sign.
- Give the stone head to the peanut man on the platform. His suitcase opens; take the gold key.
- Put the key into the keyhole in the train cab. A panel with lettered buttons B N I T appears, wired to four symbol tiles.
- Tap each tile to cycle its symbol: B to the N shape, N to the circle, I to the plus and T to the equals sign. Then press the red ▲ button.
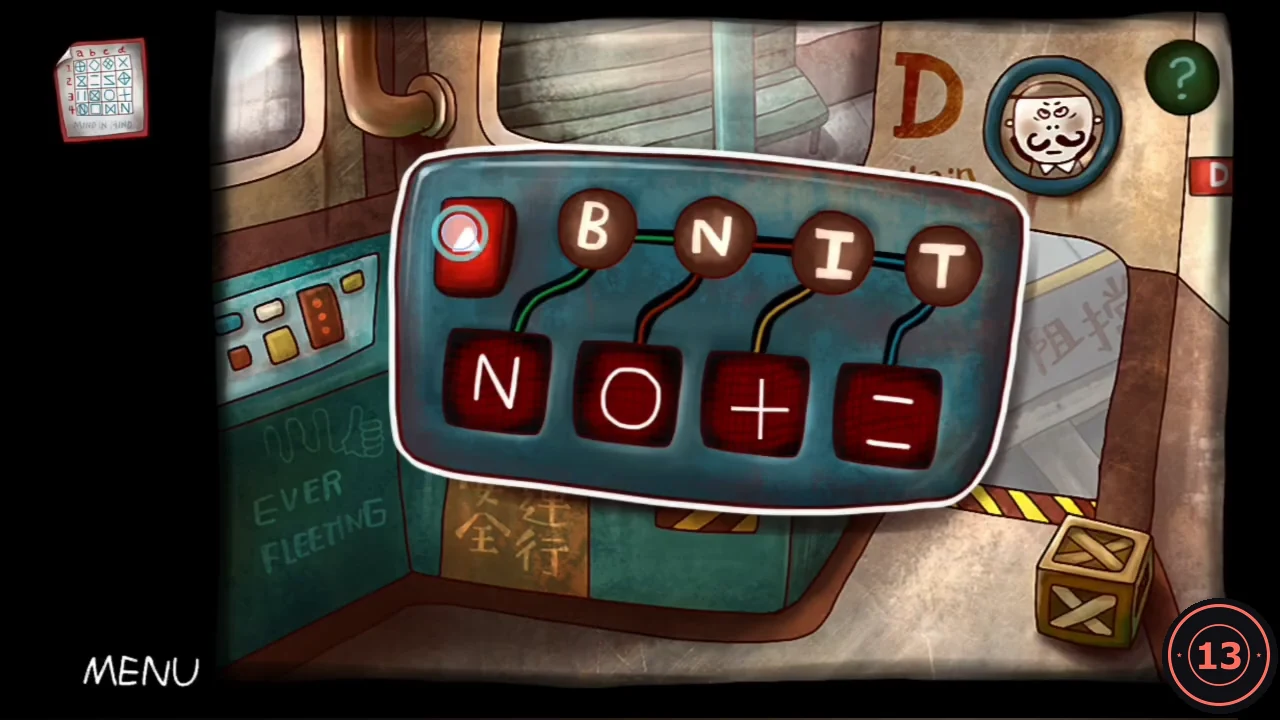
The solved panel: N, circle, plus, equals. Then press the red triangle. - The train pulls out and the chapter ends (achievement Good Driver).