The theater: the lobby and the lounge
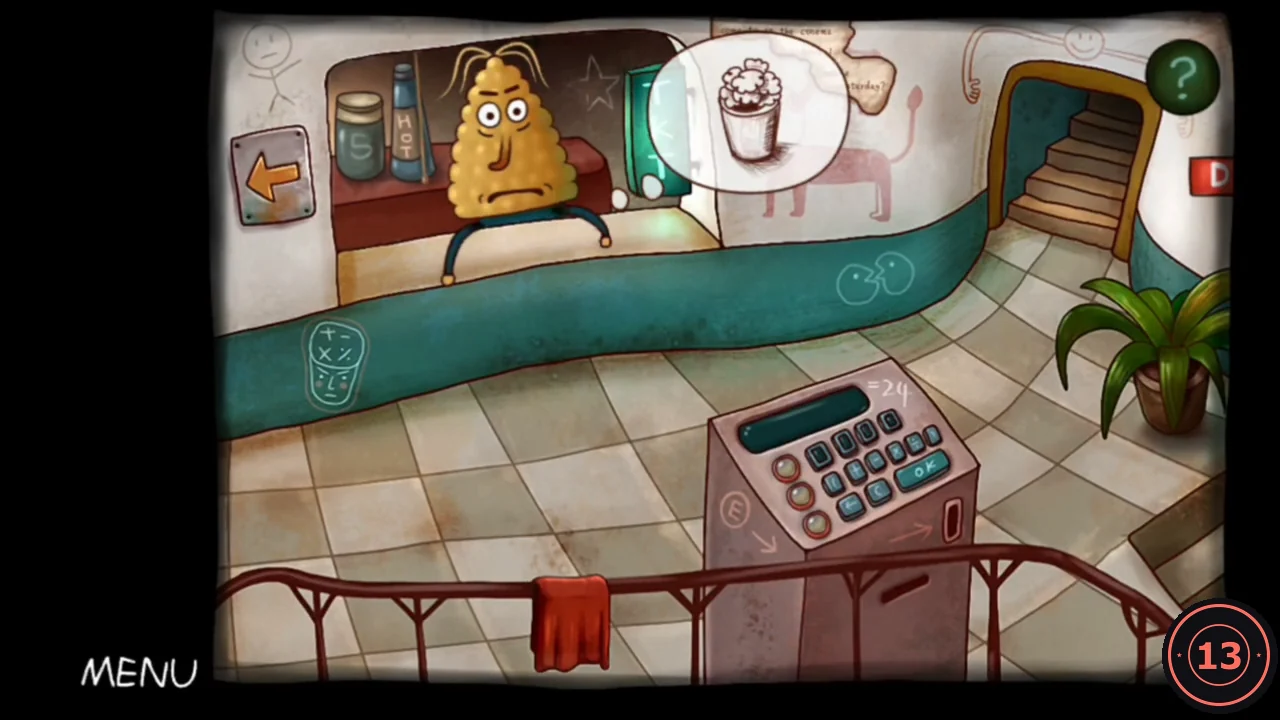
The lobby has a corn vendor at the TKT counter, a calculator and stairs at the top right up to the lounge. The left arrow leads to a poster hall with door 2 and an empty star pedestal.
- Diary piece 1 of 4: tap the paper on the lobby wall above the cow drawing. The vendor's speech bubble asks for popcorn.
- Go up to the dark lounge and take the popcorn from the front table. Give it to the vendor in the lobby, and the lounge lights come on.
- Diary piece 2 of 4: tap the newspaper the robot is reading in the lounge.
- Open the cabinet on the right and take the orange L-shaped piece and the grey knight chess piece.
- Wait a moment. The robot lowers its newspaper by itself. Then take the axe from the sofa.
The theater: the poster hall
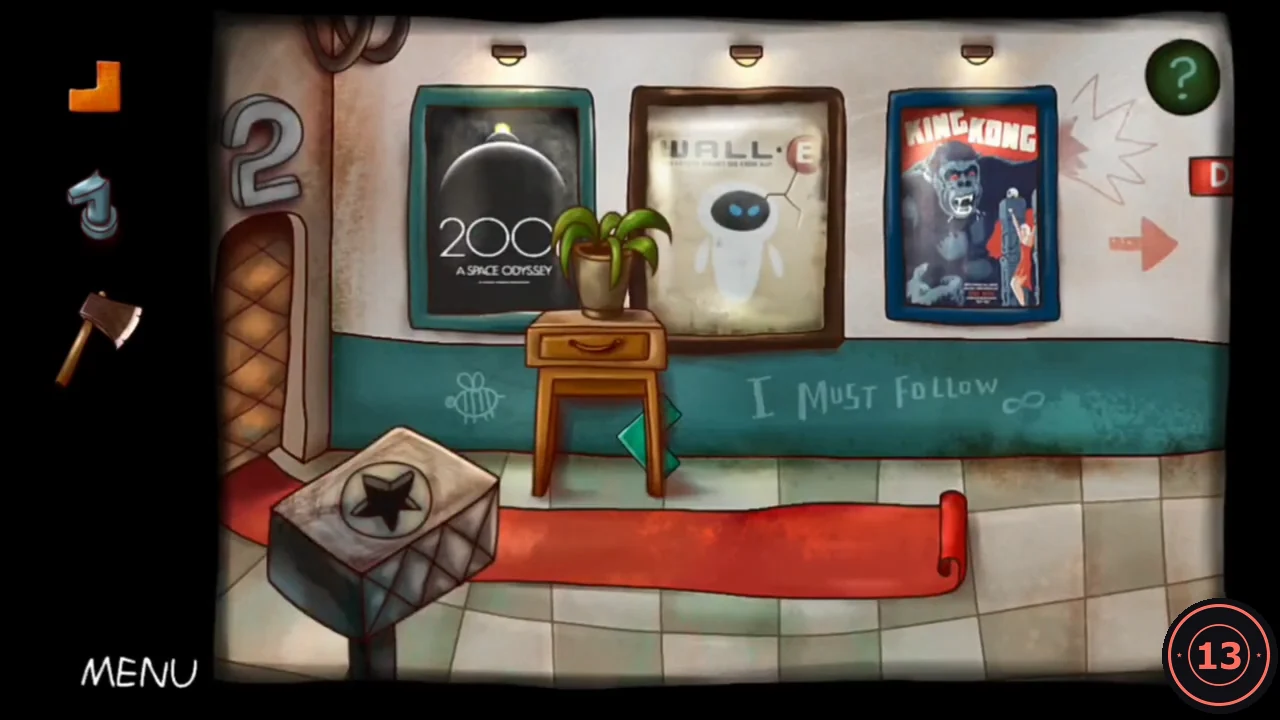
The poster hall hides the red E key and a packing piece. The lounge has the spray bottle needed later in the HAL corridor.
- In the poster hall, chop the WALL-E poster with the axe and take the red E key behind it. Take the green L-shaped piece from under the plant table too.
- The vendor now asks for a ticket. In the lounge, take the octopus-shaped spray bottle from the table at the front left.
The theater: the make-24 calculator
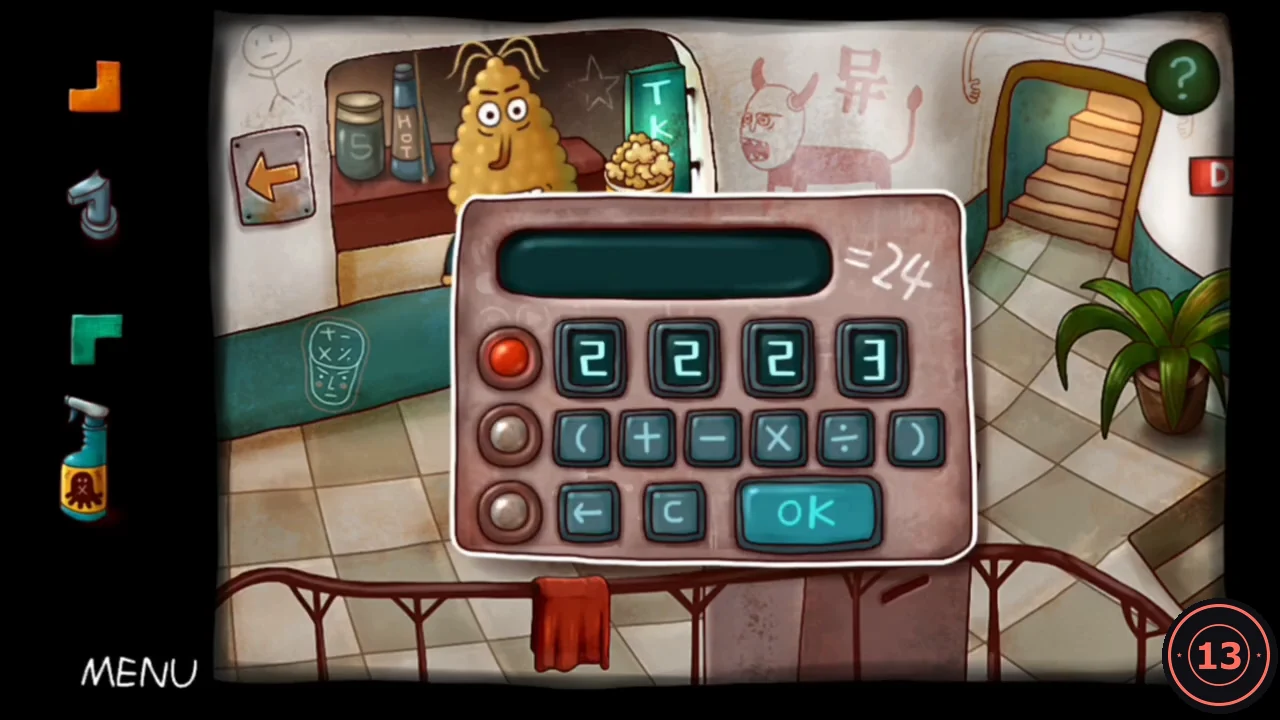
The lobby calculator gives you four numbers per round. Combine all four with + − × ÷ and brackets to make exactly 24, then press OK. ← deletes and C clears. There are three rounds. The numbers may not be the same in every game. The recording's own overlay lists other number sets, so solve the numbers you are given. Useful targets are 3 × 8, 4 × 6, 2 × 12 and 8 + 16; division can create the fraction you need. For example, 5 × (5 − 1 ÷ 5) works because 5 − 0.2 = 4.8 and 5 × 4.8 = 24.
- Put the E key into the calculator to switch it on.
- Example rounds from the reference game: 2 2 2 3 → 2 × 2 × 2 × 3; 5 7 8 8 → (7 − 5) × 8 + 8; 5 5 5 1 → 5 × (5 − 1 ÷ 5). If your numbers differ, find your own combination that makes 24.
- Take the coin that drops and give it to the vendor. He puts a star on the counter; take it.
- Place the star on the pedestal in the poster hall. Door 2 opens.
The theater: the King Kong film
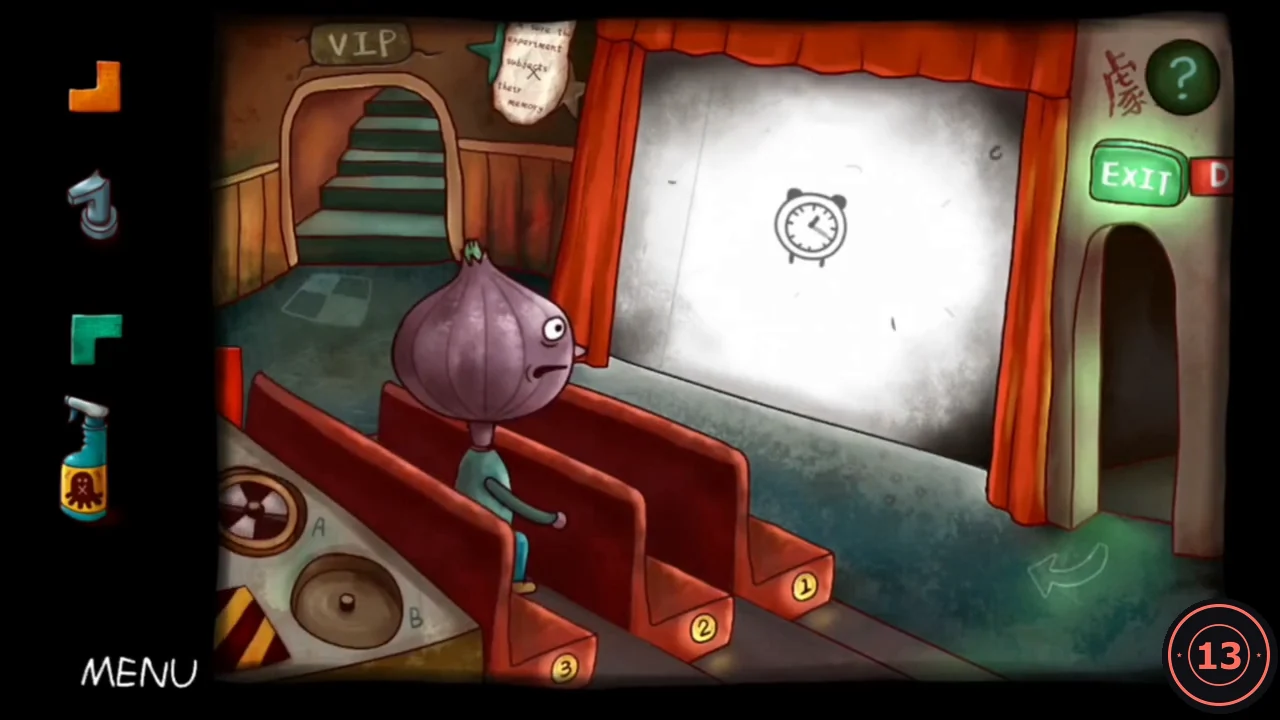
Theater 2 holds a packing piece and a diary piece. Starting the King Kong film shows the colour code for the VIP lights.
- In theater 2, take the red bar piece at the left edge of the seats. Diary piece 3 of 4 hangs from the top of the curtain. The onion in the seats is thinking about a film reel.
- Tap the round dial marked B on the projector panel at the bottom left. A King Kong film plays with numbered coloured bursts: 1 cyan, 2 red, 3 blue, 4 yellow. Remember them.
The theater: the VIP light panel
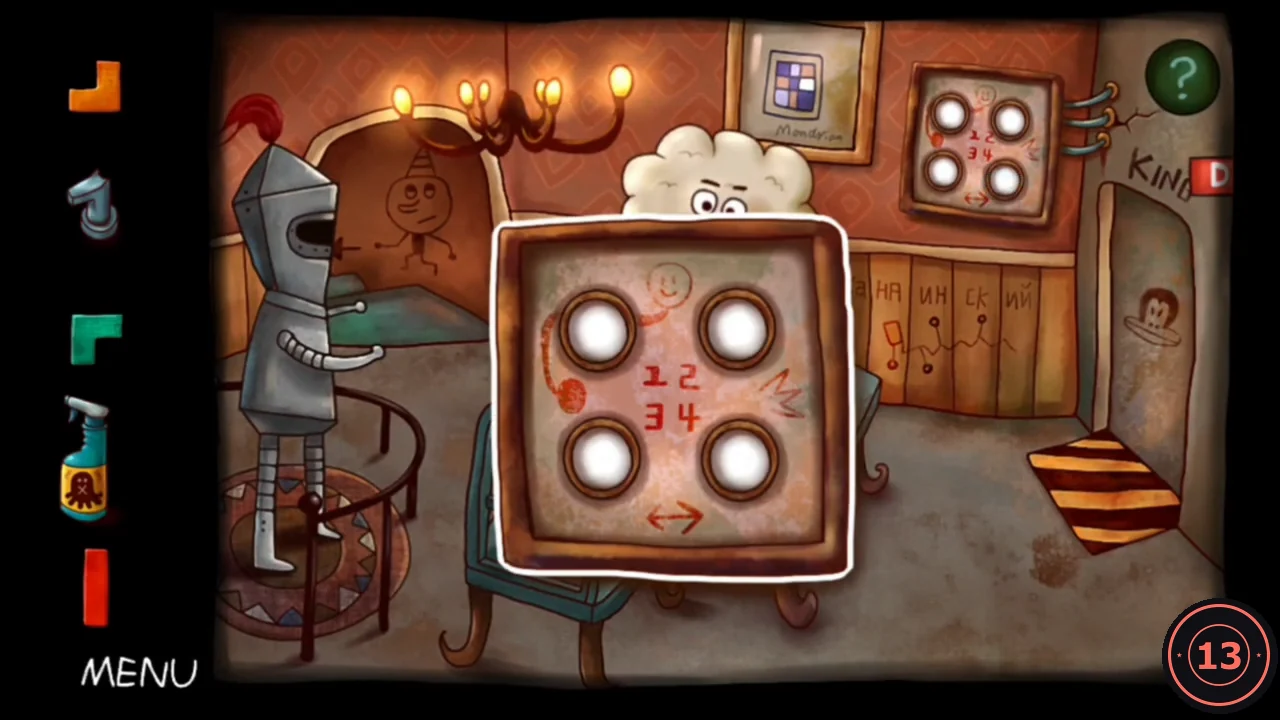
The VIP room, up the stairs at the top left of theater 2, has a panel of four lights numbered 1 2 / 3 4. Tapping a light cycles its colour.
- Set the lights to the film colours: 1 cyan, 2 red, 3 blue, 4 yellow.
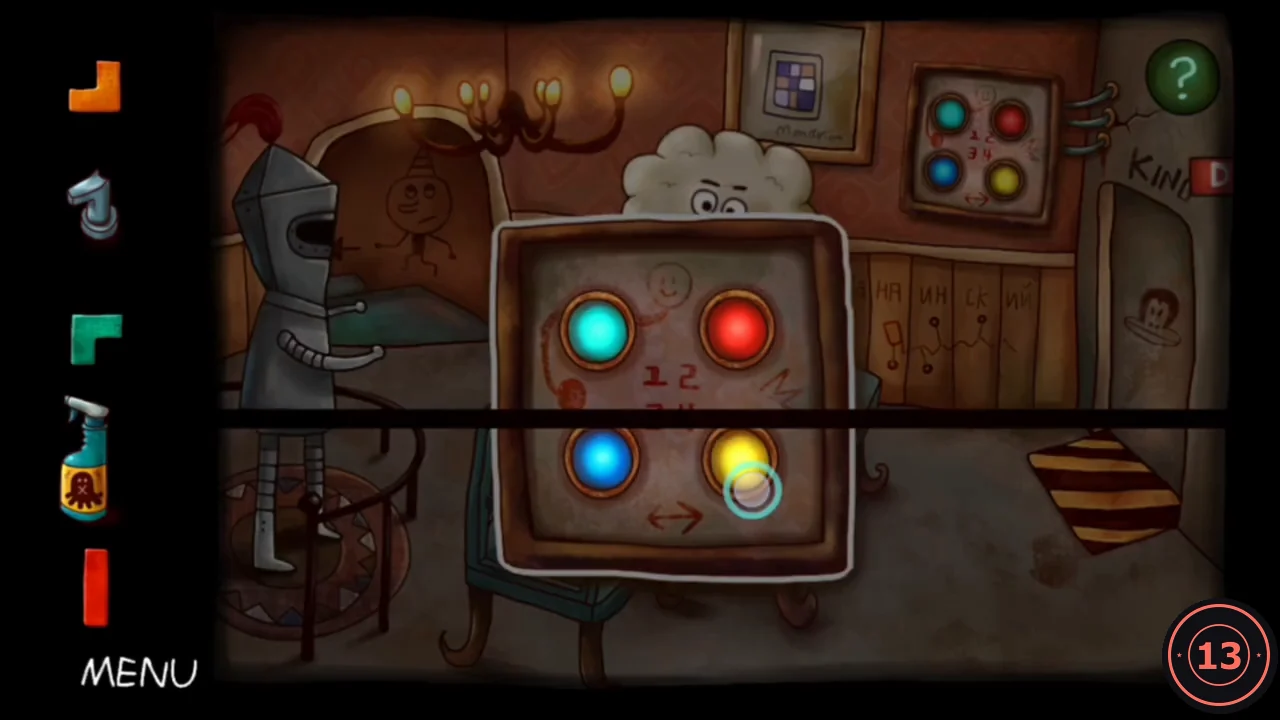
The lights set to the film colours: 1 cyan, 2 red, 3 blue, 4 yellow. - A cauliflower appears at the chess table, thinking of a knight. Give him the grey knight piece and he starts playing.
- Go through the KING door on the right into the corridor with the HAL porthole. Diary piece 4 of 4 is on the wall at the top centre.
The theater: the Lost in Space machine
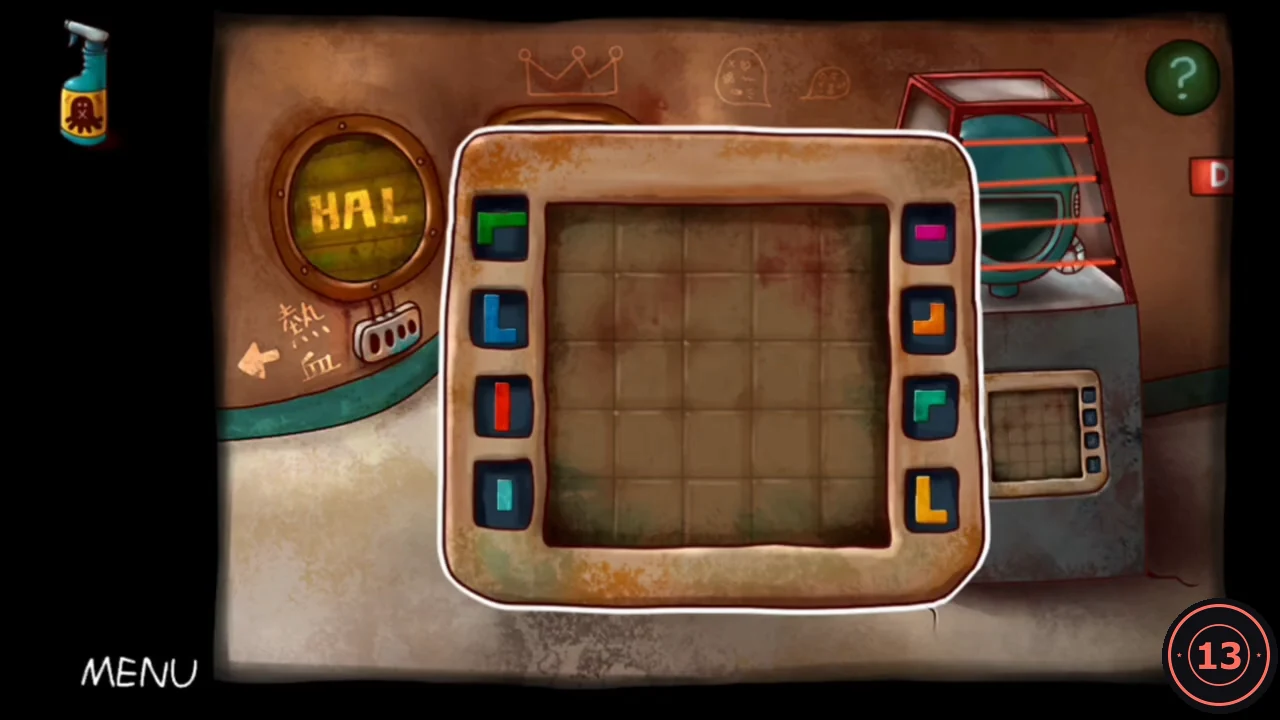
This is a 5×5 packing puzzle. Drag every coloured piece into the grid so that it is completely filled. The three pieces you collected complete the set. Rows are counted from the top and columns from the left.
- Put the orange L, the green L and the red bar into the empty slots beside the Lost in Space machine's grid.
- Fill the grid with this solved layout. Green: row 1 columns 1–3 and row 2 column 1. Teal: r1c4, r1c5 and r2c4. Orange: r2c5, r3c4 and r3c5. Red: column 2, rows 2–4. Blue: column 3, rows 2–4, plus r4c4. Yellow: column 1, rows 3–5, plus r5c2. Magenta: r5c3 and r5c4. Cyan: r4c5 and r5c5.
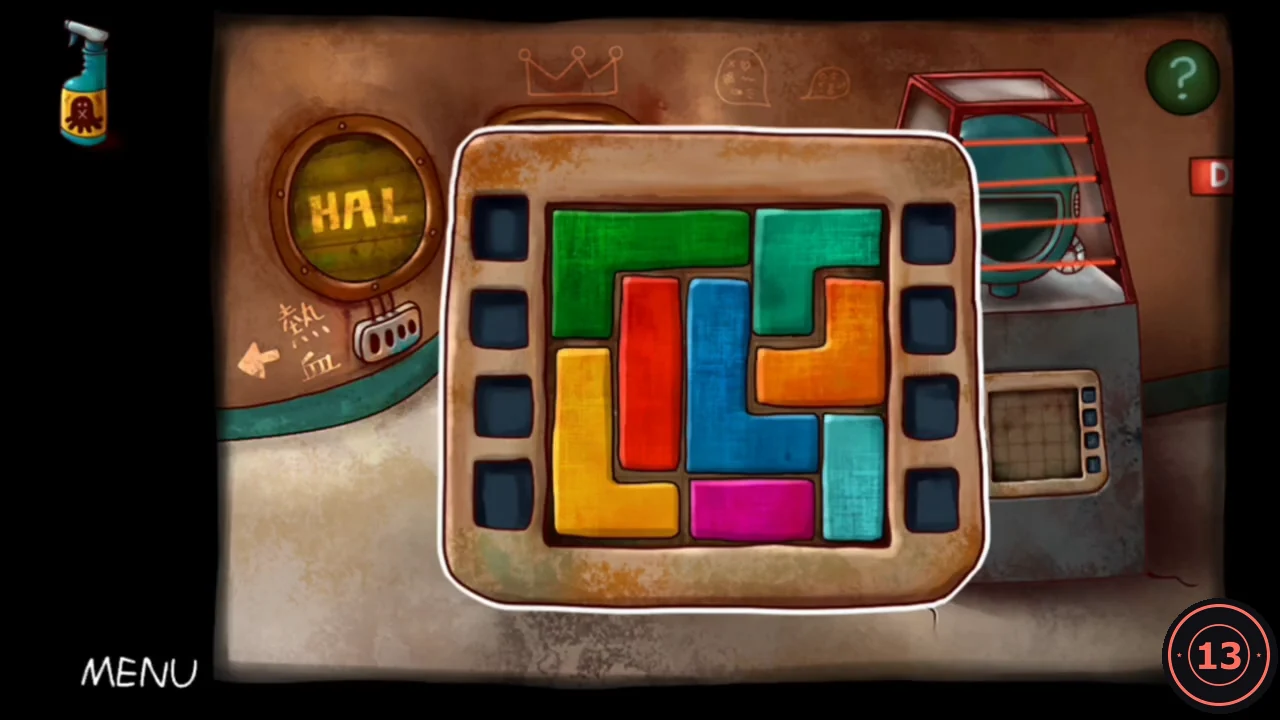
The completed packing grid. - Take the round blue helmet that the machine releases.
The theater: the HAL 9000 lock
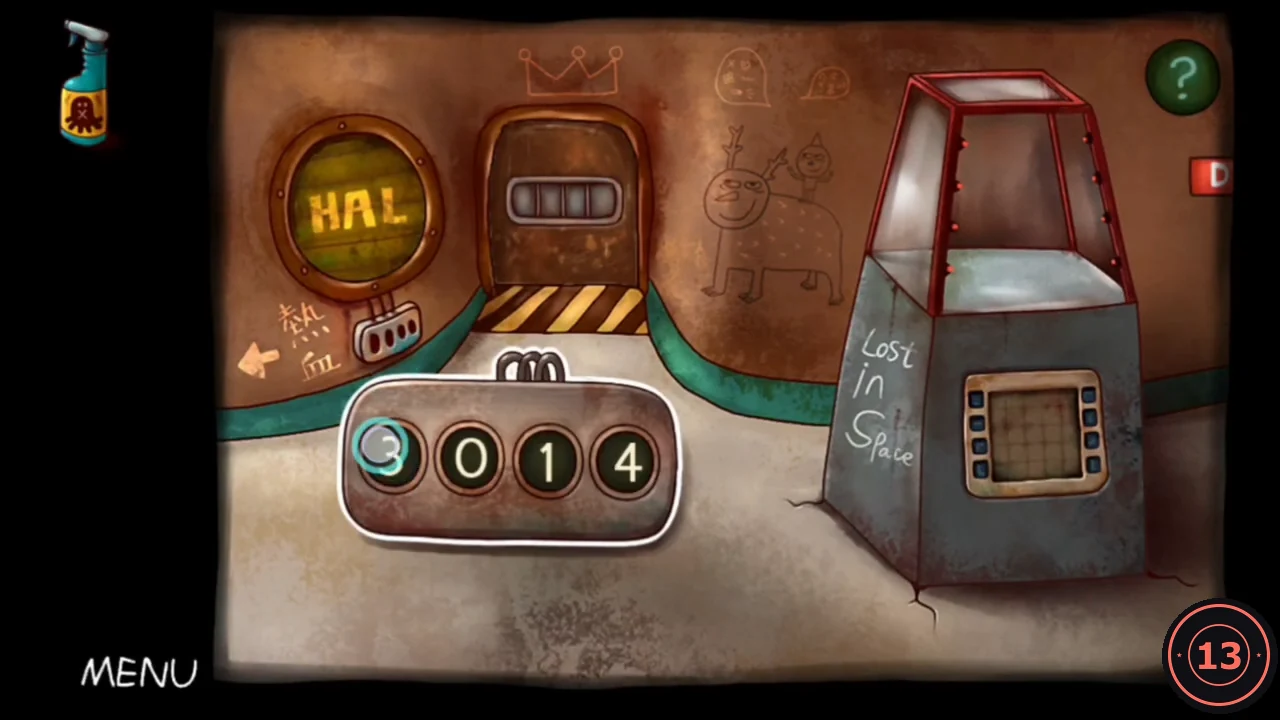
The helmet turns the onion into an astronaut. The second film shows the HAL 9000 nameplate, and that number opens the small corridor lock.
- Give the helmet to the onion in theater 2, and it becomes an astronaut. Take the second film reel that drops by the right-hand seats and drag it onto the projector panel. The film 2001: A Space Odyssey plays and shows the HAL 9000 nameplate.
- Back in the corridor, open the small four-digit lock between the HAL porthole and the Lost in Space machine. Set it to 9000.CODE9000
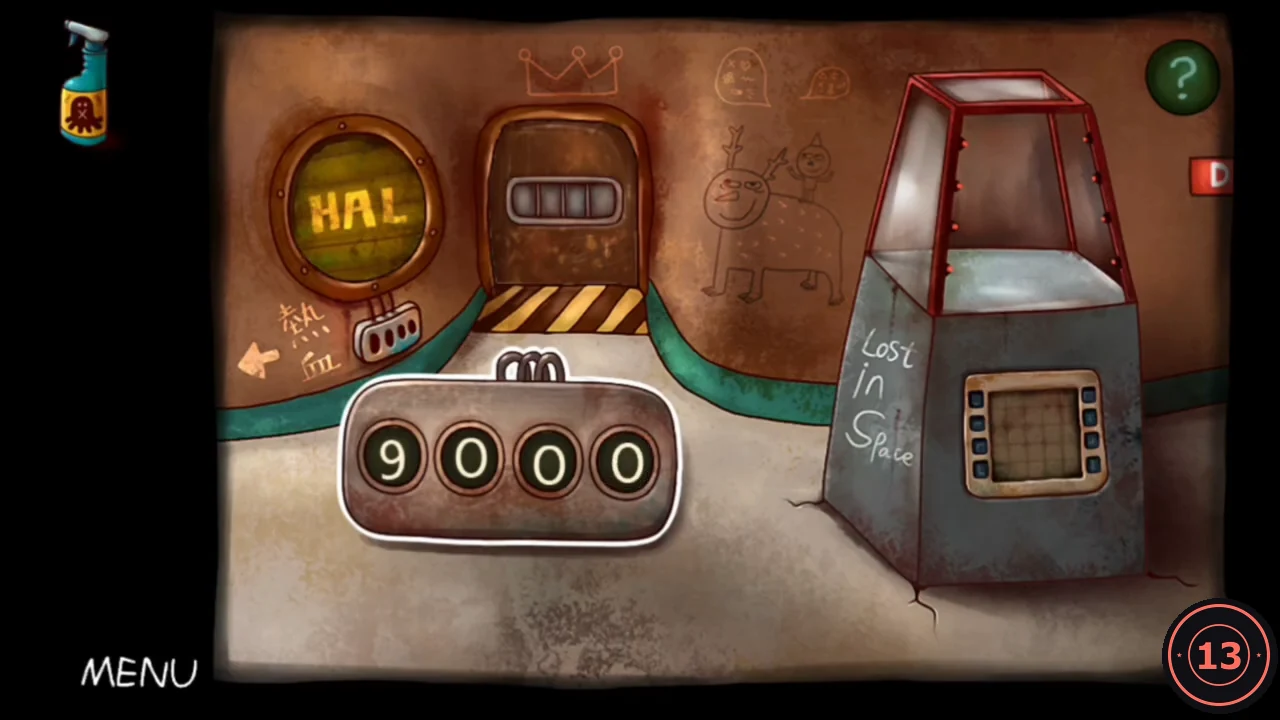
The lock set to 9000, the number from the HAL 9000 nameplate.
The theater: the chess lock
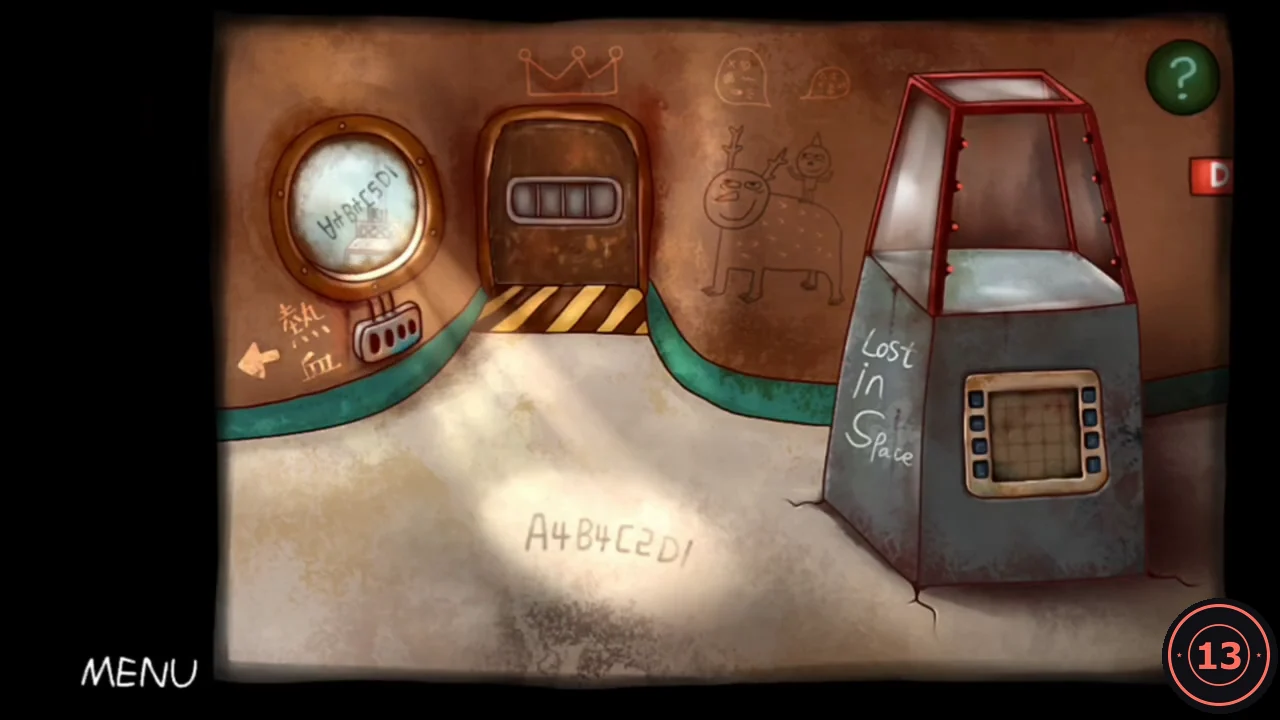
The HAL porthole projects four chess squares. The pieces standing on those squares of the VIP chess board form the code. Dark pieces on the board are entered as red pieces on the lock.
- The lit porthole is smeared with red paint. Spray it with the octopus bottle, and the floor shows A4 B4 C2 D1.
- Look at the chess board in the VIP room. Columns A–D run from left to right along the front edge, and rows 1–4 run from front to back. A4 holds a dark bishop, B4 a blue knight, C2 a blue king and D1 a dark pawn.
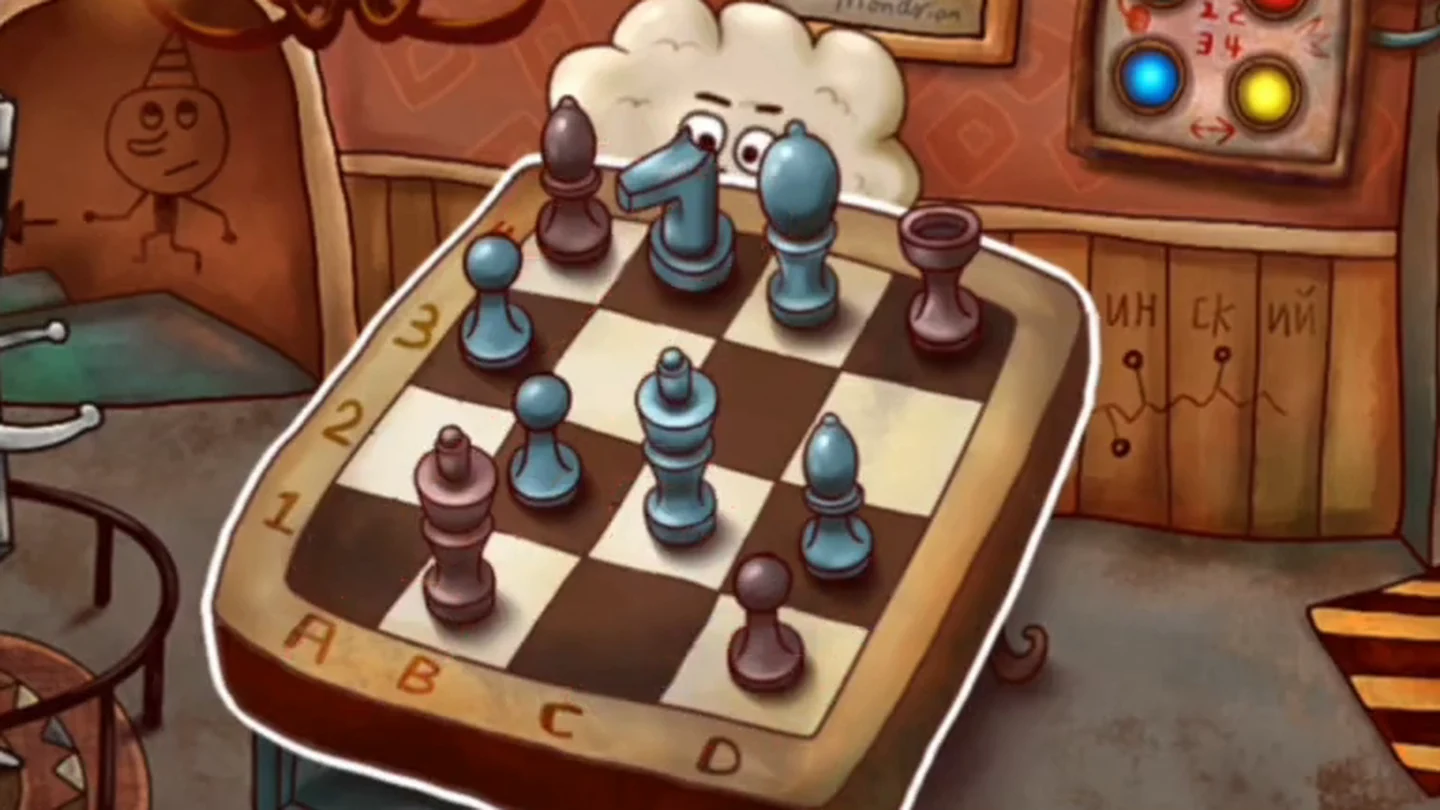
The VIP chess board. Columns A–D run along the front edge; rows 1–4 run from front to back. - Open the same small panel in the corridor, which now shows four slots. Tap the slots to cycle piece and colour until they read, from left to right: red bishop, blue knight, blue king, red pawn. The lock draws the bishop as a plain column with a flat top and base, not with the pointed head it has on the board.
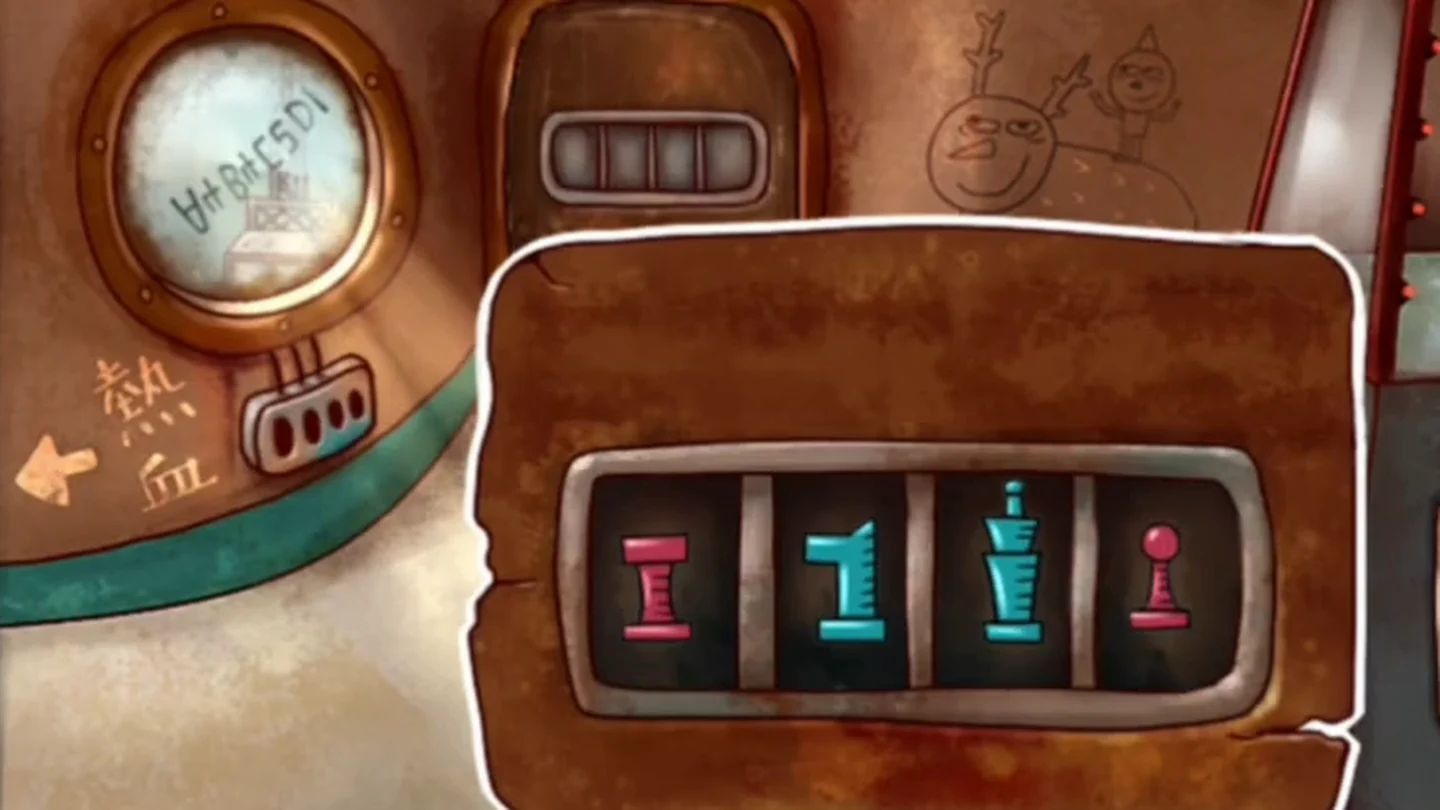
The solved chess lock. The red column on the left is the lock's bishop symbol. - Go through the door that opens to clear the chapter (achievement The Best Audience).