Starting the Bonus Chapter and the Mine
In the Bonus Chapter you play as Elliot, the boy you free from the cage in the main game. He begs the Resistance captain to let him join; the captain gives him one task: a Resistance man who tried to steal an important artifact from the witches in the town hall was caught, and Elliot must get him out of prison before a witch comes to question him at dawn. Elliot sets off through the old tunnels at the edge of the camp. The bonus story has its own 13 goblets to collect (see Bonus Chapter Goblets).
- The Bonus Chapter opens after the main game: when the main ending finishes, a message reads "You have completed the main game! You may now play the bonus chapter." Tap OK. Older versions sold the bonus chapter as an in-app purchase, but the iOS App Store release notes for versions 1.0.7 and 1.0.8 say it is now available without purchase, and the recordings used for this guide show no purchase screen. If an old installation still asks you to buy it, update the game first.
- On the title screen tap PLAY. The panel offers Main game and Bonus Chapter; tap OK under Bonus Chapter (START OVER restarts it from the beginning). Watch the introduction. The task is Get to the prison.
- Take the HOOK and use it on the cart. Move the planks and take the PICKAXE. Use the PICKAXE, then place and select the HOOK to free the cart. Walk down.
The Market Stall and the Horse Race Box
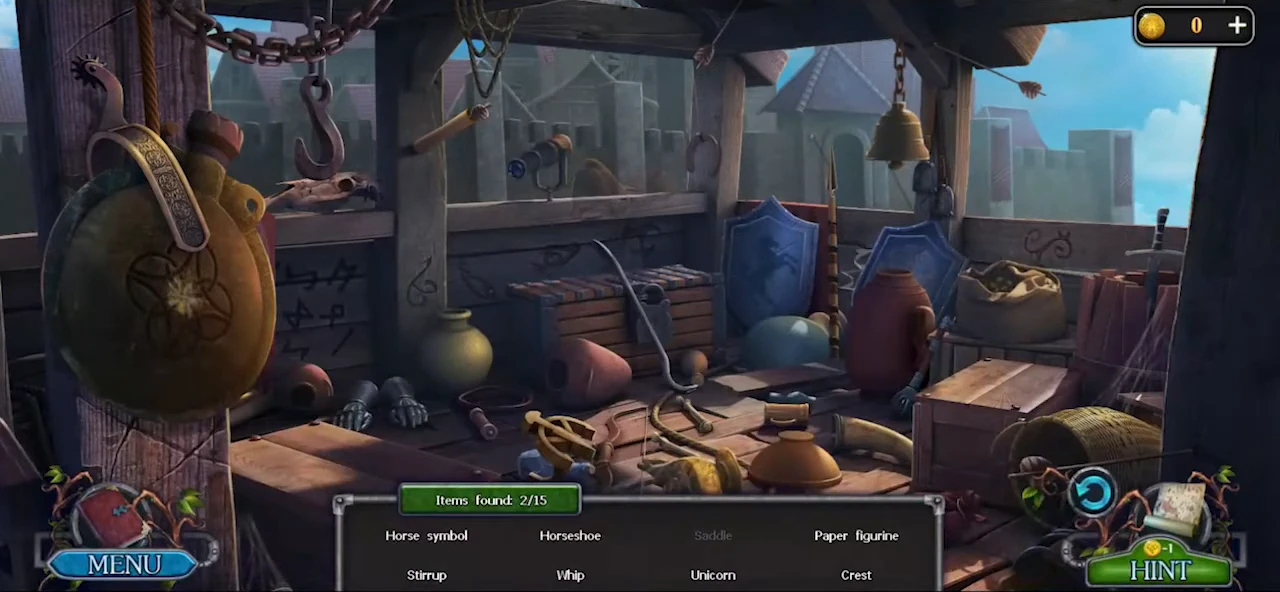
Collect two horse figurines and open the drawer in the guardhouse.
- In the town outskirts take the SAW. Walk down to the market stall and play its hidden-object scene. The last item on the list is the horse symbol: trace the glowing horse rune on the plank board. You earn HORSE FIGURINE 1/2.
- Take GOLD 1/5 from under the rag. Saw the tree with the SAW to earn the STRONG BRANCH. Go forward, take the ROPE, use the STRONG BRANCH twice and take HORSE FIGURINE 2/2.
- Go right into the guardhouse and put the HORSE FIGURINES on the race box. Four lanes hold horses 4, 3, 2 and 1 from top to bottom, and there are three columns for barriers. The game shows no rule; this layout opens the box. Left column: teal barrier on the lane of horse 3, yellow barriers on the lanes of horses 2 and 1. Middle column: yellow for horse 4, teal for horses 3 and 2, yellow for horse 1. Leave the right column empty. Press the red button; after the race the drawer opens. Take the KEY.
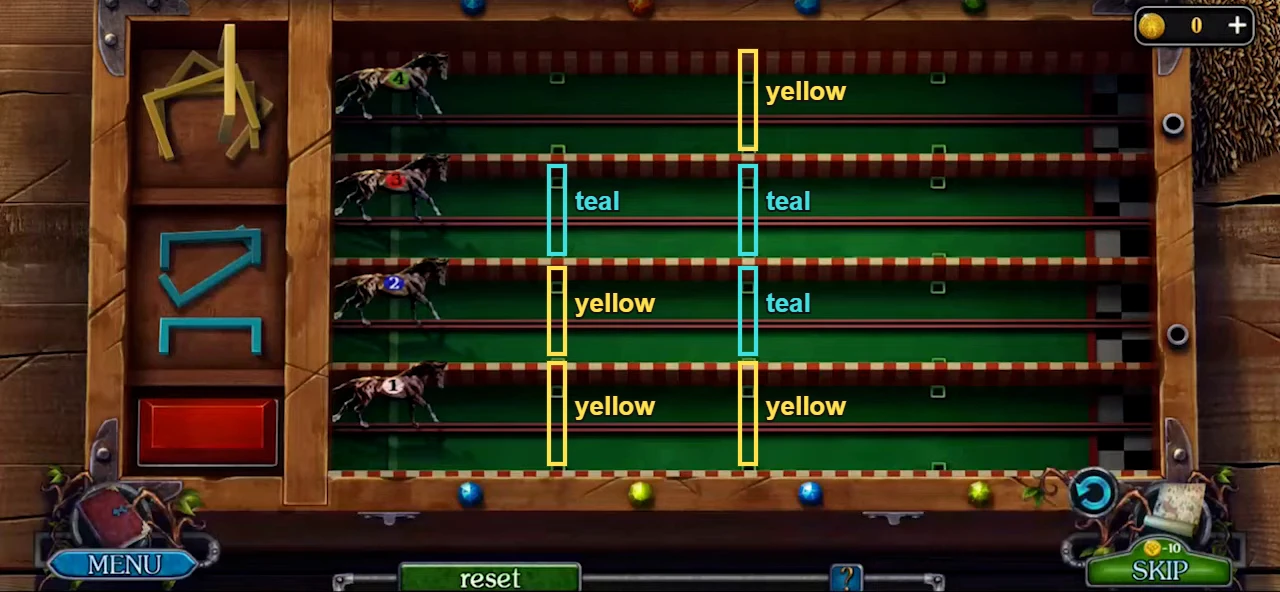
The race box before any barriers are placed, with the guide's layout marked: teal and yellow outlines show where each barrier goes. The right column stays empty. - Unlock the trapdoor with the KEY and open it. Select the case, open it and take the LOCKPICKS.
Gold for the Prison Guard
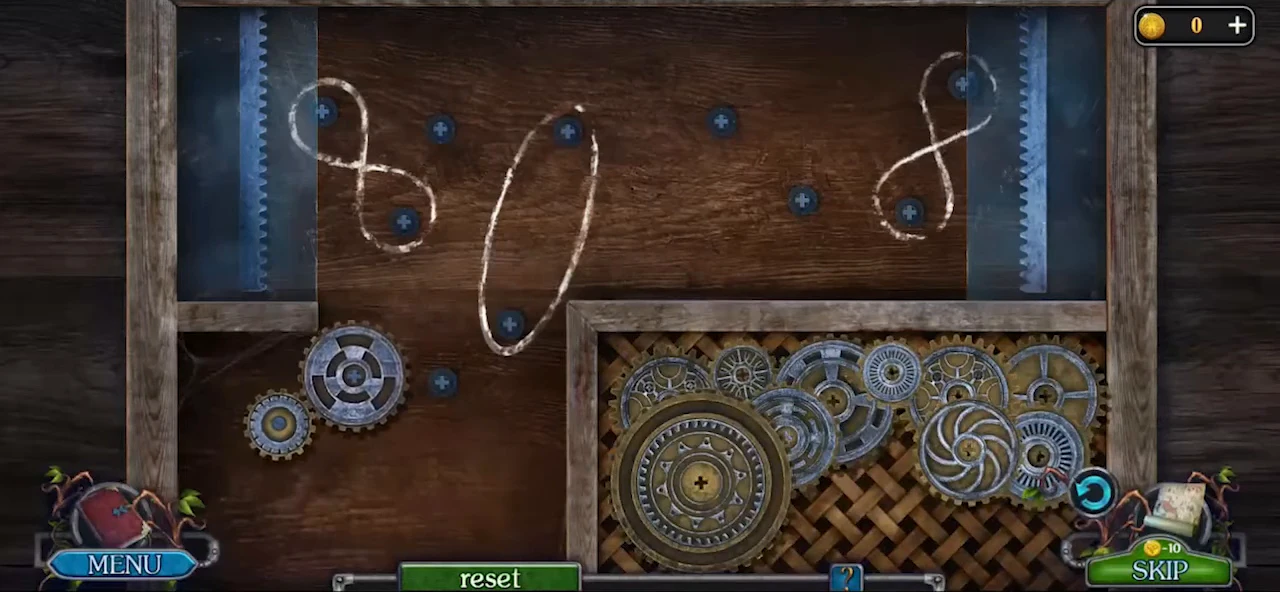
Search the market and the prison surroundings. The guard at the prison door wants five gold coins.
- Walk down twice and go left to the market street. Take the HAMMER. Move the stones and take the FLINT and GOLD 2/5. Go forward to the fountain square, open the case with the LOCKPICKS and take the KNIFE.
- Go left to the prison. Take the GEAR. Cut the bush with the KNIFE and take the SPEAR. Take the BOX, open it and take the WIRE and the WICK. Talk to the guard at the door: he asks for five gold coins, and the task becomes Give a bribe.
- Walk down twice. Put the GEAR in the stall mechanism and drag the loose gears onto the pegs until the gear train links the left panel to the right panel.
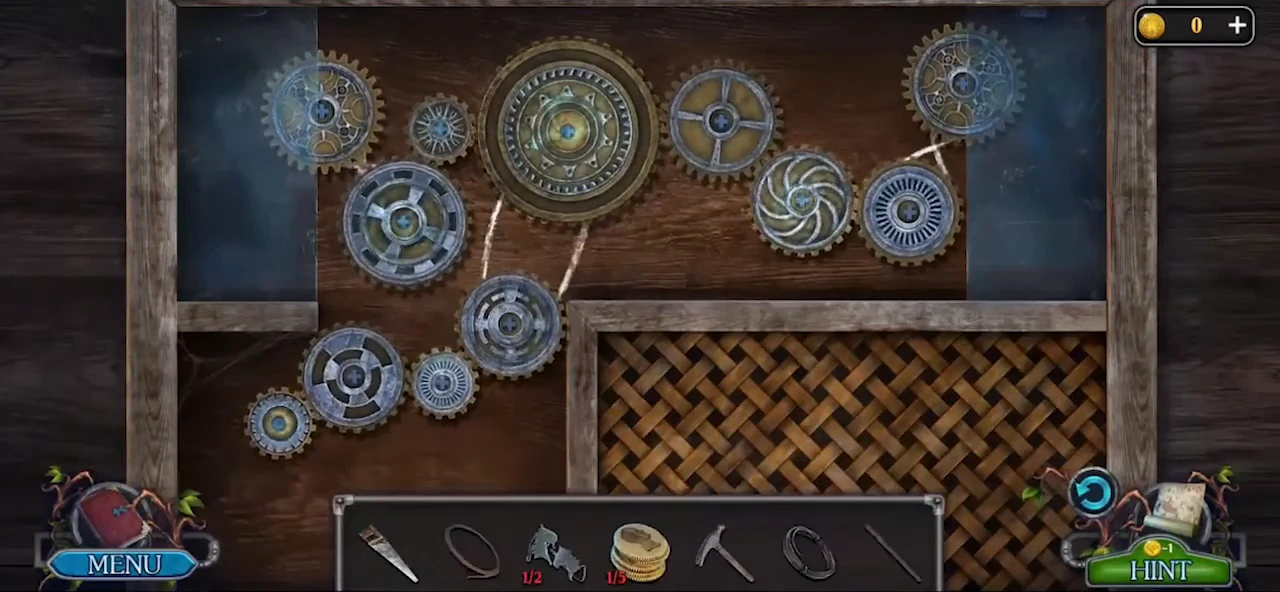
The finished gear train linking the left panel to the right panel in the recorded game. - Take the RAG, the CHISEL and the PAPER. Move the ribbon and use the CHISEL and the HAMMER to earn GOLD 3/5.
- Walk down and go forward. Knock down the HOOK and the LANTERN with the SPEAR. Open the LANTERN and light it with the FLINT to get the BURNING LANTERN.
- Walk down and go left. Light the dark drain with the BURNING LANTERN and take GOLD 4/5 and the SHOVEL. Go forward and fish out GOLD 5/5 with the WIRE.
- Go left to the prison yard. Dig with the SHOVEL, use the RAG and put the LOCKPICK, KNIFE, ROPE and HOOK in the hiding place, then dig again to bury them. Give the GOLD to the guard, who allows a five-minute visit. In the cell Elliot tells the captured Resistance man his plan: climb into the dungeon through the chimney, open the cell with a lockpick and escape through the other, heavily locked door. The task Get to the prison is complete.
The Boot Grid and the Firecracker
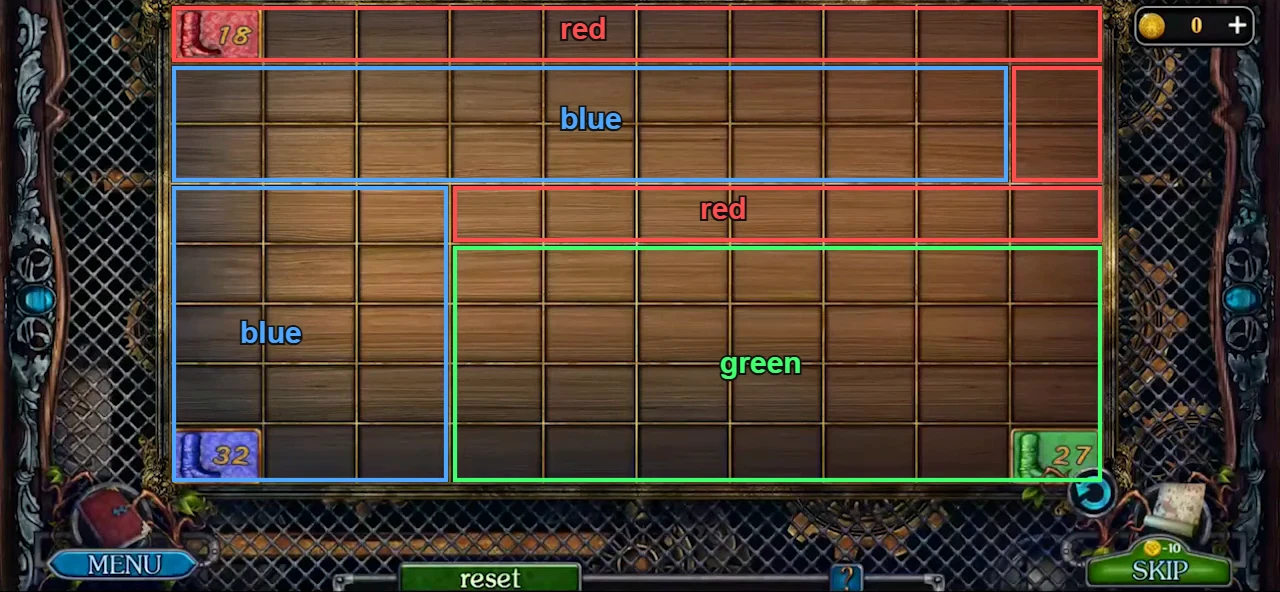
Open the blacksmith's shed and blast open the hiding place in the prison wall.
- Go left and take the SHOE CHIP from the top of the wall. Walk down, select the shed board and place the SHOE CHIP. Each boot shows how many more squares it can paint besides the square it stands on: red 18 (top left), blue 32 (bottom left) and green 27 (bottom right); the number counts down as you paint. Drag a boot to paint a trail behind it; together the three trails must fill the whole 10 x 8 grid. One solution: red covers the whole top row, the right-hand column down to row 3 and row 4 from column 4 to the right edge; green fills rows 5 to 8 from column 4 to the right; blue fills rows 2 and 3 up to column 9 and columns 1 to 3 of rows 4 to 8.
- Take the BITBRACE, the STRING and the SILVER COIN. Go left and use the SILVER COIN. Use the BITBRACE on the barrel, then the PAPER, to earn the PAPER WITH GUNPOWDER; add the WICK and the STRING to make the FIRECRACKER.
- Walk down and put the FIRECRACKER in the hole in the prison wall. Move the foliage and dig to earn the SHOVEL, take back the KNIFE, the ROPE and the HOOK, and take the ACID RECIPE (flask of water, salamander flower, witch flower root) and the LOCKPICK. Combine the ROPE and the HOOK into the GRAPPLE HOOK. From now on the MAP lets you travel quickly between the areas.
The Acid
Gather the three ingredients for the acid recipe.
- Go left and take the DURABLE GLOVES. Use the BURNING LANTERN and the KNIFE to earn the SALAMANDER FLOWER. Walk down three times and use the KNIFE to earn the EMPTY FLASK. Walk down and use the SHOVEL and the DURABLE GLOVES to earn the WITCH FLOWER ROOT.
- Go left and forward to the fountain and fill the EMPTY FLASK to get the FLASK OF WATER. Add the SALAMANDER FLOWER, the WITCH FLOWER ROOT and the FLASK OF WATER to the ACID RECIPE to make the ACID.
Down the Chimney: the Calendar Chest
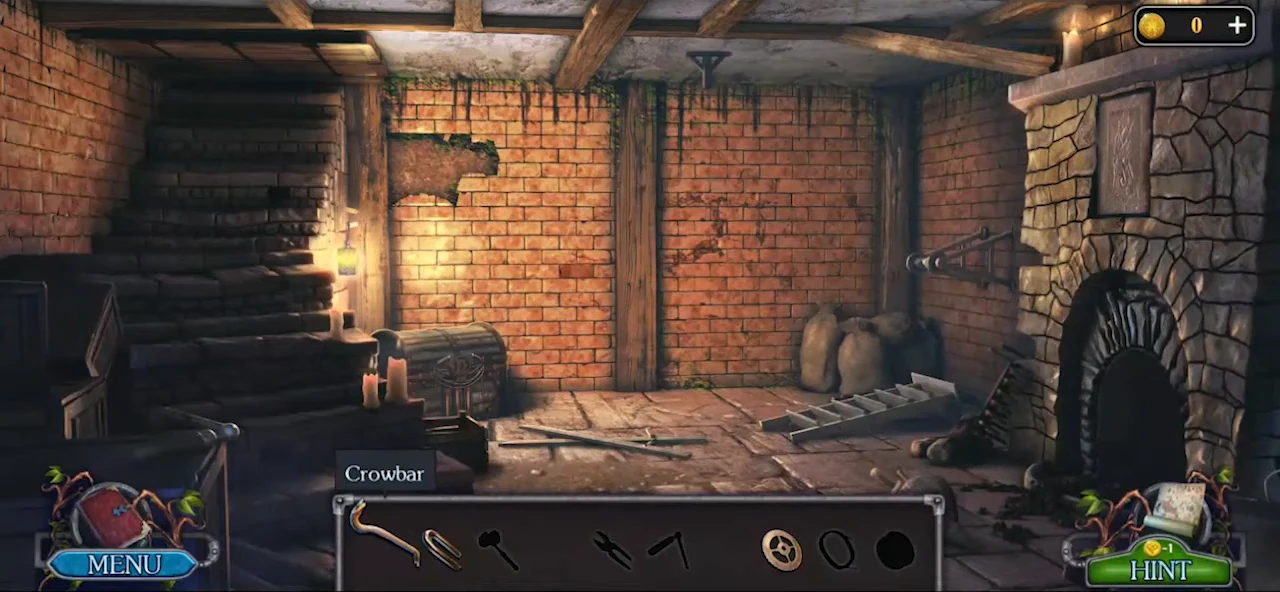
Climb into the blacksmith's cellar through the chimney.
- Go left twice. Throw the GRAPPLE HOOK onto the roof and select it to climb down the chimney. Light the cellar with the BURNING LANTERN.
- The cellar is an interactive hidden-object scene: the bar at the bottom shows the outlines of the objects to collect, and some only become reachable after you use another one. Elliot notes that the winch on the right wall probably opens the way to the cells. In our recording it went like this. Pick up the CROWBAR and the HANDLE from the floor. Zoom in on the winch and take the GEAR and the BRACKET from it. Zoom in on the brick wall, take the BROOM leaning there and pry out the loose brick with the CROWBAR; the niche behind it reads "1-1766", and the CLIPPER lies inside. Put the GEAR on the chest lock. The century 17 stays fixed at the top; turn the year ring until 66 sits above the Roman numeral I. Then use the CLIPPER on the chest clasp and open the chest: take the HAMMER and the ROPE, and pick up the COIL lying at the foot of the chest. Zoom in on the ceiling above the stairs on the left: sweep the cobweb away with the BROOM, put the BRACKET on the beam, nail it with the HAMMER and tie the ROPE to it. Back in the cellar, tap the folded ladder on the floor to stand it up, then hang the COIL on the hook in the ceiling above it, so the rope runs over it to the winch. Zoom in on the winch, fit the HANDLE and turn it: the rope pulls open the passage at the top of the stairs on the left. Go through that passage on the left to reach the dungeon.
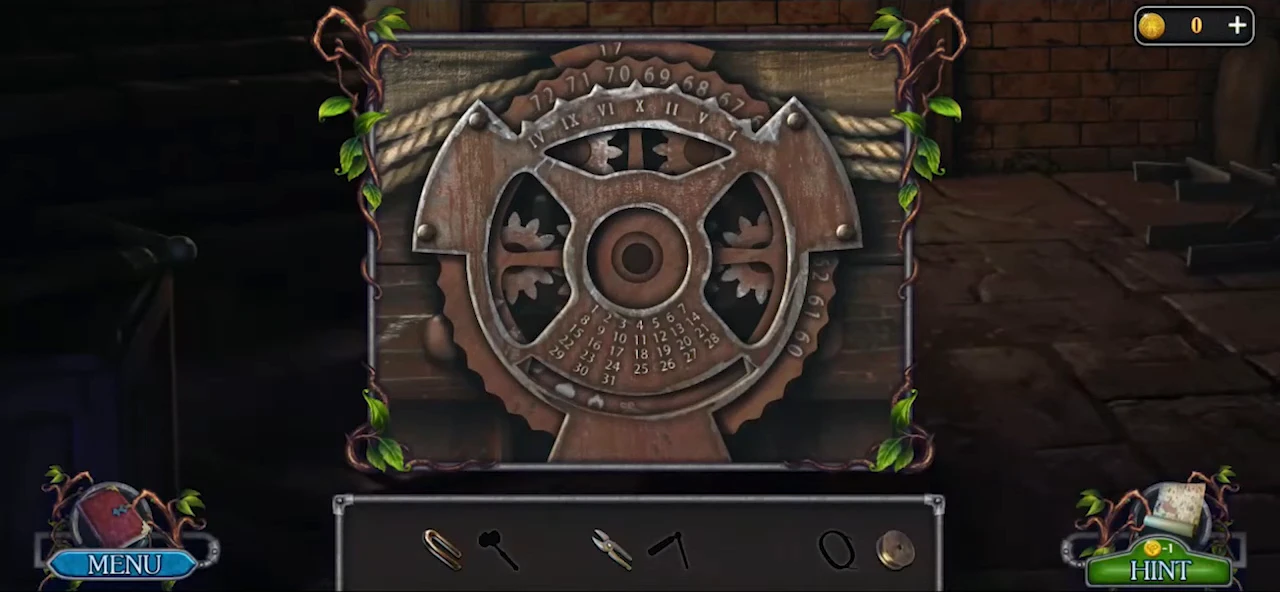
The opened calendar lock: 17 stays at the top and the year ring is turned so that 66 sits above I, under the right-hand spike.
The Dungeon Lock and the Beam Maze
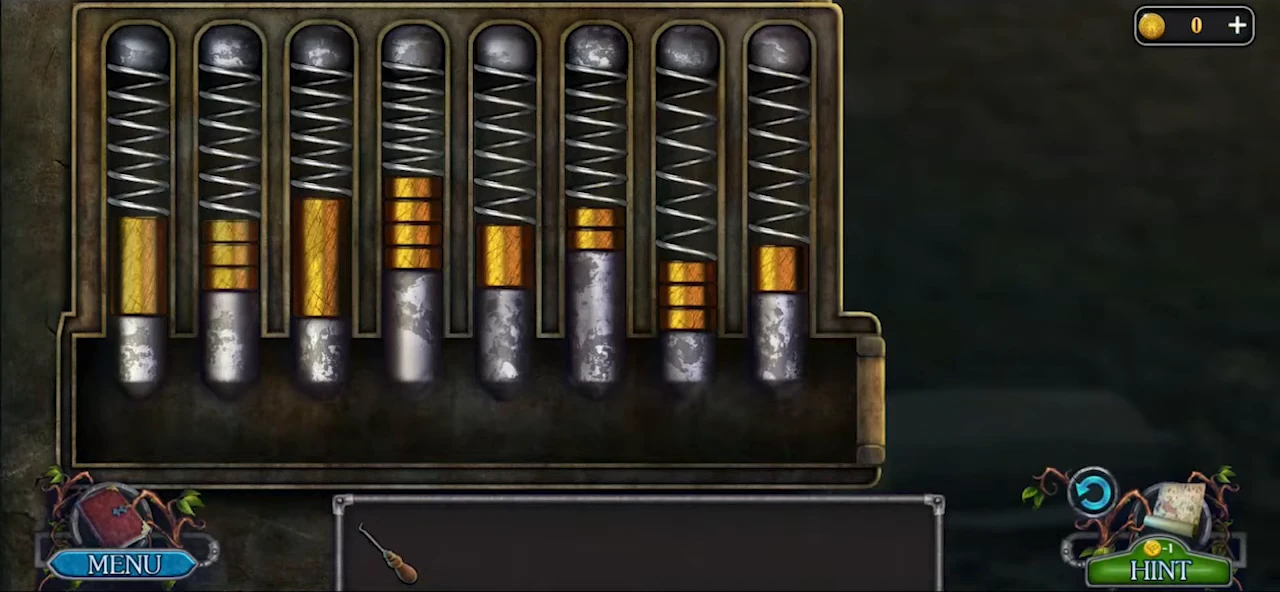
Reach the prisoner and find the key to his shackles.
- Go left, pour the ACID on the lock and use the LOCKPICK. The lock has eight spring pins. Tap under a pin to push it up with the pick; each pin is either down or raised. A raised pin stays up only if it is the correct next pin. If you raise a wrong one, the pins you had already raised drop back down and only the pin you just pushed stays up, so start again. Raise the pins in this order, counting from the left: 4, 5, 3, 2, 6, 1, 7, 8. Both recordings used exactly this order. The gold sections do not end up level; the lock opens as soon as all eight pins are raised.
- Move the cup and take the DETAIL. Select the wall panel and fit the DETAIL. Move the grey blocks so the green beam bounces from the emitter at the bottom all the way to the red block at the top.
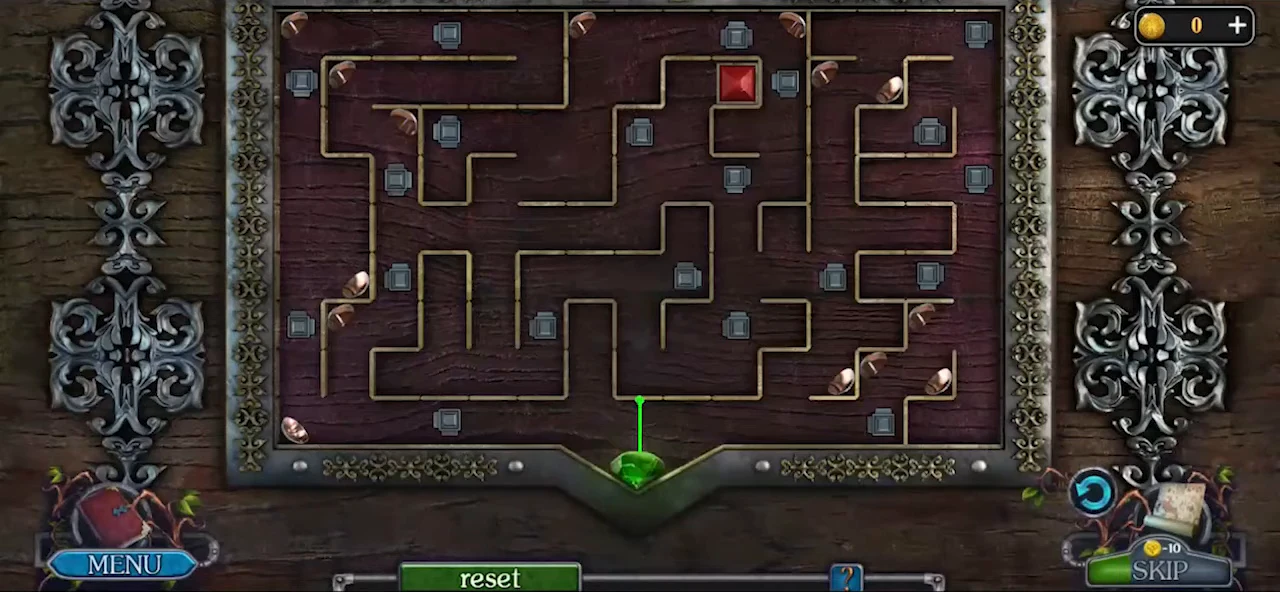
The beam maze at the start. Move the grey blocks to bend the green beam. 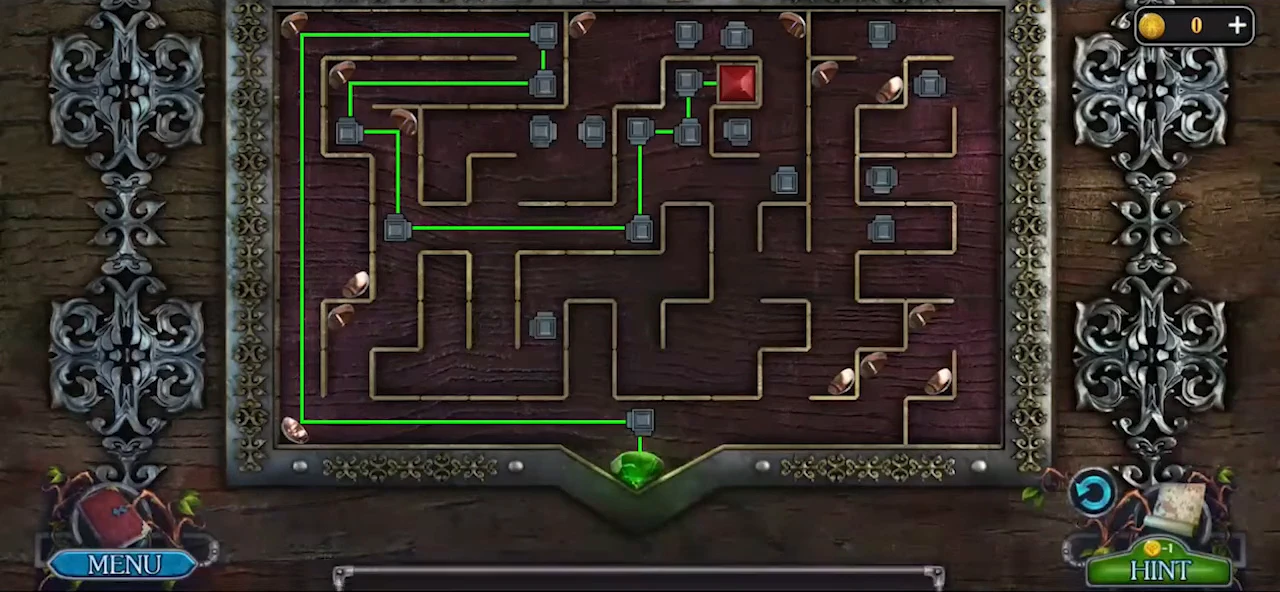
One finished route: the green beam reaches the red block. - Take the KEY TO THE SHACKLES and free the prisoner with it. Watch the escape scene: the prisoner explains that before he was caught he stole the key to the chest that holds a protective bracelet and threw it into the sewer hatch near the town hall. In the street he holds off the guards so that Elliot can run, but a witch catches Elliot and he ends up in the cage where the main game finds him.
The Tunnel Map
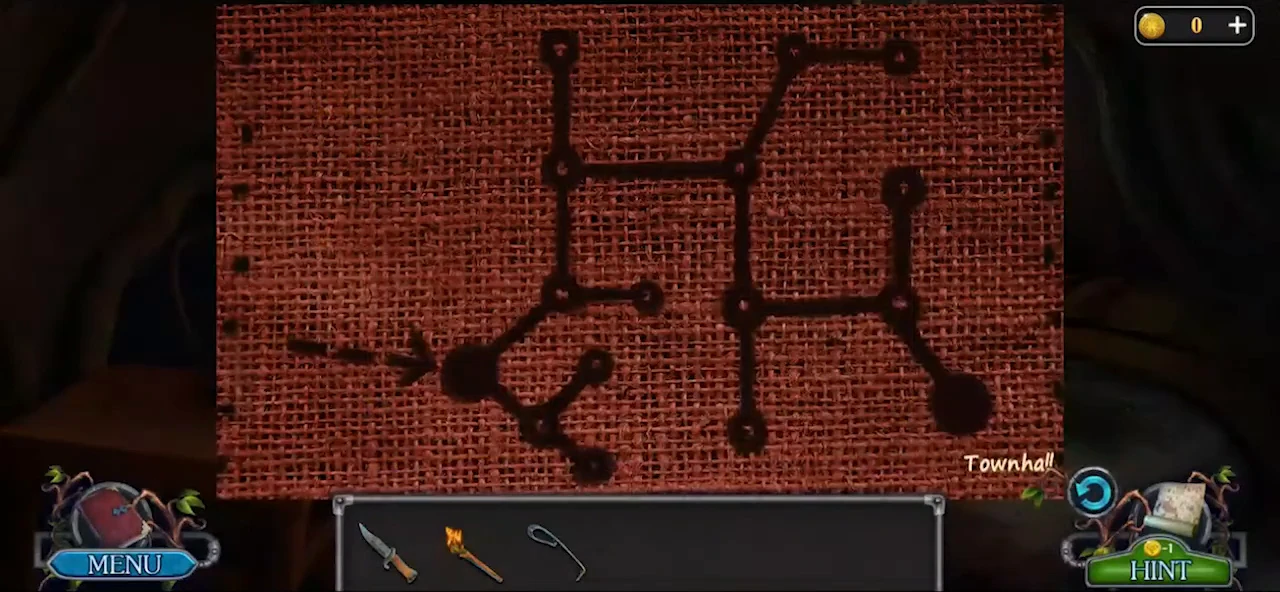
The Resistance man threw the chest key into a sewer hatch near the town hall, and Elliot sets out to finish the task himself. A map scratched on cloth shows the way through the tunnels.
- Walk down and go forward to the hideout. Take the TORCH, the DAGGER and the RABBLE. Cut the cloth with the DAGGER to reveal a map of the tunnels leading to the Townhall. Use the TORCH on the sewer hatch.
- In the tunnel, choose the passages in this order: left, forward, right, right, forward, right, forward. You arrive in the crypt.
The Crypt: Gauntlet, Wolf Tiles and Ruby Key
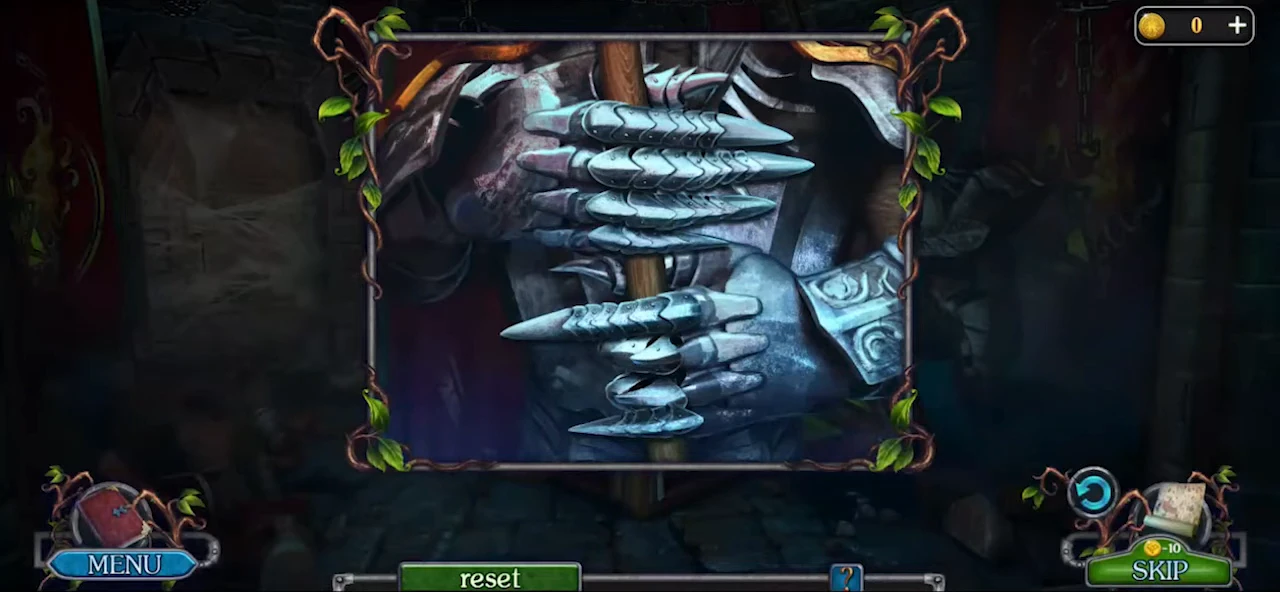
Assemble the ruby key for the artifact chest.
- Take the BROKEN KEY from the niche. Use the RABBLE on the loose stone to get the STONE WITH THE WOLF. Select the knight's gauntlet and tap each bent metal finger until all of them are straight; take the SPEAR.
- Open the sarcophagus with the SPEAR and take the SWORD and the FIRE POWDER. Burn the cobweb on the wall with the TORCH.
- Put the STONE WITH THE WOLF on the floor tiles and tap them in this order: sun (lower left), green man (lower right), moon (upper left), wolf (upper right). The path lights up.
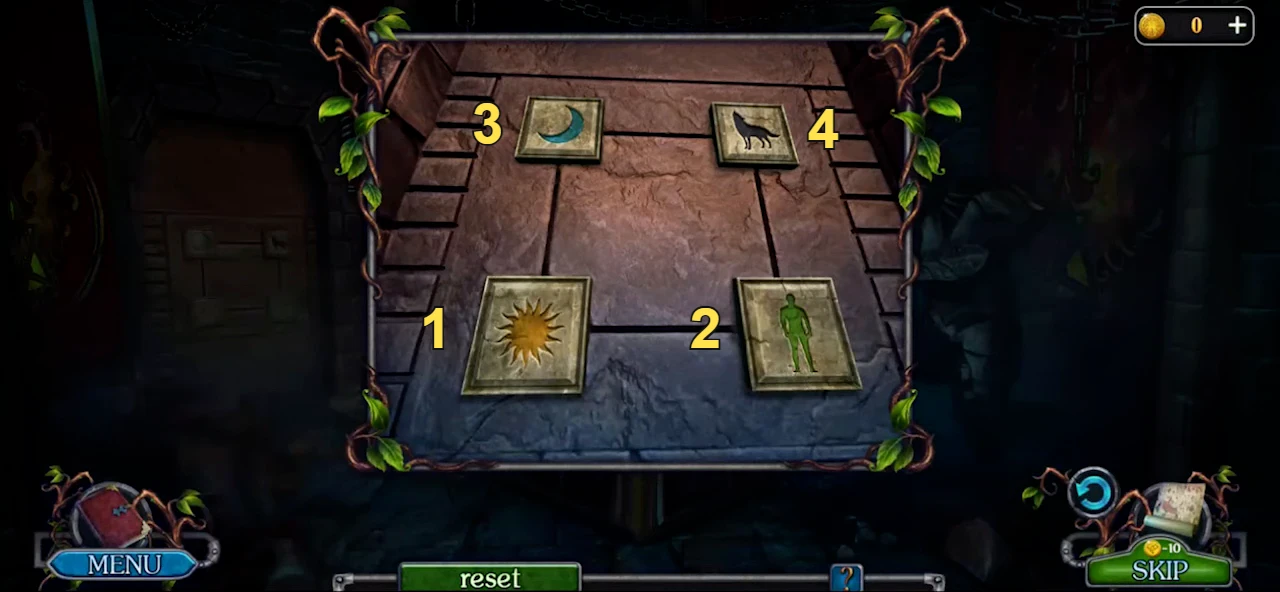
Tap the floor tiles in the numbered order: sun, green man, moon, wolf. - Play the hidden-object scene Find all the rubies (15) to earn the RUBIES.
- Open the BROKEN KEY in the inventory and add the RUBIES. Drag the ruby pieces into the empty ring of the key until it is filled; you earn the RUBY KEY.
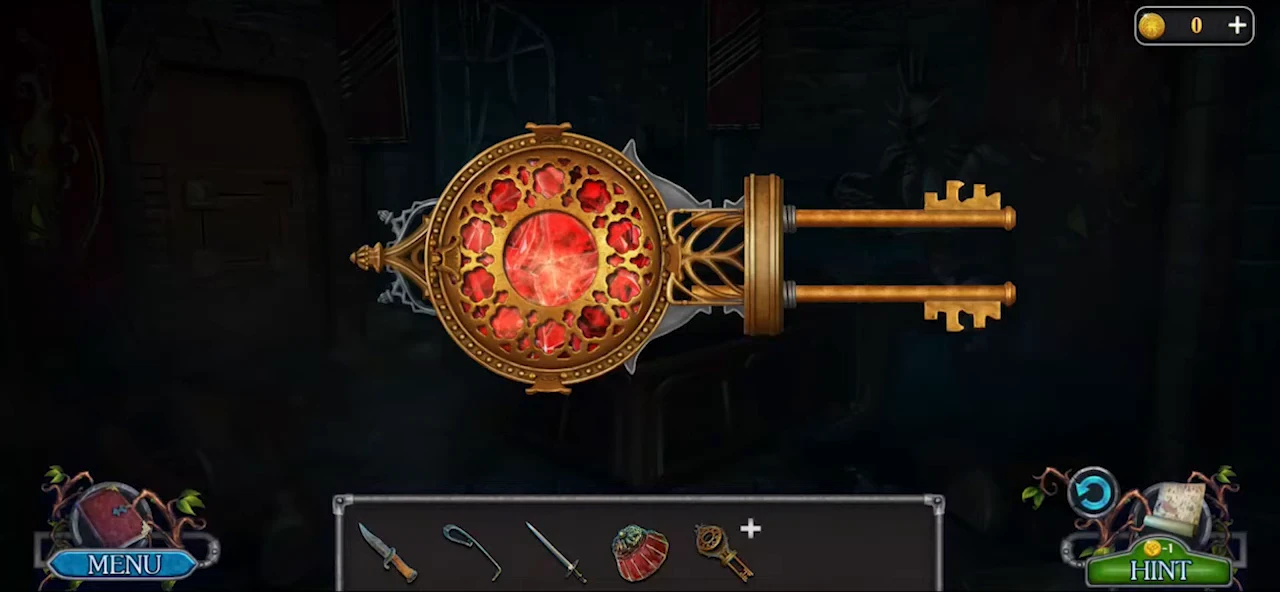
The finished RUBY KEY with its ring filled.
The Three-Gem Door
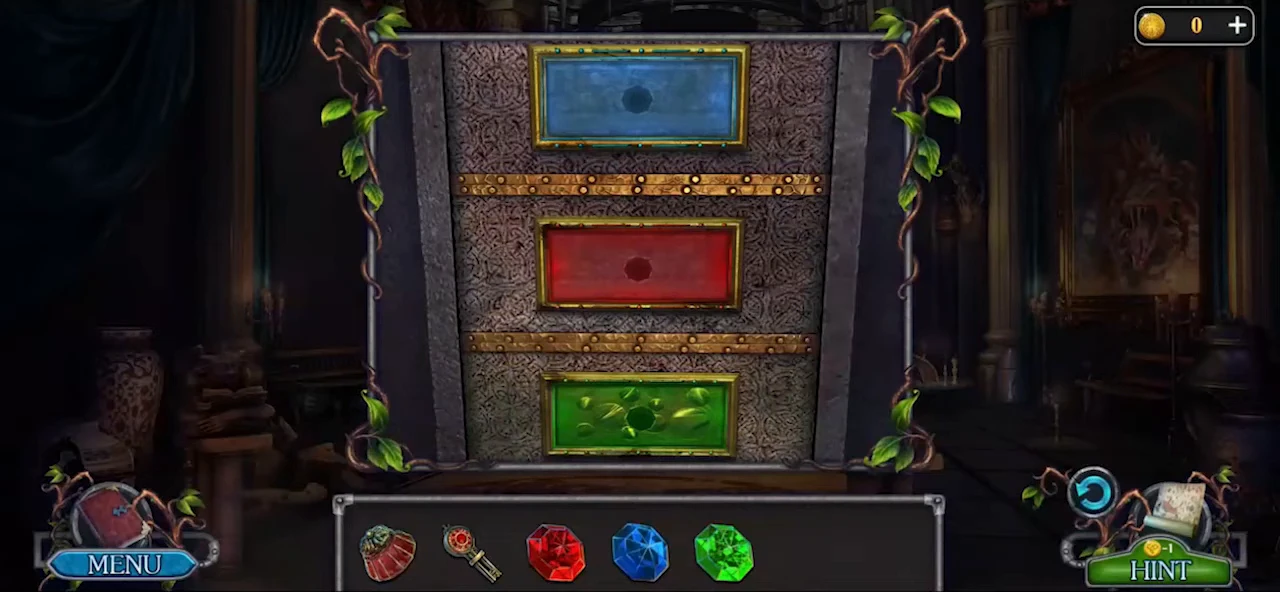
Find a ruby, a sapphire and an emerald. Each gem opens its own lock on the door.
- Go left to the throne hall. Cut the curtain with the SWORD and take the RUBY. Use the DAGGER to earn the SAPPHIRE. Take the KEY, use it and take the EMERALD.
- Sapphire lock: place the SAPPHIRE. The game asks you to connect all the points with a single continuous line; the red wedges are arrows that show which way their groove must be drawn. Drag blue lines from node to node along the grooves until every groove on the board, both the white ones and the red wedges, carries a blue line. The lock glows when the last groove is covered.
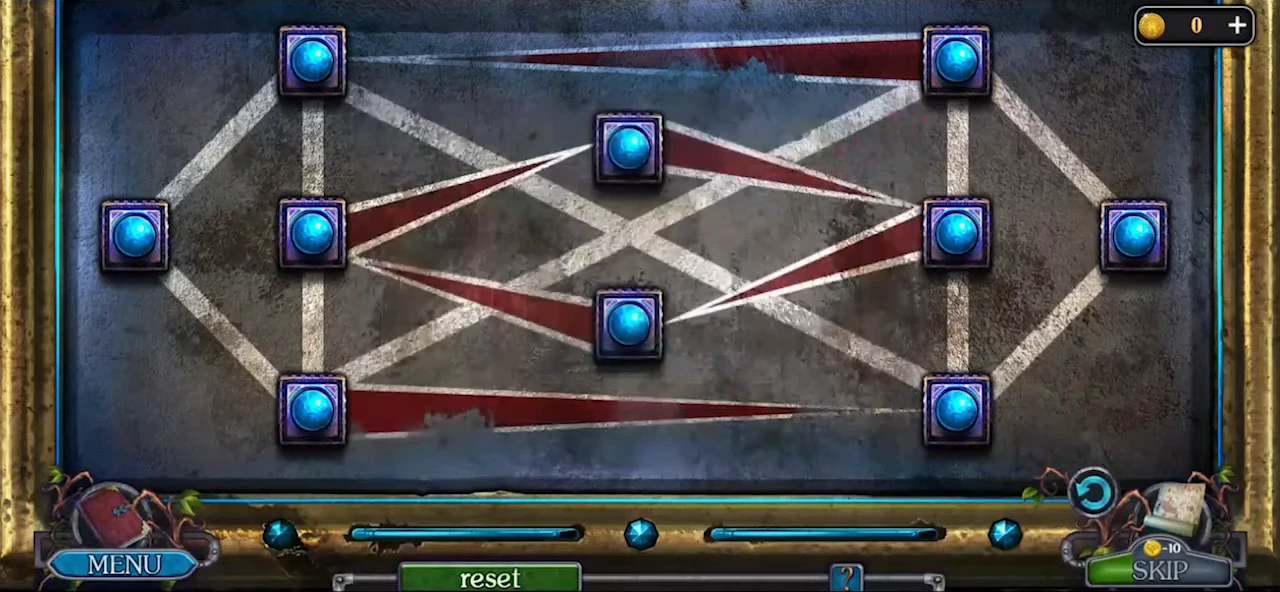
The sapphire lock at the start. The red wedges are arrows that show the direction of their groove. 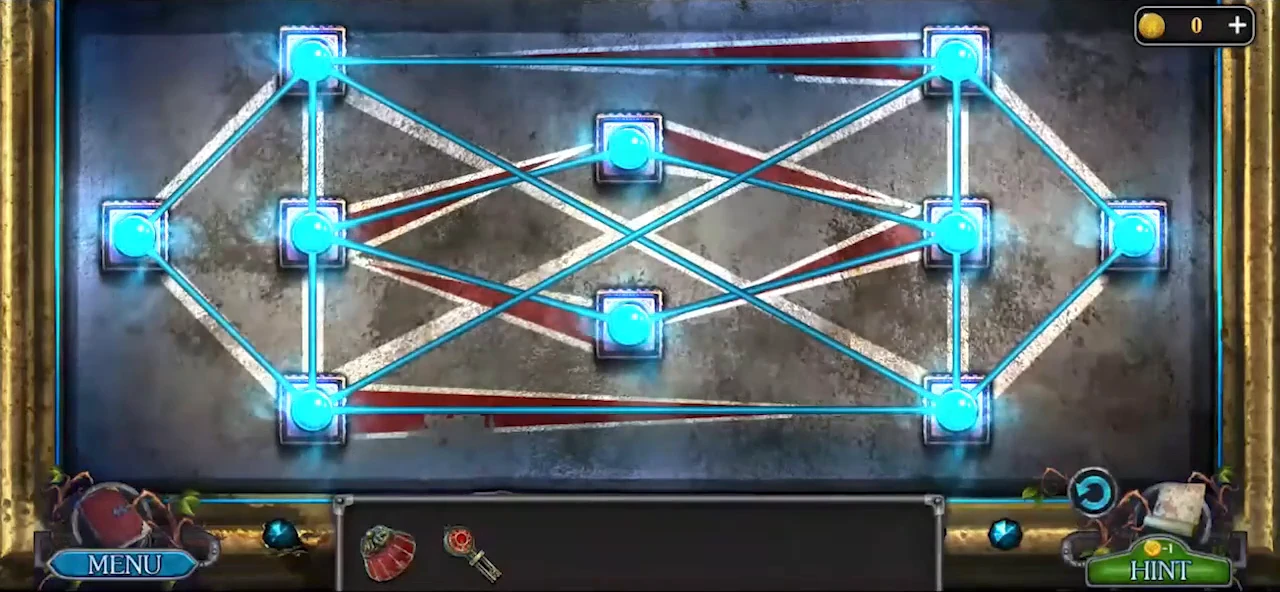
The finished sapphire lock: every groove carries a blue line. - Ruby lock: place the RUBY. In each of three rounds, drag the rune stones onto the round sockets so that the red beams between them copy the pattern on the right exactly: round 1 is a diamond with a cross, round 2 a cross with side bars and round 3 an hourglass-shaped star.
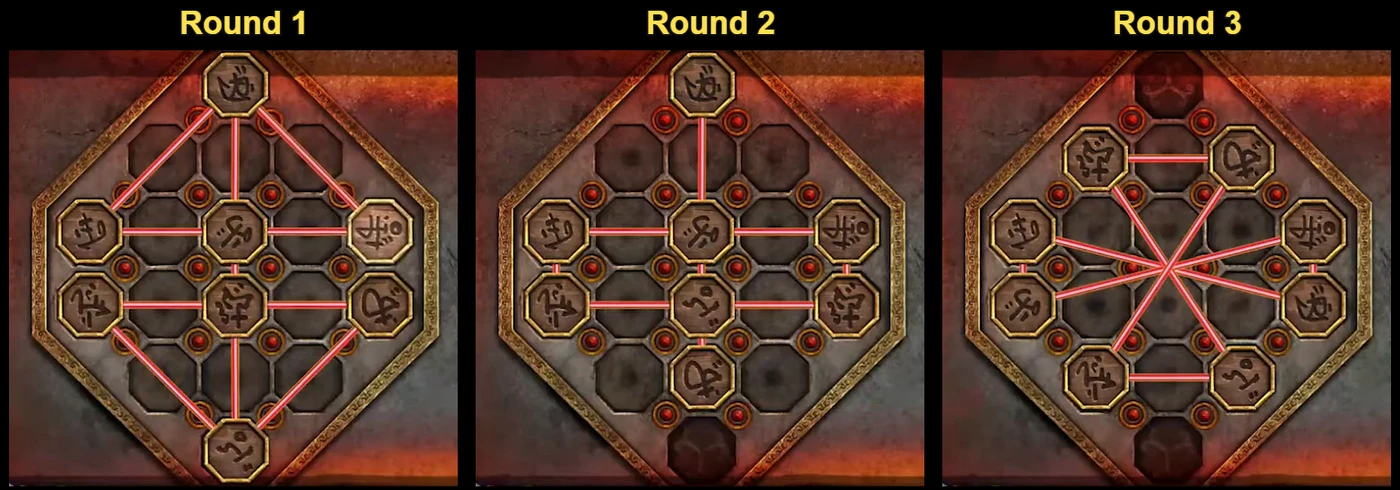
The ruby lock, all three rounds finished in the recorded game. The red beams match the pattern shown on the right of each round. - Emerald lock: place the EMERALD. Rotate the left ring, the right ring and the centre square until the knotwork and the feathers join into one complete picture.
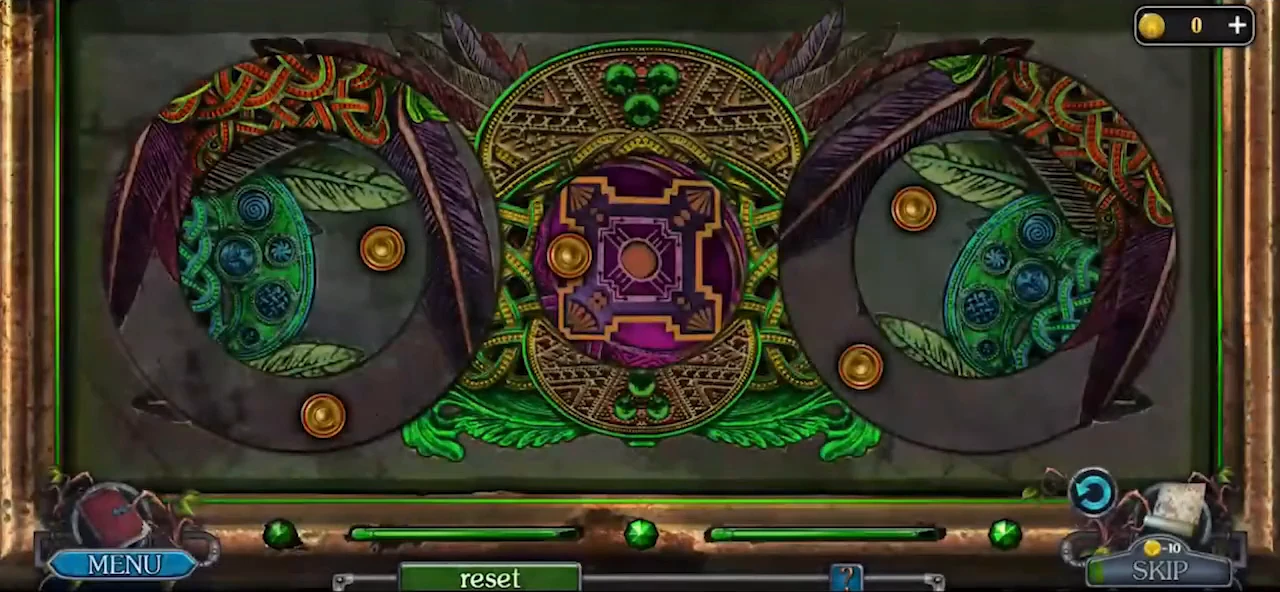
The emerald lock at the start. 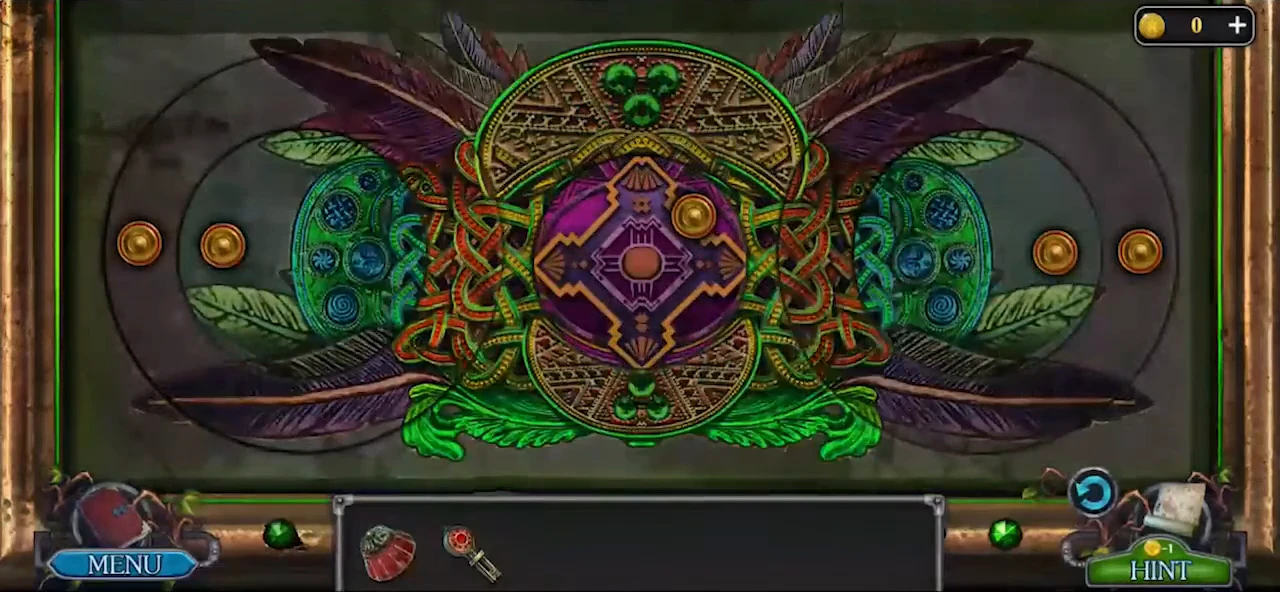
The finished emerald lock: the rings and the centre square form one picture.
The Tree and Wolf Discs and the Bracelet
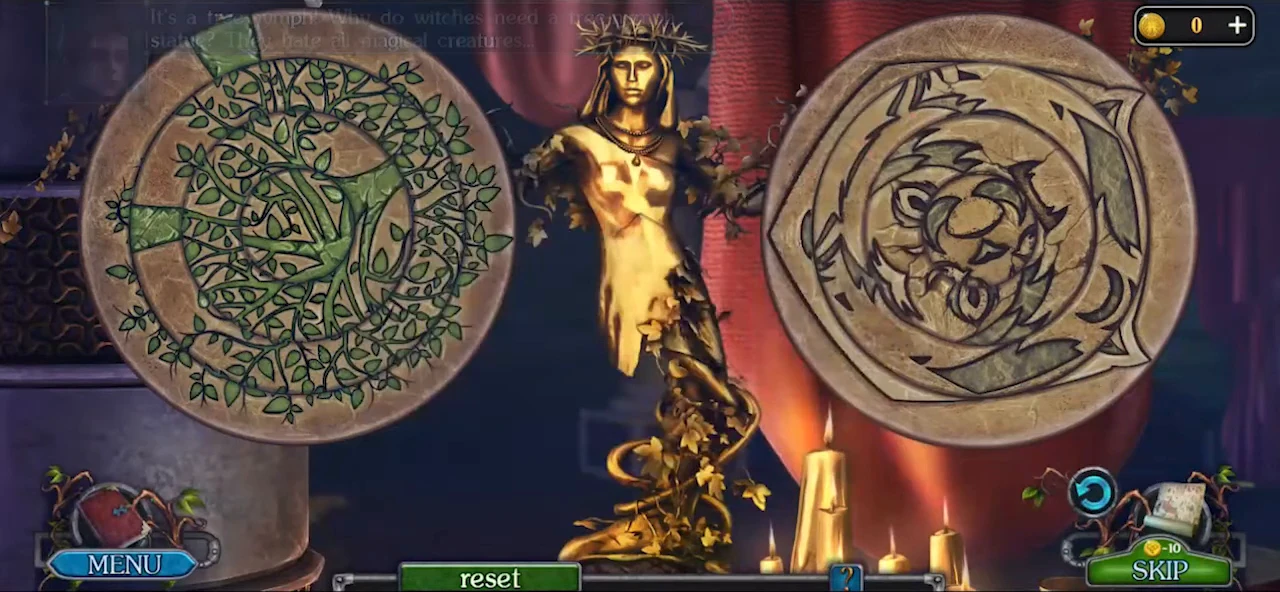
Prepare the ritual bowl and open the artifact chest. The bracelet inside is the protective artifact the Resistance man was sent to steal.
- Go forward. Read the book and take the EMPTY BAG. Walk down and fill the bag to get the ASHES OF THE GARGOYLE, then go forward and select the statue.
- The statue holds two discs, a tree on the left and a wolf on the right. Each has an outer ring, a middle ring and a centre. Drag a ring to turn it freely. Some rings are linked, so turning a wolf ring can also turn a tree ring. You are done when both pictures are whole at the same time: the tree trunk runs straight down to the bottom and the wolf face is upright. An order that works: turn the tree outer ring anticlockwise until its trunk piece is at the bottom; turn the tree middle ring anticlockwise and then the tree centre clockwise until the tree is complete. Next turn the wolf middle ring anticlockwise until it fits, and touch up the tree centre. Turn the wolf centre anticlockwise, almost a full turn, until the face is upright. That also turns the tree outer ring, so turn that ring anticlockwise until the trunk lines up again. Finish with a small clockwise turn of the wolf middle ring and a small anticlockwise turn of the tree centre; both discs glow green.
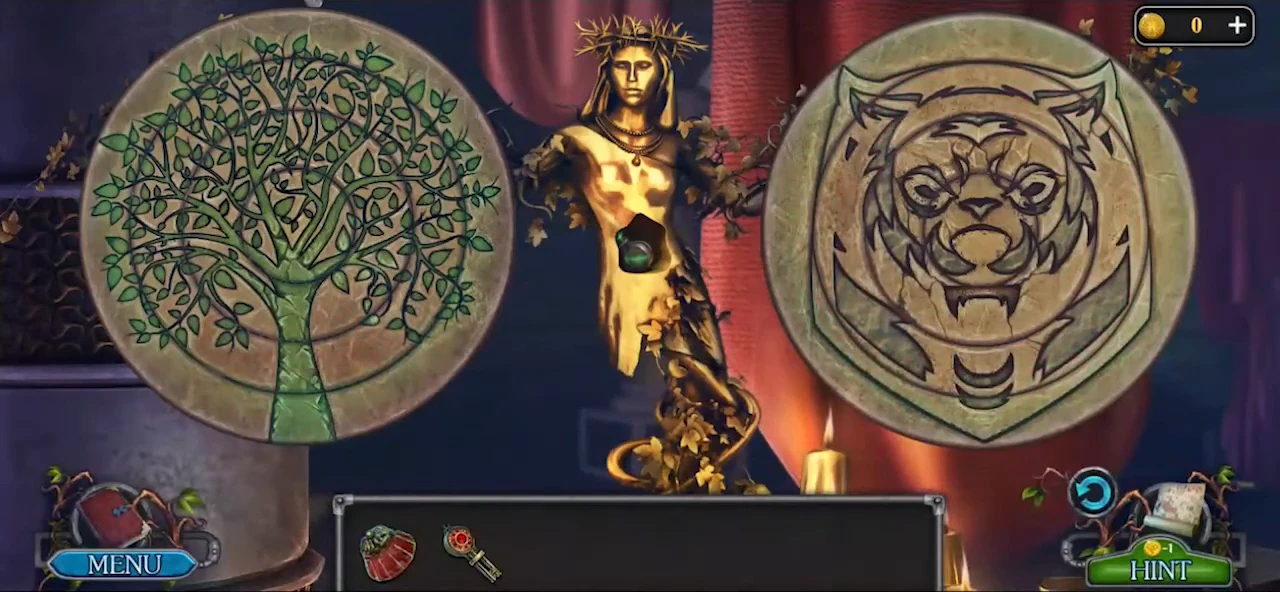
Both pictures complete: the tree trunk points down and the wolf face is upright. - Take the TREE-NYMPH'S BLOOD from the statue.
- Put the FIRE POWDER, the TREE-NYMPH'S BLOOD and the ASHES OF THE GARGOYLE into the three beams over the bowl. Open the chest with the RUBY KEY and take the BRACELET. In the closing scene Elliot brings the bracelet to the captain, who remembers Bertran, the captured man, and welcomes Elliot into the Resistance. This ends the Bonus Chapter.