CHAPTER 3
The Groom's Hut and the Rose Painting
A boy is locked in a cage outside. Collect three doll pieces and make a water bottle for him.
- Go into the groom's hut. Zoom in on the table with the candles at the back left and smash the big clay pot with the HAMMER; take DOLL 1/3 from the shards and the DISH from the table. Zoom in on the water trough on the floor at the front left and scoop with the DISH to get the BOWL OF DIRTY WATER. Zoom in on the pile of hay on the right and take the PITCHFORK and BRUSH 3/3 from it.
- Walk down to the yard outside the hut. Zoom in on the stone hollow under the purple cloth and pull DOLL 2/3 out with the PITCHFORK.
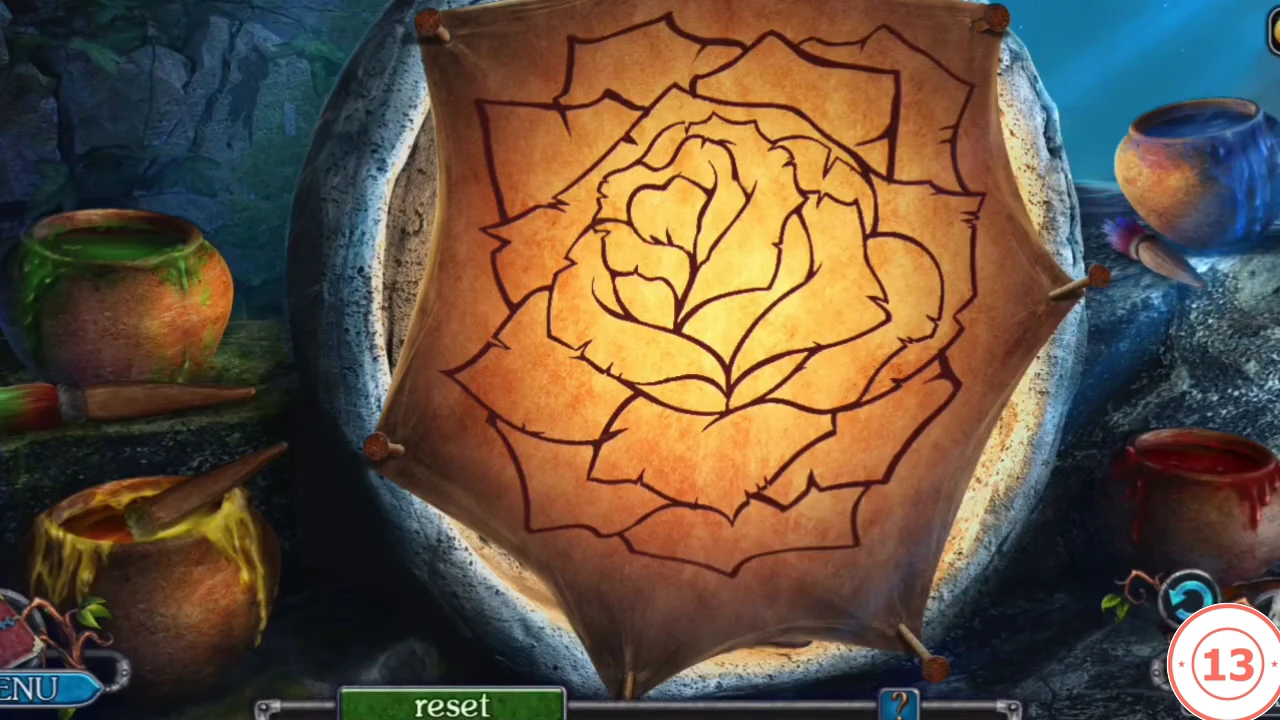
- Place the three BRUSHES at the rose painting. Dip the brush in one of the four paint pots (green, yellow, red, blue) and tap an area of the rose to paint it. Paint every area to match the finished picture. Reset clears the canvas.
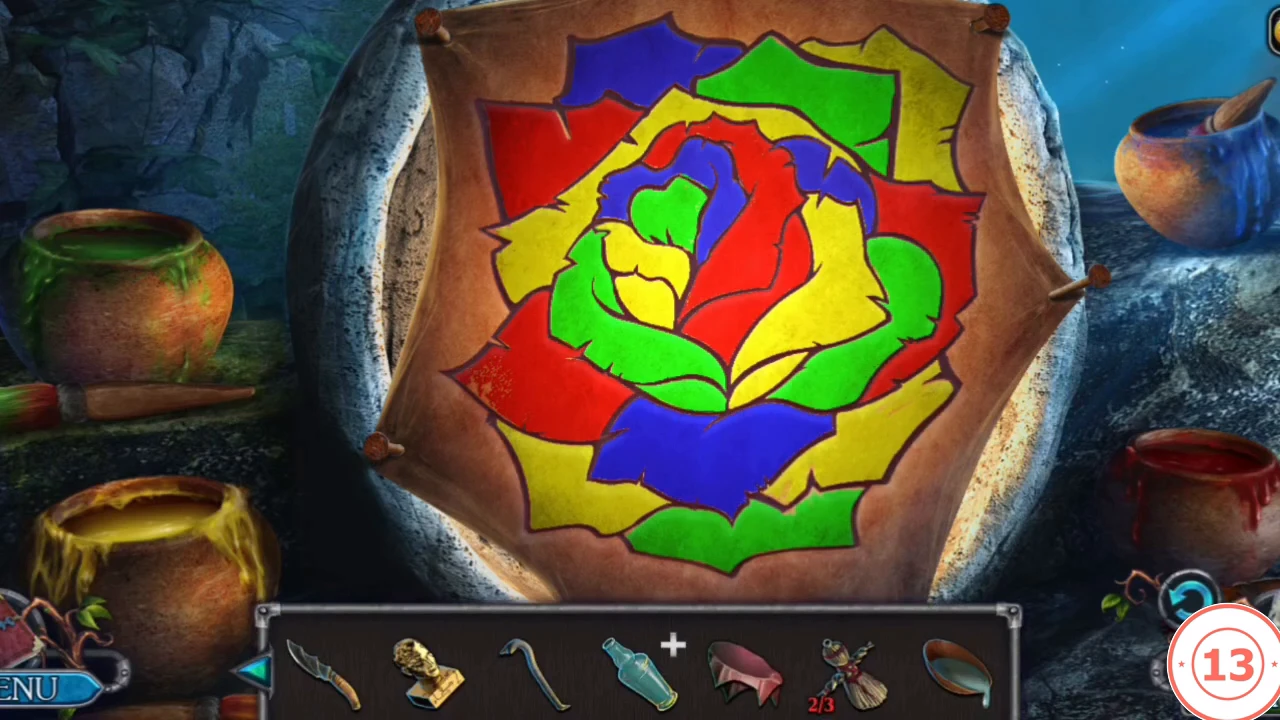
The finished rose from the recorded game, shown as the solve animation begins. Paint each area in the colour shown here. - Take the FIGURINE. Use the KNIFE and the FIGURINE to take the FUNNEL. Add the FUNNEL, the CLOTH and the BOWL OF DIRTY WATER to the BOTTLE to make the WATER BOTTLE.
- Walk down and give the WATER BOTTLE to the boy in the cage. He gives you DOLL 3/3. The task becomes Bring the lockpick.
CHAPTER 3
The Straw Doll Board and the Lockpick Case
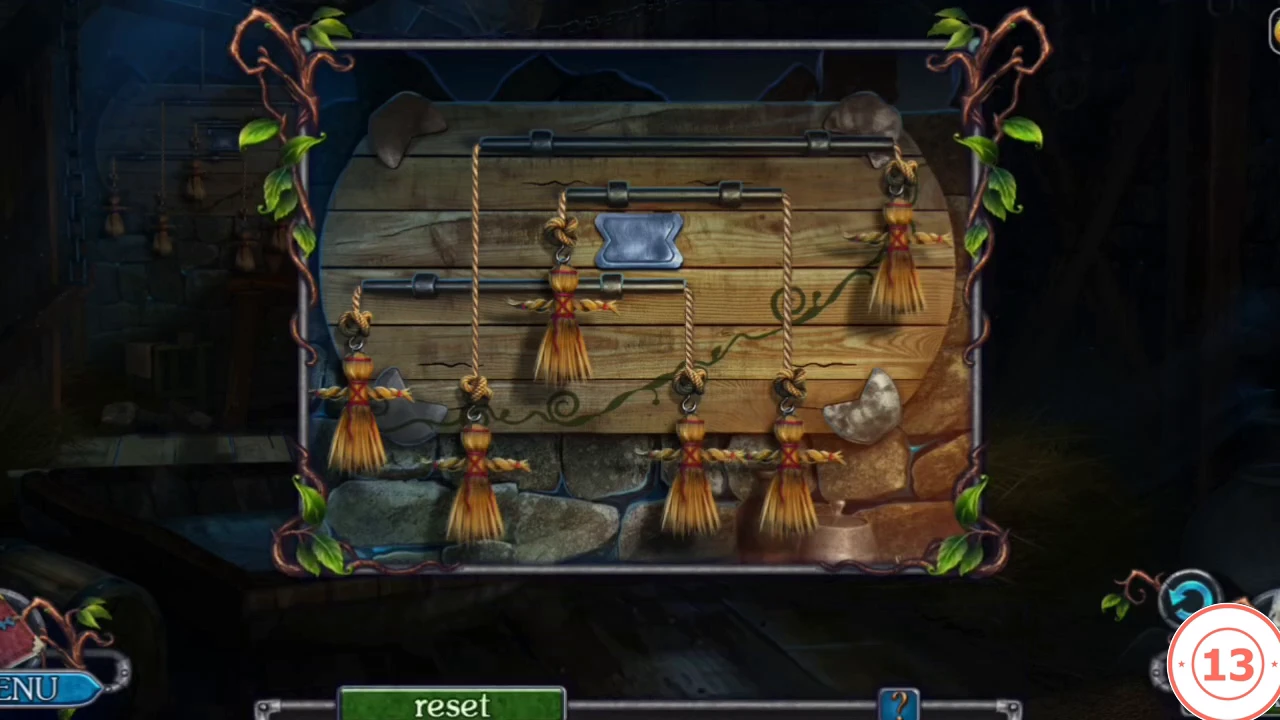
The groom's board and a case of lockpicks stand between the boy and freedom.
- Go forward and right, and place the DOLLS on the board. Tap the straw dolls to move them along their ropes and rails. The game gives no rule on screen; the finished board has the dolls hanging with their heights rising from left to right. When they are in place the board opens and gives you the KEY.
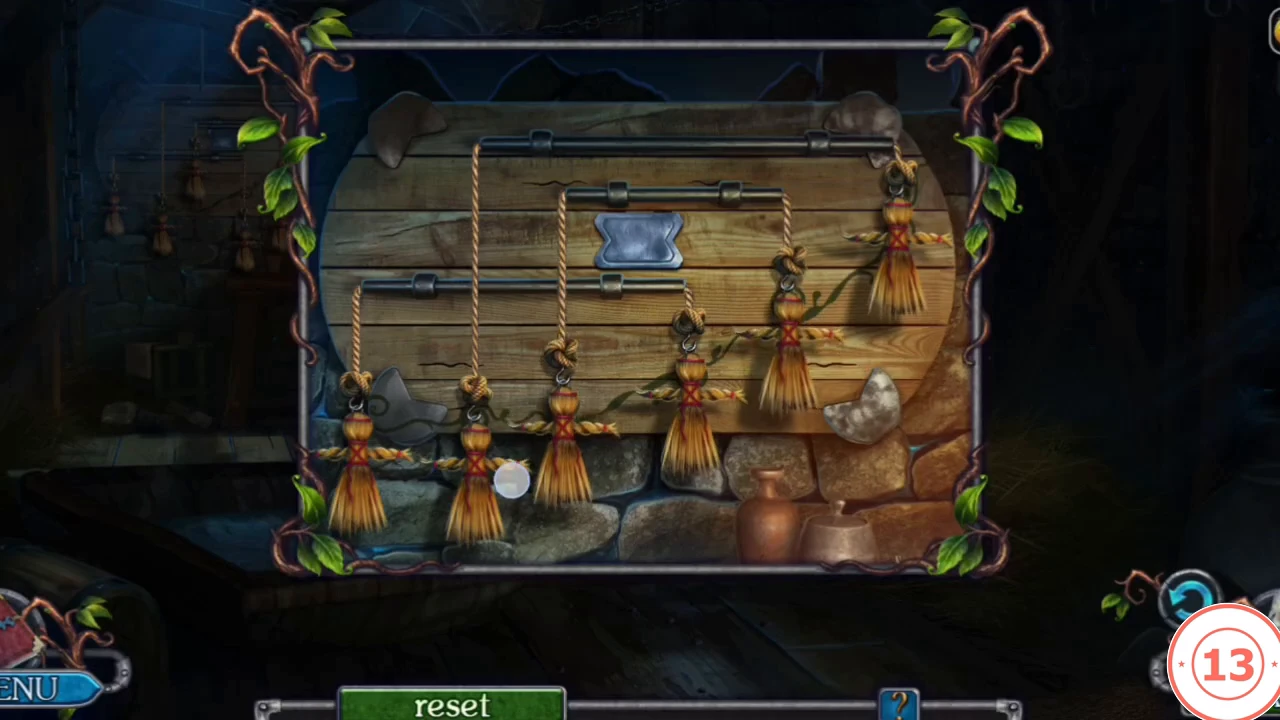
The finished board: the dolls' heights rise from left to right. - Use the KEY. Pry up the floor with the CROWBAR and select the case; open it with the KNIFE.
- This is a memory game. Tap two handles to slide out their picks: two identical picks stay out, two different ones slide back. The case holds nine handles, four on the left and five on the right. Match all four pairs; the ninth pick, the only one without a twin, is the LOCKPICK.
- Walk down twice and give the LOCKPICK to the boy, Elliot, so he can get out of the cage.
CHAPTER 3
The Groom's Room and the Silver Path
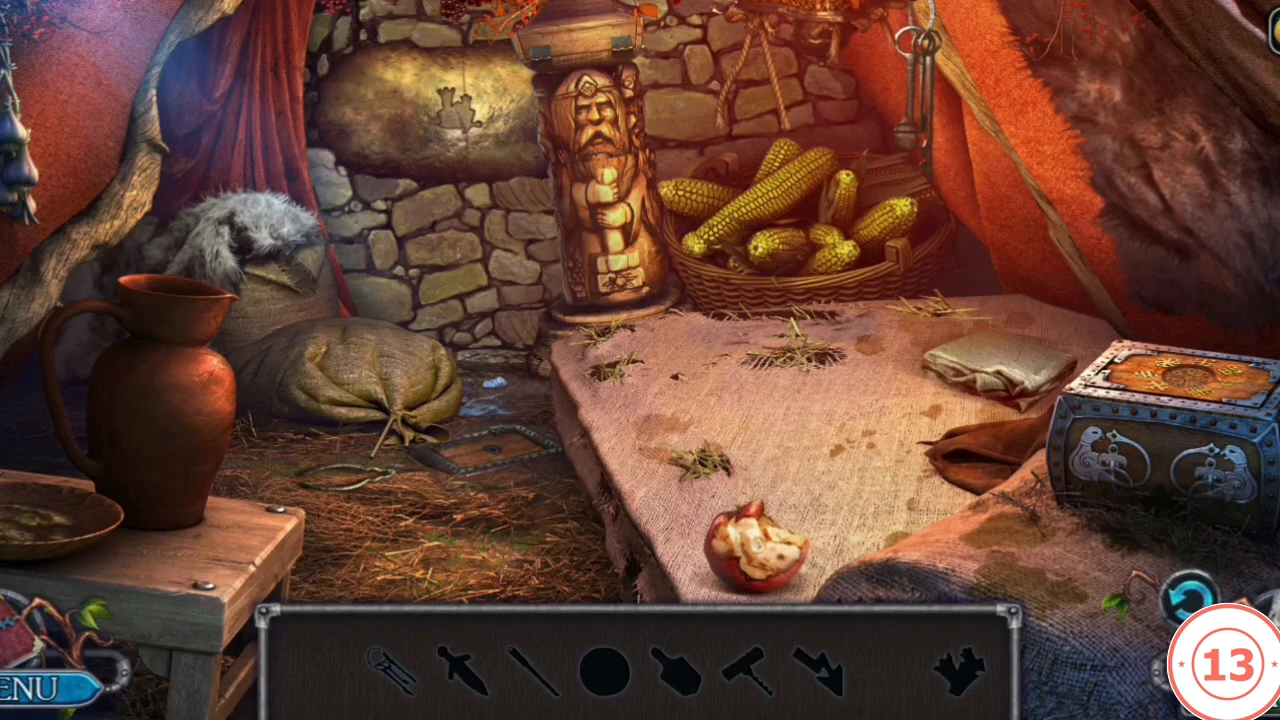
An interactive hidden-object scene leads to the secret passage into the city.
- Go forward into the groom's room. This is an interactive hidden-object scene: the bar at the bottom shows the outlines of the objects you still need, and each one is used somewhere in the room. Zoom in on the small locked chest on the floor beside the tied sack at the left ("I need a key") and take the PIECE OF CLOTH lying there. Zoom in on the torn curtain at the upper left, where a hole shows the stone wall, and cover the hole with the PIECE OF CLOTH ("I need something to fix the fabric"). Take the PINS from the pin cushion on the bed and pin the cloth in place. The mended curtain now shows seven embroidered symbols with numbers ("It looks like a hint"): the swirl-cross on the left 1, the large knot at the lower right 2, the four-loop knot at the upper right 3, the hooked cross at the top 4, the forked cross at the bottom 5, the cup on the right 6 and the star at the upper left 7.
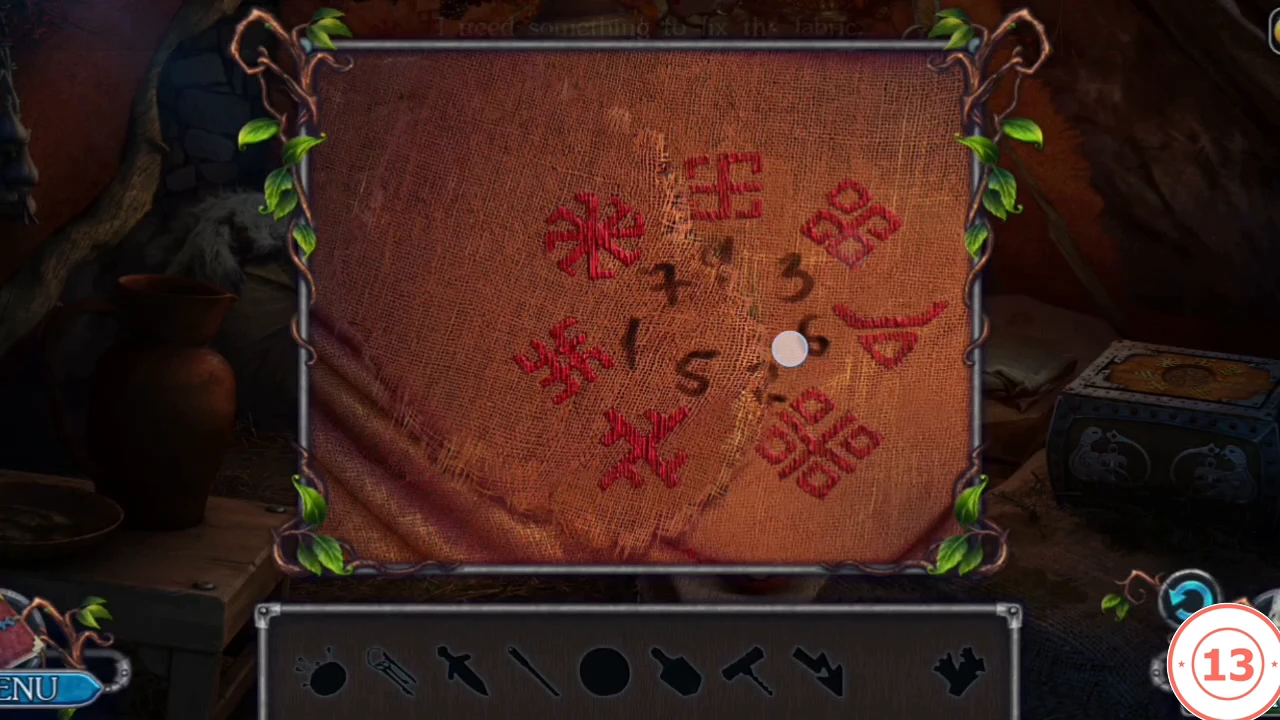
The curtain clue: each embroidered symbol has a number. Press the same symbols on the box in order 1 to 7. - The carved wooden column left of the corn basket is made of two parts that turn separately: tap the head to show the next carved head, and tap the body to show the next carved body. Turn the body until it shows the robed figure with an empty arrow-shaped hollow running down its front, then turn the head to the bearded man in a round cap. The column cannot open yet. Take the KEYS hanging from the hook on the wall to the right of the corn basket.
- Open the small chest beside the sack with the KEYS and take the RUM. Take the SAW tucked into the folds of the red curtain at the upper right and use it on the tied sack ("The bag is tightly tied"): hazelnuts spill out and you get the SWORD FIGURINE. In the close-up of the symbol box on the right, take the CORKSCREW. Zoom in on the bowl and jug on the stool at the left ("There's something at the bottom of the jug, but the neck is too narrow"). Put the RUM there, open it with the CORKSCREW and pour it into the jug; the ARROW floats up and you can take it.
- Put the ARROW into the arrow-shaped hollow on the column's body. If the head has turned away, tap it until the bearded man in the round cap shows again; the top of the column opens and gives you the ELEMENT WITH PETALS. Place it in the empty centre of the symbol box ("I think that something is missing"), then press the seven symbols in the curtain's number order, 1 to 7. The box opens; take the CASTLE FIGURINE.
- Zoom in on the castle-shaped hollow in the gold wall panel at the upper left of the room and place the CASTLE FIGURINE and the SWORD FIGURINE in it. Slide the silver pieces (the orange studs block their way) to build a track from the purple mark on the left to the purple mark on the right, and drag the purple token along it. The token can move forward along any pieces that already join up, so you can advance it part of the way, then slide further pieces into line ahead of it. When it reaches the right-hand mark the passage opens.
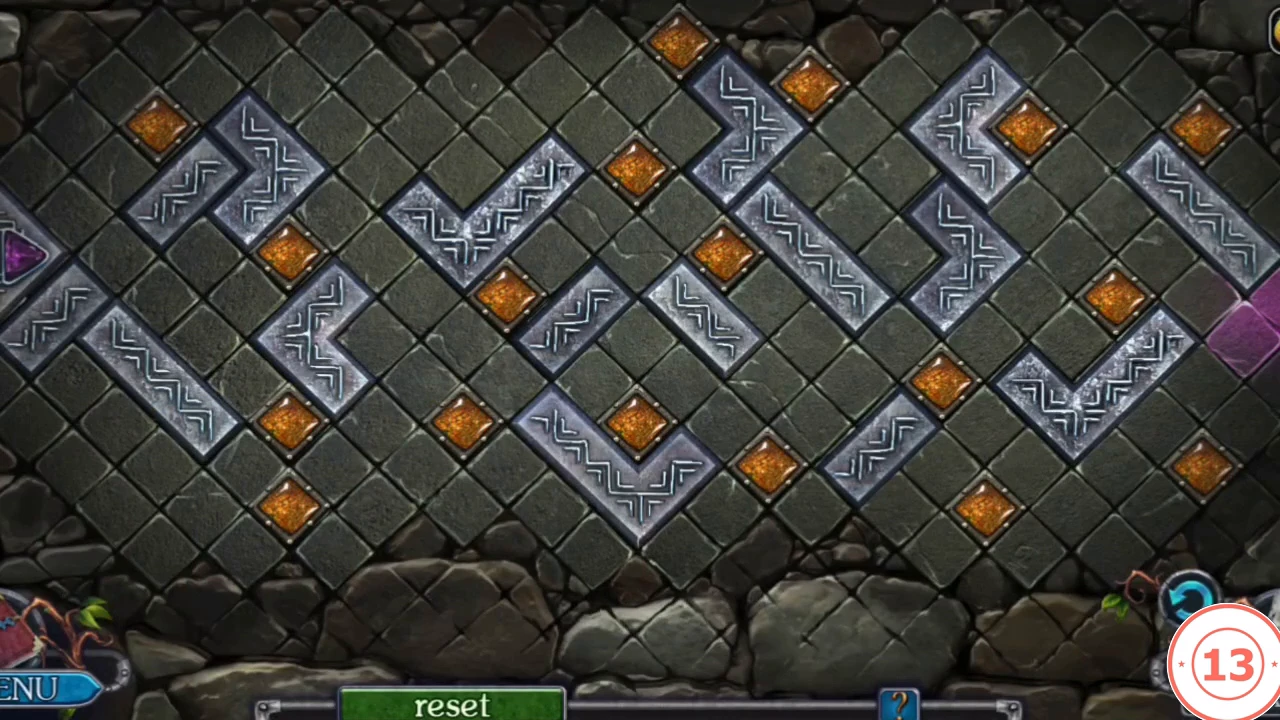
The silver path board at the start. The purple token starts at the mark on the left and must reach the mark on the right.
CHAPTER 3
The Barrel and the Window Grate
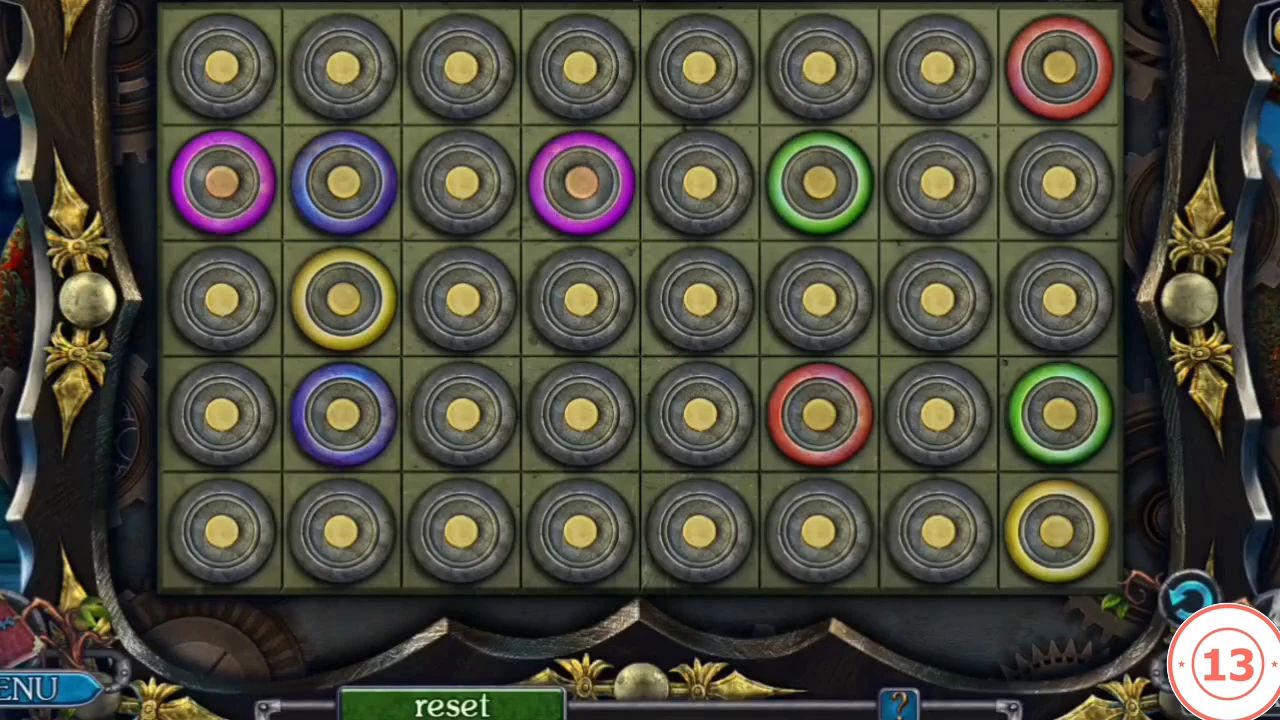
Inside the city, a grate with coloured rings blocks the way.
- Go forward three times and take the SCYTHE. Use the HAMMER and the KNIFE to take the FLOWER OF PURITY, place it and open the grate puzzle.
- On the window grate, draw a line between each pair of rings of the same colour. Lines cannot cross, and every square of the grid must be covered when you are done. A useful habit is to route the pairs along the edges first and fill the middle last.
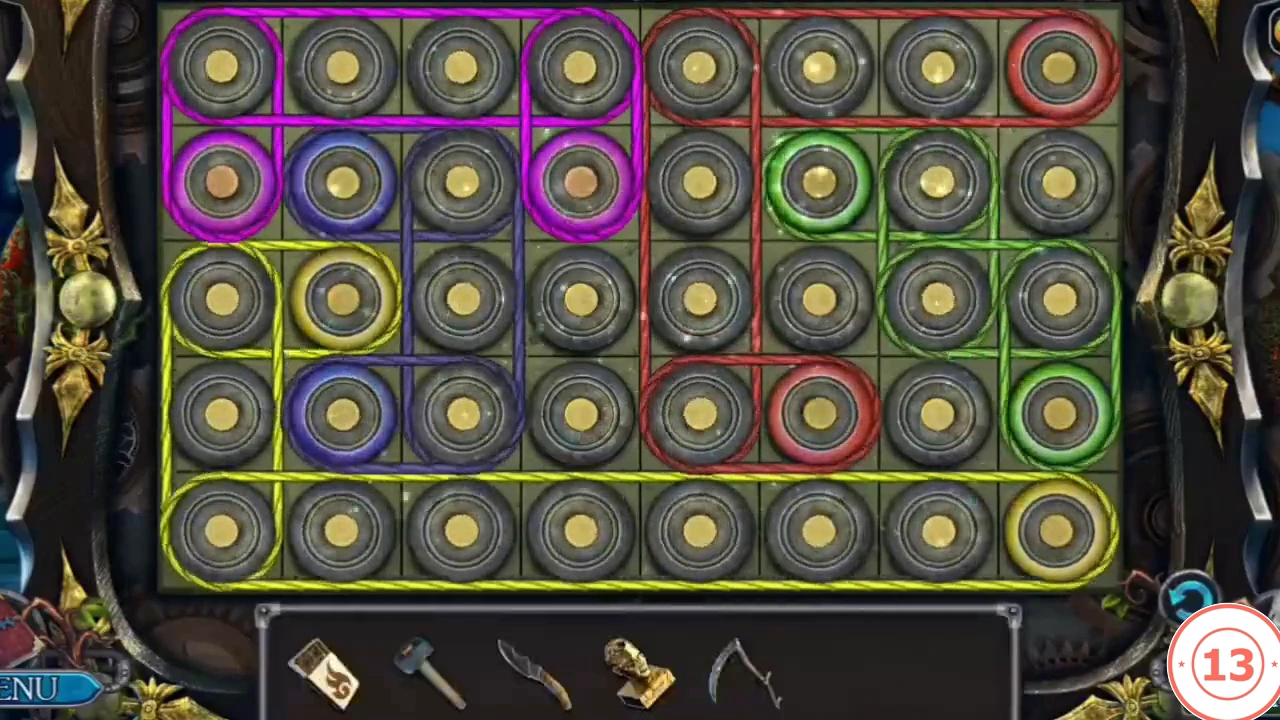
One completed grate from the recorded game: every square is covered and no lines cross.
CHAPTER 3
The Seven Tower Keys
The tower door needs seven key pieces scattered around the city.
- Go forward, move the flowers and take TOWER KEY 1/7. Take the EMPTY BUCKET and use the KNIFE to take the FISH.
- Walk down and fill the EMPTY BUCKET. Go forward and use the BUCKET OF WATER to get the FISH-SHAPED KEY, then use that key to take the FISHING ROD.
- Walk down and use the FISHING ROD to get TOWER KEY 2/7. Go forward twice; at the fountain use the HAMMER to get TOWER KEY 3/7, and take the GEAR.
- Give the FISH to the cat and take the STICK and TOWER KEY 4/7. Cut the STICK into a WOODEN DOWEL. Use the KNIFE to get TOWER KEY 5/7 and the SCYTHE to get the WHEEL.
- Walk down twice and fit the WHEEL on the cart with the WOODEN DOWEL and the HAMMER. Open the window with the KNIFE and take TOWER KEY 6/7.
- Go right and take the PAPER and the COAL. Walk down and go forward; rub the PAPER with the COAL to get the HINT.
CHAPTER 3
The Stag Ball Puzzle
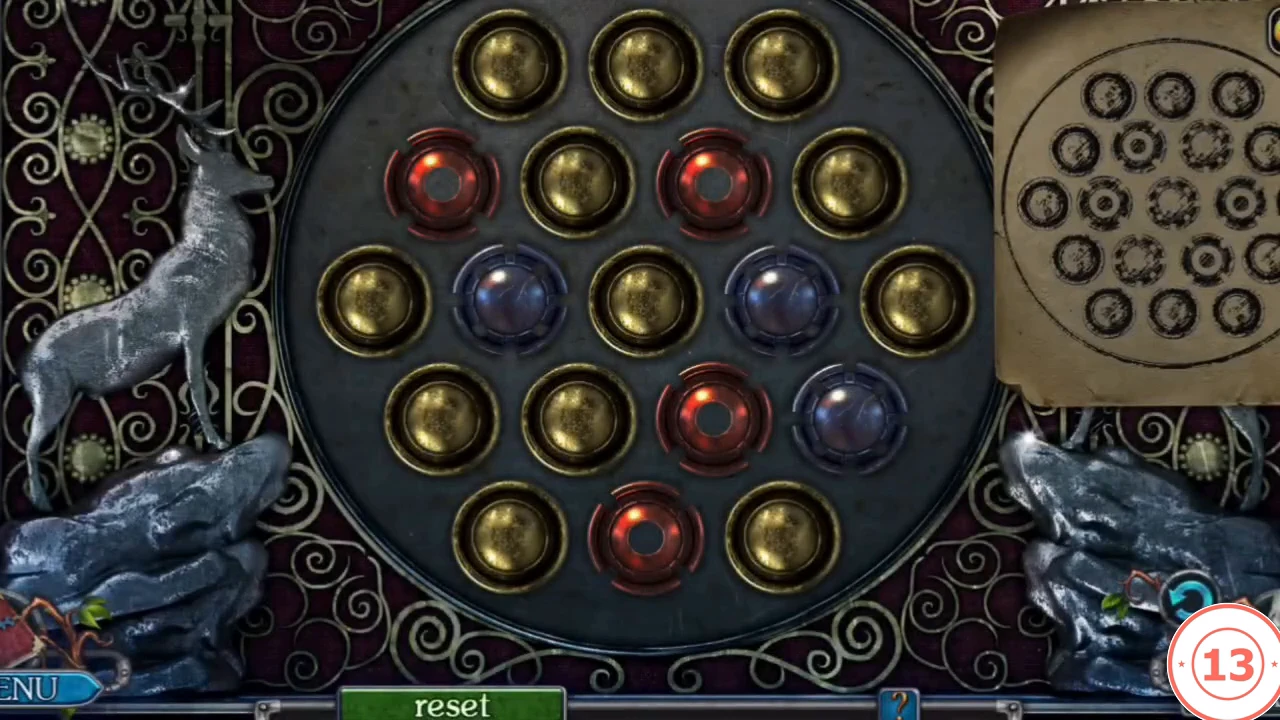
The coal rubbing (HINT) shows the pattern the stag box needs.
- Walk down and put the HINT on the stag box. The holes form five rows of 3, 4, 5, 4 and 3. Tapping a ball turns the six balls around it one step. Copy the rubbing: in row 2 the two middle holes are red then blue; in row 3 the middle three are red, blue, red; in row 4 the two middle holes are blue then red; every other hole is gold (see the picture below). Work from a corner inwards and use balls whose ring does not touch finished holes. Take the FIRE RESISTANT GLOVE and TOWER KEY 7/7.
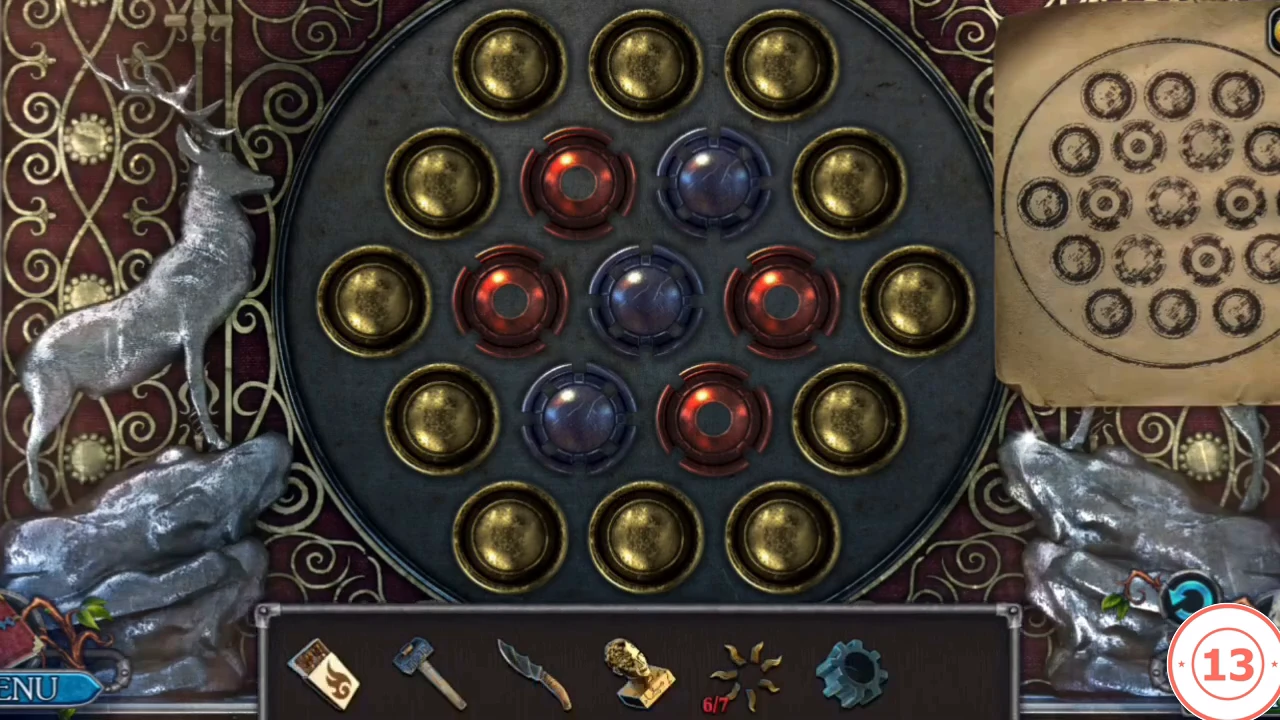
The solved pattern: red and blue form a ring in the centre; all outer balls are gold.
CHAPTER 3
The Tower and the Chip Map
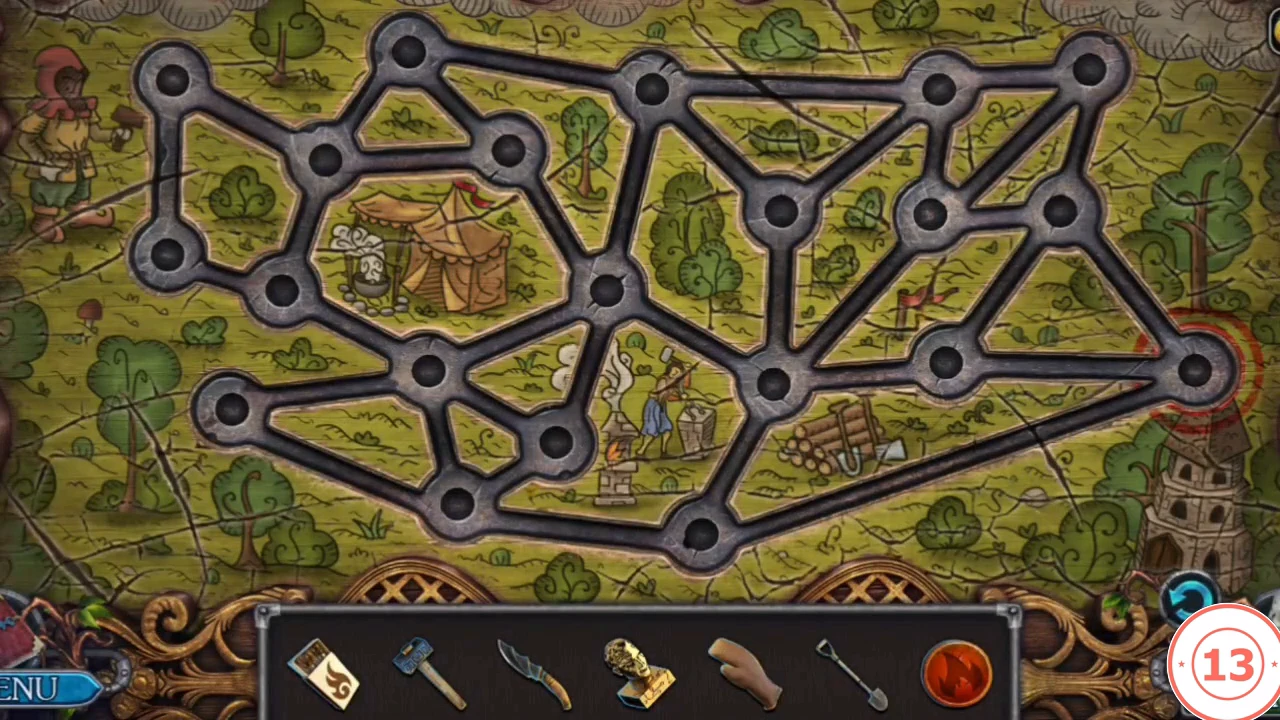
Open the tower and guide a chip across a road map.
- Go forward twice and use the assembled TOWER KEY on the door. Go forward, remove the clutter and take the SHOVEL. Fit the GEAR, use the HAMMER, turn the wheel and take the CELL KEY.
- Open the cell with the CELL KEY, use the KNIFE and take the CHIP. Put it on the map. Every road the chip travels along lights up blue; move it until every road on the map is lit. Plan a route that uses each road only once, and reset if the chip gets stranded.
CHAPTER 3
The Hall of Shields
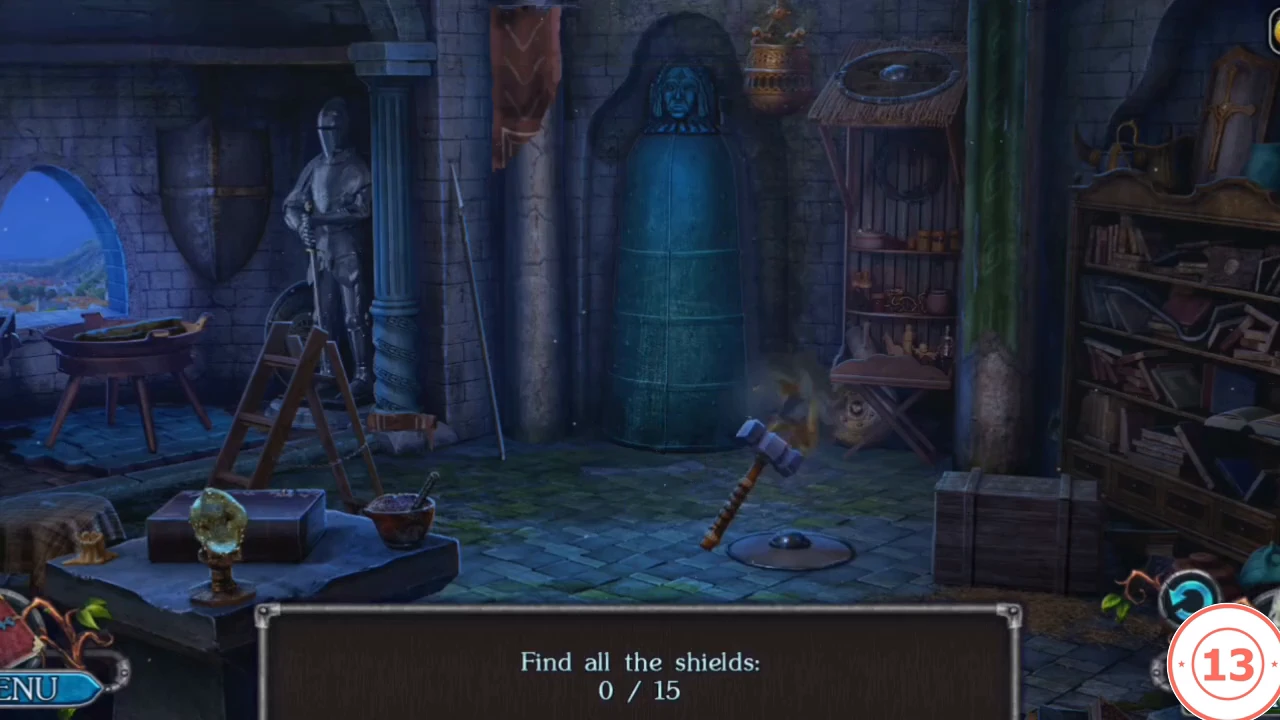
Find fifteen shields, then light the fireplace and meet Scarlet.
- Play the scene Find all the shields (15). Open the chest and take the COMBUSTIBLE MIXTURE.
- Put the COMBUSTIBLE MIXTURE in the fireplace and light it with the MATCHES. After the conversation with Scarlet, take the LIBRARY KEY.
CHAPTER 3
The Library Barrier
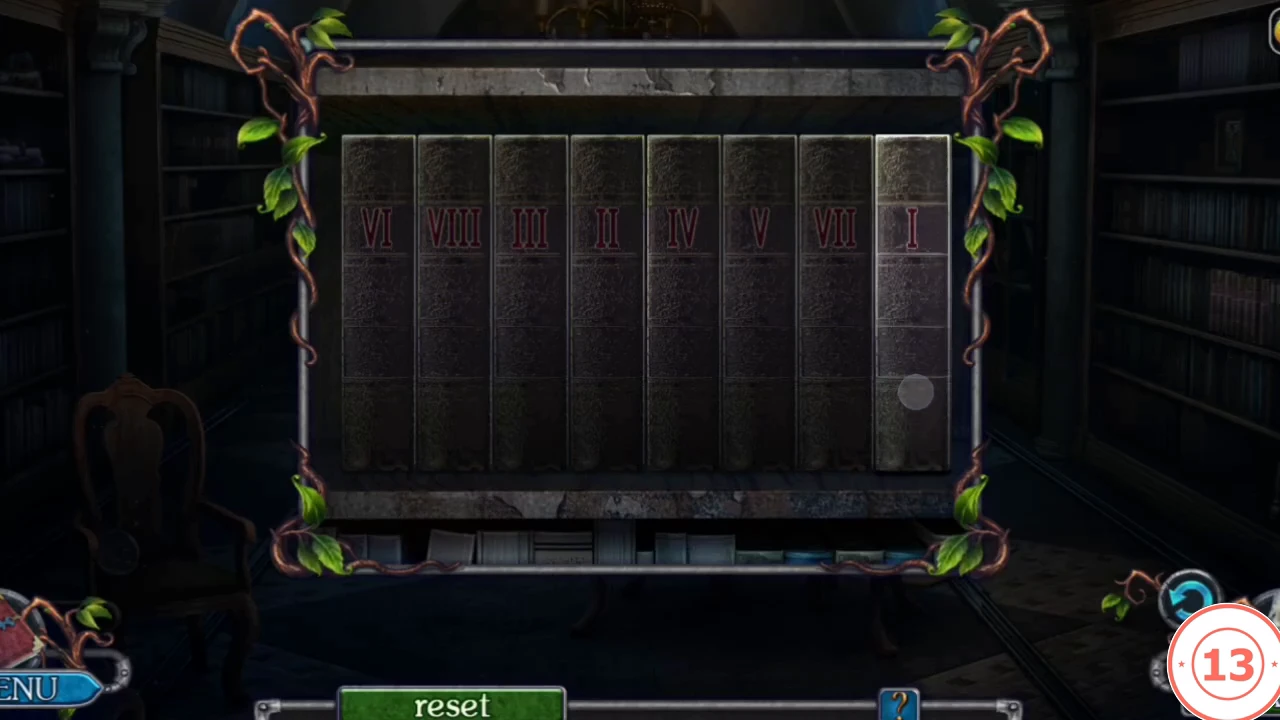
A magic barrier protects the book of the ancients. It needs four barrier keys.
- Walk down and dig with the SHOVEL to take BLACKSMITH'S KEY 1/2. Walk down, open the library with the LIBRARY KEY and go left.
- Take the BOOK. Open it and take the RULER and BARRIER KEY 1/4. Use the RULER to reach BARRIER KEY 2/4.
- Put the BOOK on the shelf. Tap two volumes to swap them, and arrange the Roman numerals on the spines from I to VIII, left to right. Take BARRIER KEY 3/4 and the WOODEN DETAIL.
- Place the WOODEN DETAIL. Slide and turn the wooden blocks until a groove runs from the small ladder on the left board to the exit ladder on the right; the ladder then travels through. Take BARRIER KEY 4/4.
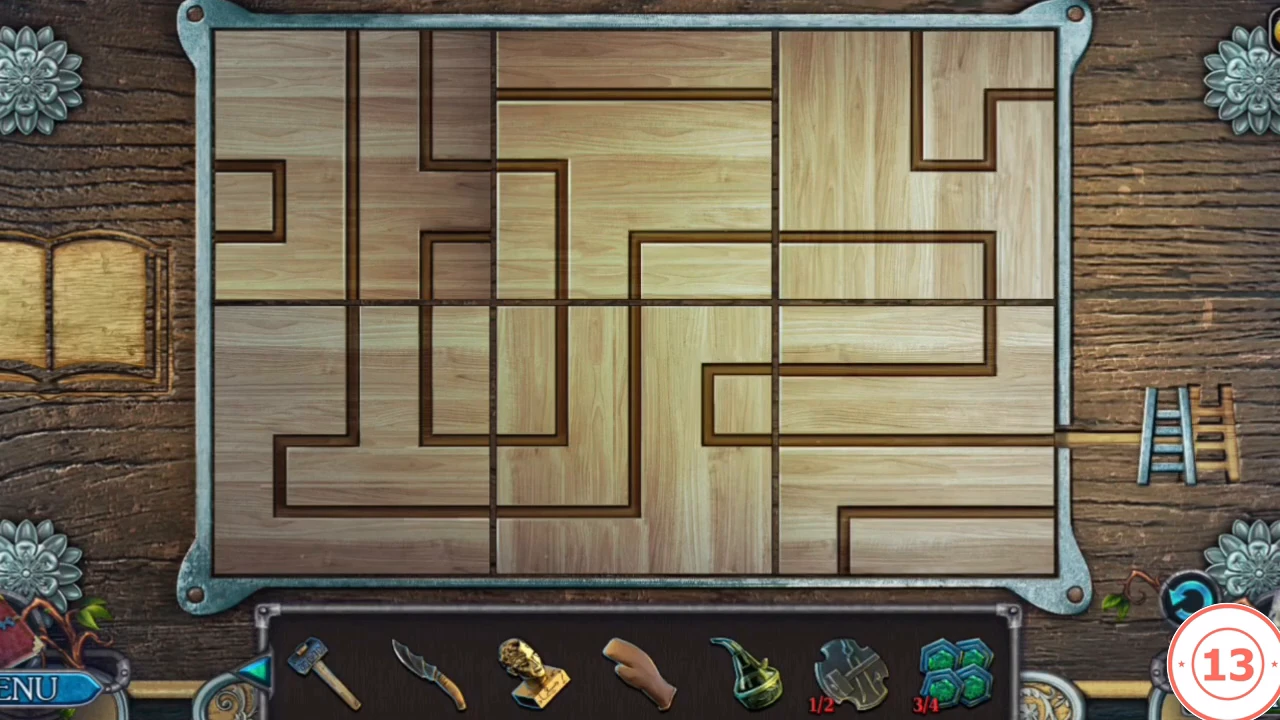
The finished block board: one groove runs from the small ladder to the exit on the right. - Put the BARRIER KEYS on the stand and read the book with Scarlet. Take the KEY SKETCH and the PLIERS. The task becomes Create a key for the sarcophagus.
CHAPTER 3
The Blacksmith's Shop
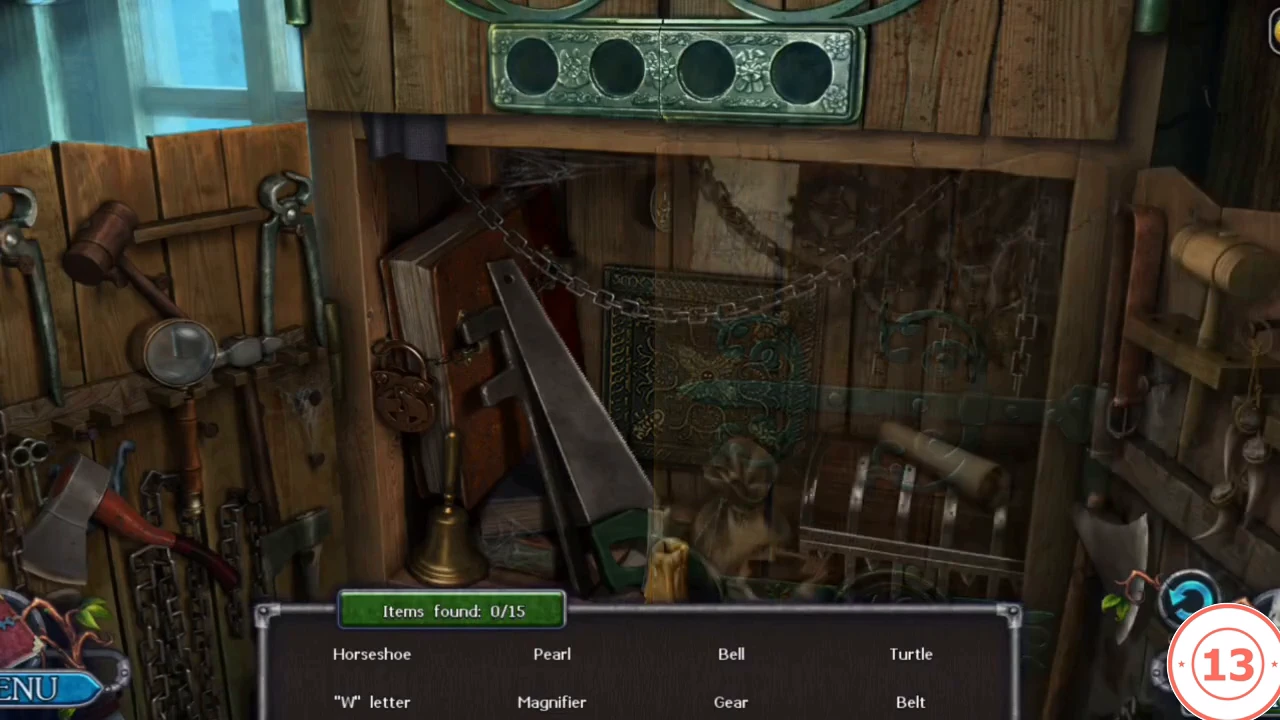
Complete the blacksmith's key and search the shop.
- Walk down twice and use the PLIERS on the wheel to get BLACKSMITH'S KEY 2/2. Go right and open the door with the key.
- Play the blacksmith hidden-object scene (15 listed items). The coin panel asks for a food chain from the weakest to the strongest, left to right: wheat, mouse, snake, eagle. You earn the BELLOWS.
- Open the key mould and place the KEY SKETCH. Slide the stone tiles until the carved grooves form the key drawn on the sketch.
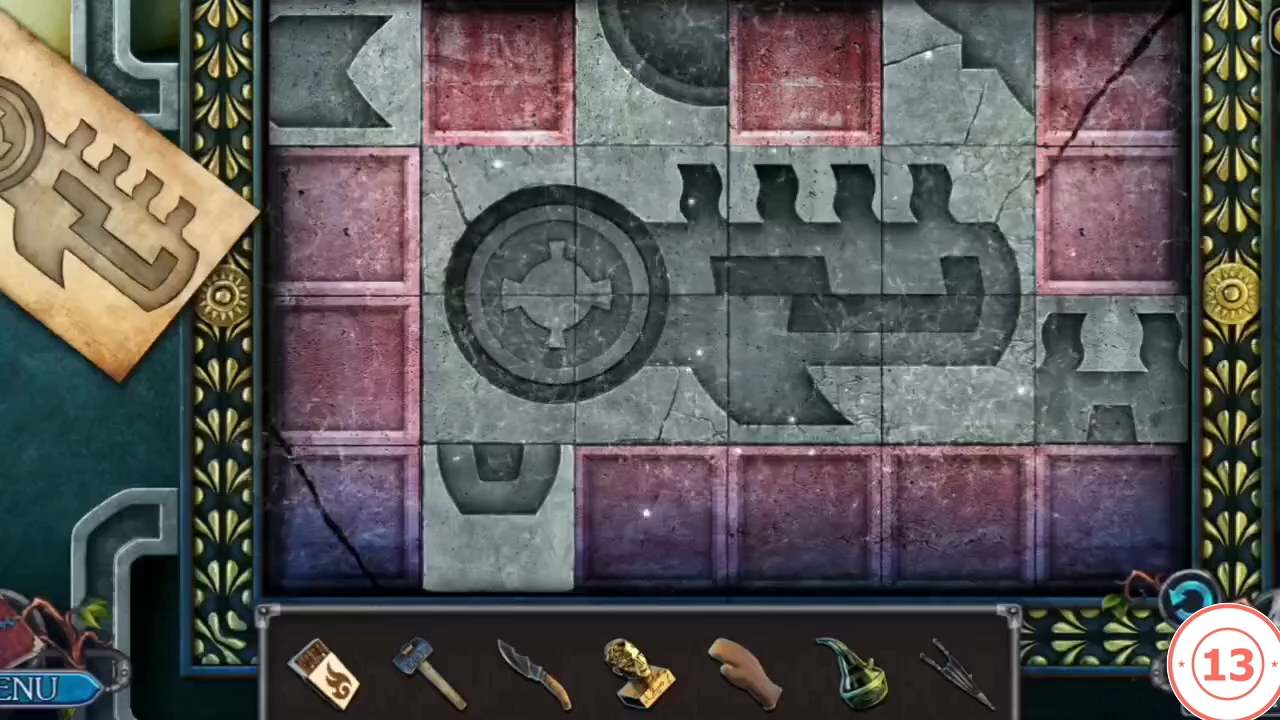
The finished key mould, matching the KEY SKETCH at the left.
CHAPTER 3
Forging the Sarcophagus Key
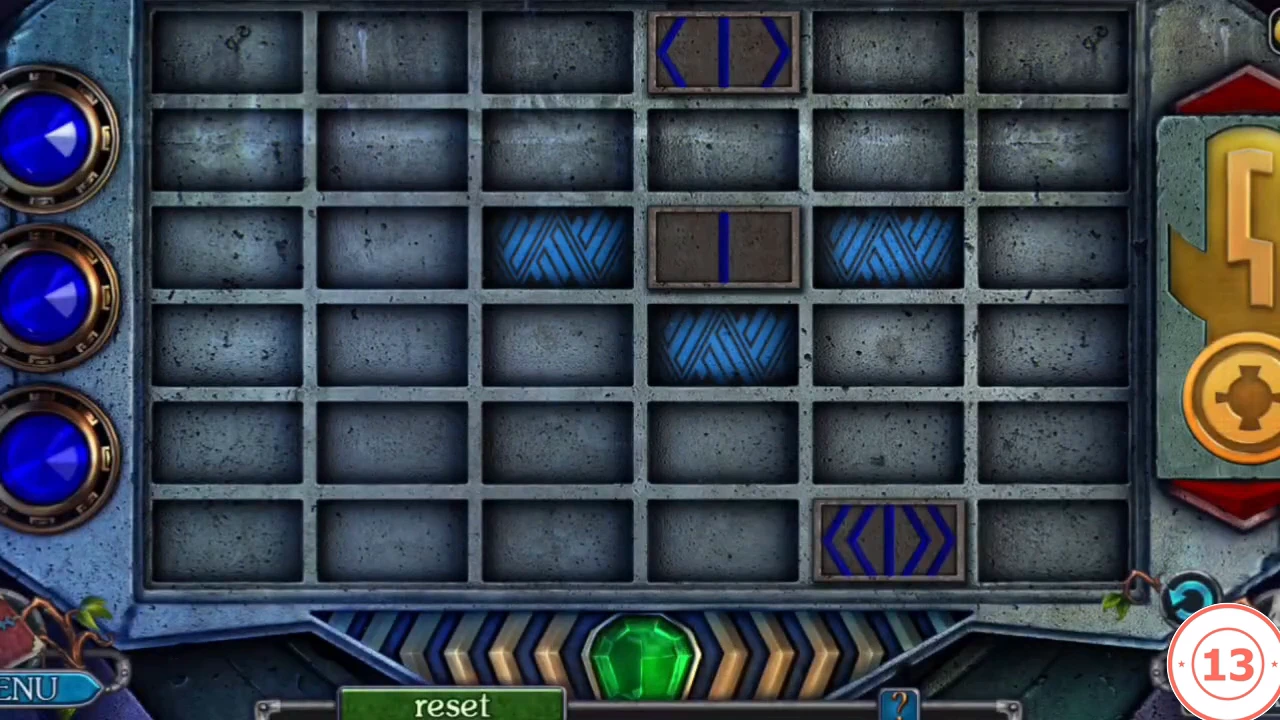
Cast the key, then open the sarcophagus lock on the temple altar.
- Fit the BELLOWS at the left of the forge ("I need something to blow up the fire") and put the STATUETTE into the vat above the fire as the metal to melt ("First I need to put a material into the vat"). Zoom in on the firebox under the vat. Matches alone will not light the bare coals ("The coals need to be prepared"), so put the COMBUSTIBLE MIXTURE on the coals and then light it with the MATCHES. The crank on the right side of the firebox tips the vat over, but it refuses until everything is ready ("This mechanism will turn the vat over, but everything is not ready yet"): go back to the main view and pump the BELLOWS so the fire blazes, then zoom in again and turn the crank. The vat tips and pours molten metal into the bailer beneath it. Take the BAILER WITH METAL with the FIRE RESISTANT GLOVE, pour the metal into the mould on the workbench and knock it out with the HAMMER to take the KEY.
- Walk down four times and go left. Put the KEY on the altar. The instruction reads "Fill the selected cells with elements using the specified number of moves". The brown tiles are the elements and the blue hatched cells are the cells to fill. The blue marks on a tile count how many moves it has left: one bar is 1 move, a pair of chevrons is 2, chevrons with a bar is 3, double chevrons is 4 and double chevrons with a bar is 5. Tap a tile to light the cells next to it (up, down, left or right), then tap one of them: the tile moves one cell and its count drops by one; a plain tile with no marks has used all its moves. Each round has as many tiles as hatched cells. Before moving anything, pair every tile with a hatched cell whose distance from it (cells across plus cells up or down) equals the tile's count, and check that the routes do not block each other. In the recording every tile was matched this way and each tile ended on its hatched cell exactly as its count ran out. Use reset if a tile ends in the wrong place. The board shows a new layout in each of the three rounds, and a blue lamp on the left lights for each finished round. Take the SARCOPHAGUS KEY.