The Tavern Yard
Witches have carried off Ulf, and Lucia needs a horse to follow them. After the opening scene you are in the yard behind the tavern. Item names in capitals are inventory items.
- Pick up the STONE and the BUCKET in the yard.
- Hang the BUCKET on the well and take the BUCKET OF WATER.
- Use the STONE on the gate latch, then open the gate.
- Give the BUCKET OF WATER to the horse. Then go left into the tavern hall, the room with the bar, the tables and a trapdoor in the floor.
The Tavern Hall and the Wolf Cabinet
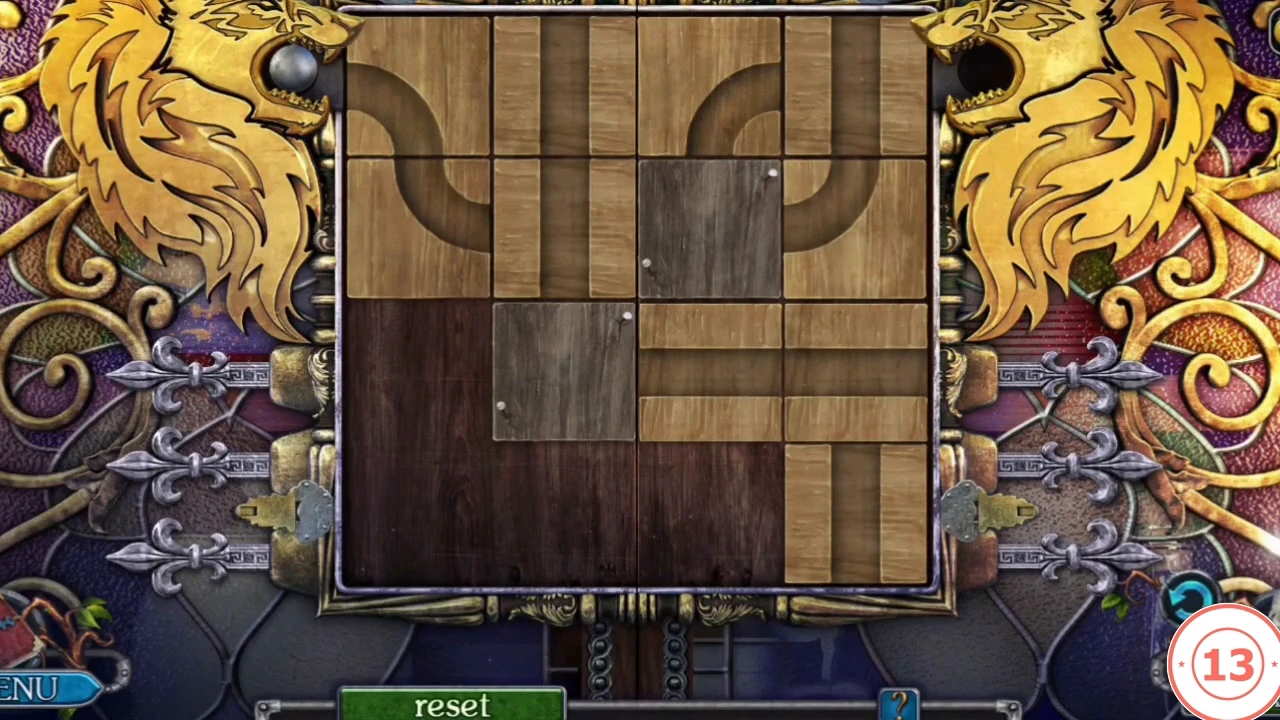
The cabinet in the tavern hall has a wolf emblem. It needs two wolf figurines, then three rounds of a sliding-track puzzle.
- Zoom in on the trapdoor in the floor and take the WIRE. Lucia remarks that she needs the ladder from the barn to climb down. Open the WIRE in the inventory and bend it into a HOOK.
- Move the bowl on the shelf and take WOLF FIGURINE 1/2 and the OILER.
- Read the note in the tavern hall. It is one of the ten manuscripts (see Collectibles in Chapter 1).
- Use the HOOK in the crack in the floor to pull out the KEY. Move the beer stein and take WOLF FIGURINE 2/2.
- Put both WOLF FIGURINES on the cabinet. A ball enters at the top left and must leave at the top right. Slide the tiles into the empty space to build an unbroken track between them; grey nailed tiles never move, so build around them. When the track is complete the ball rolls through by itself. There are three boards in a row; the reset button restores the current board.
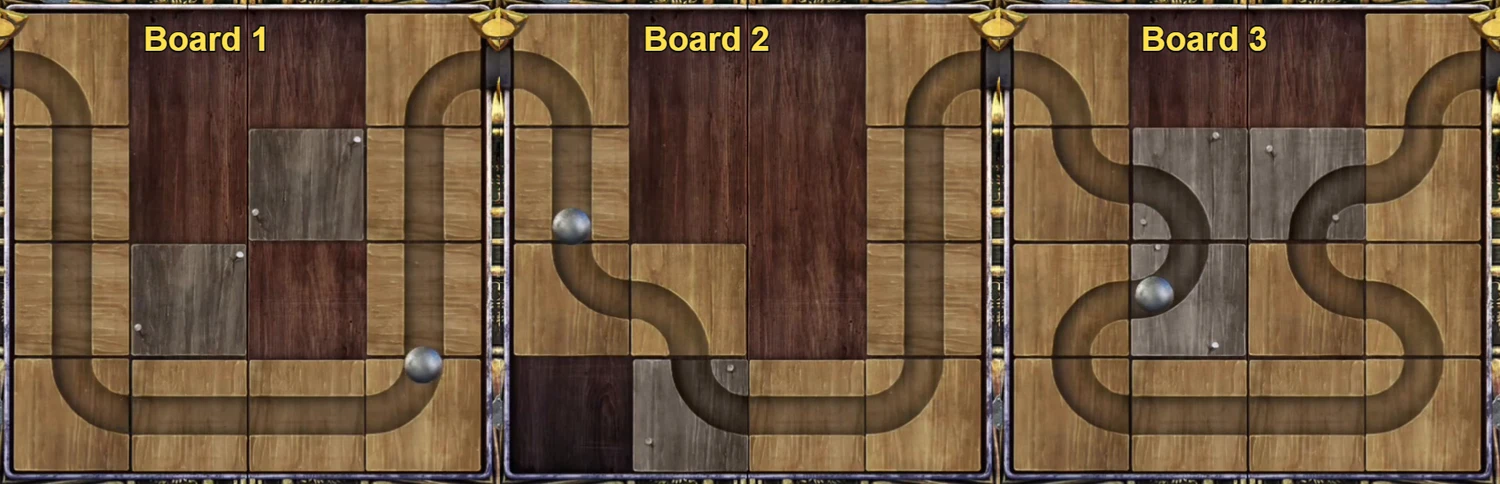
Completed tracks for boards 1, 2 and 3 in the recorded game. Grey nailed tiles stay where they are; build the groove around them. - Take the OIL LAMP from the cabinet. Open it in the inventory and fill it with the OILER. It is lit later, at the burning bowl in this hall.
The Barn and the Tavern Basement
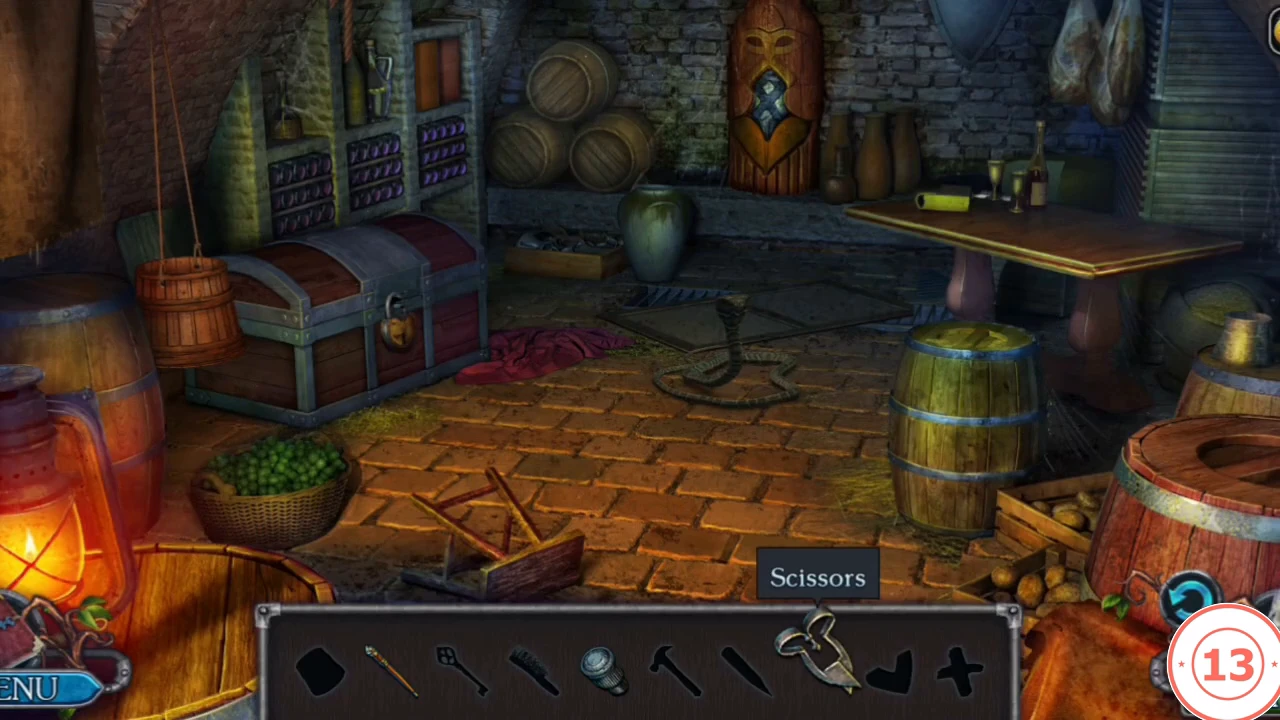
Lucia needs both pieces of horse equipment. One is in the barn, the small wooden shed across the yard; the other is in a chest in the dark tavern basement.
- Go back to the yard. Unlock the barn door (the wooden shed across the yard) with the KEY and take the LADDER and HORSE EQUIPMENT 1/2.
- Go left into the tavern hall. Open the trapdoor and put the LADDER in it. Lucia will not go down into the dark yet. Drag the OIL LAMP onto the burning bowl on top of the wooden post in the middle of the hall; Lucia lights it there and you get the LIT OIL LAMP. Now climb down through the trapdoor.
- The basement is an interactive hidden-object scene: the bar at the bottom shows the outlines of the objects to collect, and several of them are used inside the scene. Work through it in this order. Cover the snake beside the chest with the bucket from the scene, and pick up the cane and the scissors. Zoom in on the drain in the floor next to the leather pouch: move the board to find the wire brush, take the first rune piece from the pouch, then lever the drain grate open with the cane and take the second rune piece that fell in. Pick up the handle, fit it on the small cupboard door in the wall above the purple bottles, slide the door open and take the hammer and the wooden peg. Zoom in on the carved wooden idol on the back wall (its recess opens with a rune) and put both rune pieces in. It is stuck: push the wooden peg into the gap and hit it with the hammer. The idol opens and you get the KEY for the chest.
- Unlock the padlock of the chest with the KEY and open it. Clean the panel inside with the wire brush, then slide the seven vertical strips up or down until their grooves form one continuous line from the knob on the left to the right edge. Read Osbert's letter inside and take HORSE EQUIPMENT 2/2.
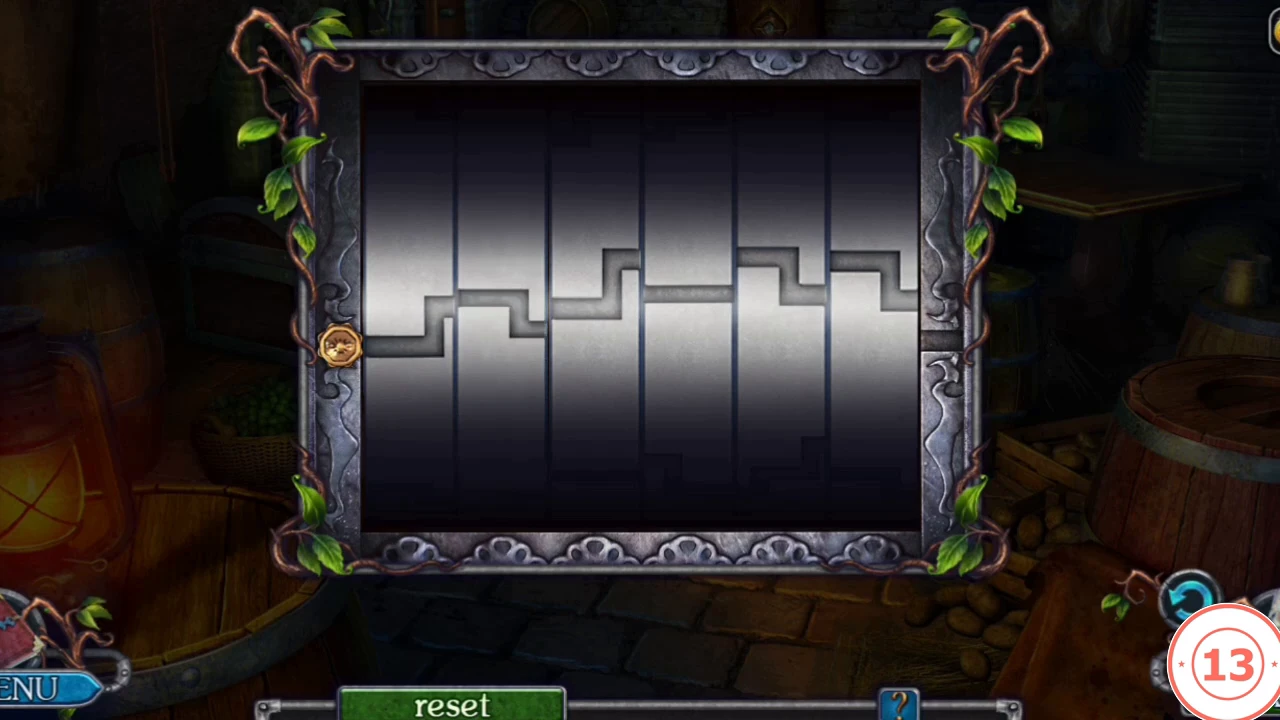
The chest panel with the strips aligned: one continuous groove from the knob on the left to the right edge. - Return to the yard and use the HORSE EQUIPMENT on the horse. Lucia rides into the witch forest.
The Forest Camp and the Path Maze
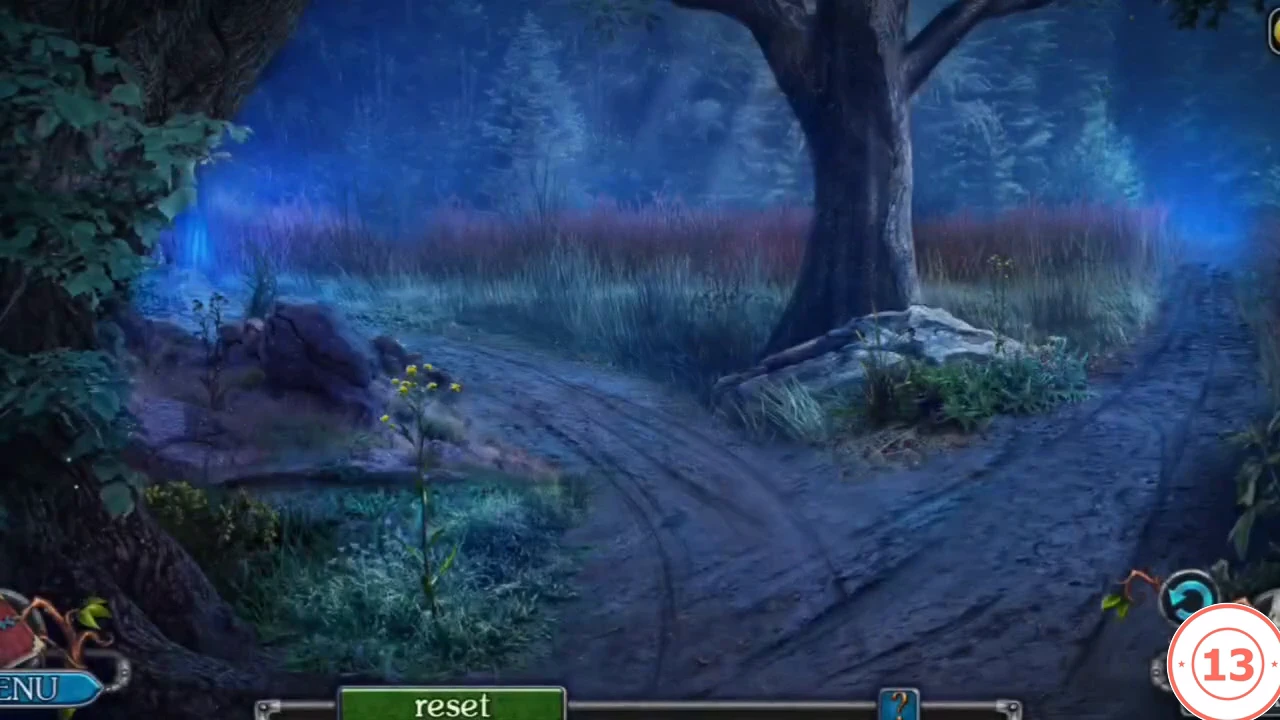
Lucia reaches a camp in the forest. Her task is now Find my brother.
- Move the blanket and take the MATCHES and the CORKSCREW. Take the STICK.
- Go right to the gate with the iron grate. Zoom in on the round stone disc and take ANVIL FIGURINE 1/2. Zoom in on the flooded crate and take STONE OF DREAMS 1/3.
- Walk down, then go left into the path maze. Each screen offers several paths. Choose, in this order: the far road on the right; the left fork; straight ahead past the plank bridge; the path ahead and to the left beside the stone wall; the stone archway. You come out in the ruins.
- Zoom in on the round pedestal and take STONE OF DREAMS 2/3. Zoom in on the fallen stone slab, pull out the cloth bundle with the STICK and take ANVIL FIGURINE 2/2.
- Go forward and place the ANVIL FIGURINES. Take the PLIERS and the HAMMER HEAD. Open the box with the PLIERS to get the FANG.
The Runic Stones and the Druid Gate
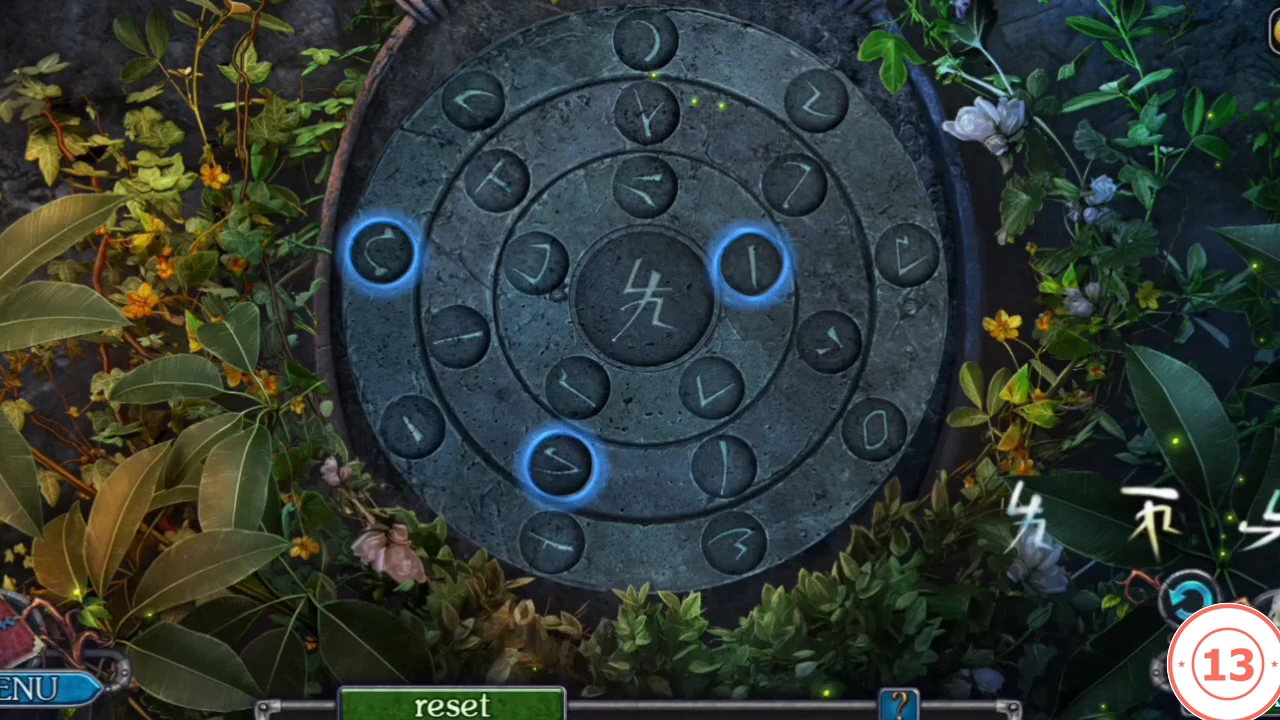
The druid's round gate needs four runic stones. A trapped kid in the ruins has one of them.
- Walk down twice to the campfire. Cut the long VINE with the FANG. Use the PLIERS on the fire to take RUNIC STONE 1/4, then zoom in on the carved stone idol and use the PLIERS again for RUNIC STONE 2/4.
- Go back to the ruins and lower the VINE into the hole to pull out the trapped kid. Herby, a radictis, explains what happened and gives you RUNIC STONE 3/4. The task becomes Find a druid.
- Go to the gate with the iron grate and poke the creepy nest with the STICK to get RUNIC STONE 4/4.
- Put the four RUNIC STONES on the round gate. The gate has three rings of rune fragments, a target rune in the centre and one glowing slot on each ring. Tap a ring to turn it one step. Turn the rings until the three fragments sitting in the glowing slots together draw the centre rune. Solve three stages (blue, yellow, then green); the progress runes on the right light up and the gate opens.
- Go through the gate and talk to the druid Egil. He gives you the PROTECTIVE TORCH RECIPE and the task Create a torch.
The Druid's Yard and the Horseshoe Box
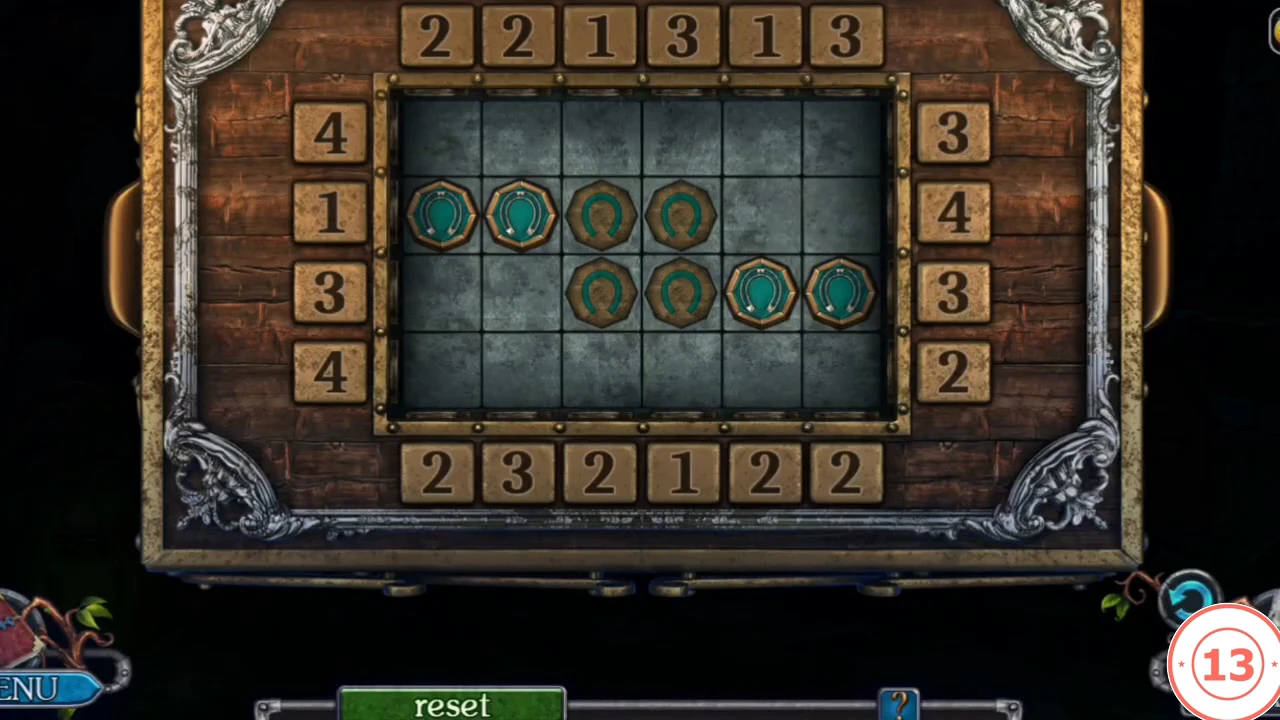
Collect tools in the druid's yard and open the chest decorated with a hippocampus.
- Zoom in on the stone oven and take the OVEN FORK and the POKER. Zoom in on the nest on the tree stump and use the OVEN FORK to get the FIGURINE OF A LIZARD. Pick up the LITTLE HORSESHOE from the ground near the house.
- Put the LITTLE HORSESHOE on the hippocampus chest. The board has 4 rows and 6 columns, four teal tokens and four bronze sockets in the middle 2 x 2 squares. Every edge button pushes a rod into its row or column by the number of squares written on it, shoving any token in the way. Goal: one token on each bronze socket. From the start (tokens in the two left squares of row 2 and the two right squares of row 3) press: bottom of column 5 (2), bottom of column 6 (2), right of row 2 (4), top of column 1 (2), left of row 3 (3), bottom of column 2 (3), left of row 1 (4), right of row 1 (3), top of column 3 (1). Rows count from the top, columns from the left. If your tokens start elsewhere, push them one at a time towards the centre, using the rods to stop them on a socket.
- Read the note in the chest and take the UNLIT SUN STONE and the CHISEL.
- Go forward into the druid's house. Take the APPLE, the HAMMER HANDLE and the FIGURINE OF AN ARCTIC FOX. Combine the HAMMER HANDLE with the HAMMER HEAD to make the HAMMER.
- Back in the yard, pick up the parchment by the pit. It is a manuscript (see Collectibles in Chapter 1).
- Walk down and zoom in on the deer and use the APPLE, then the POKER, to get the FIGURINE OF A DEER. Walk down again and free the stuck lever with the CHISEL and the HAMMER; this opens the way to the wagon.
The Wagon, the Pond and the Attic
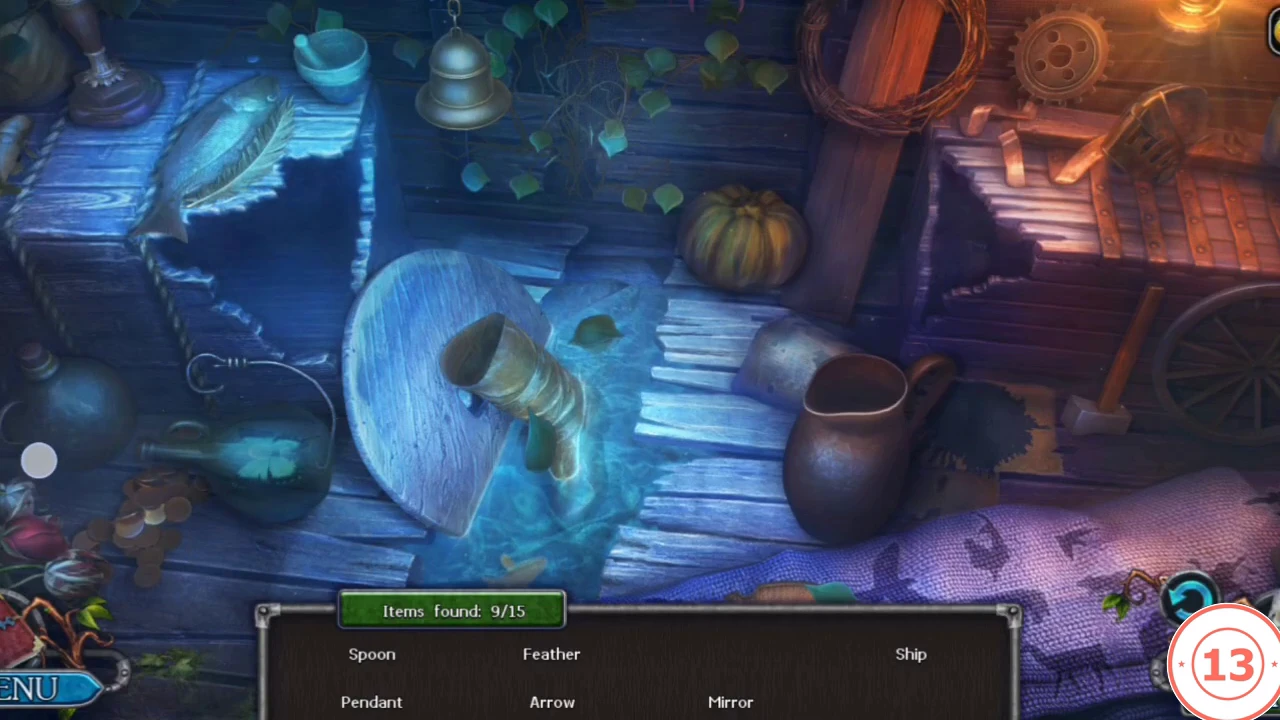
Two hidden-object scenes give the rope ladder and the torch for the druid's recipe.
- Go left to the wagon. Zoom in on the hollow in the big tree and take STONE OF DREAMS 3/3 from the nest. Then play the wagon hidden-object scene: find the 15 items on the list, including those inside the small zoom areas such as the bucket and the drawer. You earn the ROPE LADDER.
- Fish in the pond with the OVEN FORK to get the FIGURINE OF A SNAKE.
- Walk down, go right and then forward into the druid's house. Hang the ROPE LADDER at the attic hatch and open the attic doors.
- Play the attic scene Find all the birds (15). Two of the birds are hidden in mini-games. Books: tapping a book moves it to the top of the stack; stack them, top to bottom, olive-yellow, orange, green, dark slate, red, and their spines form a bird. Clock: tap two segments of the outer ring to swap them; keep swapping until the red carved lines join across every seam and the ring lights up. When all 15 birds are found, take the TORCH.
The Stones of Dreams Board
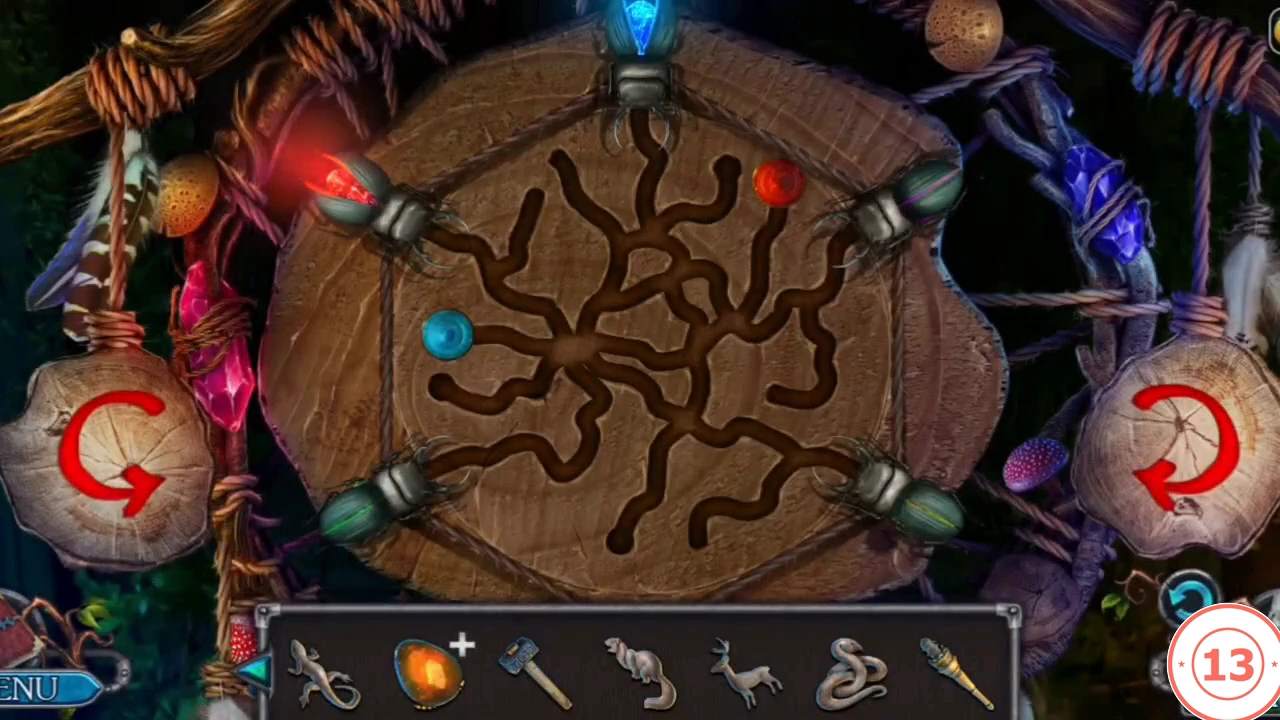
The three stones of dreams go into the round board behind the druid's window.
- Tap the round wreath window and place the three STONES OF DREAMS on the grooved board. The two red arrow buttons turn the board, and the coloured balls roll along the grooves. Guide each ball to the beetle lamp of its own colour on the rim: red to the top left, magenta to the top right, yellow to the bottom right and green to the bottom left, with the blue ball resting in the lowest groove. Work on one ball at a time; if a ball gets trapped, use reset. Take the KNIFE.
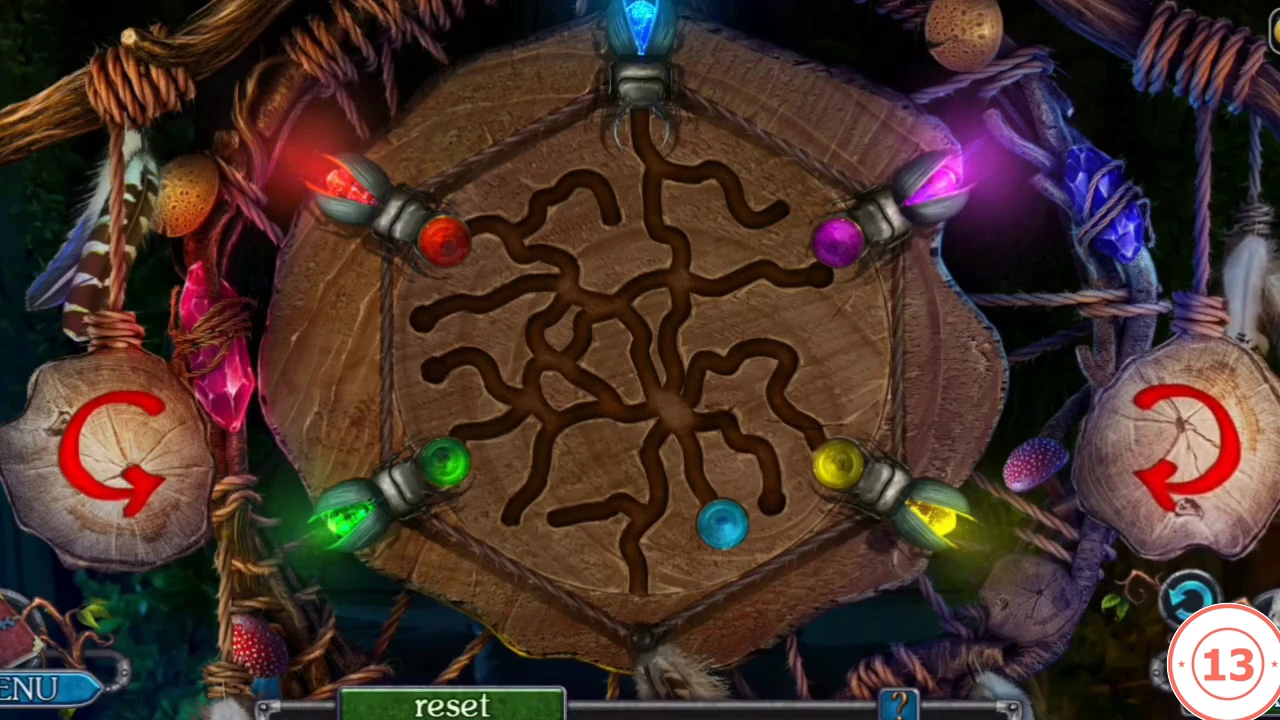
The finished board: each coloured ball rests beside the beetle lamp of its colour, with the blue ball in the lowest groove.
The Five Figurine Box
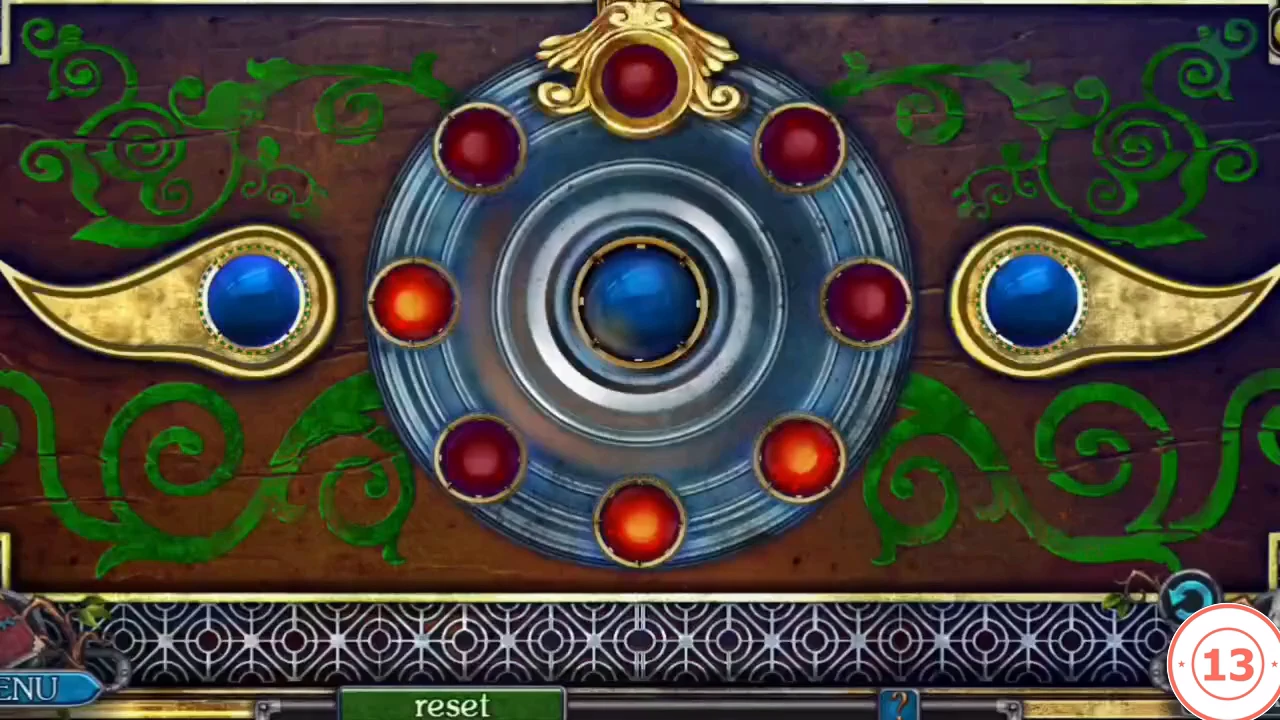
A chest needs five animal figurines: lizard, arctic fox, deer, snake and owl.
- Walk down and use the KNIFE to get the FIGURINE OF AN OWL.
- Place the lizard, arctic fox, deer, snake and owl figurines on the chest. A ring of eight red gems sits between two blue buttons; the goal is to light all eight gems. Each press turns the ring, and the gem that arrives under the gold crown at the top switches on or off. In our recording the board starts with three gems lit: the bottom, the bottom-right and the left one, and this sequence solved it: press the left button twice and the right button once (now all eight gems are dark), then press the left button eight times. Each of those eight presses lights the gem that arrives under the crown, until the whole ring glows. If your board starts differently, press reset and compare it with the start described here. Take the EMPTY JAR from the chest and leave the chest open; you need it again for the torch.
Preparing the Protective Torch
Follow the druid's recipe to turn the attic torch into a protective torch.
- Walk down twice and go left. Use the TORCH on the cobweb to get the TORCH WITH WEB.
- Walk down, go right, then left. Cut the CATTAIL with the KNIFE.
- Walk down twice, go left and forward. Use the CATTAIL, the MATCHES and the EMPTY JAR to catch the BUG IN THE JAR.
- Walk down. Open the plant, feed it the BUG IN THE JAR and dip the TORCH WITH WEB into it to get the TORCH IN THE JUICE.
- Walk down and go right twice to the druid's yard. Zoom in on the open five-figurine chest: among the bottles inside is one with a glowing green liquid. Use the TORCH IN THE JUICE on that bottle; Lucia coats the torch with it and you get the PREPARED TORCH, and the task Create a torch is complete. Then go forward into the house to the druid.
The Druid's Closet and the Bridge
Creepers attack and Ulf is wounded. Egil says the recipe for a healing potion is in a book in his closet.
- After the scene, take the KEY TO THE CUPBOARD and open the cupboard. Read the book to get the POTION RECIPE, and take the DOOR HANDLE, the BOARDS and the CALDRON.
- Walk down twice and fill the CALDRON at the water to get the CALDRON WITH WATER.
- Go left. Remove the old boards from the bridge, lay the new BOARDS and cross to the ship. Chapter 2 begins.