CHAPTER 2
The Ship Deck and the Swamp Map
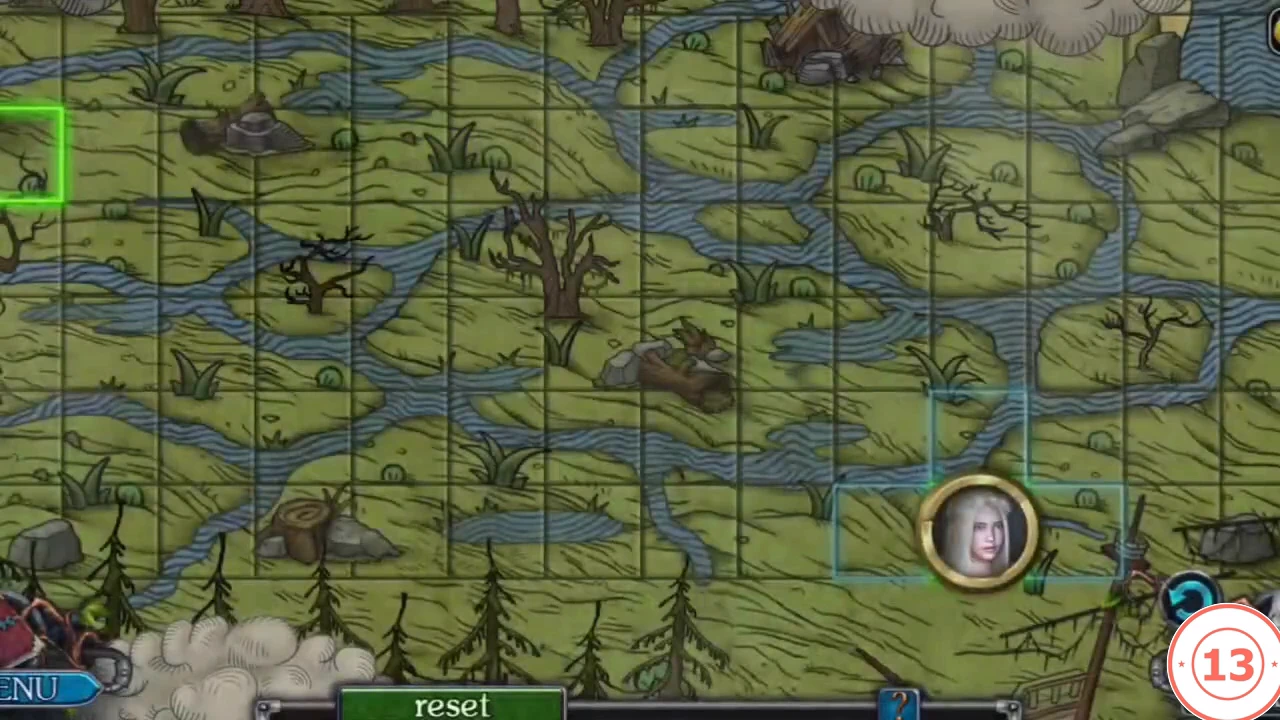
The potion recipe needs a black lily, the core of a magic flower, rum and ground ginger root, mixed in boiling water. Start by repairing the ship's steering wheel.
- Take STEERING WHEEL PART 1/3 and break out part 2/3 with the HAMMER. Go forward, use the HAMMER to free the HOOK and take part 3/3.
- Fit the STEERING WHEEL PARTS and take the SCROLL. Cut it open with the KNIFE to get the SWAMP MAP. Take the PICKLOCK.
- Walk down and place the SWAMP MAP. Lucia's token starts on the green square at the lower right and must reach the green square at the far left. It moves one square at a time over land and cannot cross the blue channels. Go up from the start through the land on the right, then follow the land along the top of the map to the goal on the left. Use reset if you get cut off.
CHAPTER 2
The Shore, the Cabin and the Mechanism
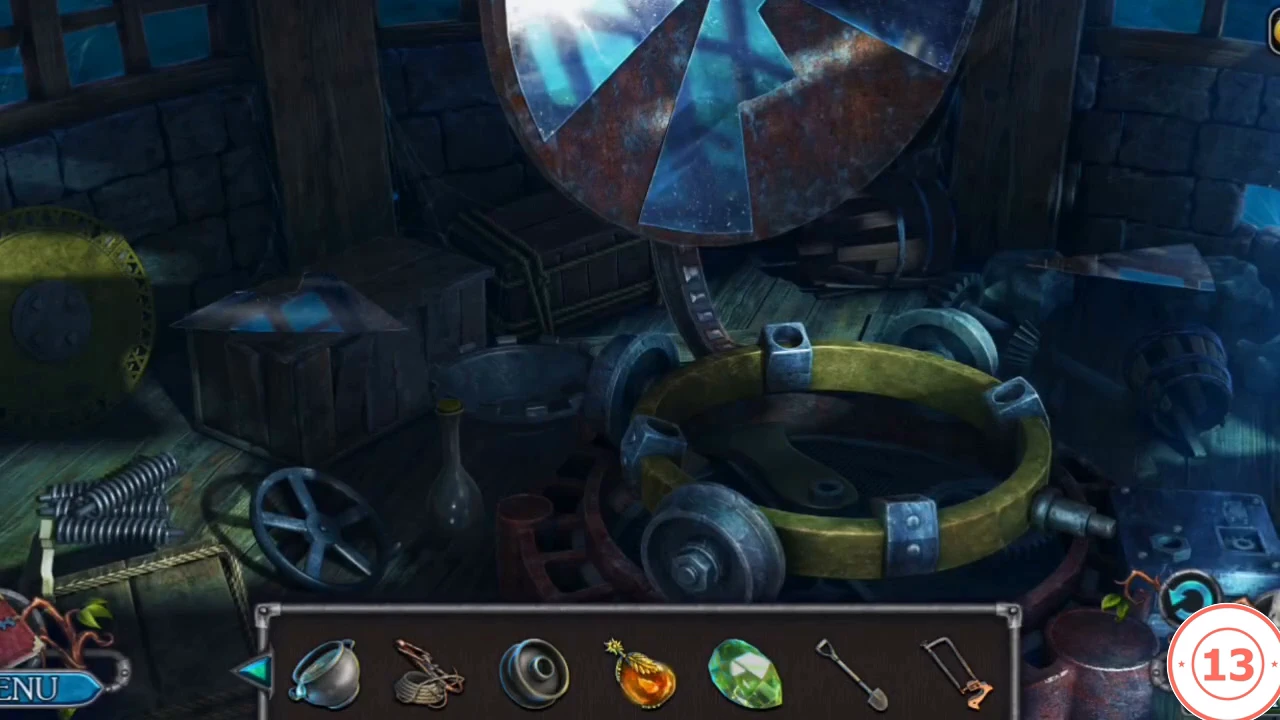
Collect tools for the mechanism behind the crates.
- Go left. Cut the ROPE with the KNIFE and tie it to the HOOK to make the GRAPPLE HOOK.
- Clear the debris twice and take the PART OF THE MECHANISM, the SUN FINIAL and the HACKSAW HANDLE. Put the SUN FINIAL on the UNLIT SUN STONE to get the SUN STONE.
- Open the door with the PICKLOCK and go forward. Move the clutter and take the EMERALD. Open the crate with the PICKLOCK and take the SHOVEL and the HACKSAW BLADE; combine the blade with the HACKSAW HANDLE to make the HACKSAW.
- Place the PART OF THE MECHANISM. Drag every loose part onto its glowing outline on the machine: the wheel, the gears, the four springs and the yellow top ring, then the oil. Light it with the MATCHES.
CHAPTER 2
The Magic Flower and the Ginger Root
Collect two of the potion ingredients.
- Leave the cabin and walk down three times to the swamp with the old wagon. Zoom in on the closed plant beside the path and pick up the manuscript page lying next to it if it is still there (a collectible). The page can already be reached in Chapter 1, so it is listed in Collectibles in Chapter 1 under the wagon swamp.
- In the same zoom, use the SUN STONE on the plant to open the magic flower, then cut it with the KNIFE and take THE CORE OF A MAGIC FLOWER.
- Walk down and go right. Dig with the SHOVEL and cut with the KNIFE to take the GINGER ROOT. Go forward and grind it on the druid's table to get GROUND GINGER.
CHAPTER 2
The Cannon Grate Puzzle
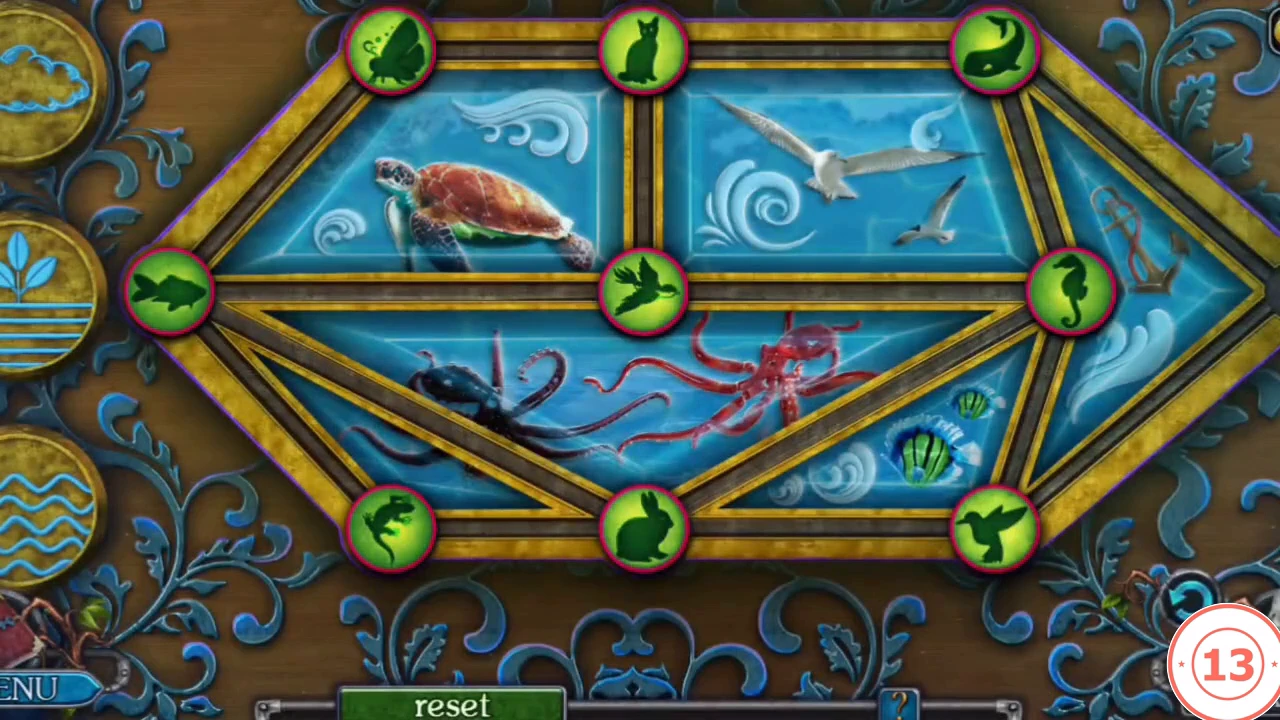
Saw through the grate on the ship to reach the sapphire and a board of creature tokens.
- Walk down twice, go left and forward twice. Cut the grate with the HACKSAW, open it and take the SAPPHIRE.
- The board has ten round slots joined by gold lines. Nine hold creature tokens; the slot at the right-hand tip starts empty. Tap a token next to the empty slot to slide it there. The medallions on the left name the rows: cloud for creatures of the air, plant for land animals, waves for sea creatures. Finish with the top row butterfly, parrot, hummingbird; the middle row rabbit, lizard, cat; the bottom row whale, fish, seahorse; and the tip empty. Take the KEY.
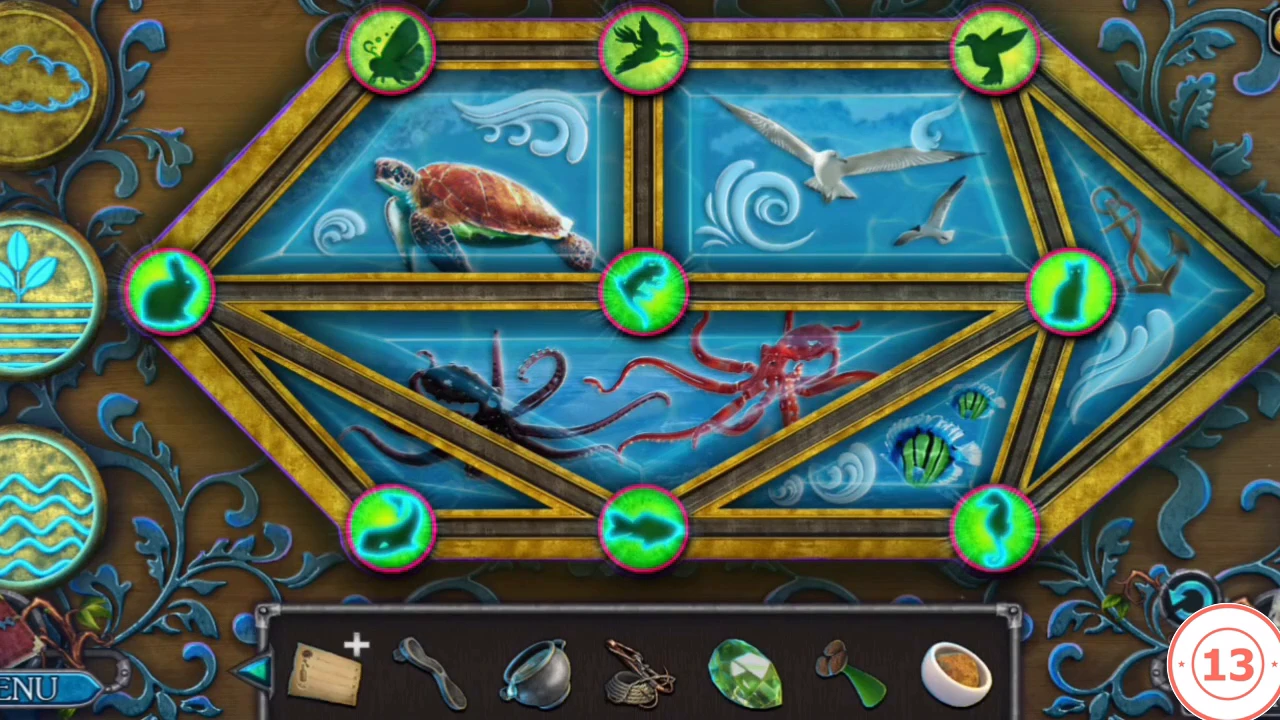
The finished board: air creatures on top, land animals in the middle, sea creatures at the bottom, and the right-hand tip empty.
CHAPTER 2
The Captain's Cabin
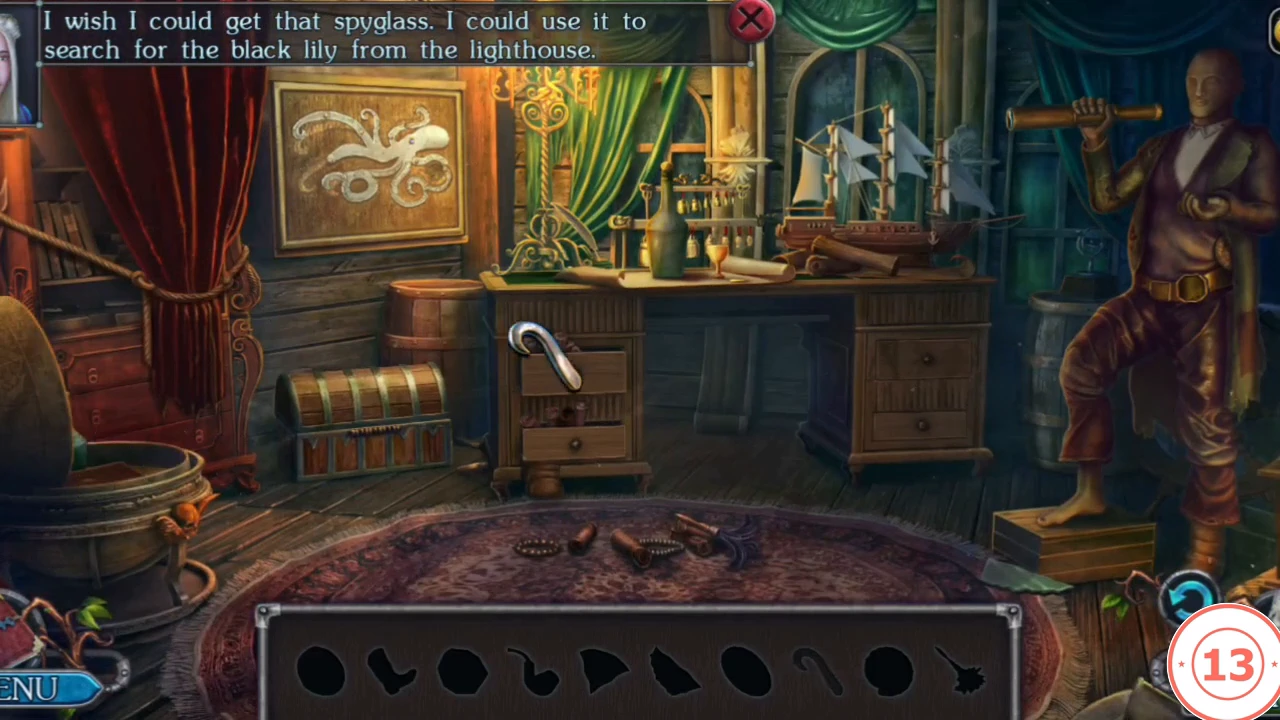
An interactive hidden-object scene with three small puzzles. It ends with the spyglass.
- Unlock the captain's cabin with the KEY. It is an interactive hidden-object scene: find the objects outlined in the bar; several are used inside the room. In our recording it went like this. Pick up the feather duster from the floor. Open the cupboard and put three identical figurines on the parts of the lighthouse; it gives the COMPASS. The chest by the magnifying glass has a number lock, so first find the code: the green bottle on the desk is very dusty, so wipe it with the feather duster and note the number 3513. Put the tentacle on the octopus panel on the wall; Lucia remembers that a shell belongs there too. Zoom in on the mannequin and take the seashell, put it on the panel, then tap the tentacles until each lies over its faint shadow on the wood. The solved panel opens a small shelf with more objects, including the PIPE. Zoom in on the chest, use the COIN from the bar on the magnifying glass leaning against it, and take the LENS that comes out. Enter 3513 on the chest lock, open the chest and take the cocked HAT (the book inside is a diary page to read).
- Now dress the mannequin on the right, the one holding a spyglass. Zoom in on it, put the LENS into the front of its spyglass and put the cocked HAT on its head. Back in the room, put the PIPE in its hand at its chest. Lucia notes that the mannequin needs boots: open the bottom drawer of the small set of drawers on the left side of the desk, and the BOOTS fall out. Take them and put them on the mannequin's bare foot resting on the crate. Finally, place the COMPASS on its belt at the hip. The mannequin then hands over the SPYGLASS.
CHAPTER 2
The Statue, the Spyglass and the Black Lily
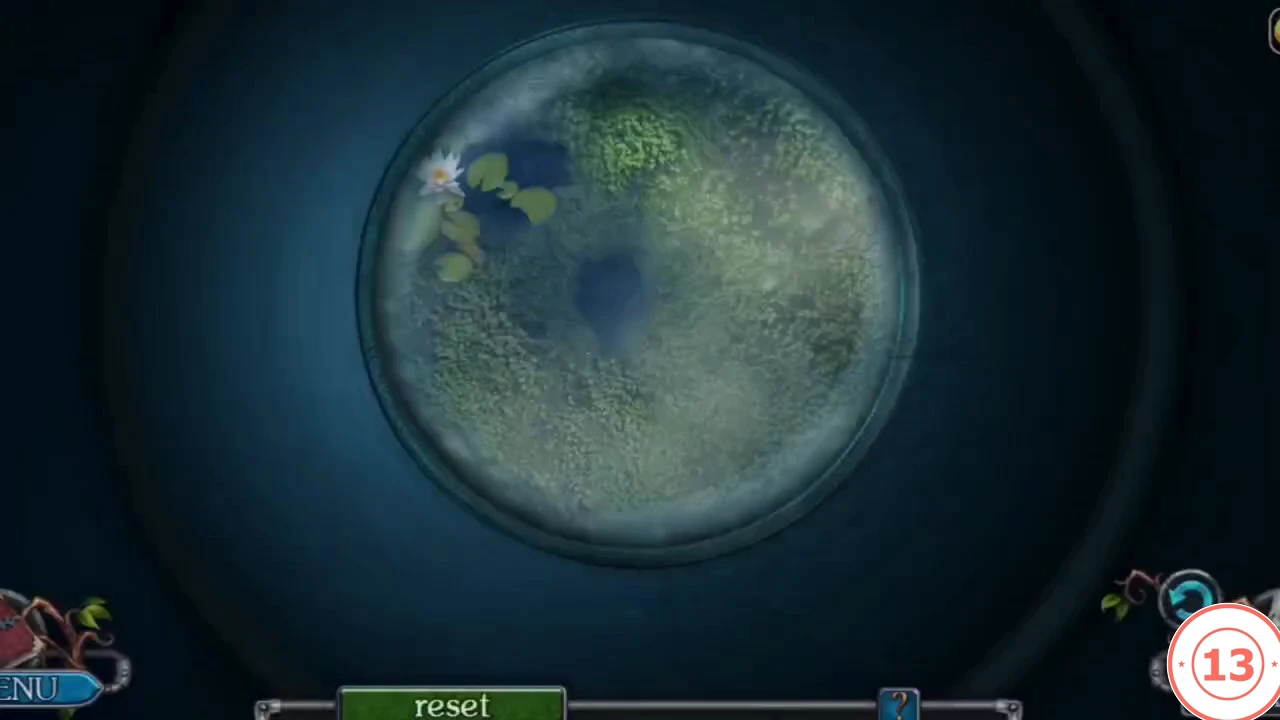
Use the gems on the statue, then spot the black lily through the spyglass.
- Walk down. Put the EMERALD and the SAPPHIRE in the statue's eyes and take the SMUGGLER'S KEY.
- Go left and forward. Mount the SPYGLASS and look through it. Move the view all the way down and slightly to the right until the water lily comes into sight.
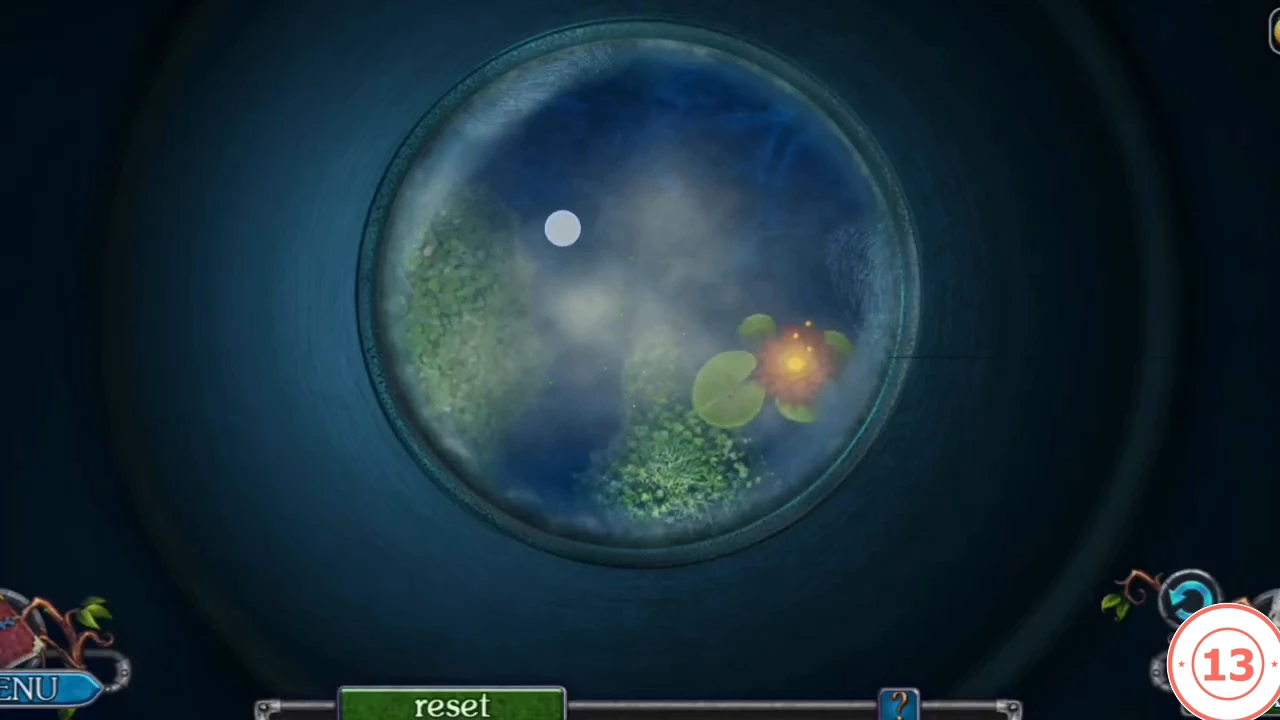
The black lily found near the bottom right of the swamp view. - Walk down and throw the GRAPPLE HOOK at the water lily to get the BLACK LILY.
CHAPTER 2
Brewing the Potion
Finish the druid's potion for Ulf.
- Walk down three times and use the SMUGGLER'S KEY. Take the STATUETTE and the CORKED BOTTLE. Open the bottle with the CORKSCREW to get the BOTTLE OF RUM.
- Add the CORE OF A MAGIC FLOWER, the GROUND GINGER, the BOTTLE OF RUM and the BLACK LILY to the POTION RECIPE to get the POTION INGREDIENTS.
- Go right. Fit the DOOR HANDLE and open the oven, add wood and light it with the MATCHES. Put in the CALDRON WITH WATER, add the POTION INGREDIENTS and take the MUG WITH THE POTION.
- Go forward and give the MUG WITH THE POTION to the druid. After the scene you receive the RUNES.
CHAPTER 2
The Hexagon Rune Board
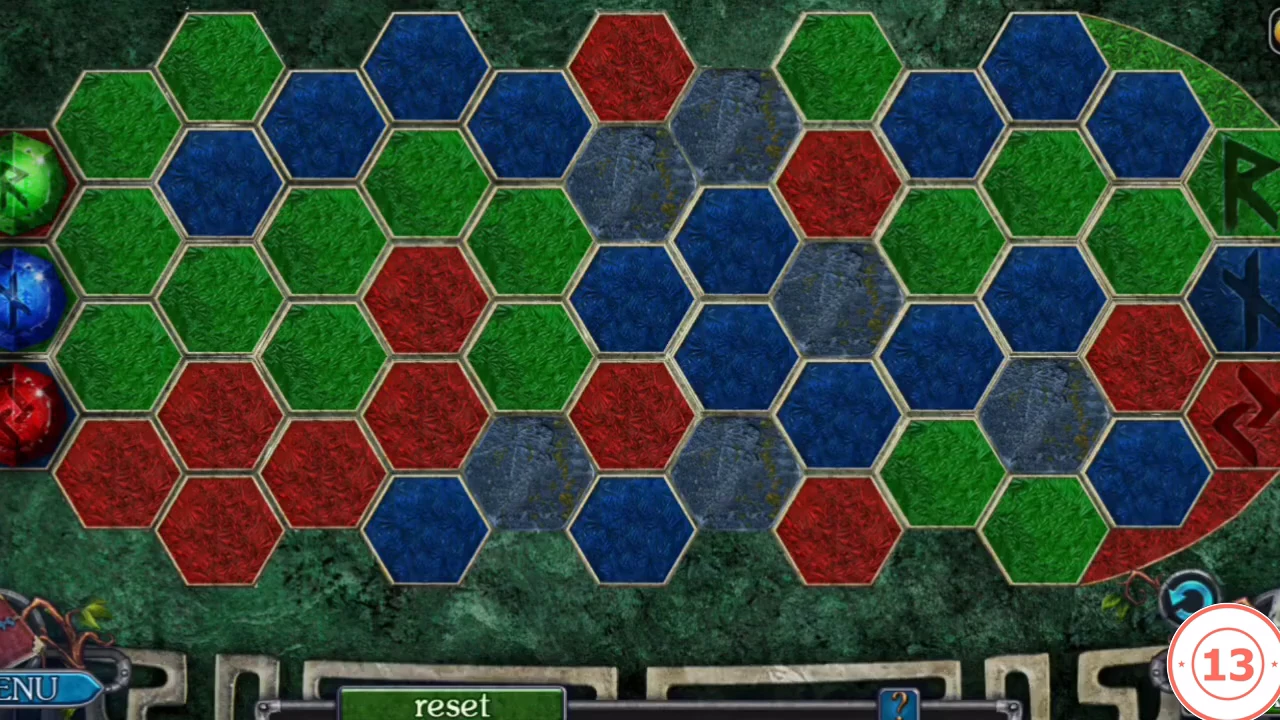
The runes open a hidden path towards the witches' city.
- Walk down three times, move the foliage and place the RUNES. Each rune (red, green or blue) moves one hexagon at a time and only onto a neighbouring hexagon of its own colour; tap a rune and the hexagons it can enter are outlined. Grey stone hexagons can never be entered. The key rule: every hexagon a rune leaves changes colour. The green rune leaves a red trail, the red rune leaves a blue trail and the blue rune leaves a green trail, so each rune builds a road for the next one. Goal: each rune reaches its symbol on the right edge, green at the top, blue in the middle and red at the bottom. In our recording the runes were moved in turns: green from the left edge into the middle of the board (its red trail lets the red rune follow), then red up through the left half, then blue across towards the right, then green to its top-right symbol, red to the bottom symbol and blue to the middle one. When a rune is boxed in, move another rune past it to repaint the cells around it; reset restores the start.
CHAPTER 2
The Watchtower and the Cage Lever
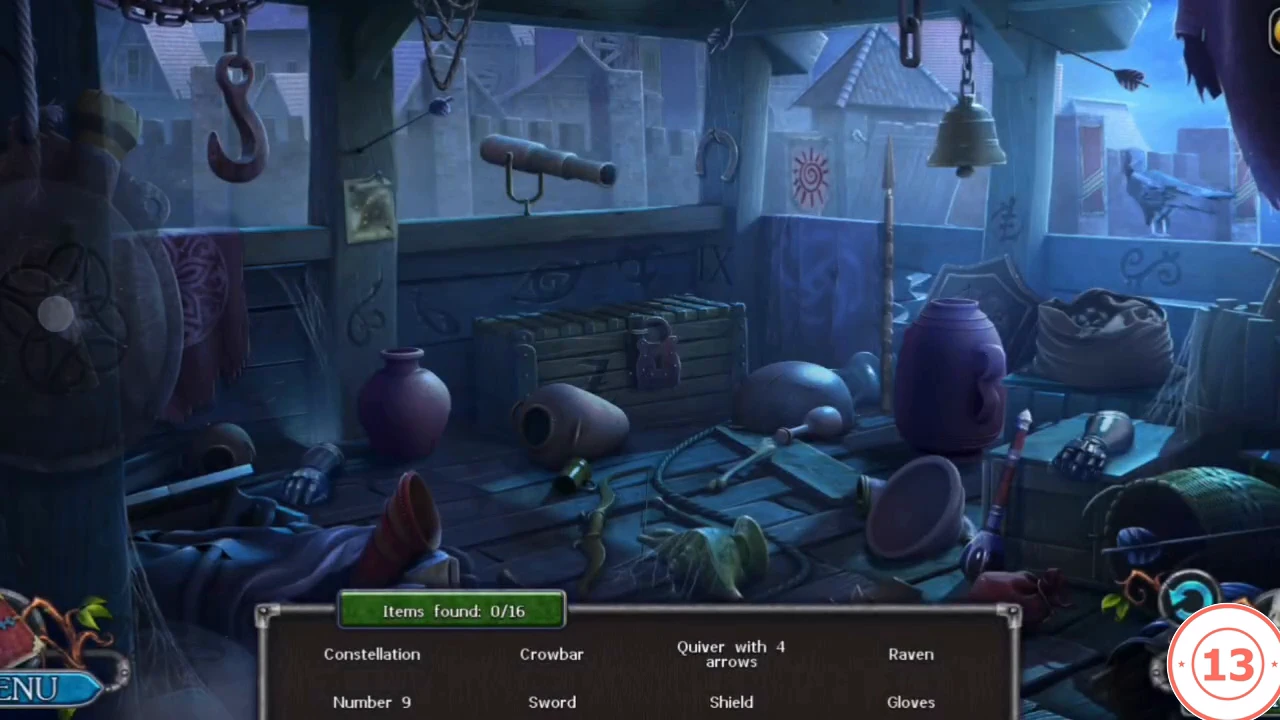
An hour later the boy in the cage is thirsty. The task is Bring water to the boy.
- Go forward. Take BRUSH 1/3 and throw the GRAPPLE HOOK up to the watchtower.
- Play the watchtower hidden-object scene (16 listed items). For the constellation, tap the stars to draw a Y: from the upper-right star down to the fork, a branch from the fork to the star on the left, and the stem down through one star to the lowest star. You earn the CROWBAR.
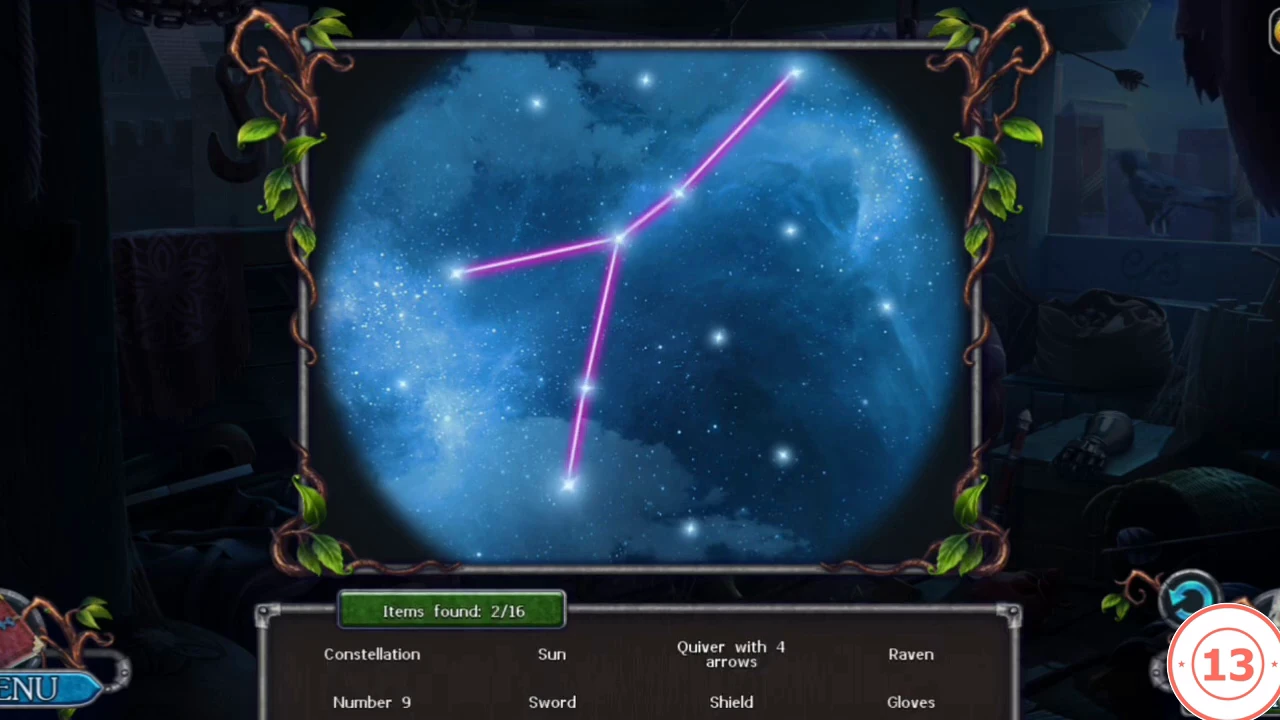
The completed constellation: a Y from the upper-right star to the fork, a branch to the star on the left, and a stem down to the lowest star. - Use the CROWBAR and the HAMMER to get the GEAR. Open the cage, move the clutter and take BRUSH 2/3. Fit the GEAR and pull the lever.
- Go forward and take the BOTTLE. Cut off the CLOTH with the KNIFE. Force the door with the CROWBAR and go right to the groom's hut. Chapter 3 begins.