CHAPTER 4 · ALICE
Attic: Hammer, Eye Numbers and the Colour Cabinet
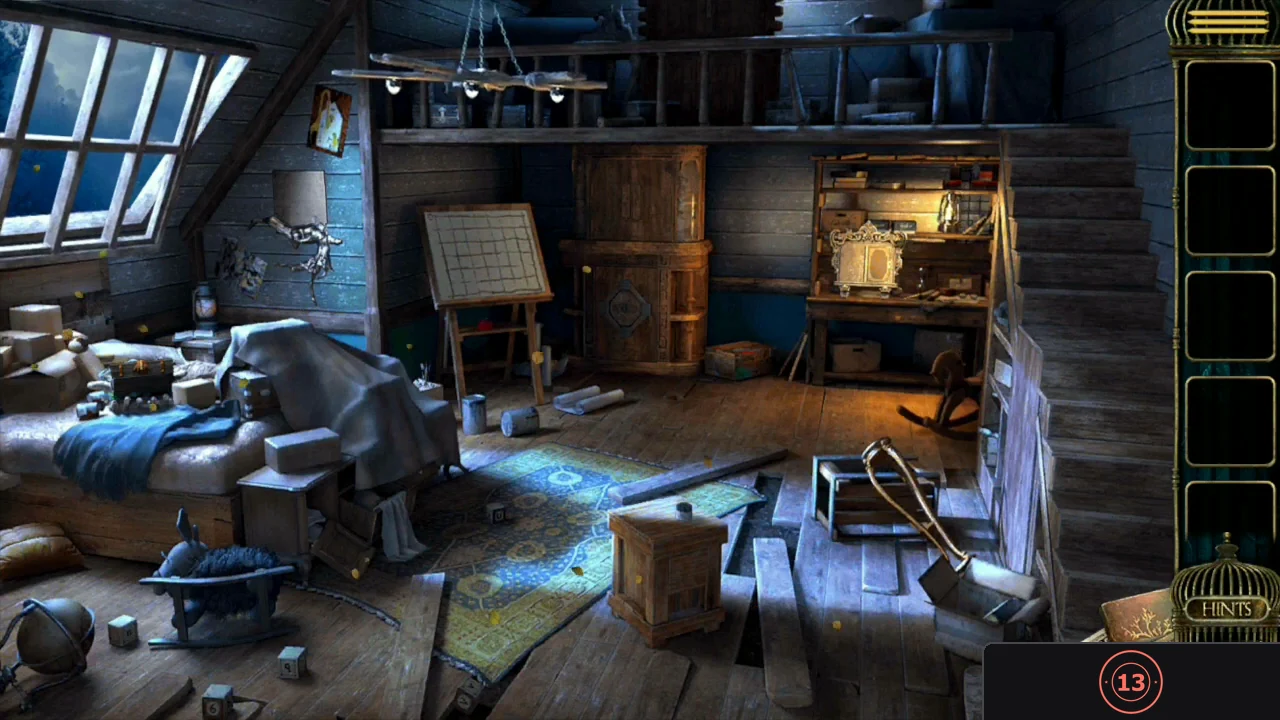
Alice's chapter starts in the attic, with a loft upstairs. Collect the paint pigments for the drawing board as you go.
- Go up to the loft, pull the metal bar on the wooden box in front of the small table and take the Wooden hammer.
- Also in the loft, take the first Alice family badge piece from the wooden box with the coloured four-digit lock on the right.
- Downstairs, break the grey panel right of the roof window with the Wooden hammer. Tap the eye in the hidden hand three times to see three pairs of numbers: green 1 8, purple 9 5, orange 0 3.
- Open the top of the cabinet beside the board and set the colour pairs: green 1 8, purple 9 5, orange 0 3. Take the Blue pigment and the Paper with tips.CODE18 95 03
- Take the White pigment from the top of the wooden box in front of you.
- Open the middle of that box to start the sliding-block puzzle. The goal is the small drawer in the middle, two squares long, with a wire handle. Slide the wooden blocks (each moves only along its length) until both drawer squares are clear: move the short blocks around the drawer away first, then push the long blocks to the edges to make room. This takes many moves. When the drawer is uncovered it opens; take the Green pigment.
- Zoom in on the small cabinet on the desk on the right. Take the Paintbrush lying beside it; it is needed for the drawing board. Optional collectible: also take Alice's hidden figurine from above the hourglass.
CHAPTER 4 · ALICE
Drawing Board and the 4375 Box
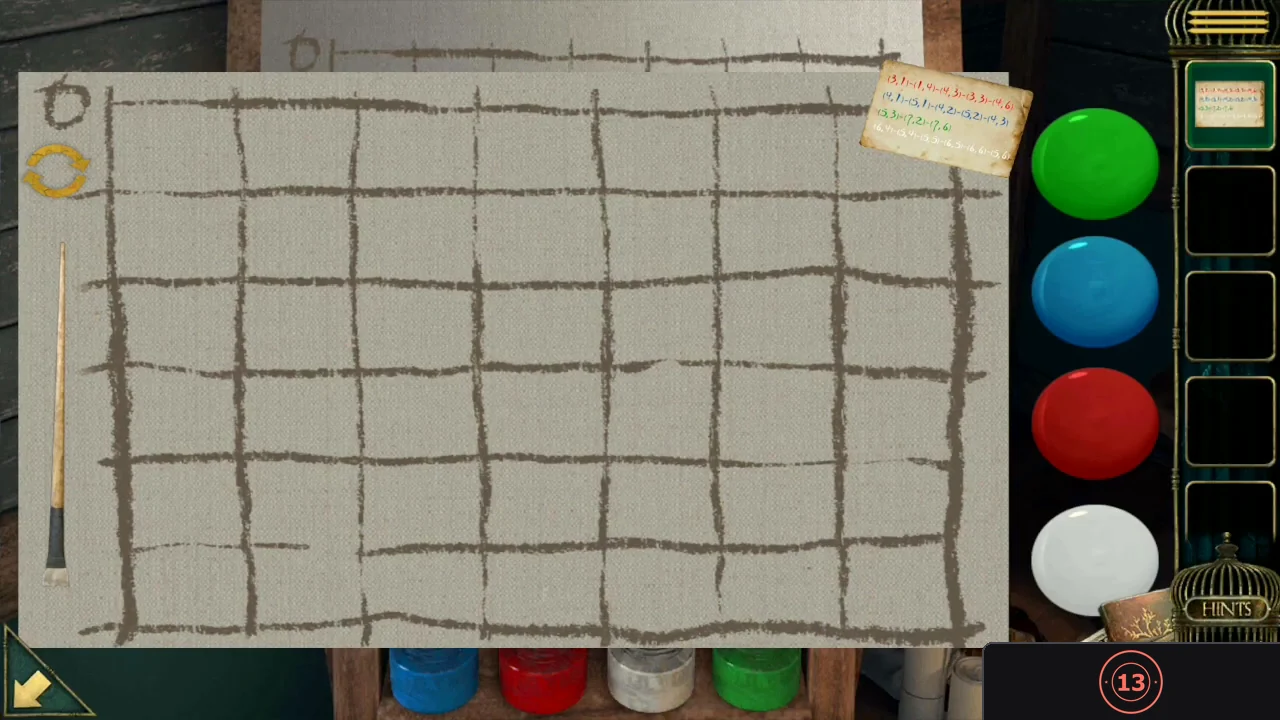
The drawing board needs all four pigments, the brush and the Paper with tips. Its lines form four coloured digits.
- Put the White, Green and Blue pigments next to the Red one under the board and place the Paintbrush on its left. Tap the Paper with tips: it lists point coordinates for each colour (red (3,1)-(1,4)-(4,3)-(3,3)-(4,6); blue (4,1)-(5,1)-(4,2)-(5,2)-(4,3); green (5,3)-(7,2)-(7,6); white (6,4)-(5,4)-(5,5)-(6,5)-(6,6)-(5,6)). Draw each colour's lines by connecting its points in the listed order on the board's grid; the lines must match exactly. The finished lines form red 4, blue 3, green 7 and white 5.
- In the loft, enter 4375 on the colour lock (red 4, blue 3, green 7, white 5) and take the Key.CODE4375
- Unlock the shiny cabinet on the desk with the Key. Tap the picture of the girl inside, then the following pages, to be drawn into the treehouse room.
CHAPTER 4 · ALICE
Treehouse: Birds, Mouse Hole and Sugar Cubes
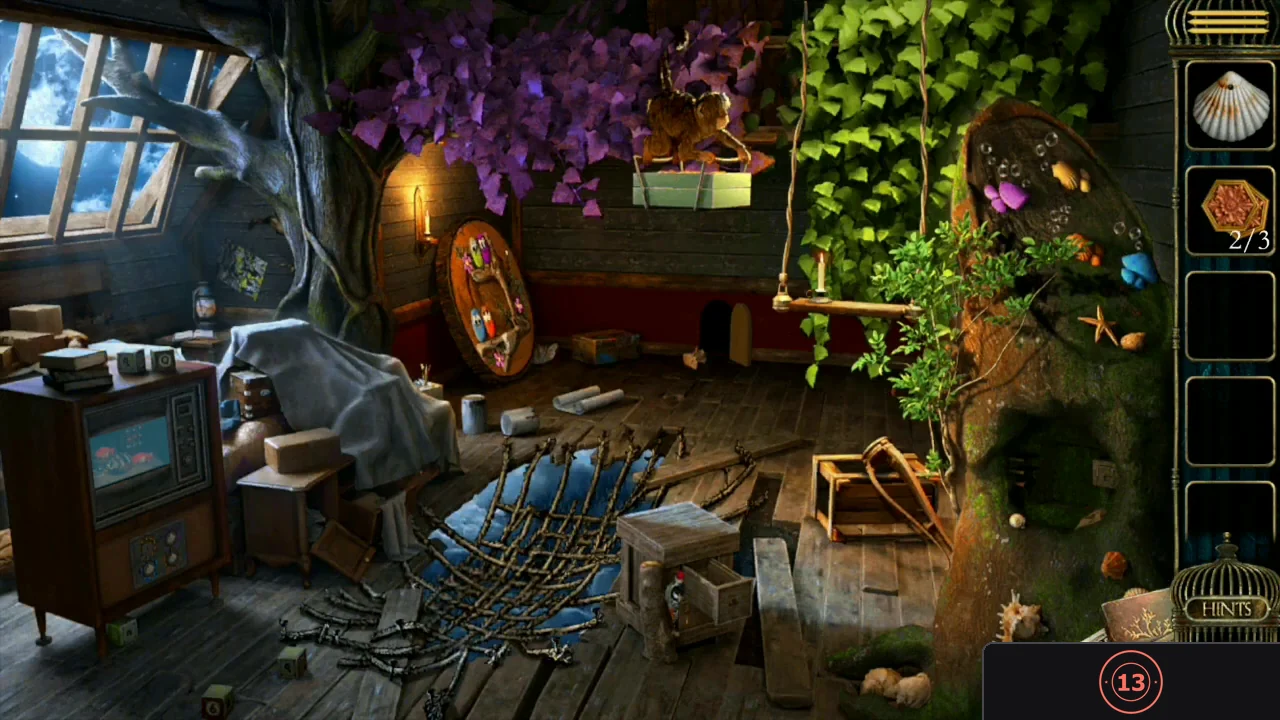
The treehouse has an old TV with four shell dials, a bird stump, a woodpecker box, a mouse door and a tree stump with an ant board.
- The TV stands on the left side of the room. Take the second Alice badge piece just to the right of the TV.
- Look at the bird stump: each bird looks at a flower. Count its petals: yellow 4, orange 6, blue 5; the purple bird's flower has no petals and counts as 1.
- The colour marks on the woodpecker box read yellow, orange, blue, purple. Tap 4, 6, 5, 1 on its number grid. Take the Cheese and the Shell from the drawer.CODE4651
- Put the Cheese by the small mouse door at the back. When the mouse comes out, take the Hexagonal flower tile from its hole.
- Zoom in on the board in the hole of the tree stump on the right. Place sugar cubes from the shelves on the grid-line crossings so they trace the path carved on the stone to the right, following it from end to end. The ant eats along the trail and the panel opens; take the second Hexagonal flower tile.
CHAPTER 4 · ALICE
Shell Dials, Butterflies and Snails
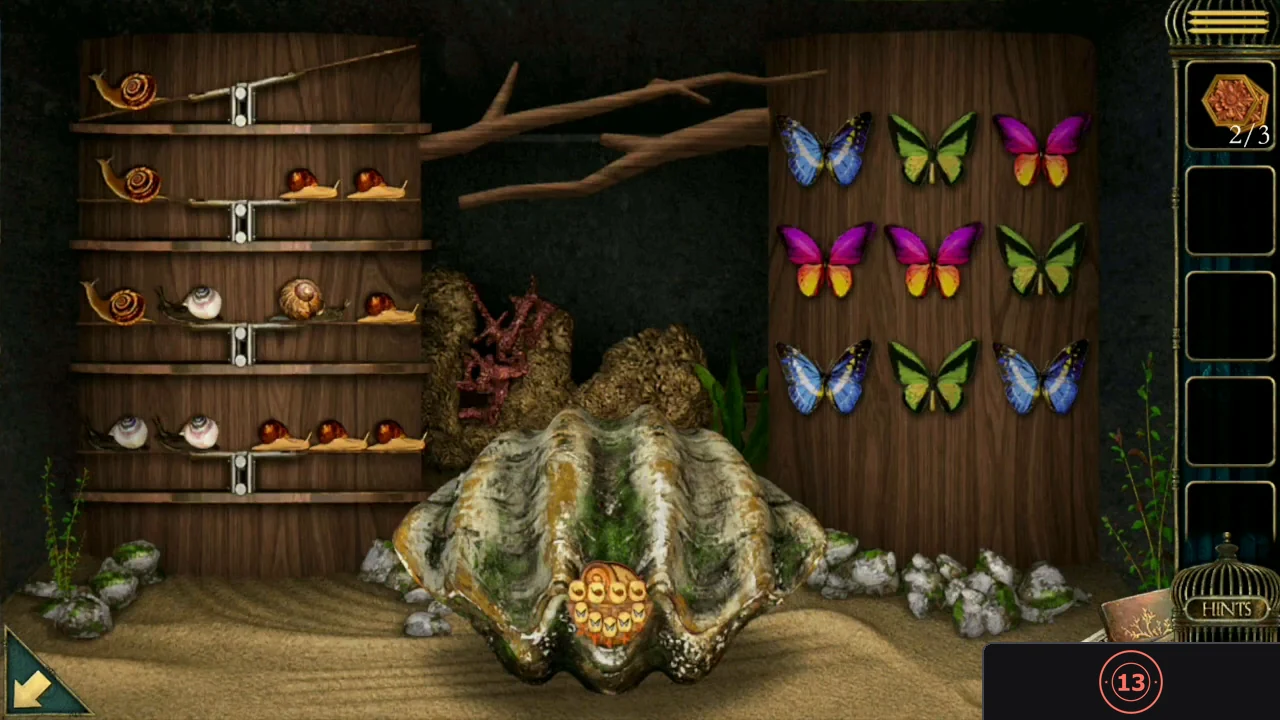
The TV's shell dials open a seashell puzzle with a butterfly part and a snail part.
- Fit the Shell into the empty dial under the TV. Look into the top of the right-hand tree trunk and count each fish's bubbles: yellow 3, purple 6, blue 3, orange 7.
- Set the dials by their number colours: yellow (top left) 3, purple (top right) 6, blue (bottom left) 3, orange (bottom right) 7. The TV front opens.CODE3637
- Tap the symbols on the large seashell. Each of the five lower symbols has a white dot: trace that symbol over the 3×3 butterfly wall on the right and the dot lands on the butterfly that belongs in that slot. Tap each slot to cycle it to that butterfly.
- Work out the snail weights from the balances on the left shelves (a red-shelled snail is the lightest unit; compare each balance in turn) and set the top row from heaviest to lightest. When both rows are right, the seashell opens; take the third Hexagonal flower tile.
CHAPTER 4 · ALICE
Family Portrait Match and the Colour Containers
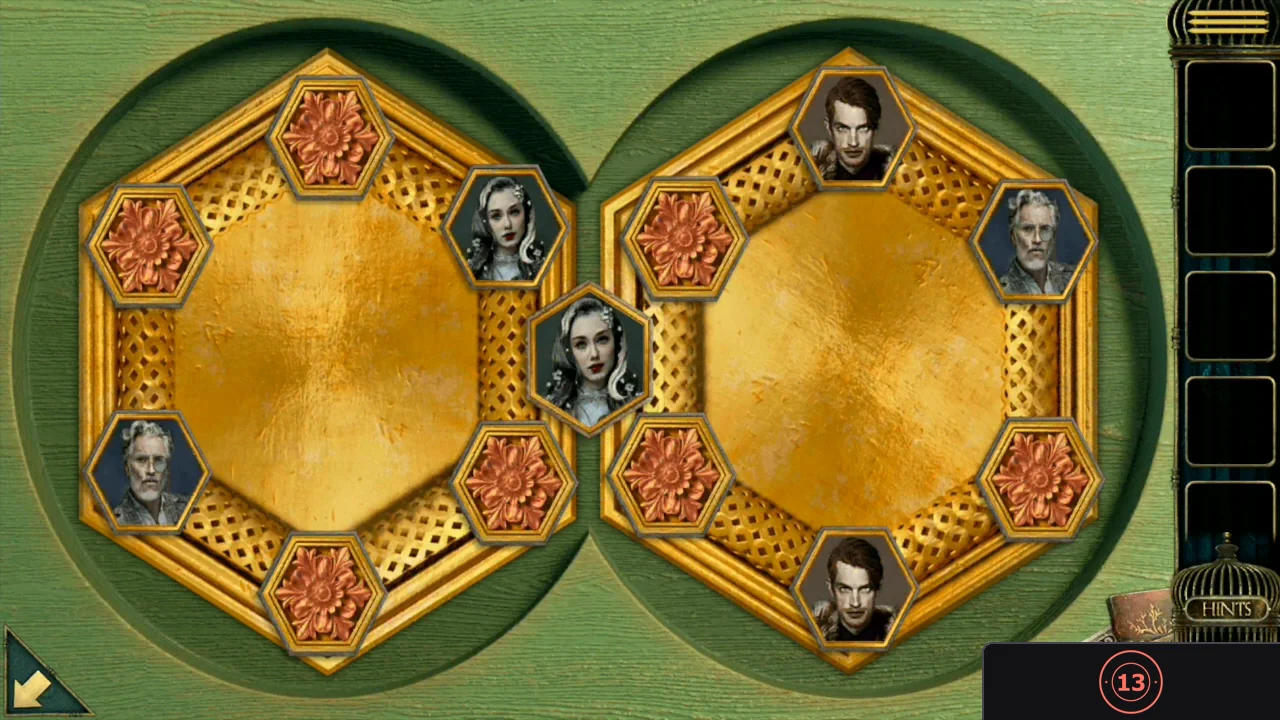
The box under the monkey holds a matching puzzle around an old man's picture; afterwards you return to the attic for the container puzzle.
- Open the box under the monkey, place the three Hexagonal flower tiles and match the pictures in pairs, one from each side: the old man, the dark-haired man, the silver-haired woman, the red-haired woman, the young girl and finally the two R letters. Take the Game cube; you return to the attic.
- Open the lower part of the large cabinet behind the board and add the Game cube. Move pieces between the four outer containers using the small centre container, turning it with the left and right gears. Removing two pieces reveals a container's colour (top blue, right green, bottom red, left yellow); sort every piece into the container of its colour. Take the Rocker.
- Use the Rocker on the box on the bed. The blue light inside carries you to the memory amusement park.