Treatment Room: Showcase Key and Door Handles
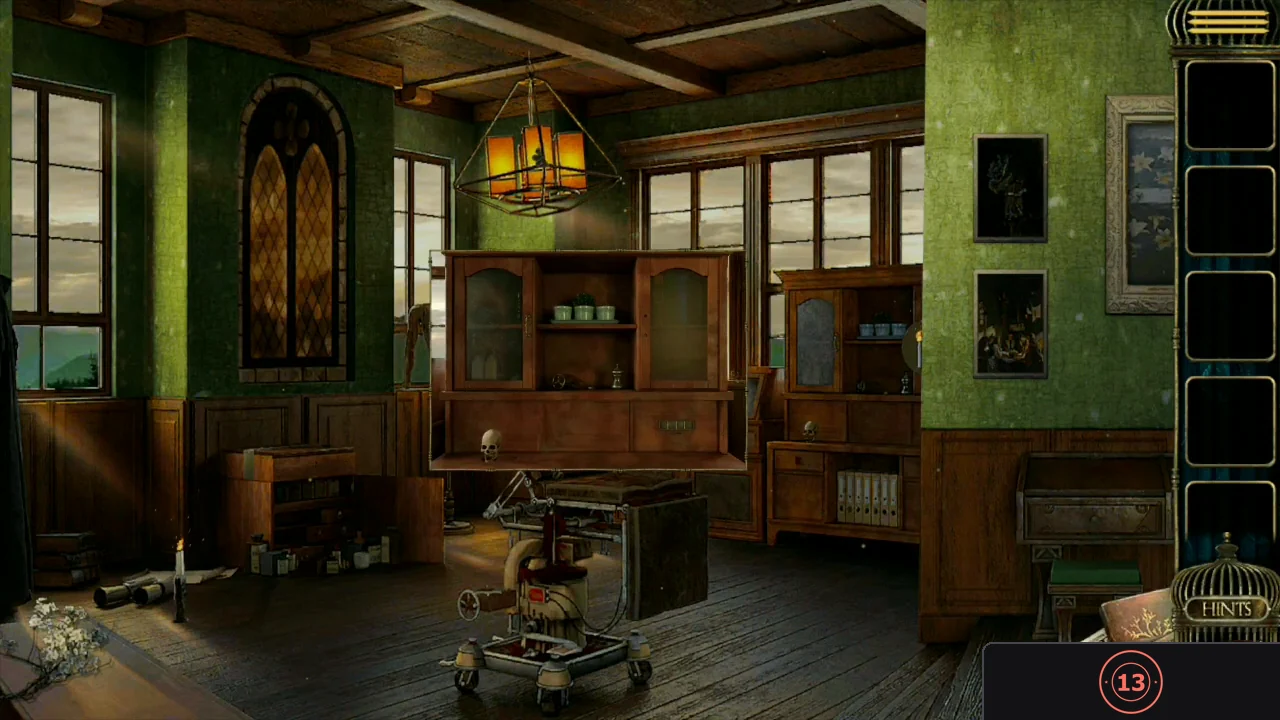
Jason's chapter starts in a treatment room with a dental chair, a wooden mannequin, a showcase cabinet and a large cabinet with a skull.
- Optional collectible: zoom in on the large cabinet on the right and take the small figure on its shelf to collect Jason's hidden item.
- Read the number 0755 smudged on the showcase cabinet glass. Slide open the door on the right of the large cabinet, enter 0755 on the small safe and take the Key.CODE0755
- Unlock the showcase cabinet with the Key and take the Scissors and the Syringes.
- Cut the strap on the small cabinet on the left with the Scissors and take the Door handles. Note the five bottles in its lower part.
Jigsaw Box, Book Cabinet and Bottle Order
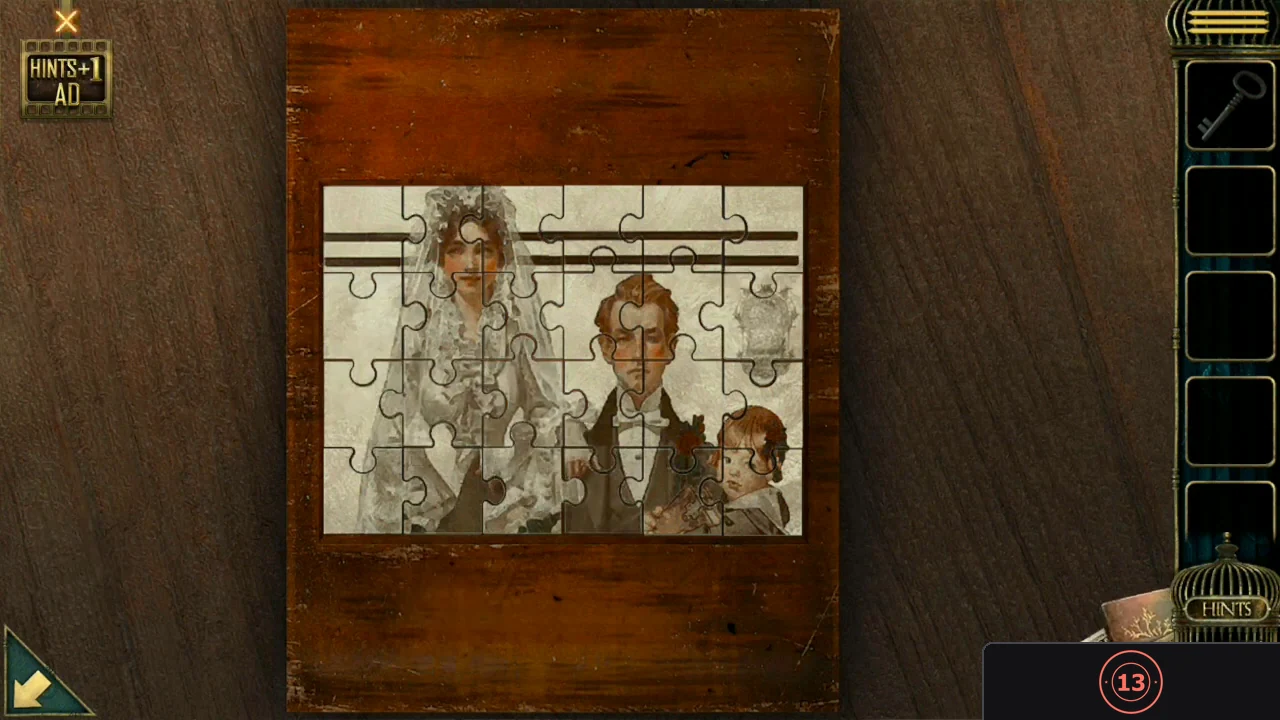
The room to the right holds a jigsaw box behind a folding screen and the turquoise letter screen.
- Go right and zoom in on the small box. Take the first Jason family badge piece beside it.
- Tap the box to start the jigsaw. Drag the loose pieces into the frame until the family portrait is complete (pieces only fit in their own place, so start with corners and edges). Take the Book from the drawer that opens.
- In the treatment room, attach the Door handles to the sliding door of the large cabinet and open it. Put the Book in the gap on the shelf and take the Puzzle piece from the compartment below. Note the book colours from left to right: brown, yellow, green, blue, red.
- Zoom in on the bottles in the small cabinet and swap them until their colours follow the books: brown, yellow, green, blue, red. Take the Medicine bottle from the compartment that opens.
Chair Gears, Skull Teeth and the NIOBE Safe
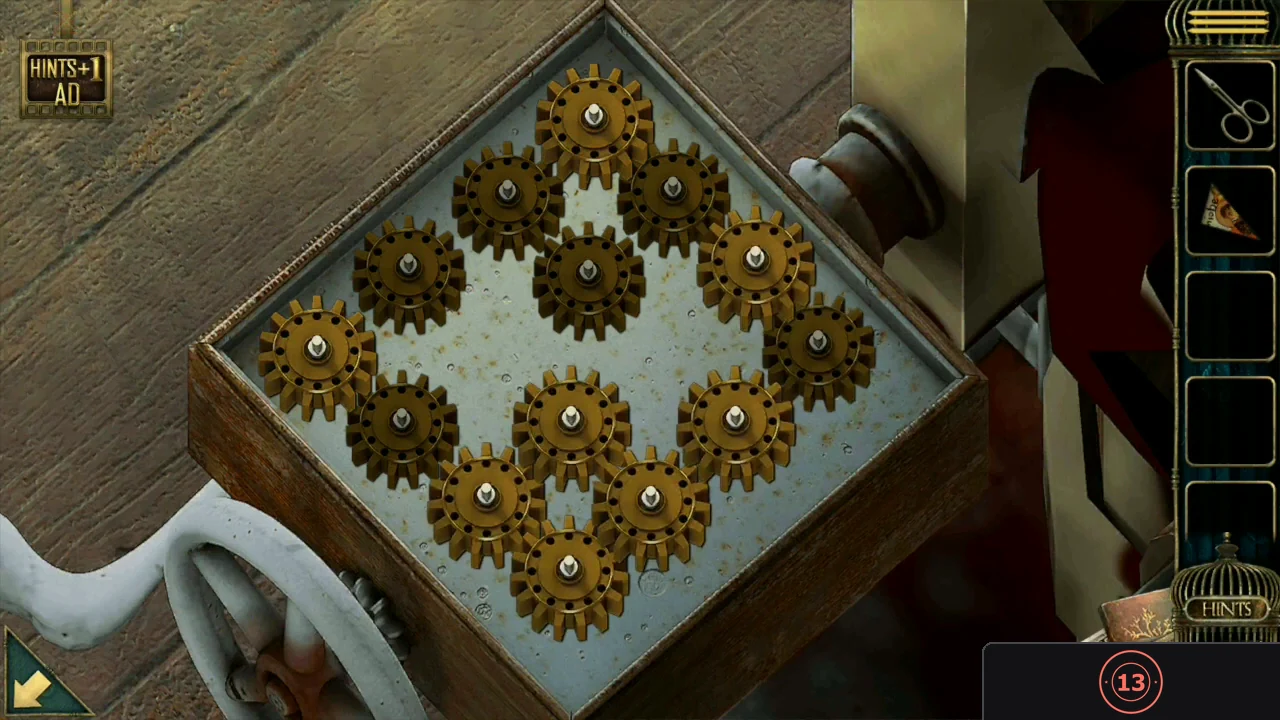
The gear box at the foot of the treatment chair is a light-up puzzle.
- Open the Syringes in the inventory and drag the Medicine bottle onto them to clean and grease the gear.
- Zoom in on the gear box at the lower left of the chair and fit the gear in the empty slot. The 14 gears form a diamond with an empty space in the middle. Tapping a gear switches it and every gear touching it along the diamond's slanted lines (not across the empty middle) between lit and dark. Tapping the same gear twice cancels out and the order of taps does not matter, so each gear needs at most one tap. From the starting pattern (lit: the top, left and bottom corners plus the two gears on either side of the right corner) tap these seven gears once each: the three gears on the upper-left edge below the top corner (including the left corner), the two gears between the top and right corners on the upper-right edge, and the two gears inside the diamond. Every gear is then lit. The chair lowers; take the Teeth and note the letters EDGW carved on the seat.
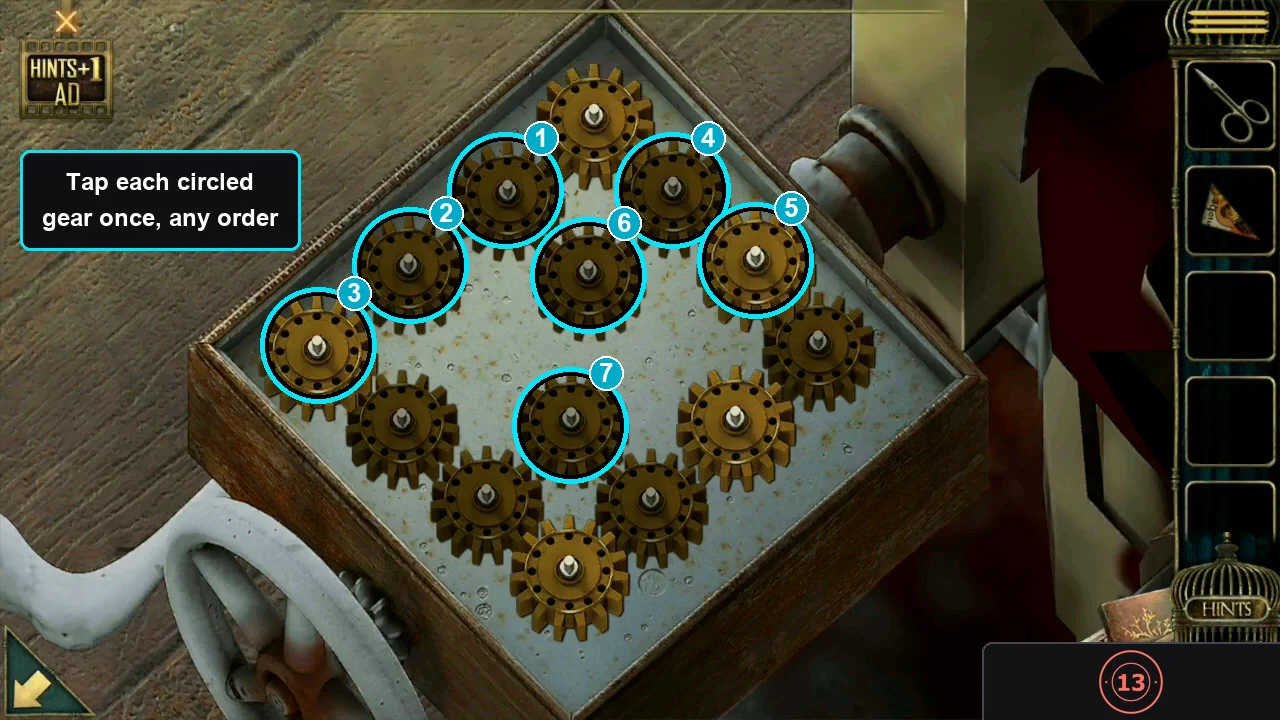
The seven gears to tap once each, in any order: three on the upper-left edge, two on the upper-right edge and the two inside the diamond. - In the room on the right, set the four turquoise medallions on the folding screen to E, D, G, W. The screen moves aside.CODEEDGW
- Put the Teeth into the skull in the large cabinet and tap them. Remove teeth by selecting two with the same number, or two whose numbers add up to a third tooth (all three disappear). Clear them all and take the second Puzzle piece.
- Fit both Puzzle pieces into the picture on the right-hand wall. The picture shows the word niobe and slides aside to reveal a safe. Enter NIOBE and take the Heart.CODENIOBE
- Place the Heart in the chest of the wooden mannequin in the treatment room. You are pulled inside Jason's mind; follow the hallway down to the room with the giant heart.
Giant Heart Room: Skulls, Webs and 500 ml of Water
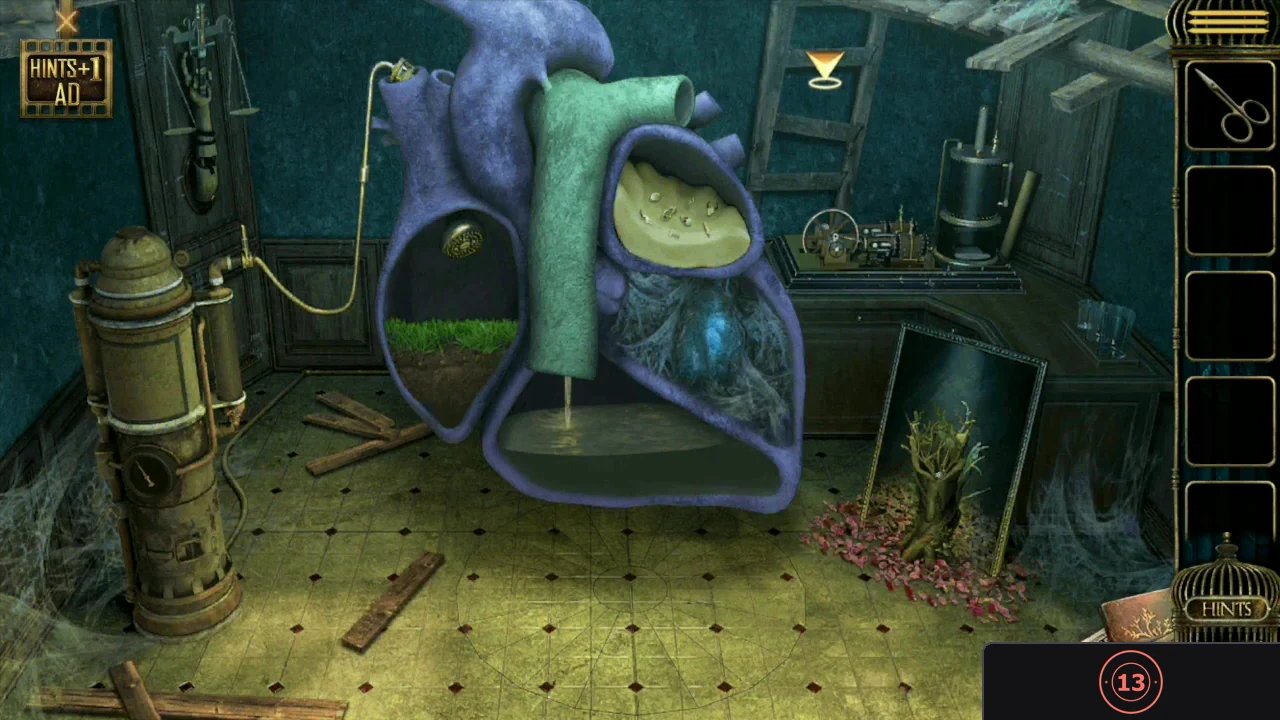
The giant heart room has a sand chamber, a webbed chamber, a water chamber, a steam machine, a grinder, a hand holding scales and a picture of a hollow tree.
- Zoom in on the sand chamber at the top of the heart and clear the bones in matching pairs by tapping one and then its partner. Pairs are the same kind of bone or two parts of one skeleton: the two human skulls, the head and tail halves of the fish skeleton, the two horned skulls (they have different shapes) and the large reptile skull with its long jaw. When all pairs are gone you receive the Sheep skull and the Fishbone; take the Spade from the hole in the sand.
- Take the Sword from the hand holding the scales on the left wall.
- Cut the twigs in the hollow-tree picture on the right with the Sword. Take the Tree branch, the playing card and the second Jason badge piece there.
- Cut the webs on the webbed chamber of the heart with the Scissors and take the Spider webs and the Matches.
- Take the Roll of paper from the steam machine and read it: the machine needs twigs, matches and 500 ml of water, and the grinder needs ingredients in this order: spider web, charcoal, spider web, sheep skull, charcoal, fishbone, spider web.
- Take the 1000 ml cup from the shelf, fill it from the water in the lower heart chamber and put it back beside the 700 ml and 300 ml cups. Pour between the cups until exactly 500 ml is in the 1000 ml cup, for example: 1000 to 700, 700 to 300, 300 to 1000, 700 to 300, 300 to 1000, 700 to 300, 1000 to 700, 700 to 300, 300 to 1000. Take the 500 ml cup.
Steam Machine, Grinder and the Brain
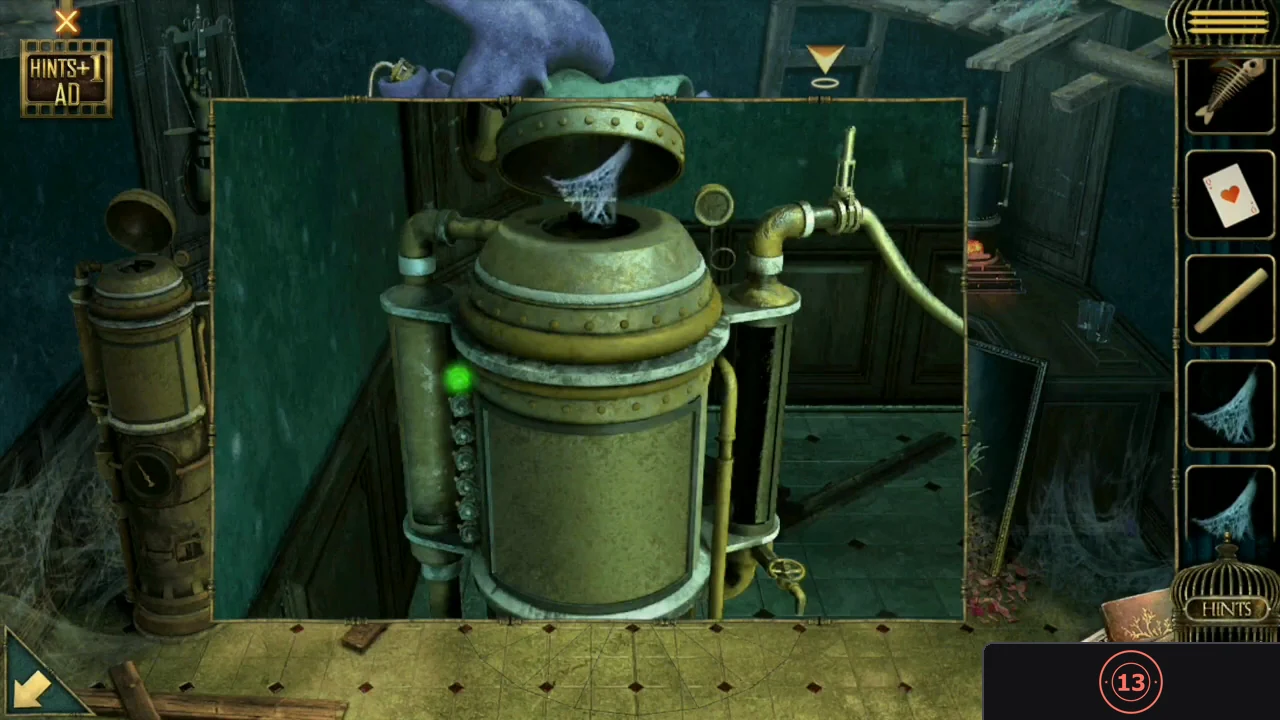
Follow the Roll of paper to run the two machines.
- Pour the 500 ml of water into the pipe of the steam machine, put the Tree branch in its fire box and light it with the Matches.
- Use the Spade in the fire box, then tap the loaded Spade resting at the edge of the fire to collect two pieces of Charcoal.
- Open the hatch of the grinder and add the ingredients in the recipe order: spider web, charcoal, spider web, sheep skull, charcoal, fishbone, spider web. Each correct ingredient lights a green lamp.
- A flower grows in the left chamber of the heart; take it to get the Needle. Pierce the blue wall in the middle chamber with the Needle and take The Brain.
- Return to the treatment room (use the map) and put The Brain in the mannequin's head. Back in Jason's mind, the floor under the giant heart opens; go down the stairs to the council room.
Council Room: Shield Code and Dagger Rack
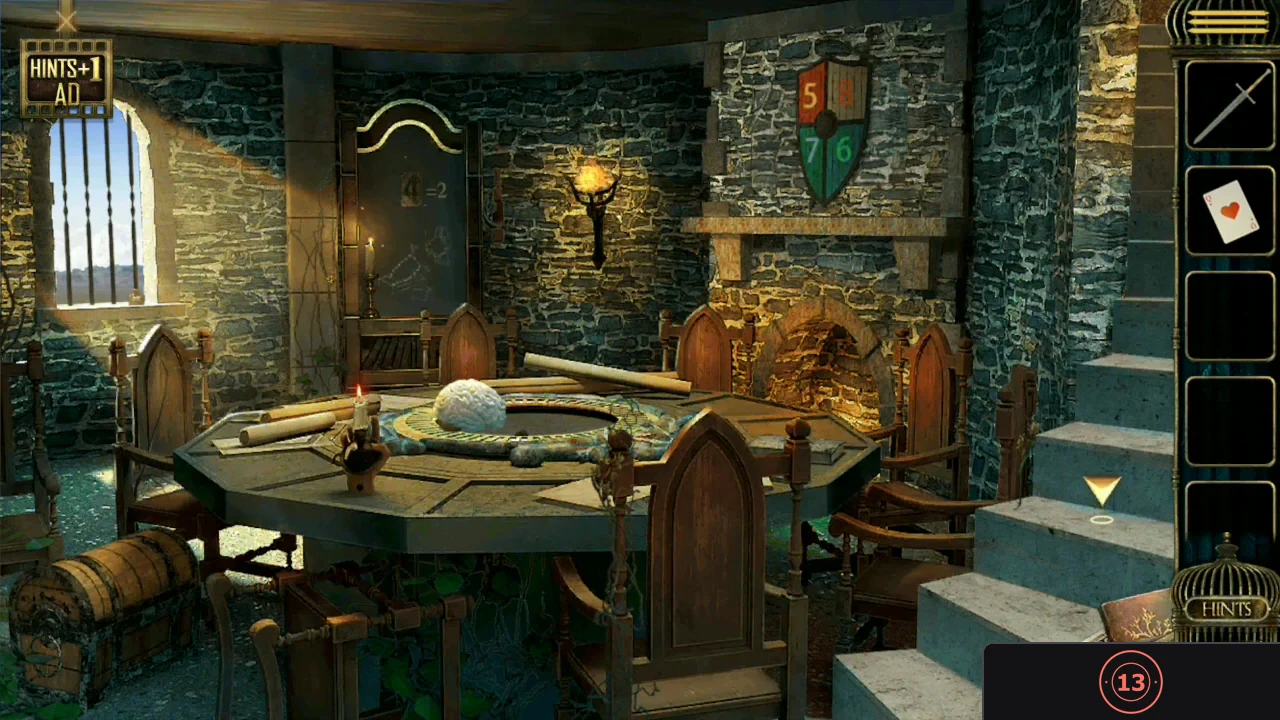
The council room has a shield over the fireplace, a chest with a colour lock, a book with a card lock, a brain model on the table and a barred window.
- Put the Sword in the empty place under the shield above the fireplace. Read the coloured numbers on the shield: yellow 5, red 8, blue 7, green 6.
- Take the third Jason badge piece by the chest on the left.
- The chest lock has colour squares red, yellow, blue, green. Enter the matching numbers 8576 and take the White ink and the Dagger.CODE8576
- Slide the shield aside, place the Dagger in the empty spot on the knife rack and swap the blades until every blade matches its hilt. Take the Black ink and the Skull from the compartments that open.
- Look at the board by the torch on the back wall: flip the card to read that the clubs card equals 2, and note the cannon drawing. Take the Spyglass beside the board and the Pink ink from the window ledge.
Card Book, Ostrich Drawing and the Cannon
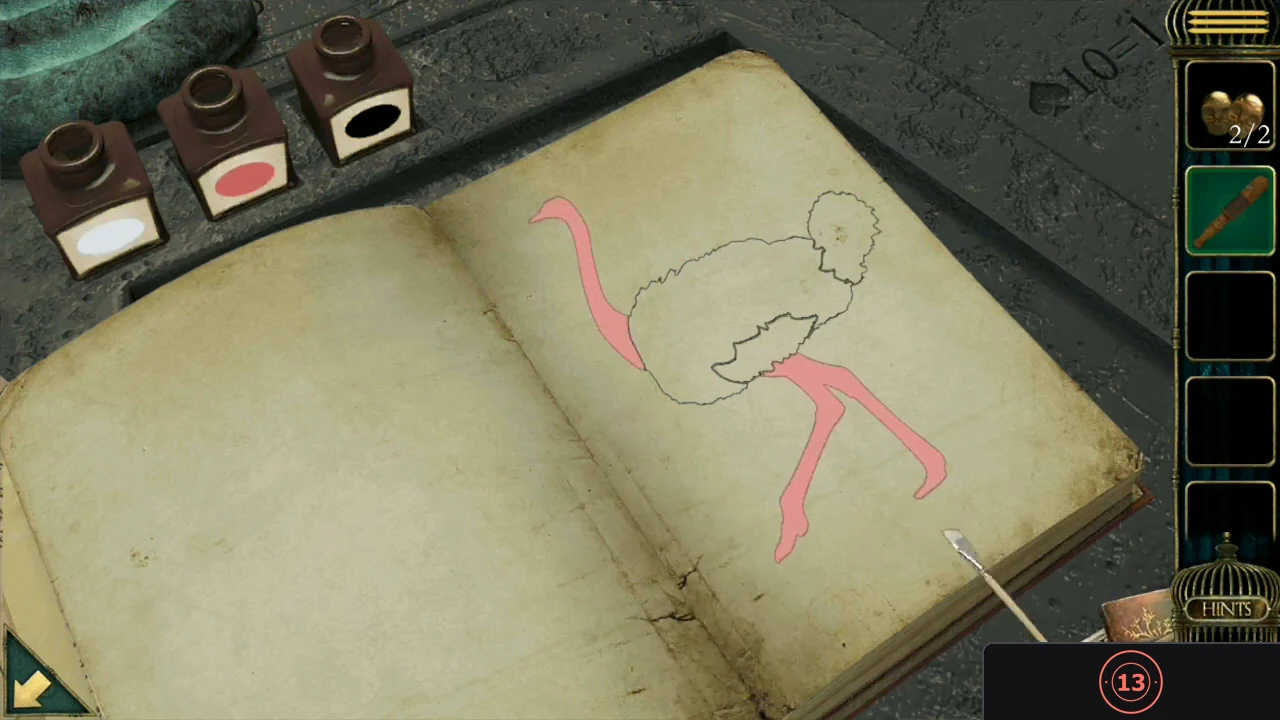
The book on the table needs a four-digit card-suit code, then an ostrich must be painted to match the bird outside.
- Examine the Spyglass: diamonds equal 0. The book page shows spades equal 1, and the heart card counts as hearts equal 2. Enter 1220 (spades, hearts, clubs, diamonds) on the book lock.CODE1220
- Place the White, Pink and Black inks in the three ink wells and open them. Use the Spyglass at the window to see the ostrich outside: black body, white underbelly and tail, pink neck, head and legs.
- Use the brush to paint the drawing in those colours. Take the Feather that appears, then tap the ostrich at the window to get a second Skull.
- Open the brain model on the table, add both Skulls and rearrange the skulls between the sockets until every connecting line turns yellow. Take the Ring from the compartment below.
- Tap the cannon to fire it at the barred window, then go through the window into the observatory.