The study: dagger, desk box and the sideboard memory game
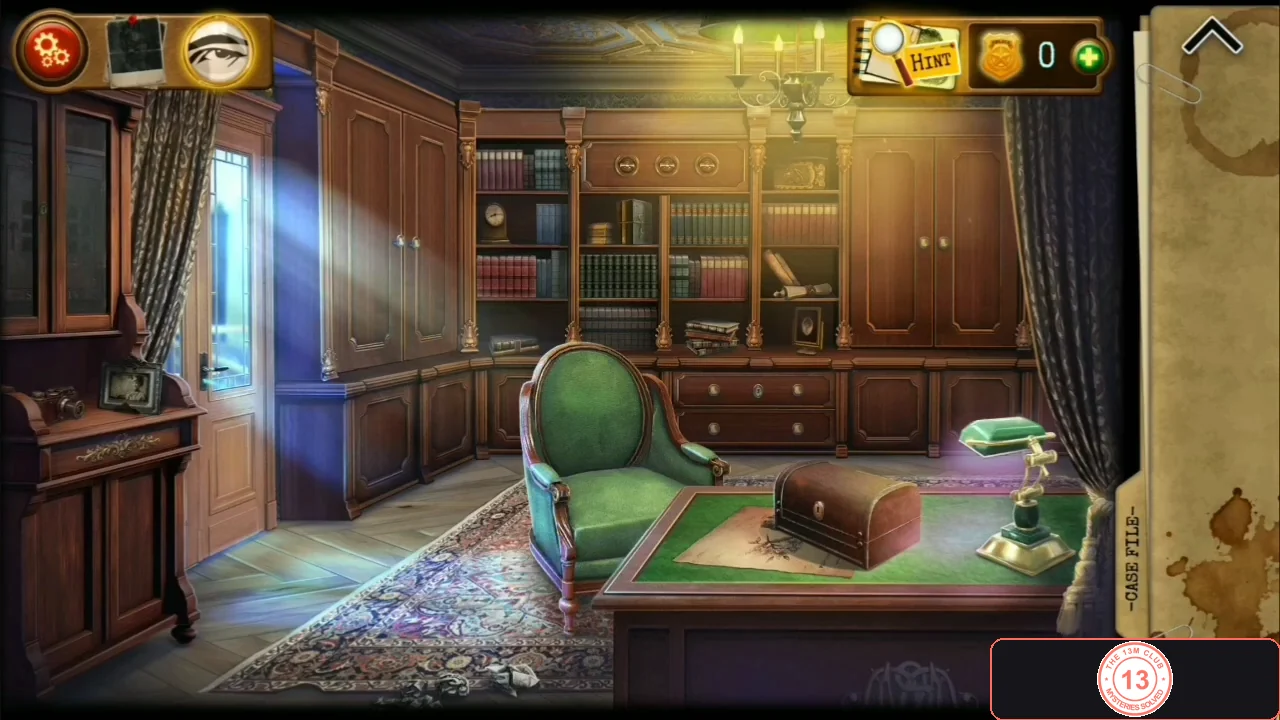
Andrew starts in the Collector's study. Find the Dagger, open the desk box, prepare the needle and thread, and beat the timed picture-triplet game in the left sideboard to get the Door key.
- Zoom into the bookshelf left of centre (shelf with books and an African-style mask) and take the Dagger.
- Use the Dagger on the back of the green armchair to cut it open and take the Box key.
- Use the Box key on the wooden box on the desk. Move the photos and glasses aside and take the Pillow with needles, the Sideboard No. I key and the purple thread. Easy to miss (Case File entry 1): tap the photo of the intern ('Admittedly, the intern is intelligent and resourceful...').
- Combine the Pillow with needles with the thread in the inventory to get a threaded needle.
- Use the Sideboard No. I key on the dark sideboard (secretary) on the left wall of the study. Press the green power button to start: 'Find each picture's triplet in the given time.' You have 45 seconds to find the three matching tiles of each of the five pictures (dagger, cash, walkie-talkie, revolver, goggles). Tip: flip tiles quickly and remember where each picture sits, then collect one picture's three tiles in a row. When all triplets are found the upper door opens: take the gold Door key from the lower shelf. Note the beetle-shaped recess in the floor of this compartment; the Scarab goes there later.
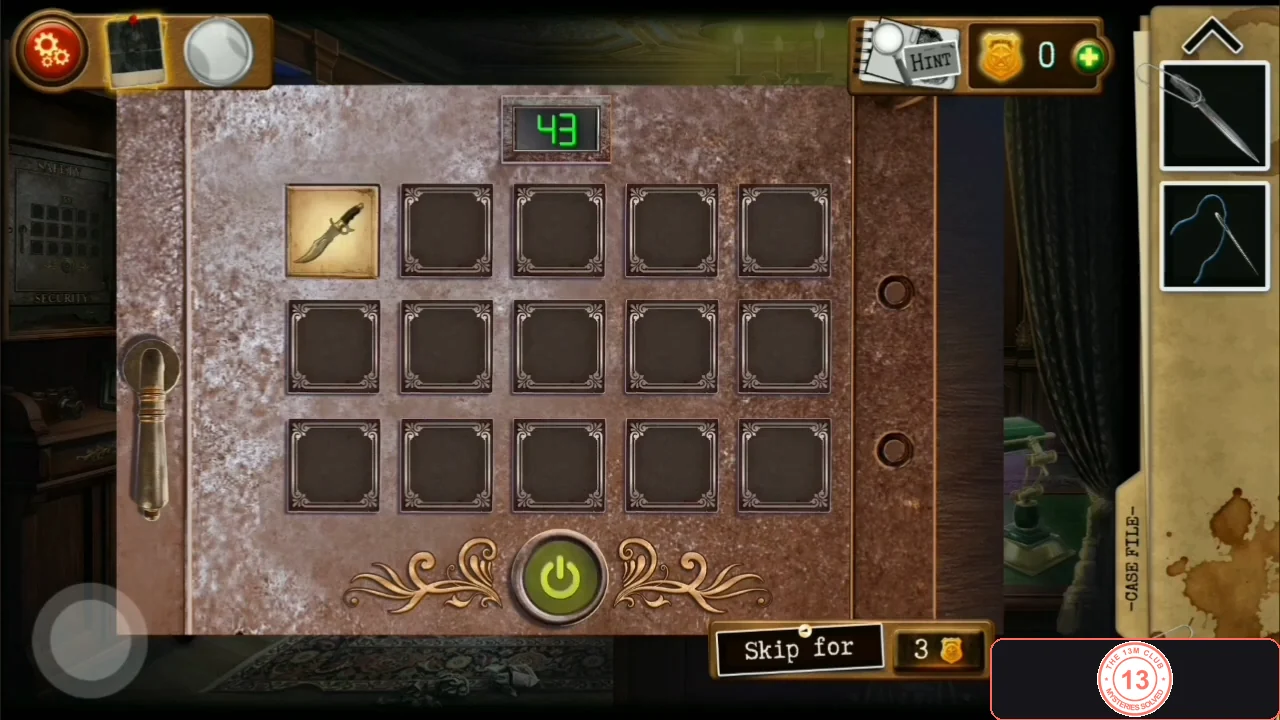
The timed triplet game in the sideboard. Find all three tiles of each picture before the timer runs out.
Upstairs landing: sew the torn painting and read the mirror
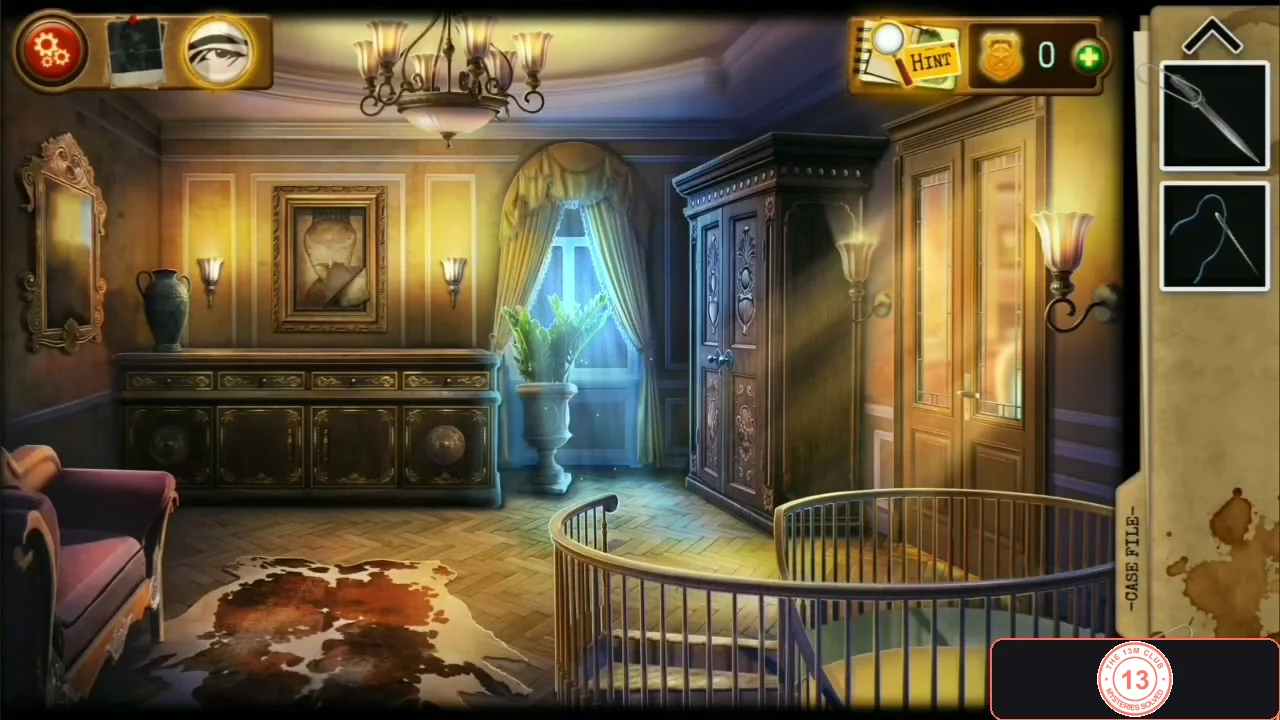
The study door leads to the upstairs landing. Repair the torn portrait to reveal one number clue and read the tally marks on the misted mirror for the other.
- Use the Door key on the study door (left side of the study) to reach the upstairs landing.
- Zoom into the torn portrait on the centre wall and use the threaded needle on it. The repaired picture shows two red X marks and a row of five red hearts. Count X as 10 and each heart as 1: 10 + 10 + 5 = 25.CODE25
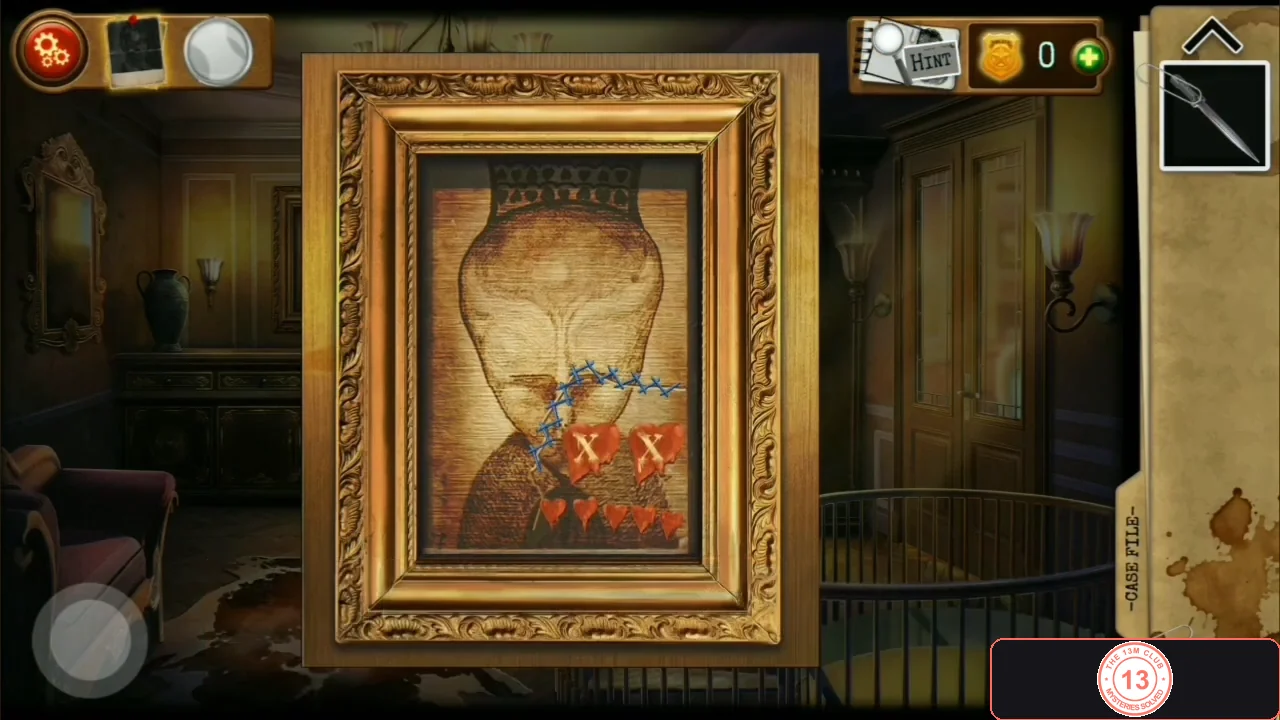
The sewn portrait: two red X marks (10 + 10) and five hearts (5) make 25. - Zoom into the mirror on the left wall of the landing. The misted glass shows groups of tally marks: 5, 6 and 2, for a total of 13.CODE13
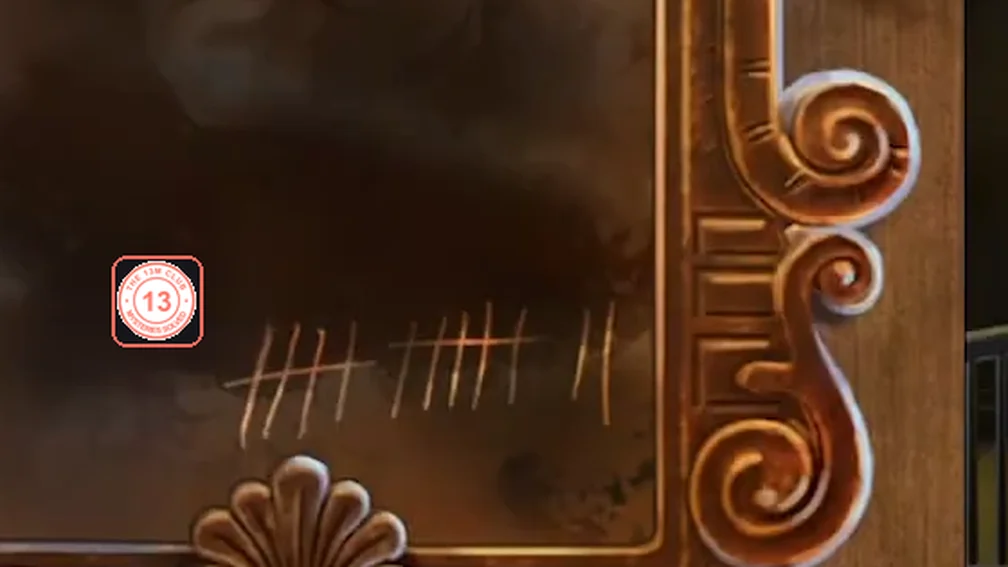
The tally marks on the misted mirror: 5 + 6 + 2 = 13.
Foyer chest: the music-box rhythm game
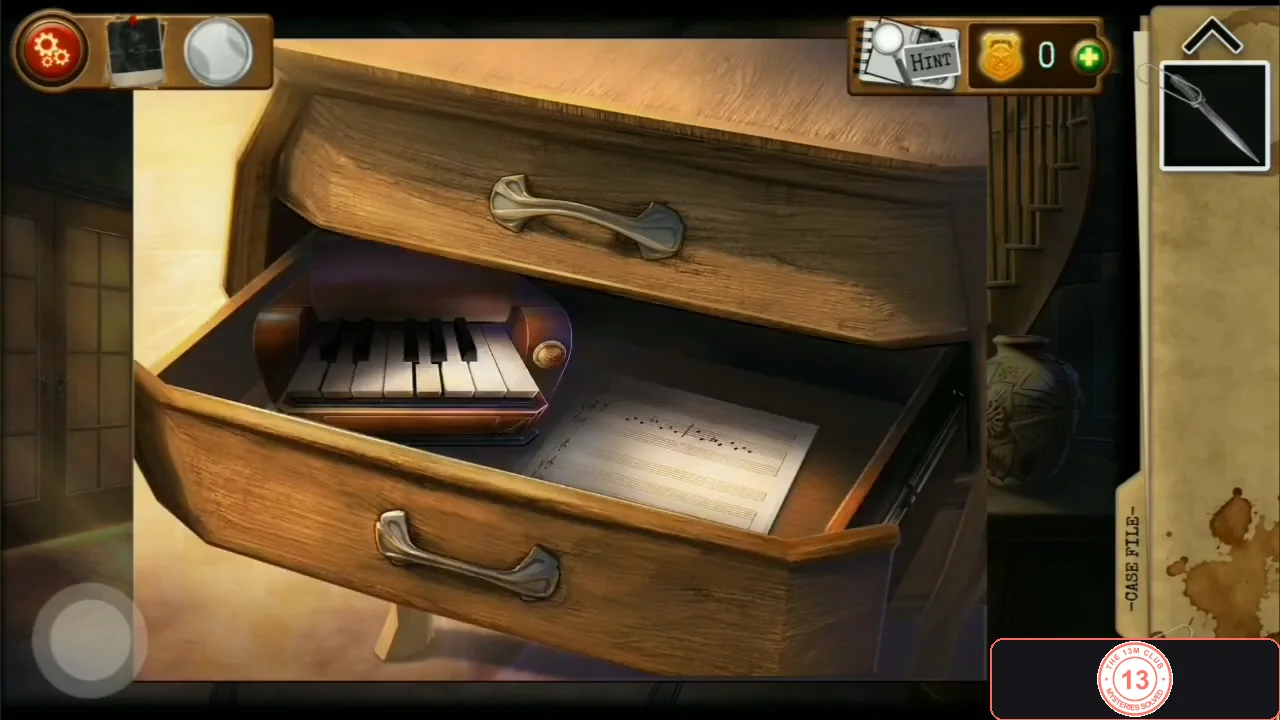
Downstairs in the foyer, the top drawer of the chest beside the staircase holds a music-box keyboard. Play the melody in time to open the lower drawer.
- Go down the stairs to the foyer and open the top drawer of the chest of drawers on the right: 'Press the keys when the dash comes up to play a melody.' Dashes move down the drum; tap each key exactly when its dash reaches it. This is a timing game rather than a code, so if you miss, simply try again. When the melody is complete the lower drawer opens: take the lock pick ('Master key') and look at the paper slip with three circles showing a vertical line, a line from top-left to bottom-right and a line from bottom-left to top-right (| \ /).
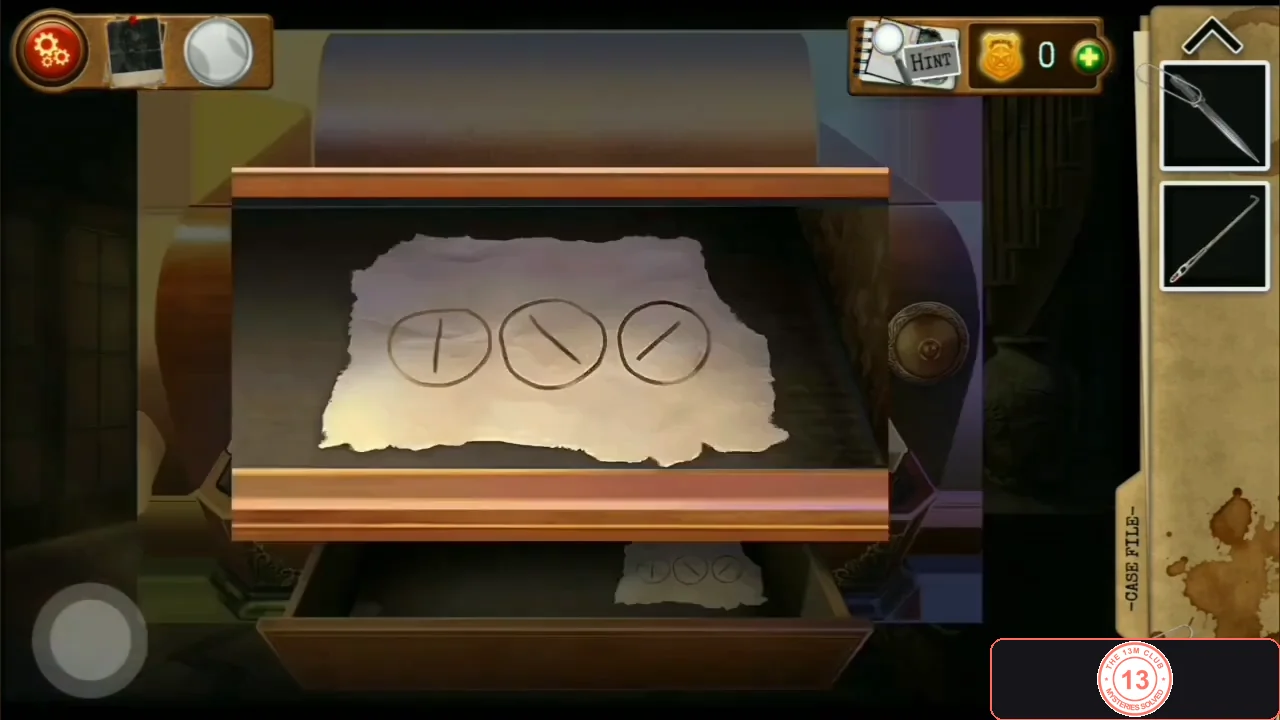
The slip from the lower drawer: vertical, top-left to bottom-right, bottom-left to top-right.
Study security cabinet, UV note and desk drawer
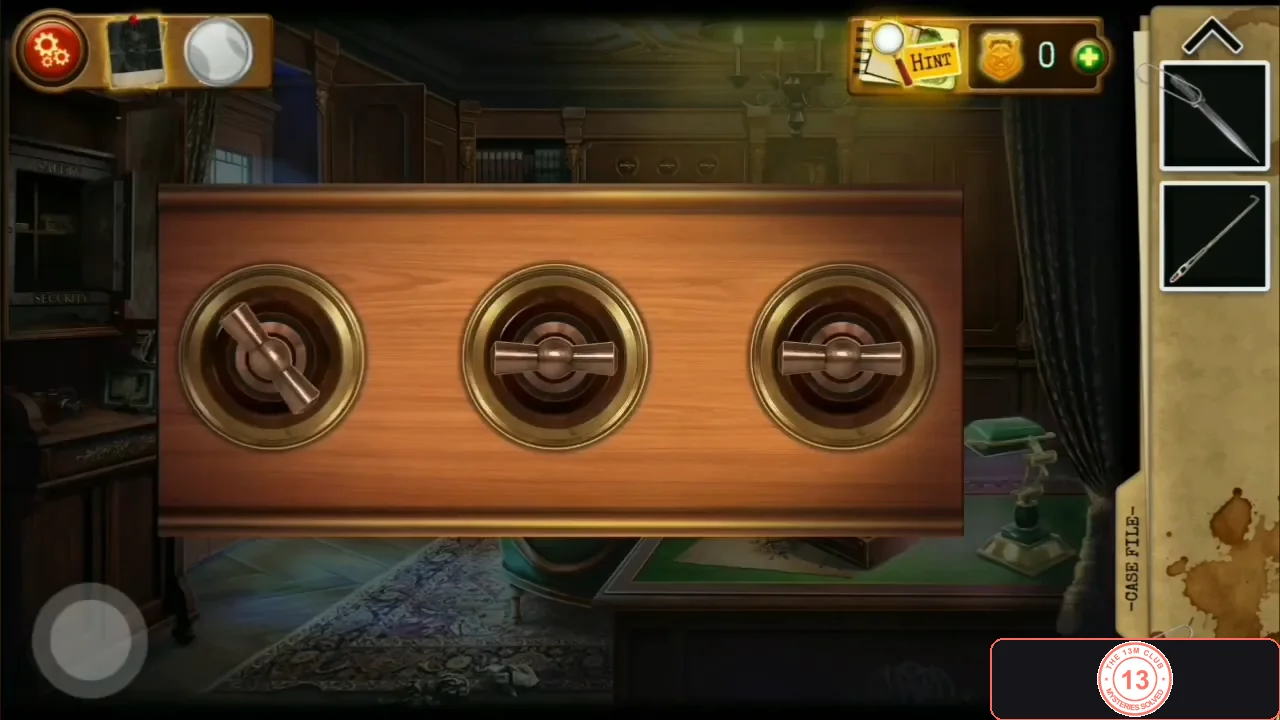
Back in the study, set the three dials on the upper-left 'SECURITY' cabinet to open a keypad safe, reveal its code with the desk lamp, then use the key inside on the desk drawer.
- In the study, zoom into the three-dial panel of the 'SECURITY' cabinet on the upper part of the left wall. All three handles start horizontal, and each click turns a handle 45 degrees clockwise. Set them to match the slip: left vertical (|), middle top-left to bottom-right (\), right bottom-left to top-right (/). From the start that is two clicks on the left dial, one on the middle dial and three on the right dial. The right handle passes through vertical on the way; the cabinet opens only when it reaches the / position. Inside is a safe with a keypad and a yellow sticky note.
- Take the yellow sticky note from the safe ('indentations... maybe not an ordinary pen?'). Hold it under the green desk lamp ('Hmm, a UV lamp.'): the hidden code 4512 appears.CODE4512
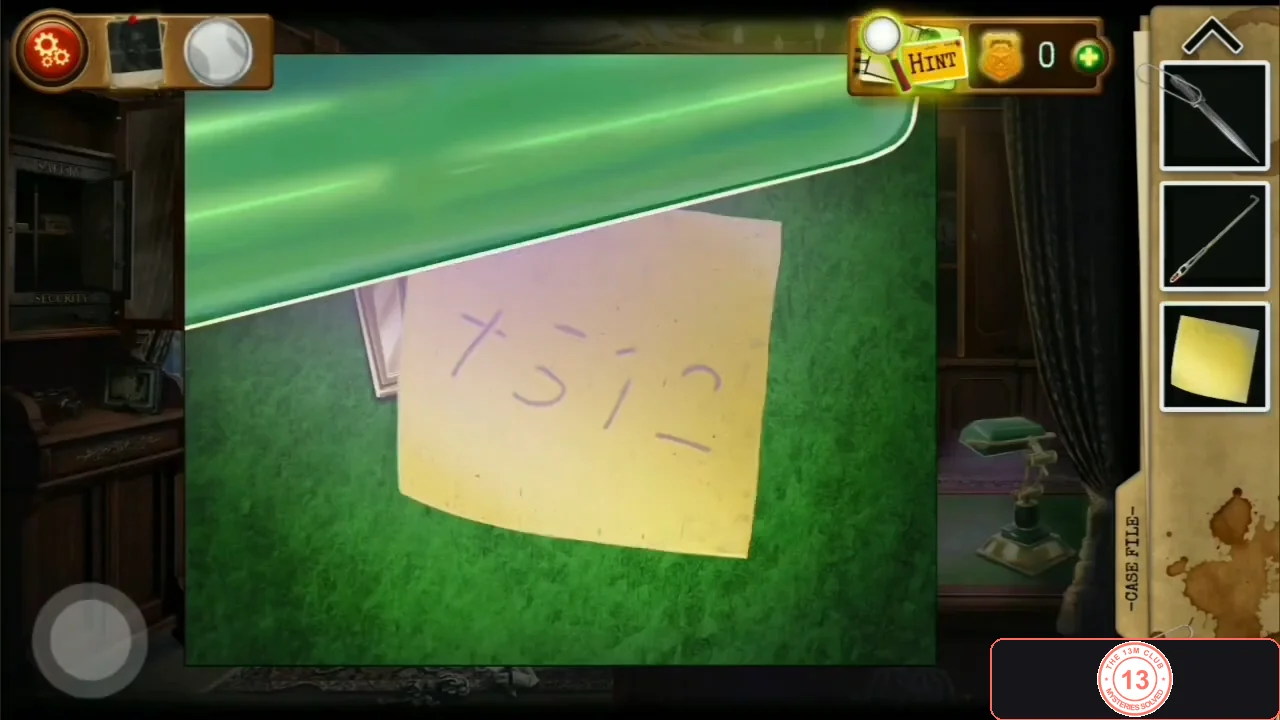
The sticky note under the UV desk lamp reveals 4512. - Enter 4512 on the safe keypad. Take the vinyl record C2 and the Cabinet drawer key.CODE4512
- Zoom into the front of the desk and use the Cabinet drawer key on the centre drawer. Take the red Button ('It's not from the nuclear weapons control panel, I hope.') and the Cabinet key.
- Easy to miss (Case File entry 2): zoom into the green leather top of the desk and place the Button on it. A fingerprint shows on the red cap ('Damn it! I think I've seen similar fingerprints before...'). The Button goes back to your inventory for later.
Landing nightstand: two number locks
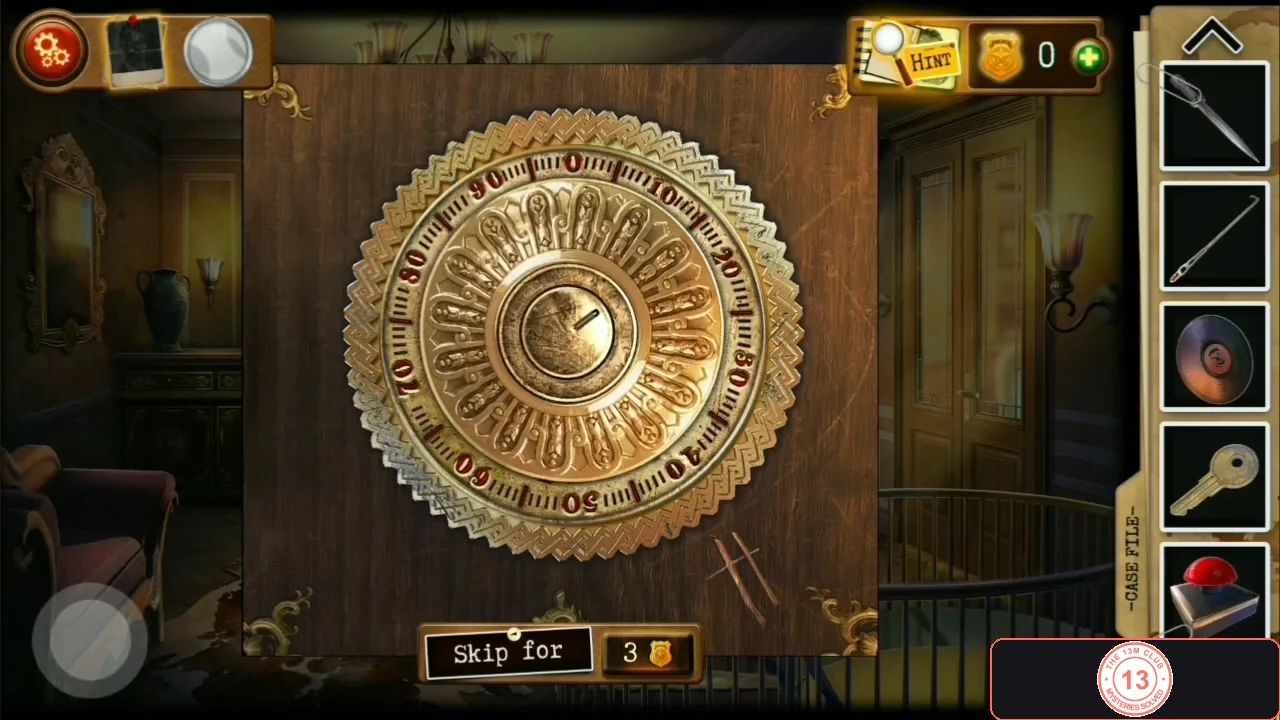
The low nightstand on the landing has two dial locks. The mirror and painting clues give their numbers.
- On the landing, zoom into the low nightstand on the back wall. Set the lock on the left end (marked with two scratch lines) to 13 and the lock on the right end (red smear) to 25, in either order. 'The lock on the nightstand is now open.' Inside, a pistol is photographed ('...looks like the gun that shot Chester') for Case File entry 3; take the vinyl record D4. Leave the pistol where it is.CODE13 / 25
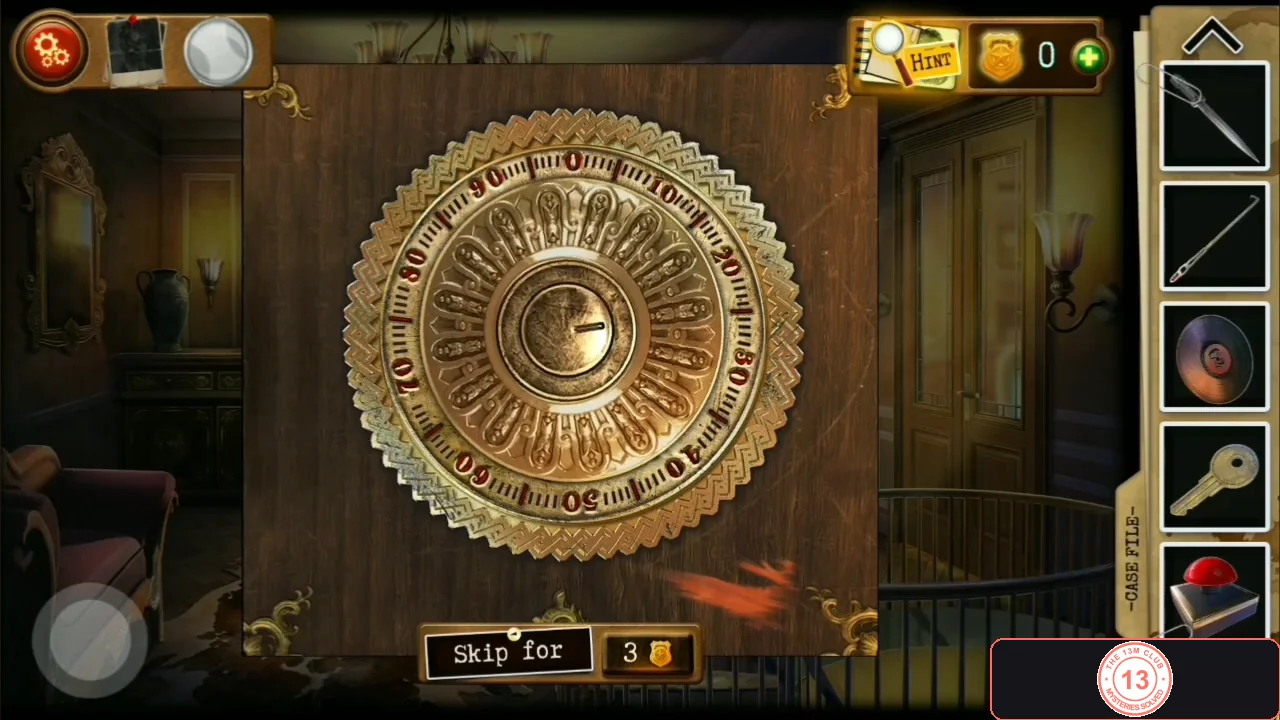
The right-hand lock, marked with a red smear: set it to 25.
Landing wardrobe: the lock-pick box
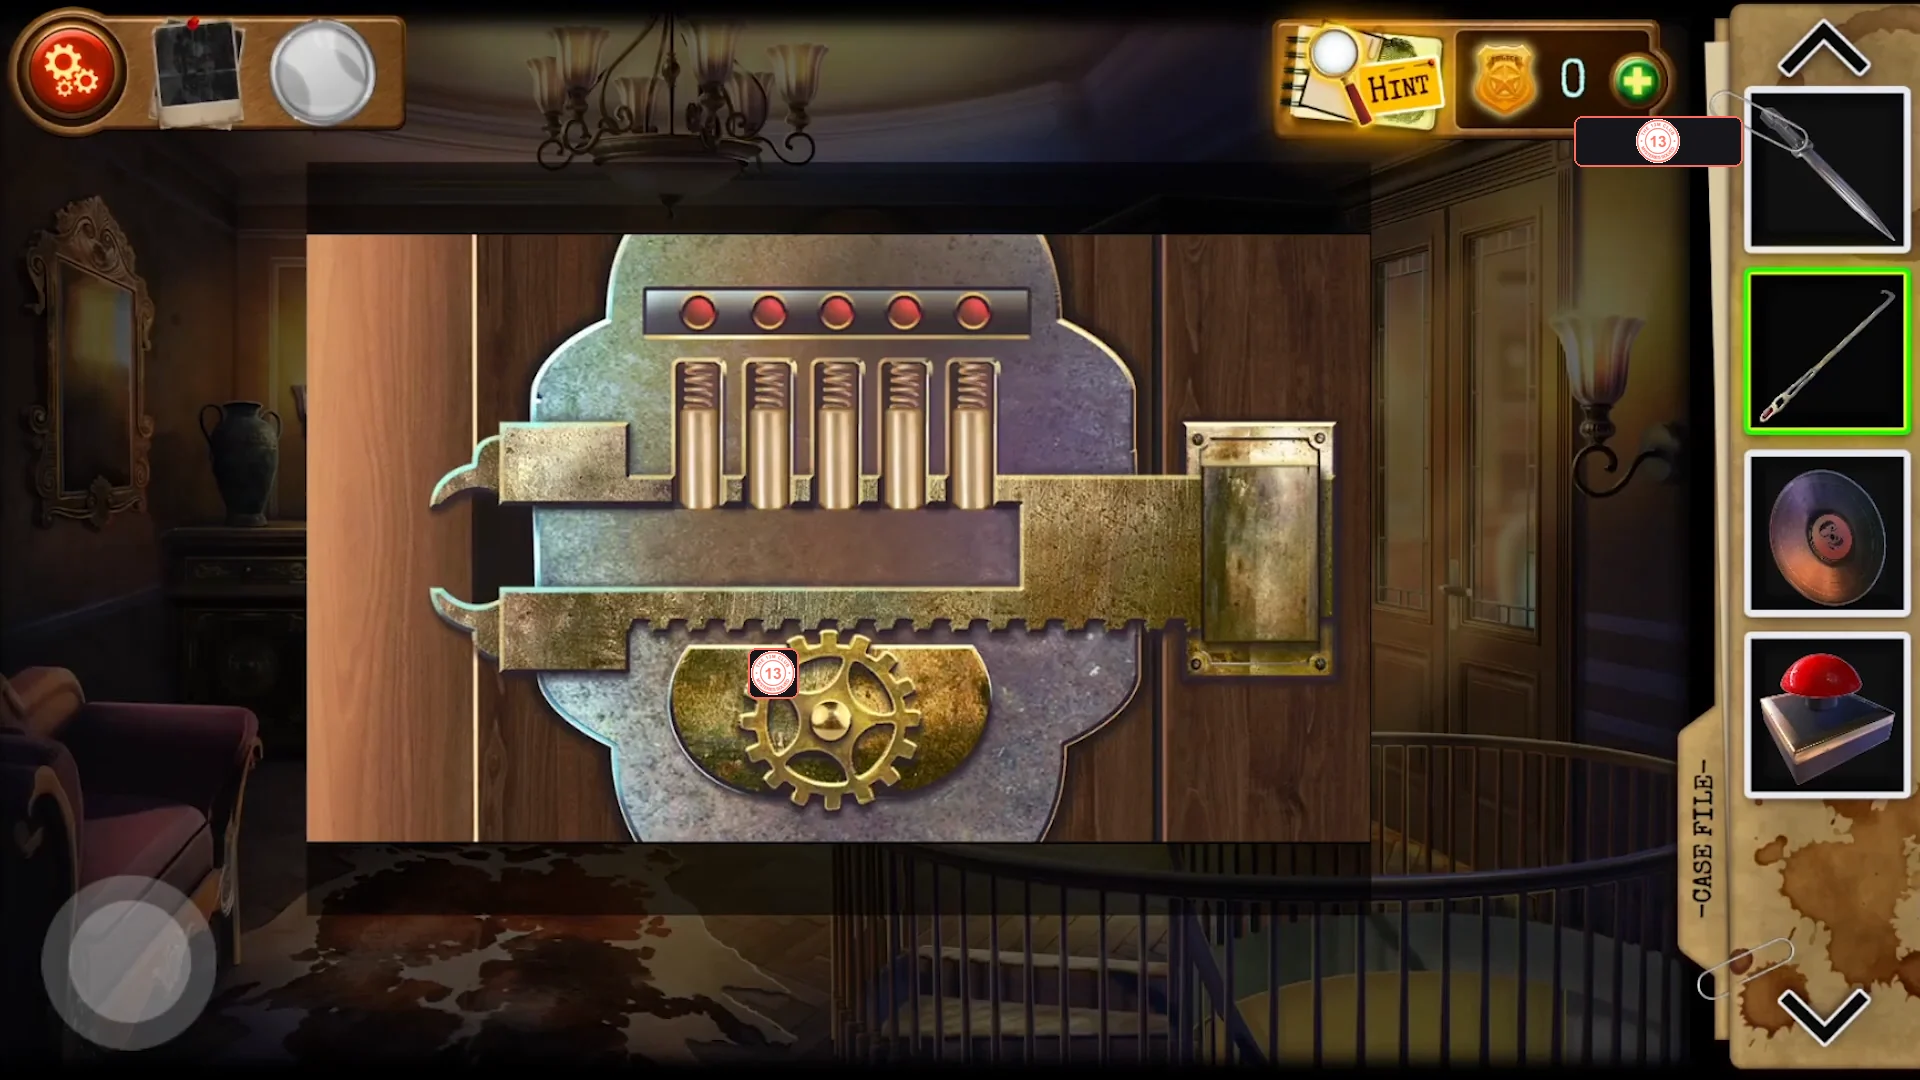
Open the landing wardrobe with the Cabinet key, note the four numbers on its door and pick the small box lock with the Master key.
- Use the Cabinet key on the tall wardrobe to the right of the landing window. Read the note on the inside of the left door: 6 3 4 3 (needed in the bedroom). A small locked box sits on the shelf.
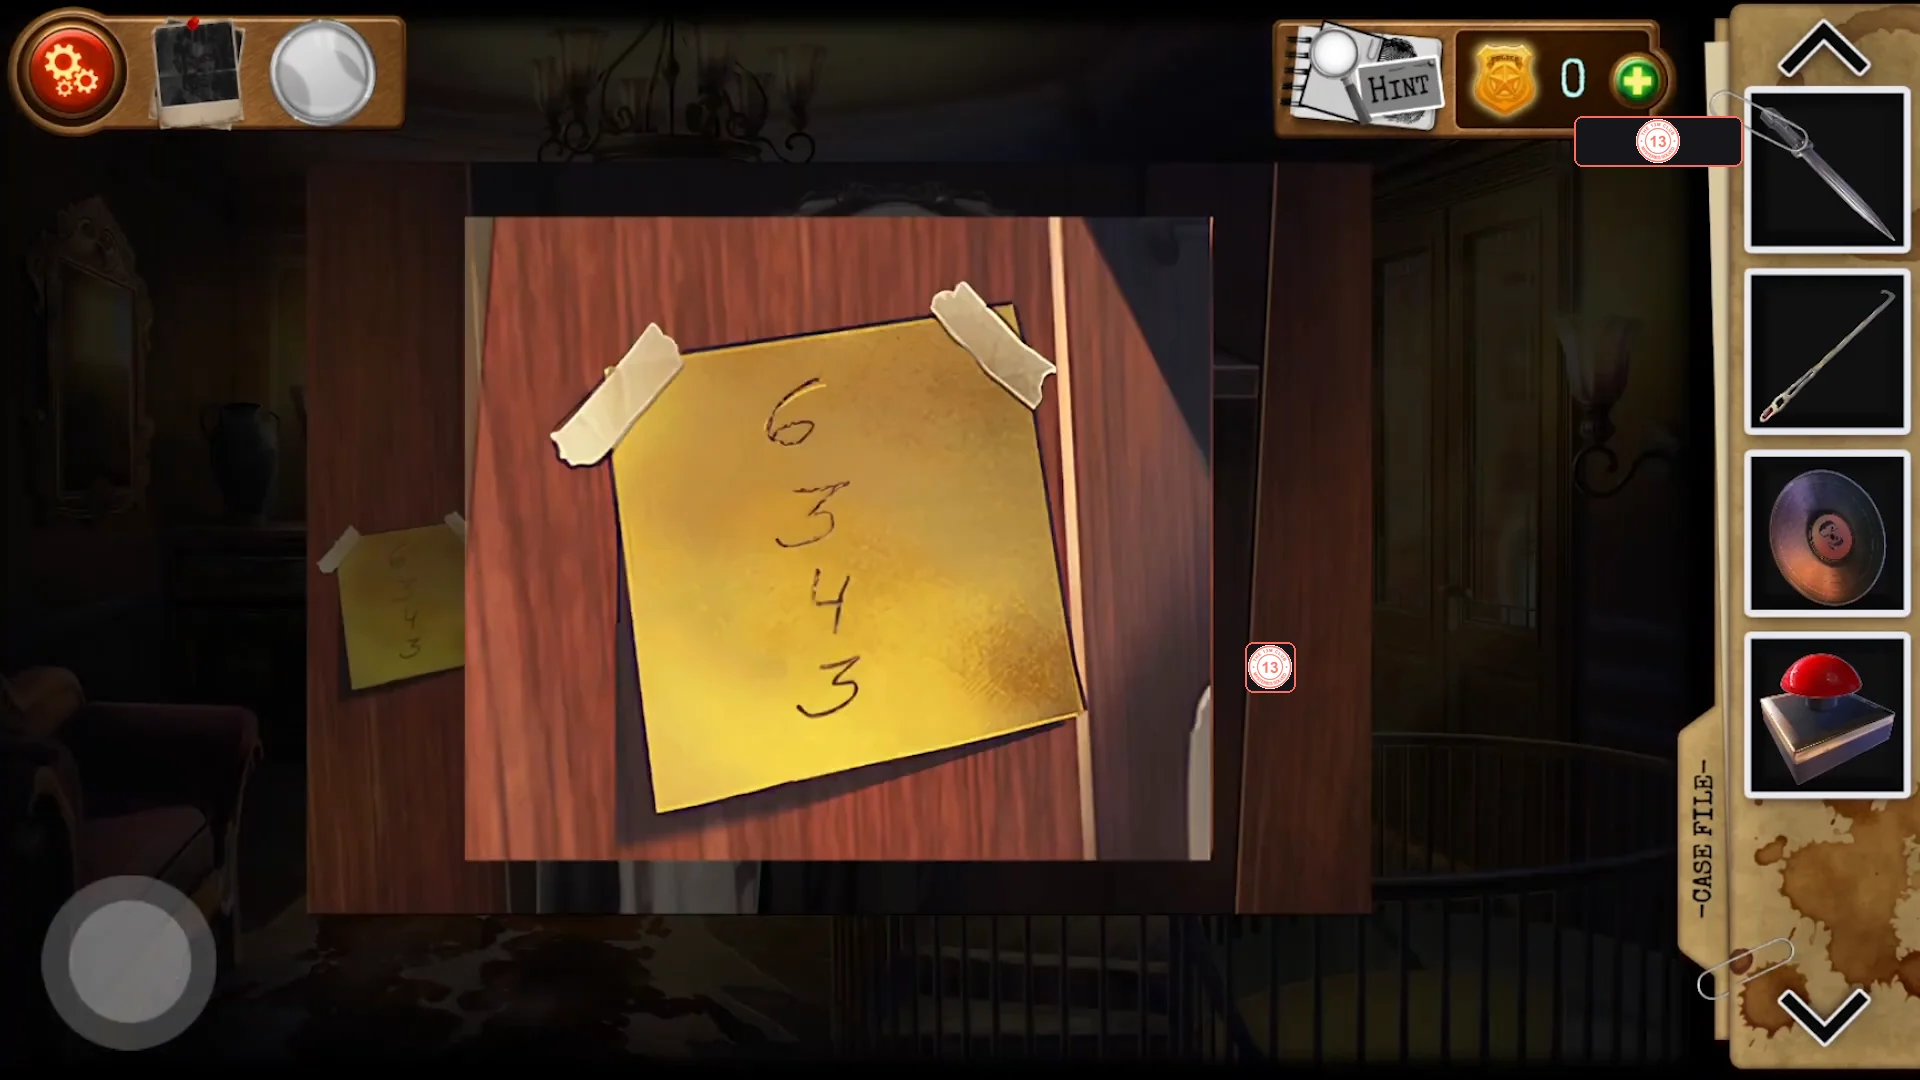
The note inside the wardrobe door: 6 3 4 3, the number of sides for the bedroom drawer shapes. - Use the Master key (lock pick) on the box lock. 'Move the master key with a finger and tap on it when the green light is over the lock prong.' Slide the pick under each of the five pins and tap when the light over that pin is green; repeat for all five. The box opens: take the large skeleton key ('Maybe I should employ as a locksmith after this case?').
Bedroom: lights, painting niche, bed and chest of drawers
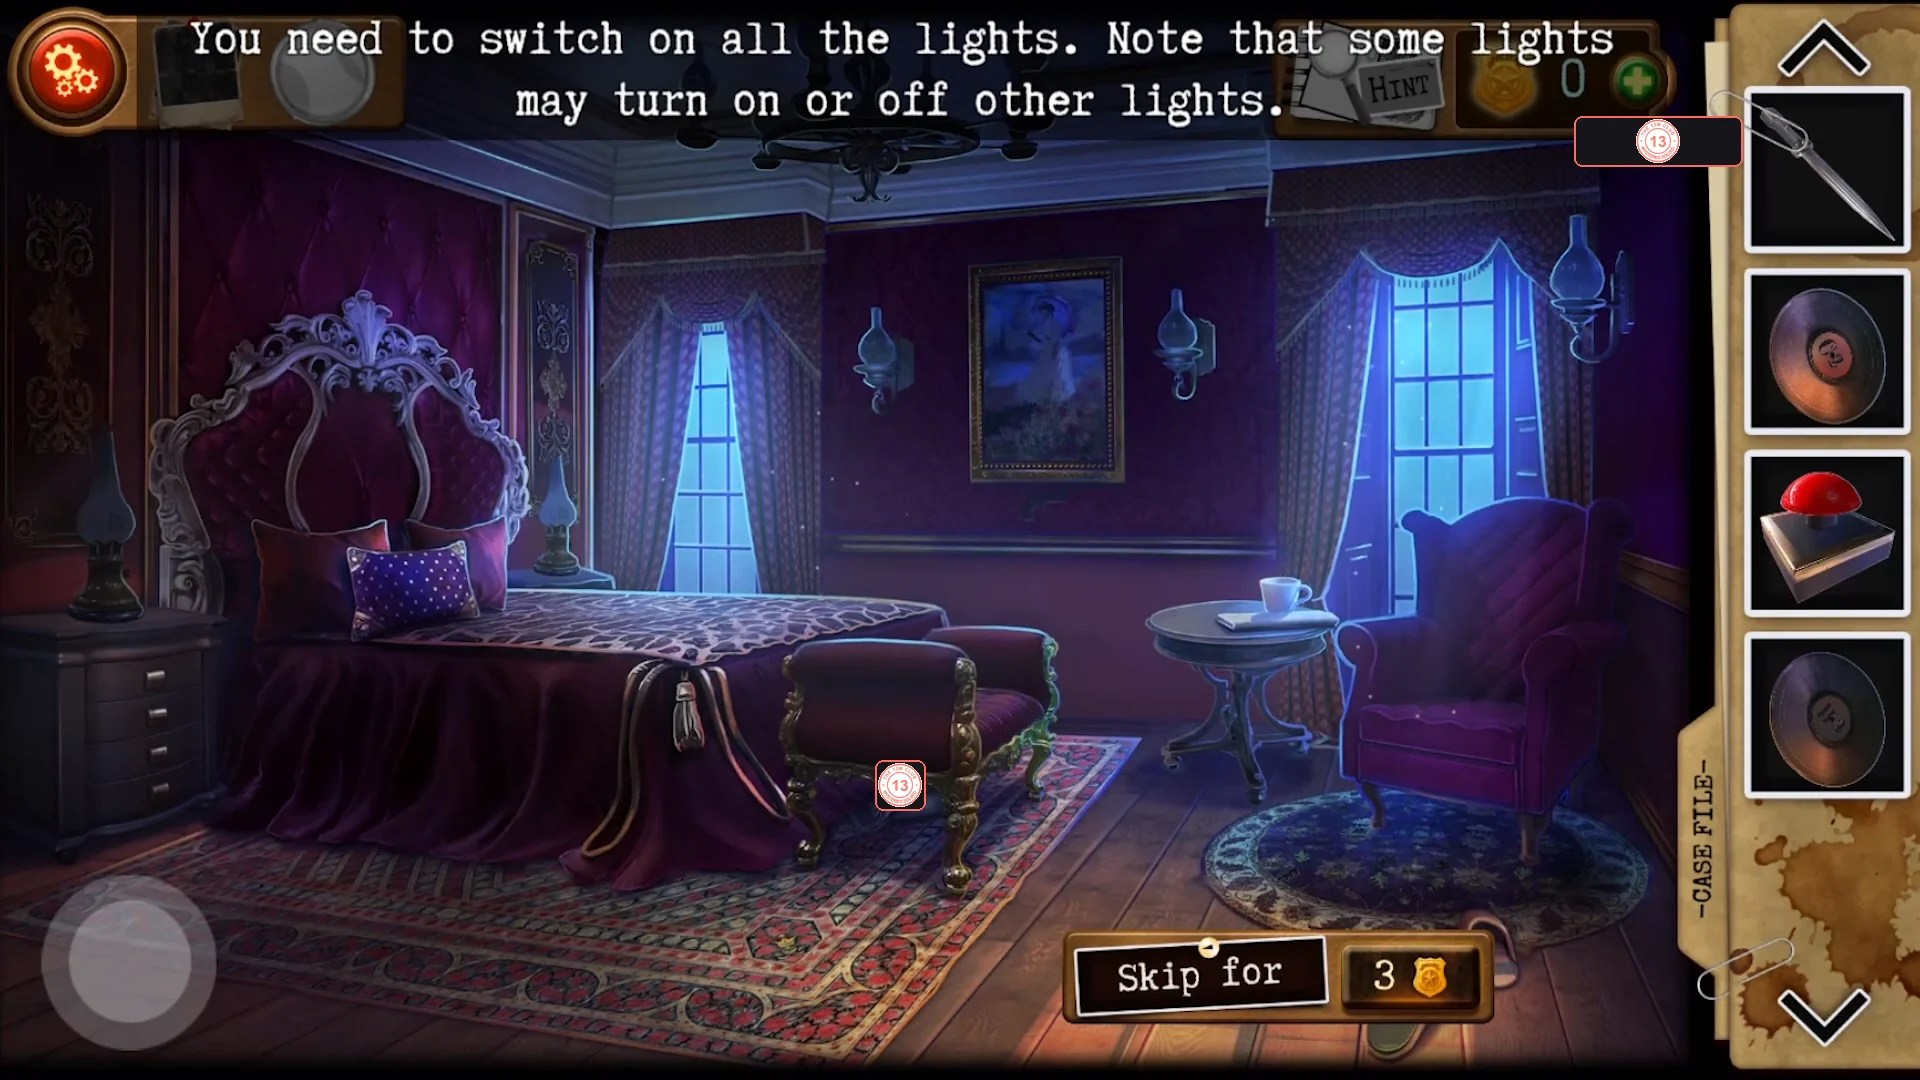
The skeleton key opens the glass double doors in the foyer. Switch on every light, then search the painting niche, the bed and the shape-locked chest for two statuettes and the last records.
- In the foyer, use the skeleton key on the glass double doors on the left to enter the bedroom.
- 'You need to switch on all the lights. Note that some lights may turn on or off other lights.' The room starts dark; the lights are the two bedside lamps, the chandelier and the wall sconces. Which lights a tap affects differs between playthroughs (one recording finished with a single tap, the other needed about six), so there is no fixed sequence. Method: tap one lamp and note which lights change; tapping the same lamp again undoes it. Keep the taps that light more than they switch off and work towards the remaining dark lamps until every light is on.
- Zoom into the foot of the bed and open the sack underneath. Take the Cat statuette from the straw. A child's drawing of 'doctor Miles' is added as Case File entry 4 ('This is the first victim, Jeffrey Miles, a child psychotherapist...').
- Tap the painting on the bedroom wall: it opens to a niche. Take the vinyl record B1 and note the empty gun-shaped recess.
- Zoom into the tall chest of drawers. Each of its four drawers has a shape button; tap a button to change its shape. The wardrobe note 6 3 4 3 gives the number of sides from top to bottom: hexagon, triangle, square, triangle. The bottom drawer opens: take the Scarab ('A Mummy... That's exactly what I need right now.').CODEhexagon, triangle, square, triangle
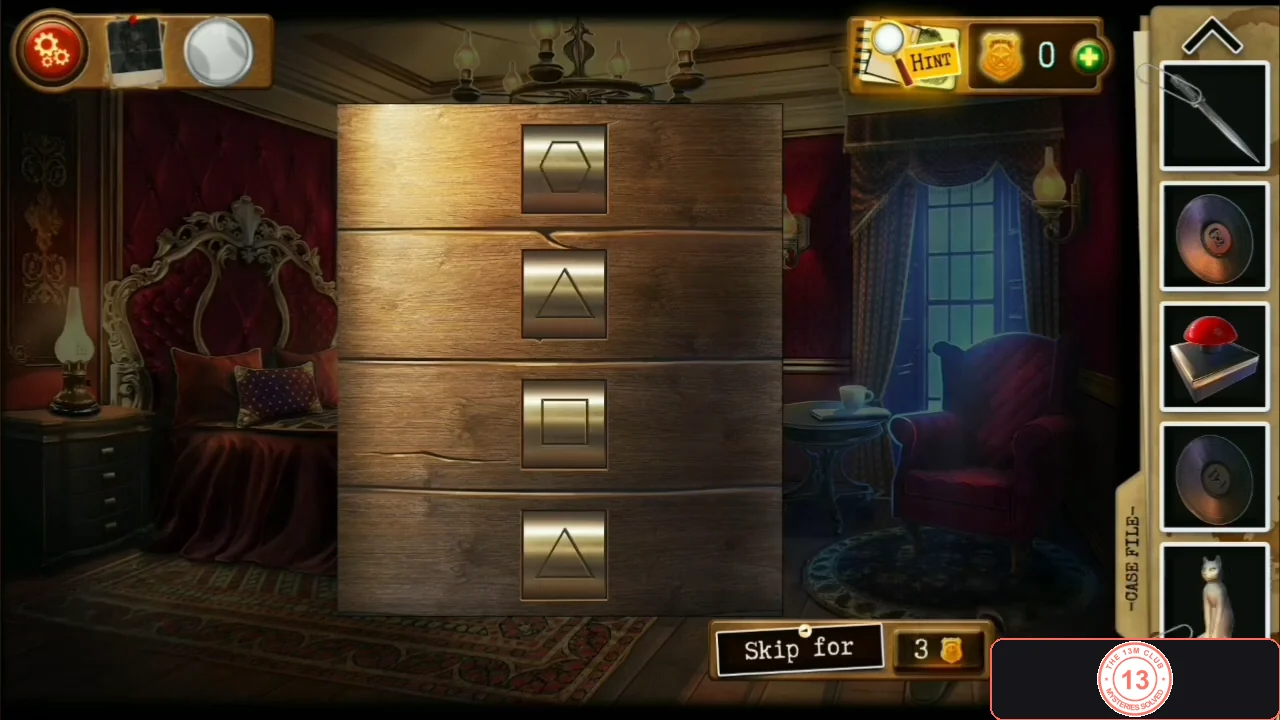
The drawer buttons set to hexagon, triangle, square, triangle (6 3 4 3 sides). - Zoom into the head of the bed, move the purple cushion aside and use the Dagger on the red pillow. Take the Replica gun (a small derringer: 'more like a talisman or a paperweight').
Three statuettes, the foyer floor mosaic and the jukebox
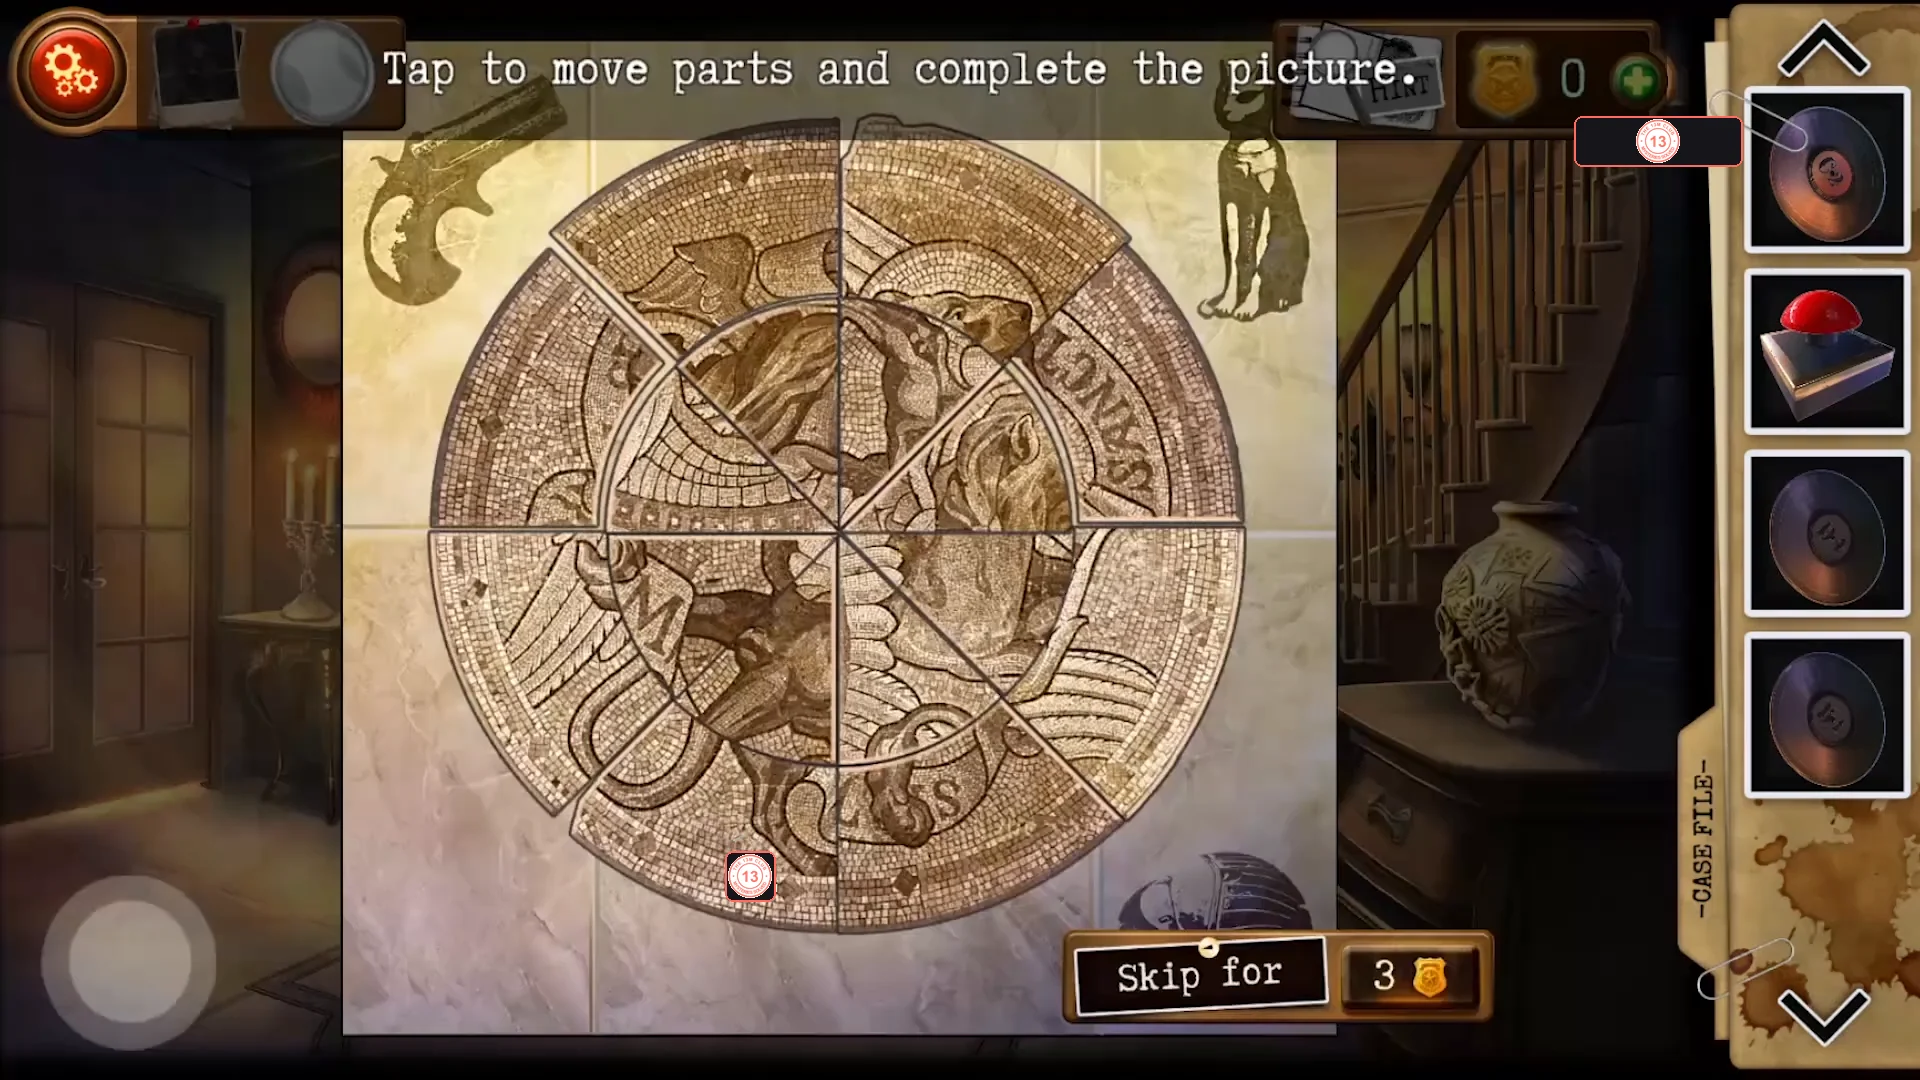
Place the three statuettes in their shaped recesses, rebuild the picture on the foyer floor and play the records on the hidden jukebox to open the way down.
- Put the Replica gun into the gun-shaped recess in the bedroom painting niche.
- On the landing, open the nightstand and put the Cat statuette on the cat-shaped outline on its upper shelf.
- In the study, open the dark sideboard on the left wall again - the one you opened with the picture-triplet game - and place the Scarab in the beetle-shaped recess on the floor of its compartment.
- 'The images on the floor have changed. I need to examine them.' Zoom into the round mosaic on the foyer floor: 'Tap to move parts and complete the picture.' Rearrange the wedge-shaped pieces of the inner and outer rings until they form a winged lion with a 'SANCTVS' banner. The starting arrangement differs between playthroughs, so build the picture from landmarks: first place the pieces carrying the banner text in reading order, then the lion's head and wings around them, and fill the rest of the ring last. When it is complete, a white wall panel between the left glass doors and the front door slides open to reveal a jukebox.
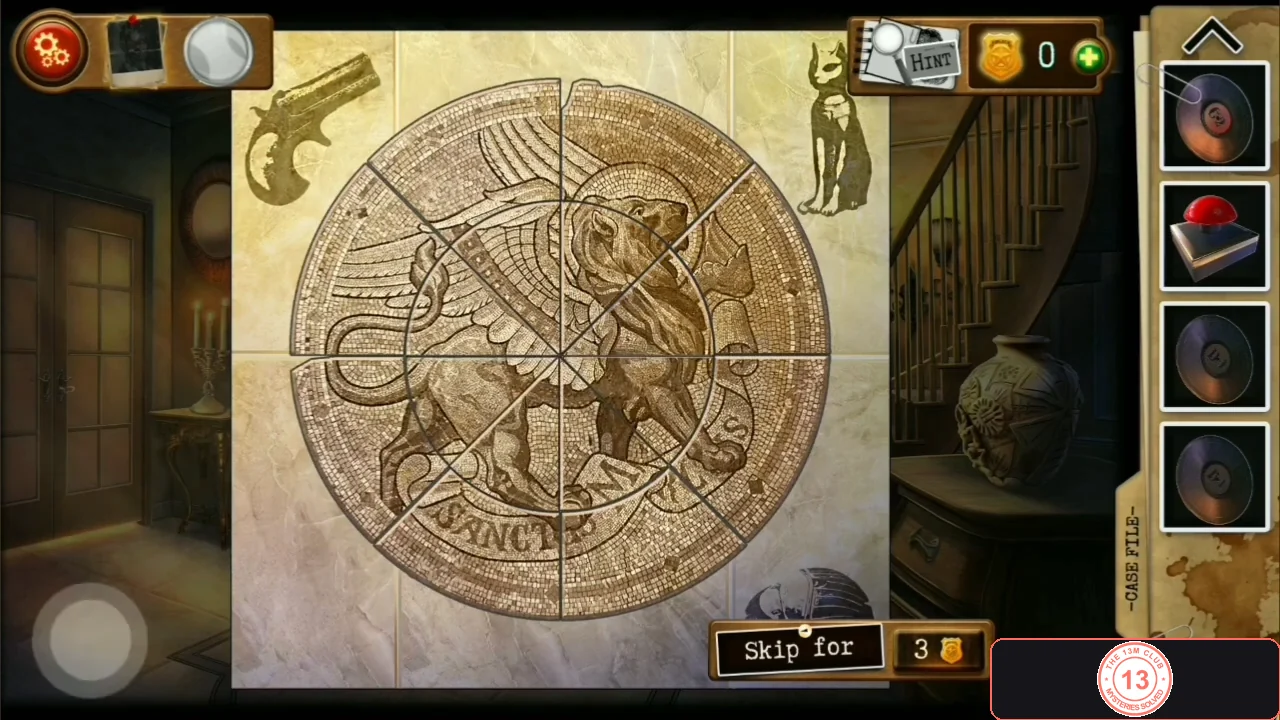
The finished mosaic: a winged lion above the SANCTVS banner. - Tap the jukebox ('Wow! A real rarity! But it doesn't work though, pity.'). Insert the three vinyl records (B1, C2 and D4), then place the Button on the console and press it. 'Nothing exploded anywhere, I hope...' The jukebox slides away and reveals a dark passage; go through it.
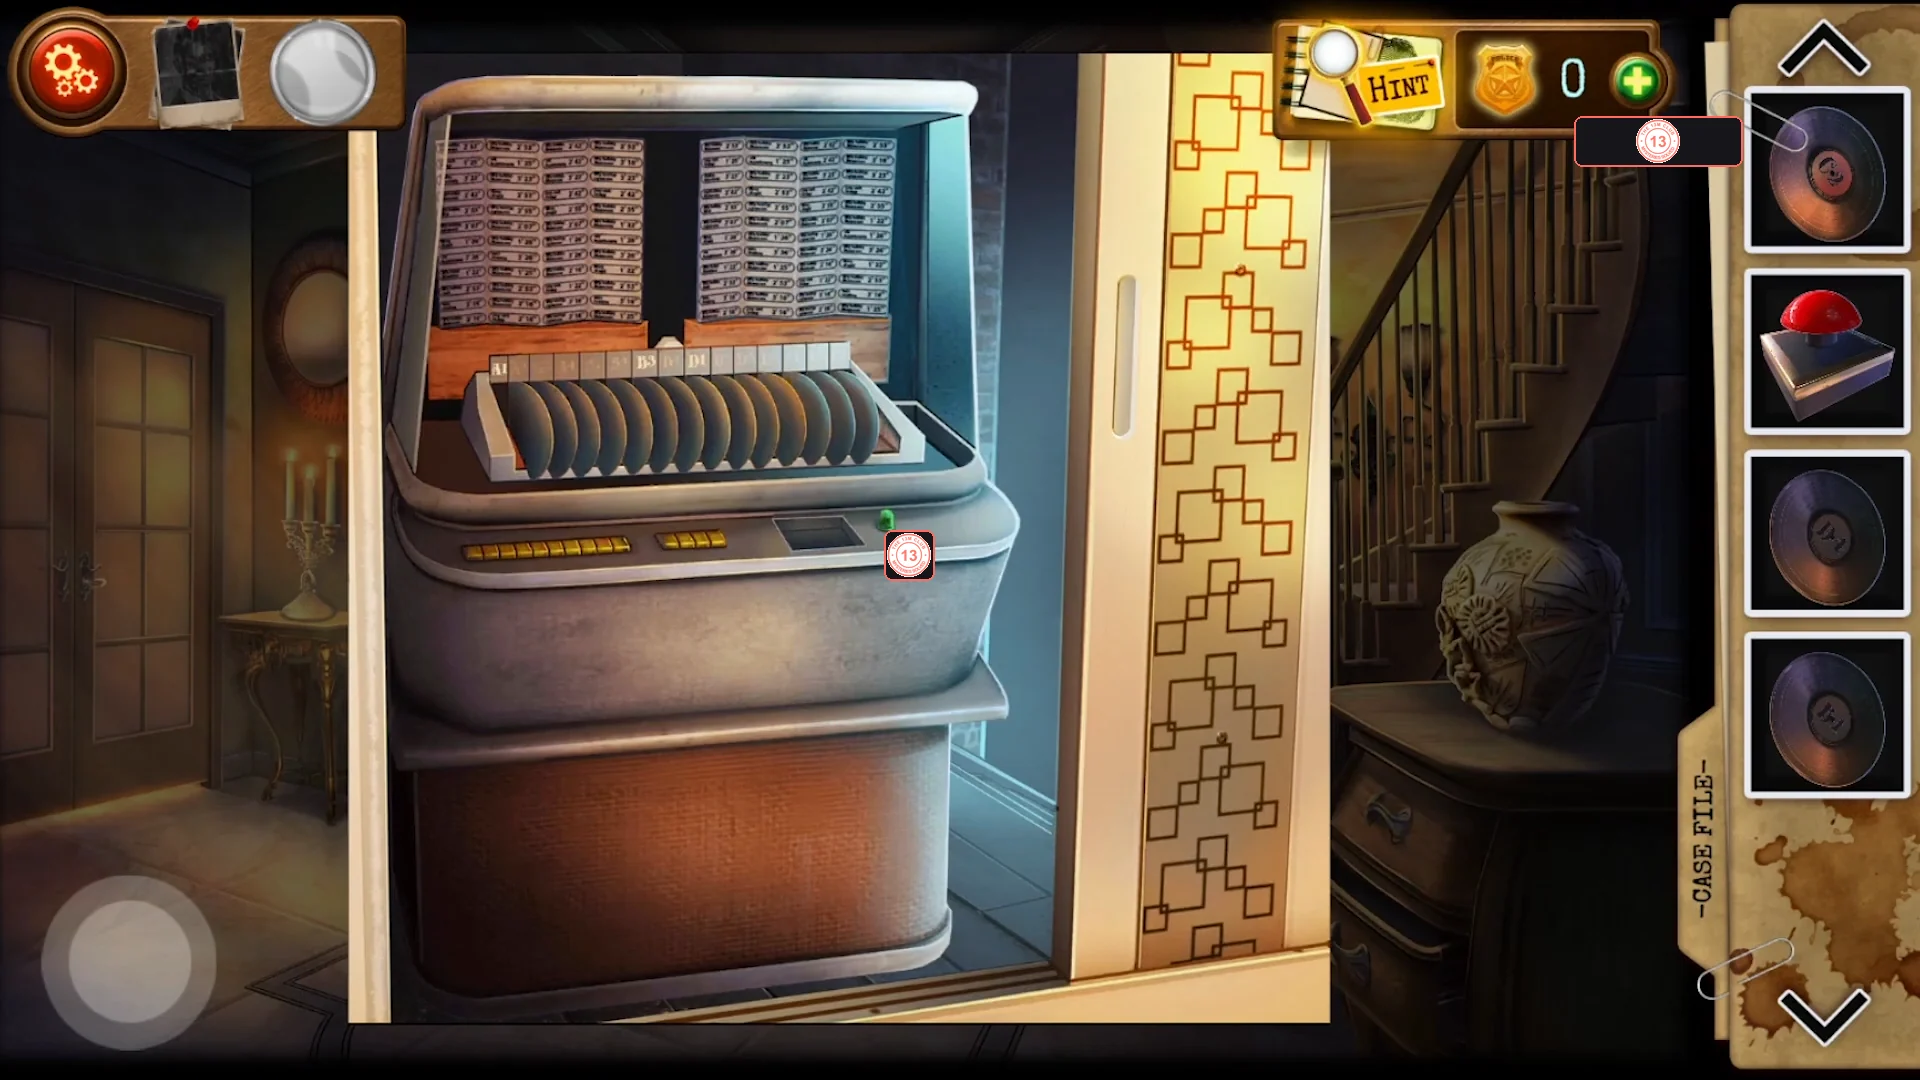
The jukebox behind the sliding wall panel. Insert the three records, then put the Button on the console.
Basement washrooms: toolbox, pipe box, magnet and gun clip
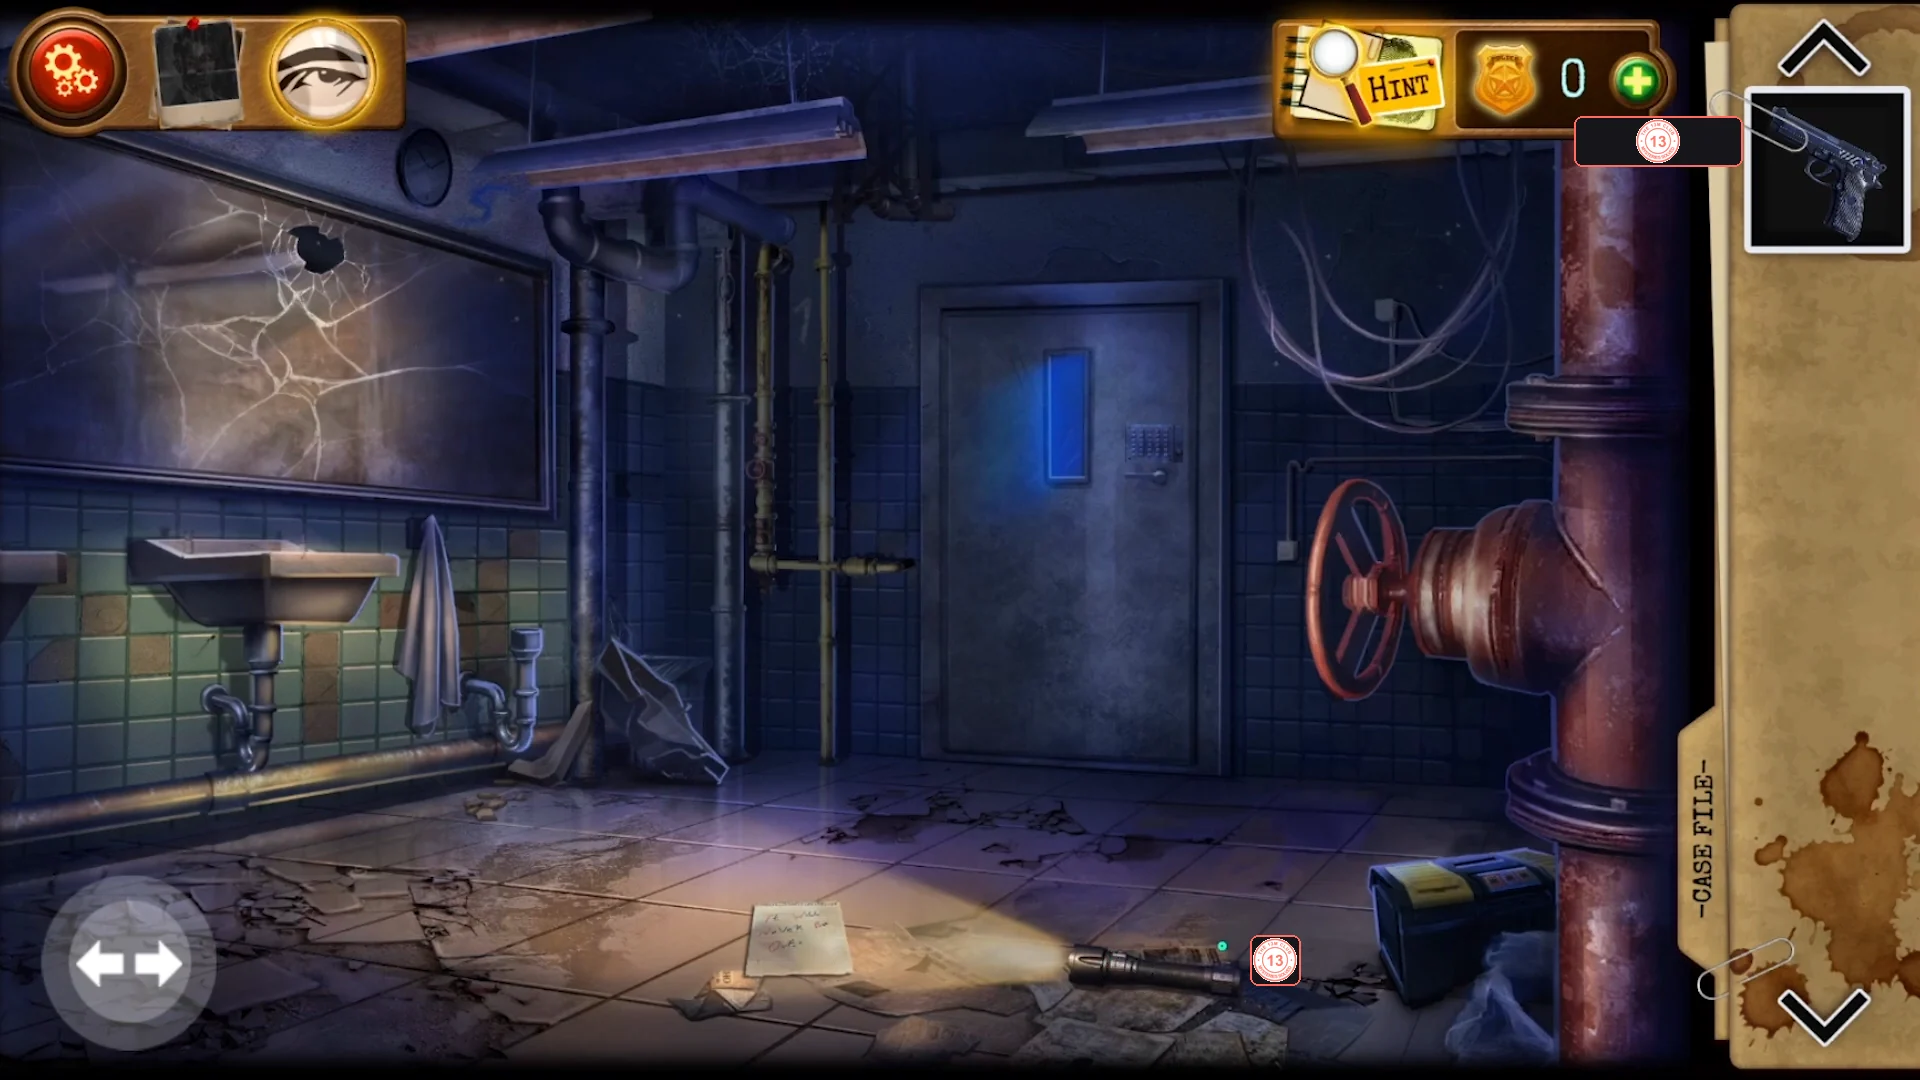
Andrew wakes up trapped in two connected basement washrooms. Read the note, open the coloured toolbox, free the box in the pipe, fish the door key out of the drainpipe and load the gun.
- Take the empty pistol from the floor ('Damn, it's empty.') and tap the note 'It Will Never Be Over' for Case File entry 5. Note its red capital letters in reading order: I, W, N, B, O.
- Find three painted numbers: a red 9 faint on the tiles above the bathtub (second room), a blue 5 beside the clock above the mirror, and a pale 1 on the wall between the pipes left of the steel door. Set the toolbox dials to red 9, purple-blue 5 and grey 1 and take the Wrench.CODE951
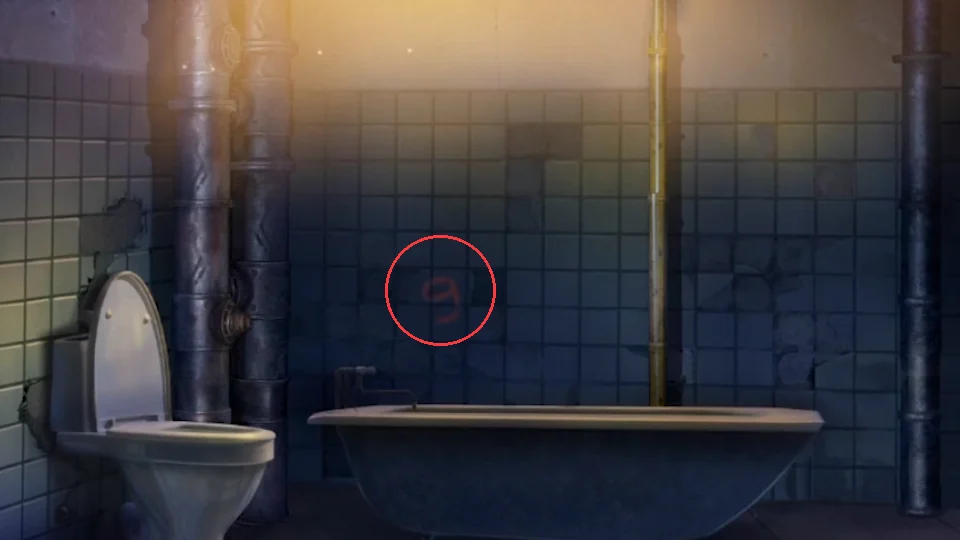
The faint red 9 on the tiles above the bathtub. 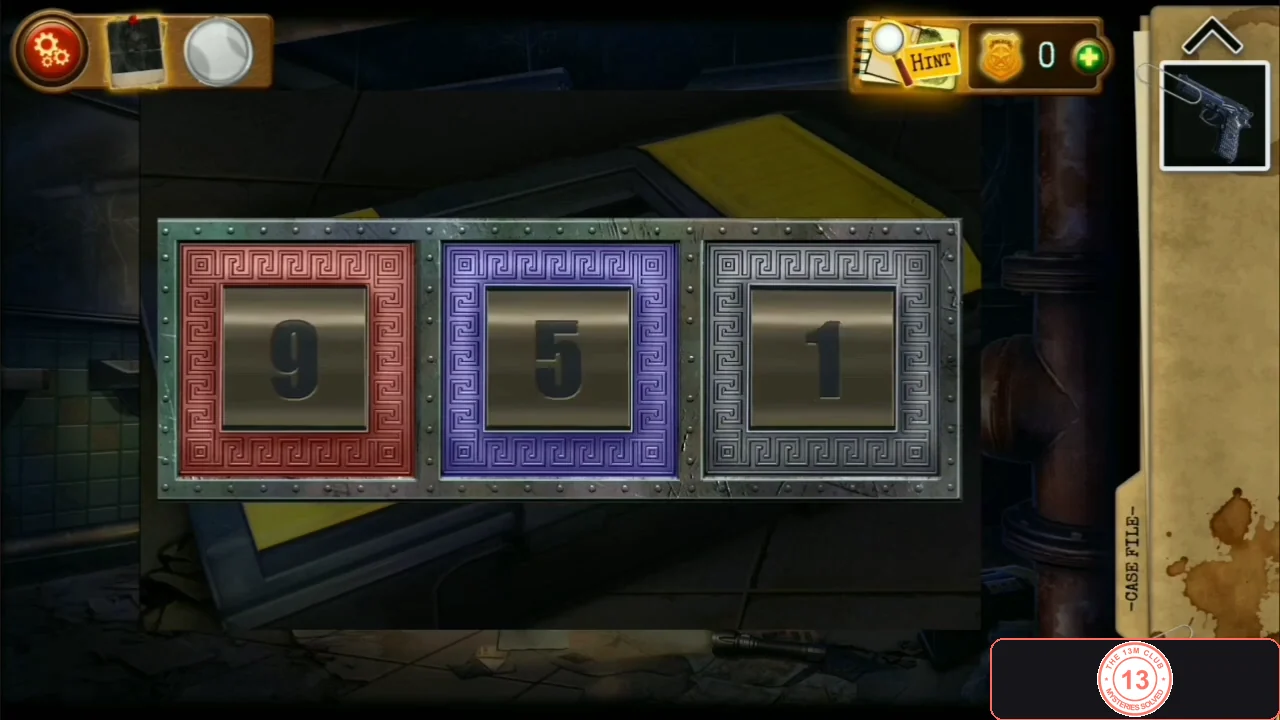
The toolbox dials set to red 9, purple 5, grey 1. - In the bathtub room, use the Wrench on the bolts of the chained pipe on the left. A box is inside: 'Press the pins to raise them all, and spin the pointer in the center.' Six pins sit in a ring around the carved disc: top-left, top-right, right, bottom-right, bottom-left and left. A raised pin shows its full length with the ringed handle at the outer end; a lowered pin shows only a short ringed knob. Tapping a pin flips it and its two neighbours in the ring. Both recordings start with the top-left, right and bottom-left pins lowered: tap each of these three once and all six stand up (the neighbour flips cancel out). Then spin the pointer on the centre disc. The box opens: take the Magnet and note the number 74583 scratched inside the lid.CODE74583
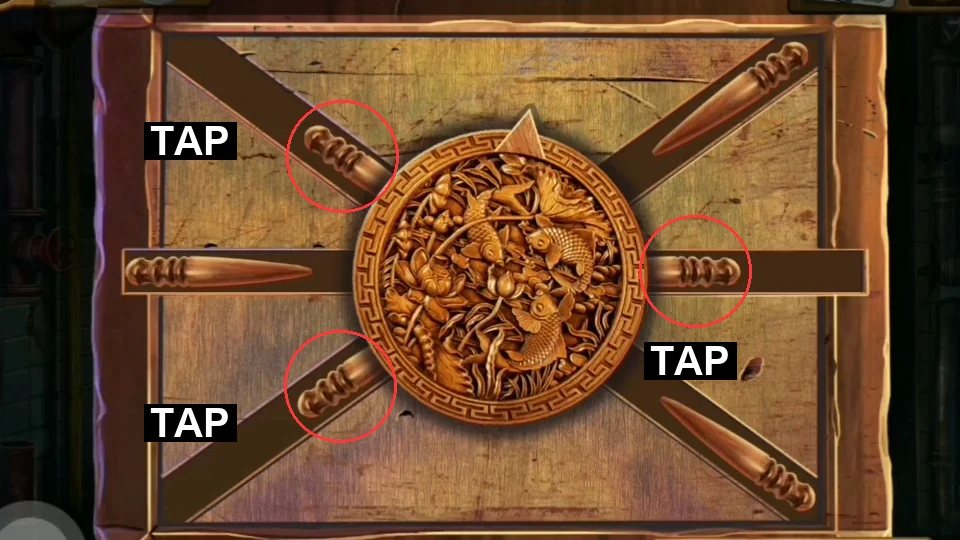
Starting position: the circled top-left, right and bottom-left pins are lowered. Tap each once to raise all six. 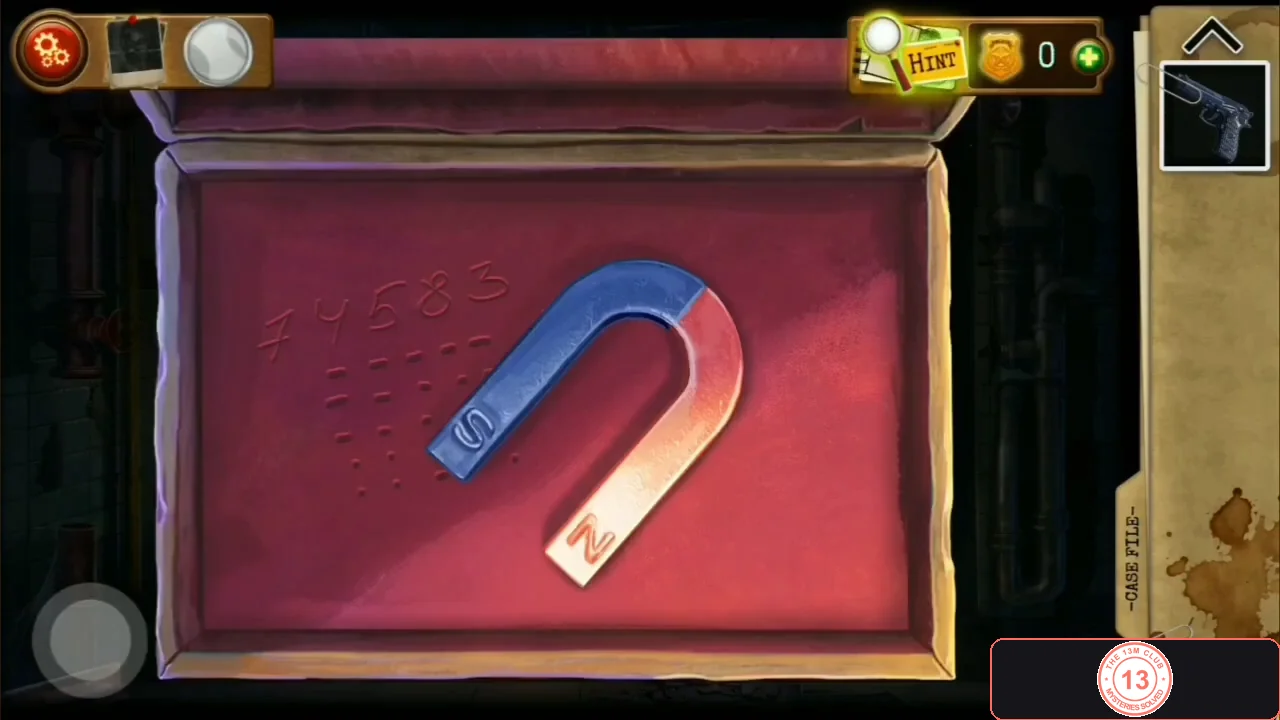
The opened pipe box: the Magnet, and 74583 scratched inside the lid. - Search the black bag in the bathtub and take the coil of wire. Combine the wire with the Magnet to get a magnet on a string.
- In the first room, zoom into the open drainpipe behind the curtain left of the steel door and lower the magnet on the string into it. Pull out the Door key.
- Zoom into the shattered mirror in the first room and take the Tank drawer key from behind the glass. In the bathtub room open the toilet tank, use the key on the small teal drawer inside and take the Clip. Use the Clip on the Gun to load it.
The steel door: W N I O B sum panel
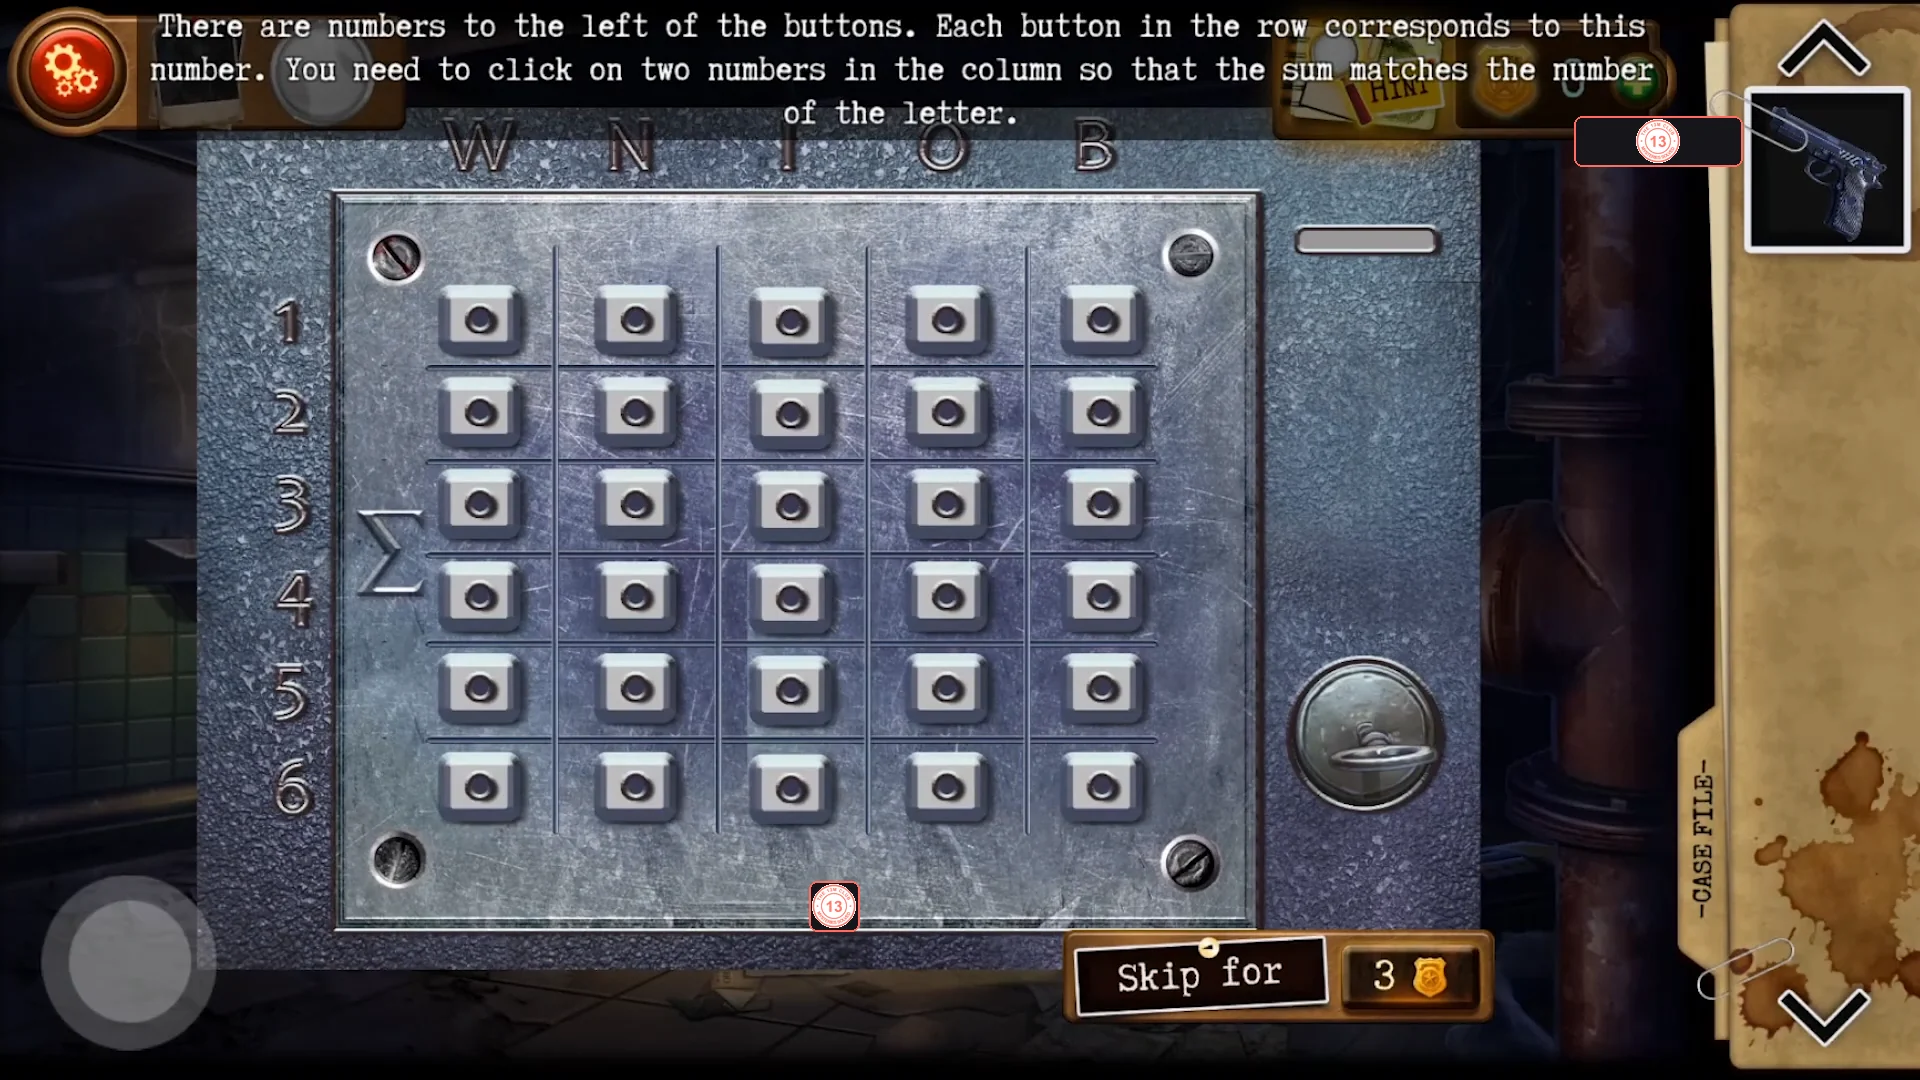
Unlock the steel door's panel and light two buttons in each lettered column so they add up to that letter's value.
- Use the Door key on the steel door. 'There are numbers to the left of the buttons. Each button in the row corresponds to this number. You need to click on two numbers in the column so that the sum matches the number of the letter.' Match the note's red capitals in reading order (I, W, N, B, O) to the lid digits 7 4 5 8 3: I = 7, W = 4, N = 5, B = 8, O = 3. In each lettered column press two buttons whose row numbers add up to that value, for example W 1+3, N 1+4, I 3+4, O 1+2, B 2+6 (any pair with the right sum works). The bar turns green and the door opens.CODEW4 N5 I7 O3 B8
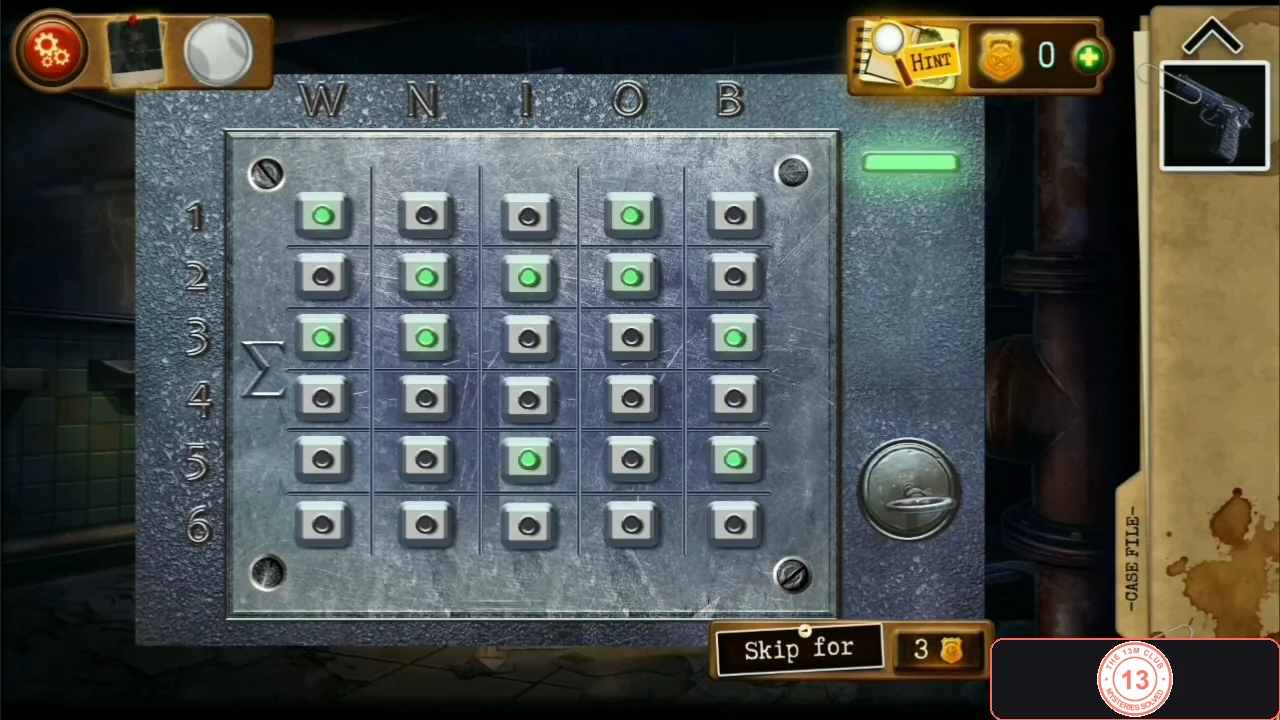
One accepted solution with the green bar lit. Any pair with the right sum works.
True ending and bad ending
Opening the steel door starts the final confrontation with the Collector. Which ending you see depends on how many Case File entries you have collected across all eight chapters.
- True ending (all 40 entries): Andrew catches the Collector but lowers his weapon, and the Collector is taken into custody. The result screen reads 'The criminal got what he deserved! That is the story's true ending, by no means the only one.' and shows 40/40.
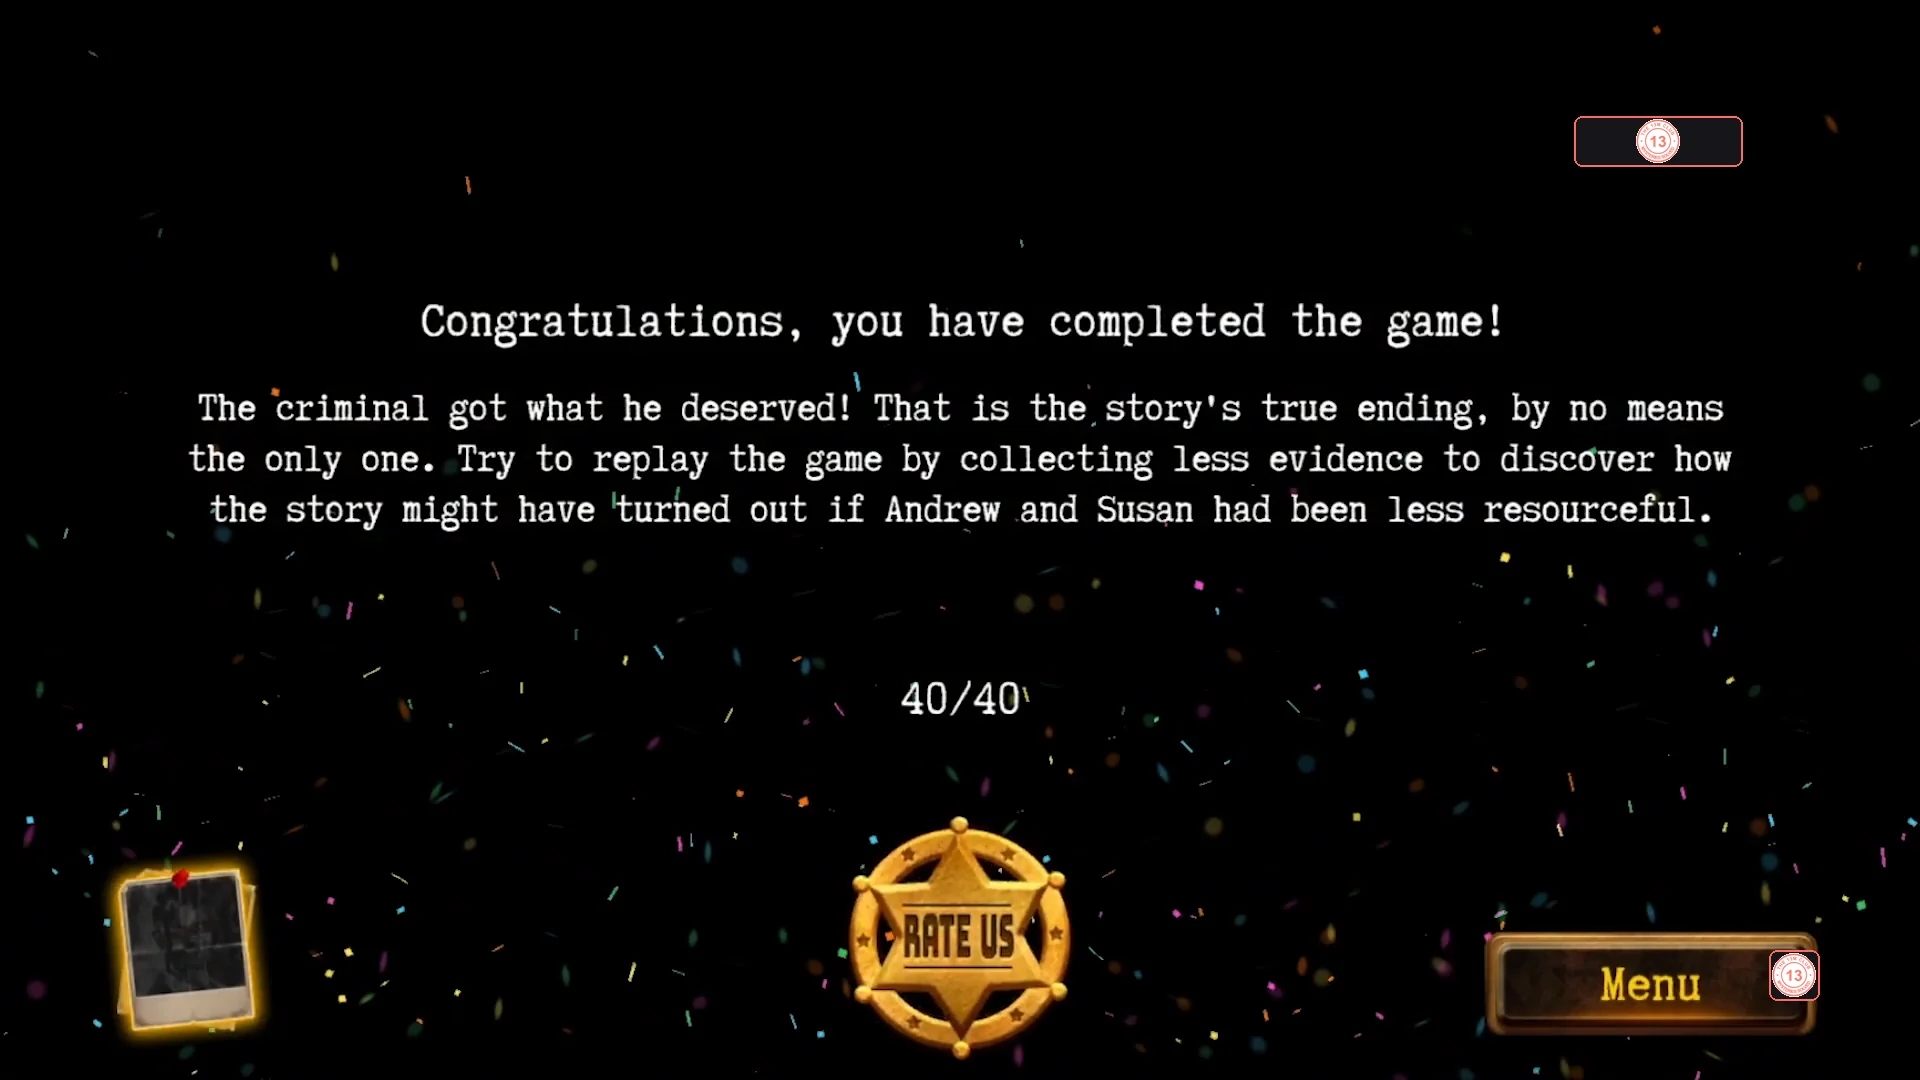
The true-ending result screen with all 40 Case File entries. - Bad ending (fewer than 40 entries): Andrew catches the Collector, who taunts him that there is not enough evidence to lock him up, and Andrew shoots him. The result screen reads 'The Andrew and the Collector's clash ended in bloodshed. To discover the story's true conclusion, gather all the evidence.' and shows your total, for example 39/40.
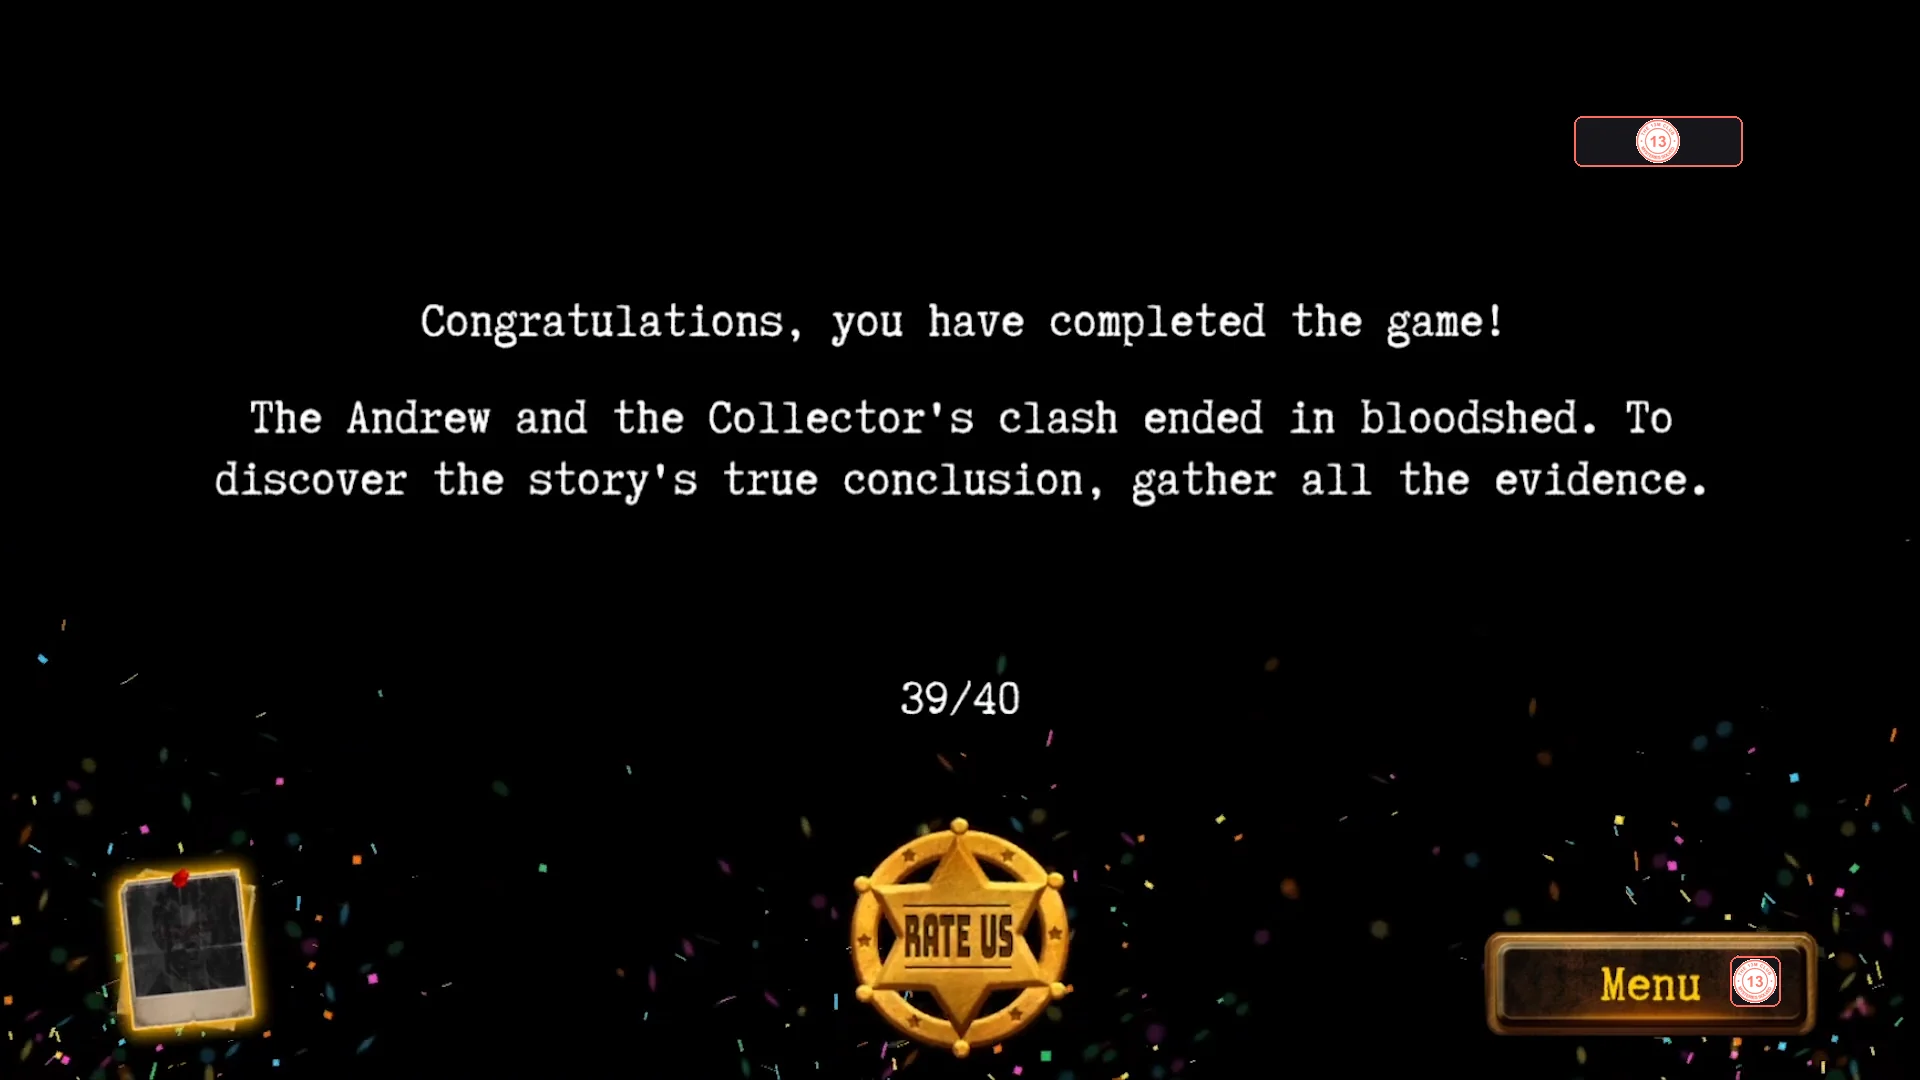
The bad-ending result screen, here with 39 of 40 entries. - The result screen offers the evidence album, Rate Us and Menu. To see the other ending, the game suggests replaying with a different amount of evidence: for the true ending collect every entry flagged in this guide; for the bad ending leave at least one optional entry (for example the Button fingerprint in this chapter) uncollected before opening the steel door. Whether replaying a single chapter from the Chapters menu changes your total was not shown, so the safe route to the true ending is to collect all 40 in one playthrough.