Fisherman's cabin: workbench, taped key and green locker
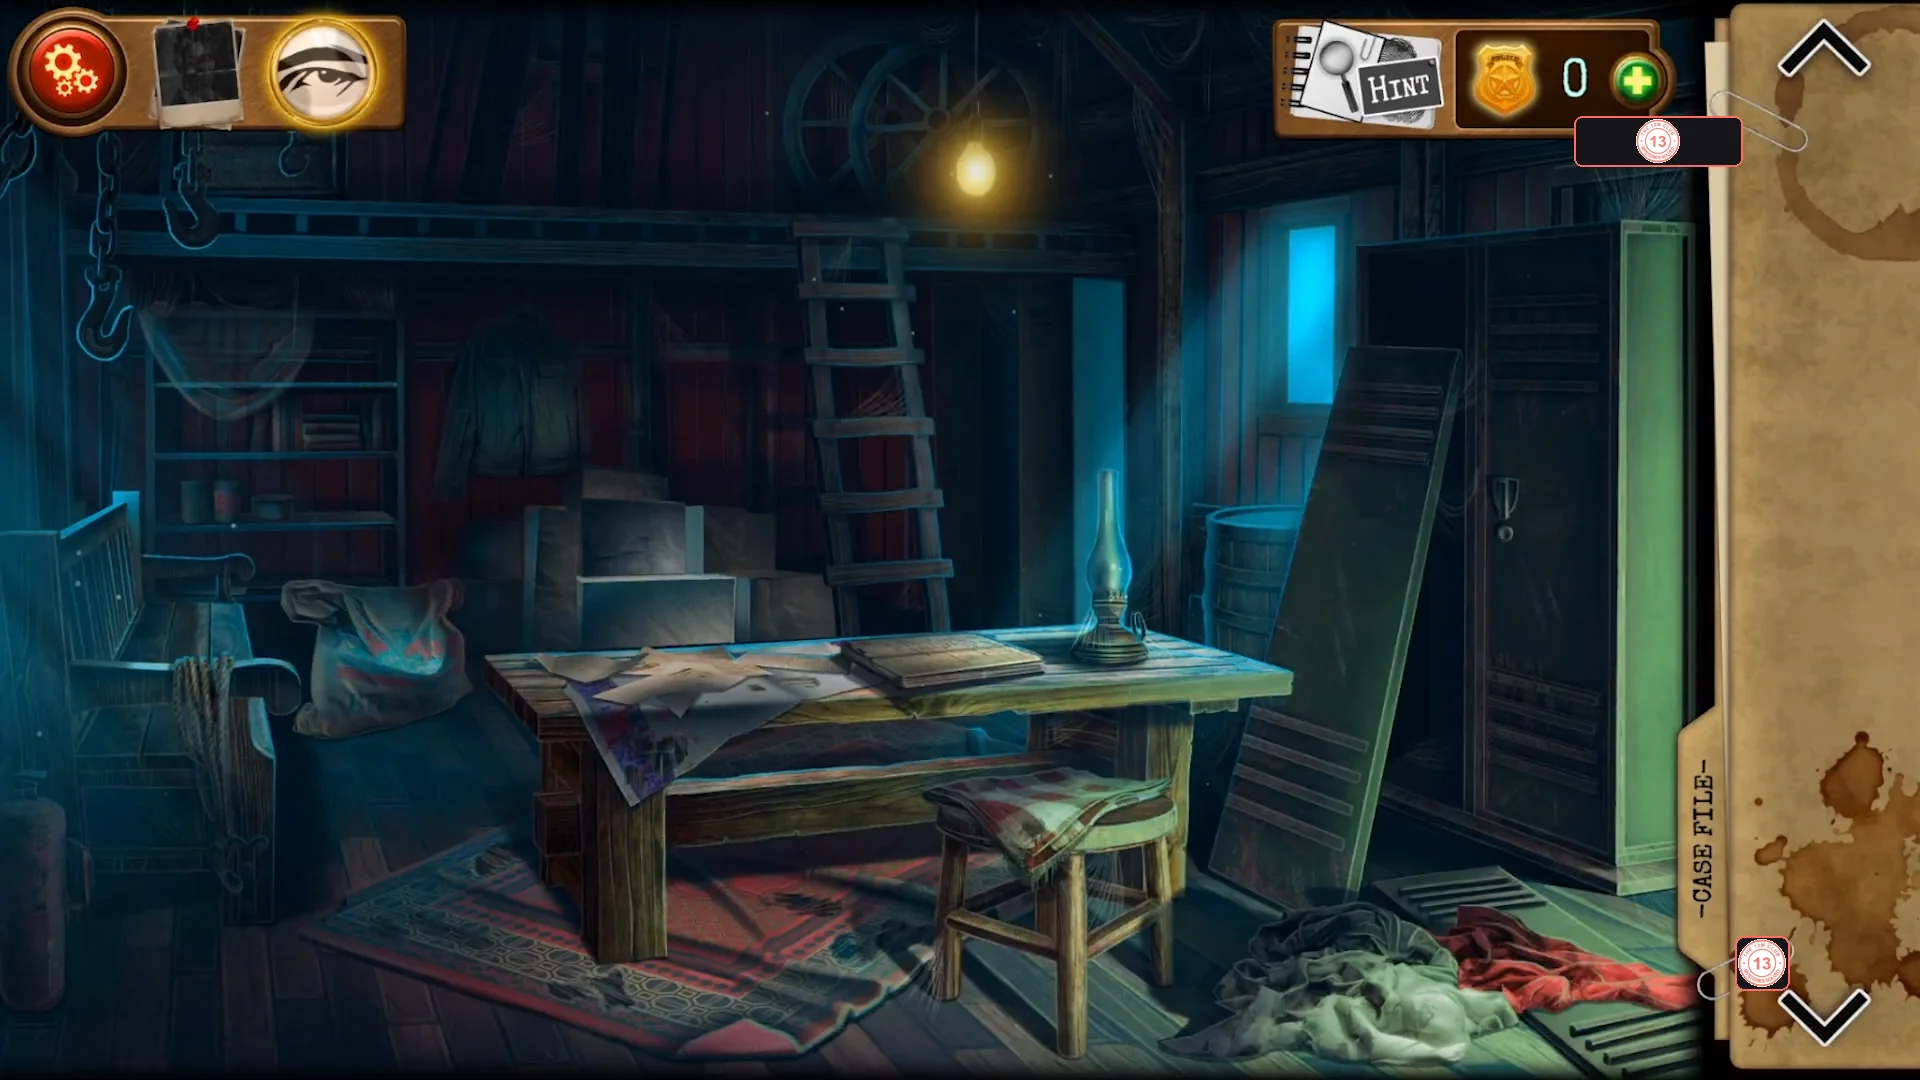
You arrive in the fisherman's cabin at the pier. Collect the gloves and headlamp from the cluttered bench, log the bank flyer, find the locker key under the table and empty the green locker.
- Tap the cluttered workbench at the far left of the cabin. Take the Gloves, move the fish, hook and rag aside and take the Headlamp from under them.
- In the same close-up, tap the blood-stained flyer 'Lefelman's Bank of Mysteries' for Case File entry 1. (It may register as soon as the flyer is uncovered; tapping it makes sure.)
- Back in the room, tap under the wooden table in the middle and peel off the tape to take the Locker key.
- Use the Locker key on the tall green locker on the right. Use the Gloves on the bucket of fish on the lower shelf to clear it and take the Wire cutters, then take the hawk figurine from the upper shelf (one of four animal figurines needed later).
Diary matchstick puzzle and the floor hatch
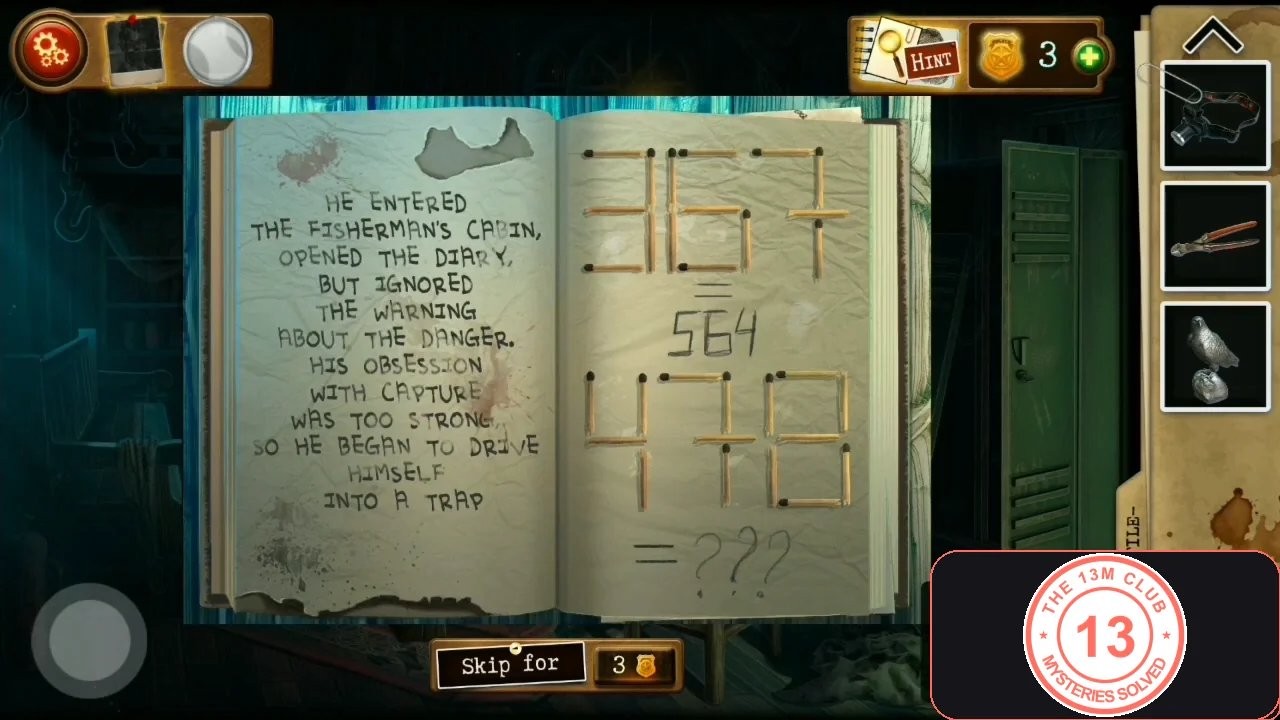
Slide the boxes aside to find a round floor hatch with a 3-digit lock; the matchstick puzzle in the diary on the table gives the code.
- Tap the cardboard boxes on the floor left of the table to slide them aside: a round hatch with a 3-digit lock is underneath. Open the diary on the central table. Its example replaces each digit with the number of matchsticks needed to write it (3 6 7 becomes 5 6 4; the 7 is drawn with a crossbar, so it takes 4 sticks). Do the same for 4 7 8: a 4 uses 4 sticks, the crossed 7 uses 4 and an 8 uses 7, giving 447.CODE447
- Tap the hatch, set the three tumblers to 4-4-7 and tap the open hatch to climb down.CODE447
Brick corridor: the captive's cell and the terminal
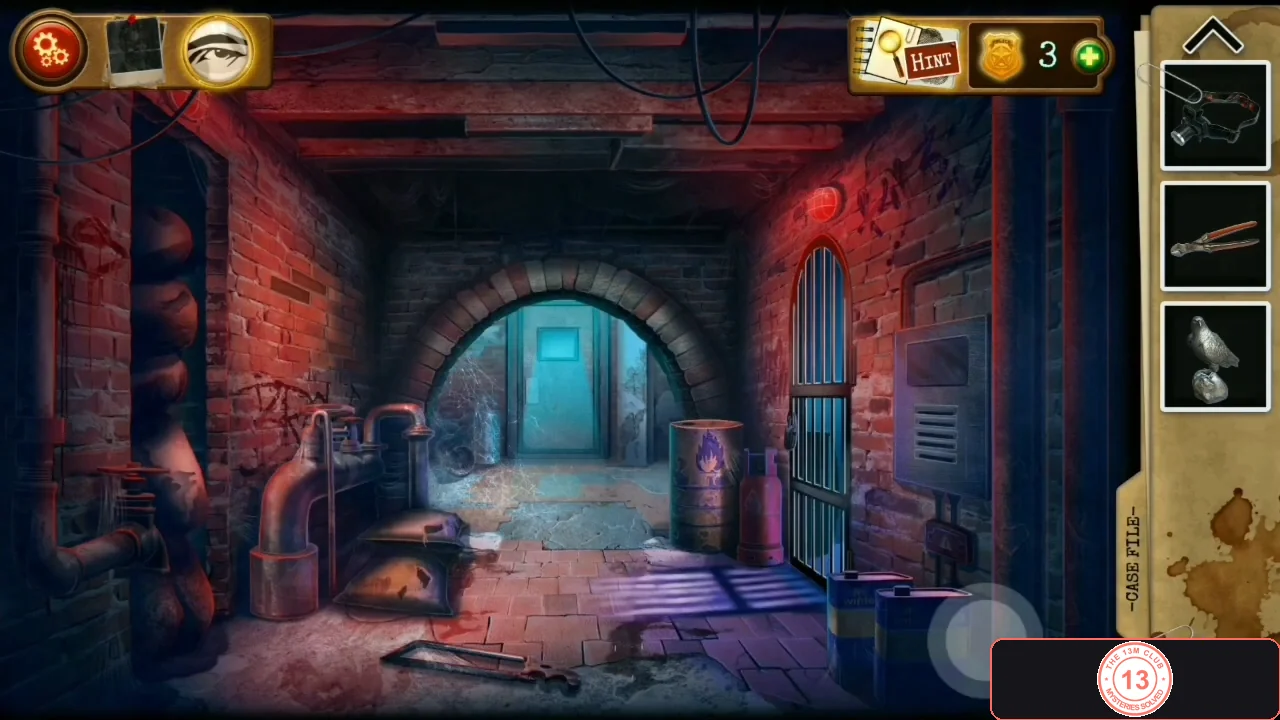
The corridor below has a brick wall (left), a closed barred gate and a teal terminal (right). Through the archway is a cell with a chained captive and several parts you need.
- Tap the open space under the archway at the end of the corridor (left of the far blue door) to enter the cell with the chained man and the words YOU COULD'VE SAVE HIM. Entering registers Case File entry 2.
- In the cell take the Tweezers from the floor right of the mug, the RAM sticks and the red-and-silver Ultraviolet light bulb from the metal mug, and the data cable from the red bowl.
- Tap the captive's torn shirt and take the first part of the sheet music (treble clef with red notes). This also registers Case File entry 3.
- Back in the corridor, tap the teal terminal on the right wall. Take the small wolf figurine at its bottom-left corner and read the note taped on top: '1: 2 - IV 2: 3 - I'.
Roman-numeral brick wall
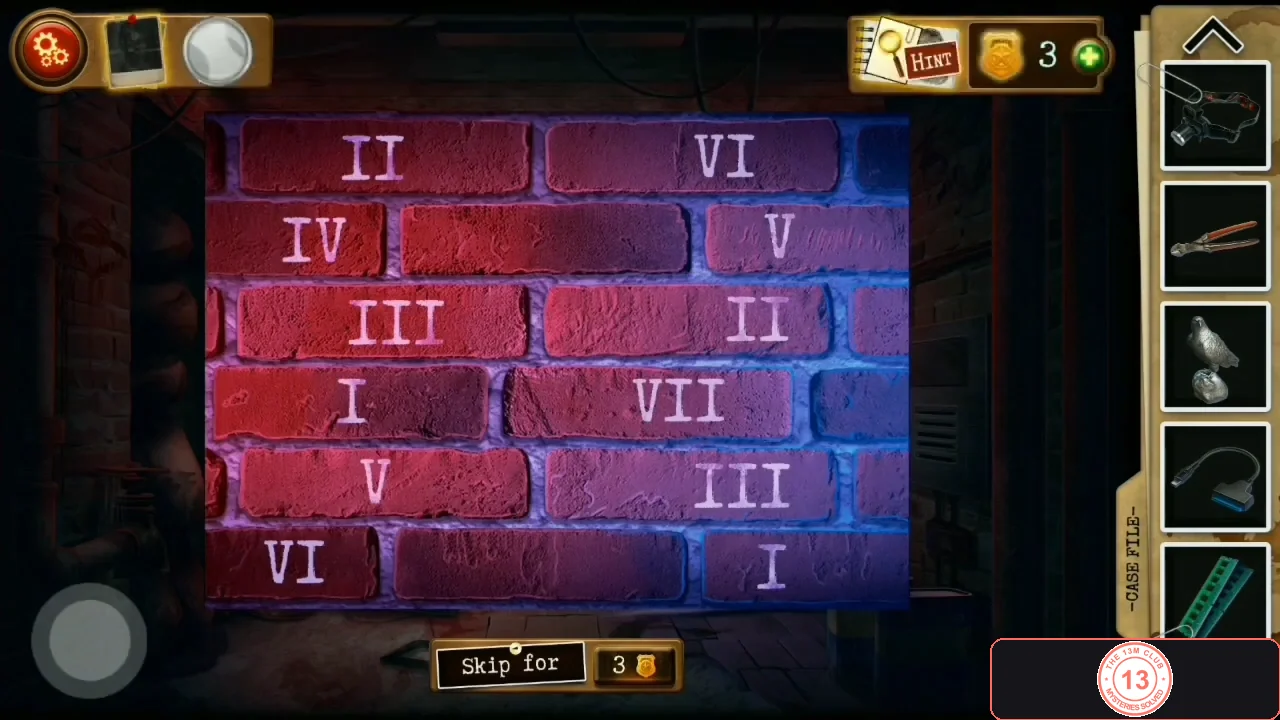
Press bricks on the left corridor wall in the order given by the note on the terminal to clear the rock-blocked passage.
- Tap the brick wall on the left of the corridor. The note means: first press the IV brick 2 times, then press the I brick 3 times. The IV brick is in the second row on the left; the I brick is in the bottom-right corner. Press IV, IV, I, I, I and the rubble-blocked passage to the wine cellar clears.CODEIV, IV, I, I, I
Wine cellar: bottle scale, barrel and barbed-wire chest
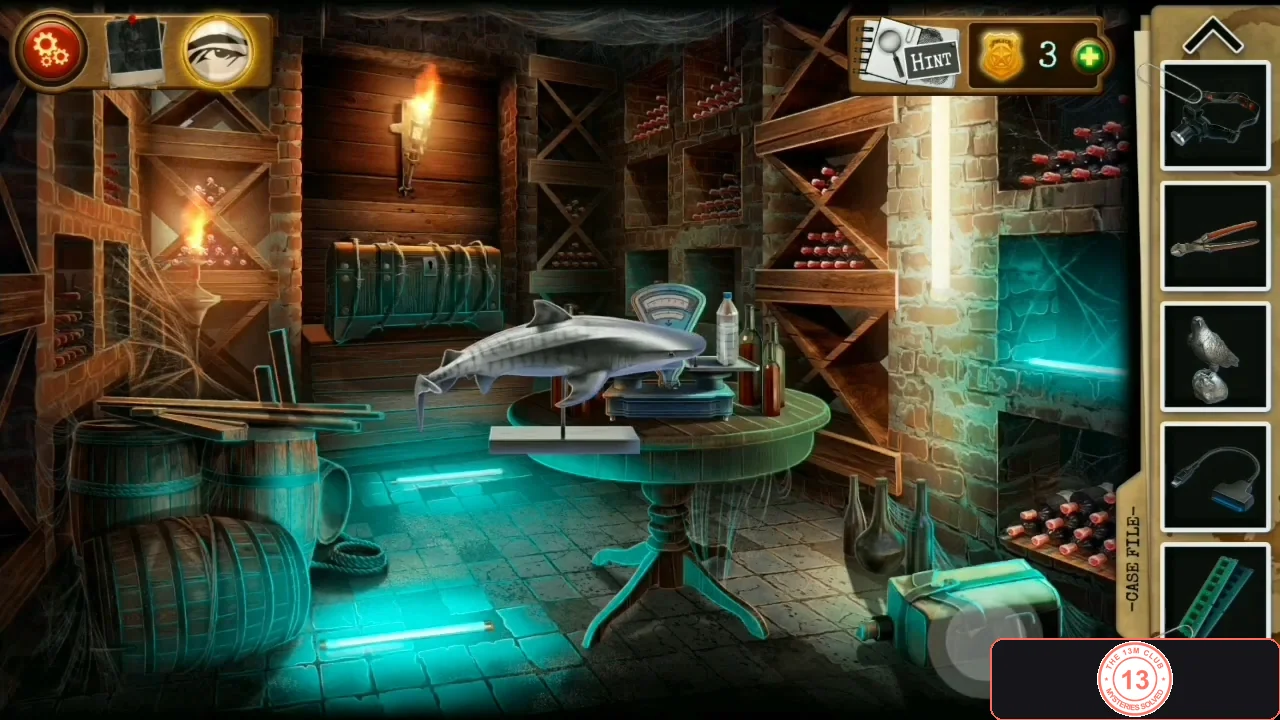
Balance the bottles on the scale to open the barrel, then cut the barbed wire off the chest and open it with the barrel key.
- In the wine cellar, take the shark figurine standing on the round table.
- Tap the scale on the table and take the plastic Water bottle off the right pan. Then drag wine bottles onto the two pans so both carry the same amount: on one pan the full bottle and the half-full bottle (1 + 0.5), on the other the three-quarter bottle and the three quarter-full bottles (0.75 + 0.25 + 0.25 + 0.25). When the needle centres, 'Something has opened up.'
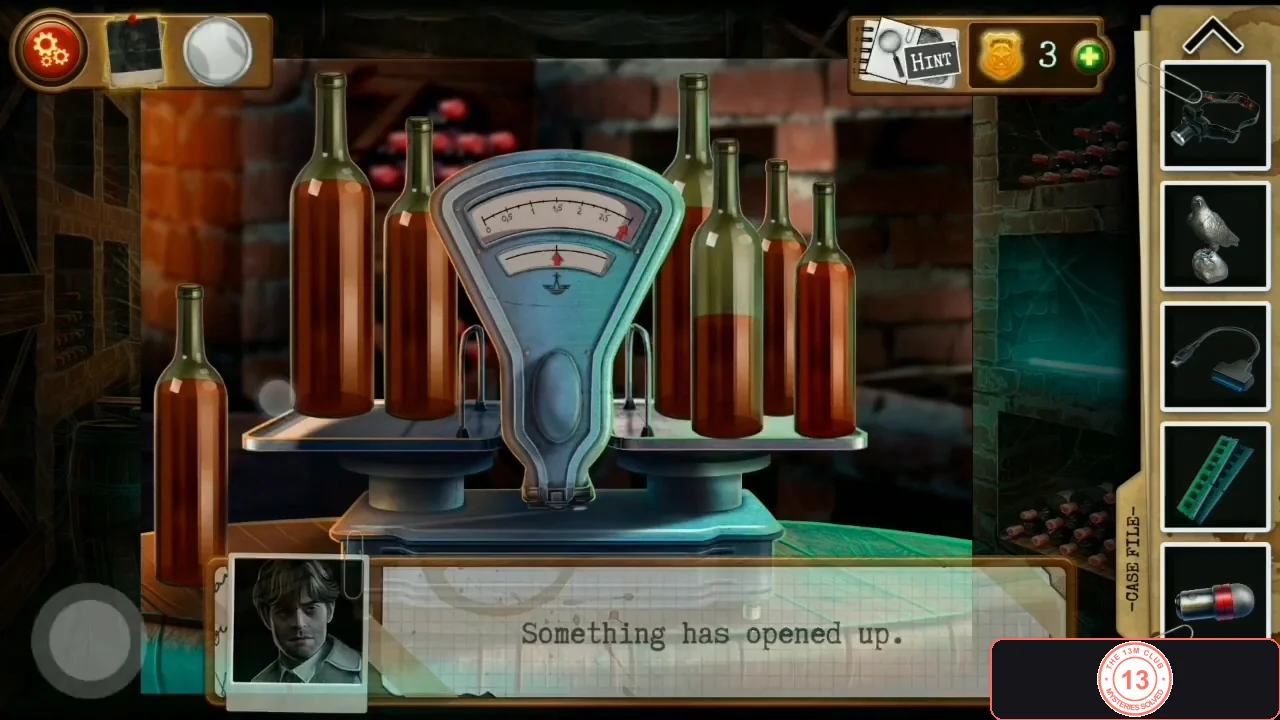
Balanced: full + half bottle on the left, three-quarter + three quarter-full bottles on the right. - Tap the large barrel on the left; its lid is now open. Move the rags aside and take the Chest key and the Processor (CPU).
- Tap the wooden chest on the shelf at the back left. Use the Wire cutters on each strand of barbed wire, then use the Chest key on the lock. Inside is a synthesizer. Take the Hard disk from the left compartment, then use the Water bottle on the box marked with a water drop on the keyboard and take the Screwdriver, the gold Room key and the second part of the sheet music.
Pillar room: music-note notebook and 6-digit safe
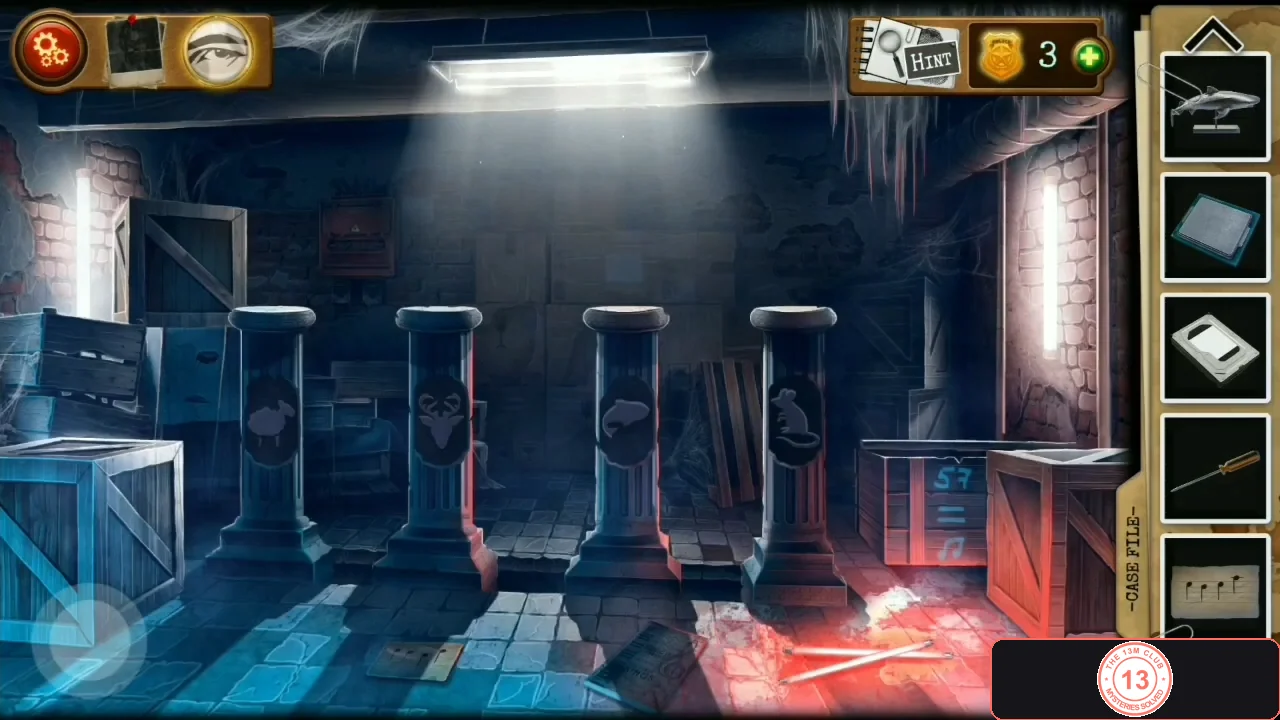
Open the barred gate with the Room key. In the pillar room, a notebook of music-note sums gives the 6-digit code of the wall safe, which holds the assembly sheet for the terminal.
- In the corridor, use the gold Room key on the barred gate on the right and go through into the room with four pillars, two crates and a wall safe.
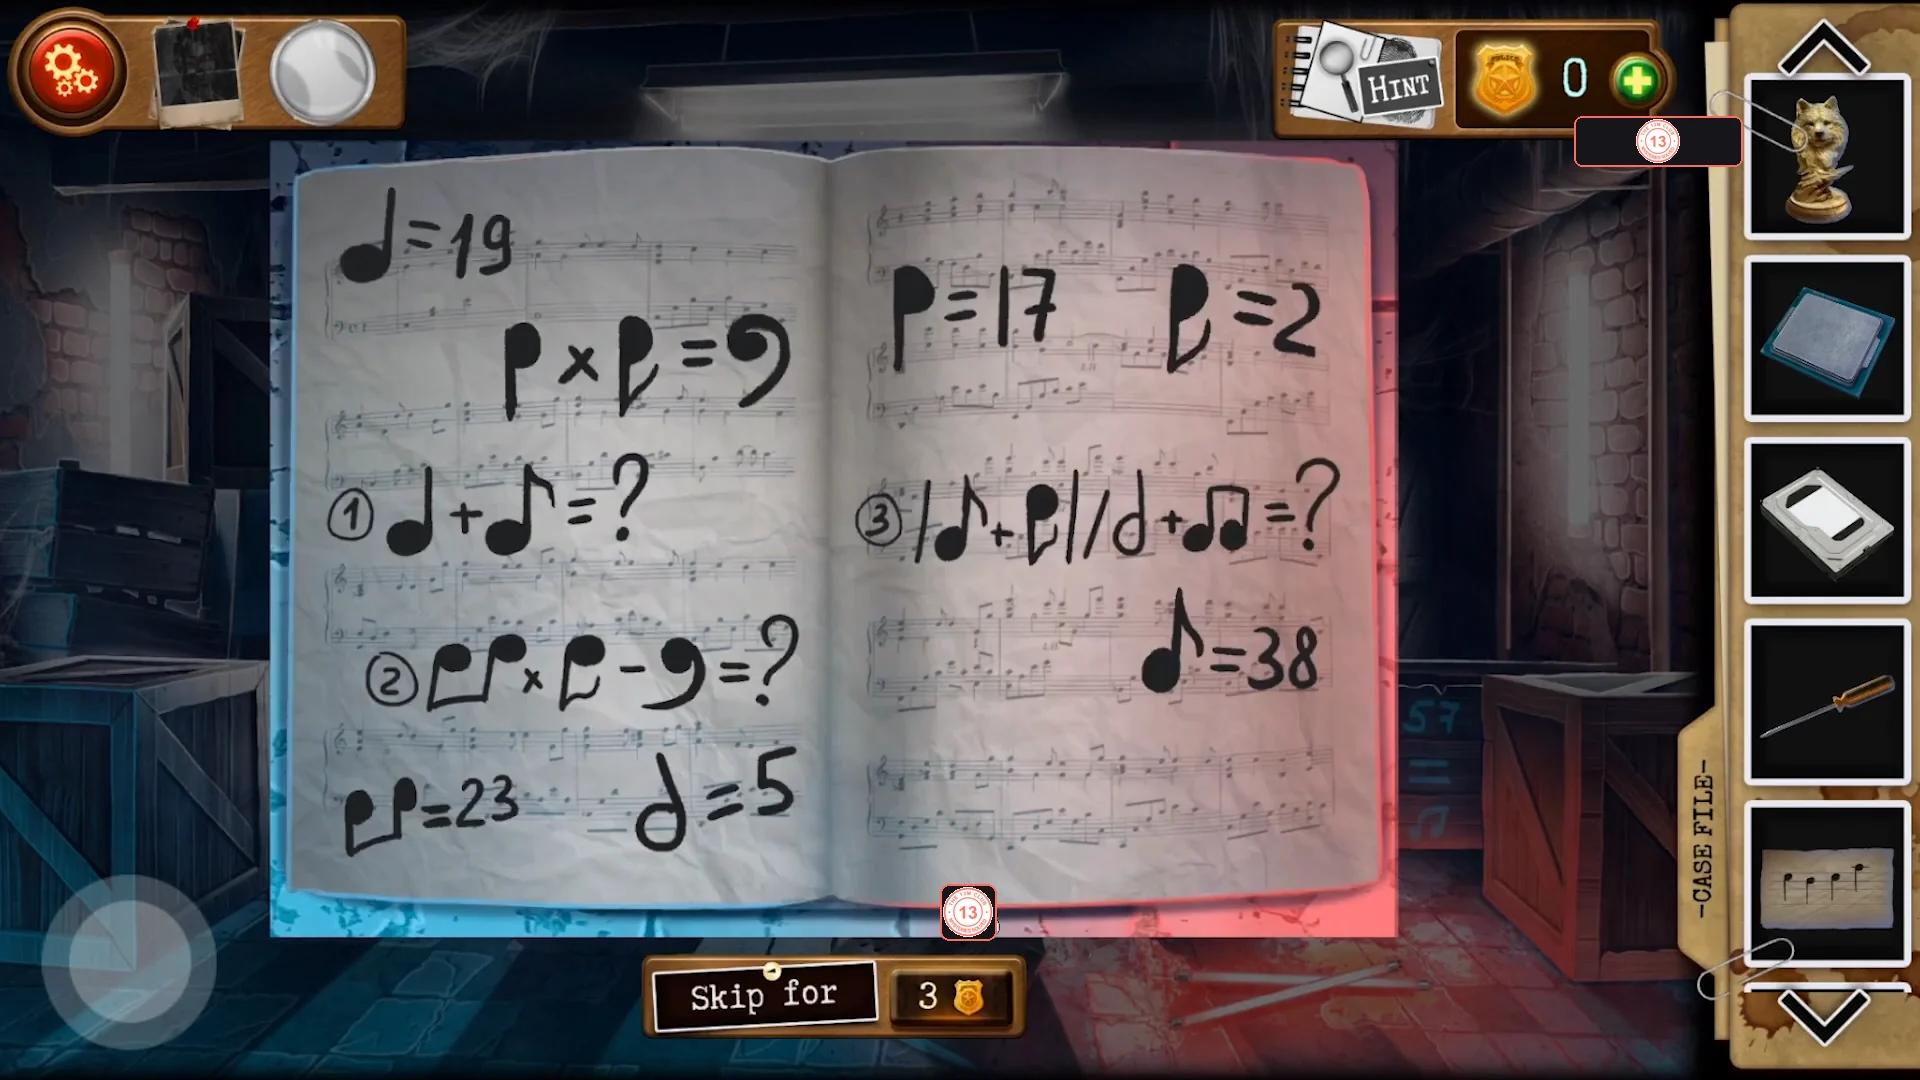
The music-note notebook. Its three equations give 57, 12 and 65, so the safe code is 571265. - Read the notebook on the floor. Each note symbol stands for a number (for example the top-left note is 19, P is 17, B is 2, the double note 23, the half note 5 and the eighth note 38). Solve its three numbered equations: they give 57, 12 and 65. Enter them in order, 571265, on the wall safe at the back left. Inside is a sheet with the assembly order for a computer: 1 Processor, 2 Cooler, 3 Hard disk, 4 RAM, 5 connect the processor to the power supply (grey cable), 6 connect the RAM (blue cable).CODE571265
Synthesizer melody and the wiring safe
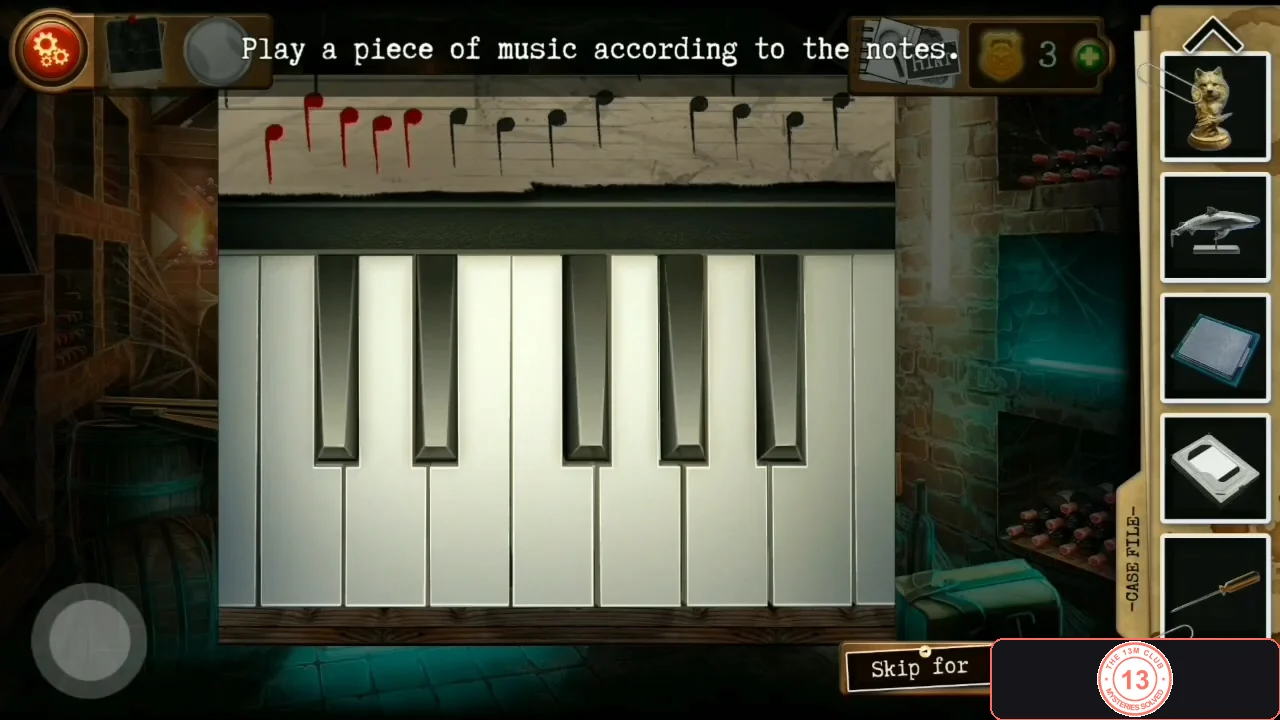
Put both halves of the sheet music on the synthesizer in the cellar chest and play the melody; a wall safe appears, which you unscrew and rewire for the Generator key and the bear figurine.
- Return to the chest in the wine cellar, put both parts of the sheet music on the synthesizer's stand and tap the keys. Number the seven full white keys 1-7 from the left, ignoring the thin strip at the far-left edge. Play 1, 5, 3, 2, 3, 3, 2, 3, 6, 5, 4, 3, 6 - each note's height on the score matches its key, so a higher note means a key further right. Correct notes turn green; a wrong key turns them red and you start again. When all 13 notes are green, 'Part of the wall moved.'CODE1 5 3 2 3 3 2 3 6 5 4 3 6
- Tap the metal plate that appeared on the cellar wall and use the Screwdriver on its four corner screws. On the board, each wire colour has a Roman numeral (red V, blue VI, black IX, yellow V, green VI, white IX) and each node shows a number of dots (top row 1, 2, 4; bottom row 5, 3, 6). Connect each wire between two nodes whose dots add up to its numeral: red 1-4, blue 2-4, yellow 2-3, green 1-5, white 4-5, black 3-6. When all six lamps are green the safe opens: take the Generator key (top shelf) and the bear figurine (bottom shelf).
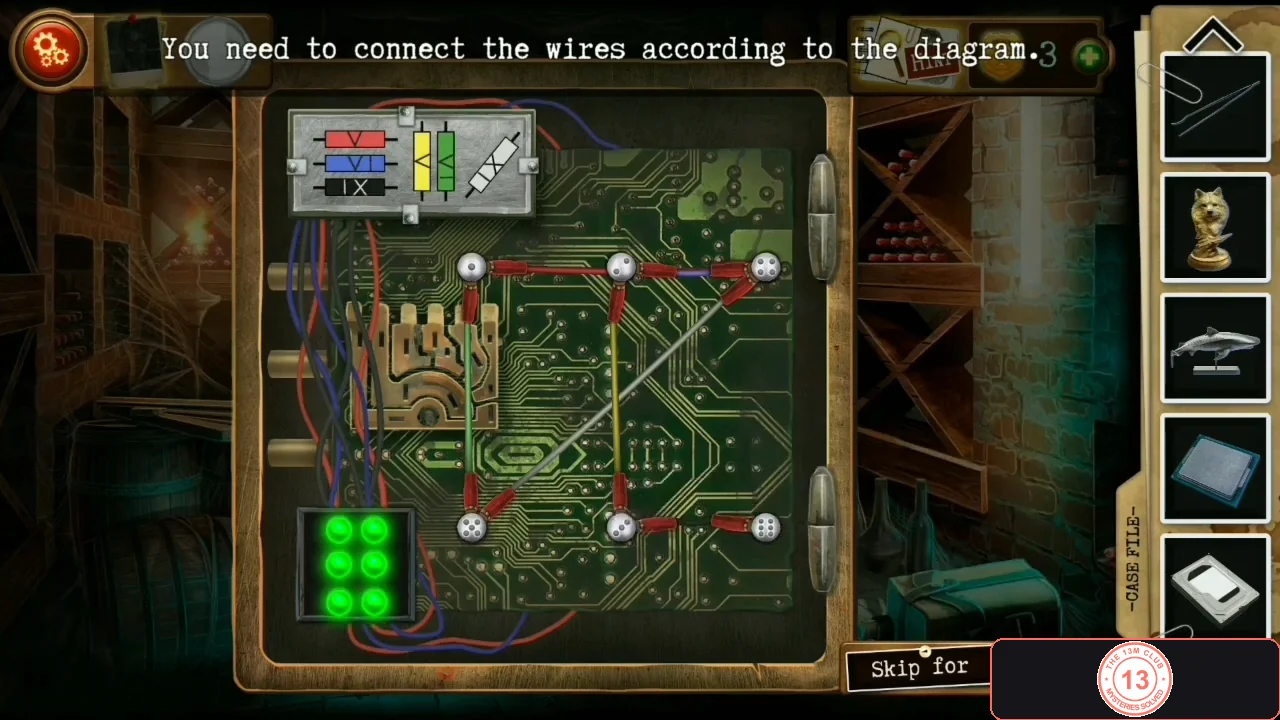
Solved wiring: all six lamps are green and the safe opens.
Four animal pillars and the crates
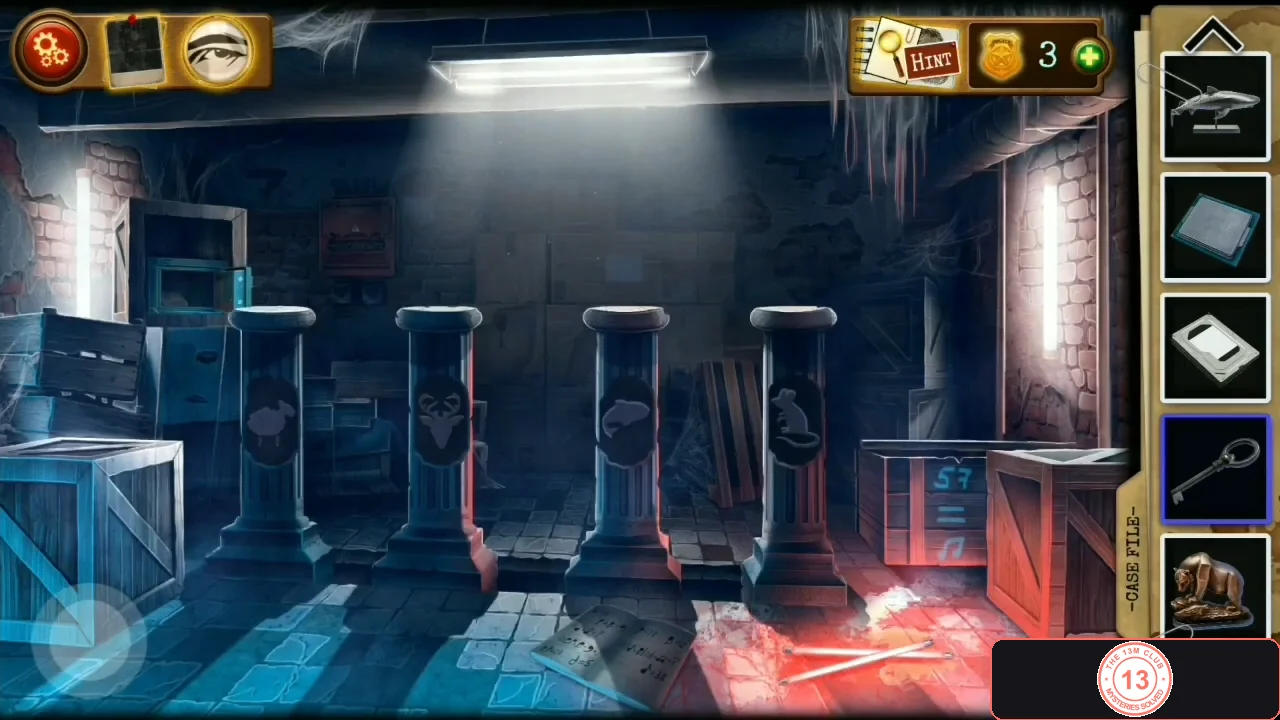
Place the four animal figurines on the matching pillars to open the blue crate, then chop open the red crate.
- In the pillar room, place each predator figurine on the pillar showing its prey: wolf on the sheep (1st, left), bear on the deer (2nd), shark on the fish (3rd) and hawk on the mouse (4th). The blue crate on the left opens.
- Tap the open blue crate: take the Cooler (PC fan) and the Fire axe behind it. Use the axe on the red wooden crate on the right and take the blue cable from inside.
Assemble the terminal computer and its password
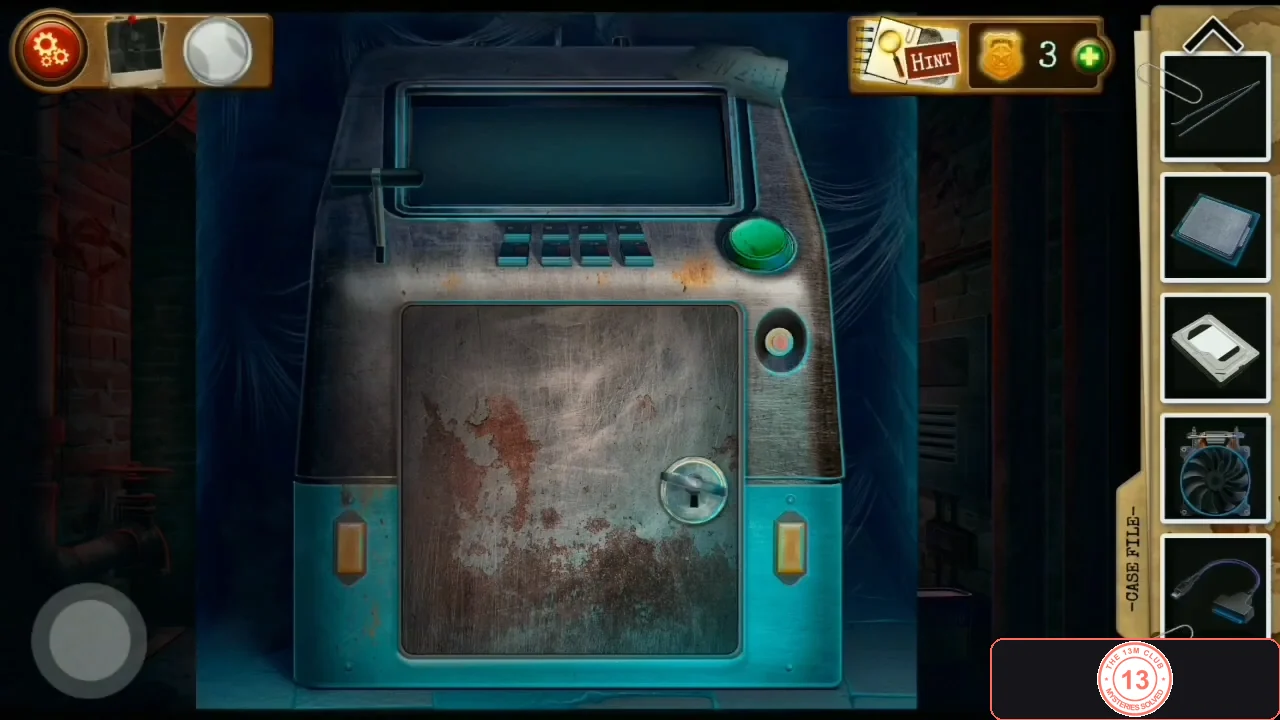
Open the corridor terminal with the Generator key, fit the parts in the order from the safe sheet, power it on and decode the scratched letters YDCL.
- Use the Generator key on the lock of the teal terminal in the corridor. Install the parts in the order from the safe sheet: Processor, Cooler, Hard disk, RAM, then the dark data cable from the cell (it shows black once fitted) and finally the blue cable; the game routes each cable itself. Press the green button; the fan lights up and the screen asks for a four-digit password.
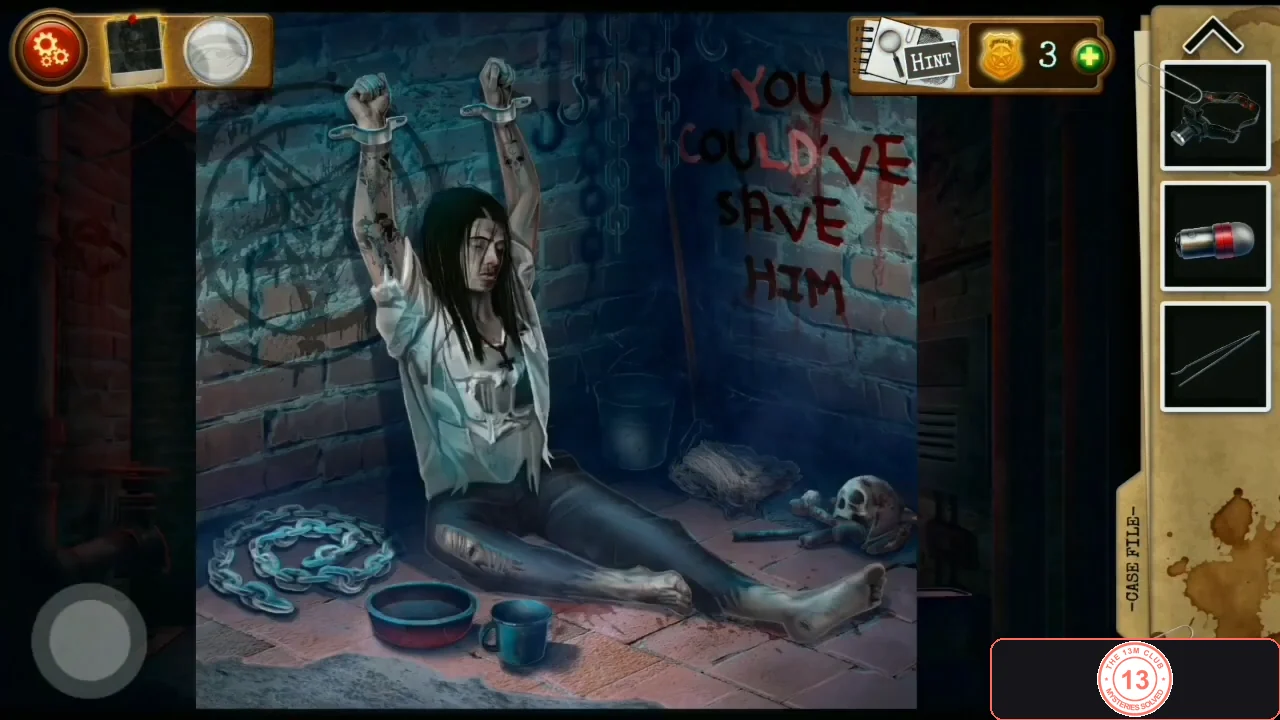
Number the letters of YOU COULD'VE from 1: Y=1, C=4, L=7, D=8, so YDCL is 1847. - The letters YDCL are scratched next to the buttons. Number the letters of the blood writing YOU COULD'VE in the captive's cell: Y=1, O=2, U=3, C=4, O=5, U=6, L=7, D=8. Y D C L becomes 1 8 4 7. Enter 1847; the blue door beyond the archway opens to the crypt.CODE1847
Crypt: dossier, coffin, UV wire puzzle and the trap
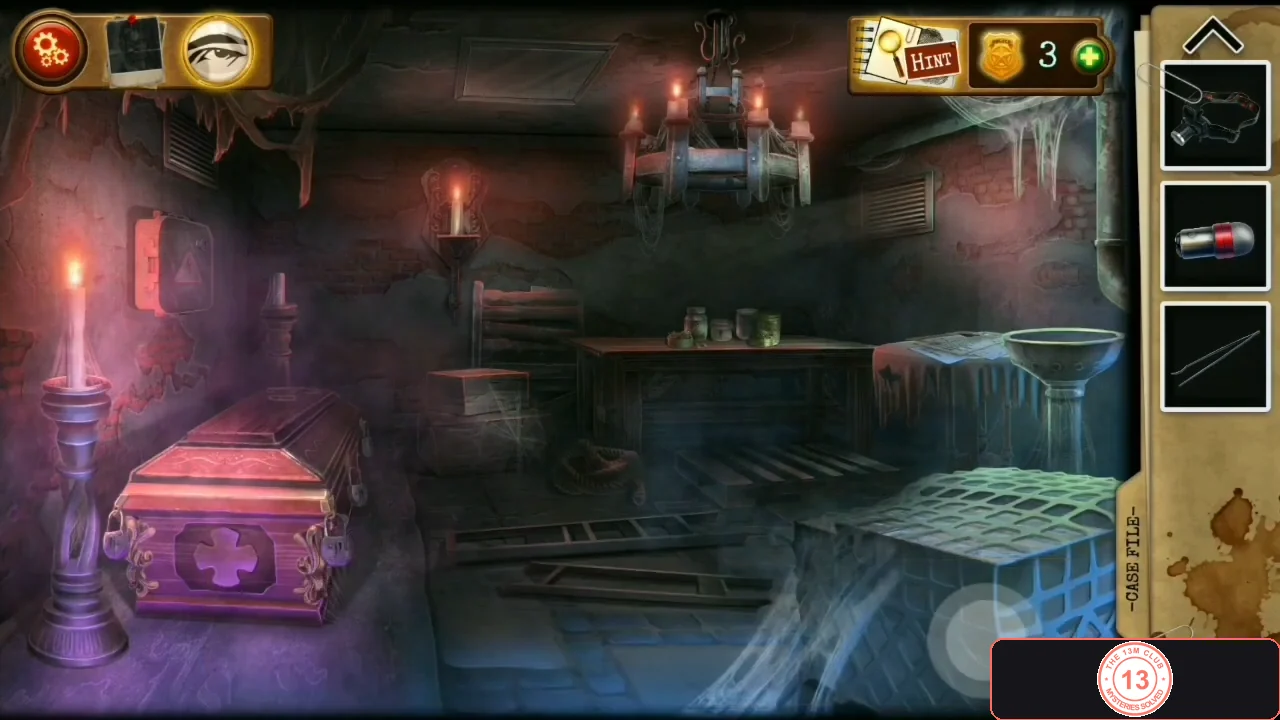
Read Andrew Simmons' dossier and reveal a fingerprint on it with UV light (both easy to miss), pick the coffin lock for a spark plug, solve the UV wire-sum puzzle for the panel key and switch the panel on.
- Easy to miss (Case File entry 4): tap the table at the back. Tap the fallen glass jar to spill screws and keys (the keys do not open the coffin; taking them is optional). Open Andrew Simmons' dossier lying on the table ('How did he get my dossier?!').
- Easy to miss (Case File entry 5): combine the Ultraviolet light bulb with the Headlamp in the inventory to make the UV head lamp, and use it on the open dossier. A glowing fingerprint appears. Nothing later requires this, so do it before using the panel at the end of the chapter.
- Use the Tweezers on the lock of the purple coffin. Slide the tweezers under each of the five prongs and tap when the green light above that prong is lit, until all five are set. Take the Spark plug from the skeleton's ribcage.
- Use the UV head lamp on the brick wall to reveal a hidden panel. Connect wires so that each number on the left equals the sum of three numbers along the top, matching each wire to the socket colours: 42 = 12 (red) + 17 (grey) + 13 (black); 55 = 22 (grey) + 11 (red) + 22 (black); 87 = 31 (red) + 23 (red) + 33 (grey). When all three targets turn green a compartment opens with the electrical panel key.
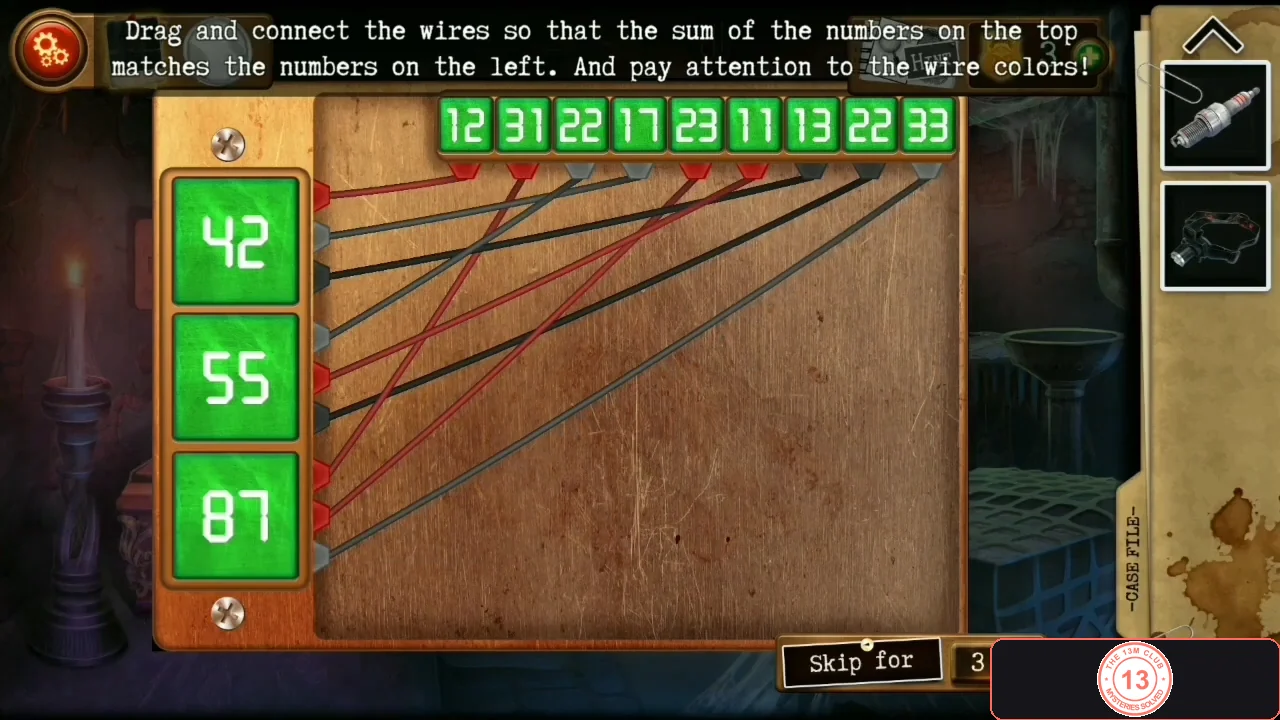
Solved: all three targets (42, 55, 87) are green. - Use the panel key on the HIGH VOLTAGE box on the left wall, put the Spark plug in the empty slot and switch it on. Green gas floods the crypt and Andrew is carried off ('Your obsession is your undoing, Andrew.'); the chapter ends.