Oceanside Cemetery: tools, vines and the mausoleum door
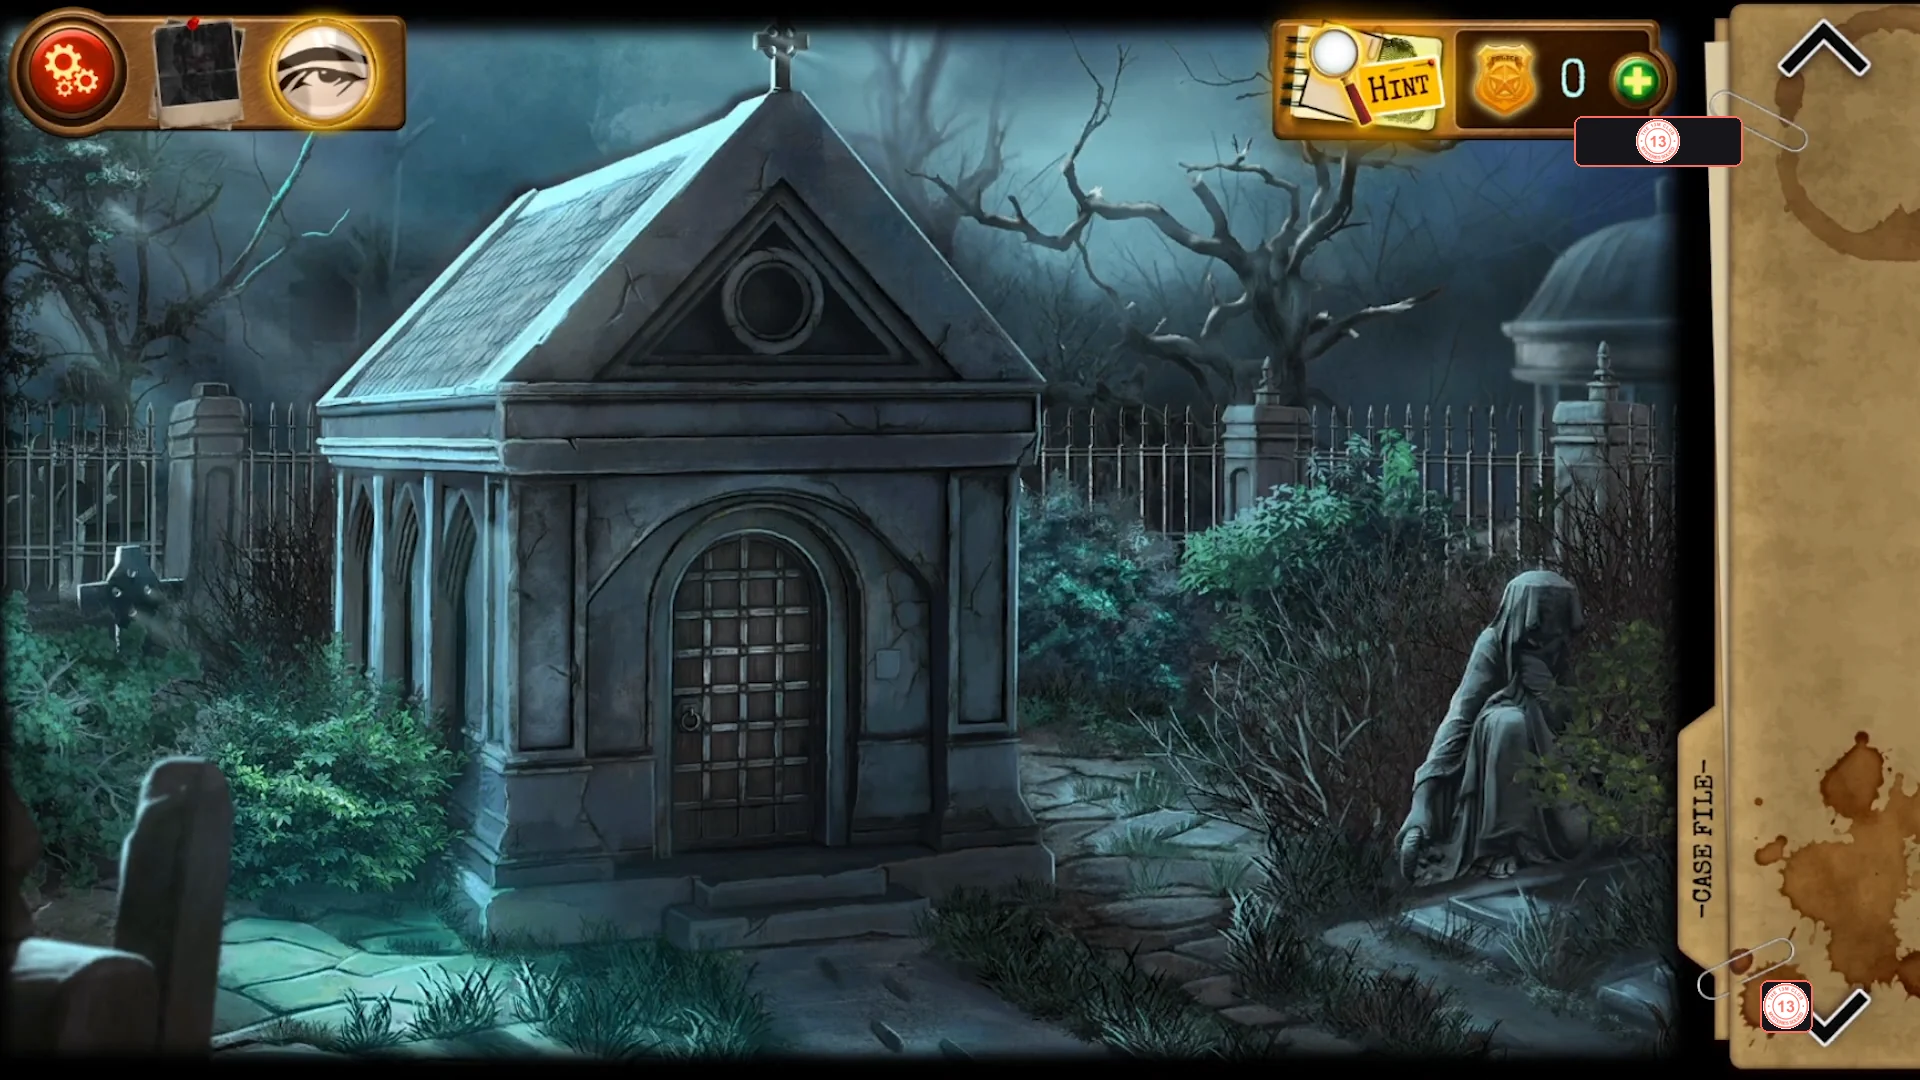
You arrive outside the Oceanside Cemetery mausoleum. Collect the wire cutter and garden shears, free the hammer from the fence, clear the vines from the lockbox and break open the hidden panel to enter the crypt.
- Easy to miss (Case File entry 1): tap the footprints on the path right in front of the mausoleum door: 'The footprints are recent. Perhaps there is someone else in here.' A photo of the footprints is added. Nothing else needs this tap.
- Tap the vine-covered stone slab in the lower left in front of the mausoleum and take the red Wire cutter (bolt cutter) lying to the right of the vines.
- Go to the fence on the right side of the mausoleum and take the Garden shears from the ground.
- In the same fence view, use the Wire cutter on the wire that ties a hammer to the fence bars. The hammer drops; take the Hammer. The wire cutter is used up.
- Back at the vine-covered slab, use the Garden shears on the vines. A red lockbox with a three-wheel number lock appears, with a notebook on top: a sketch of the crypt door with an arrow to a small square right of the door and the words 'hello sue!'. You do not have the lockbox code yet. The shears stay in your inventory.
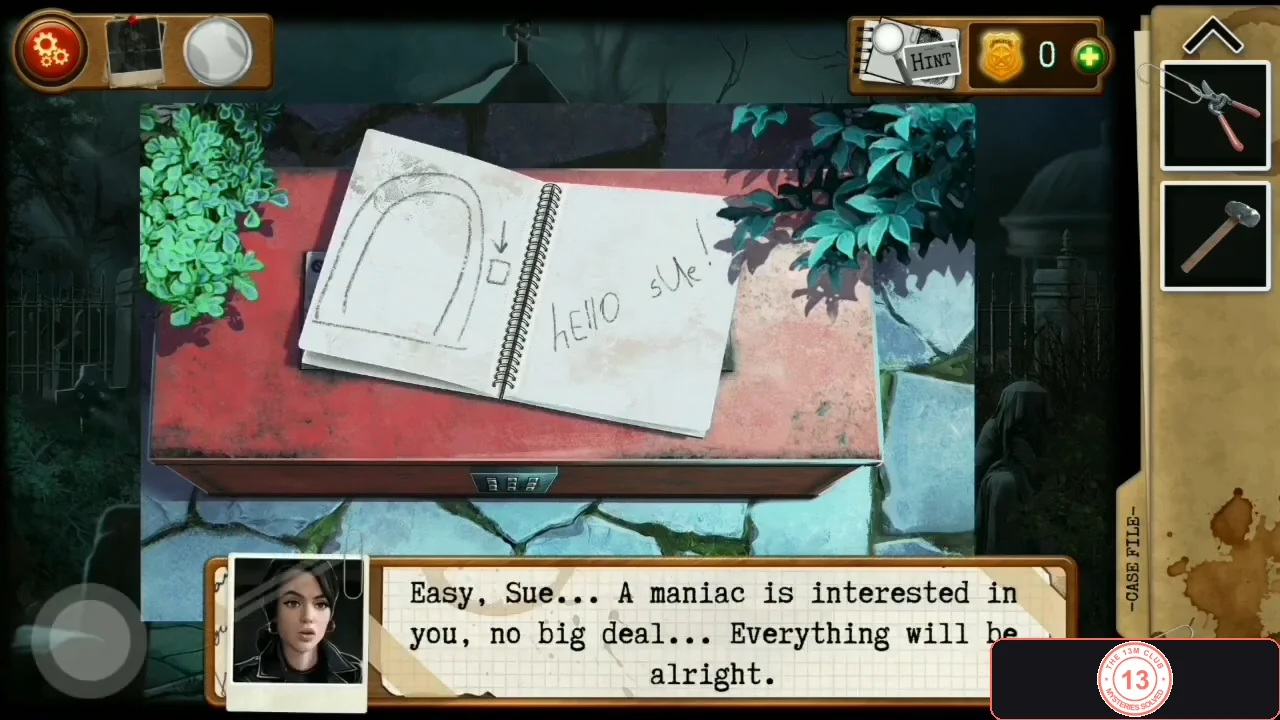
The notebook on the lockbox: the arrow points to the hidden panel to the right of the mausoleum door. - Tap the wall to the right of the mausoleum door ('There's a hidden panel here, but I can't open it just like that.') and use the Hammer on it. The hidden switch opens the door; go inside. The hammer is used up.
Crypt: shovel, three keys, floor hatch and gravestones
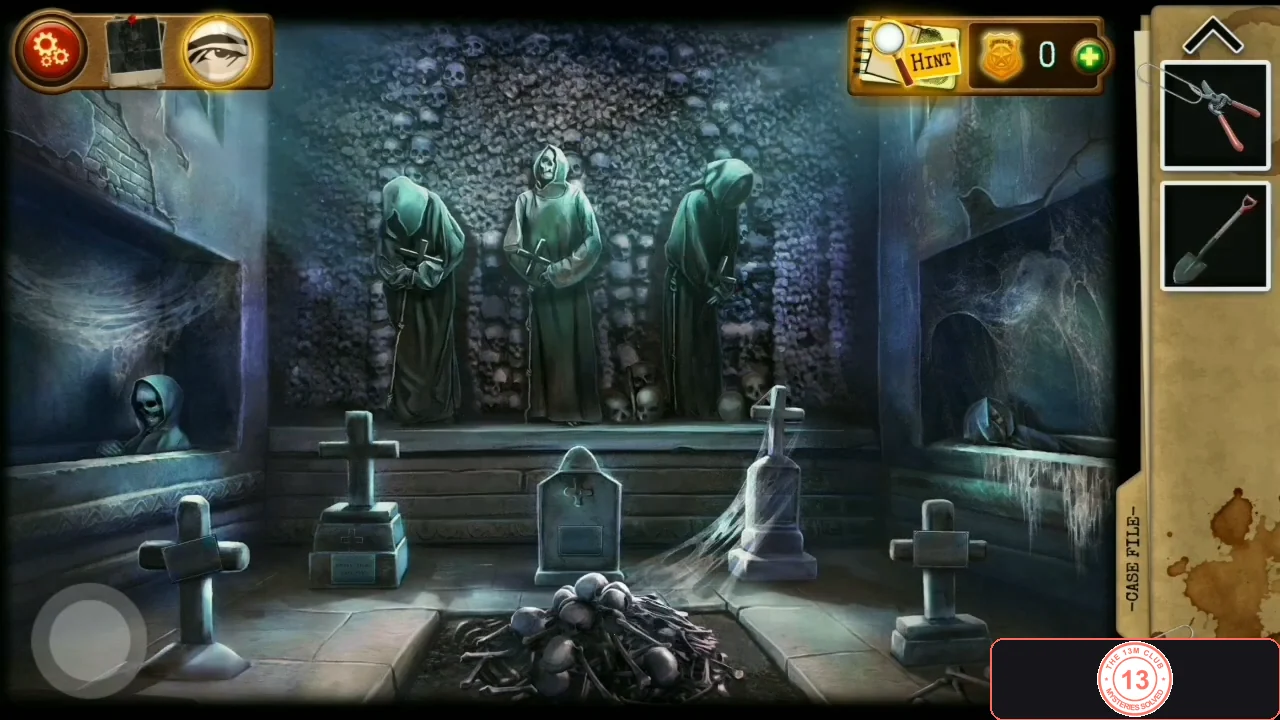
Inside the crypt, collect the shovel and three keys, uncover the locked floor hatch and read the gravestones for a number clue.
- Take the Shovel leaning to the right of the cobwebbed gravestone. Then take the three small keys lying along the top of the low stone ledge in front of the statues (left of the central gravestone, above it, and on the right by the cobwebbed cross): Key 1, Key 2 and Key 3.
- Use the Shovel on the bone pile in the middle of the floor. A round wooden hatch is uncovered, but it is locked ('Closed.'; the statue keys do not fit). The shovel stays in your inventory.
- Read the five small gravestones: Ethan Brown 1950-2010 (beloved father), Michael Brown 2015-2019 (beloved son), Enith Brown 1985-2020 (beloved wife and mother), Felicia Days 1965-2020 (car crash) and Linda Gray 1972-1995. Michael Brown's stone is the stepped one with a cross on top, left of the central headstone; a yellow number 6 is scrawled beside its name plate. Remember yellow = 6.
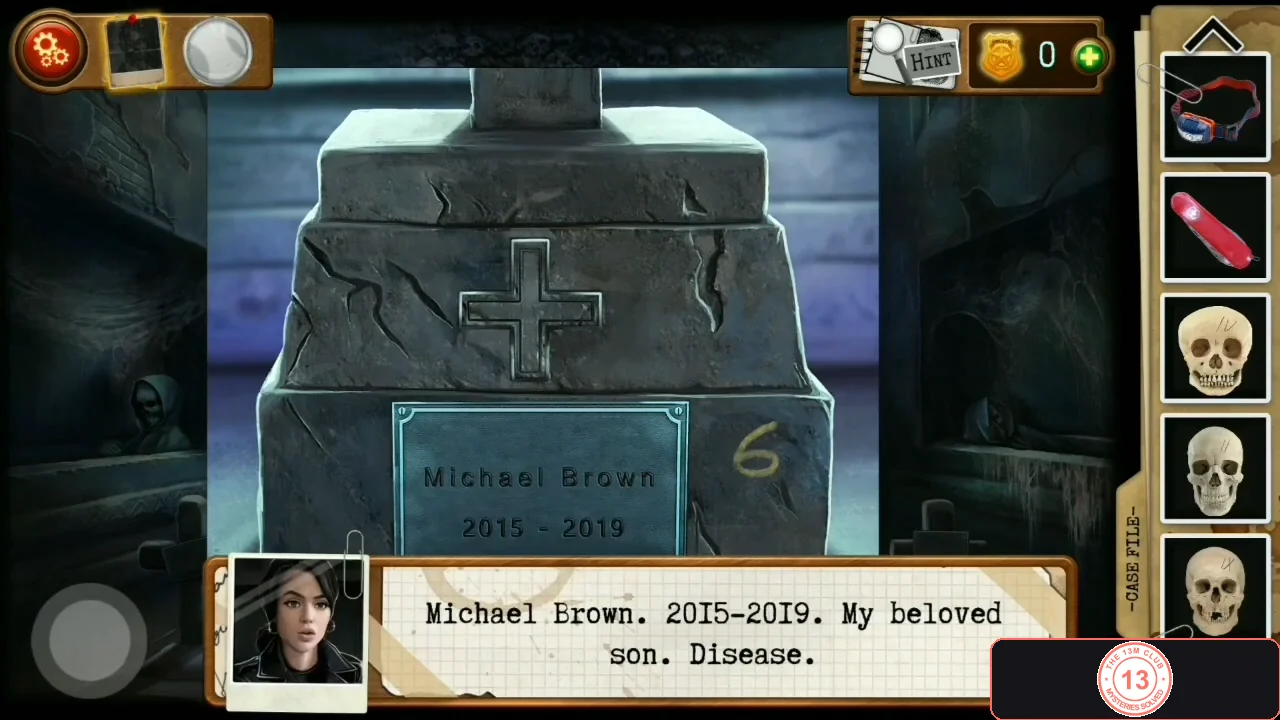
Michael Brown's stone: the yellow 6 beside the name plate means yellow = 6.
Right niche skeleton: rose picture puzzle
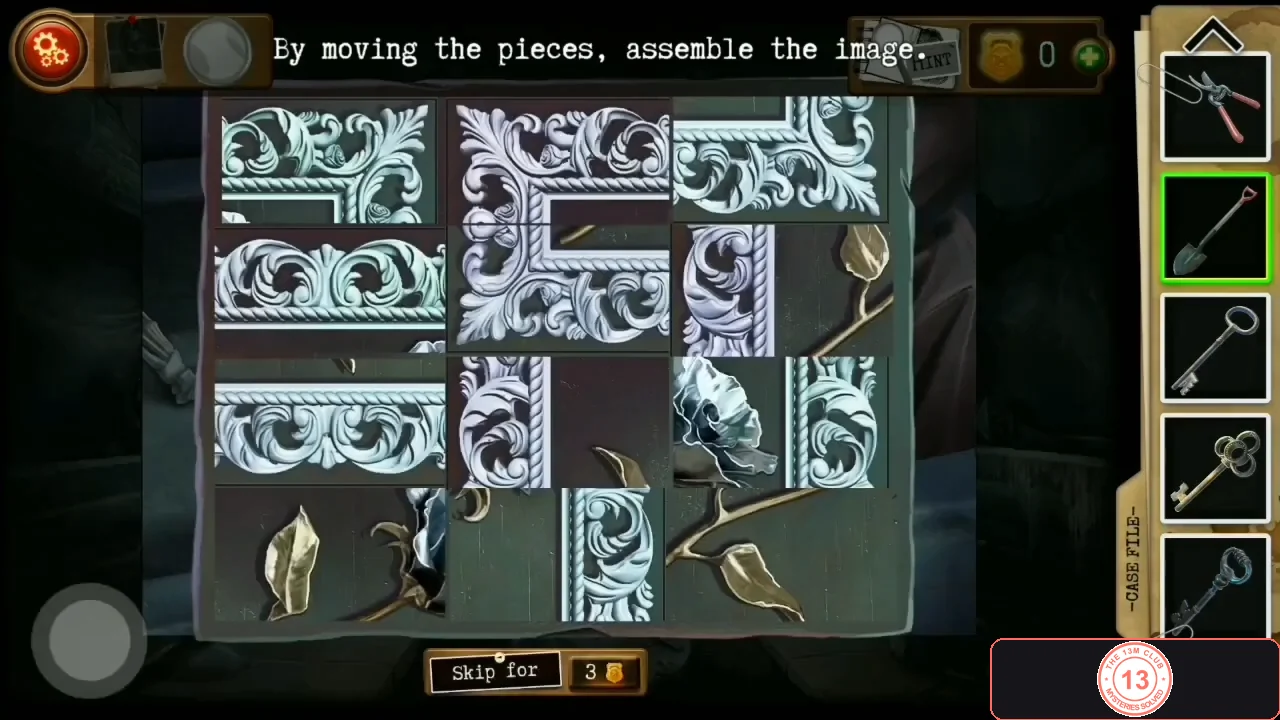
Cut open the robe of the skeleton in the right wall niche and assemble the rose picture to open a small box with a number slip and Epinephrine.
- Tap the robed skeleton lying in the right wall niche and use the Garden shears on its robe. A picture frame appears: 'By moving the pieces, assemble the image.' Any two pieces can be swapped, so there is no fixed move list: start with the corners and edges of the ornate frame, then fill the middle so the rose is complete. The box opens: take the slip with the blue number 7 and the Epinephrine auto-injector.
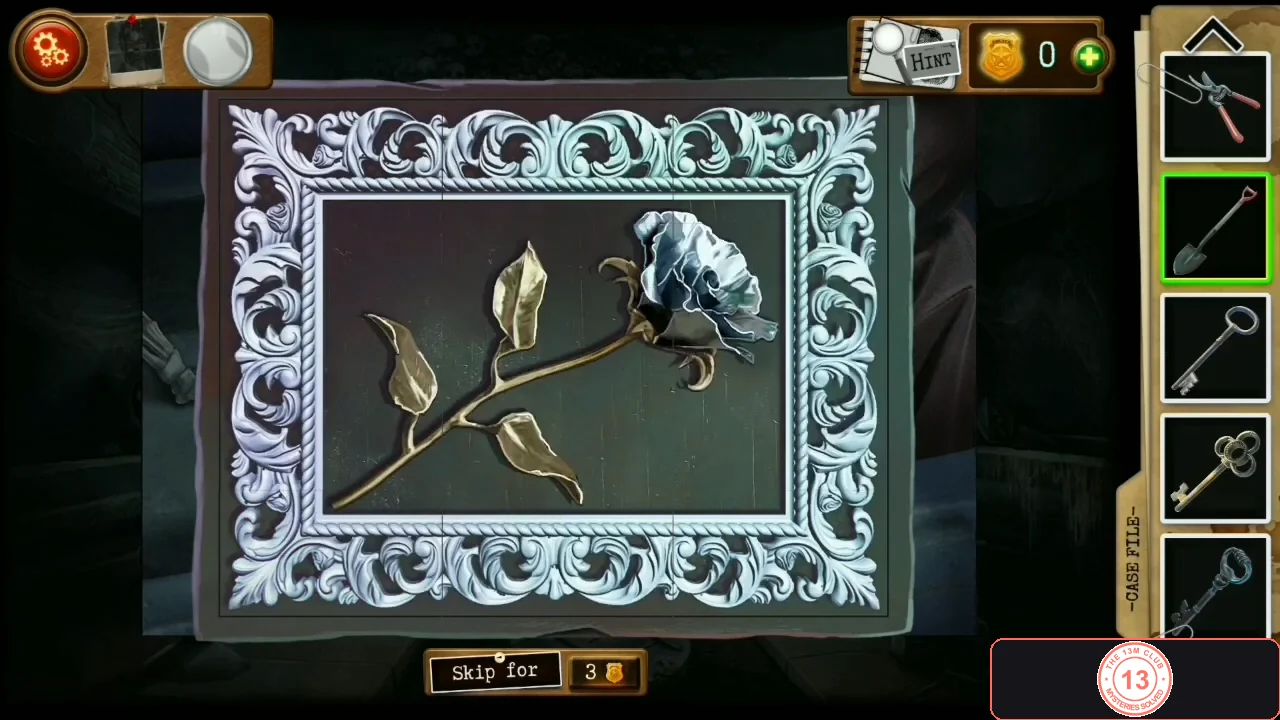
The finished rose picture.
Left niche skeleton: colour note and heart sequence box
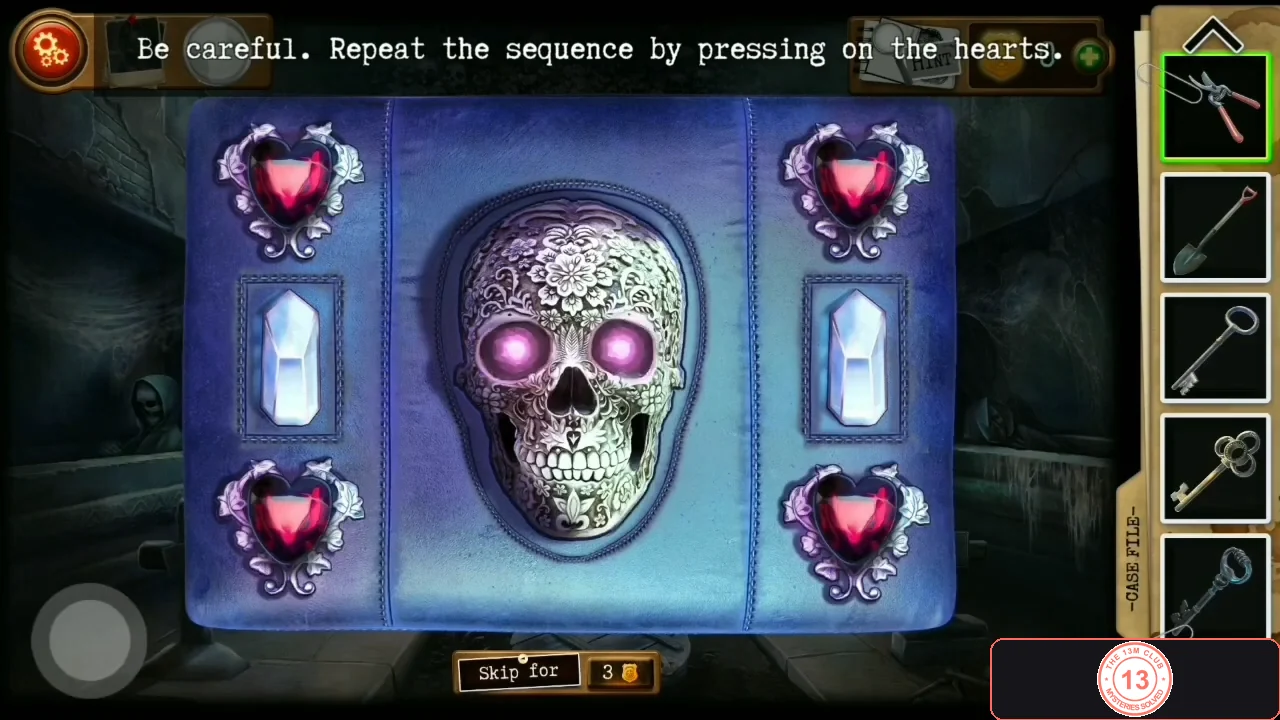
Cut open the robe of the skeleton in the left niche to find the colour-mixing note and a heart box that must be played back as a memory sequence.
- Tap the robed skeleton in the left wall niche and use the Garden shears on its robe. Read the note: purple = red + blue, green = blue + yellow, orange = yellow + red.
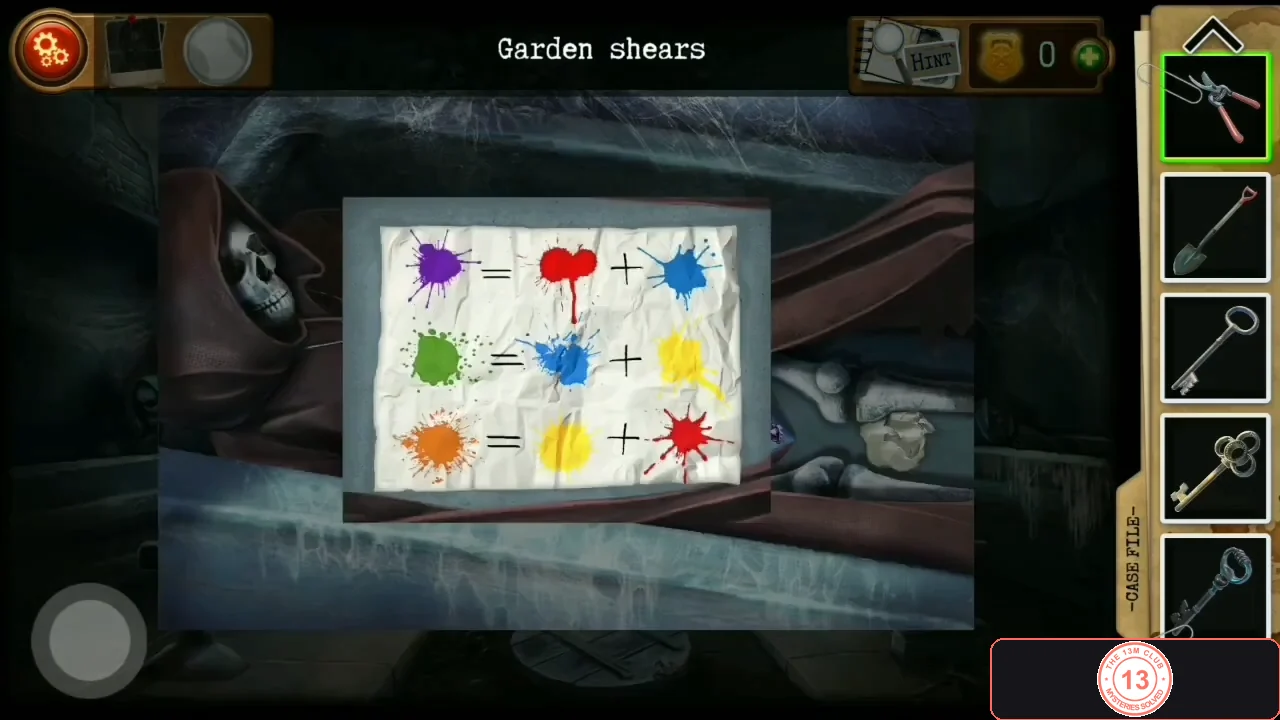
The colour-mixing note from the left skeleton's robe: purple = red + blue, green = blue + yellow, orange = yellow + red. - Open the heart box ('Be careful. Repeat the sequence by pressing on the hearts.'). Watch which of the four hearts light up and press them in the same order. The sequence is generated by the game, so copy what you see rather than a fixed answer. Each correct round fills one of the crystals or skull eyes; when all four are filled (four rounds) the box opens. Take the red Goggles.
Fence corner: buried sack and Simmons' wallet
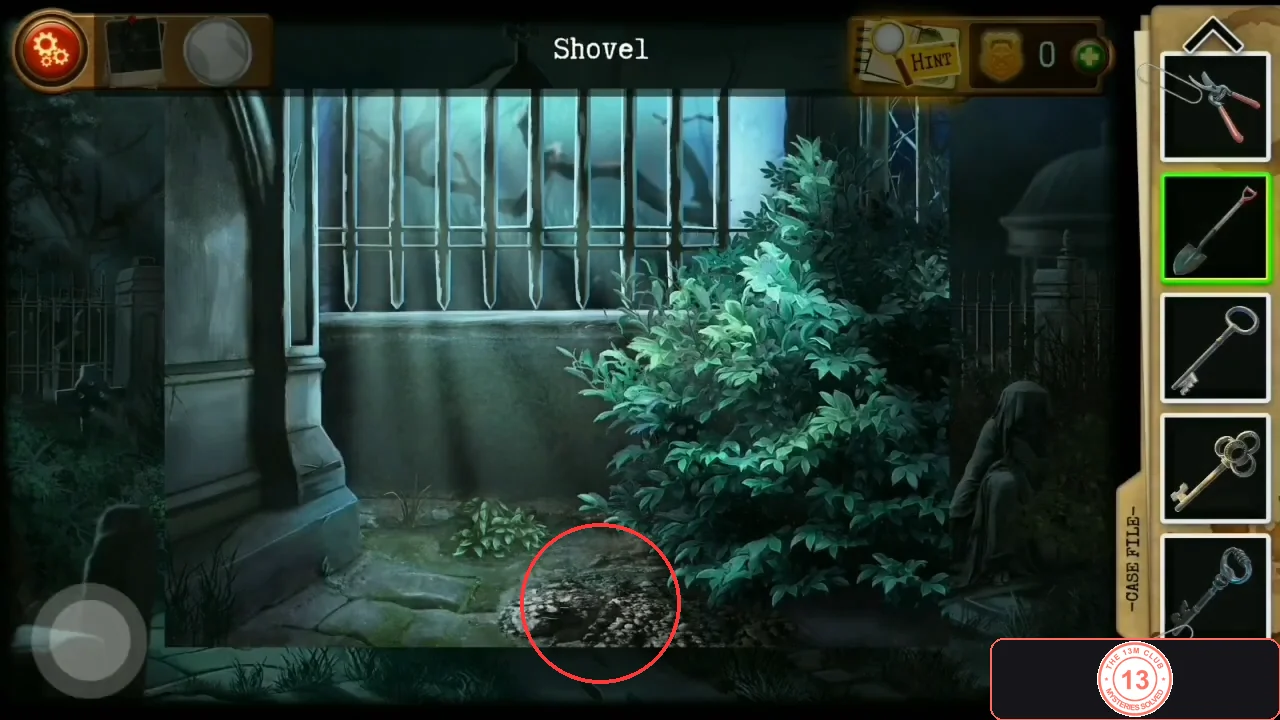
Back outside, dig up a sack by the fence and cut it open for the hatch key, a Swiss knife, a number clue and Mr. Simmons' wallet.
- Leave the crypt and go to the fence view on the right side of the mausoleum. Use the Shovel on the patch of loose dirt at the bottom of the fence view, in front of the bush, to dig up a sack. The shovel is used up.
- Use the Garden shears on the sack (the shears are used up). Move the skull, bottle and handcuffs aside. Tap the wallet - 'This is Mr. Simmons' wallet. I'm definitely on the right path.' - for Case File entry 2. Take the bronze Old key and the red Swiss knife. A red number 9 is painted at the bottom of the sack: remember red = 9.
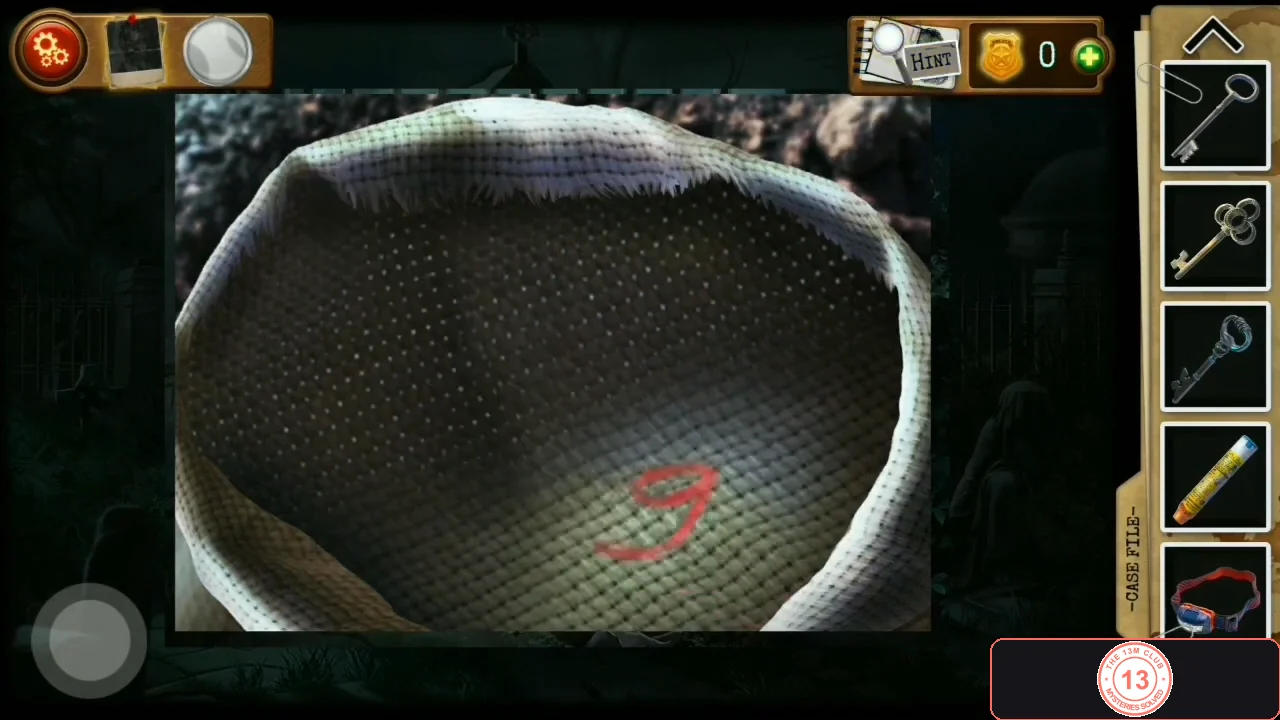
The red 9 at the bottom of the emptied sack means red = 9.
Catacombs: three skulls and the lockbox code
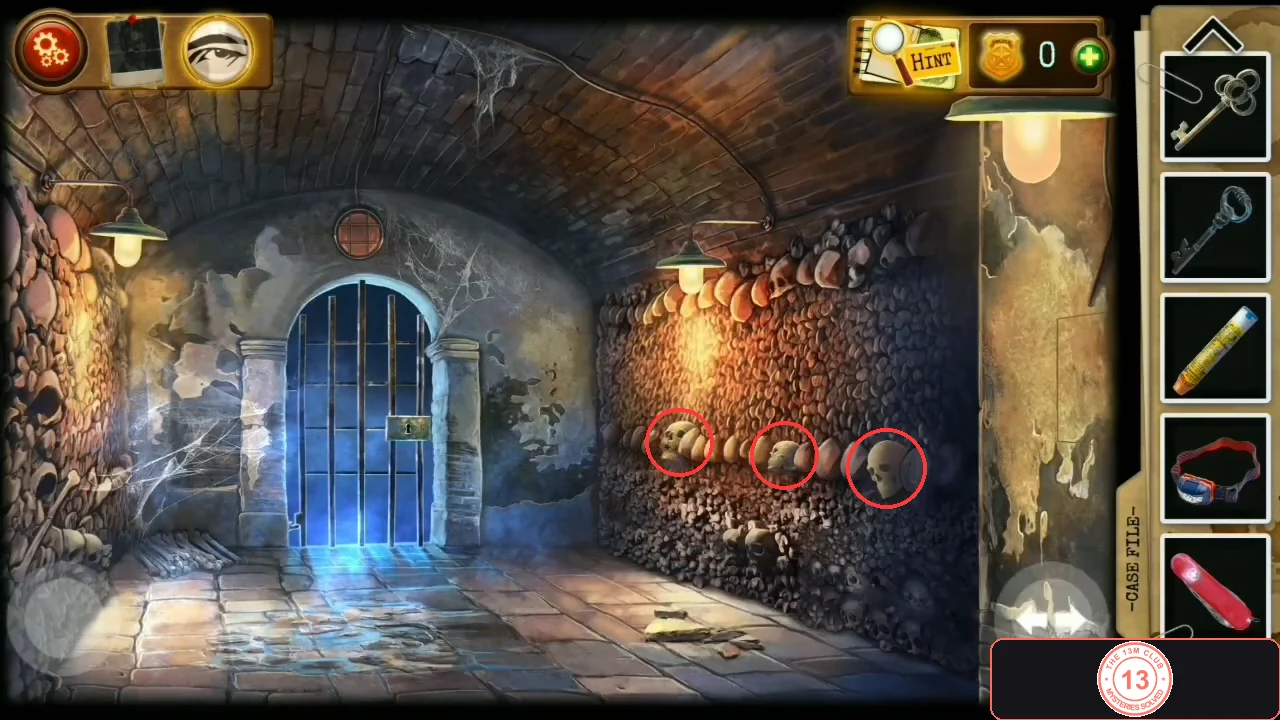
Open the floor hatch, collect three skulls in the catacomb corridor, read the Roman numerals on them and open the lockbox outside.
- In the crypt, use the Old key on the floor hatch. It opens; climb down into the catacomb corridor with the blue barred gate. The Old key is used up.
- On the right wall of the corridor, take the three white skulls that stick out of the middle row of skulls. 'And what if I make up the numbers from young to old skulls? It looks like a code.'
- Inspect each skull in your inventory: the Skull of a baby is marked IV, the Skull of an adult II and the Old skull IX. Young to old gives 4-2-9.
- Go back outside to the red lockbox by the vines and set the wheels to 4-2-9. It opens: read the note (Jeremiah Brown's suicide; the family must be reunited according to the death date) and take the Remote (OPEN/CLOSE), the Urn and the record (Abracadabra album, Mr Simmons' favourite).CODE429
Basin room: urn, skull alcoves, colour keypad and ABRACADABRA
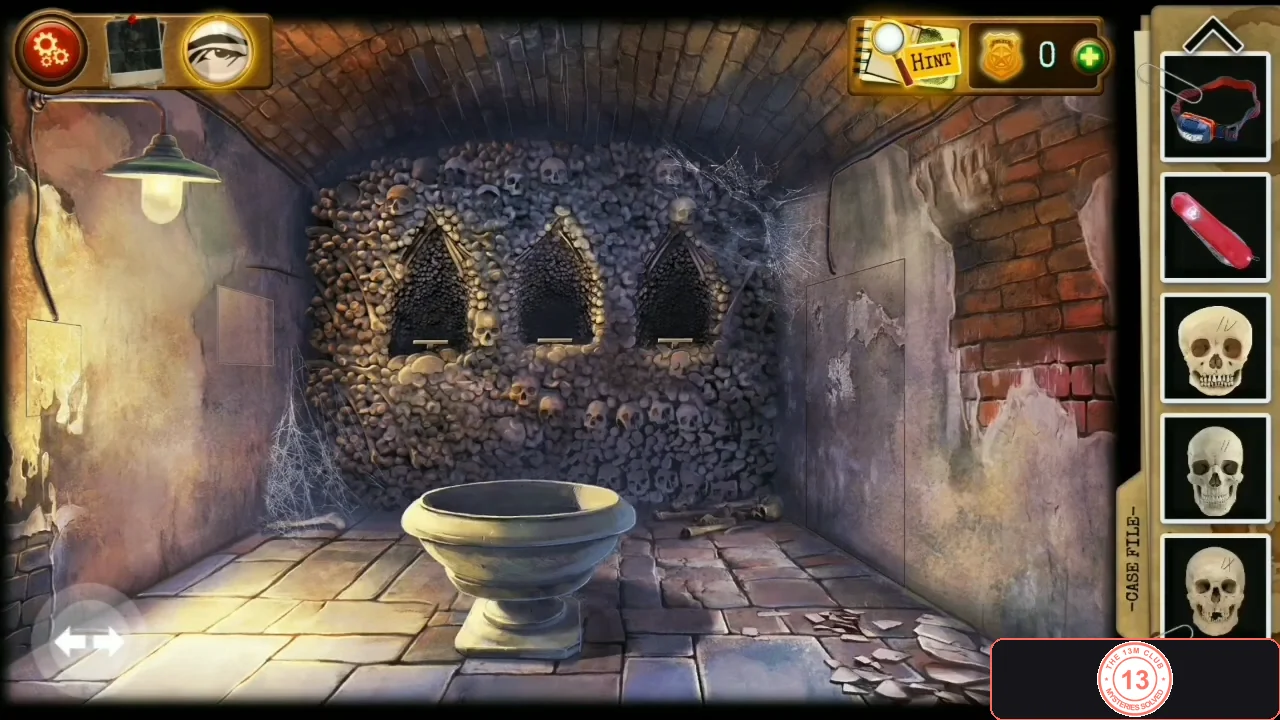
Place the urn and use the remote to open three alcoves, set the skulls by age and enter the colour sums on the keypad. Then switch the light off, spell ABRACADABRA in the dark corridor and press VERITAS to open the way to the office.
- In the catacombs go left into the room with the stone basin. Place the Urn in the basin (the mechanism reacts to the weight), then press OPEN (green) on the Remote. Three arched alcoves open in the wall behind the basin.
- Tap the alcoves and place the skulls by death date (the family must be reunited): Old skull on the left pedestal, Skull of a baby in the middle, Skull of an adult on the right.
- Open the keypad on the left wall of the basin room ('Click on the numbers and enter them in the colored squares.'). Add the colour numbers using the mixing note - blue 7 (rose box slip), red 9 (sack) and yellow 6 (gravestone): purple = red + blue = 16, green = blue + yellow = 13, orange = yellow + red = 15. Enter 16 in the purple square, 13 in the green and 15 in the orange. 'Sometimes nonsense can be a spell.'CODE16-13-15
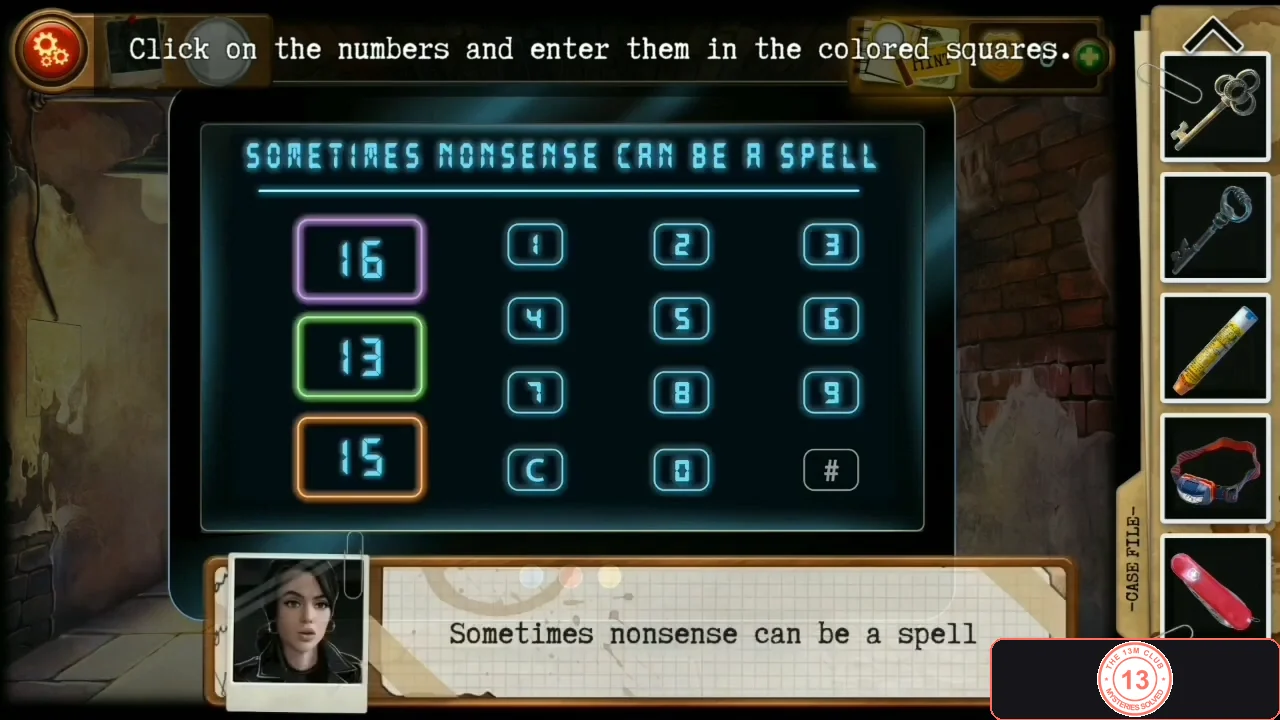
The keypad accepted: purple 16, green 13, orange 15. - In the basin room, press the light switch on the left wall to turn the lights off. Go back to the gate corridor, which is now dark: glowing letters float on the wall. Tap them in order to spell A-B-R-A-C-A-D-A-B-R-A (the title of the record). 'The bones seem to have fallen out of the wall.' Then return to the basin room and press the switch again to turn the lights back on.CODEABRACADABRA
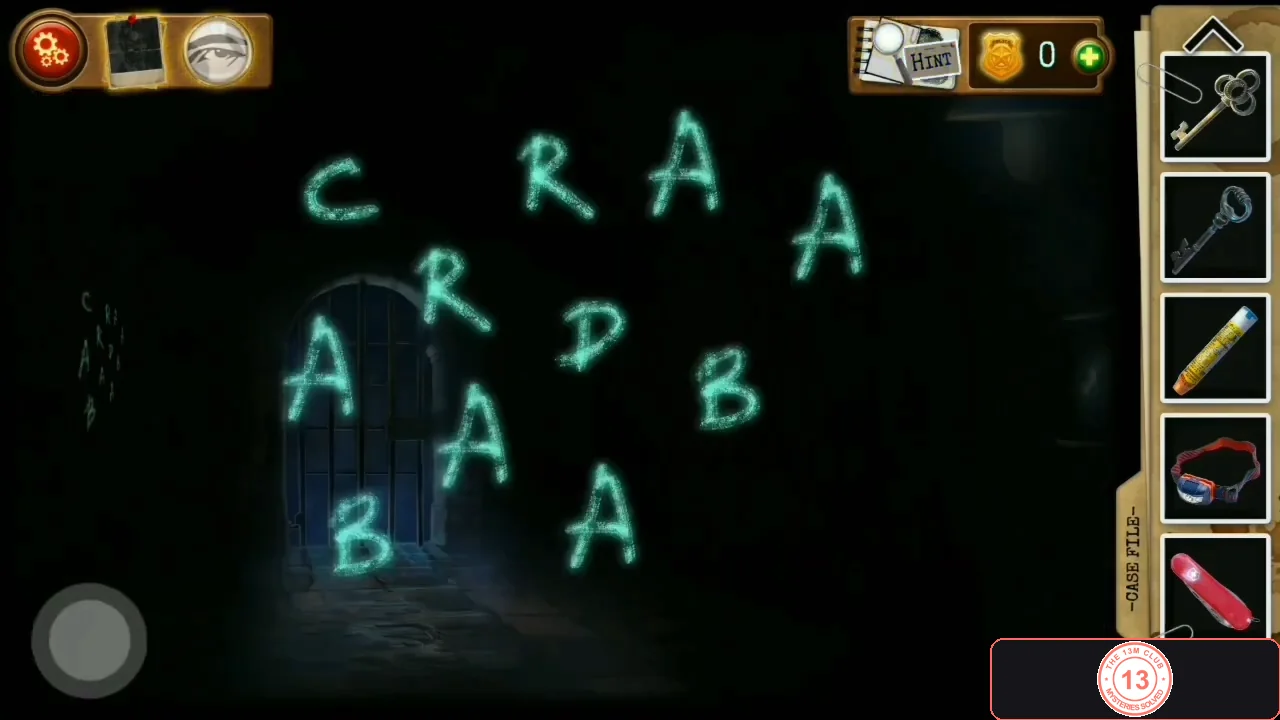
The glowing letters in the dark corridor. Tap them to spell ABRACADABRA. - Easy to miss (Case File entry 3): in the lit gate corridor, tap the pile of fallen bones in the lower left to find a burnt book page. Then zoom into the new wall niche with two buttons, AEQUITAS and VERITAS ('Justice and truth... it's a tough call.'). Press the glowing blue VERITAS button: its light goes out and 'Something moved in the next room.' A new doorway opens in the right-hand wall of the basin room. AEQUITAS is used later.
The Collector's office: photo board, WHO safe and computer
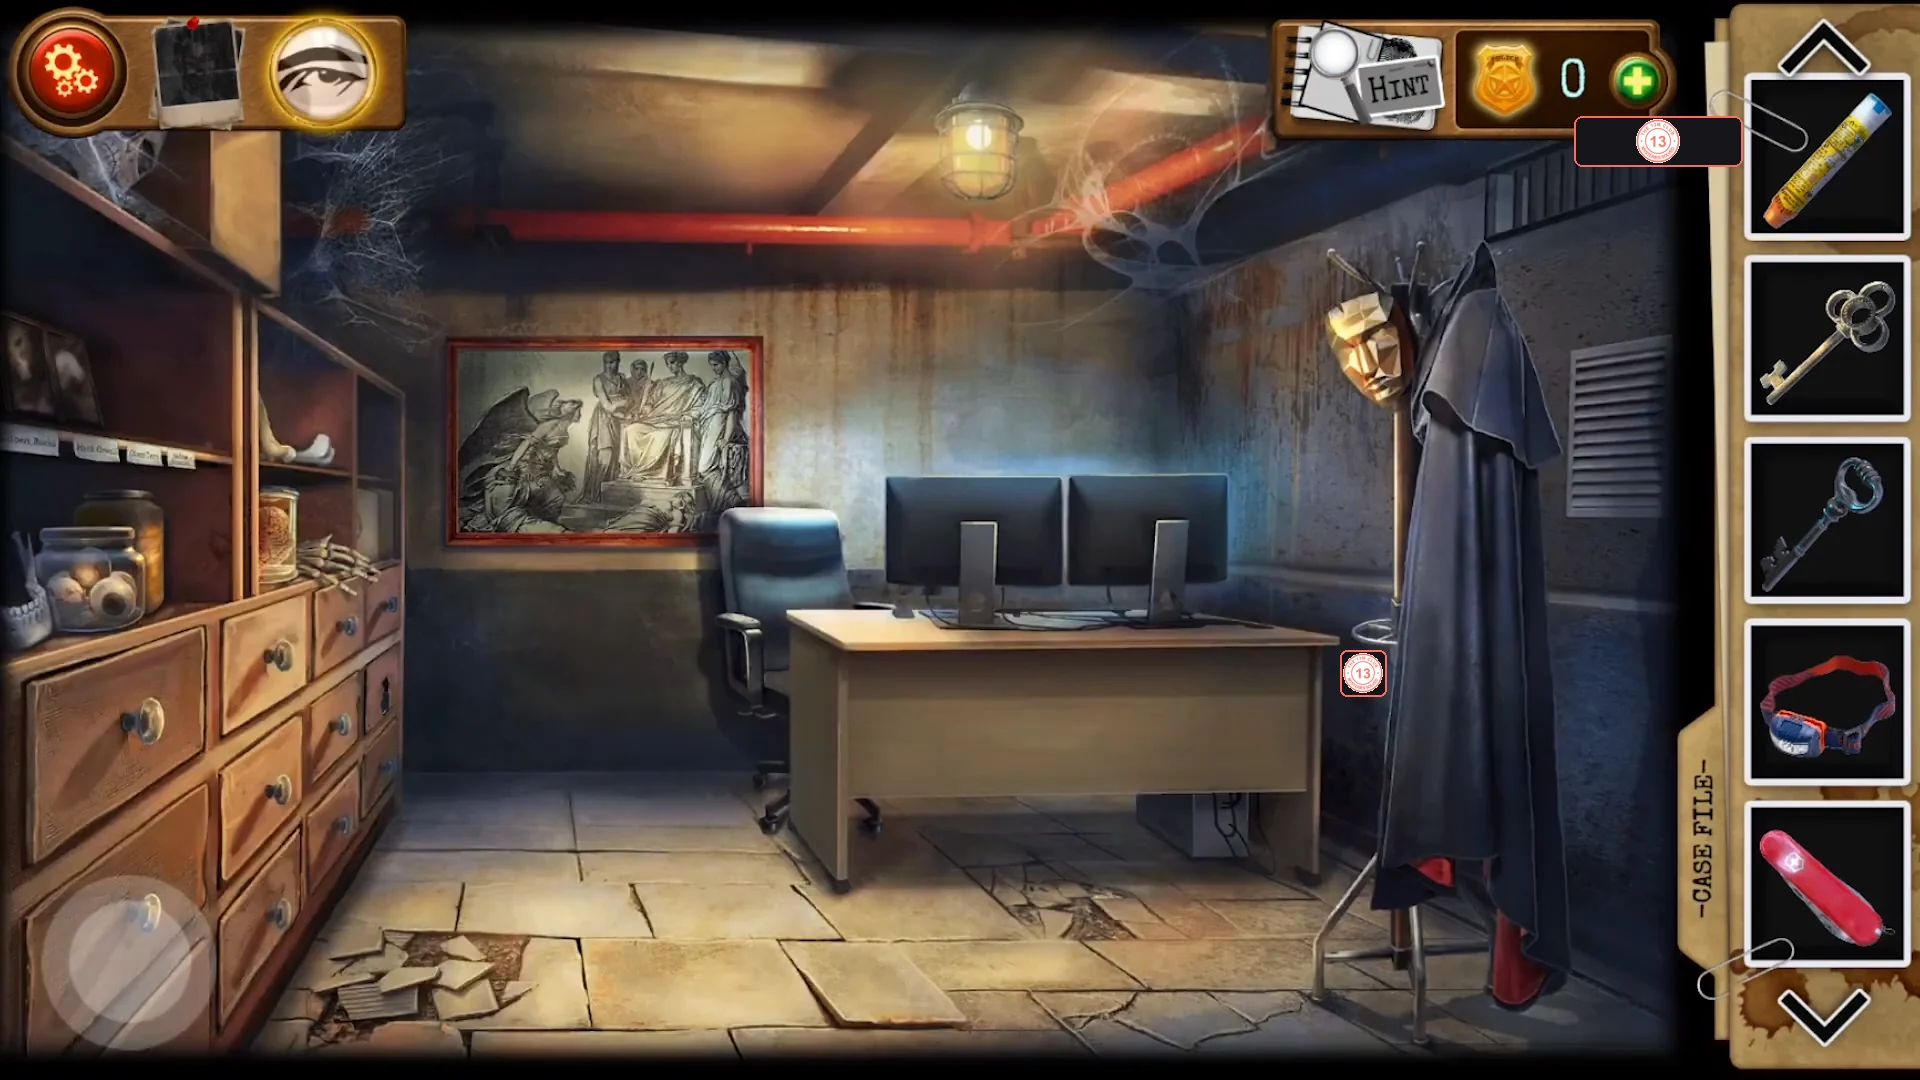
In the hidden office, take the cloak evidence, order the victim photos, pick up the easily missed burnt scrap, open the WHO safe, then unlock the computer and use it to unlock the cache outside the mausoleum.
- Go through the doorway that VERITAS opened in the right-hand wall of the basin room into the office. Easy to miss (Case File entry 4): tap the black cloak and mask on the coat stand on the right ('We'll catch you very soon.').
- Open the shelf of five victim photos and swap them until each picture sits above the right name. The starting order differs between playthroughs, but the target is fixed. From left to right: William Miles = man slumped by a tiled wall (4), Gilbert Bucks = hooded man tied to a chair (2), Hank Orwell = body beside a toilet (9), Oliver Terry = woman chained to a brick wall (5), Andrew Simmons = man sitting in a cave (8). 'It looks like the photos are all in place now.'
- Missable (Case File entry 5): after the photos are in place, a small burnt paper scrap lies on the shelf ledge below William Miles's photo (bottom left). Tap it. It is small and nothing points to it - this is the Chapter 6 entry most often missed, and without it the true ending is lost.
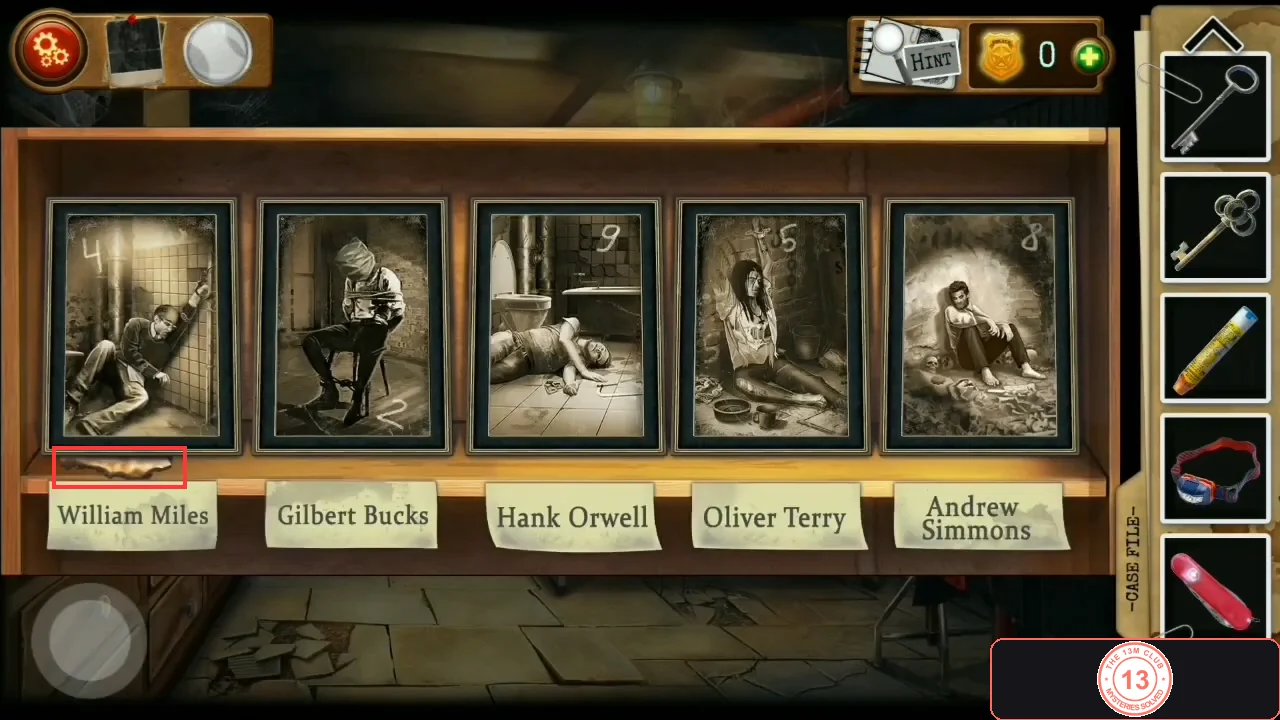
Photos in the correct order (4, 2, 9, 5, 8). The outlined burnt scrap under William Miles is the easily missed Case File entry 5. - Open the wall safe marked W H O on the left wall. Take the photo numbers of the victims whose first names start with those letters: William Miles 4, Hank Orwell 9, Oliver Terry 5. Set the dials to 4-9-5 and take the Grapnel (rope with hook) from the top shelf.CODE495
- Tap the computer on the desk: 'Password required', hint 'In vino...'. The proverb is 'In vino veritas' ('The truth is in the wine... TRUTH in Latin'). Type VERITAS. Required: on the screen that appears, tap Unlock the cache. The view cuts to a camera shot zooming in on the stone panel at the lower left of the mausoleum; without this the circuit panel outside cannot be used. Then tap the arrow at the left edge to switch to the other monitor and tap Start the camera: the feed shows Mr. Simmons alive in a cell ('He's alive!').CODEVERITAS
Mausoleum circuit box, AEQUITAS button and the barred gate
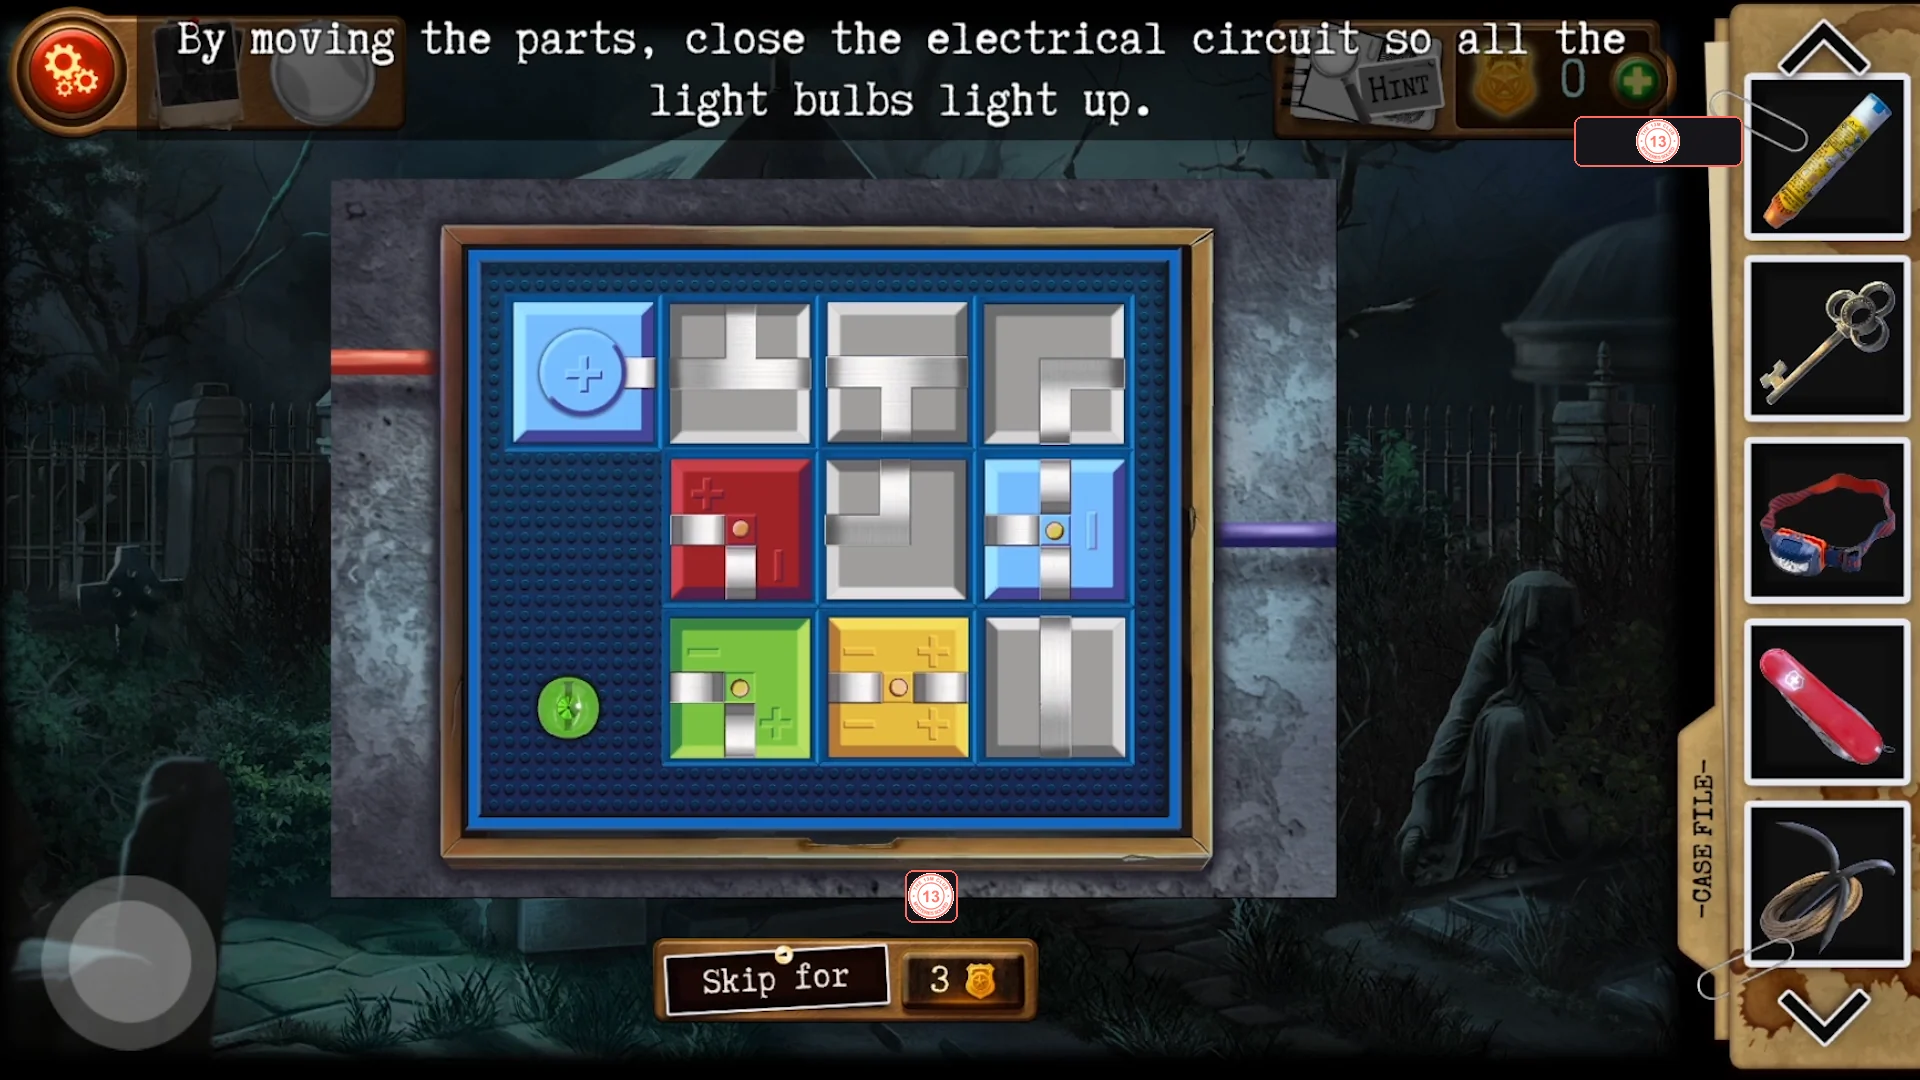
Power the gate by solving the circuit in the box outside the mausoleum, press the AEQUITAS button and open the barred gate with Key 1 and the grapnel.
- After pressing Unlock the cache on the office computer, go outside to the mausoleum and tap the stone panel at the lower left of the building. Use Key 3 on its keyhole (Key 3 is used up). 'By moving the parts, close the electrical circuit so all the light bulbs light up.' The panel has a fixed blue power terminal at the top left, a green indicator light at the lower left and nine movable tiles that fill every slot: grey wire pieces and four coloured bulb tiles (green, blue, red and yellow). Tap a tile to rotate it in place; drag a tile onto another slot to swap the two tiles. The starting layout differs between playthroughs, so build the circuit rather than copying a layout: starting from the power terminal, turn and swap tiles until the metal strips join into one unbroken line that runs through every coloured bulb tile. When all four bulbs and the green indicator at the lower left light up, 'I think I've powered the second button.'
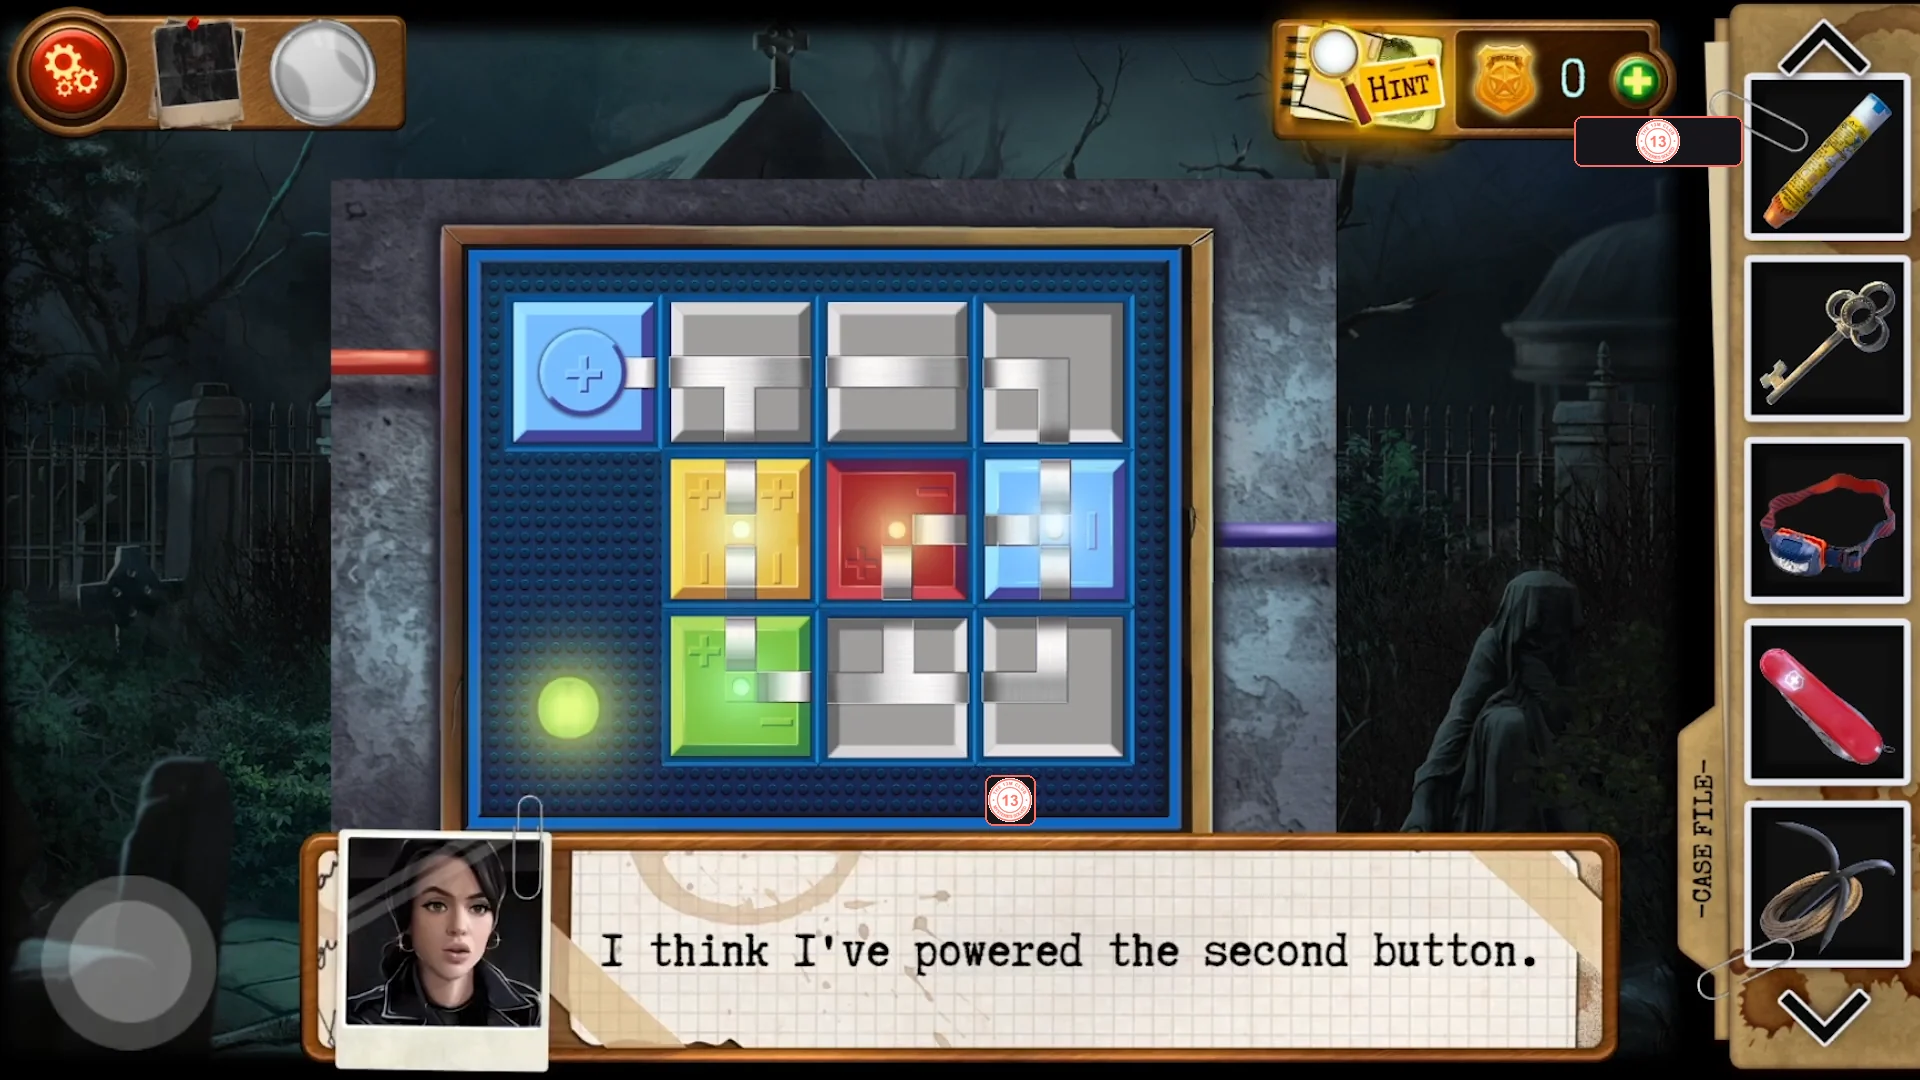
An example of a working arrangement from one recording: all four bulbs and the green indicator at the lower left are lit. Your starting layout may differ. - Return to the button niche in the gate corridor. AEQUITAS now glows yellow; press it. The lamp above the gate lights up.
- Use Key 1 on the lock of the blue barred gate (before the power is on it only says 'It didn't open... There's probably some kind of magnet lock on it. The light's not working.'). Then use the Grapnel at the bottom of the gate to pull it open. Key 1 and the grapnel are used up.
Simmons' cell: rescue, skull dial safe and door mechanism
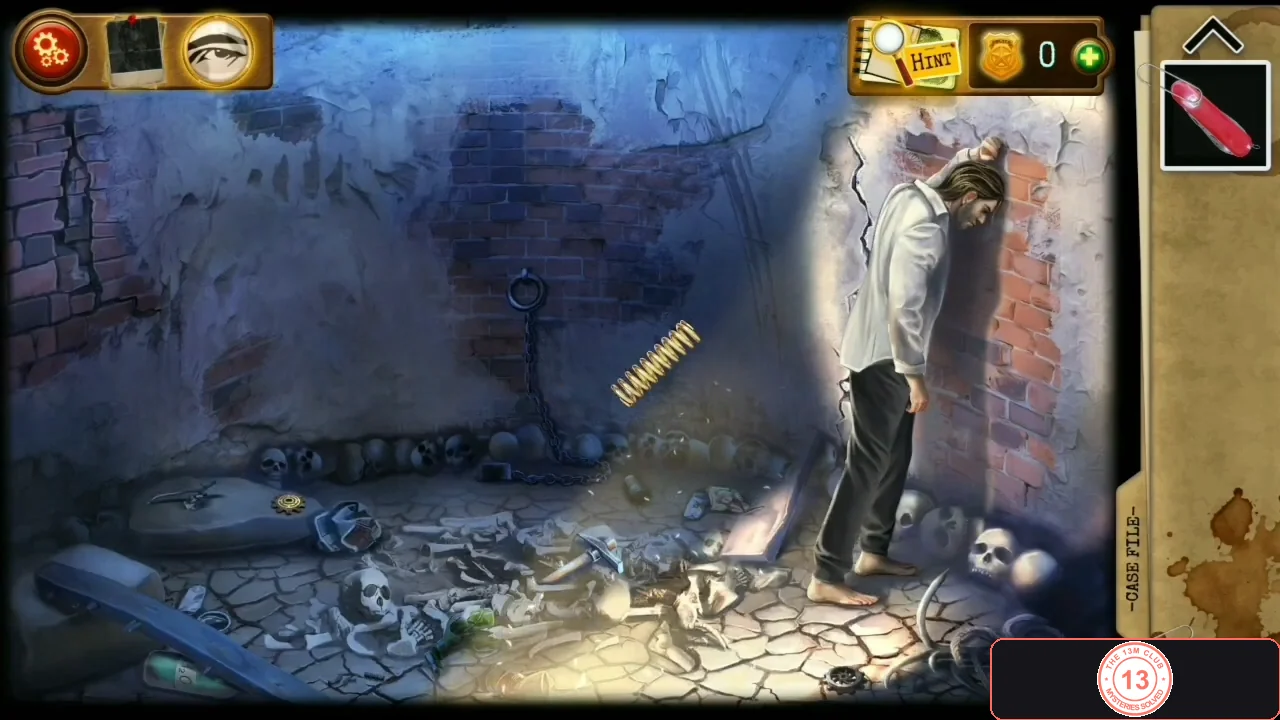
Free and revive Mr. Simmons, help him break through the wall, open the skull-coded dial safe and repair the door mechanism to escape.
- Enter the dark cell ('Damn, it's hard to see even with a flashlight'; the Goggles leave your inventory here). Tap Mr. Simmons, use Key 2 on the padlock of his ankle shackle, then use the Epinephrine on him. He wakes up and stands. Key 2 and Epinephrine are used up.
- Collect the items on the cell floor: the Spring, the Bottle of water, two gears and the Pickaxe (by the left wall).
- Combine the Swiss knife with the Bottle of water to get an Opened bottle of water and give it to Simmons ('Here, have a drink, recuperate.'). When he asks 'Hey, Jones, give me a pickaxe', give him the Pickaxe. He breaks the wall open, revealing a metal door: 'There is a mechanism here. The lid is bolted.'
- Tap the skull pile on the floor ('Skull's size Small -> Large'). From the smallest skull to the largest the marks are 5 ->, 2 ->, 3 <-, 3 <-, 4 ->, where the arrow is the turning direction. Open the dial safe in the cracked left wall ('Turn the dial to enter the code.') and turn right to 5, right to 2, left to 3, left one more full turn back to 3, then right to 4. Take the two gears and the Screwdriver.CODER5-R2-L3-L3-R4
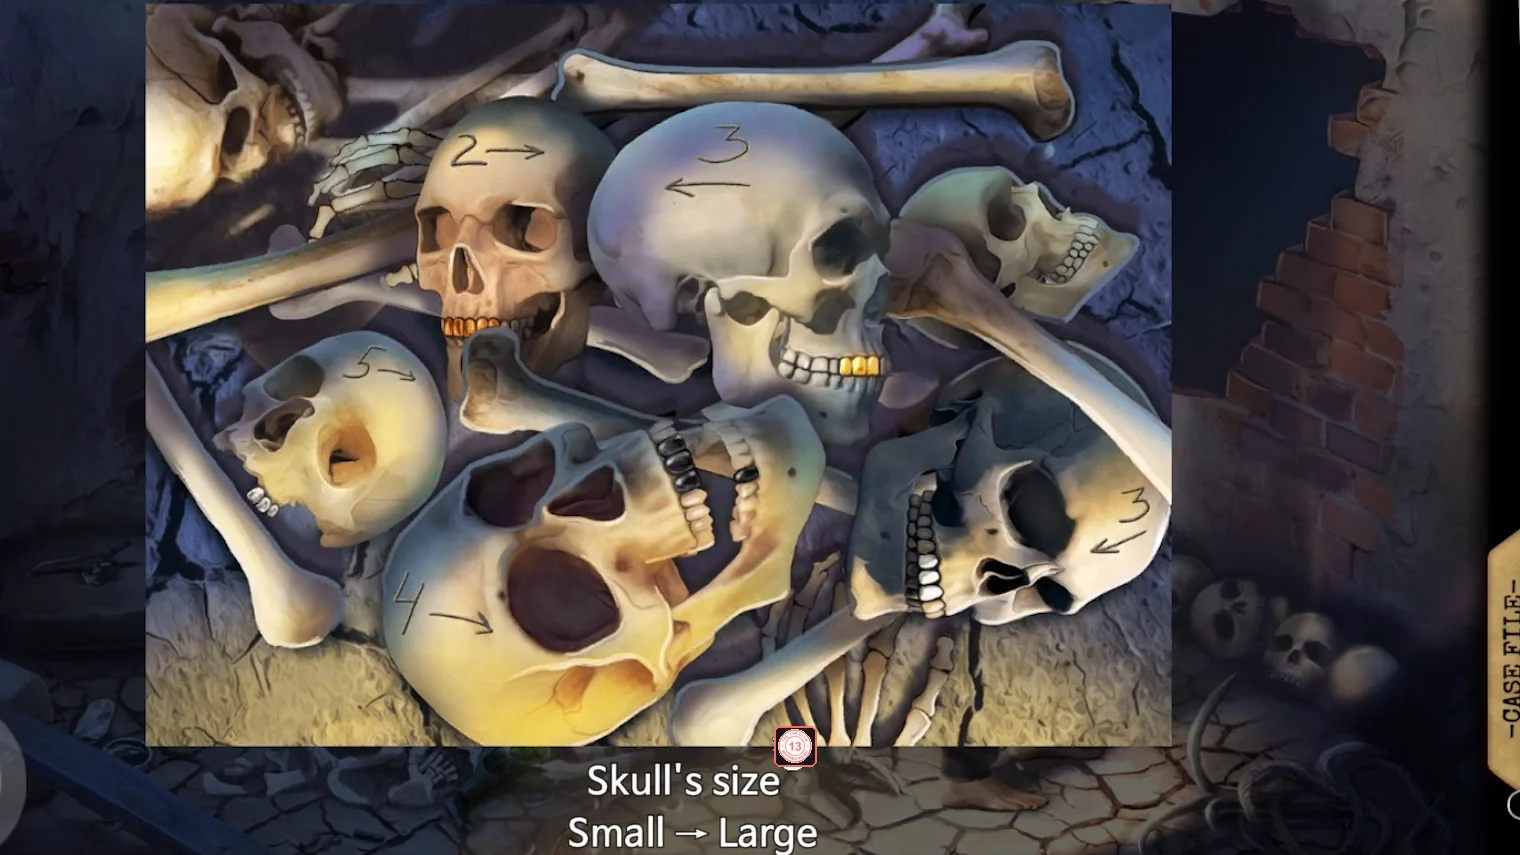
The skull clue. From the smallest to the largest skull: 5 ->, 2 ->, 3 <-, 3 <-, 4 ->. - Use the Screwdriver on the two screws of the lid above the metal door. 'Line up the gears and springs in the right order to get the mechanism working': put the Spring in the empty chamber on the left, then place the gears on the pegs so that they mesh into one chain from the small gear at lower left up to the toothed bar. The bar moves, the door opens and the chapter ends.
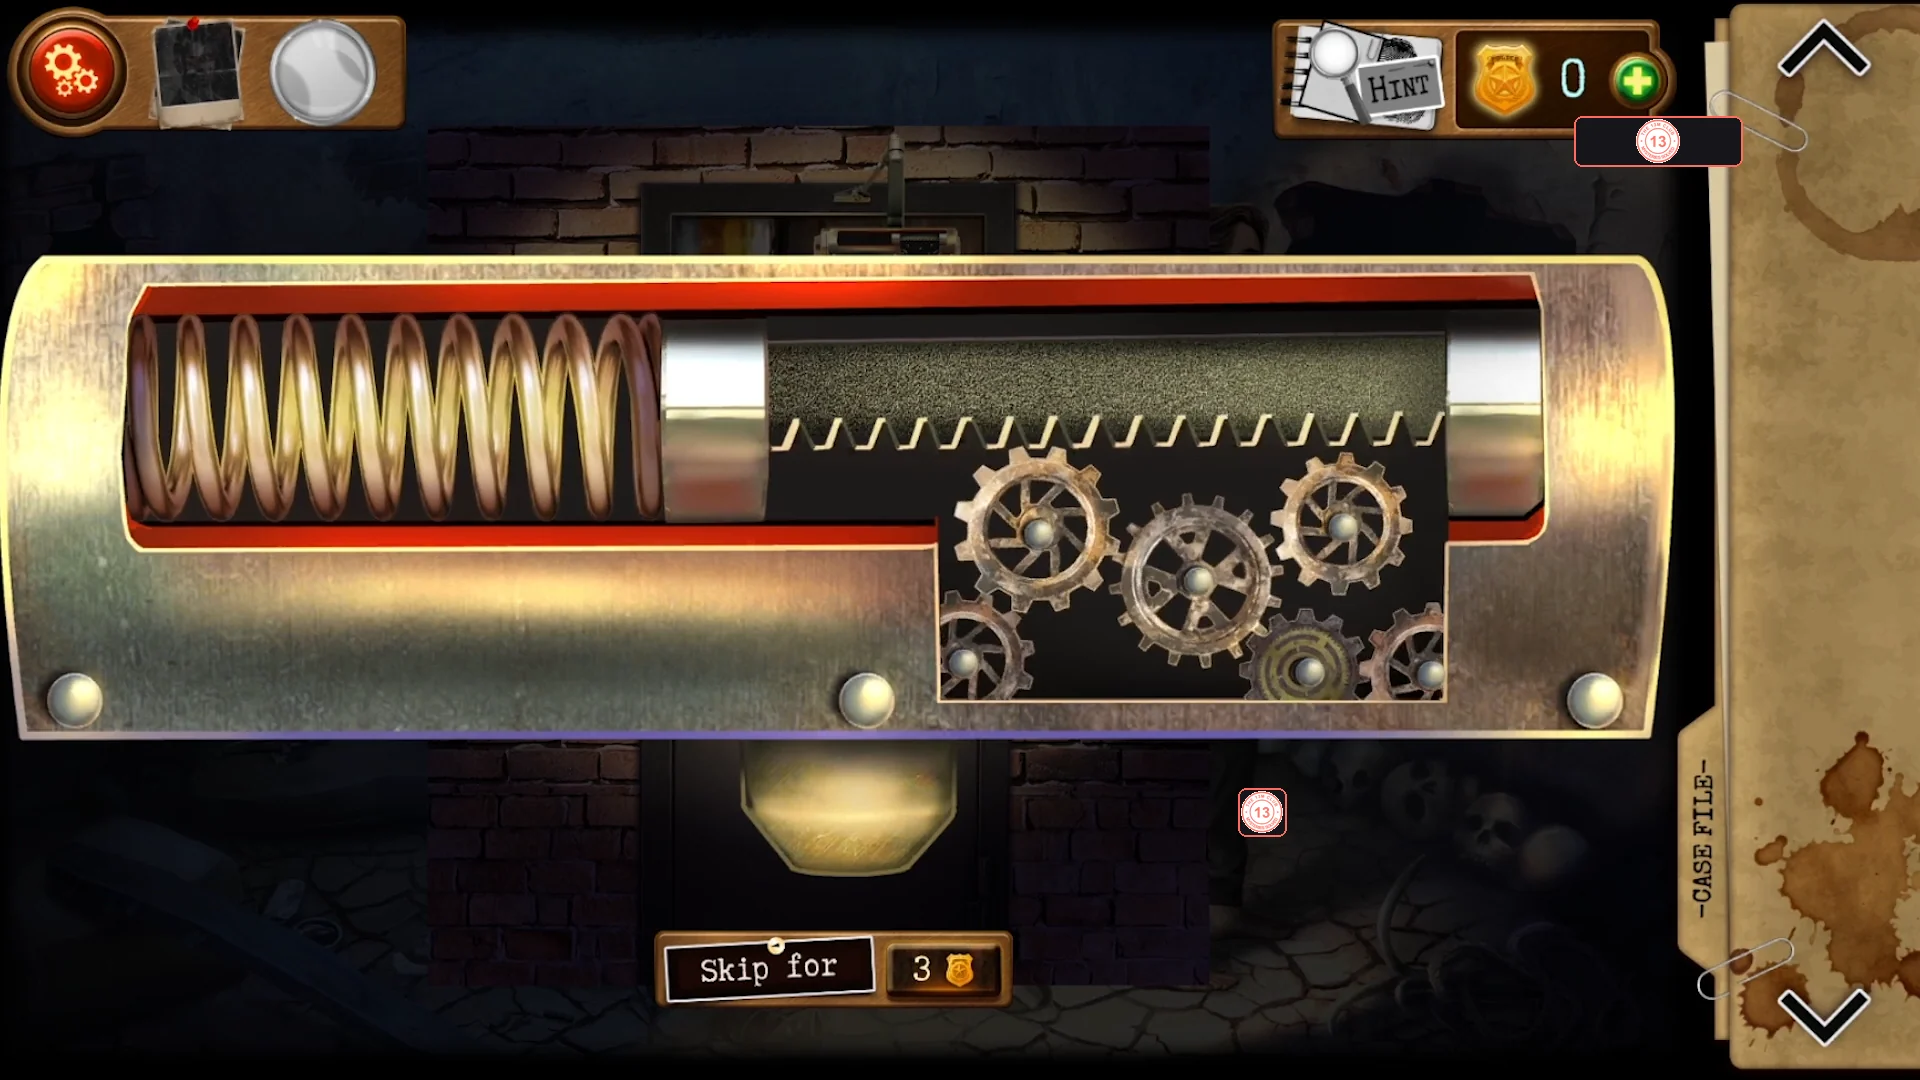
The finished door mechanism: spring in the left chamber and all gears meshing up to the toothed bar.