Chester's yard: doghouse, angel statue discs and front door
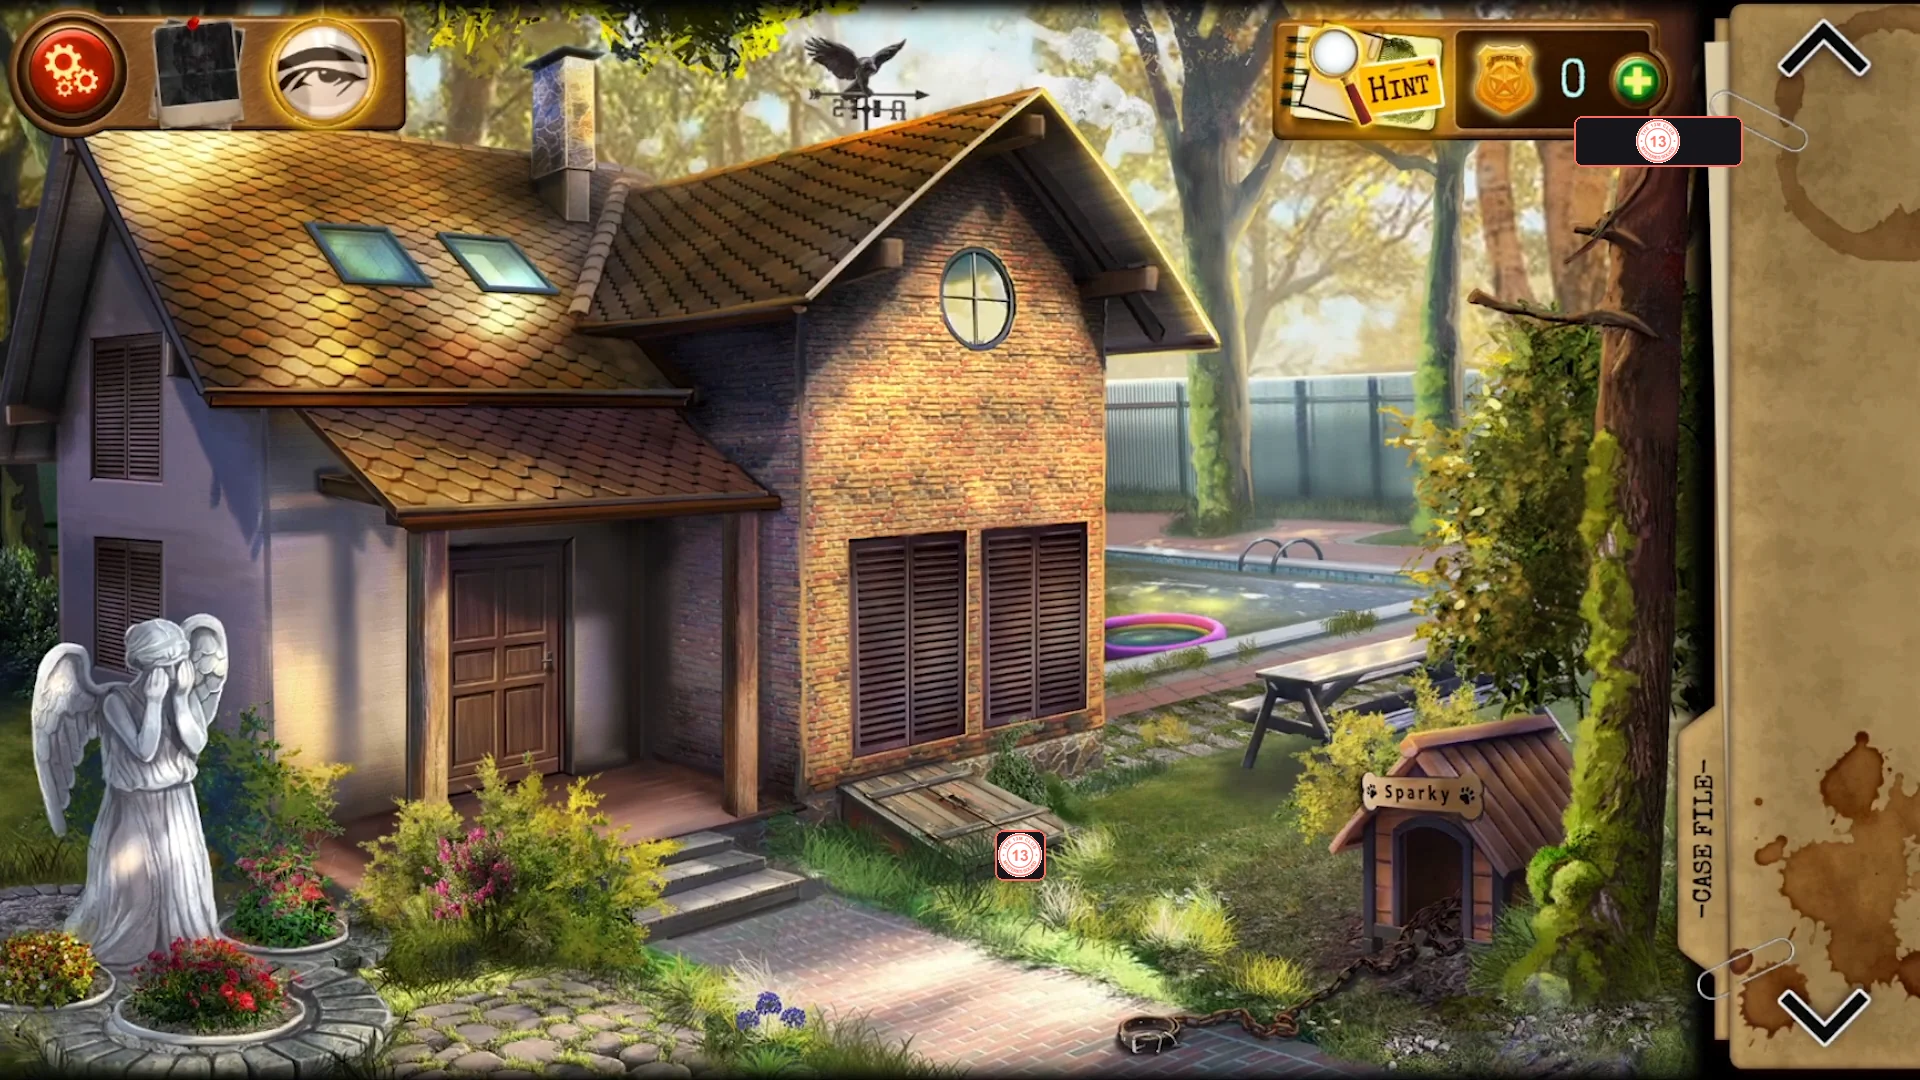
You arrive in the yard of Chester's country house. Clear the doghouse for tools, dig up the three flowerbeds at the angel statue, solve the three spinning stone discs and take the House key to open the front door.
- Tap the doghouse labelled 'Sparky'. Move the clutter aside and take the Screwdriver (thin, dark handle), the Shovel, the sledgehammer (inventory name 'Hammer') and the round knob 'Bedside table handle'. A polaroid of an ID badge is taken (Case File entry).
- Tap the flowerbeds at the foot of the angel statue and use the Shovel on each of the three beds. Each reveals a round carved stone disc. The Shovel is used up.
- Tap each disc and spin its rings until the picture is whole: the left disc shows a padlock, the middle disc an eagle in flight and the right disc a cherub holding a finger to its lips.
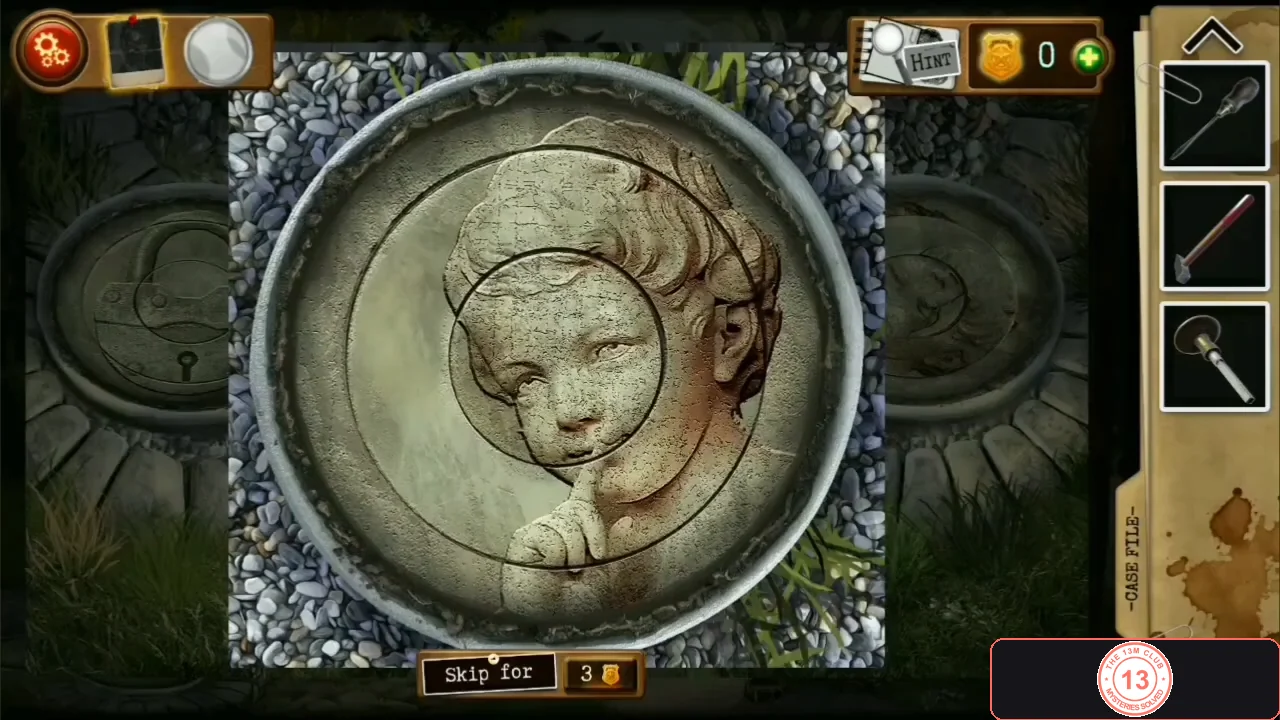
The right-hand disc completed: a cherub holding a finger to its lips. The other two discs show a padlock and an eagle in flight. - Back in the yard the angel statue has moved ('Now, the main thing is not to blink, right?'). Take the House key from the statue's hand, then use it on the locked front door.
Hallway: shoe drawer, floorboards and wardrobe levers
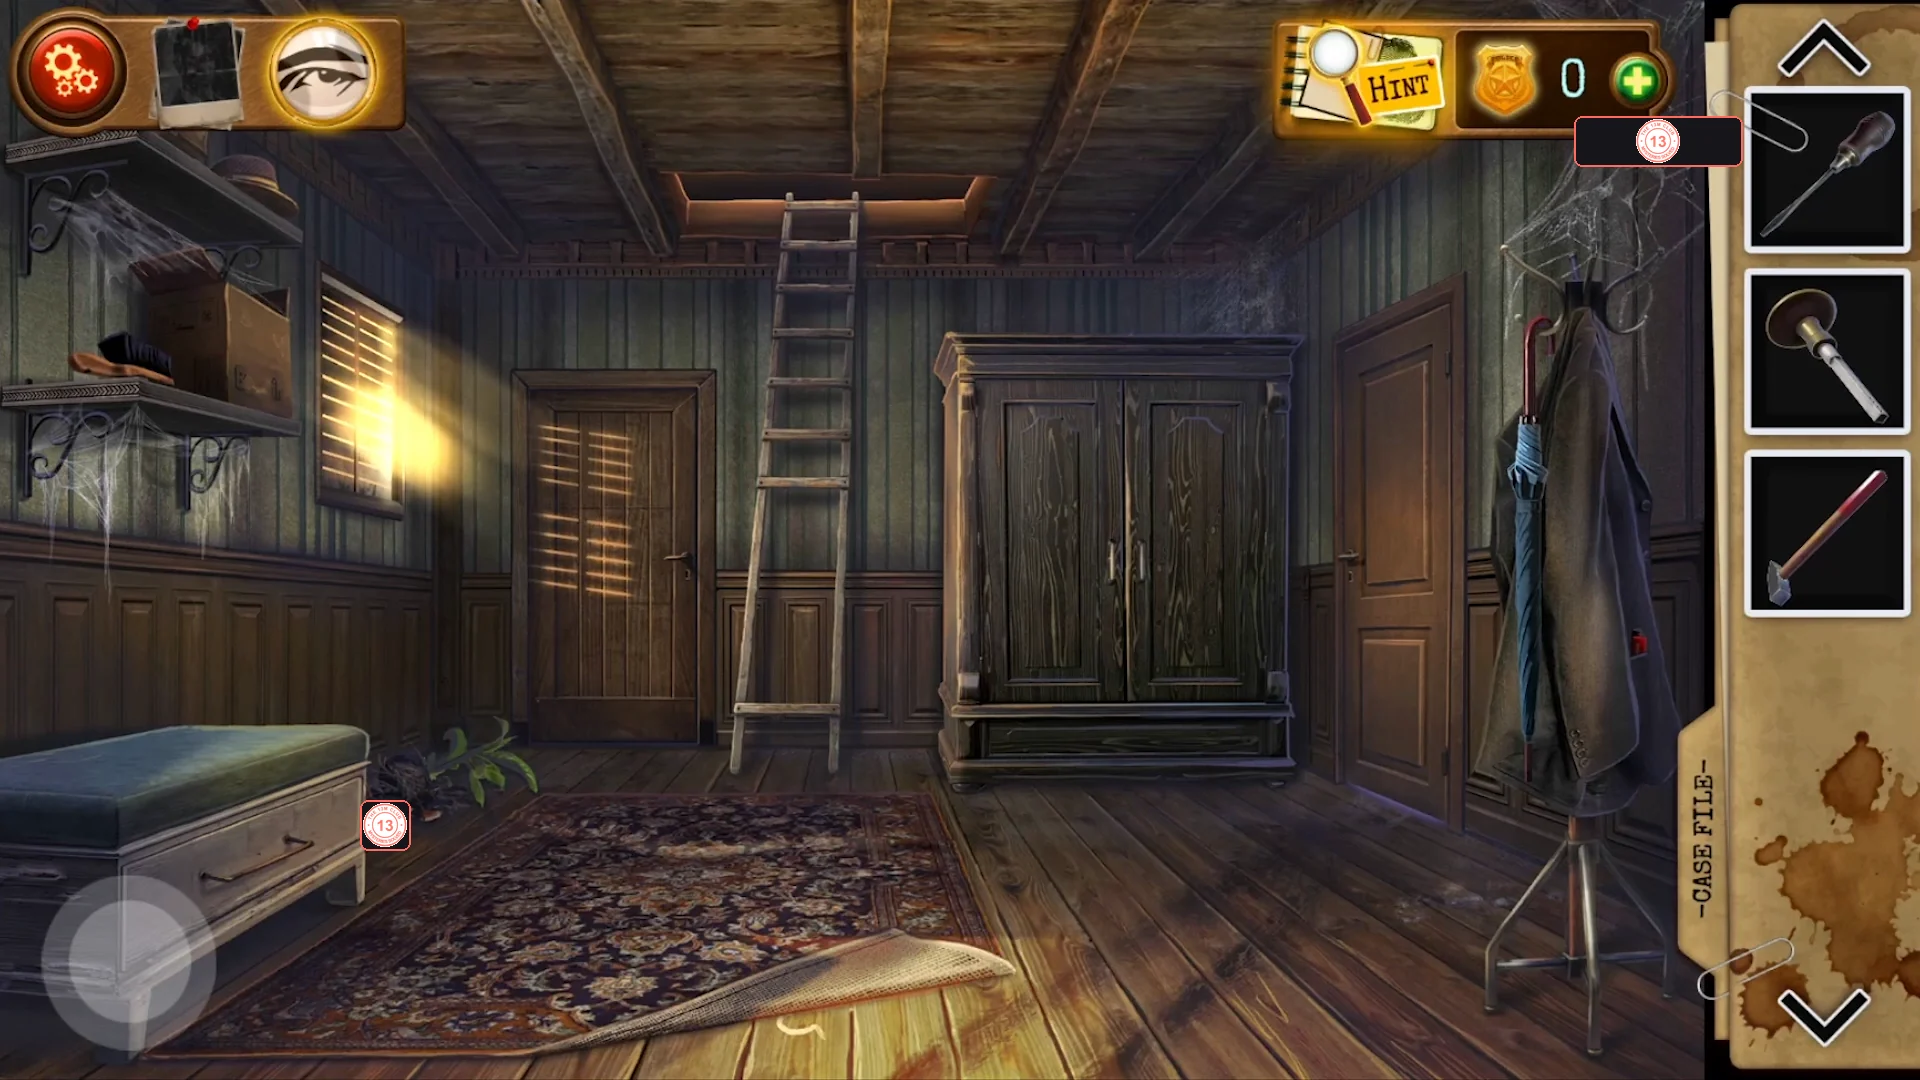
Inside the hallway, pair up the shoes in the bench drawer to unlock the wardrobe, note the carved floorboards under the rug, then set all wardrobe indicators to green for the Office key.
- In the hallway, pick up the Shoe Brush lying on the floor at the foot of the attic ladder.
- Open the drawer of the bench on the left and take the wooden plank (a ladder 'Step'). Then tap shoes to swap them until every pair sits side by side: red high-tops, brown brogues, grey sneakers and flip-flops. The starting order differs between playthroughs; just pair the matching shoes. 'Hmm. Weird... The closet opened.'
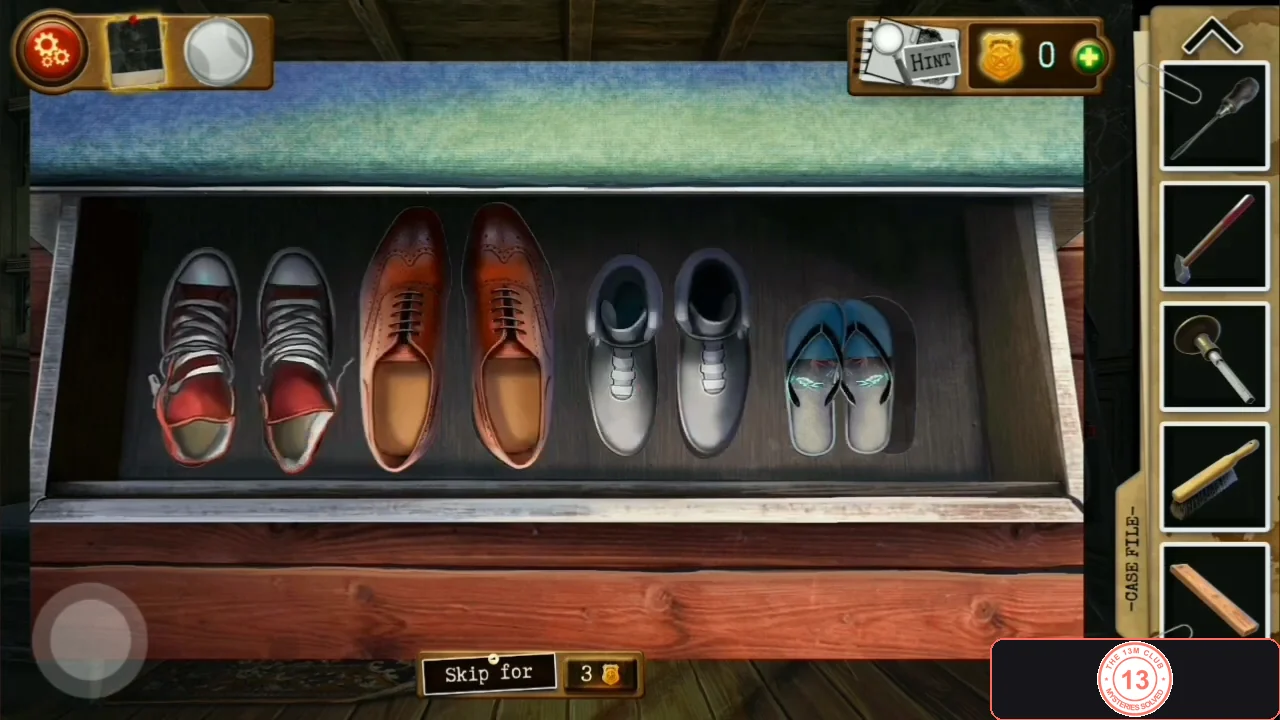
The shoe drawer solved: each pair sits side by side. - Tap the turned-up corner of the rug: carved floorboards read 'HE will not tell you anyThinG' with a hand making a 'shush' sign and the number 9. A polaroid is taken (Case File entry). You cannot lift the boards by hand yet.
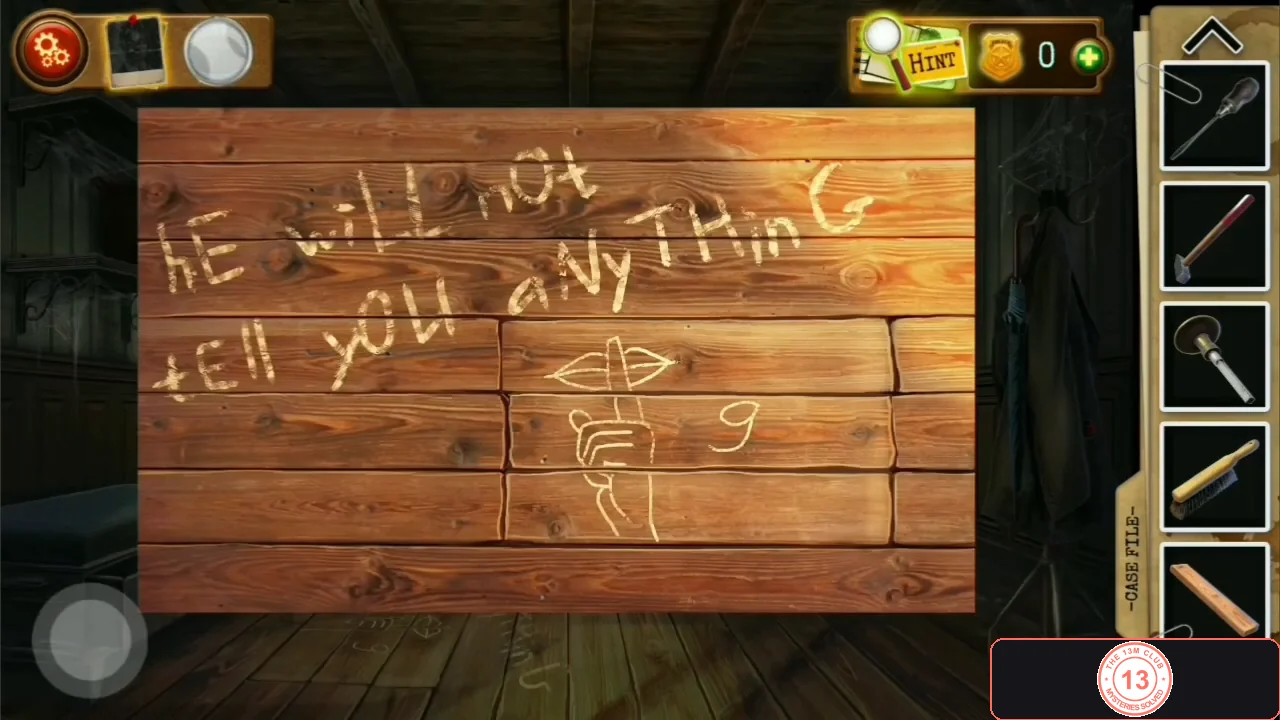
The carved floorboards under the rug: the shushing hand is marked 9. - Open the wardrobe and push the clothes aside to reveal six squares with levers ('Press the levers to switch the indicators on the squares. Put a green indicator on all the squares.'). Pressing a lever switches its own square and the squares directly to its left and right. The starting lights differ between playthroughs. Method: work from the left - whenever a square has no green light, press the lever under the next square to its right; this fixes it without disturbing the squares already done. If at the end only the last (sixth) square is left without green, press levers 1, 2, 4 and 5. When all six are green the lower compartment opens: take the Office key and the red lighter.
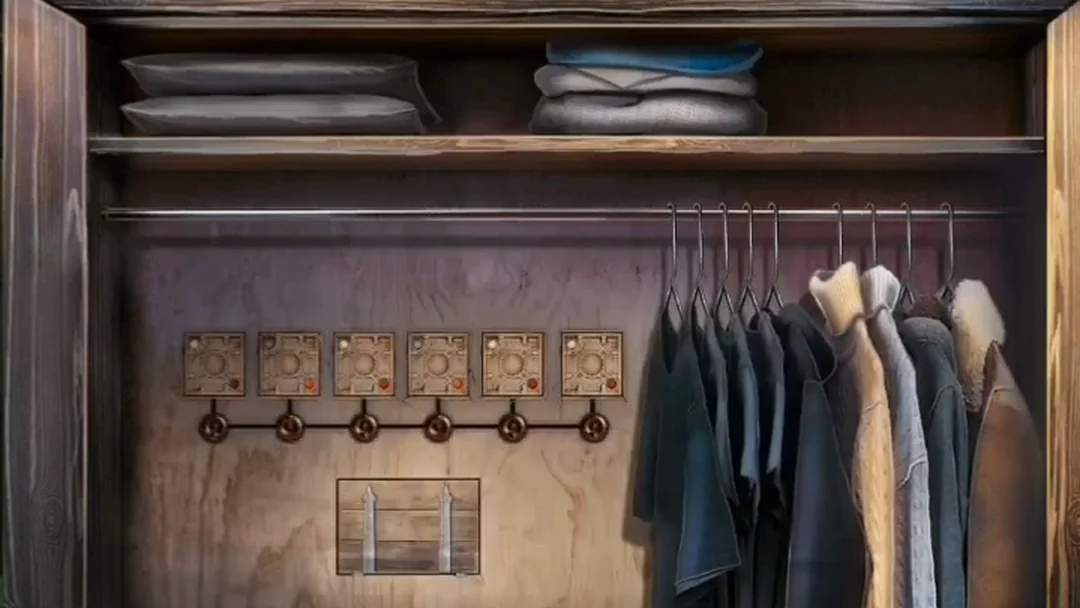
The six indicator squares and levers in the wardrobe. Each lever switches its own square and the squares on either side.
Chester's office: bedside drawer, bookshelf and desk
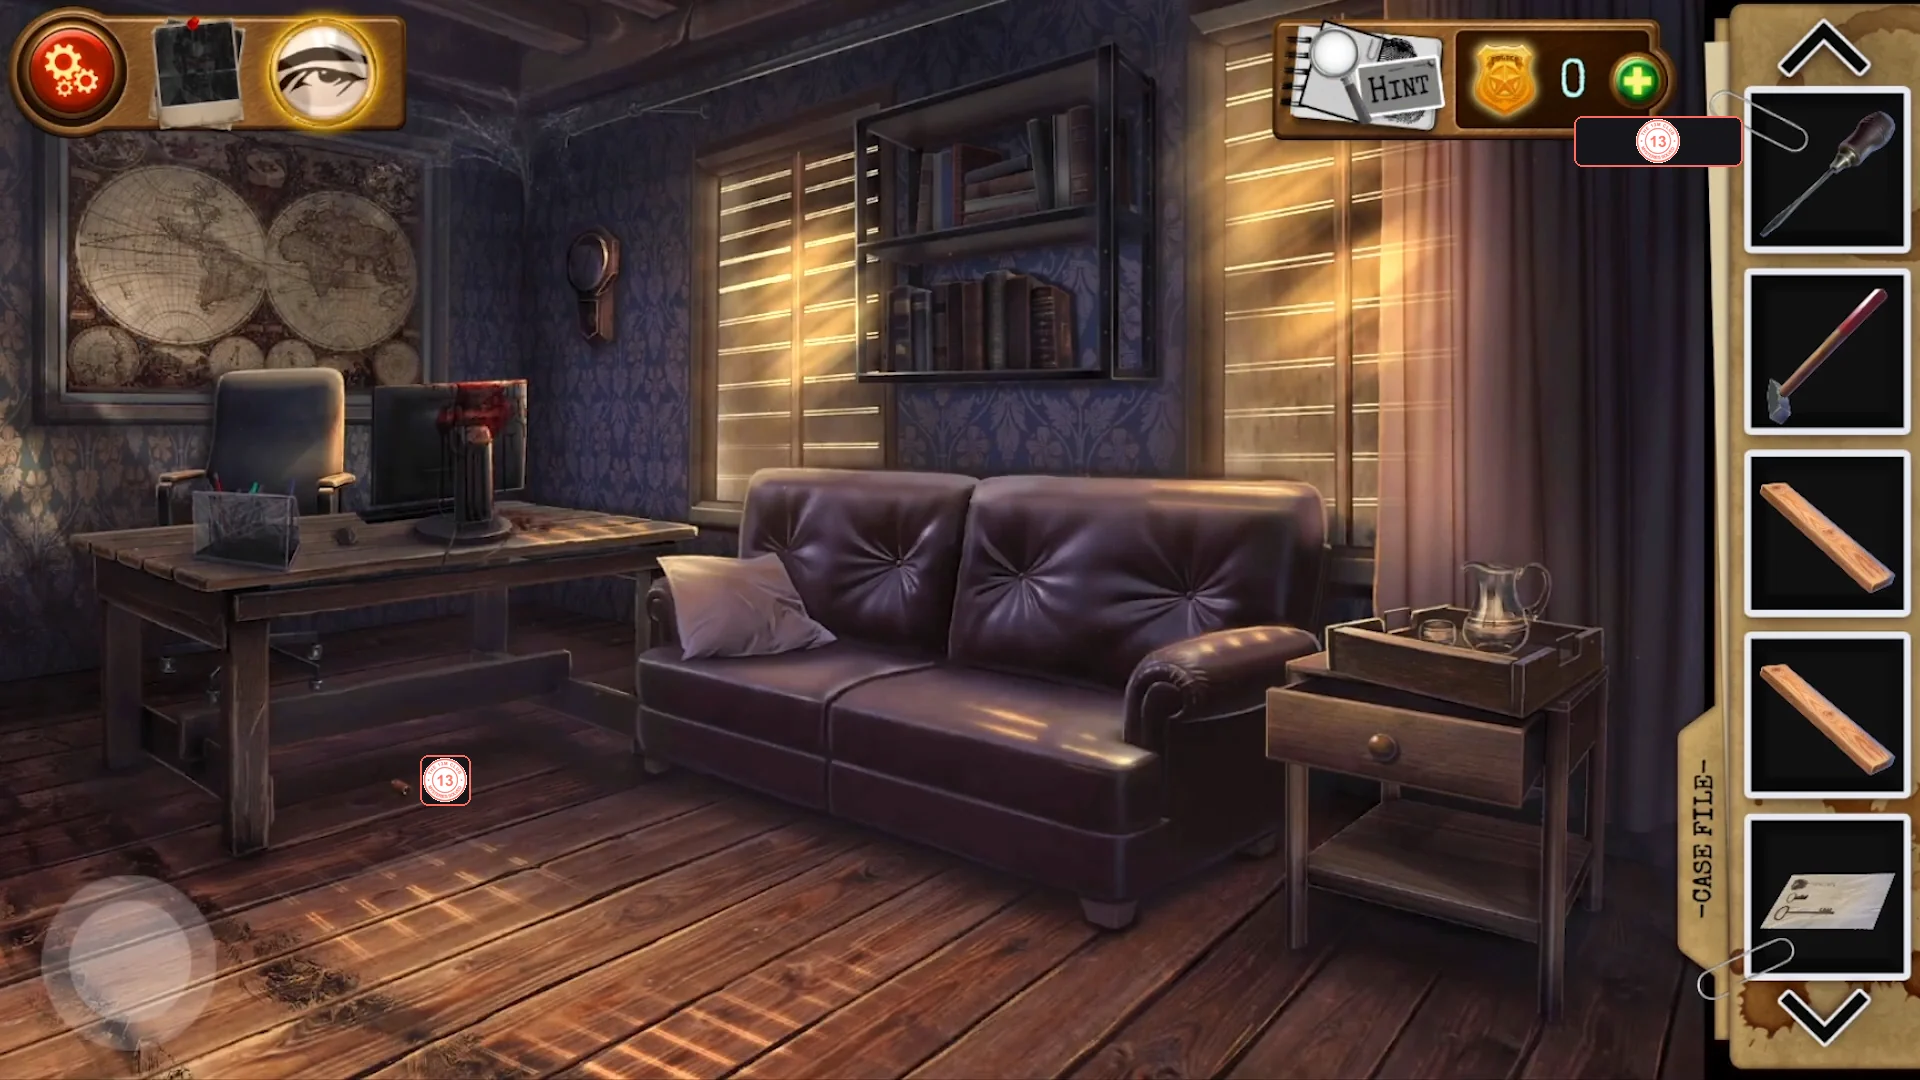
Unlock the office with the Office key. Collect a plank, the key drawings, a screwdriver from the bookshelf and the Storage room key from the desk.
- Use the Office key on the locked office door in the hallway. On entering, a polaroid of a shell casing is taken automatically (Case File entry).
- Tap the bedside table next to the sofa ('...how can I open it? What should I grab?'), attach the Bedside table handle and open the drawer. Take the wooden plank (Step) and the sheet with drawings of keys.
- Tap the bookshelf above the sofa and take the cutting tool with a round black-and-red bulb handle. It is used later to cut keys; it is not the screwdriver.
- Tap the desk: the monitor is covered in blood ('Damn, someone's brains were blown out right on the monitor.'). Take the Storage room key from the pen holder on the desk.
Storage room: jar labels and the screwed wall plate
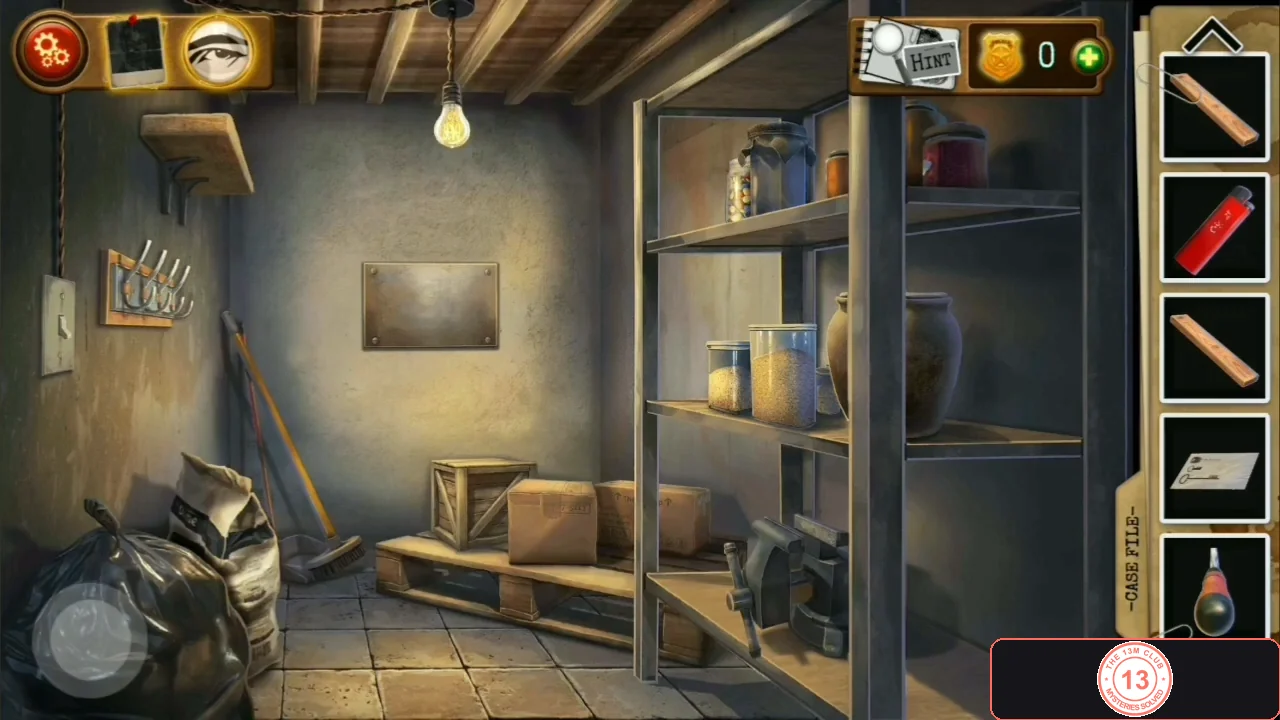
Open the storage room, take the rag, pin the key drawings behind the vise, fix the jar labels to get the alcohol, and unscrew the wall plate for a plank, an oil lamp and a photo album.
- Use the Storage room key on the storage-room door in the hallway and go in ('Blinks as if there is a very weak supply of electricity...').
- Take the rag (towel) hanging on the wall hooks. Tap the vise and place the Key drawings sheet on the board behind it.
- Tap the shelves of jars and drag the labels between jars until each label matches what is inside (olives, cucumbers, jam, the bottle marked C2H5OH and so on). The starting mix differs between playthroughs, so match by looking at each jar's contents. 'Now the stickers are in their places, the most useful thing here is ethanol.' Take the Alcohol bottle.
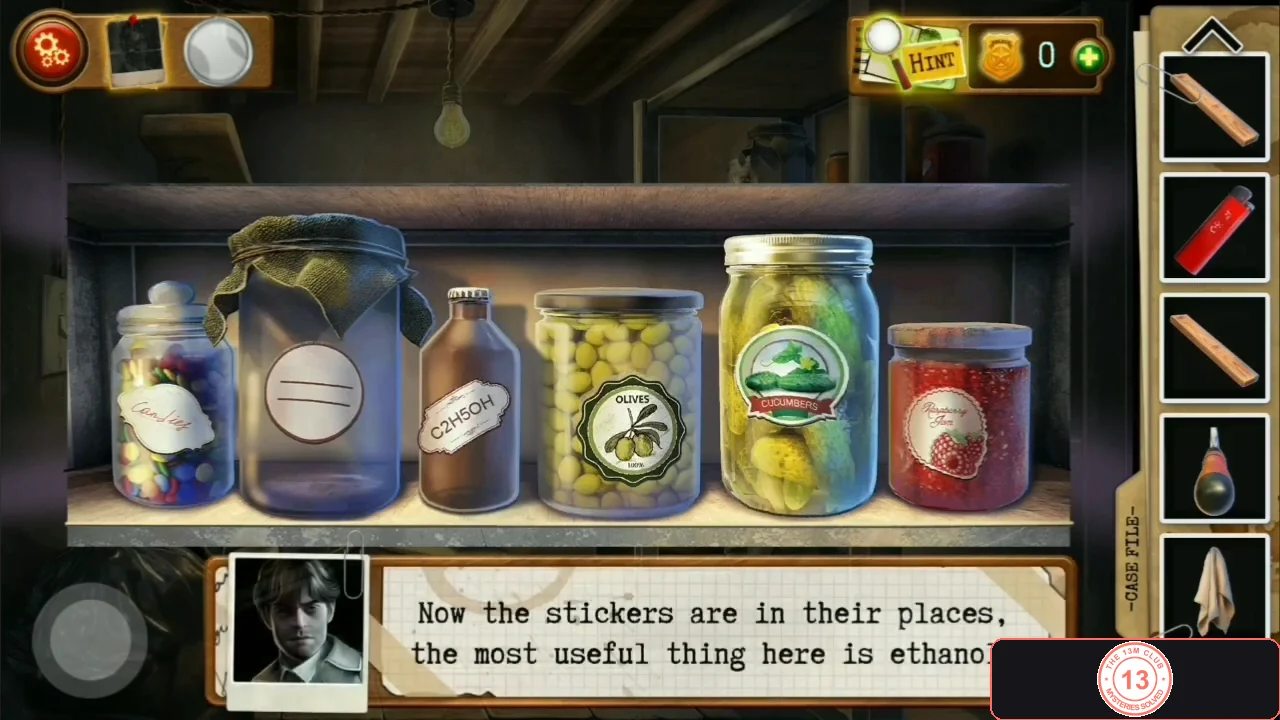
The jar labels in their correct places. The bottle marked C2H5OH is the alcohol. - Tap the metal plate on the wall and use the Screwdriver from the doghouse on its four corner screws (the Screwdriver is used up). In the niche behind it take the wooden plank (Step) and the oil lamp, and open the photo album: a photo of a girl in a yellow princess dress is marked 4 ('This is Chester's daughter.').
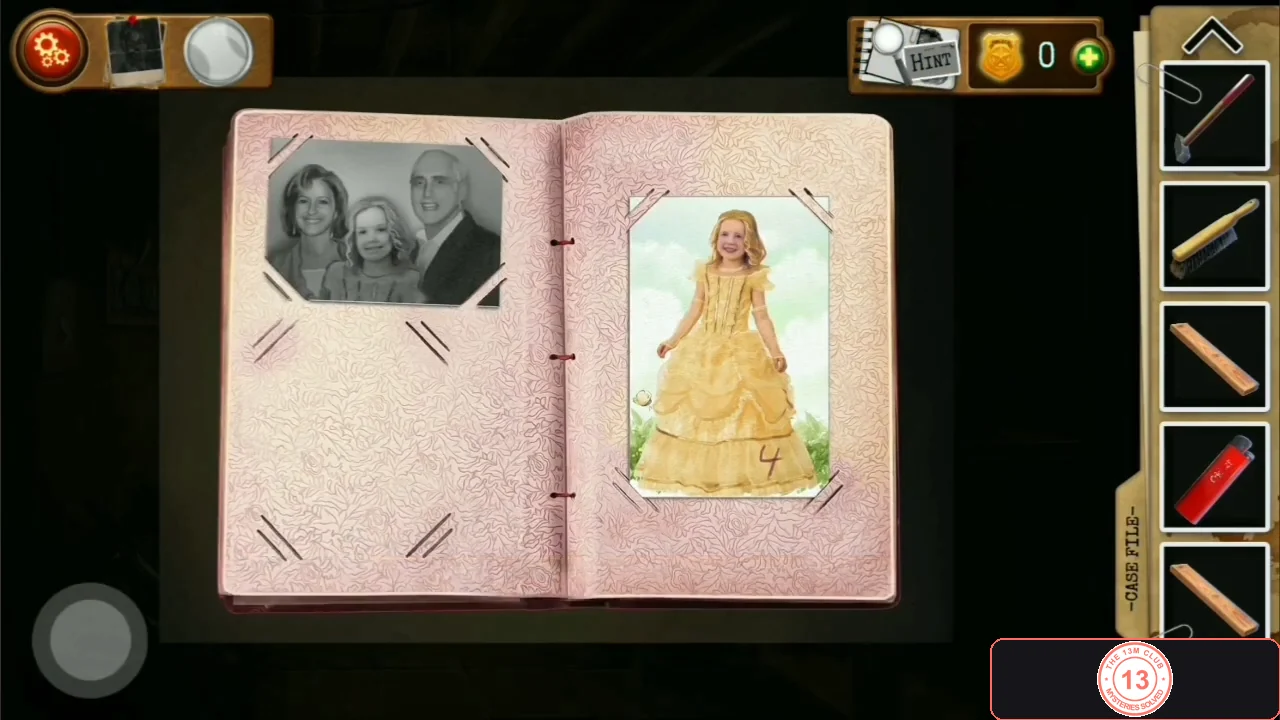
The photo of Chester's daughter in the album: the little princess is marked 4.
Attic: ladder repair, number lock, Gamebox and stepladder
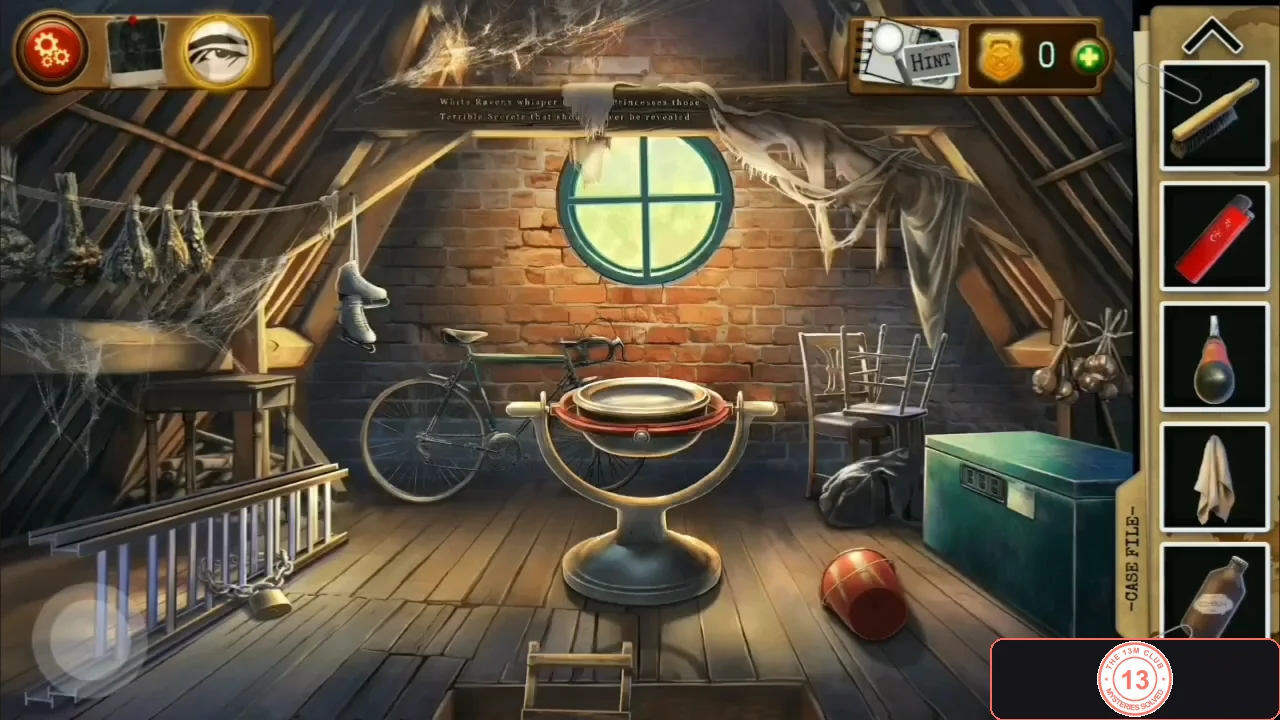
Repair the attic ladder with the three planks, then in the attic collect the bucket and bicycle chain, read the inscription, open the chest with 144, win the Gamebox mini-game and free the stepladder.
- In the hallway, tap the broken attic ladder and place the three planks (Steps) in the gaps, then hit them with the Hammer (sledgehammer). Climb into the attic.
- In the attic take the red bucket from the floor and tap the bicycle to take its chain. (The stepladder on the left is chained: 'I have to get rid of the chain first...')
- Easy to miss (Case File entry): tap the inscription on the beam above the round window - 'White Ravens whisper to Little Princesses those Terrible Secrets that should never be revealed' - for a polaroid. No mechanism needs the tap, but the inscription is also the key to the computer password at the end of the chapter.
- Tap the green chest. The note beside its 3-digit lock shows 13 21 34 55 89; each number is the sum of the two before it, so the next is 55 + 89 = 144. Dial 1-4-4. Inside is a locked safe (it opens later).CODE144
- Tap the Gamebox and use its arrow buttons to keep the square around the moving dot until the bar at the top fills ('Kids get dumb of such games...'). Take the Chain lock key that pops out and the mesh pouch (Bag of blanks).
- In the inventory, drag the Rag onto the Alcohol bottle to make 'Cloth in alcohol'.
- Use the Chain lock key on the padlock of the chained stepladder on the left and take the Ladder.
Monitor, pool and weather vane
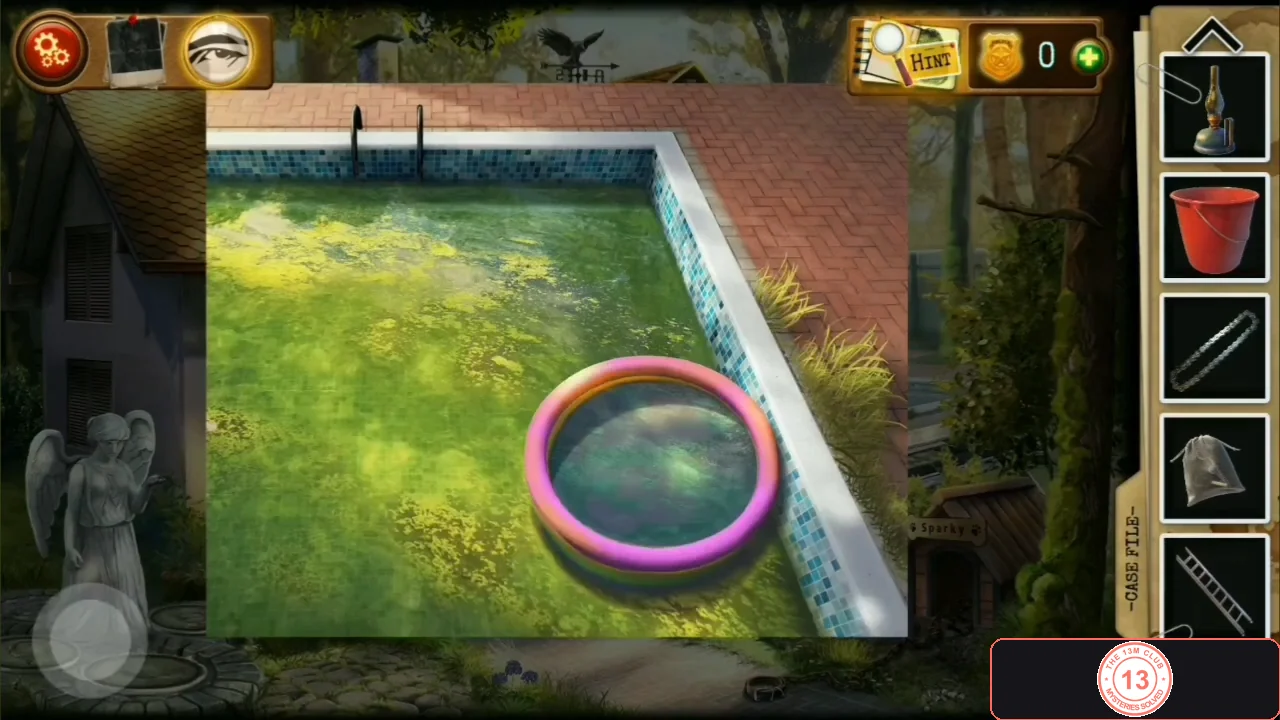
Clean the office monitor, bail out the paddling pool for the Locker key, and climb onto the roof to take the switch lever and turn the weather vane to its correct position (number 2).
- In the office use Cloth in alcohol on the bloody monitor. It is clean, but there is not enough power to switch it on yet.
- In the yard tap the inflatable paddling pool in the overgrown swimming pool and use the Bucket on it (three scoops) to bail out the water. Take the Locker key from the bottom.
- Place the Ladder against the house wall and tap the weather vane on the roof. Pick up the Lever (a two-pronged metal switch handle) lying on the roof, then turn the raven vane until it faces you with spread wings and shows the number 2 ('And here is the correct position.'). Remember: White Ravens = 2.
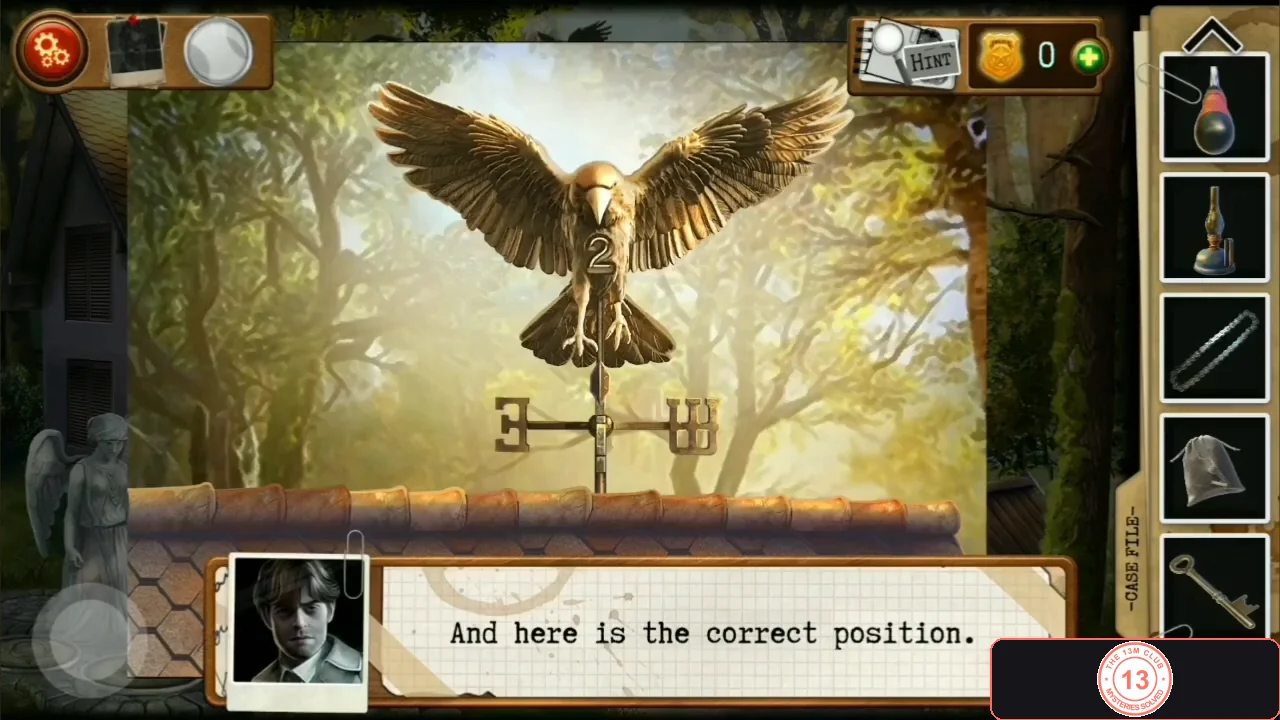
The weather vane in its correct position, showing 2.
Storage room vise: cutting three keys
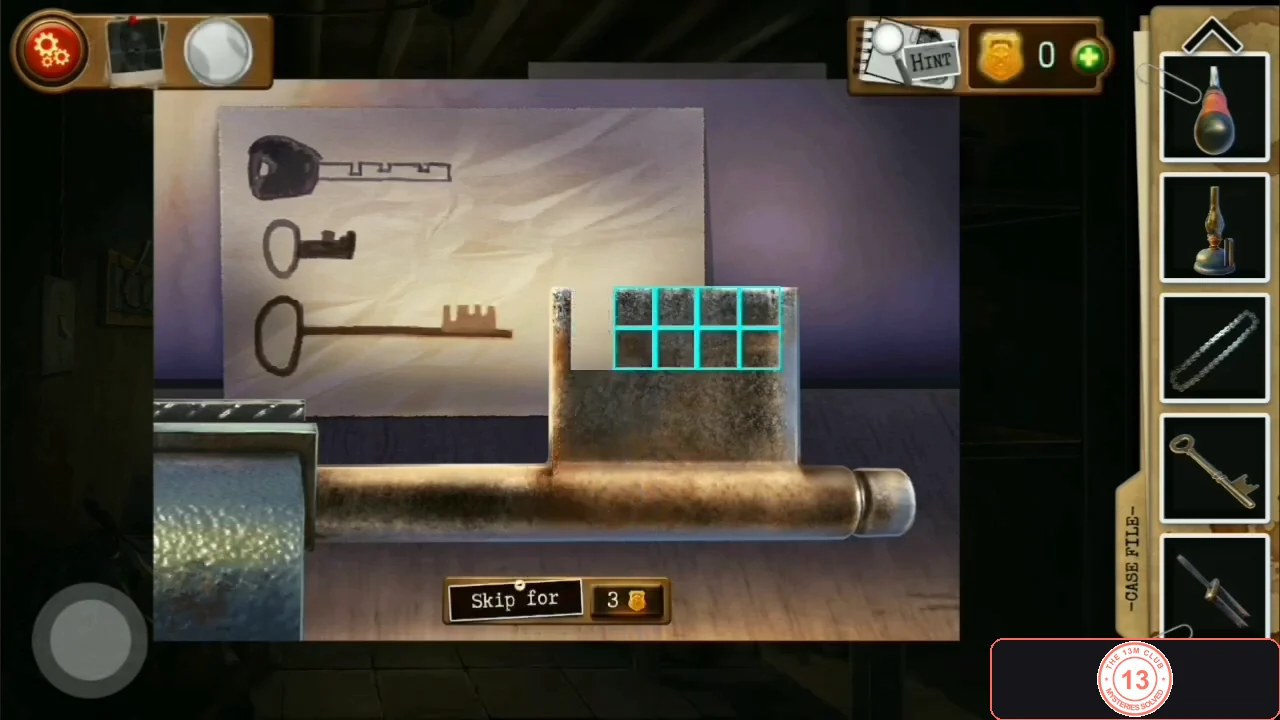
Put the Bag of blanks in the vise and cut the teeth of three key blanks to match the key drawings pinned behind it.
- In the storage room, tap the vise and use the Bag of blanks on it. For each blank ('By pressing, cut out the teeth on the key blank.') tap grid cells to cut them away (the bulb-handled tool does the cutting) until the blank's outline matches the matching key on the drawing pinned behind the vise. Cut the big old key first, then the car key, then the small key; compare the teeth with the drawing column by column. A wrong cut turns the grid red ('Looks like I was wrong.') and resets that key.
Cellar, colour panel and crate: letters W and N
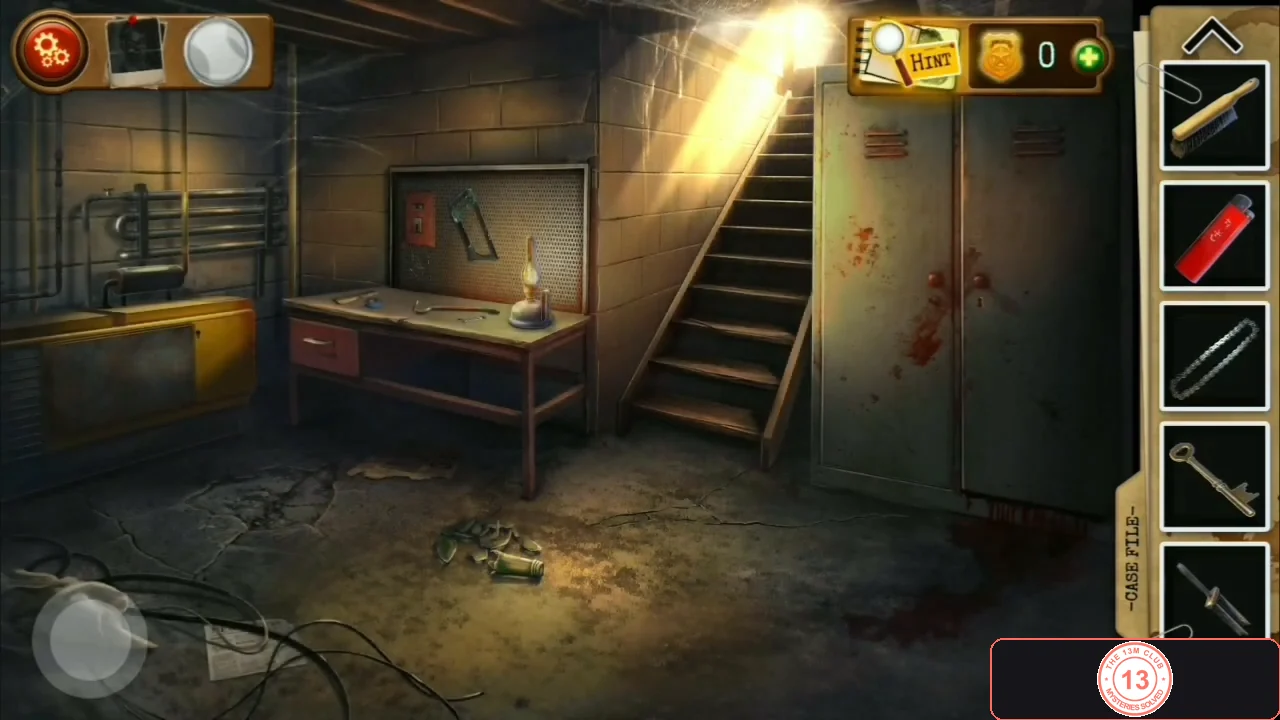
Open the cellar with the cut big key, light it with the lamp and lighter, collect tools, melt the wax seals on the yellow machine, then pry the hallway boards for a colour-memory panel (letter W) and open the crate (letter N).
- In the yard, use the big cut key ('Basement key') on the cellar doors and go down. In the dark, place the oil lamp on the workbench and light it with the lighter.
- Tap the workbench: open the drawer and take the three screwdriver bits, and take the crowbar lying on the bench. Attach the Lever (from the roof) to the switch box on the pegboard; it will not move yet ('It doesn't succumb... It needs to be lubed up').
- Tap the yellow machine on the left and use the lighter on the four yellow wax seals over the corner screws of its cover.
- In the hallway, lift the rug corner again and use the crowbar on the carved boards. Behind them is a panel of coloured buttons: watch each flashing sequence and repeat it. The sequences are random, so copy what you see; the run shown needed three rounds. Take the letter W.
- In the storage room use the crowbar on the wooden crate and take the letter N from the straw.
Attic compass, oiled switch, yellow machine screws and the locker
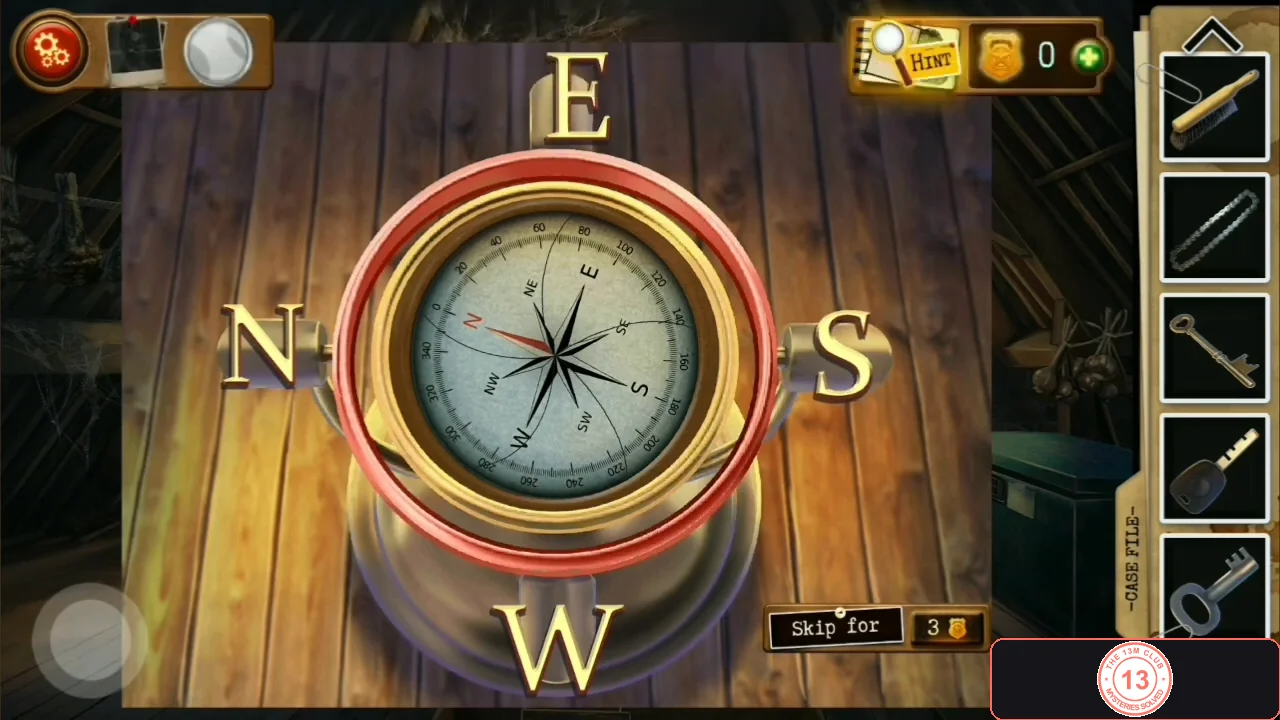
Complete the attic compass with W and N for an electric screwdriver and oil can, oil the stuck switch, unscrew the yellow machine cover with the right bits, and open the bloody locker to find Chester.
- In the attic, tap the compass on the pedestal ('Set the cardinal directions correctly using letters and swipe your finger along the compass...'). Place the letters W and N in the empty slots, then arrange the letters to match the compass dial: W at the top, N on the right, E at the bottom and S on the left, and swipe around the compass. It opens: take the electric screwdriver (yellow drill) and the oil can.
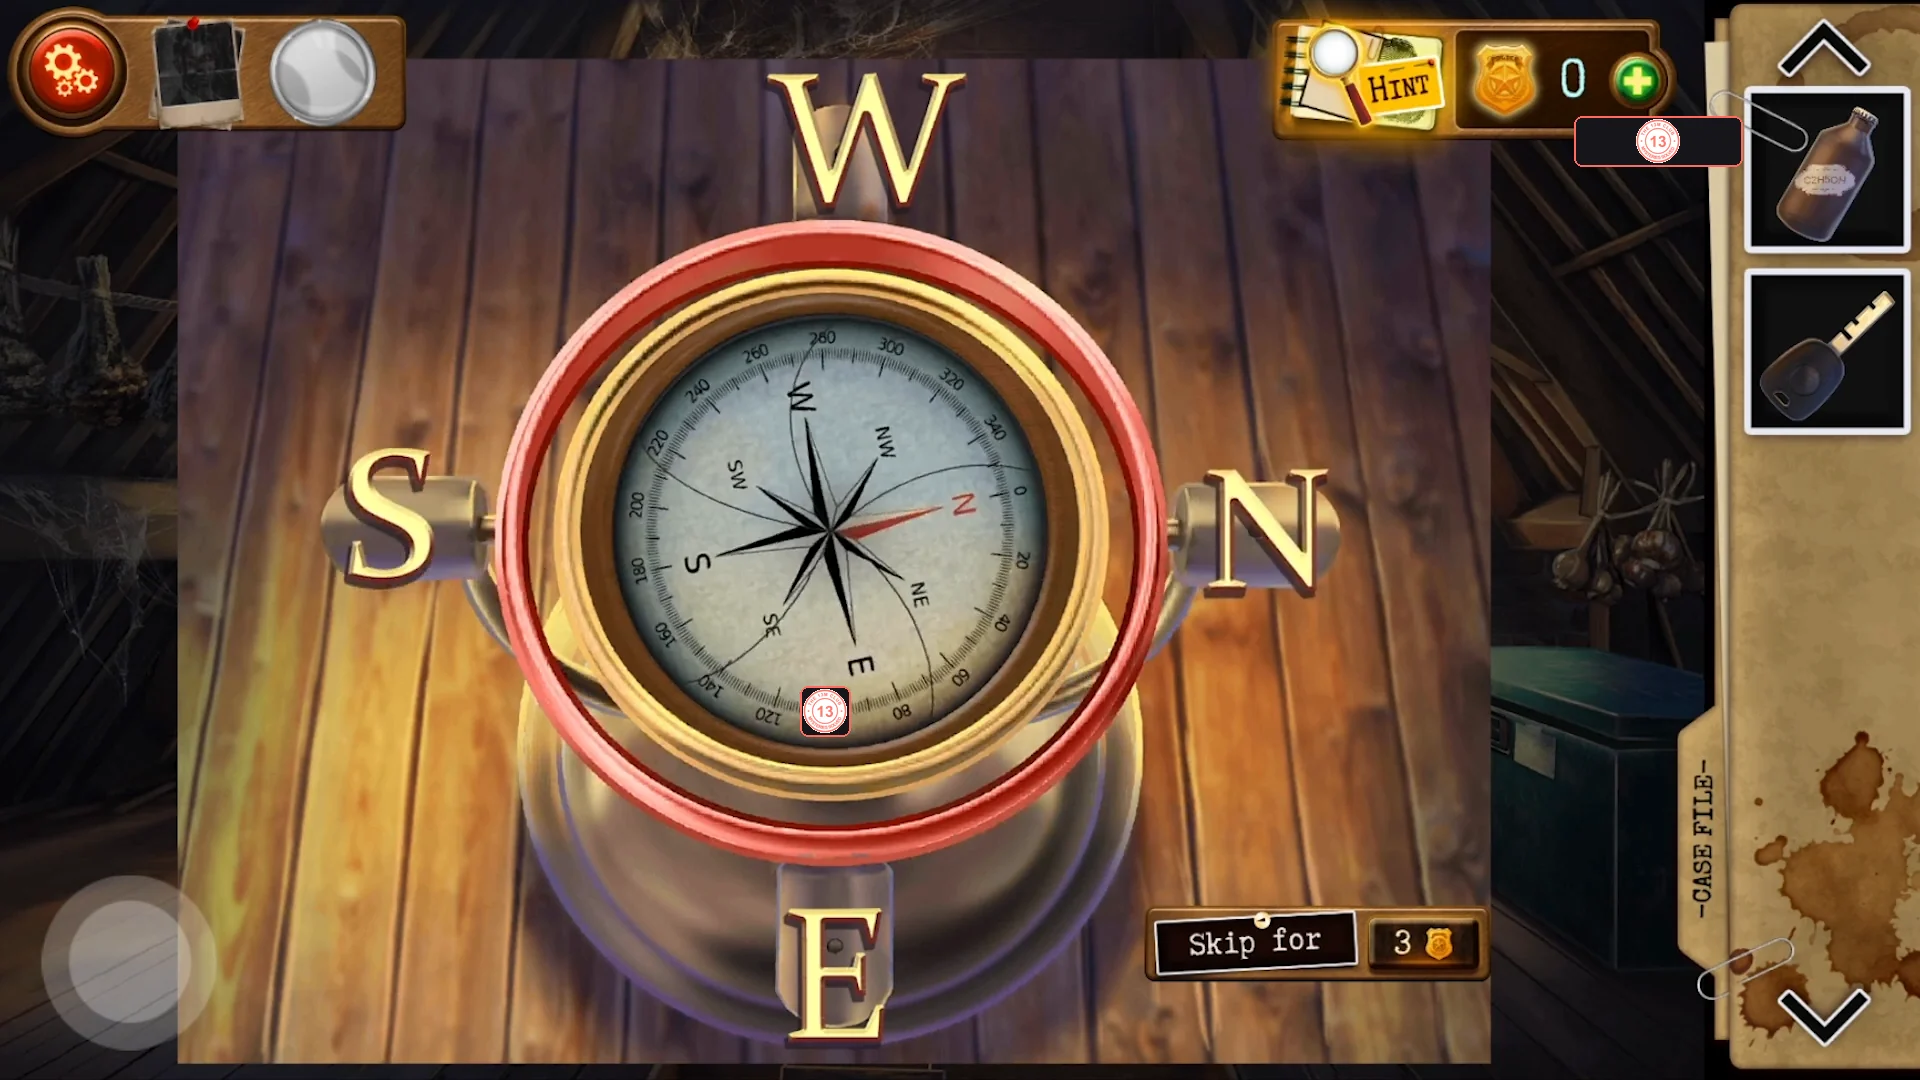
The correct arrangement: W at the top, N on the right, E at the bottom and S on the left. - In the cellar, use the oil can on the stuck switch with the lever at the workbench, then flip it ('And what does it do, I wonder...'). After this, the safe inside the attic green chest is open.
- At the yellow machine use the electric screwdriver on the four screws, fitting the matching bit from the three bits for each screw (a wrong bit gives 'Doesn't fit here.'). The cover comes off, exposing a gear compartment.
- Use the Locker key on the bloody locker on the right. Chester's body falls out ('What the... Chester?!') and a polaroid is taken (Case File entry). Tap his shoe and scrub the sole with the Shoe Brush: it shows a padlock and the number 5. Remember: Terrible Secrets = 5.
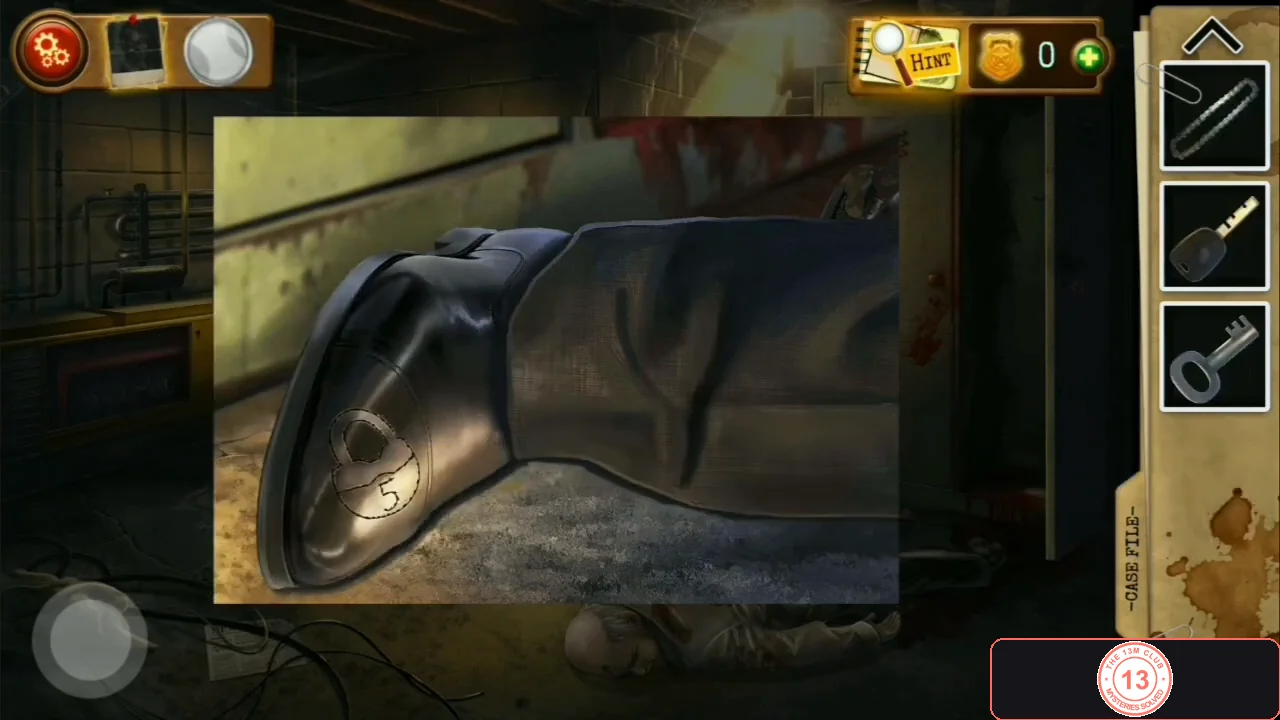
Chester's brushed shoe sole: a padlock with the number 5.
Fuel, gears and chain, then the computer password
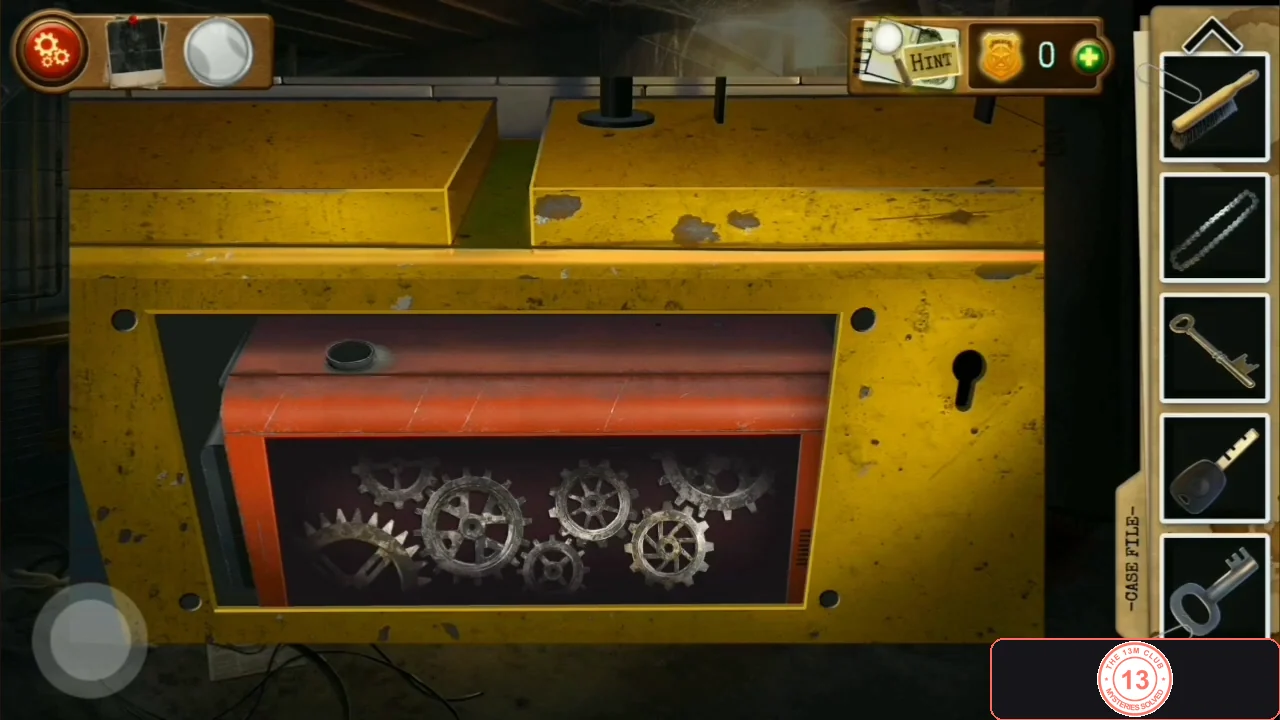
Fetch the fuel can from the now-open safe in the attic chest, fuel and repair the yellow machine with gears and the bicycle chain, start it with the small key, then enter the password 2945 on Chester's computer.
- In the attic open the green chest again: the safe inside is now open. Take the Fuel canister. In the cellar use it on the tank of the yellow machine.
- Tap the gear compartment ('Restore the mechanism by installing the gears and chain correctly.'). Drag the loose gears onto the empty pegs - try them on different pegs until each one meshes with its neighbours into a continuous train - then drag the Chain onto the sprockets.
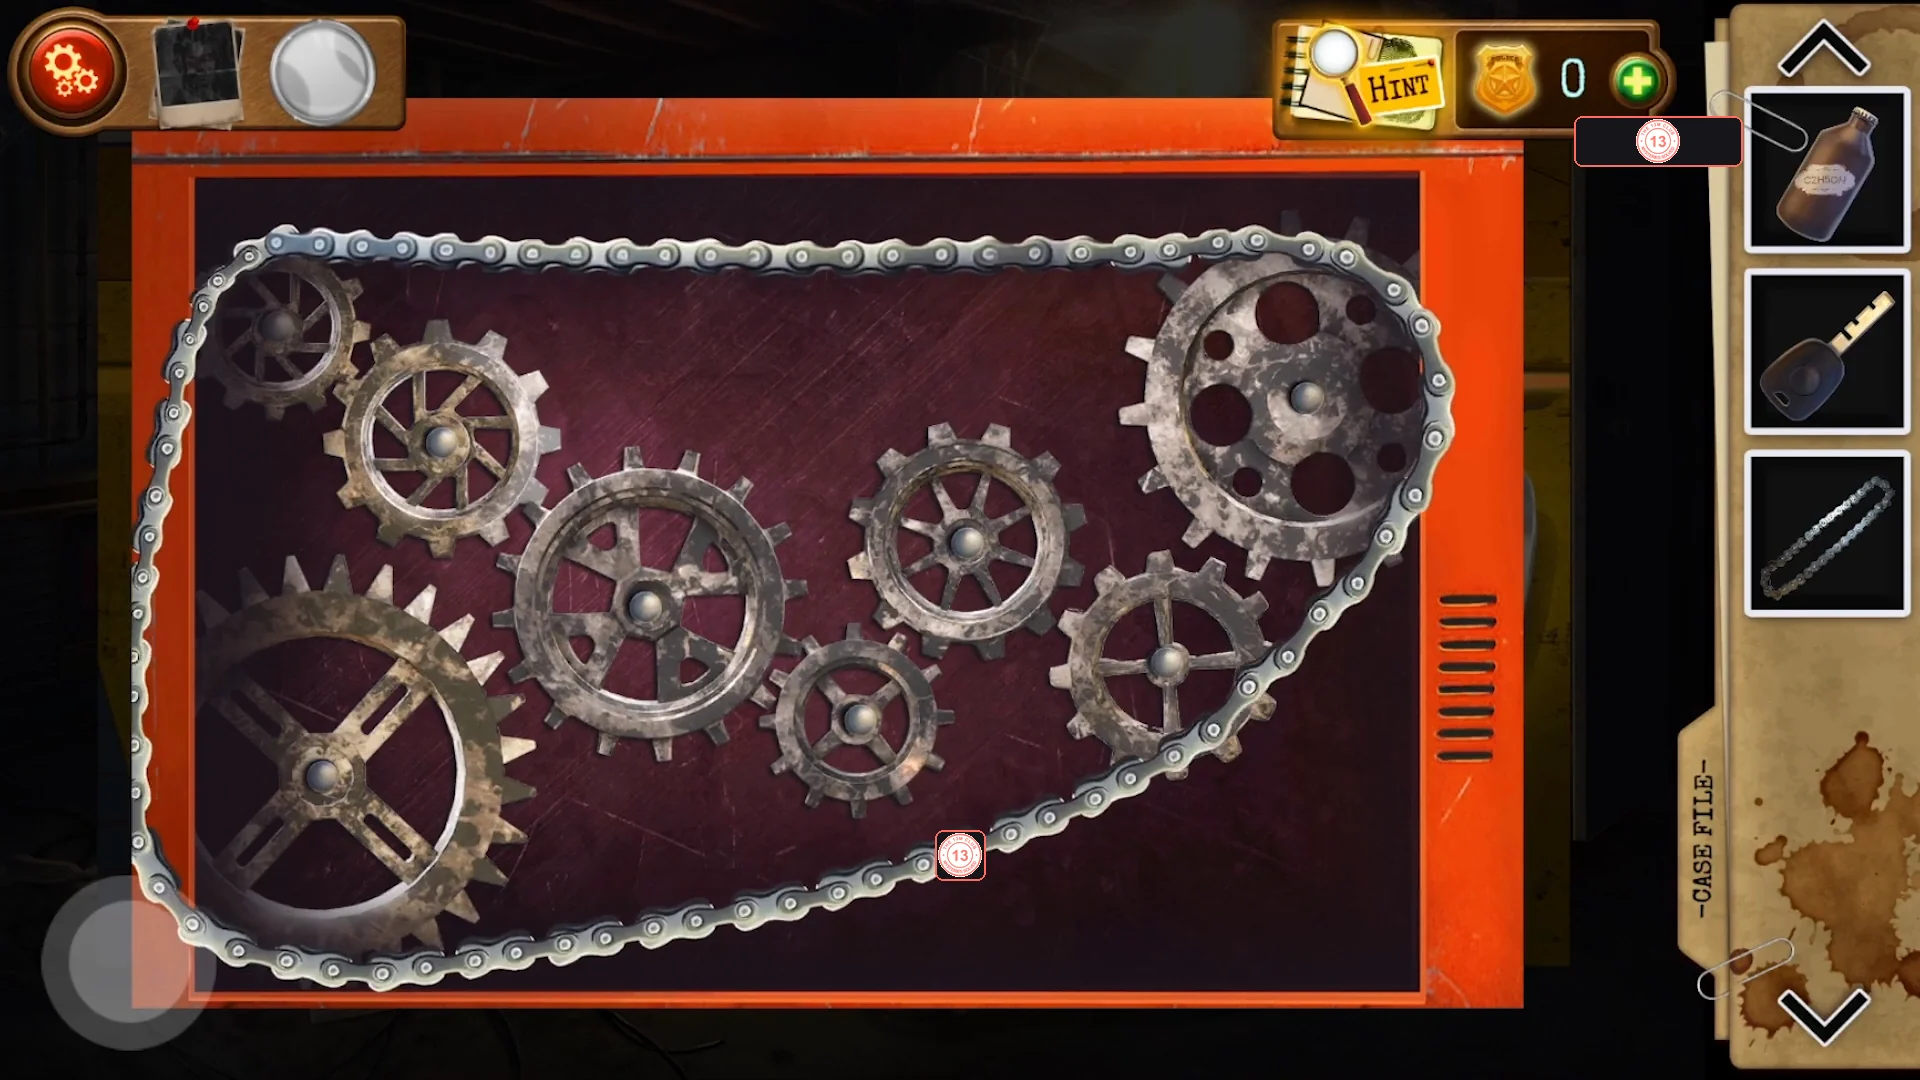
The repaired mechanism with the gears meshing and the chain fitted. - Use the small cut key (its inventory label is also 'Office key') on the keyhole on the right of the yellow machine and turn it. The machine starts and the house gets power.
- In the office, tap the computer ('Password required'; hint 'Girder is in the attic', pointing to the inscription on the attic beam). Each part of the inscription matches a numbered clue: White Ravens = weather vane 2, whisper = shushing hand on the floorboards 9, Little Princesses = album photo 4, Terrible Secrets = padlock on Chester's sole 5. Enter 2945. Chester's e-mail points to his car's glove box, and the chapter ends.CODE2945
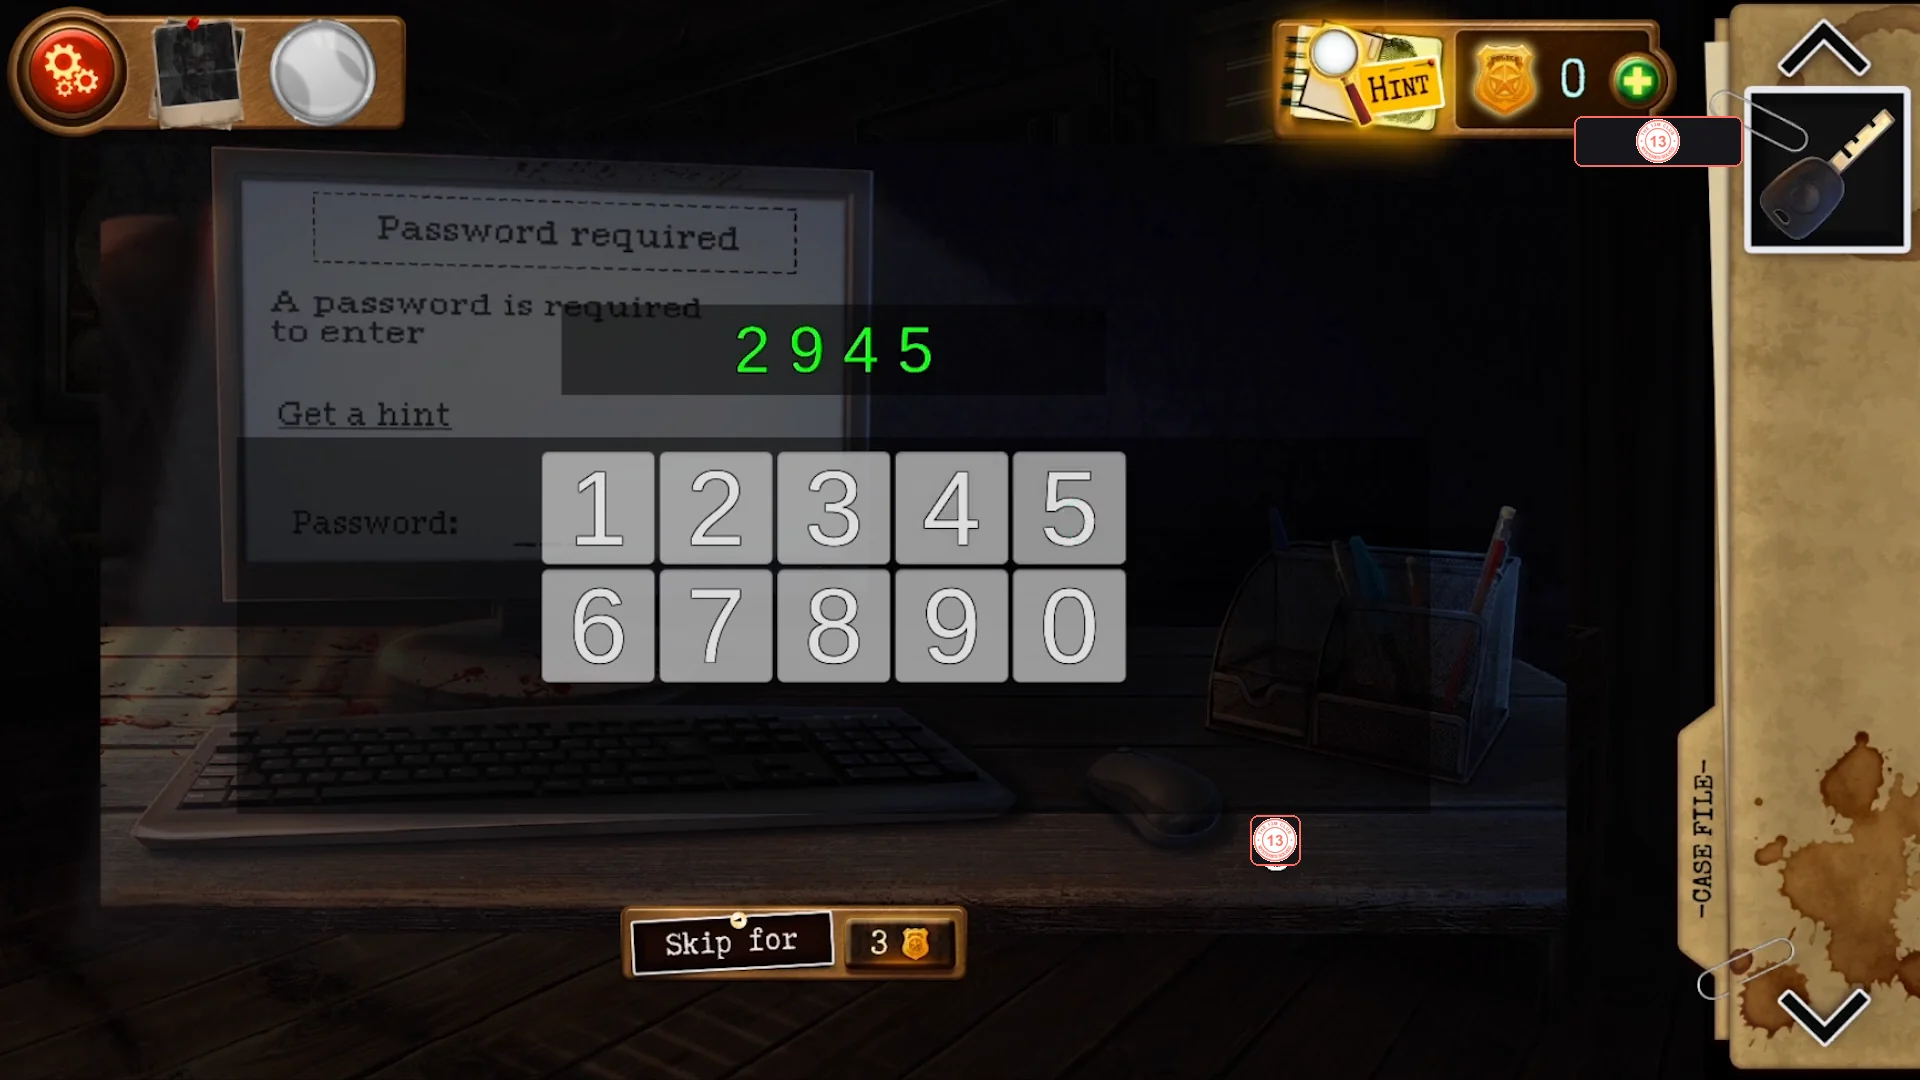
Chester's computer with the password 2945 entered.