Factory basement: crowbar, taped boxes and the key in the cobweb
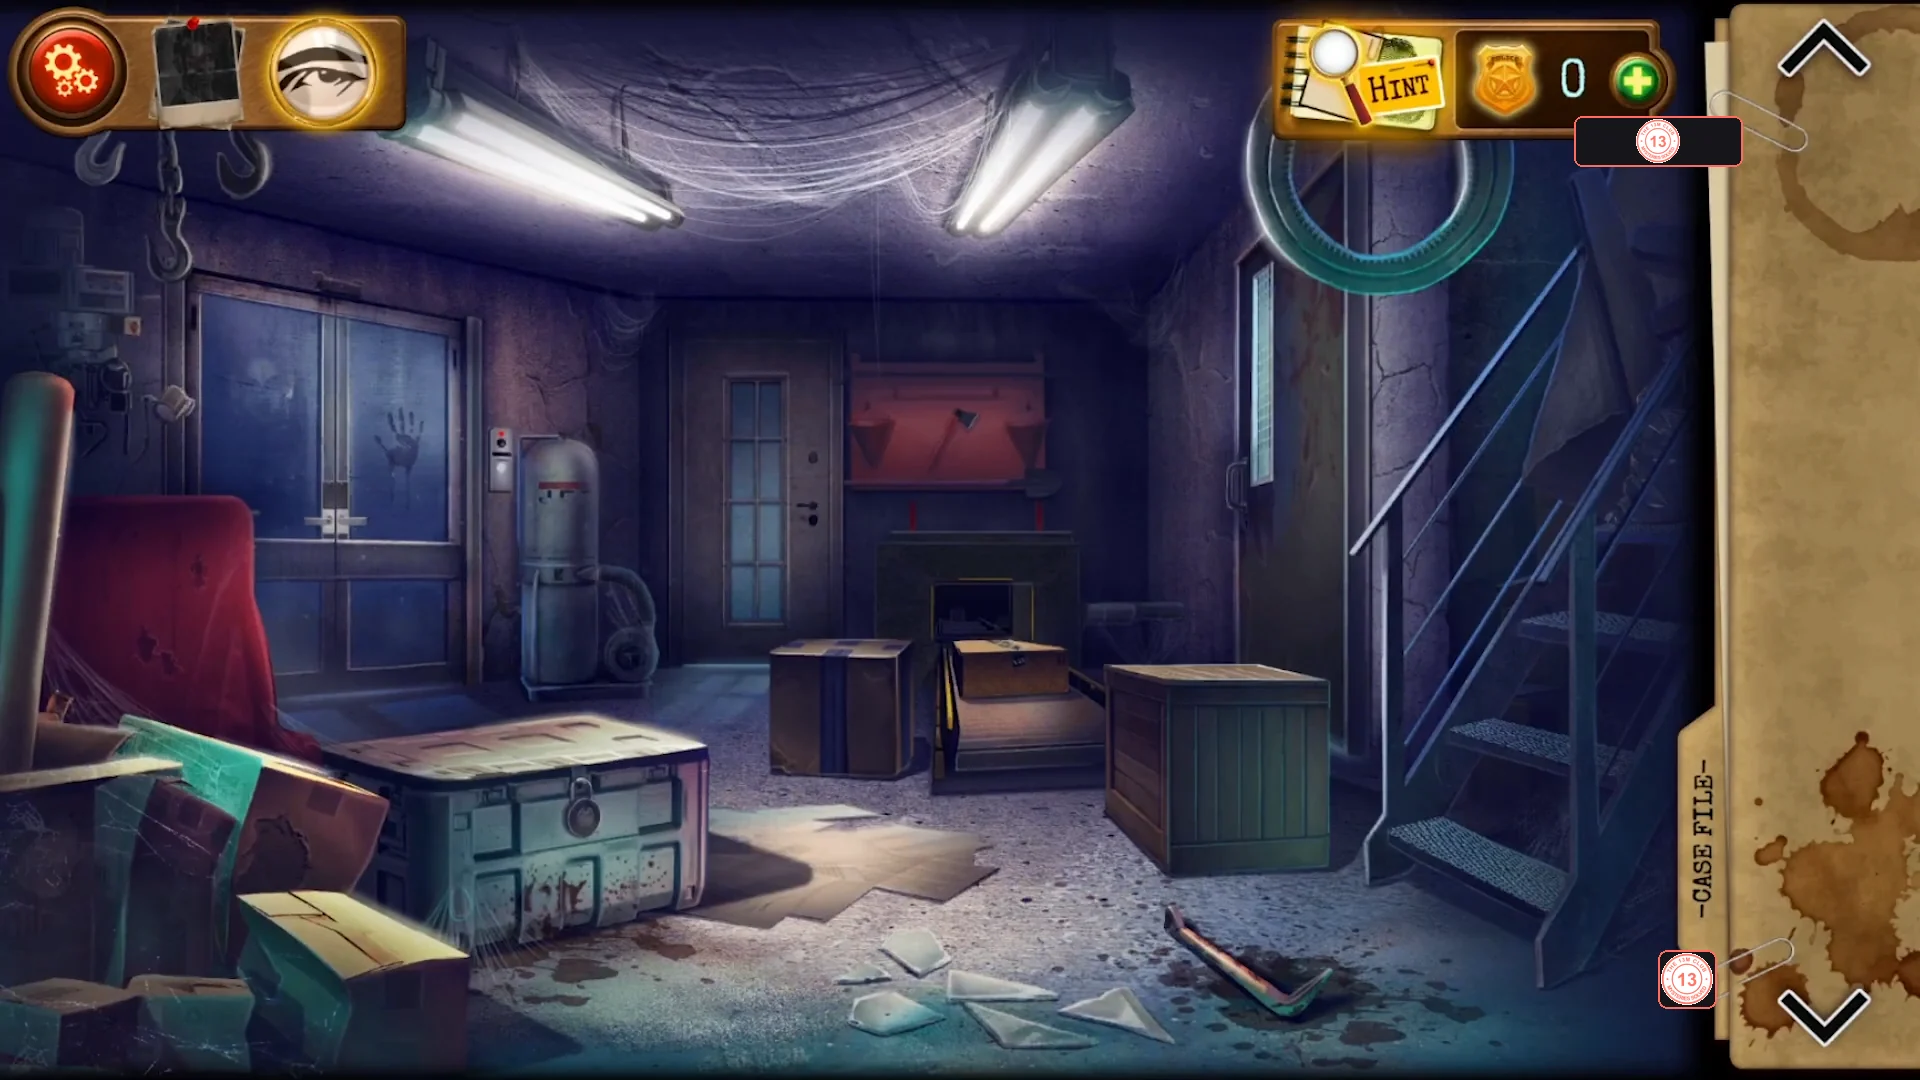
You start in the basement of the abandoned Galileo factory. Take the crowbar, open the two taped cardboard boxes, make a hook on a line and fish the Box key out of the cobweb under the stairs.
- In the basement, pick up the crowbar lying on the floor in front of the crates (the inventory calls it 'Bloody crowbar').
- Tap the cardboard box with the cross of tape, peel off the tape and open it. Take the Antifreeze canister (later renamed 'Canister of lye') and read the newspaper clipping 'The mayor wants to reconstruct the old Cemetery', with the word Cemetery written in blood.
- Tap the long box with blue printed tape, pull the tape off and open it. A severed gloved hand is inside and a photo is taken automatically (Case File entry 1). Move the tools aside and take the spool of fishing line, the hook, the torn paper piece and the Latin textbook leaf (DCCV 705 ... DCCIX 709).
- Combine the fishing line with the hook in the inventory. Tap under the metal stairs on the right, where a key hangs in a cobweb, and use the hook on a line on it to get the Box key.
Green chest: 6x6 number grid and the briefcase lock
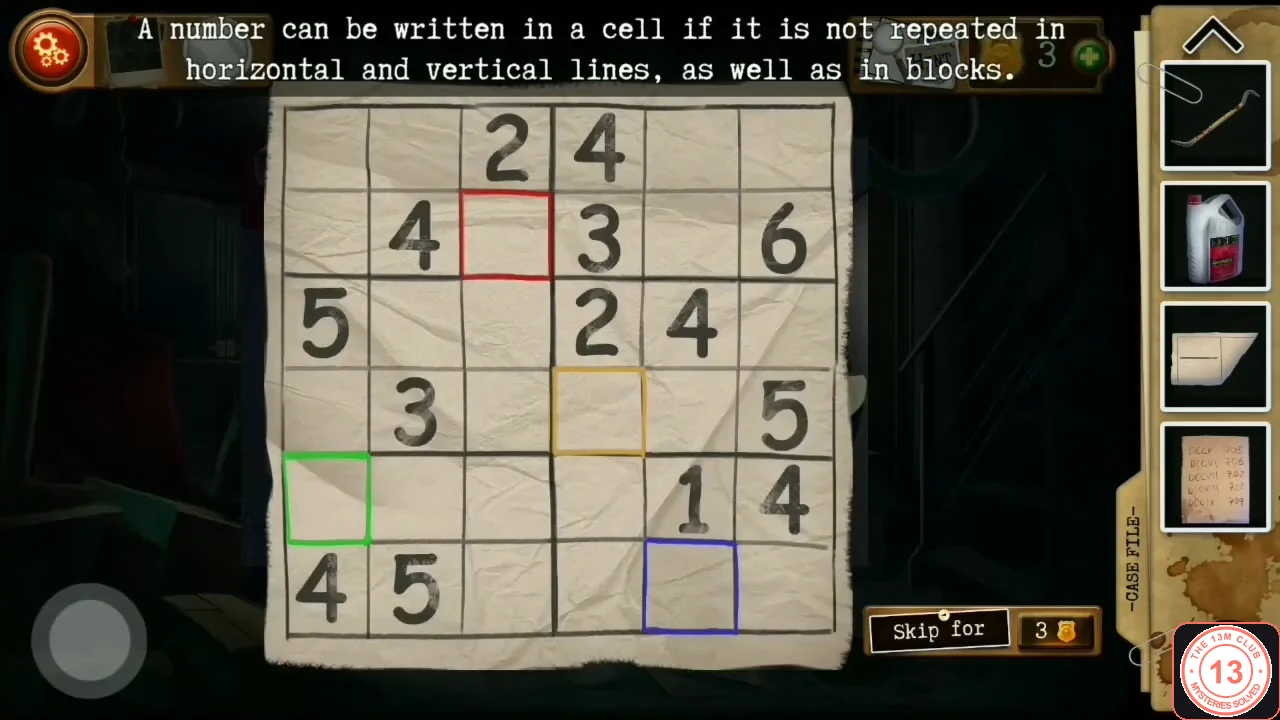
The Box key opens the green military chest. Solve the 6x6 number grid inside; the four coloured cells give the 4-digit code of the silver briefcase, which holds the Office key and a hint piece.
- Use the Box key on the padlock of the green chest on the left of the basement. It opens to show a number grid, a silver briefcase with a 4-roller lock and a small colour sticker below the lock.
- Fill the 6x6 grid so that no number repeats in any row, column or 2x3 block. The solution, row by row: 3 6 2 4 5 1 / 1 4 5 3 2 6 / 5 1 6 2 4 3 / 2 3 4 1 6 5 / 6 2 3 5 1 4 / 4 5 1 6 3 2. The four framed cells then read red 5, orange 1, green 6 and blue 3; the colour sticker below the briefcase lock gives that order.CODE5163
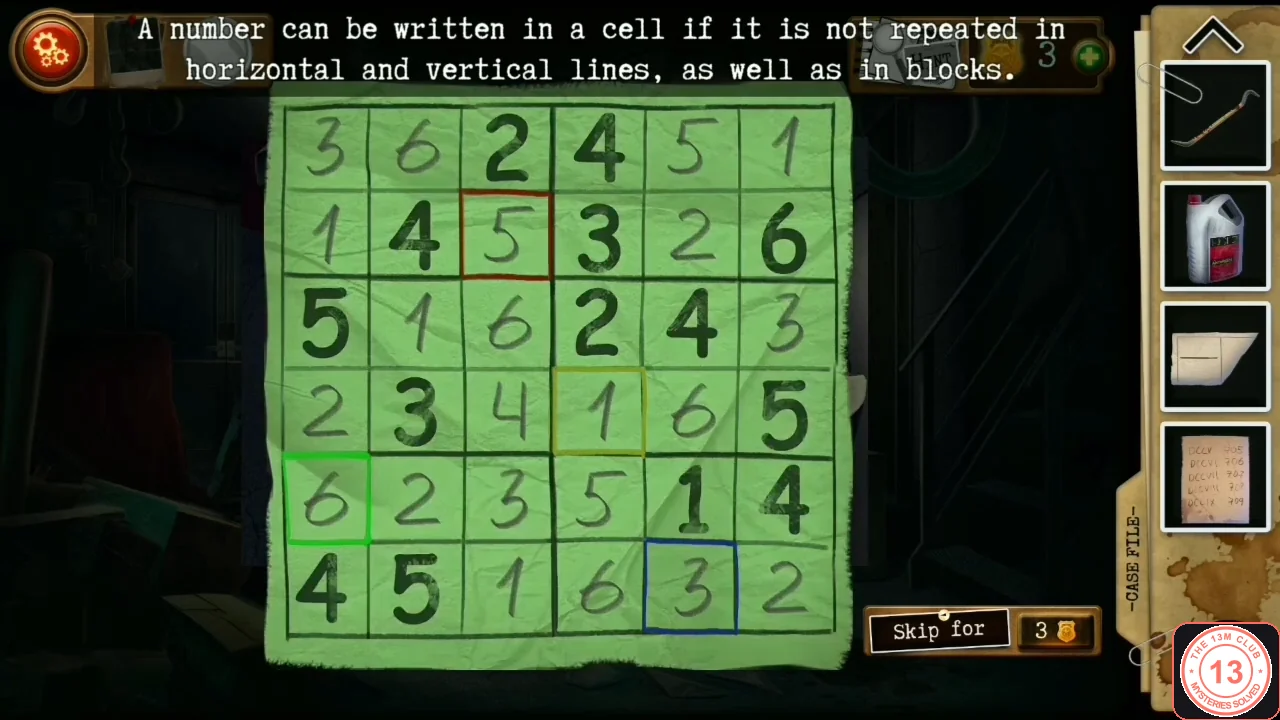
Solved grid: red 5, orange 1, green 6, blue 3, so the briefcase code is 5163. - Tap the briefcase lock and set the middle row of the rollers to 5-1-6-3 (red, orange, green, blue). Take the ornate Office key and the torn hint piece (a line and a circle) from the case.CODE5163
Red fire shield and the ring-tower safe
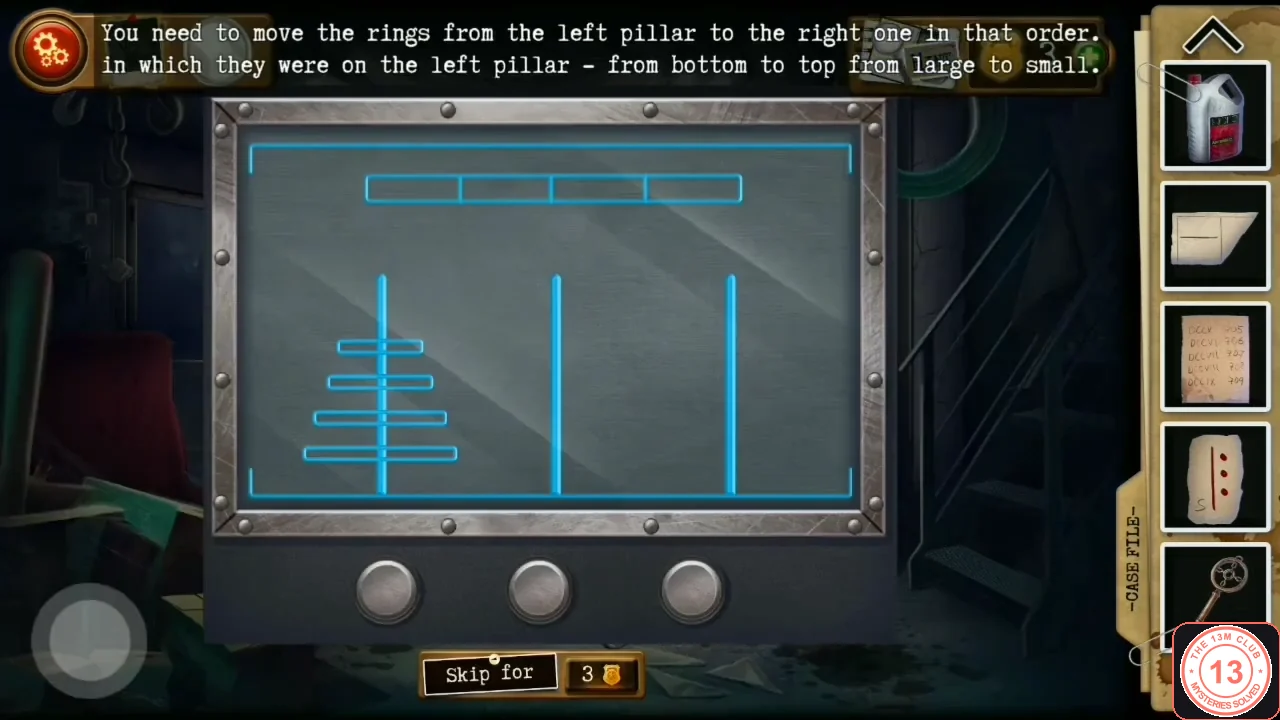
The red fire shield on the back wall is missing a tool. Hanging the bloody crowbar there reveals a small wall safe with a ring-tower (Tower of Hanoi) screen; solving it gives the Key to the case.
- Tap the red fire shield on the back wall ('There is a tool on the fire shield missing out') and use the Bloody crowbar on it; the crowbar stays on the shield. A small safe appears on the wall to its left.
- Open the wall safe: a ring-tower (Tower of Hanoi) screen. Move all four rings from the left pillar to the right pillar, never putting a larger ring on a smaller one. Tap the button under the pillar to take a ring from, then the button under the pillar to put it on. The shortest solution takes 15 moves (L = left, M = middle, R = right): L-M, L-R, M-R, L-M, R-L, R-M, L-M, L-R, M-R, M-L, R-L, M-R, L-M, L-R, M-R. Take the Key to the case (silver) from the opened safe.CODEL-M, L-R, M-R, L-M, R-L, R-M, L-M, L-R, M-R, M-L, R-L, M-R, L-M, L-R, M-R
Office: chalkboard word and the papers on the desk
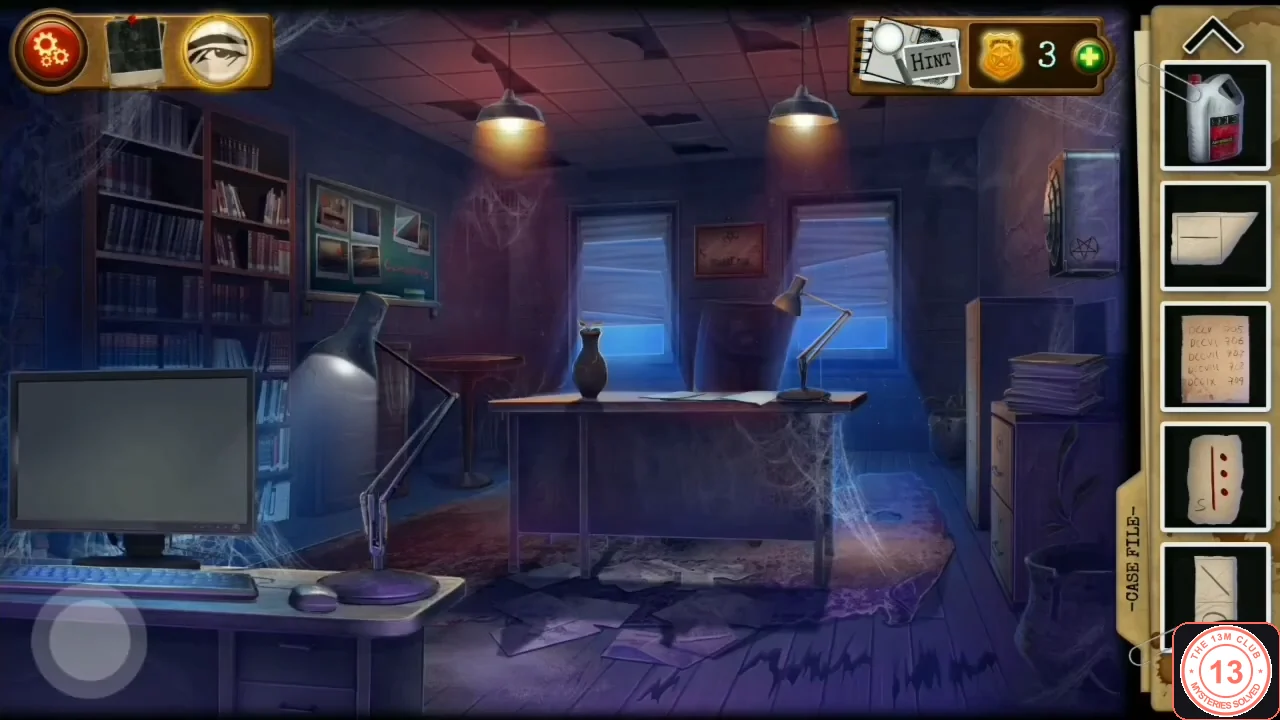
The Office key opens the central basement door to the office. Spell the newspaper's blood-written word on the photo chalkboard, then search the desk papers for the Shower key.
- Use the Office key on the closed central door of the basement ('Closed.') and go through into the office.
- Tap the green chalkboard with photos on the left wall, beside the bookshelf. Tap the red letters hidden in the photos to write C-E-M-E-T-E-R-Y, the word written in blood on the newspaper (the sponge erases mistakes). A photo is taken (Case File entry 2) and the cemetery photo moves aside; take the torn hint piece pinned behind it.CODECEMETERY
- Tap the papers on the office desk and move them aside. Underneath are a perforated sheet of runes (the cipher sheet, still incomplete) and the Shower key; take both.
Locker room and shower: hammer and chisel, sliding picture
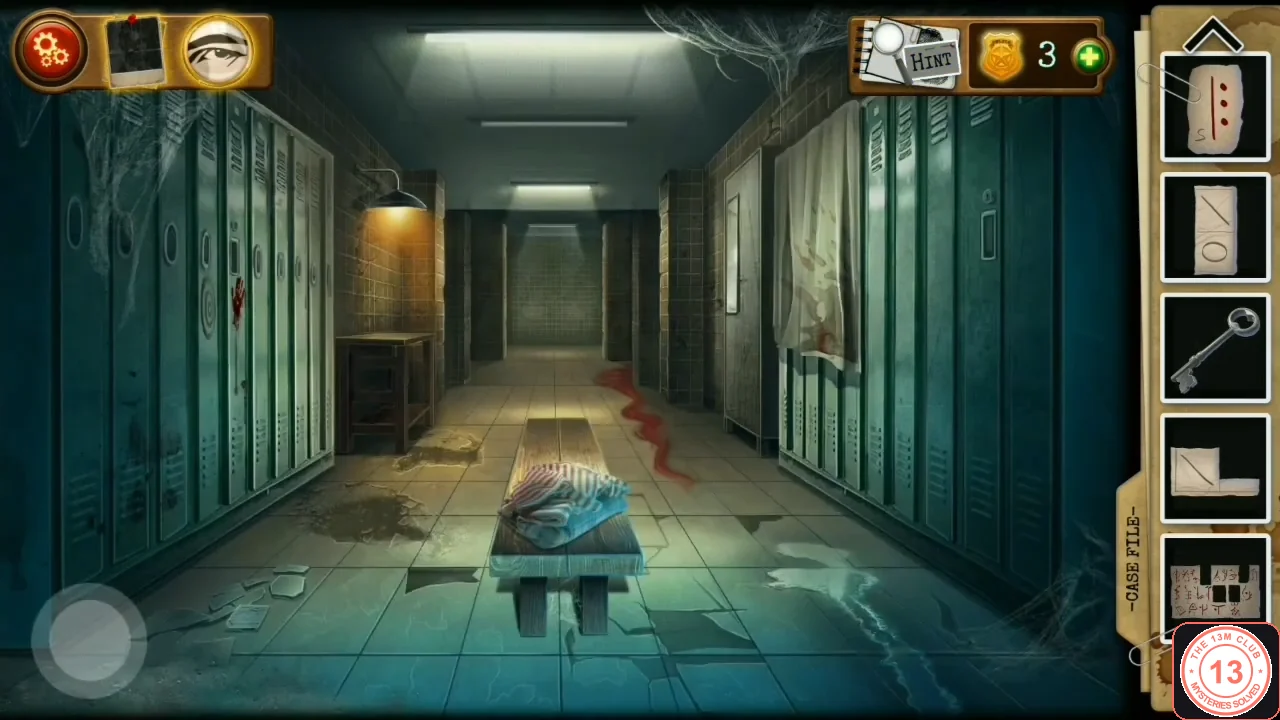
The Shower key opens the door next to the stairs into a locker corridor. A key under the bench opens the handprint locker (hammer and chisel); breaking the cracked shower wall reveals a corpse with a sliding-picture case.
- Back in the basement, use the Shower key on the door beside the stairs. In the locker corridor, tap under the central bench and take the Locker key with hand mark.
- Tap the locker with the bloody handprint (left side) and use the Locker key with hand mark. Take the hammer and chisel from the top shelf. A wooden box with square, circle and triangle buttons sits on the lower shelf; you open it after the next step.
- Walk to the shower at the end of the corridor and tap the cracked, bloody tiles ('Oh, I have a bad premonition...'). Use the hammer and chisel on them: a half-naked corpse falls out with a metal case in its belly.
- Tap the case in the corpse. It is a sliding picture: click tiles next to the empty space to slide them until they form the cowboy-on-horseback picture. Place the top row first, then the left column, and finish the remaining corner by cycling tiles around the gap. The case opens with a note: 'Jeff, if anything happens, take the contents of the box to my wife... You can open it with two pieces of pepperoni and one whole margarita.'
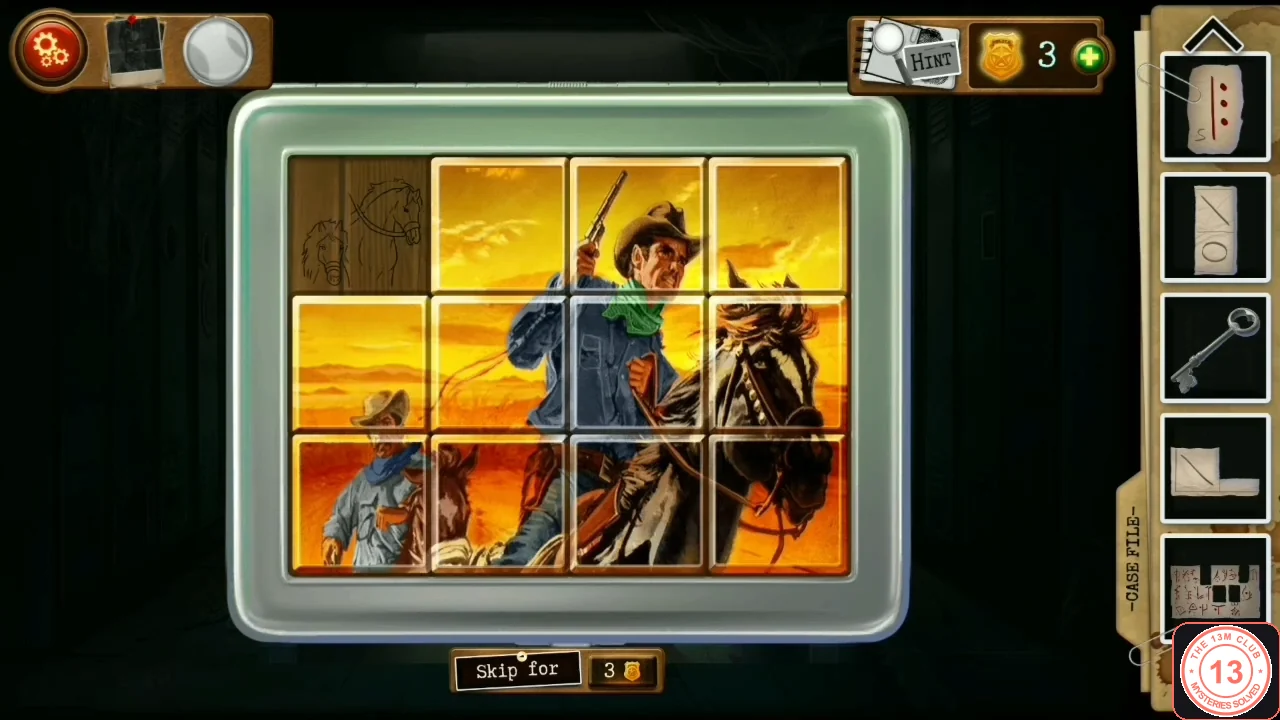
The finished sliding picture. The blank wooden tile ends up in the top-left corner.
Locker shape box: pepperoni and margarita
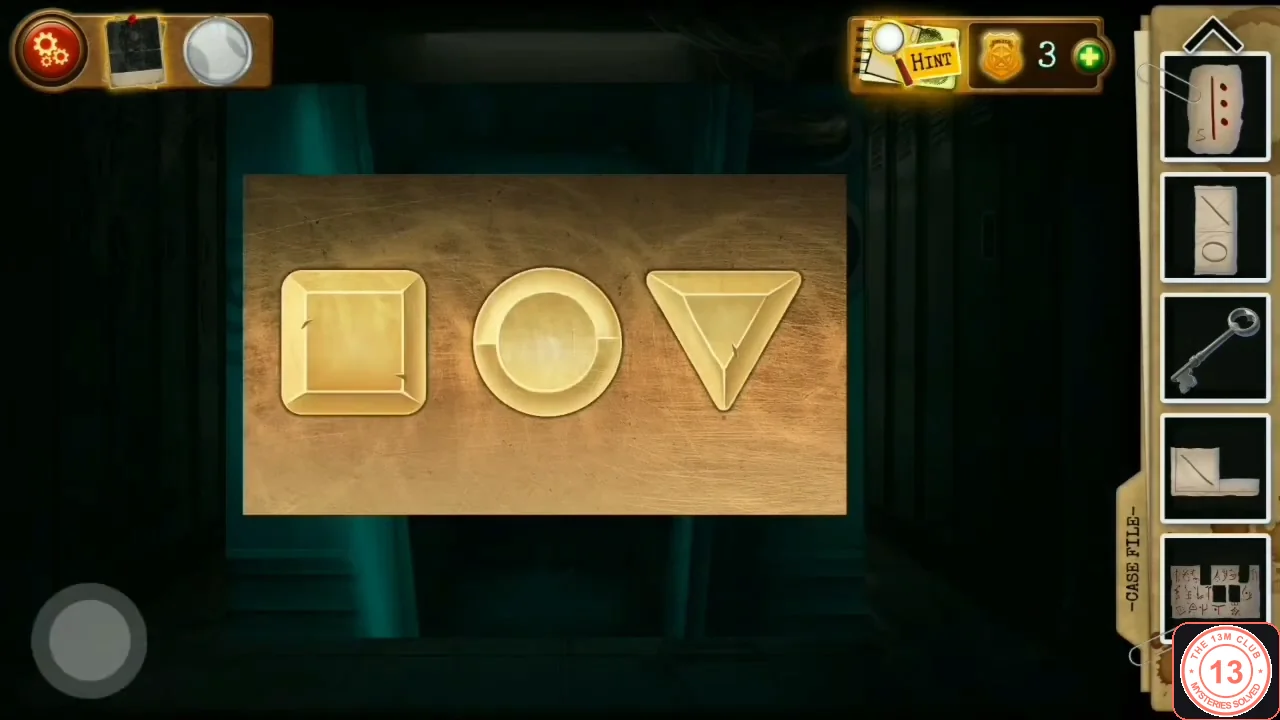
The pizza note is the code for the shape box in the handprint locker: two pieces of pepperoni are two triangle slices, one whole margarita is a circle. Inside are a note about Simon Leslie and a key card.
- Return to the handprint locker and tap the wooden box. Press the triangle 2 times and the circle 1 time; leave the square alone. Inside, look at the worker photo and read the note: 'I had seen how Simon Leslie started bringing crates here...'. A photo is taken (Case File entry 3). Take the key card.CODETriangle x2, Circle x1
Warehouse pyramid and the office drawer chest (707)
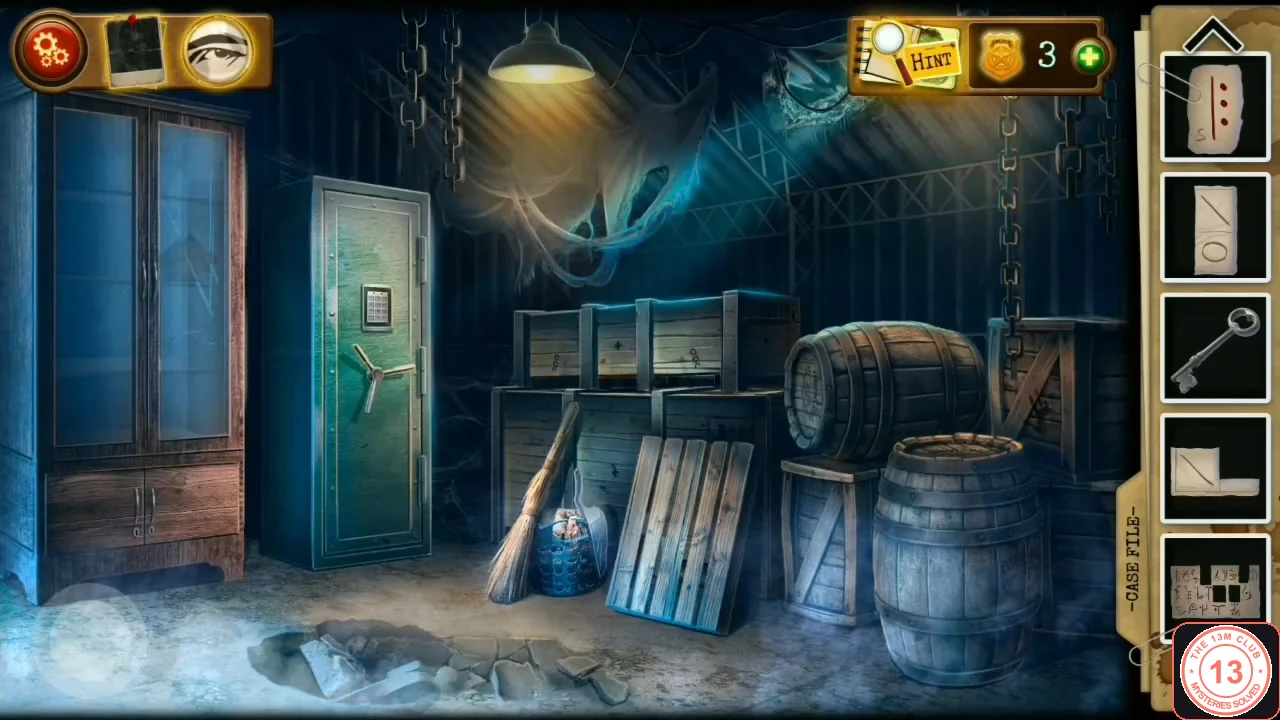
The key card opens the card-reader door into the warehouse. The stone pyramid in the glass cabinet gives the key to the office drawer cabinet; inside it, a small chest takes the Roman-numeral code DCCVII = 707 and gives the Cabinet key.
- In the basement, use the Key card on the card reader of the locked door to enter the warehouse (green safe, barrels, tall glass cabinet on the left).
- Open the glass door of the tall cabinet on the left and tap the stone pyramid. Tap its pieces to rotate them until the carved line runs without a break from top to bottom. The tip lifts: take the Key to the drawer in the cabinet and the paper scrap with a red rune.
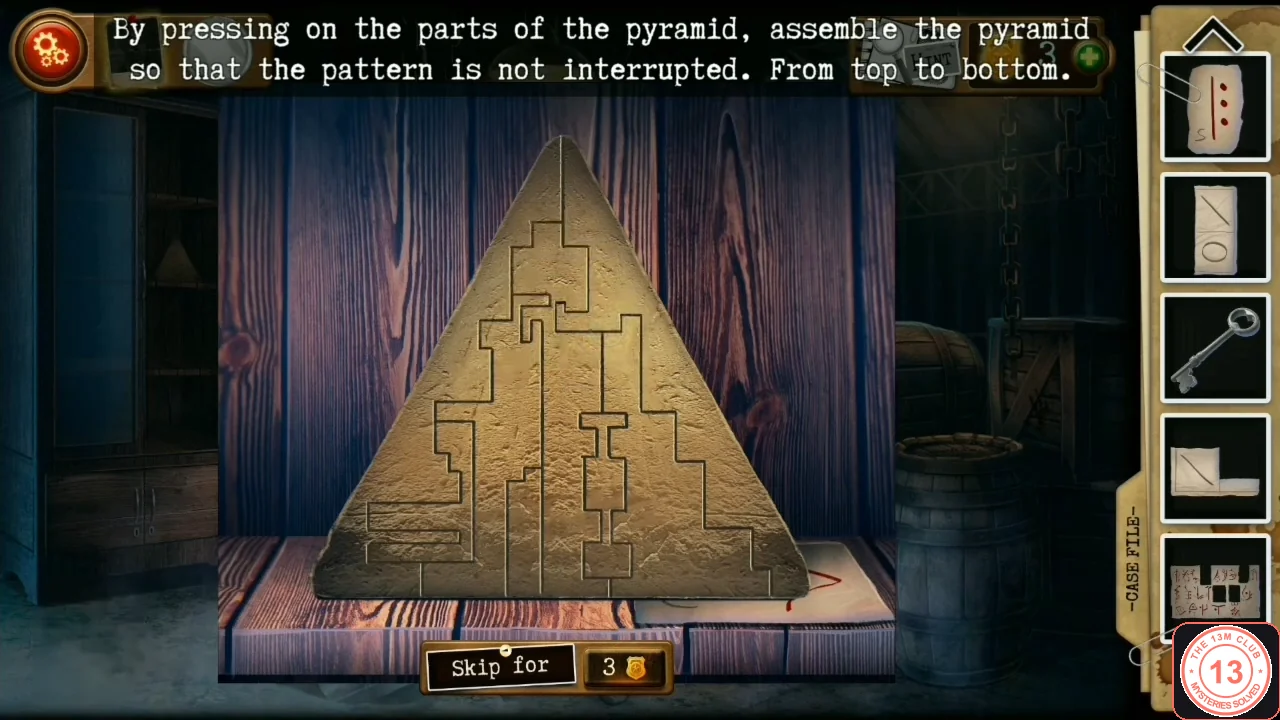
Solved pyramid: the carved line runs without a break from top to bottom, and the tip lifts. - Go to the office and tap the three-drawer cabinet right of the desk. Use the Key to the drawer in the cabinet on the top drawer. Take the paper with symbol No. 2 (DCCVII and a red rune) and the triangular paper piece; a small chest with a 3-number roller lock stays in the drawer.
- The Latin textbook leaf from the first box lists DCCVII = 707. Tap the chest in the drawer and set the middle row of its rollers to 7-0-7. Take the gold Cabinet key and read the Latin sheet under it ('Eripitur fictus, manet res'); you need it twice later.CODE707
Warehouse: line panel, axe, crate manual and the green safe (042)
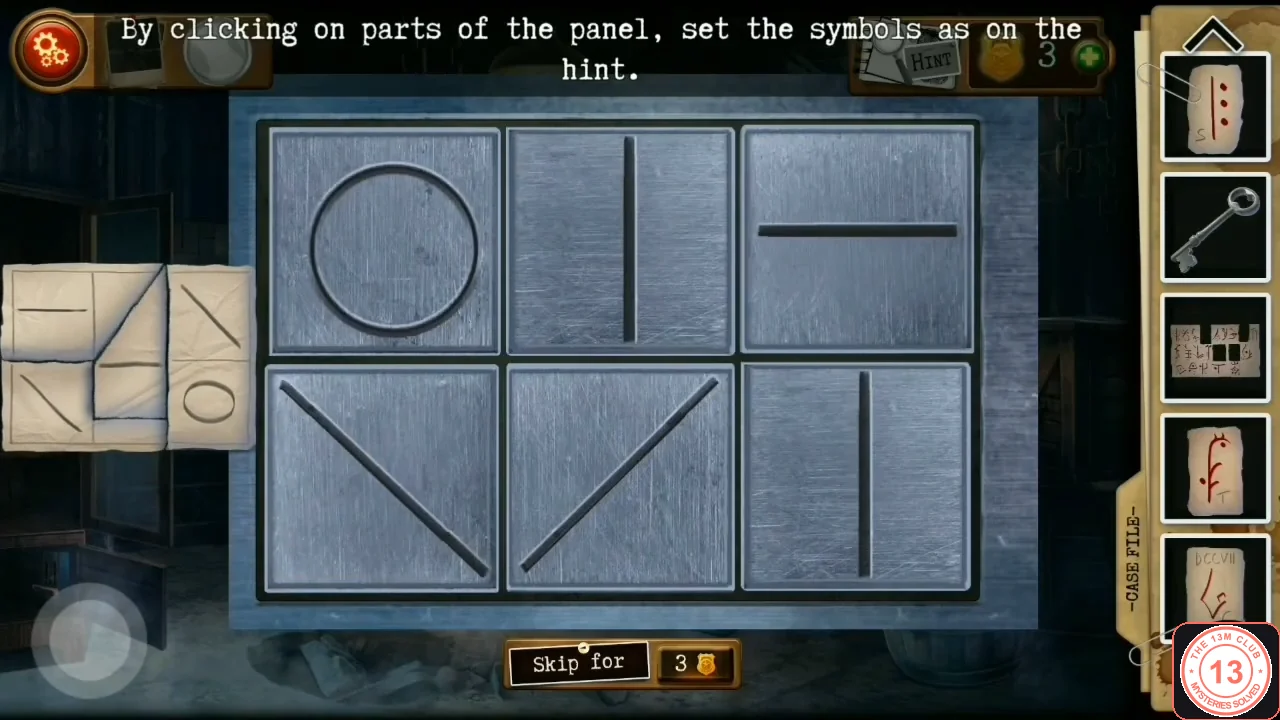
The Cabinet key opens the drawer under the glass cabinet: a six-tile line panel. Match it to the assembled hint pieces for an axe, chop open the handprint crate for the code manual and open the green safe with 042.
- In the warehouse, use the Cabinet key on the bottom drawer of the tall glass cabinet. The four torn hint pieces you collected are laid out on the left as the target. Tap the tiles to rotate them until they match: top row horizontal line, rising diagonal (/), falling diagonal (\); bottom row falling diagonal (\), horizontal line, circle. Take the axe from the opened compartment.
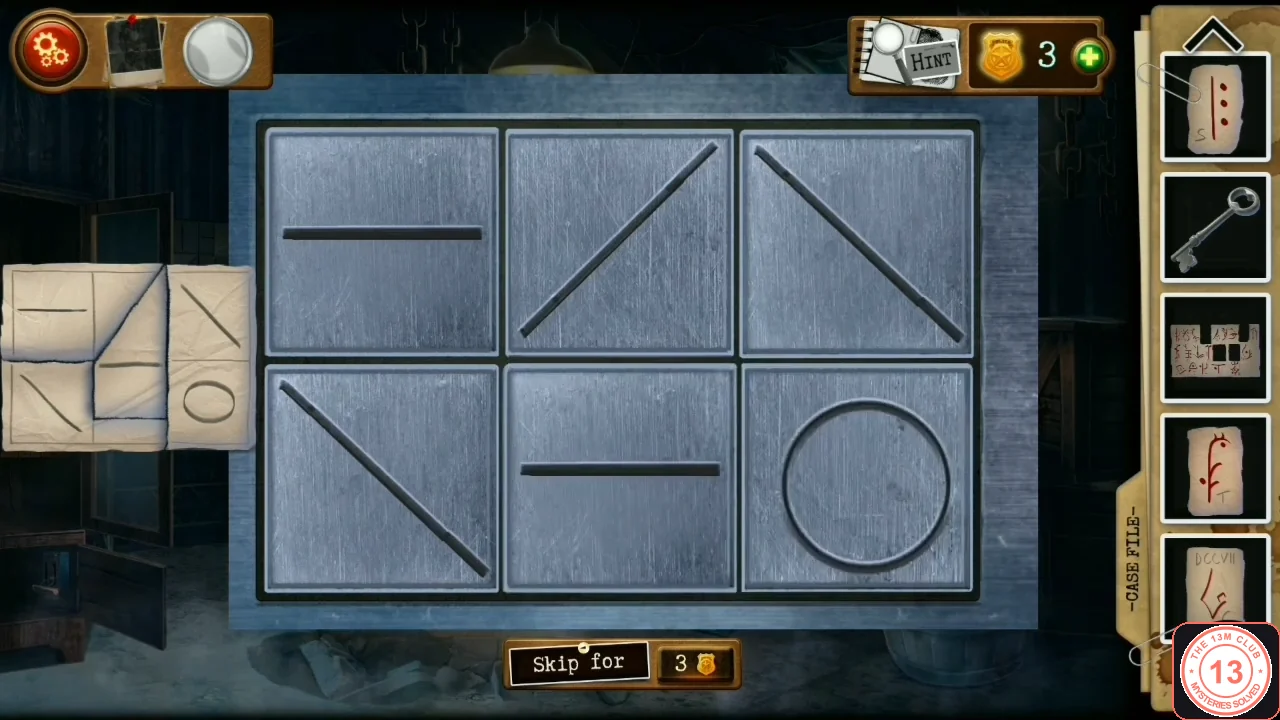
Solved panel. Top: horizontal, rising diagonal, falling diagonal. Bottom: falling diagonal, horizontal, circle. - Tap the wooden crate with the bloody handprint behind the ring of barrels and use the axe on it (three chops). Open the red Manual inside: '682 - one number correct and in its place; 614 - one number correct but out of place; 206 - two numbers correct but out of place; 780 - one number correct but out of place; 738 - everything is wrong.' 738 rules out 7, 3 and 8. 682 then leaves only the 2, in last place. 206 needs a second digit besides the 2: the 0, which cannot be in the middle, so it goes first. 614 leaves the 4 for the middle. The answer is 042.CODE042
- Tap the keypad of the big green safe and enter 0-4-2 (one recording also pressed # to confirm). The safe opens. Tap the note pinned inside - 'if you want to see him alive, play by my rules', with a rose - for Case File entry 4, then take the paper scrap of red runes under it. The cipher sheet is now complete ('It looks like I can figure out the cipher now..').CODE042
Office rune safe: the missing Latin word
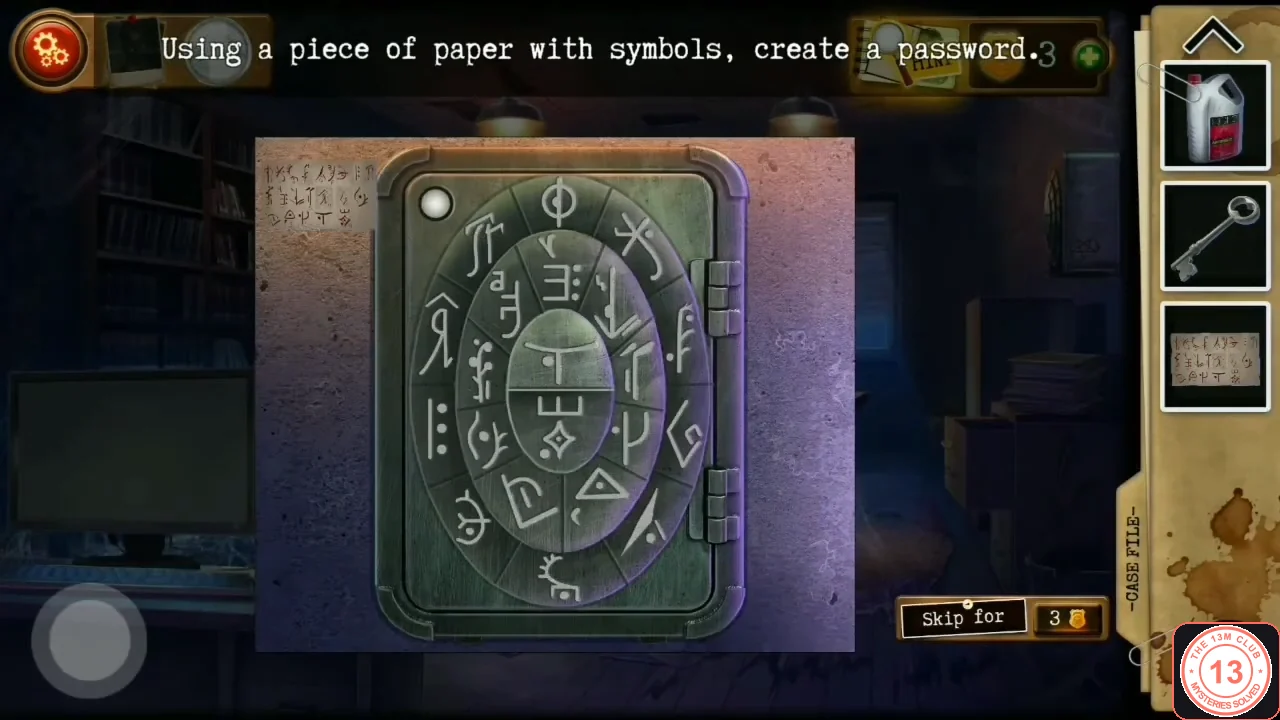
The framed plaque 'Eripitur ..., manet res' in the office is missing a word; the Latin sheet from the drawer chest completes it as 'Eripitur fictus, manet res'. Spell FICTUS on the rune safe with the completed symbol sheet.
- In the office, compare the plaque above the desk (one word missing) with the Latin sheet from the drawer chest: the missing word is FICTUS. Tap the rune safe on the right wall and open the Sheet with symbols, which pairs each rune with a letter. Tap the runes for F, I, C, T, U and S in that order; each turns red. The safe opens: take the crowbar and the copper Key to the case (your second key with that name). The grid paper with a Y and a red X is not used in this chapter.CODEFICTUS
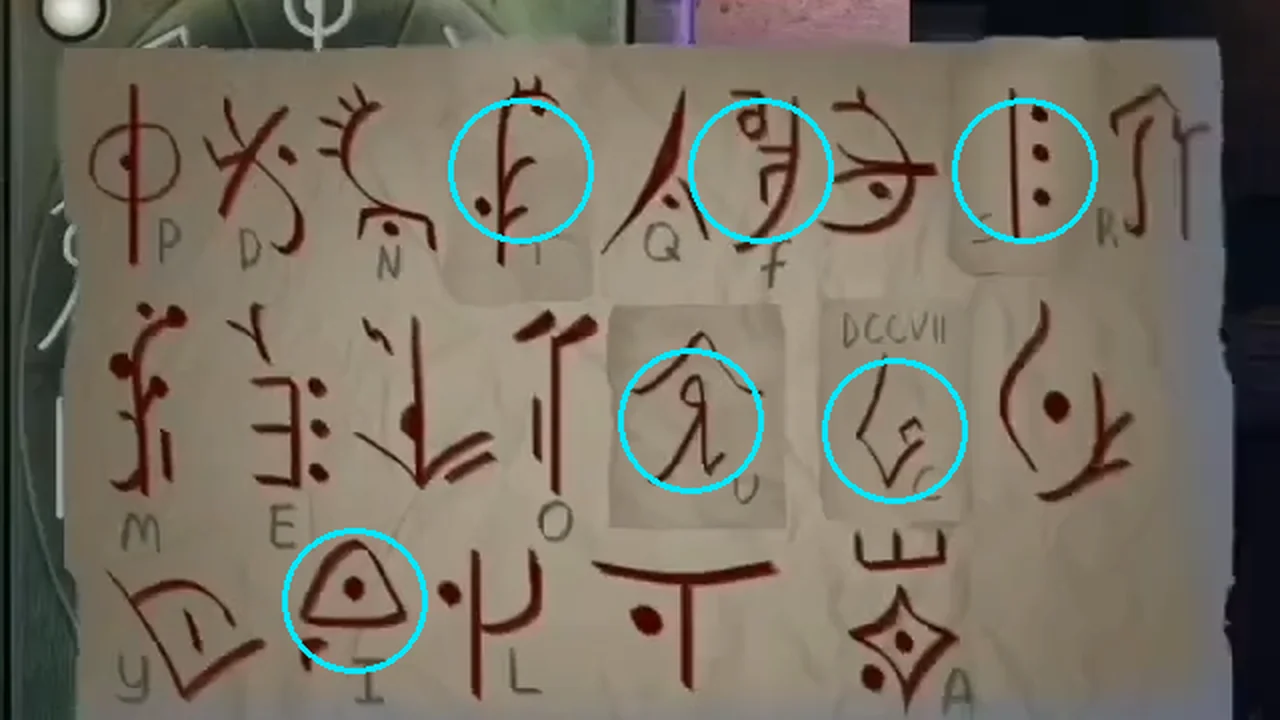
The completed Sheet with symbols. The circled runes are F, T and S (top row), U and C (middle row) and I (bottom row); tap them in the order F-I-C-T-U-S.
Sealed briefcase, the urn and the ABYSSUS locker
Pry open the sealed warehouse crate, dissolve the hardened substance with lye and open the briefcase with both keys named Key to the case. Then pry open the easy-to-miss urn crate in the basement. The gold key from the briefcase opens a green locker whose letter safe takes ABYSSUS and ends the chapter.
- In the warehouse, use the crowbar on the boarded crate that is 'sealed too securely to open with your hands'. Pour the Canister of lye on the yellow hardened mass covering the briefcase, then open its two locks with the two keys named 'Key to the case' - the copper one from the rune safe on one lock and the silver one from the ring-tower safe on the other. Take the gold key and read the 'List of Crawford Cemetery owners'.
- Easy to miss (Case File entry 5): in the basement, tap the wooden crate with green side boards (right of centre) and use the crowbar to pry it open (the crowbar is used up). An urn of ashes is inside and a photo is taken ('And how did this end up here...'). It counts towards the 40 entries needed for the true ending, so open it before you solve the ABYSSUS safe, which ends the chapter.
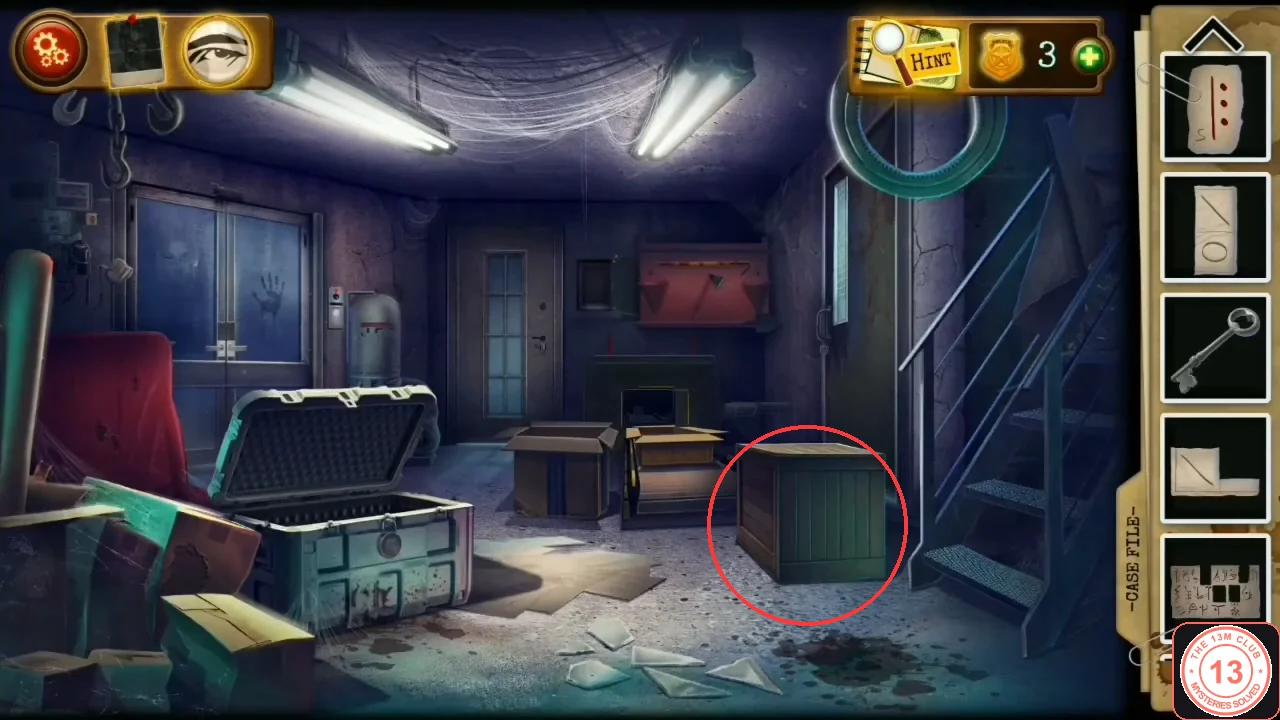
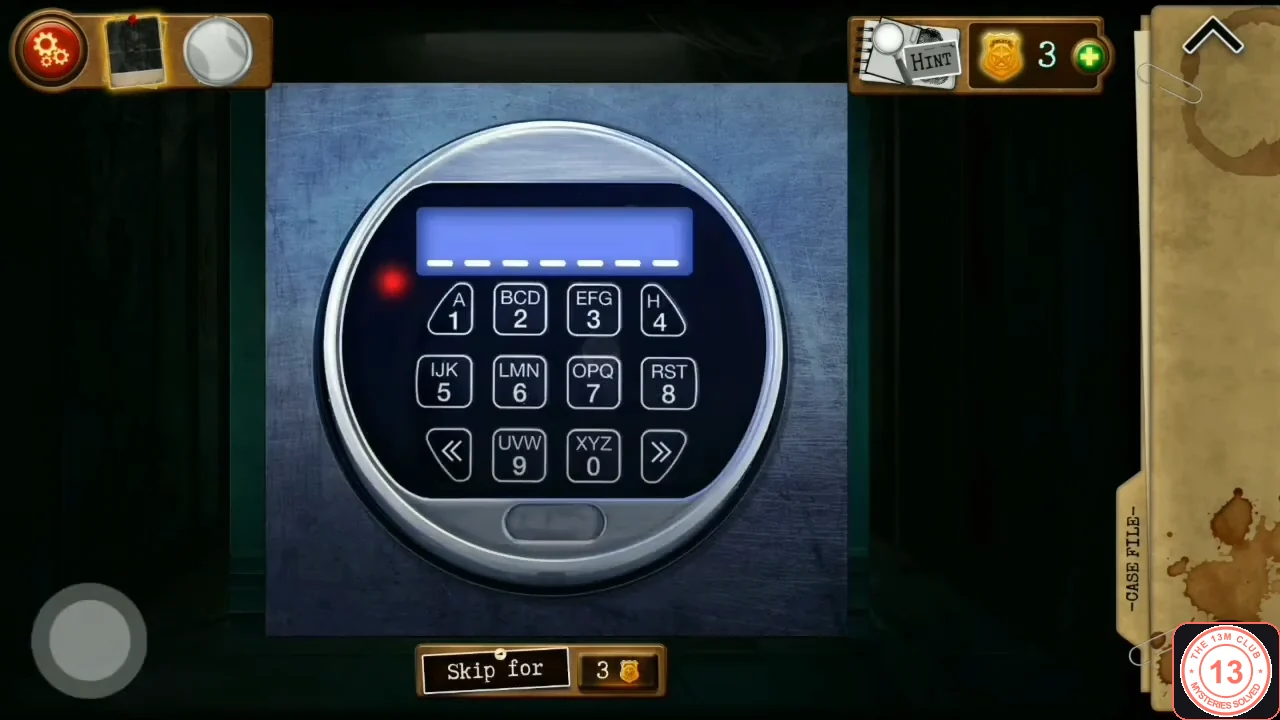
Easy to miss: the crate with green side boards right of centre holds the urn (Case File entry 5). Pry it open with the crowbar. - In the locker corridor, use the gold key on the locked green locker. The upper shelf holds a CD 'ABY... To Death and Beyond' with a pentagram, and the Latin sheet from the office drawer chest has an ink blot ending in '...SSUS': together they give ABYSSUS. Tap the letter keypad safe below the shelf. Its keys carry letter groups like a phone keypad (for example BCD on 2, RST on 8, UVW on 9); tap a key repeatedly to cycle through its letters and type A-B-Y-S-S-U-S.CODEABYSSUS
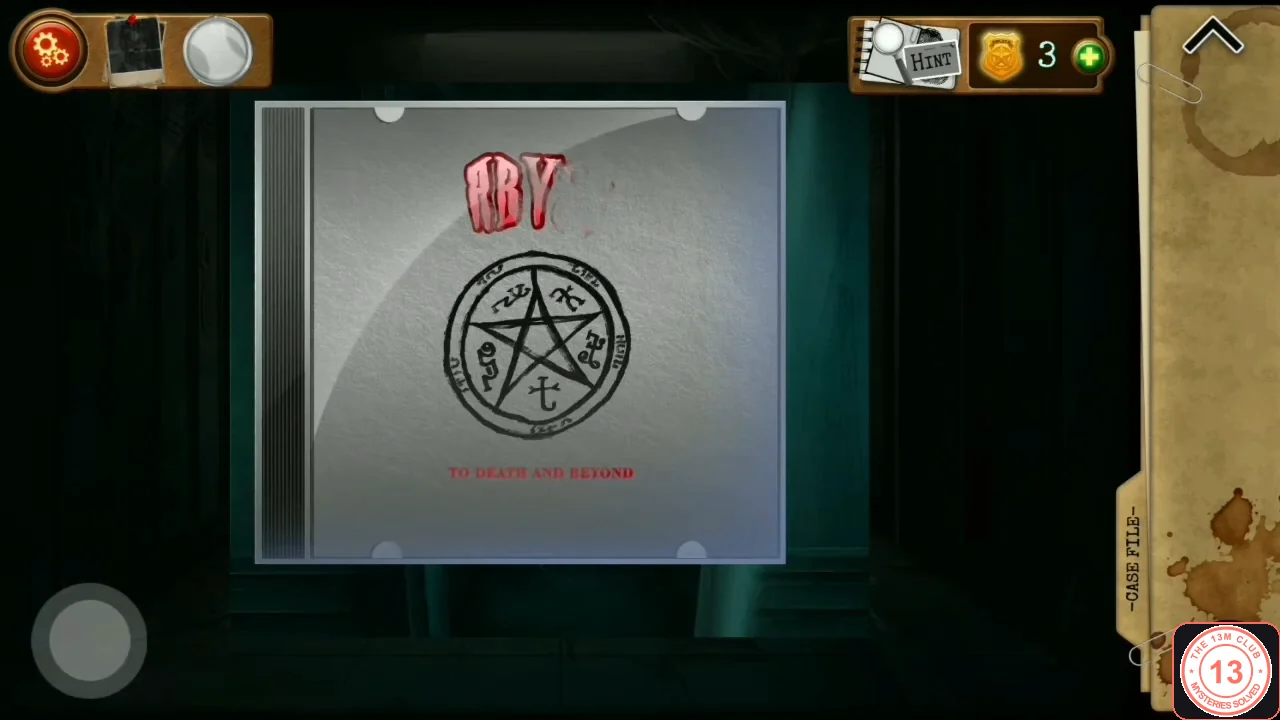
The CD on the locker's upper shelf starts the word: ABY... Add the ...SSUS from the ink blot on the Latin sheet to get ABYSSUS. - Tap the photo inside the safe: Mr. Simmons chained in a brick cell. The chapter ends with Simon Leslie's arrest and the title card 'Chapter 6: Ashes to ashes'.