The Desert Courtyard
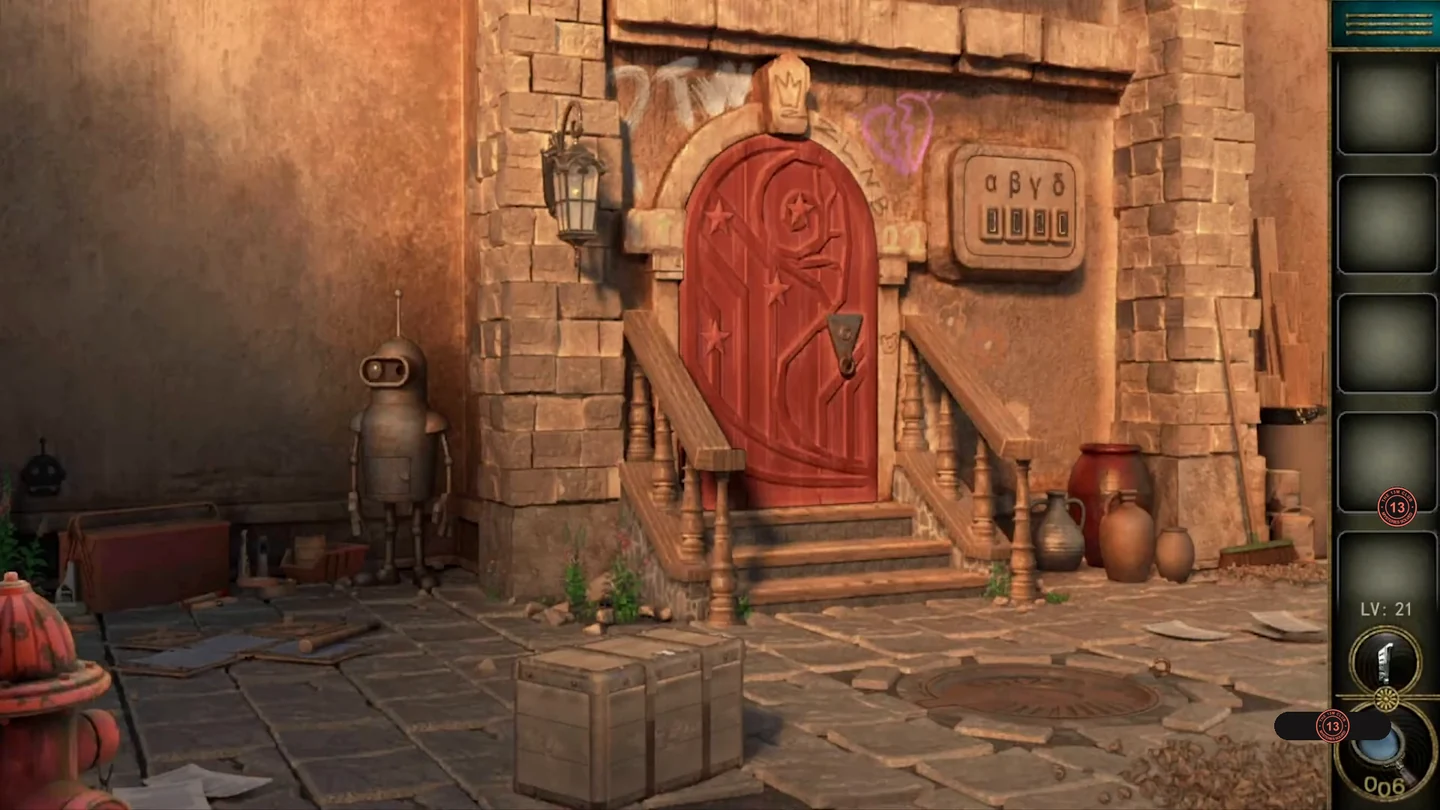
Solve the Greek-letter equations for the wall safe, wake the tin robot to get a hammer and a spray can, then rebuild its graffiti on the sliding chest lock.
- Take the wooden handle resting on the right edge of the stone equation tablet. Optional star 21: zoom into the red entrance door and keep tapping the carved stars on it until the accomplishment is awarded.
- Take the screwdriver from the shelf above the clay jars by the stairs and unscrew the covered plates on the equation tablet.
- Solve the tablet: α ÷ 2 ÷ 3 = 1 gives α = 6, and α = γ gives γ = 6. The last two tiles, δ > γ > β and δ − γ = β, allow more than one pair of digits; the combination that opens the safe is β = 1 and δ = 7. Enter 6167 on the α β γ δ wall safe. Take the robot eye and the first tile piece, and note the two arrows on the safe's back wall.CODE6167
- Put the eye into the tin robot's empty socket. Set the left eye to point right and the right eye to point down-left, as the safe arrows show. Take the hammer head from the robot's chest and fit it on the wooden handle.
- Smash the clay jars by the stairs with the hammer and take the spray can and the second tile piece.
- Give the spray can to the robot; it paints HAO / REN / KA on the wall.
- Put the tile pieces into the lock of the wooden chest in the foreground. Slide the tiles until the letters read HAO on the top row, REN in the middle and KA at the bottom. Take the matches.
- Light the fuse on the manhole cover with the matches. After it blows open, take the key from the shaft and unlock the red door.
The Bio Laboratory
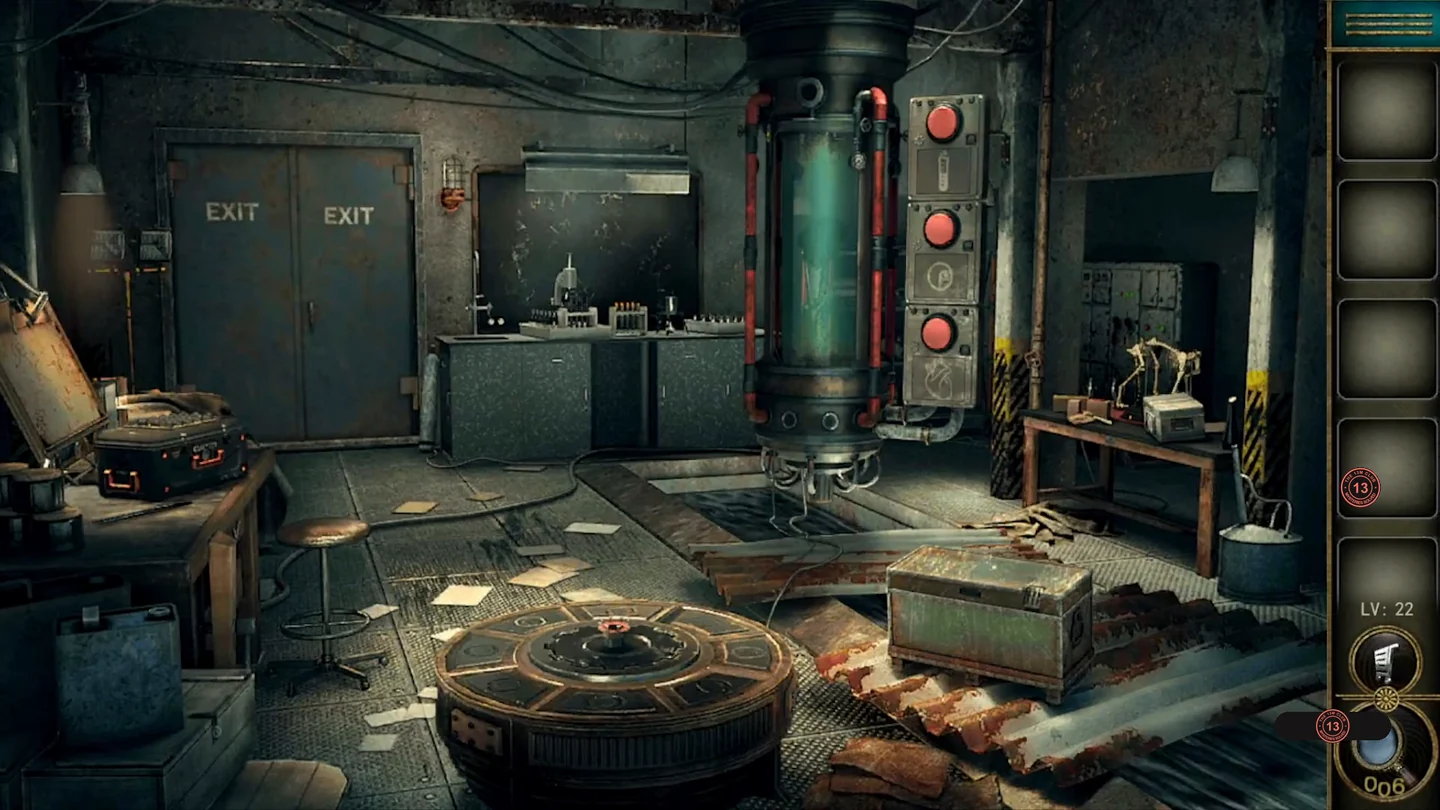
Gather the parts to bring the specimen in the central vat to life: an artificial eye, a heart and a freshly mixed reagent.
- Press the red hub of the gear mechanism on the floor to raise the gear. Take the tweezers lying on the left worktable next to the CORETECH case, then use them in the pit under the raised floor gear to pick out a metal ball (1/2). Optional star 22 is in the same gap; tap it.
- The molecule chart above the workbench has arrows on six of its rings. Set the six switches on the green floor trunk to match them: top row down, up, up; bottom row down, up, down. Take the second metal ball and the yellow test tube.
- Place both balls on the CORETECH case to start the node puzzle. Start from the highlighted first node of the middle row. You can only light a node that is joined by a wire to one that is already lit. Six nodes have a marked rim: these are the targets, and all six must be lit. Unmarked nodes can be lit as connectors to reach them, but every lit node drains the energy bar at the top, so keep an eye on it and take short routes; if it runs out, use the reset arrow and try a different path. The question mark shows the target pattern. When all six marked nodes glow, take the artificial eye and the dinosaur skull from the opened case.
- Attach the skull to the dinosaur skeleton on the right workbench and take the biohazard badge from the drawer. Place the badge in the silver briefcase maze and move it with the arrows to the centre slot. Take the heart and the green test tube.
- At the chemistry bench, put both test tubes in the rack. Scratches on the coloured slab show how much of each to pour into the beaker: blue 2, red 1, purple 4, yellow 3, green 2. Pour them in, light the burner and take the finished reagent.
- At the central vat, press the three red buttons to open the slots. Insert the heart in the bottom slot, the eye in the middle and the reagent at the top, pressing each button. The specimen wakes and the exit opens; go through.
The Vine-Covered Cellar
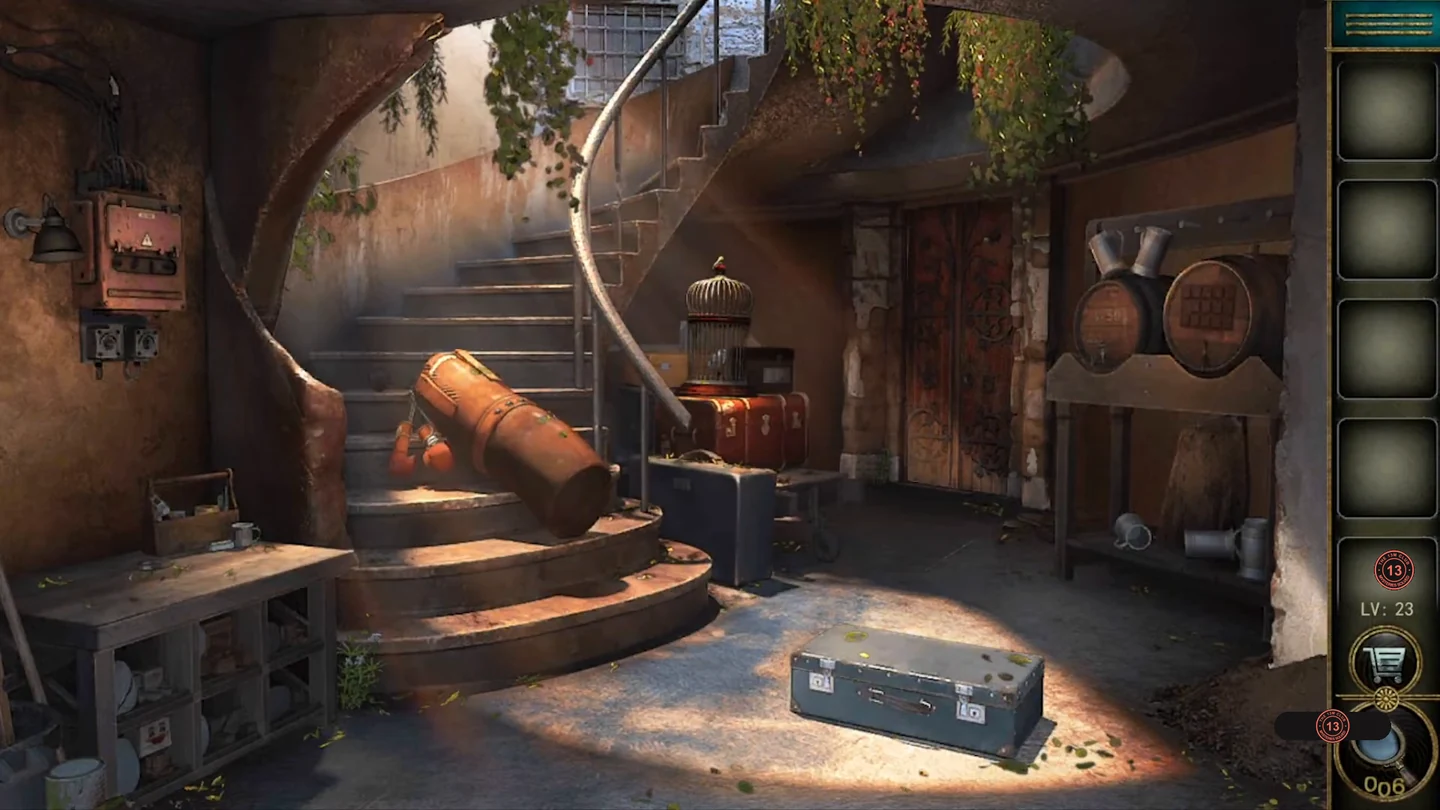
Collect two pointers for the 220-volt box, copy the glowing tube segments onto the hatbox lock, tour the barrel board and match the wooden faces to the stone eggs.
- Brush the leaves off the grey trunk on the floor, open it and take the first pointer and the shears.
- Zoom into the leather punch bag on the stairs. Optional star 23 is among the coloured stars on its strap; tap it. Cut the bag's seam with the shears and take the second pointer.
- Insert both pointers in the 220 VOLT box on the wall and set the four pointers horizontal, vertical, horizontal, horizontal. The box opens to show four coloured lights above four glass tubes.
- Tap the lights from left to right. Each tube lights part of a symbol: a middle bar, the two left uprights, a middle bar with the two right uprights, and a U shape along the bottom. Copy those four shapes onto the segment lock of the round hatbox beside the birdcage, and take the first wooden head and the wooden tile.
- Fit the tile into the empty spot on the barrel end on the right; the board opens as 3 rows of 5 tiles. Tap the bottom-left tile first. Each tile you tap darkens and lights a few dots along its edges, and these dots point to the next tile: each edge's dots mean move that many tiles toward that edge. For example, the bottom-left tile lights 2 dots on its top edge and 3 on its right edge, so the next tile is 2 rows up and 3 columns right; a tile with one dot on its bottom edge sends you one tile straight down. Keep following the dots until all fifteen tiles are dark, and use the reset button if you tap a wrong tile. Take the bolt cutters from the opened barrel.
- Cut open the birdcage on the landing. The dove flies away; take the second wooden head from the cage.
- Place the heads on the empty wooden figures on the egg shelf. Swap the heads until each wooden figure shows the same expression as the stone egg beside it. Take the golden key from the opened cubby and unlock the red door.
The Tech Workshop
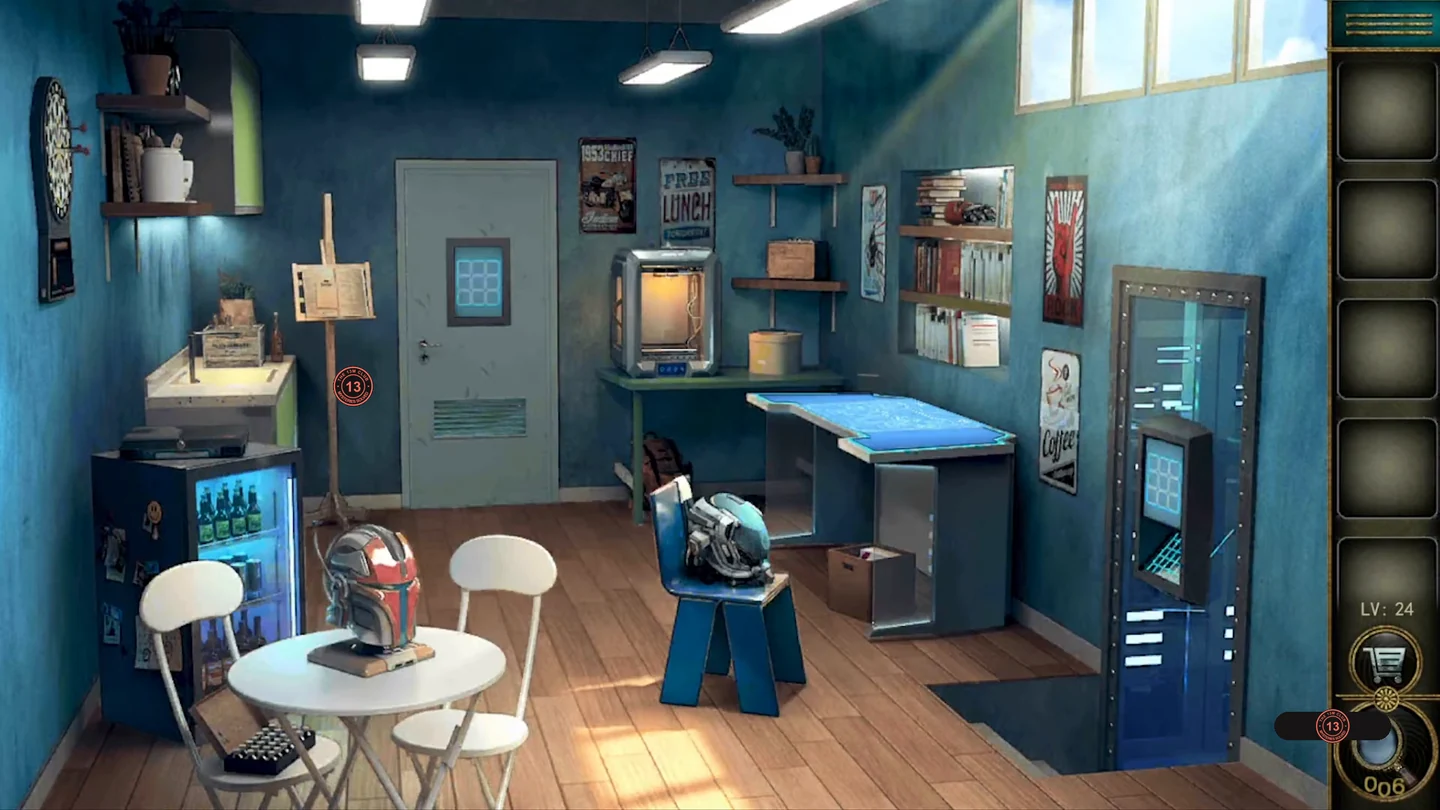
Power up the rugged laptop, use the holographic workbench to print a gamepad, enter a famous cheat code and build a robotic hand for the server's hand scanner.
- Take the small key lying on the glowing blue workbench and use it on the black laptop on the left counter. Connect the numbered circles with single or double lines so each circle has as many lines as its number, without crossing lines. The screen then shows 6739.
- Enter 6739 on the workbench keypad. Open the puzzle screen and assemble the blueprint pieces into the gamepad schematic. The 3D printer at the back then prints a gamepad; take it.CODE6739
- Plug the gamepad into the stand of the red helmet on the round table. Tap the spiral S icon on the workbench to see the input: ↑ ↑ ↓ ↓ ← → ← → B A B A. Enter it on the gamepad and take the first hand part from the helmet.CODE↑↑↓↓←→←→BABA
- Optional star 24: zoom into the server cabinet on the right and tap the star on the lower shelf, to the right of the hand scanner. Take the robotic arm from the high shelf above the workbench.
- Tap the icosahedron icon on the workbench to reveal a = 45°, y = 3, z = y + 6 and x = a / y². That gives y = 3, x = 5 and z = 9. Set the dials on the teal helmet on the chair to those values, using the Y, X and Z marks on the helmet, and take the second hand part.CODEY3 X5 Z9
- Combine both parts with the robotic arm and place it on the hand scanner in the server cabinet. The grid above traces a spiral path: centre, top middle, top left, middle left, bottom left, bottom middle, bottom right, middle right, top right.
- Tap that same spiral path on the 3 × 3 panel of the exit door and go through.
The Classroom
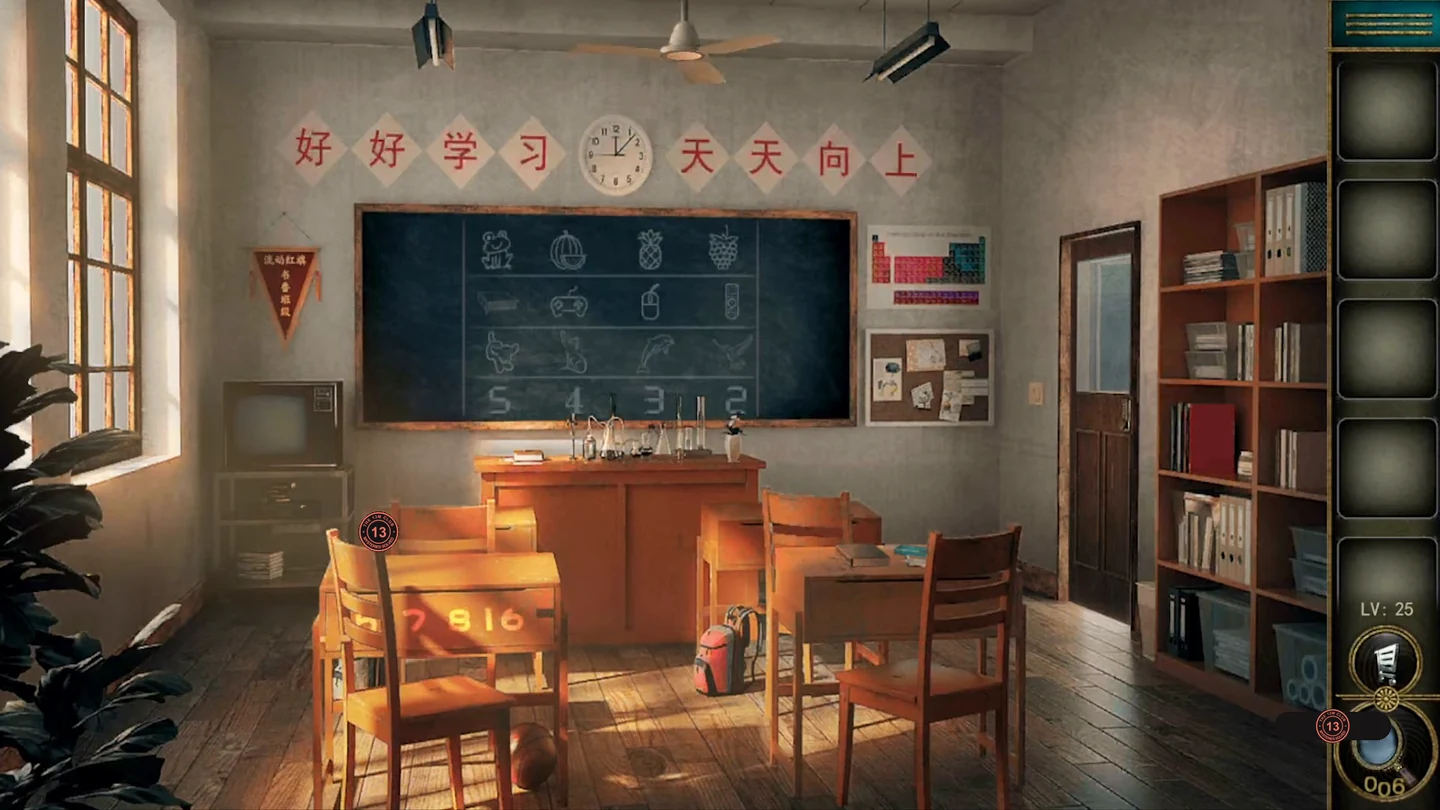
Turn the desk numbers into chemical symbols, restore the lightning bolt on the bookshelf, solve the purple glyph box and finish the chalk puzzle to get the door code from the TV.
- On the teacher's desk, move the grey notebook aside and take the first book.
- Optional star 25: tap the starred Helium (He) square on the periodic table.
- The front student desk shows 5 7 8 16. On the periodic table those atomic numbers are B, N, O and S. Enter BNOS on the desk's letter lock and take the second book from the drawer.CODEBNOS
- Place both books on the bookshelf and swap them until the red marks on the spines form one complete lightning bolt. Take the glyph card from the compartment.
- Insert the card in the purple box on the teacher's desk. Move the glyph tiles through the rotating centre to the left-hand slots so they read, from top to bottom, as shown on the card. Take the chalk from the pencil case that opens.
- Use the chalk on the blackboard: circle the frog, the book, the bird and the column number 4. Take the remote control from the tray below the board.
- Use the remote on the old TV to show 2886. Enter 2886 on the door keypad and leave.CODE2886
The Music Parlour
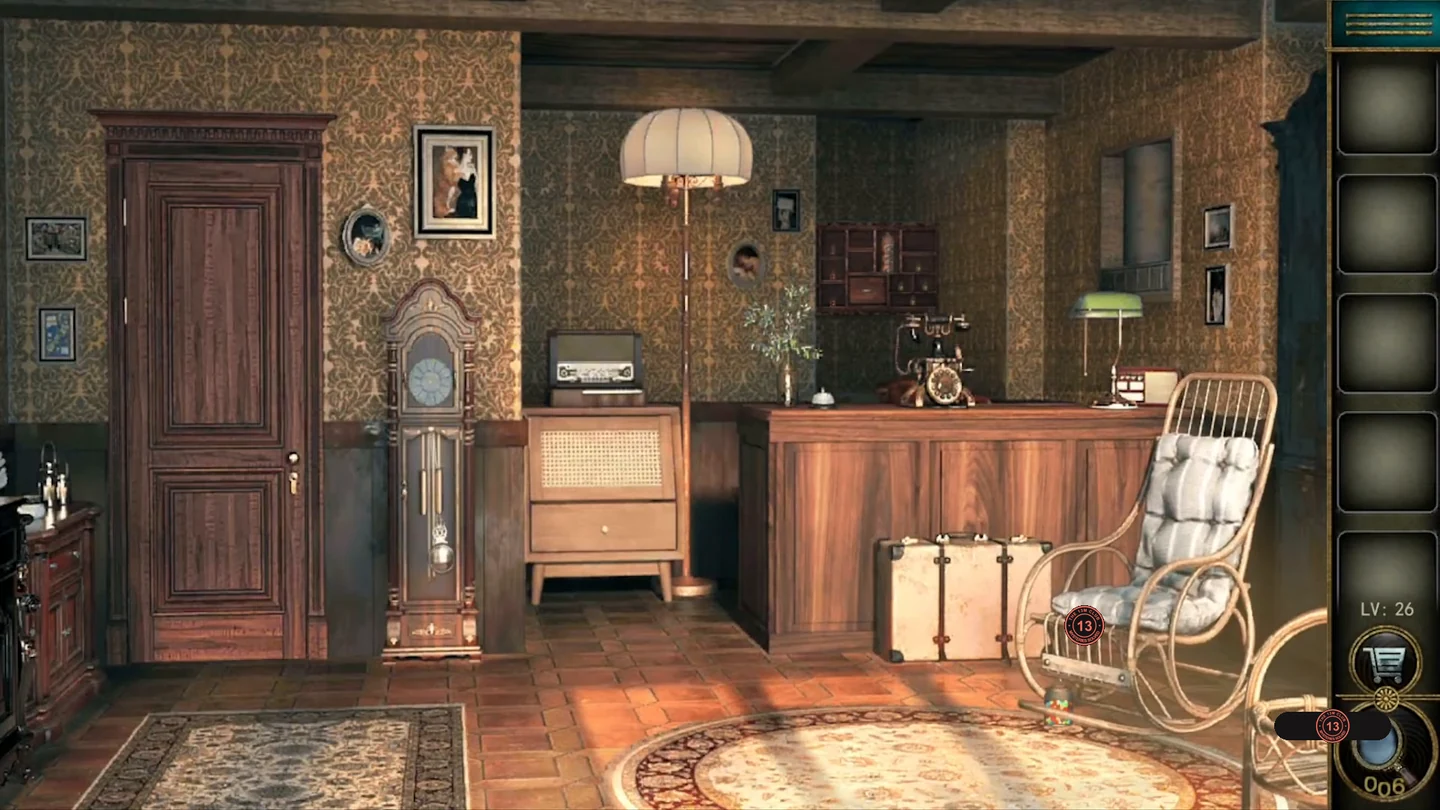
Release the jar from the ball rack, light the floor lamp, follow the music clock's hands on the radio piano, dial a phone number and sort the jars on the shelf.
- Take the screwdriver lying near the wooden ball rack under the stairs. Unscrew the plank on the rack and take it, along with the first jar of sweets (1/3).
- Fit the board onto the floor lamp under the umbrella shade and tap the bulbs until all four are lit. Take the clock hand that drops out.
- Attach the hand to the grandfather clock. Its five hands point to five music symbols; optional star 26 also appears here, so tap it.
- On the radio's colour-labelled piano, play the five symbols in clockwise order from the top of the clock: the eighth note, the slanted pair of beamed notes, the crossed-out whole note, the pair of beamed notes and the sharp sign. Take the phone number note (568023) and the second jar from the radio.
- Dial 568023 on the rotary phone. The letters ZCARE light up on the wall beside it.CODE568023
- Set the five-letter lock below the metal drum on the counter to ZCARE and take the third jar.CODEZCARE
- Place the jars on the big display shelf. The rule (shown by the question mark) is that two jars of the same kind may not sit directly above one another. Swap jars between compartments until no matching jars are stacked. Take the key from the centre drawer and unlock the door on the left.
The Toy Theatre
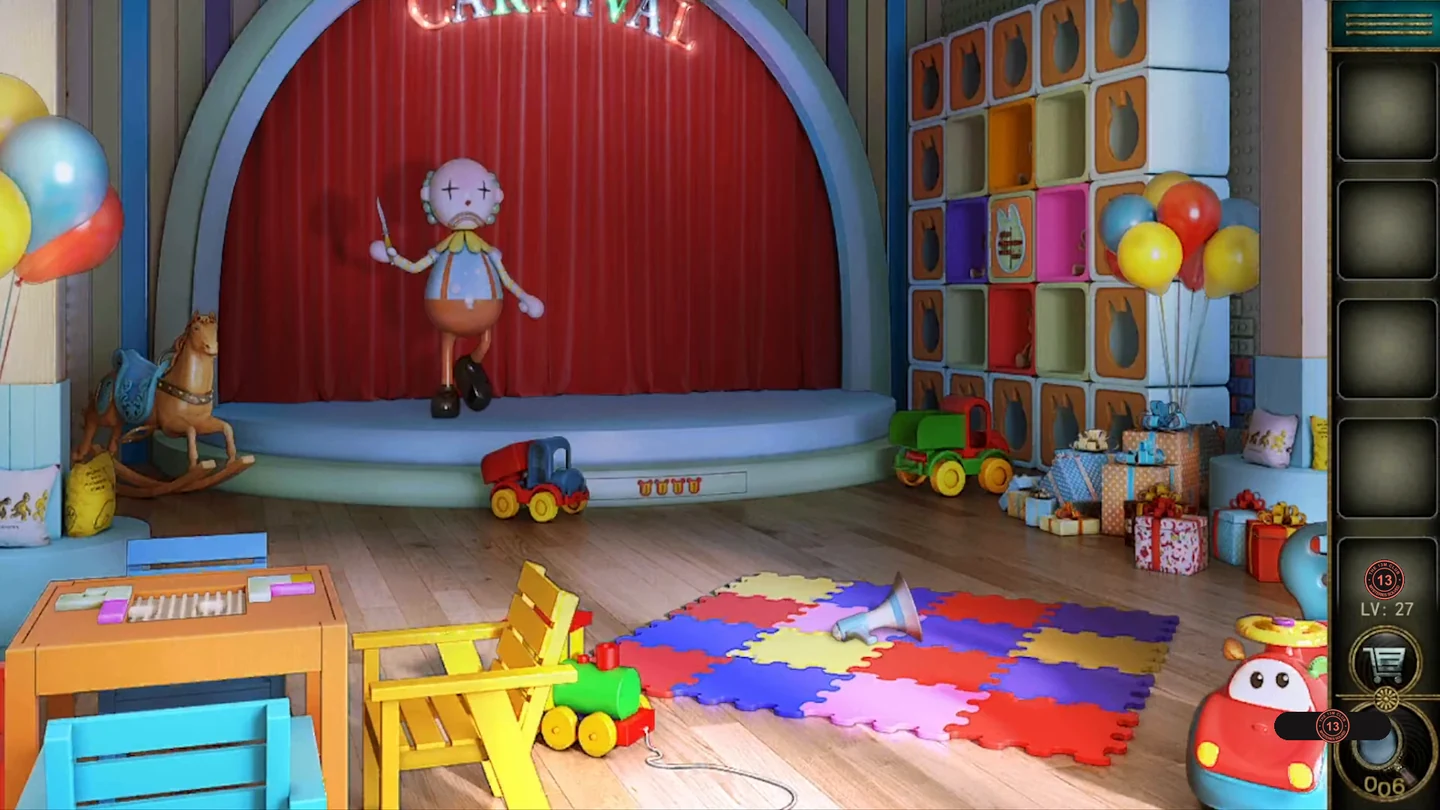
Cheer up the sad clown puppet on the stage: follow the arrows through the toy cubbies, count the foam mat colours, fill the pegboard and restore the round picture puzzle.
- Pick up the megaphone from the foam mat and give it to the clown puppet on stage. Take the knife it was holding.
- In the toy cubbies, the arrows lead from the toy in the orange cubby to the bear (blue), then the giraffe (red), then the elephant (pink). Count the foam mat tiles of the matching colours: yellow-orange 3, blue 6, red 5, pink 2. Enter 3652 on the bear-head dials under the stage and take the first building block.CODE3652
- Cut the ribbons of all four gift boxes on the floor with the knife. Take the blue eye from the brown patterned gift on the left and the second building block from the red gift on the right.
- Put the eye into the rocking horse's empty socket and take the picture tile from its mouth.
- Place both blocks on the pegboard on the child's table and fit all the pieces so the board is completely filled. Take the second picture tile and the red nose from the compartment behind it.
- Give the red nose to the clown puppet. He is still sad.
- Insert the picture tiles into the round sliding picture on the wall. Slide the pieces along the horizontal rows and the central vertical channel until both pictures are complete: the boy in the top hat and the dressed-up dog. Take the jester hat from the cubby that opens.
- Put the jester hat on the clown. He laughs and the curtain opens to reveal a portal.
- Optional star 27: zoom into the clown's face and tap his red nose; the star is awarded straight away. Then step into the portal.
The Attic Studio
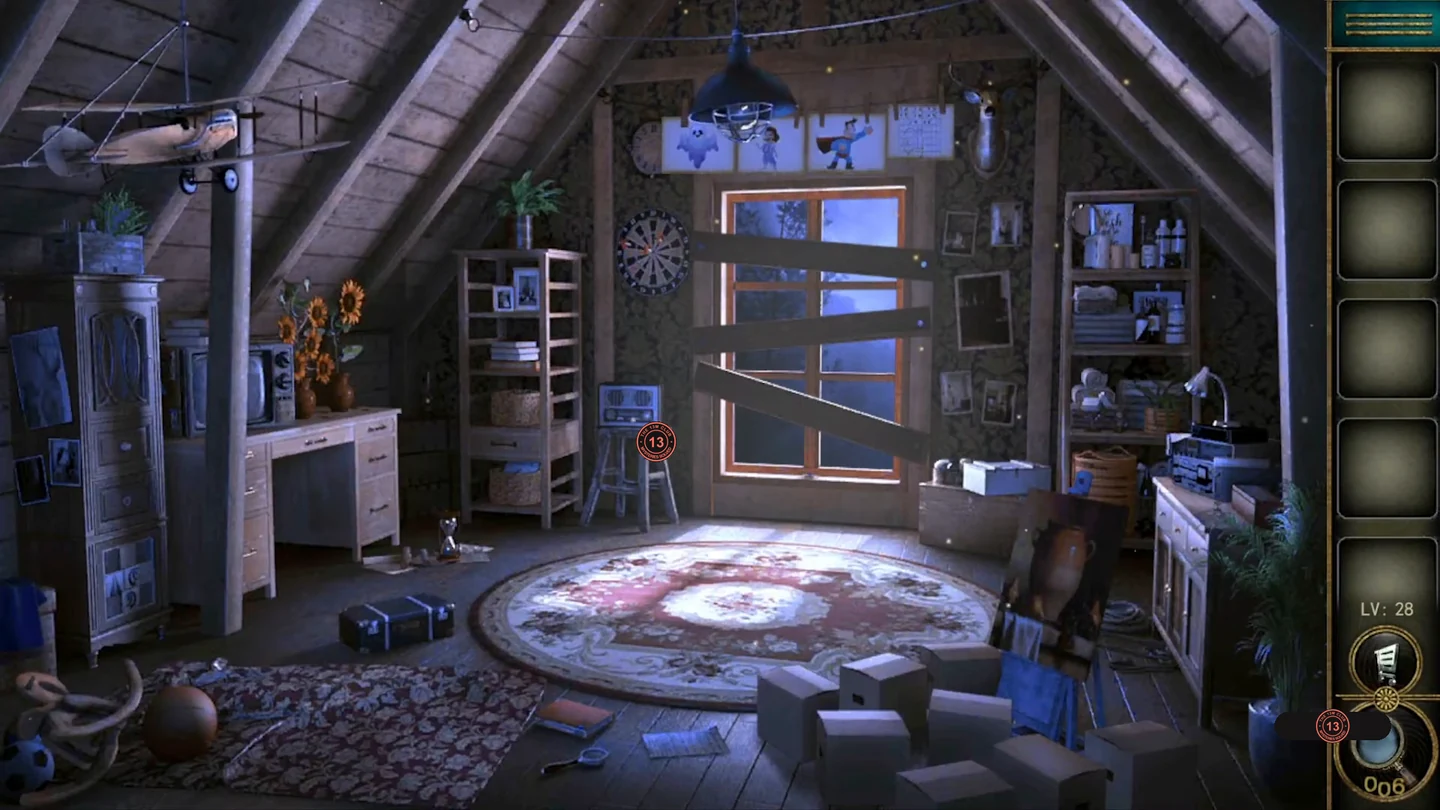
Trade fruit with the creature in the suitcase, make all the sunflowers bloom, trace the paper-plane folding diagram for a nine-digit code and spell out the missing letters to find a hammer for the boarded window.
- Zoom into the clothesline above the window and take the note pinned on the right. For optional star 28, tap two pictures to swap them until the superhero hangs on the left, the ghost in the middle and the child on the right. The superhero's beam clears the ghost and reveals a star in the middle; tap it.
- At the long wooden box with nine dials on the right desk, take the green grape and the drawer handle. Fit the handle to the upper drawer of the chest of drawers and take the sunflower head and the hammer handle.
- Feed the grape to the glowing-eyed creature in the black suitcase on the floor. Take the second sunflower head it leaves behind.
- Put both heads on the bare stems of the left sunflower pot. Tapping a flower toggles it and the flowers linked to it; keep tapping until every flower is in bloom. The big sunflower in the right pot opens; take the cherry.
- Feed the cherry to the suitcase creature and take the patterned tile it leaves.
- The note shows half a paper plane with a red fold line and a table of eight numbered directions. Mirror the outline across the fold and follow it from the red dot, writing down the table number for each direction: 731674658. Enter it on the nine-dial box and take the second tile.CODE731674658
- Insert both tiles into the sliding puzzle on the lower door of the tall cabinet on the left. Slide them until the blue fleur-de-lis is complete, then take the key and the letter sheet.
- On the letter sheet, each letter in the red grid is where a top-row letter and a side-column letter meet. Use the grid to fill in the four question marks: C, H, F and I.
- Open the cardboard boxes on the floor in front of the still-life painting. Seen from the front, they stand in three rows of three. Four of them hide the letters: the top-right box (F), the centre box (I), the middle-right box (H) and the bottom-middle box (C). Each letter appears on the painting as its box opens. When all four are showing, the blue crate opens; take the hammer head and fit it on the handle.
- Pry the boards off the window with the hammer, unlock the window with the key and climb out.
The Abandoned Hospital
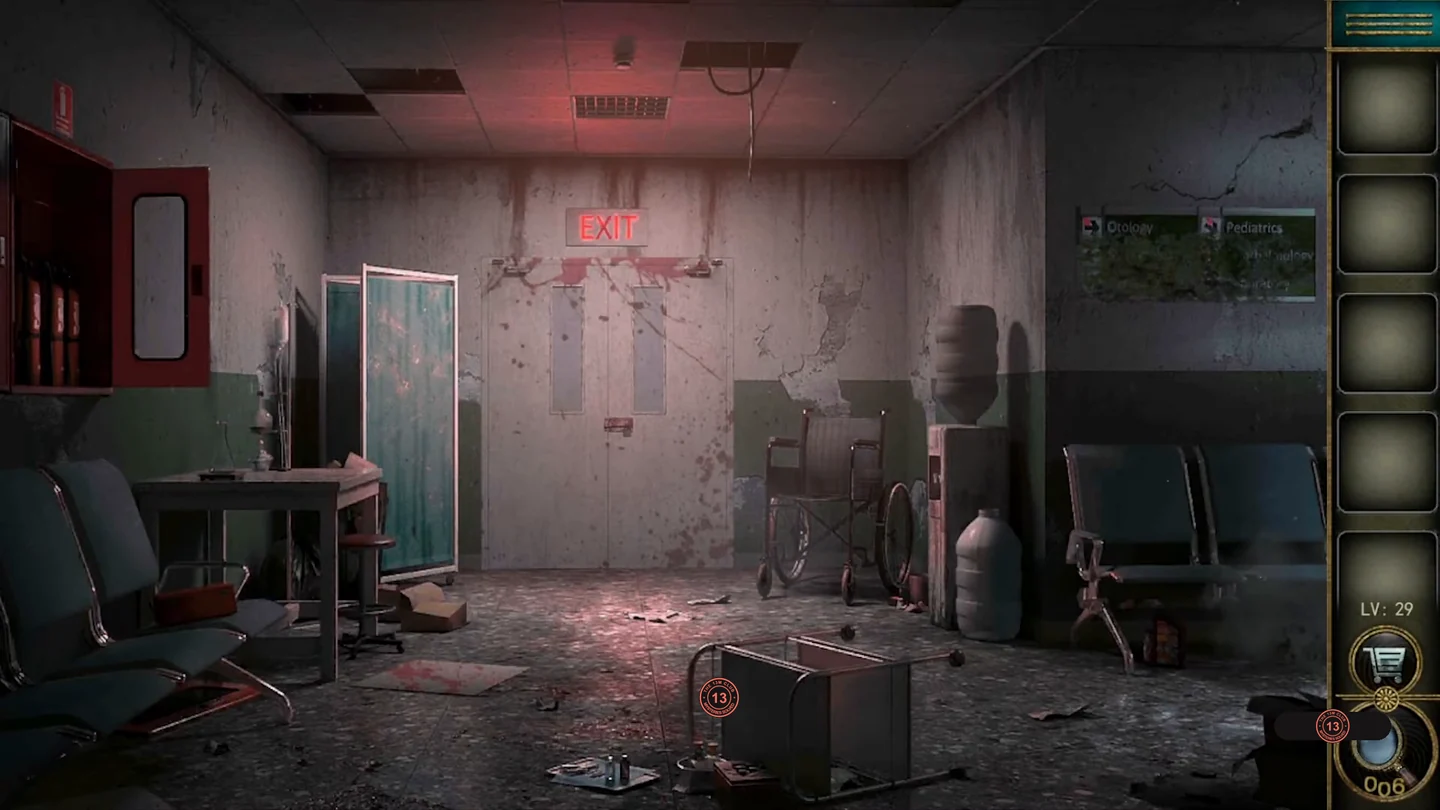
Clean the department sign to read a five-letter code, fill a glass at the water cooler, line up the animal totems and brew a corrosive liquid for the padlocked exit.
- From the tray in the foreground, take the two medicine bottles. Take the cloth from the blue waiting chair, where a five-letter box also sits.
- At the red extinguisher cabinet, the diamond above numbers the directions 1 up, 2 right, 3 down and 4 left. Tap one extinguisher and then another to swap them, until their arrows read up, right, down and left from left to right. The compartment above opens; take the spray head and the recipe sheet.
- Fit the spray head on a medicine bottle, spray the grimy department sign on the right wall and wipe it with the cloth. Five of the six arrows now show red numbers; the left-pointing Stomatology arrow has none. Follow the numbered arrows in order from 1 to 5. Each points to a blue letter, sometimes in a neighbouring row: 1 (Dermatology) to the a in Stomatology, 2 (Laboratory) to the b in Laboratory, 3 (Ophthalmology) to the s in Pediatrics, 4 (Otology) to the O in Otology and 5 (Pediatrics) to the h in Ophthalmology. That spells ABSOH.
- Set the five dials of the box on the blue chair to ABSOH and take the glass, the corkscrew and the red bird figure.CODEABSOH
- Fill the glass at the water cooler; you need a full glass of water later. For optional star 29, pour the water into the blue jug beside the cooler and refill the glass. Keep doing this until the accomplishment is awarded as a full glass returns to your inventory. Keep that final full glass for the chemistry bench. If you skip the star, filling the glass once is enough.
- Uncork both medicine bottles with the corkscrew; one holds a small purple horse figure.
- Place the horse and the bird figures on the two empty spots of the three-ring board on the foreground box. Rotate the rings until each animal figure sits on the circle of its own colour. The box opens; take the green crystals.
- At the chemistry bench, set out the crystals, the skull bottle and the full glass of water from the cooler (needed whether or not you collected the star), and pin the recipe sheet on the wall. The sheet lists twelve additions to the flask in four groups of three. Read the top row from left to right, then follow the curved arrow down; the bottom row runs from right to left. A glass or bottle drawn with steam must be heated over the burner first. One drawn with a drop must first get a drop from the red dropper. Tap an item, then tap the flask to pour it in. The order is: crystals, skull bottle, skull bottle; heated water, skull bottle with a drop, plain water; water with a drop, heated skull bottle, crystals; heated water, water with a drop, heated skull bottle. The flask fills with purple corrosive liquid; take it.
- Pour the corrosive liquid on the padlock of the exit doors and go through.
The Streamer's Room
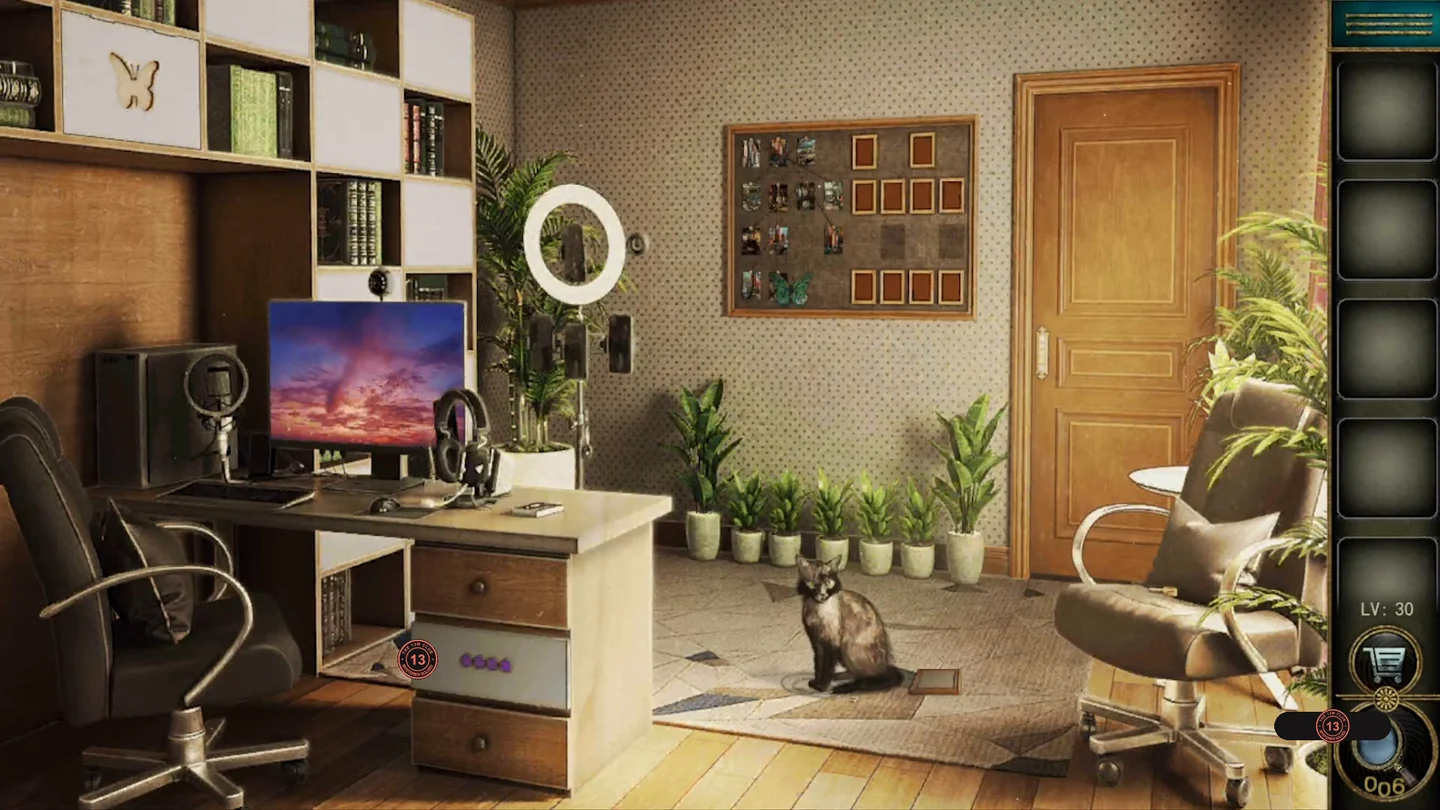
Rehang the photos on the corkboard, decode the ring light's letters on the hidden letter wheel, plug in the external drive and steer the smiley through the computer game for the door code.
- Zoom into the computer monitor and take the ring paper on the screen. Zoom into the ring light and fit the ring paper over it. Then look at the cat on the rug and take the photo frame lying beside it.
- Take the green butterfly from the bottom edge of the photo corkboard. Fit it into the cut-out on the wooden box on the bookshelf and take the second photo frame inside.
- Place both photo frames in the two empty spots on the corkboard. Then drag each strung photo on the left into a frame on the right as shown in the picture below: the photo with a red number goes into the frame with the same blue number. When all twelve match, the corkboard slides aside to reveal a letter wheel; take the toy mouse from its centre.
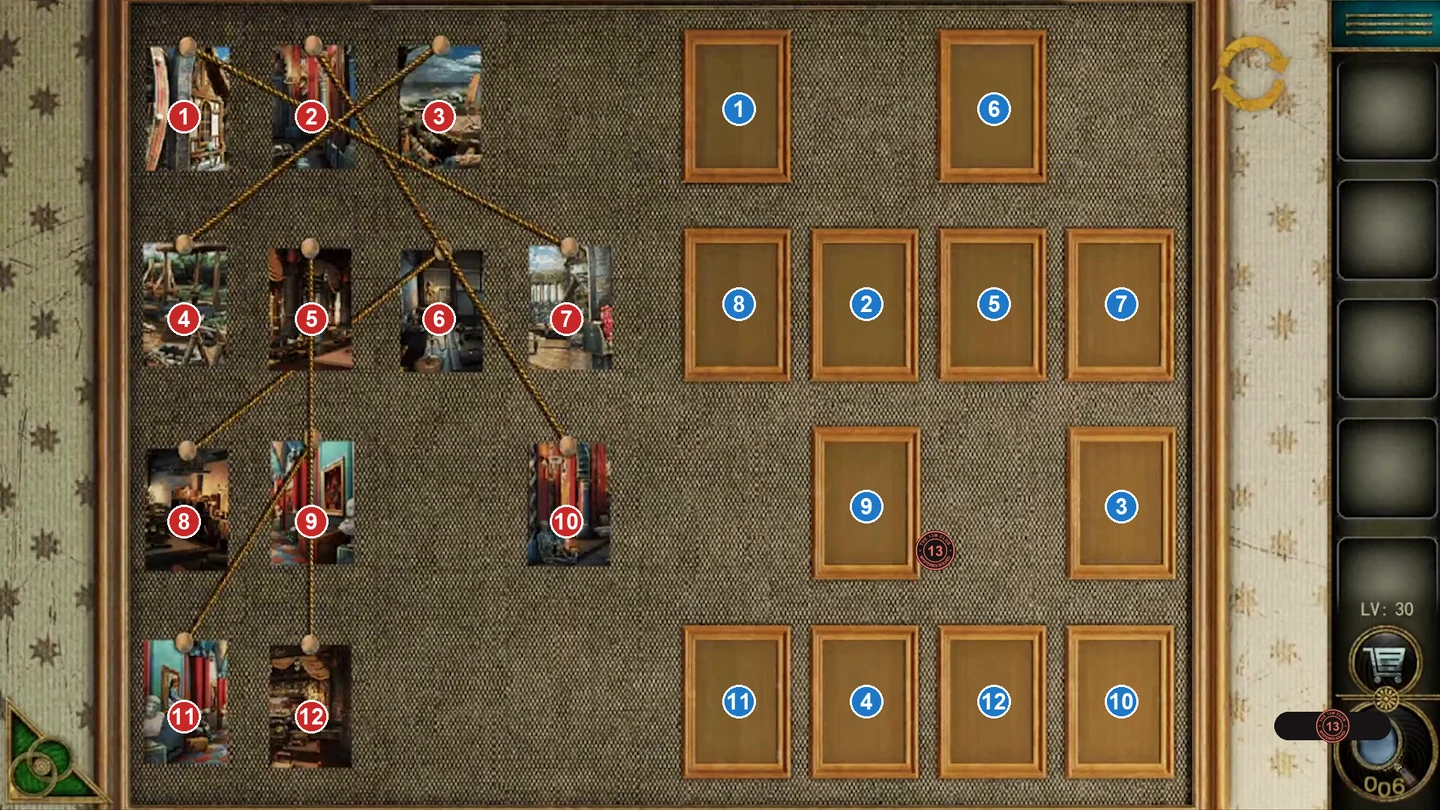
Move each red-numbered photo into the frame with the same blue number. - At the grey armchair, take the wind-up key from the seat. Then lift the pillow to uncover the black control knob underneath and take it.
- With the ring paper fitted, place the knob on the ring light's switch and turn it to cycle the light's colours. For optional star 30, stop at the yellow setting, where the phone shows a starry wallpaper, and tap the bright star at the upper left of the phone screen. In the pink setting (the phone shows a cloudy sky), the ring shows the letters O, R, F and N.
- Fit the wind-up key into the toy mouse in the inventory, then set the mouse down by the cat on the rug. The cat chases it away, uncovering a data cable; take it.
- On the letter wheel behind the corkboard, find O, R, F and N on the outer ring; the inner ring letters next to them are L, O, C and K. Enter LOCK on the purple dials of the desk drawer and take the external drive. Combine it with the cable.CODELOCK
- Plug the drive into the computer and open the new MHD program. Move the blue smiley along the lines to the green smiley on the left without being caught by the red angry faces. When you finish, the monitor shows 4236.
- The door has five dials. Enter 4, 2, 3 and 6 on the first four. The fifth dial is not shown on the monitor and can differ between games, so step the last dial through the digits until the door opens. Go through.