Bishop's study and the owl
Travel by map to the Order HQ and go to Bishop's study.
- Blow the AIR HORN at the owl on the desk to scare it away. Take the RULER from the desk and the Central Park card from under the book. The gun cabinet behind the desk is locked.
The bookcase heights
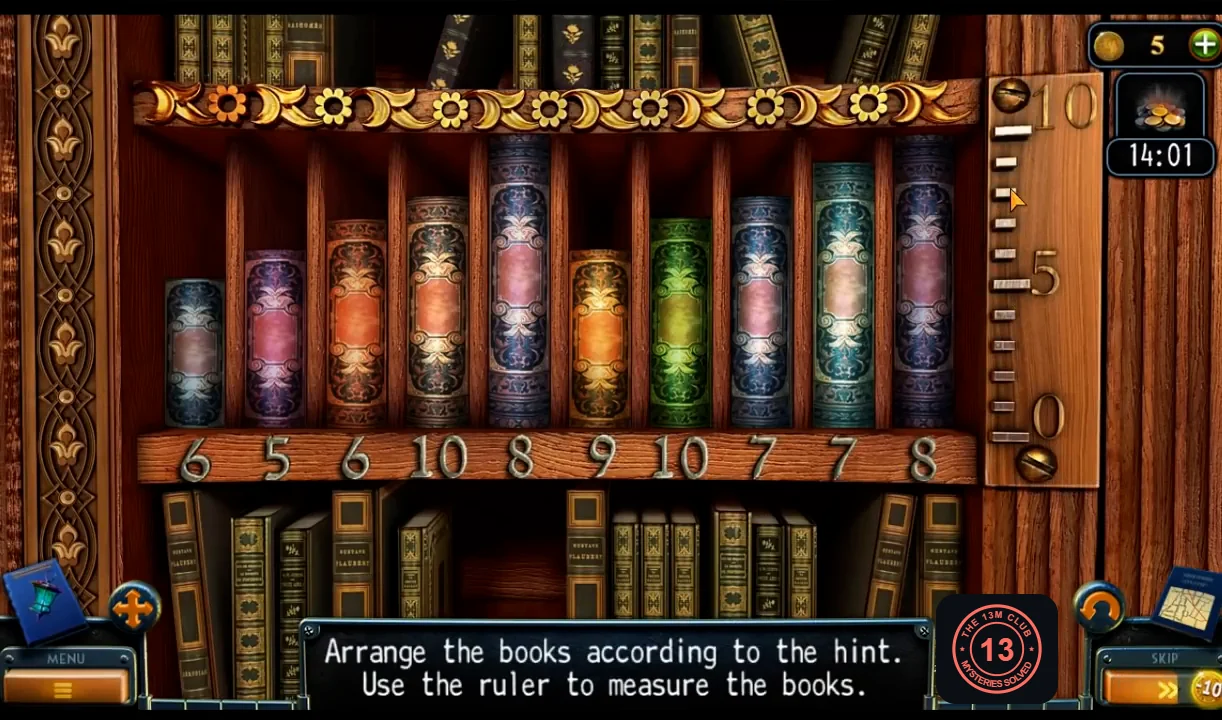
The right-hand bookcase hides a secret passage. Each slot of the shelf has a number underneath: 6, 5, 6, 10, 8, 9, 10, 7, 7, 8 from left to right.
- Put the RULER on the right-hand bookcase.
- Click two books to swap them. Measure each book against the ruler at the right and put it over the number that equals its height: heights 6, 5, 6, 10, 8, 9, 10, 7, 7, 8 from left to right. The bookcase slides aside to reveal a secret passage.CODE6-5-6-10-8-9-10-7-7-8
The library hall and the golden book
Pick up the treble-clef note in the passage, look over the library hall and read the floor-tile order through the pattern on the golden book.
- In the passage, the golden machine on the stand needs no action. Pick up the collection item on the floor at the lower left near its stand (a treble-clef note).
- Go through to the library hall. The ladder is broken, the lion relief is missing its face and the code machine on the table needs a code. Take the PATTERN (a perforated stencil) from the table.
- In the HQ entrance hall, lay the PATTERN on the open golden book on the stand. Four symbols numbered 1 to 4 show through: they belong to the covered floor tiles, which need light first.
The helmet and the barred window
Take the knight's helmet from the Hall of Fame and saw through the cell-block window bars in the mayor's bunker.
- In the Hall of Fame, cut the left purple glass capsule with the GLASS CUTTER and take the knight's HELMET.
- Travel to the mayor's bunker. Saw through the bars of the window in the cell-block door with the FILE and go through to the storage room with the red crane.
The bunker storage search
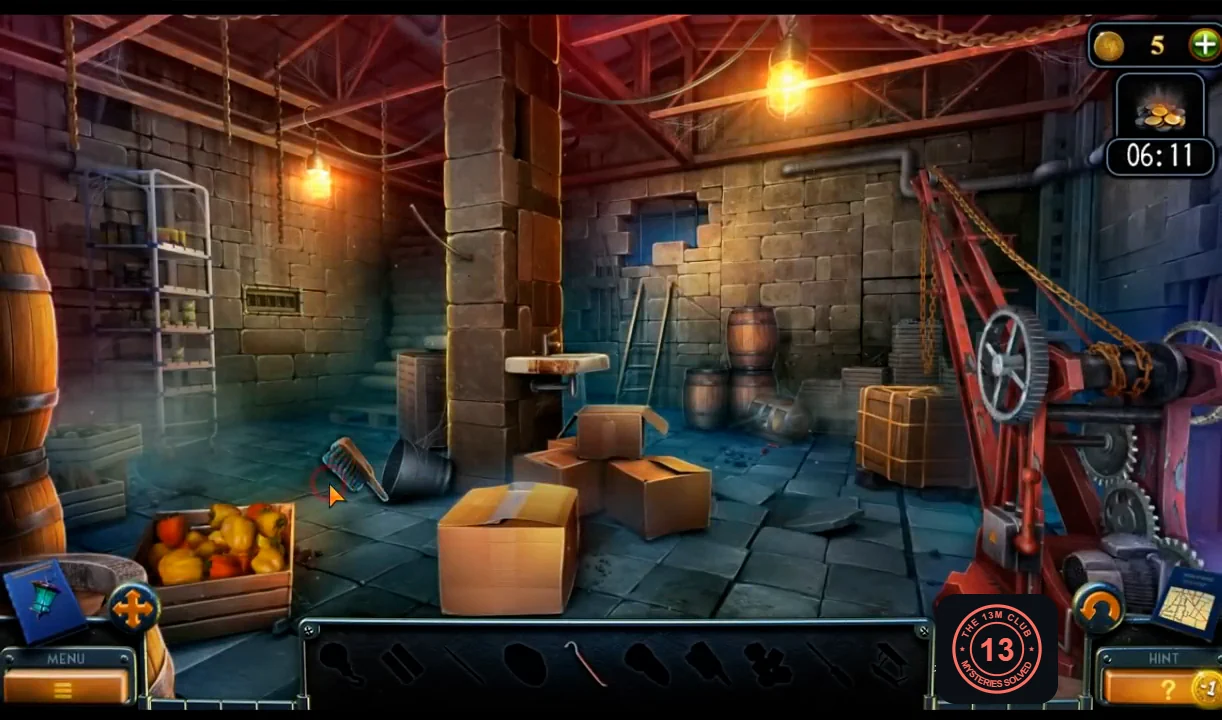
The storage room is an interactive search scene; its items stay inside the scene.
- Take the CROWBAR from the wall left of the pillar and the BRUSH. Move the peppers in the crate at the lower left and take the STEP.
- Lift the broken crate on the left and take the BATTERIES; the old paper underneath is too faint to read. Put the STEP on the ladder at the back left: it still has to be secured.
- Take the SCALPEL from the ledge of the left wall panel. Cut the tape of the cardboard box with it and take the SCREWDRIVER and the FLASHLIGHT. Put the BATTERIES in the FLASHLIGHT.
- Secure the step of the ladder with the SCREWDRIVER and climb to the hole in the blue wall. Take the lump of COAL, light the hole with the FLASHLIGHT and pull out the HOOK with the CROWBAR.
- Attach the HOOK to the crane: it lifts the wheeled crate and the CUBES fall out.
- Put the CUBES on the left wall panel and clean them with the BRUSH. Rub the COAL over the old paper to read the symbol order: quartered circle, ring with dots, dark circle with an X, triangle in a circle, three circles.
- Press the cubes in that order. Take the SAFE HANDLE (shaped like a ship's wheel).CODEquartered circle, dotted ring, X circle, triangle, three circles
The vault and the freezing agent
Open the bunker vault with the safe handle, read about the freezing drug and collect two reaper figurines for the map table.
- In the mayor's office place the REAPER FIGURINE on the map table. More figurines are still missing.
- At the vault door in the corridor, put the SAFE HANDLE into the recess of its wheel. The door opens on a barred cell holding a zombie.
- Read the clipboard about the B-12 freezing drug. Take the TANK from the pipe beside the cell and the REAPER FIGURINE near the pipe valve.
- Put the REAPER FIGURINE on the map table in the mayor's office. One is still missing.
The reapers on the map table
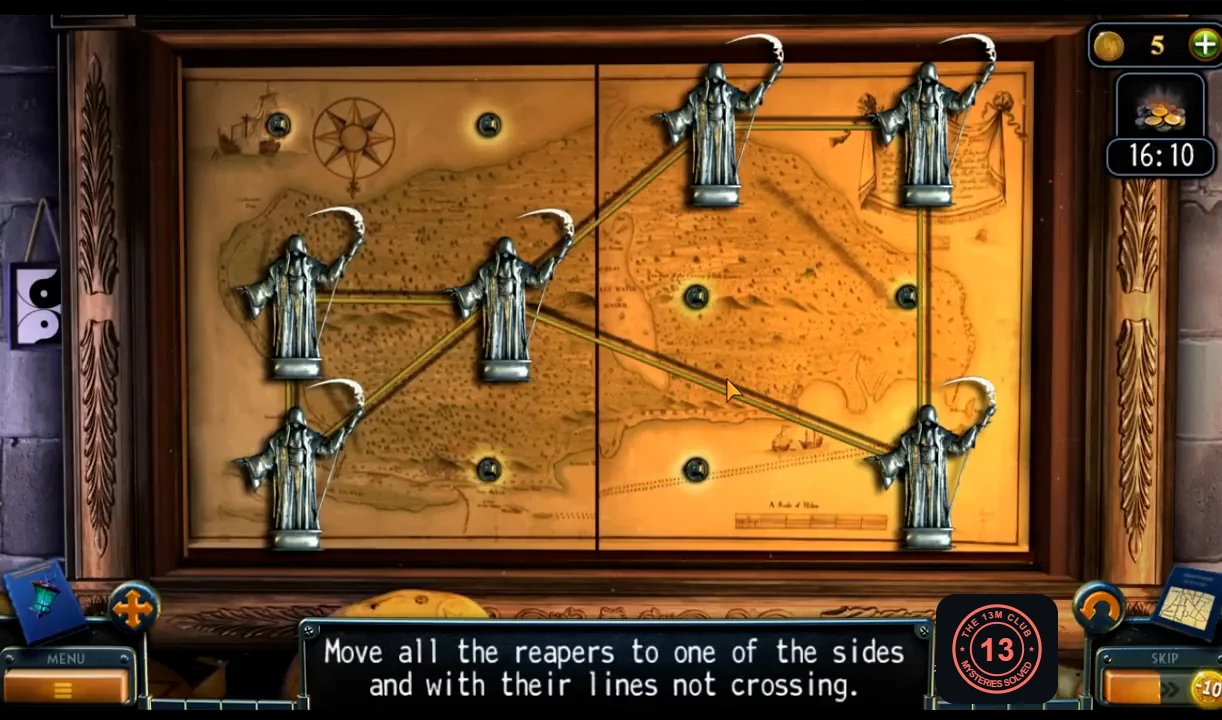
Get the last reaper from the attic safe, then rearrange the reapers on the map table for the telescope lens.
- At the opera, in the secret attic, put the VIOLIN in the violin-shaped recess on the desk. The magnetic safe opens: take the last REAPER FIGURINE.
- Place the last REAPER FIGURINE on the map table in the mayor's office.
- Drag a reaper into any empty hole. Number the four columns 1 to 4 from the left (the divider runs between columns 2 and 3). Make four moves: column 2 middle to column 3 middle; column 4 bottom to column 4 middle; column 1 bottom to column 4 bottom; column 1 middle to column 3 bottom. All six reapers now stand on the right and no ropes cross.
- Take the TELESCOPE LENS and read Hardstein's journal in the compartment.
- Fit the TELESCOPE LENS on the telescope in the secret attic. Laura sees Hardstein with the lantern on top of the Empire State Building (task Search results).