The rocket alarm
The bonus chapter is a stand-alone story: the Order sends Will to examine Richard Hardstein's war bunker before the authorities destroy it, and a rocket launch sequence starts as he enters. It becomes available after the main game ends: a message on the main menu tells you that you may now play the bonus chapter.
- After the main ending you return to the main menu. A CONGRATULATIONS message says that you have completed the main game and may now play the bonus chapter. If you played on Hard difficulty, the achievement Expert appears at the same time. Close it with OK and start the bonus chapter from the main menu. It opens with Will driving to Hardstein's bunker.
- After the opening scene the alarm warns that the rocket launch is imminent. The switch box on the left wall of the office will not stop it, and the desk phone has a dial of military symbols that you cannot use yet. Take the SOLVENT from the shelf on the right. The taped cardboard box beside it has to be cut open.
- Leave the office by the left exit to reach the round hall. Note the wall panel with three coloured discs and an empty socket, the side door with a jammed latch and the bottle in the aquarium. Take the INSULATING TAPE from the lamp tree.
The tangled wires
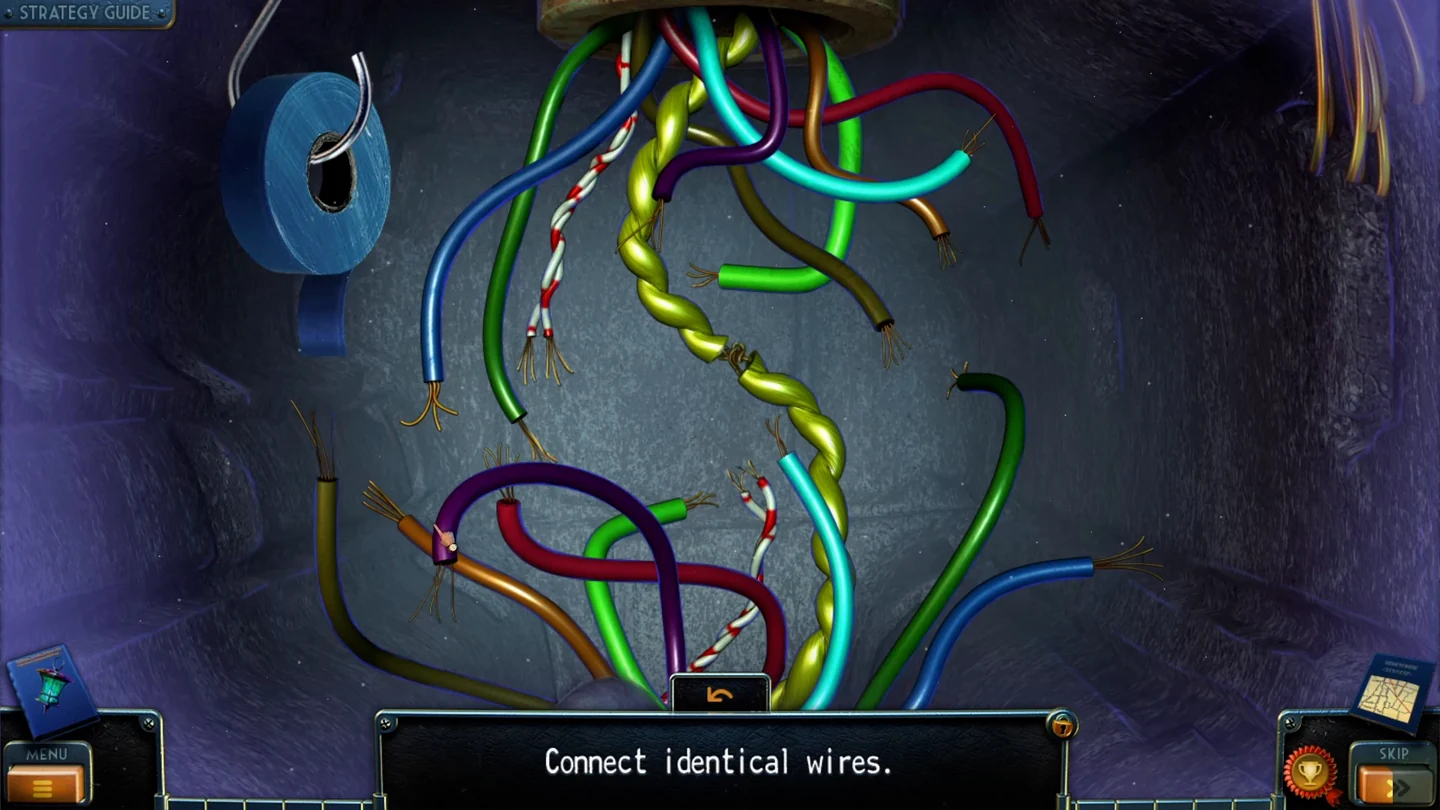
Tape the wire conduit in the office and join the loose wire ends in matching pairs to open the office's right-hand door.
- Back in the office, use the INSULATING TAPE on the wire conduit on the left wall.
- Join each loose wire end to the end with the same colour and pattern: plain colours with plain colours, the yellow twisted wire with its twin and the striped wire with its twin. When all pairs are joined, the right-hand door of the office opens.
The painted dial and the phone
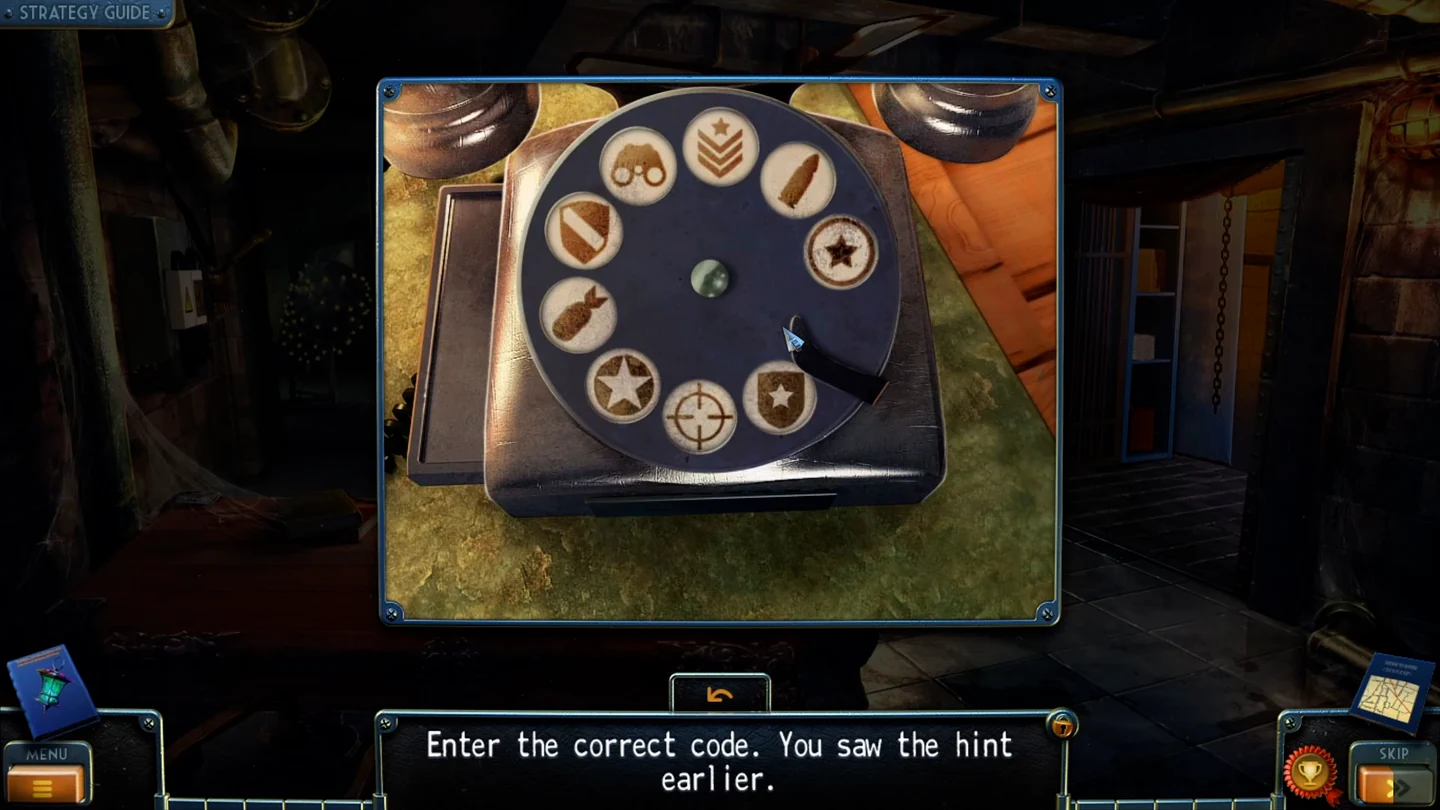
Clean the painted cell door to find the dial number, then dial it on the office phone using the symbols.
- In the prison corridor, a locked box sits behind the cell bars and a cell door is painted over in blue. Take the BROOM, then pull out the loose wall brick and take the RAG.
- Combine the RAG with the SOLVENT in the inventory and rub the painted cell door with the wet rag. A telephone dial appears with the number 1342 written under it.
- On the office desk phone, each symbol sits where a digit sits on the painted dial. Dial 1 = the star in a circle (right), 3 = the chevrons (top), 4 = the binoculars (top left) and 2 = the bullet (upper right). Take the KEY that drops out.CODE1342: star in circle, chevrons, binoculars, bullet
The lounge
Open the lounge, read the diary about the NEW WORLD program and get the record from the office box.
- Unlock the door at the top of the hall stairs with the KEY. In the lounge, take the KNIFE from the desk.
- Read the diary on the desk about the NEW WORLD program. The gramophone on the right is missing its record.
- Cut the tape of the cardboard box in the office with the KNIFE. Take the RECORD and the ROPE.
The gramophone buttons
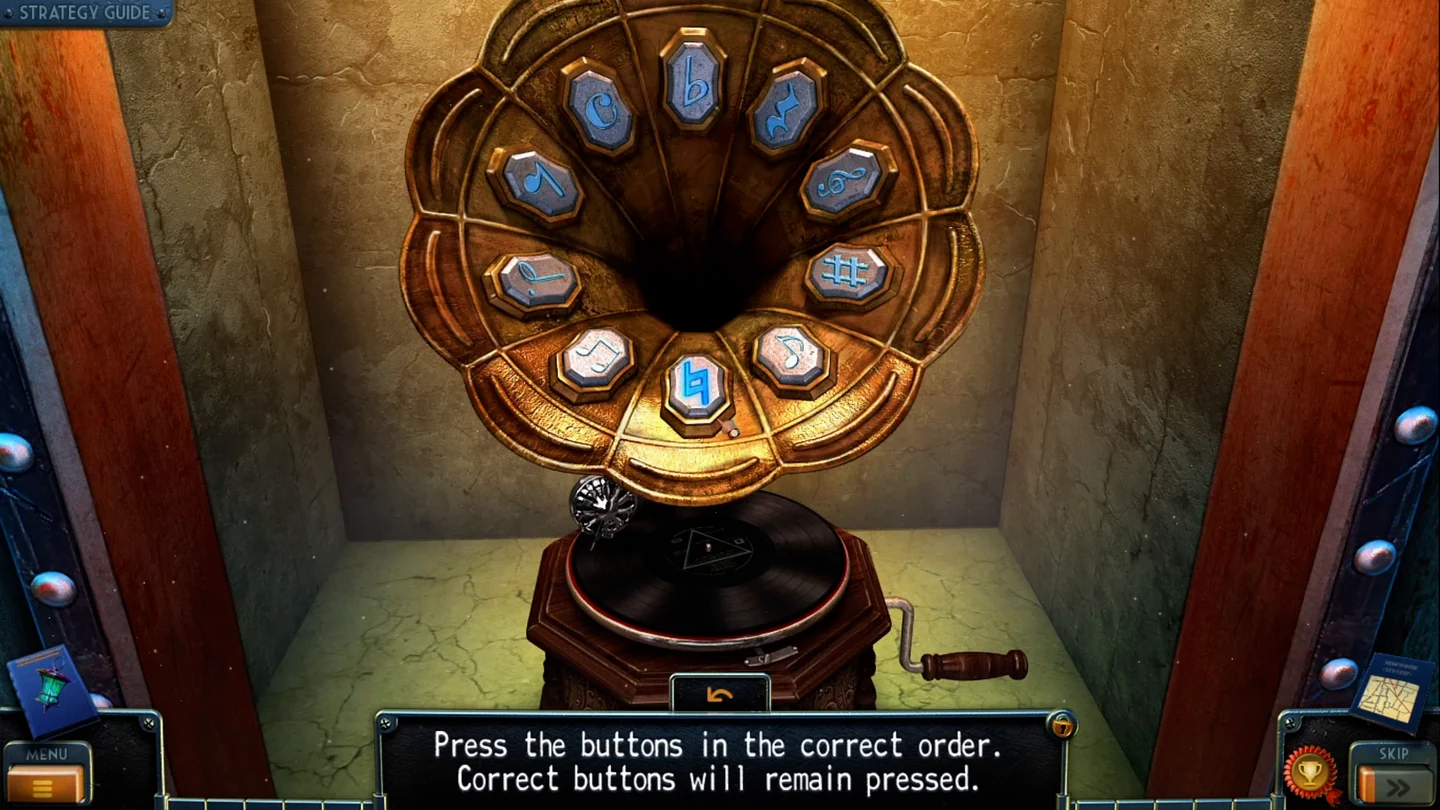
Play the record on the lounge gramophone, then press the ten music-symbol buttons in the right order.
- Put the RECORD on the gramophone in the lounge.
- Ten buttons with music symbols surround the horn. A correct button stays pressed down; a wrong one releases all of them. Press: the treble clef (upper right), the natural sign (bottom), the eighth rest (upper left), the quarter rest (top right), the eighth note (lower right), the note lying on its side (left), the flat (top), the sharp (right), the beamed notes (lower left) and finally the "C" (top left). Take the DEACTIVATOR PART and the COILED LINE. The deactivator now appears in your inventory and collects its parts as you find them.CODEtreble clef, natural, eighth rest, quarter rest, eighth note, sideways note, flat, sharp, beamed notes, C
- The roll-top desk in the lounge is locked; you will need a tool to break the lock.
The hook and the aquarium
Knock down the hook, pull the key with the cross-shaped bow from the armchair and fish the bottle with the drawing out of the aquarium.
- In the hall, knock the HOOK down from the lamp tree with the BROOM.
- In the lounge, lift the seat of the red armchair. Pull the stuck KEY with a cross-shaped bow out of the grille with the HOOK.
- Combine the HOOK with the COILED LINE to make a STRING WITH HOOK. Fish the BOTTLE out of the hall aquarium with it and open the bottle in the inventory: it holds a colour-wheel DRAWING.
The colour discs
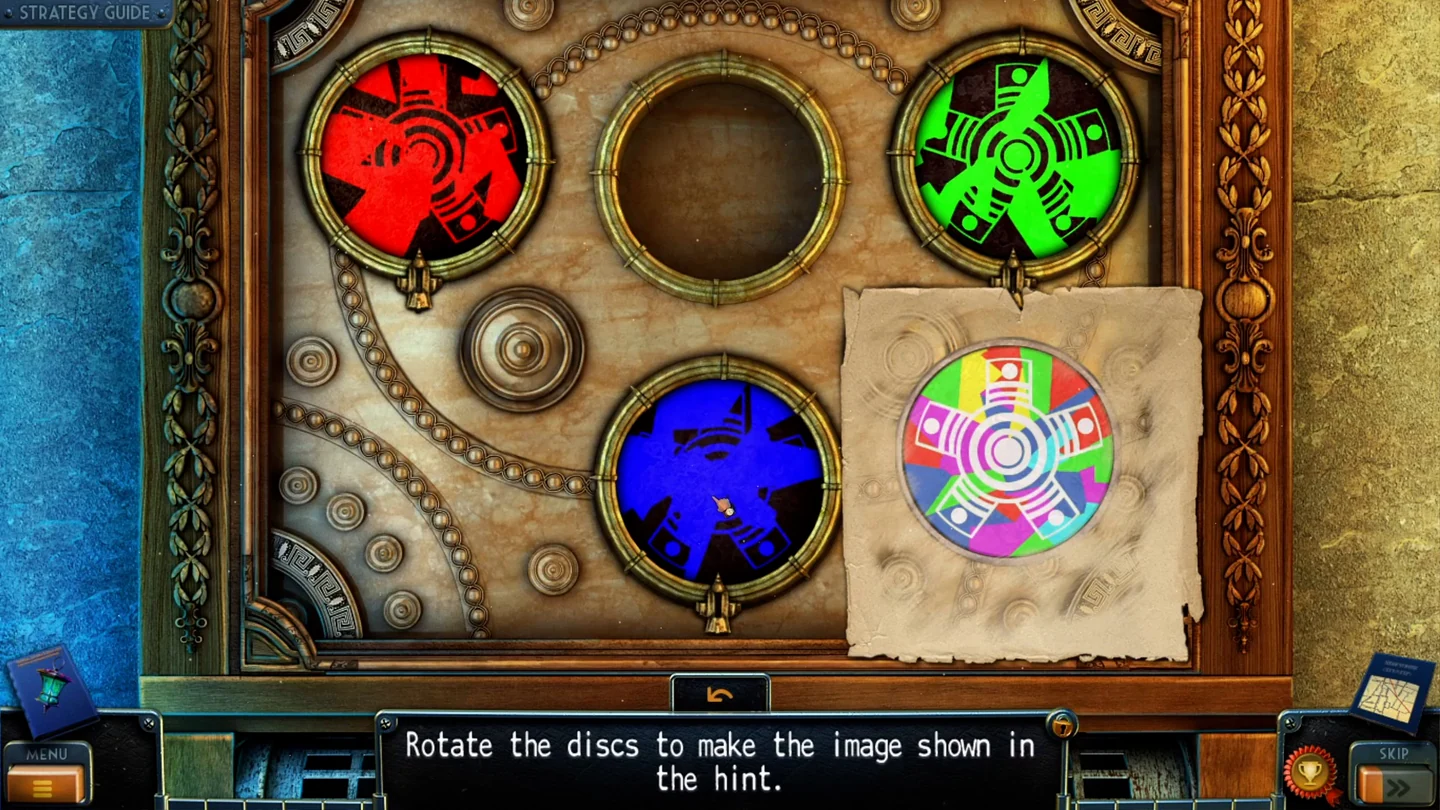
Turn the hall's three colour discs until they match the drawing from the bottle.
- Put the DRAWING on the hall wall panel with the red, green and blue discs.
- Click a disc to rotate it. Turn each disc until its coloured shape matches the drawing. Then click the empty circle in the centre of the panel: the three discs merge there into the picture and a compartment opens: take the DEACTIVATOR PART (it joins the deactivator) and the GAFF.
The prison cell
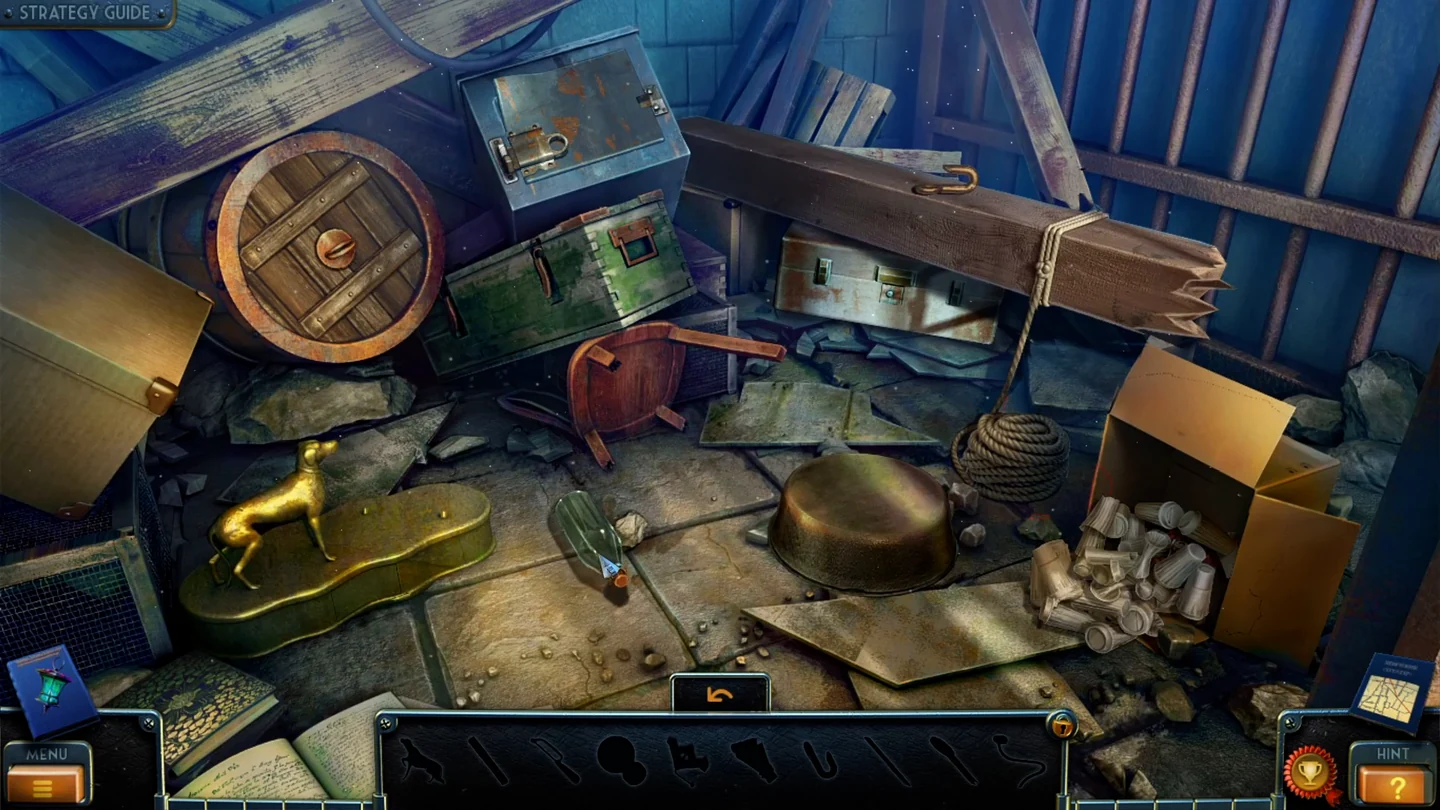
The prison cell is an interactive search scene: the items you find are used inside it.
- In the prison corridor, unlock the cell bars with the CROSS KEY and enter the cell.
- Take the GLASS SHARD from the floor by the basin and the HOOK from the top of the rope-bound beam. Remove the cans from the cardboard box and take the JACK. Fix the HOOK on the barrel lid. Cut the rope tied round the beam with the GLASS SHARD, take the ROPE and tie it to the hook to pull the lid off. Take the SAW BLADE from the barrel.
- Put the JACK under the heavy beam to lift it. A locked white crate is uncovered (it needs a key). Take the KNOB (a clear glass knob) that is now within reach and attach it to the door of the blue box at the top; open the box and take the GOLDEN DOG FIGURINE.
- Put the figurine on the empty place of the gold pedestal next to the other dog and take the KEY from the drawer. Open the white crate with it. Fit the SAW BLADE into the hacksaw frame, saw a leg off the red stool and push the CHAIR LEG into the iron hammer head. You receive the HAMMER.
The tunnel room, workshop and greenhouse
Open the side door to the tunnel room, explore the workshop and greenhouse, and turn the oiled wheel to open the way to the hangar.
- In the hall, knock the jammed latch of the side door with the HAMMER and go through to the tunnel room. Lift the floor hatch lid with the GAFF.
- The drop is too high, so tie the ROPE at the hatch. The green double door has a symbol panel with a part missing, something is written behind the window, and the wheel on the pillar needs oil. Climb down the rope to the workshop.
- Take the LOCK PART from the red press; the pole on the floor is too heavy to lift. Go left to the greenhouse: take the PIPE FRAGMENT. In the close-up of the pile of rocks, move the rocks off the red bag, open the bag and take the CAMERA. Its lens is missing. The red tank needs a valve to drain the water.
- Lever up the pole in the workshop with the PIPE FRAGMENT and take the OIL CAN. Oil the pillar wheel in the tunnel room and turn it: a side passage opens to the hangar.
The hangar
Take the crowbar from the hangar's crane cabin. The aircraft and the crane are used later.
- The aircraft door will not open by hand. Break the window of the crane cabin with the HAMMER and take the CROWBAR from the control panel; the crane cannot be used without instructions. Prise the aircraft door open with the CROWBAR.
Inside the aircraft
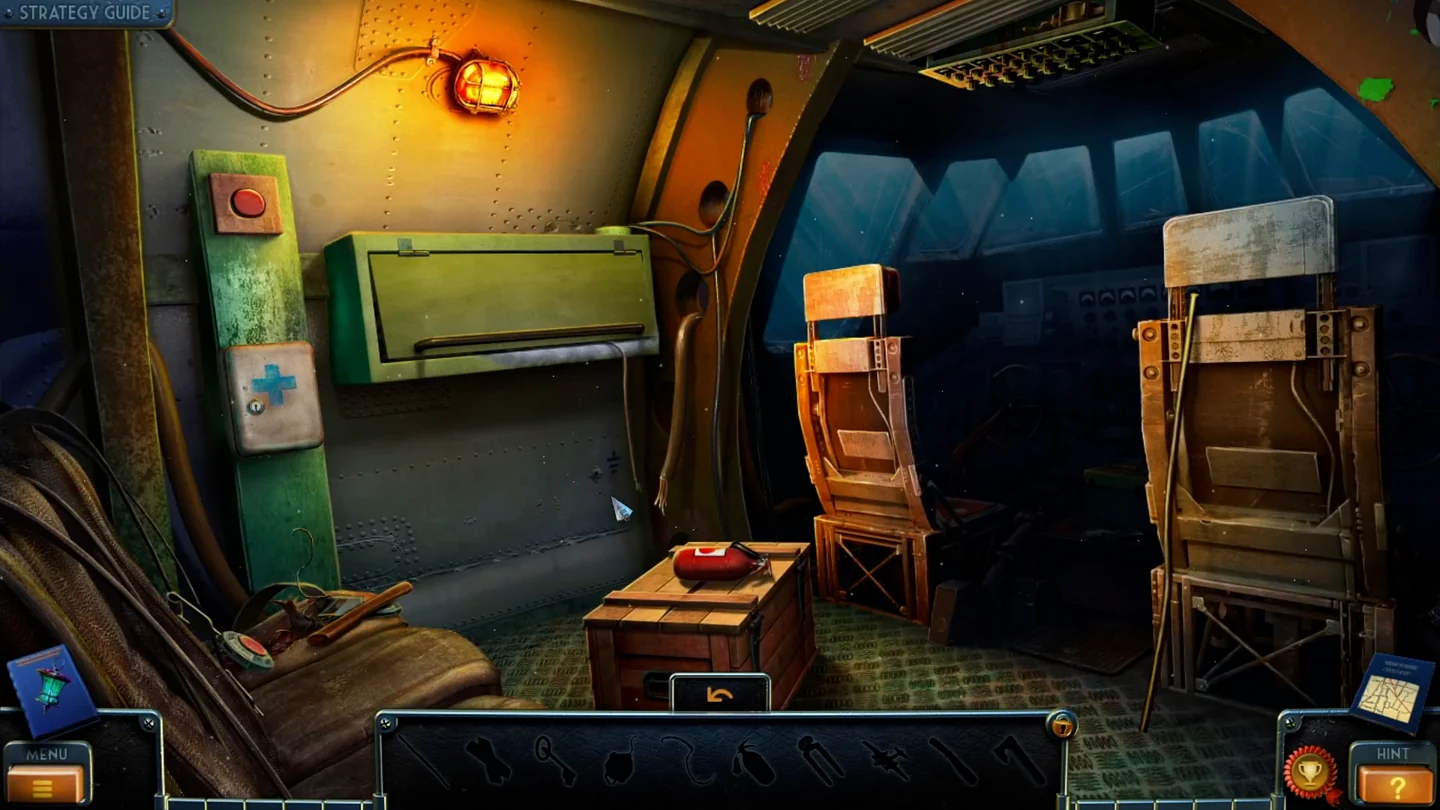
The aircraft is an interactive search scene: the items you find are used inside it.
- Take the AXE HANDLE from the seat, the FIRE EXTINGUISHER from the floor crate and the STICK leaning by the right seat. Open the yellow wall box and put out the fire inside with the FIRE EXTINGUISHER. Take the NIPPERS.
- Cut the SPRING out of the torn seat with the NIPPERS and use it to pull the KEY out of the box under the seat. The lock of the first-aid box is rusty.
- Open the ceiling panel by the lamp with the STICK and take the OIL CAN. Oil the first-aid lock, open it with the KEY and take the PATCH. Put the PATCH on the red wall button and press it: the cockpit lights come on.
- In the cockpit, put the AXE HANDLE on the axe head by the green box to make an AXE. Smash the floor crate with it and take the TOY PLANE. Fit the TOY PLANE into the plane-shaped recess of the green box and take the VALVE.
The infirmary and the hidden note
Drain the greenhouse tank to reach the infirmary, find the note behind the corridor wall tile and drill open the lounge desk.
- The wooden crate in the hangar is too heavy to move. Put the LOCK PART into the symbol panel of the green door in the tunnel room. Three rows of sliders appear, but you need a hint first.
- In the greenhouse, fit the VALVE on the pipe of the tank panel and turn it. The water drains: walk through the tank into the infirmary.
- Take the CHISEL lying beside the green case. Open the latch of the case with the KNIFE and take the FLASHLIGHT from inside.
- In the prison corridor, knock out the loose wall tile with the CHISEL and the HAMMER. Read the note: the underwater tunnel that starts in the boiler room is the only way out. Take the HAND DRILL from the cavity.
- Drill out the lock of the roll-top desk in the lounge with the HAND DRILL. Take the DEACTIVATOR PART and the LENS. Fit the LENS to the CAMERA in the inventory.
The pipe symbols and the green door
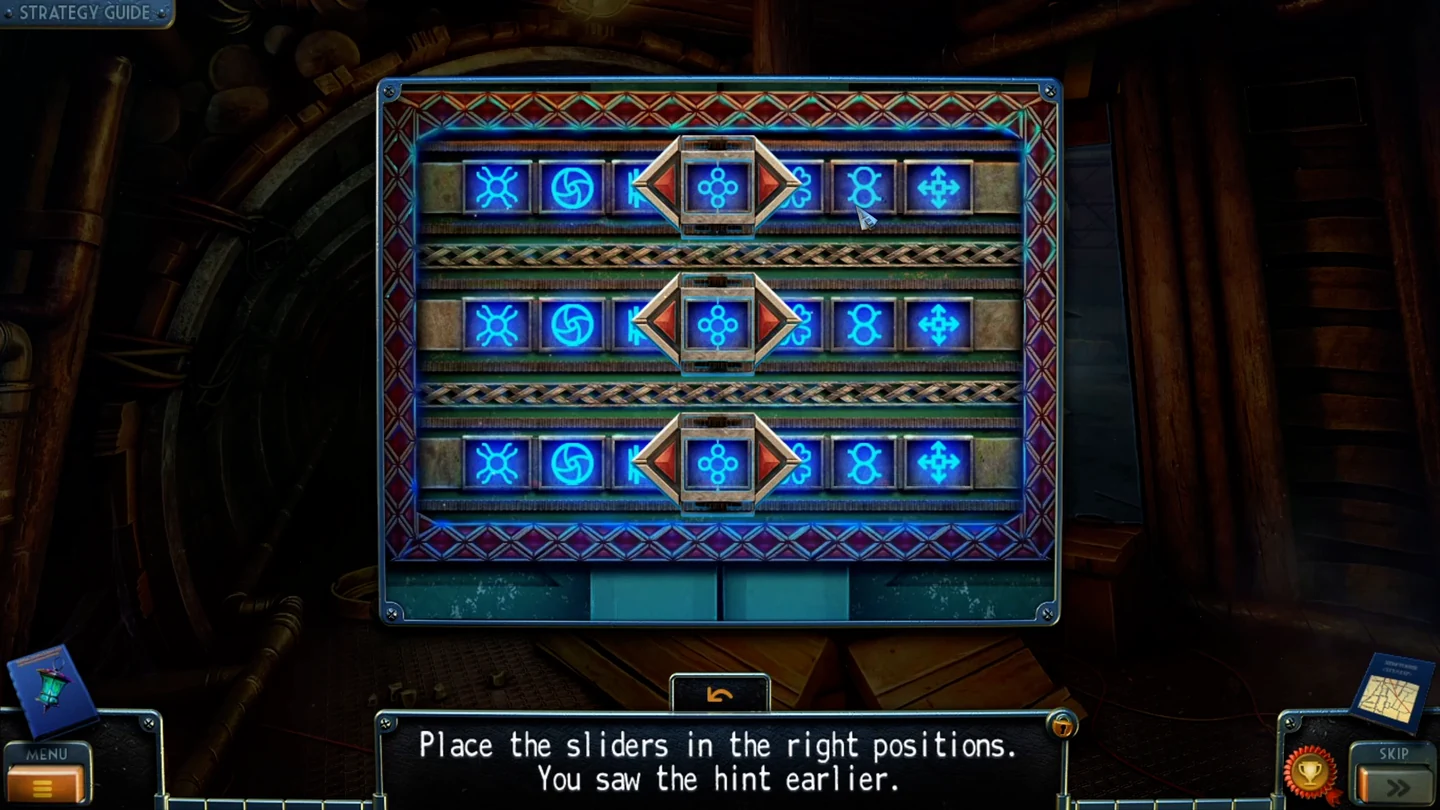
Read the three pipe symbols through the camera and set the green door's slider rows to match.
- Look through the tunnel-room window with the CAMERA. Three red symbols are painted on the pipe, left to right: a figure of two rings like an 8, a figure of H-bars and a four-leaf clover.
- Open the slider panel on the green door. Each row holds the same seven symbols. Set the top row to the two-ring figure (6th place), the middle row to the H-bars (3rd place) and the bottom row to the clover (5th place). The door opens to the boiler room.CODEtop two rings, middle H-bars, bottom clover