The speleologist's bunker
Under the junkyard well lies an old bunker with a ladder, a round vault door, a chest, a skeleton and a rusty wall panel.
- Move the stones beside the skeleton and take the FANCY DISC and the SPELEOLOGIST'S DIARY.
- Collectibles by the golden vault door: click the grey rat right of the green toolbox at the lower right (morphing object), then pick up the small gold miner figurine standing on the ground by the tree root, left of the vault door.
- Take the PICK-AXE from the ground right of the vault door. Put the FANCY DISC into the lid of the chest at the bottom right and take the CUTTERS, the STONE DETAIL and the BATTERY PACK. The three coin slots inside are for later.
- Chip a piece off the blue crystal on the right with the PICK-AXE to get the BLUE MINERAL.
- Read the SPELEOLOGIST'S DIARY (task Hole) and take the CHART from its plan page.
- The vault door needs a flywheel. Take the LAMP from the floor at the door, inspect it and add the BATTERY PACK to make the UV LAMP.
- Inspect the CHART and shine the UV LAMP on it. The hidden route appears and it becomes the VENT SYSTEM CHART.
The rusty panel
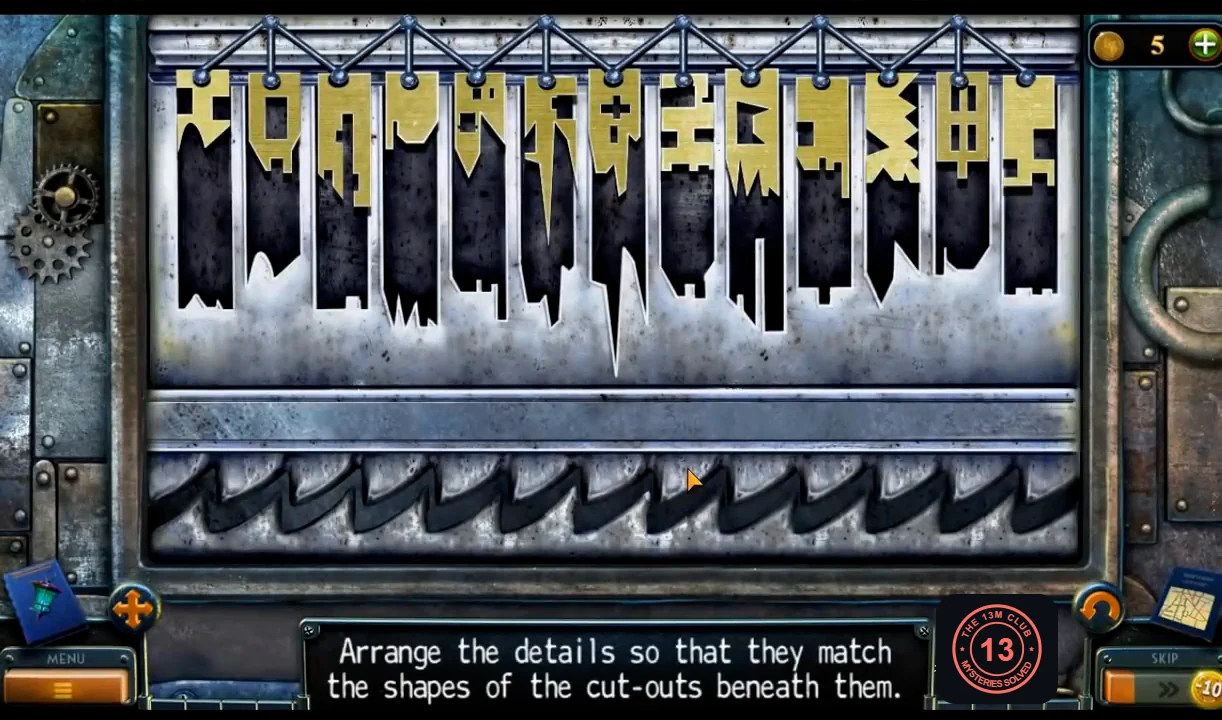
Make a brush from barbed wire and a stick, clean the rusty bunker panel and fit its hanging pieces into the matching cut-outs.
- Climb out to the junkyard. Click the morphing object by the barbed-wire fence. Cut a length of BARBED WIRE from the river fence with the CUTTERS.
- Wind the BARBED WIRE around the STICK in inventory to make a HOMEMADE BRUSH.
- In the bunker, scrub the rusty panel on the left wall with the HOMEMADE BRUSH.
- Arrange the pieces to match the cut-outs beneath them. Click a hanging piece, then another, to swap them; a piece above its matching cut-out drops in and turns blue. Fill all 13 cut-outs. A doorway opens in the left wall.
Machine room search
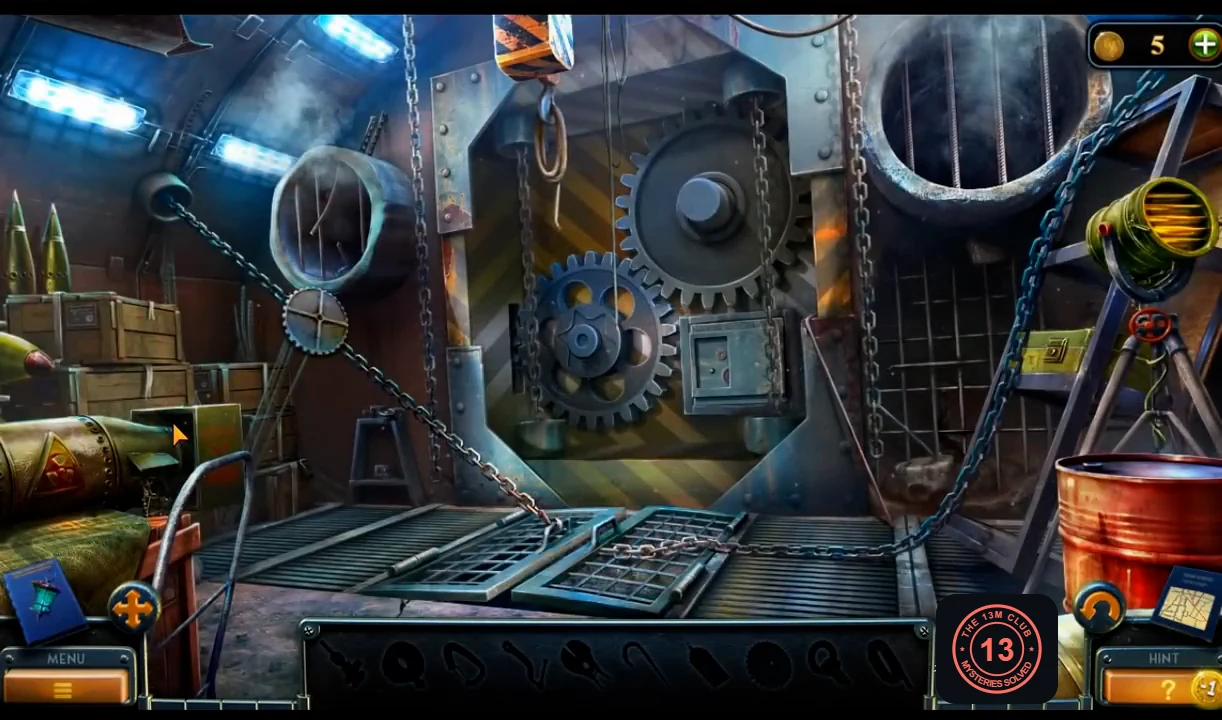
The machine room is an interactive search scene with ten silhouette objects.
- Take the INSULATING TAPE from between the bars of the round vent (upper left). At the winch base by the floor grate take the CARABINER. Pick up the COG in the room.
- Fit the COG on the gear of the blue wall panel and take the CRANE PUSH BUTTON HANDLE. Take the GAFF on the right and use it on the round vent to hook out the HAND DRILL.
- Drill out the lock of the green box with the HAND DRILL and take the POWER CUTTERS. Take the RING-BOLT from the winch base.
- Cut the wire cage with the POWER CUTTERS, take the LEVER and fit it on the winch base.
- Put the CRANE PUSH BUTTON HANDLE on the crane controller and press it to lower the chain. Link the chain to the floor grate with the CARABINER and turn the winch lever to lift the grate.
- Wrap the frayed crane cable with the INSULATING TAPE, press down, and take the ROPE from the hook.
- Tie the ROPE to the edge of the cellar hole, climb down and screw the RING-BOLT into the crate.
- At the crane controller press down to hook the ring-bolt, then up to raise the crate. Open it and take the LADDER. The scene ends.
The vent maze
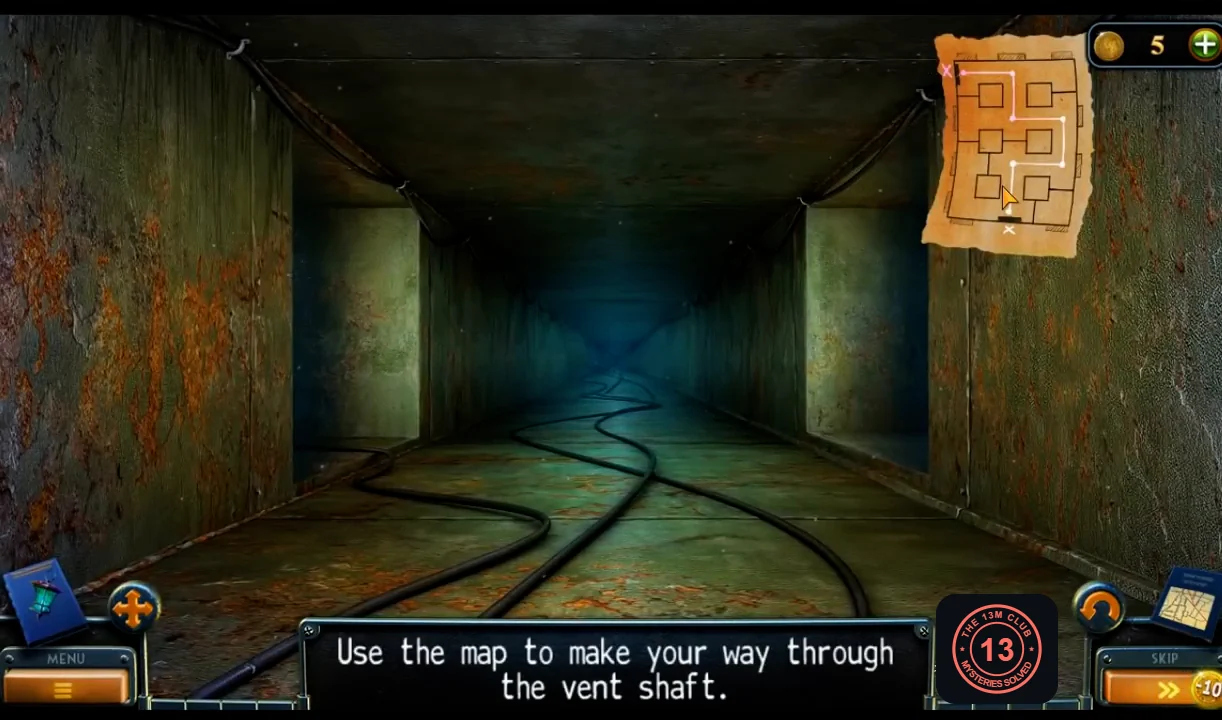
Place the LADDER under the pipe at the upper right of the bunker and climb into the vents. The VENT SYSTEM CHART is shown in the corner; a wrong turn sends you back to the bunker.
- Put the LADDER under the high pipe and enter the vent.
- Follow the chart from the entry X to the exit X. From the entrance, facing along the first shaft, choose: forward, right, left, left, right, left. Laura drops into the mayor's bunker.CODEF-R-L-L-R-L
The mayor's bunker
Start on the stone pedestal in the mayor's bunker, take the rebar from the press and break through the glass door to the greenhouse.
- At the stone pedestal take the STONE from the top and put the STONE DETAIL into the left round slot. The right slot is still empty.
- The valve box on the left has a broken chain. Click the morphing object near the eagle over the vault door and pick up the collection item on the eagle's shield (an eagle shield).
- Inspect the press on the right and take the REBAR from its right side. The press needs a vessel.
- The glass door on the far left is locked from the other side. Break the glass pane with the STONE and go through to the greenhouse.
Greenhouse, press and generator
Search the greenhouse and piano, crush the blue mineral in the press and power the generator. The room collapses and Will is trapped.
- Take the POT beside the glass dome on the right (the dome is reinforced glass).
- Pick up the small gold treble clef among the stacked books under the grand piano at the lower left of the greenhouse (treble-clef note).
- Prop up the grand piano lid with the REBAR. A token is stuck behind the strings; take the RUBBER GLOVE inside the piano.
- At the press, put the BLUE MINERAL on its bed and the POT under it. Use the RUBBER GLOVE on the broken wires on the right to work the press and collect the BLUE POWDER.
- Pour the BLUE POWDER into the open chamber of the generator in the greenhouse and pull the lever. Watch the scene: the room collapses and Will is trapped under the rubble.
The crystal wall and the vault
Reveal the light rays on the cracked wall, open the vault door with the pyramid and get the gas mask and flare gun in the control room.
- Take the PIECE OF ARMORED GLASS and the STONE FLOWER from the broken dome. Click the morphing object at the lower right near the generator.
- At the cracked wall plate puff the POWDER onto the wall to show two light rays. Break the wall where the rays point with the PICK-AXE and take the YELLOW CRYSTAL piece. A flower-shaped keyhole is revealed: put the STONE FLOWER into it, the wall opens, and you take the STONE DETAIL with a blue swirl.
- Put the STONE DETAIL into the right slot of the stone pedestal and take the PYRAMID. Place it in the centre socket of the vault door.
- In the gas-filled control room you get the POCKET WATCH. Cut the tape on the box on the right with the PIECE OF ARMORED GLASS: Laura puts on the gas mask; take the FLARE GUN. On the wall panel left of the vault door press the fan button to clear the gas.
The Reaper, the mutant lab and the TV
The Reaper, imprisoned behind glass, asks you to find his lantern (task Prisoner).
- The TV console has a lever missing; the green cabinet needs a special key. Pick up the collection item near the right door frame (an apple) and the morphing object. Take the DOOR HANDLE from the gas wall panel.
- In the greenhouse Will is gone (task Find Will). Fit the DOOR HANDLE on the back door and enter the mutant lab. Click the morphing object by the trolley.
- Cut the string on the folder on the operating table with the PIECE OF ARMORED GLASS. Read the FOLDER and take the SURGICAL CLAMP from its back cover. Take the STETHOSCOPE PART beside the glass box; a second part is still missing. The key inside the glass box cannot be reached by hand yet.
- Pick up the collection item on the right shelf (an apple). The wall screen needs fixing. Take the KNOB from the anatomy mannequin (its heart is missing).
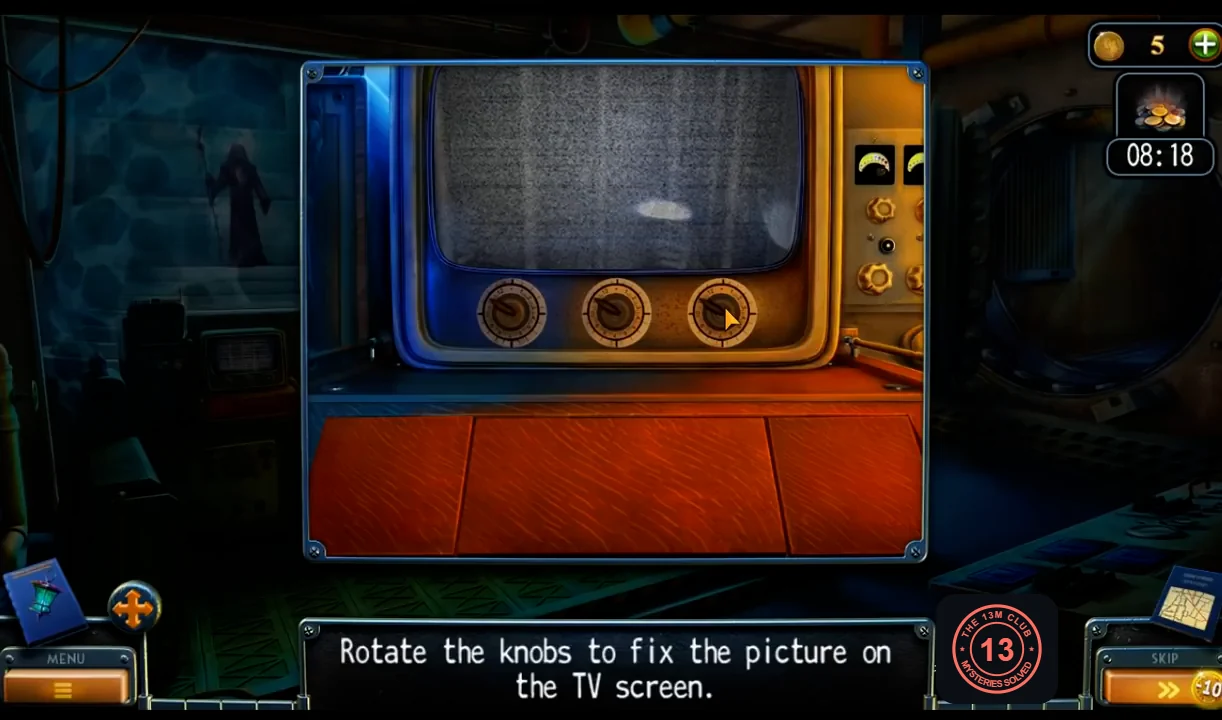
- Put the KNOB into the middle socket of the TV console and rotate the three knobs until the picture is clear. Each knob fixes a different part of the image, and the start positions may vary: turn one knob at a time and keep the position where the static drops. Will appears behind bars. Take the SCREWDRIVER from the drawer below.
Token door and potting room
The potting room is an interactive search scene with ten silhouette objects.
- Reach between the piano strings with the SURGICAL CLAMP and take the TOKEN. Put it in the token machine of the striped door at the back left and enter the potting room.
- Take the PAPER CLIP near the planter box and the STICK at the bottom left. Lower the hanging pot with the STICK and take the CLIPPERS. Cut the tangled vines by the sink and take the WATERING CAN.
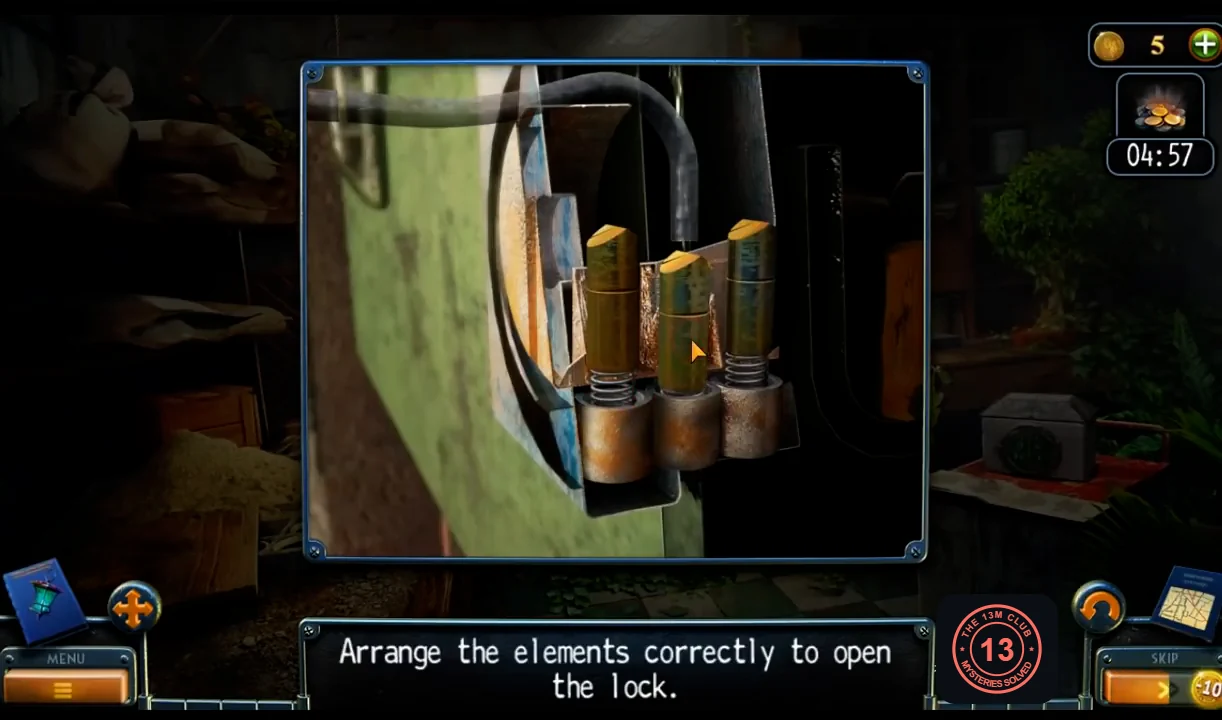
- Use the PAPER CLIP on the lock of the green toolbox on the shelf. The lock close-up opens: "Arrange the elements correctly to open the lock."
- The lock has three spring pins, all raised at the start. Clicking a pin moves it up or down. Leave the LEFT pin up, with its spring showing, and push the MIDDLE and RIGHT pins down. The lock then opens.
- Take the HAMMER from the open toolbox.
- Break the top of the red crate with the HAMMER and take the GLOVE. Use it in the sink (live wires in the water) to get the SPADE, and scoop plaster from the sack.
- Pour the SCOOP OF PLASTER into the leaf form on the shelf and add water from the WATERING CAN. Put the plaster LEAF into the matching empty slot; the panel opens: take the MAPLE LEAF.
- Put the MAPLE LEAF into the book on the planter chest. Set the chest's four Roman-numeral tiles to: top left II, top right V, bottom left IV, bottom right I. Take the KEY.CODEII-V / IV-I
The pit, eagle stairs and the soldier diorama
Fish the key out of the dark pit, open the hidden stairs to the office and guide the soldier figurine across the desk diorama.
- Open the green cabinet in the control room with the KEY and take the ROPE AND HOOK.
- In the mayor's bunker fire the FLARE GUN into the dark pit by the right pillar. Pull up the suit with the ROPE AND HOOK, take the KEY from its pocket and read the Metropolitan Opera staff badge.
- Put the KEY into the lower-left round handle of the gas wall panel and turn it. Stairs open on the right side of the mayor's bunker; climb to the office.
- Click the morphing object at the desk front. Unscrew the cover of the electrical box by the big metal door with the SCREWDRIVER and take the SCREWS (the box needs a terminal wire). Take the SOLDIER FIGURINE from the right wall.
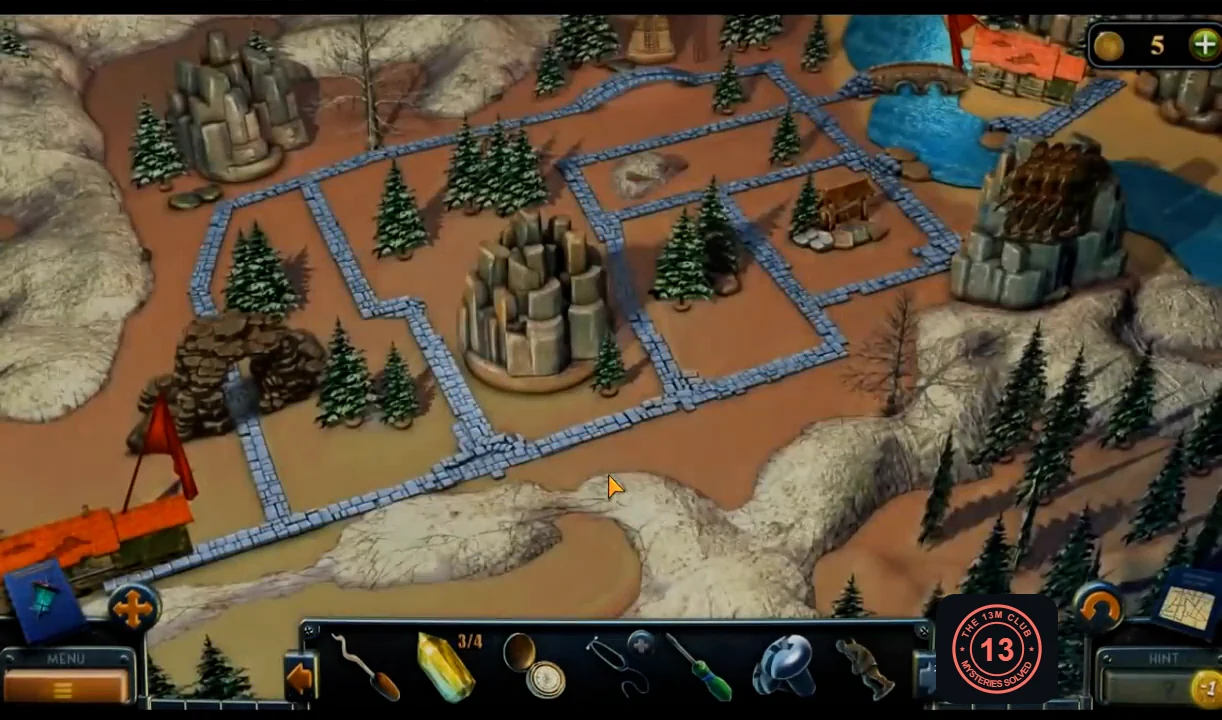
- Place the SOLDIER FIGURINE on the desk diorama and use the green arrows to reach the far river bank. From the red flag at the bottom left go right along the bottom path to the branch just right of the central rock, go up to the top path, then right past the cabin and up to the bridge. Barbed wire appears if you try the top-left path: back up and take the other branch. The tower opens: take the XV KEY from inside it.
- The wall map needs three Reaper figurines (later). Pick up the collection item above the desk lamp (an eagle shield). Take the ID CARD from the desk wallet and read it (Richard Hardstein, opera employee; task Clues). Back at the diorama, take the SPRING from the opened tower (where the XV KEY was) and combine it with the BROKEN STAPLER to make the STAPLER.
Freeing Will
Fix the projector in the mutant lab, power the cell-block door and free Will from his handcuffs.
- In the mutant lab fix the hanging screen fabric with the STAPLER and watch the film of Hardstein with the lantern. At the projector, unscrew the wiring panel with the SCREWDRIVER and take the TERMINAL CONNECTOR.
- In the office electrical box install the TERMINAL CONNECTOR, put the SCREWS back and tighten them with the SCREWDRIVER, then flip the switch on the left of the box. The big metal door opens to the cell block, where Will is handcuffed behind bars.
- Click the morphing object on the brick pile at the right and take the COINS there. Pick up the collection item near locker XV (an apple). Open locker XV with the XV KEY and take the HANDCUFFS.
- In the mayor's bunker open the valve box on the left: use the HANDCUFFS to join the broken chain, then turn the red wheel. The oil can rises; take the OIL CAN. Back in the cell block oil Will's handcuffs with it; he slides free and gives you the MECHANICAL ARM.
Organ mannequin and the way out
Use Will's mechanical arm to get the plastic heart, restore the anatomy mannequin and leave the bunkers.
- In the mutant lab reach into the glass box with the MECHANICAL ARM and take the FAUCET HANDLE. Fit it on the specimen tank to drain it and take the PLASTIC HEART.
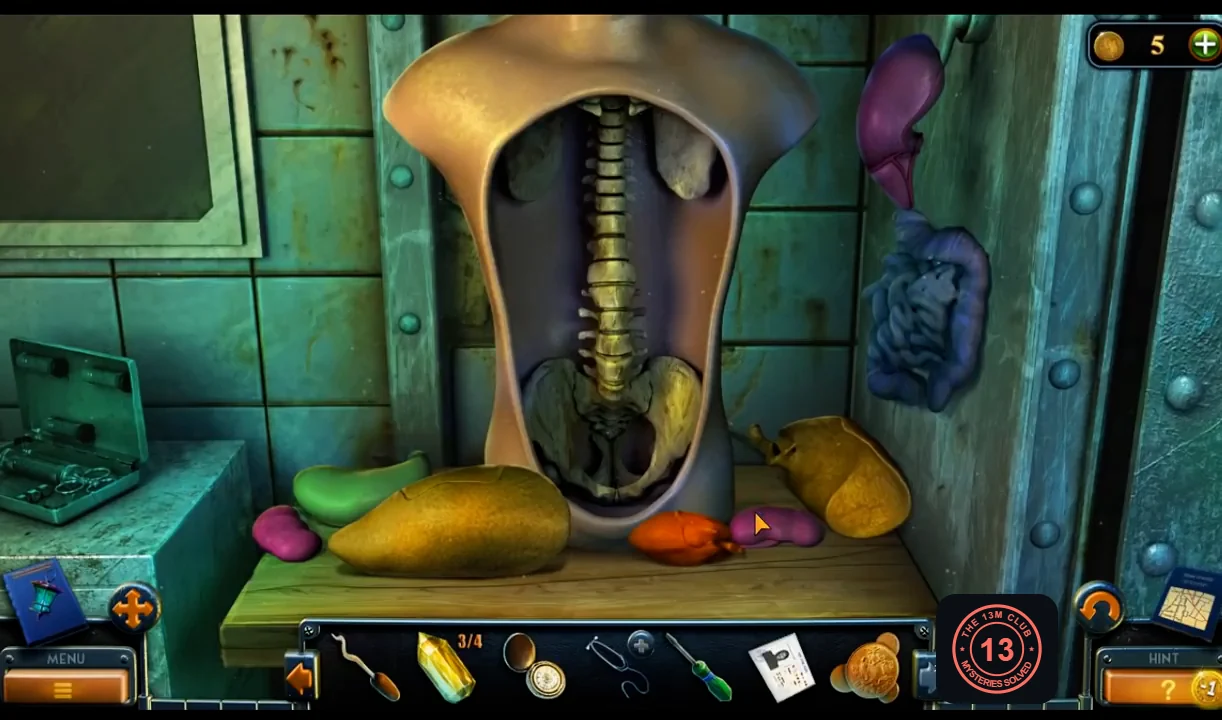
- At the anatomy mannequin put all the organs back; a cyan outline shows each organ's place. Order used: liver (centre left), both lungs (top), stomach (right of the liver), kidneys (low left and right), intestines (bottom), then the PLASTIC HEART between the lungs. Take the KEY.
- Turn the KEY in the lower-right handle of the gas wall panel to stop the fan. Leave through the bunkers to the junkyard and travel to the Order HQ.