The boiler room
The underwater tunnel that leads out of the bunker starts somewhere in the boiler room.
- Take the SHOVEL leaning by the furnace. Open the furnace and take the TONGS; the coals are still hot enough to be blown back to life.
- Dig into the coal cart on the right with the SHOVEL and take the BELLOWS. Use the BELLOWS on the furnace coals: the fire burns again.
- Take the PLIERS from the locomotive control panel in the centre. One part of the steering mechanism is missing: an empty lever slot by the gauges.
The cryo chamber
Turn the broken key in the infirmary's back door and fish the key out of the steaming vat in the cryo chamber.
- Go back to the infirmary. Someone broke the key in the back door: turn the broken key with the PLIERS and enter the cryo chamber.
- Fish the KEY out of the steaming vat on the left with the TONGS. The keyhole of the filing-cabinet drawer is iced over. The white chest in the centre has a code lock, and there is an empty space behind the wall stand with the paper scraps.
The mirror table
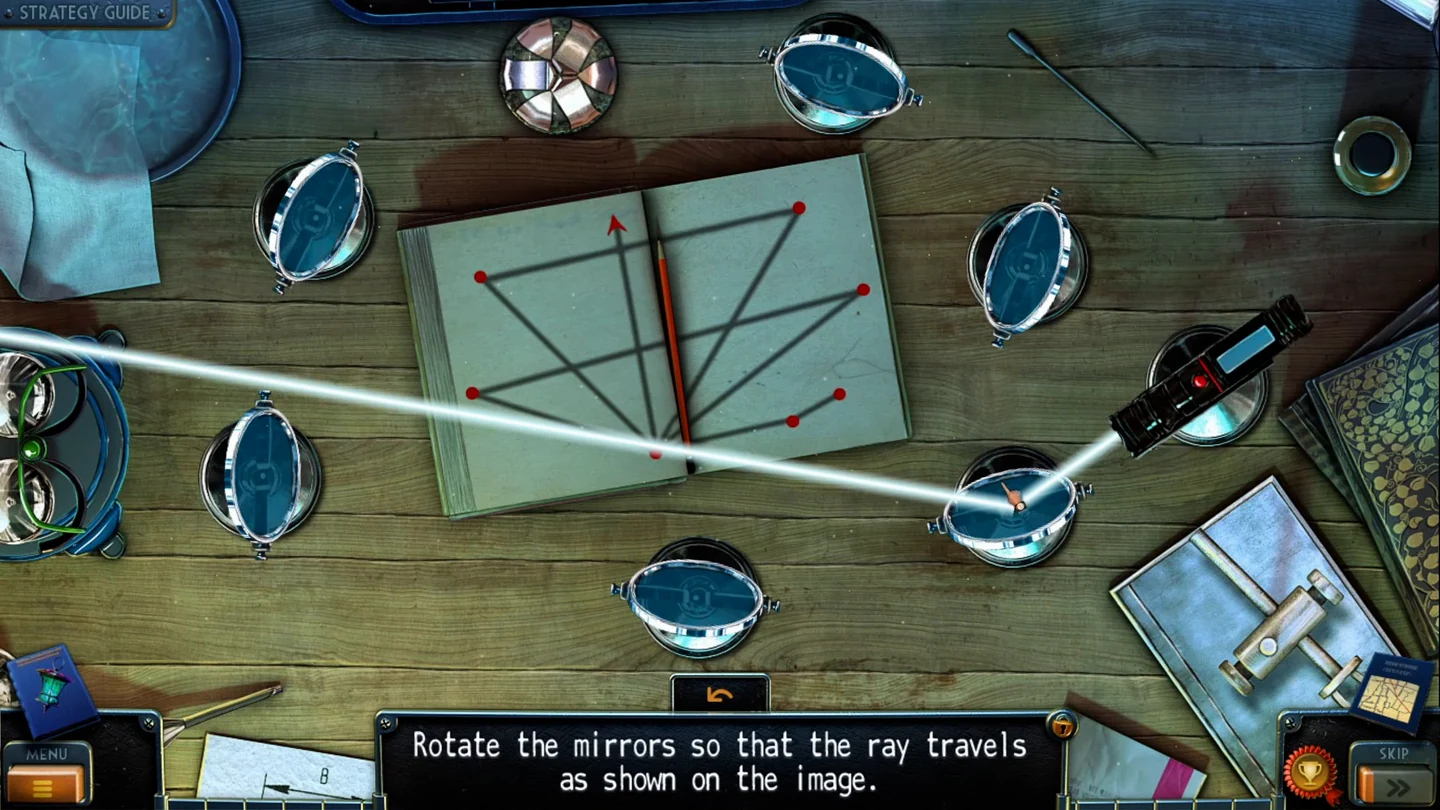
Fit the flashlight in the mirror table and turn the mirrors until the beam fans out like the book's diagram and leaves upward.
- Look at the workbench on the right. Put the FLASHLIGHT into the empty holder on the right of the mirror table.
- The book shows a fan of lines from one point at the bottom and an arrow pointing up. Click the mirrors to turn them: the beam goes from the flashlight to the lower right mirror, then to the bottom centre mirror. From there it bounces back and forth between the bottom centre mirror and each outer mirror (left, right, upper right and upper left) before it leaves upward. The wall stand moves aside: take the CRANE MANUAL.
The hangar crane
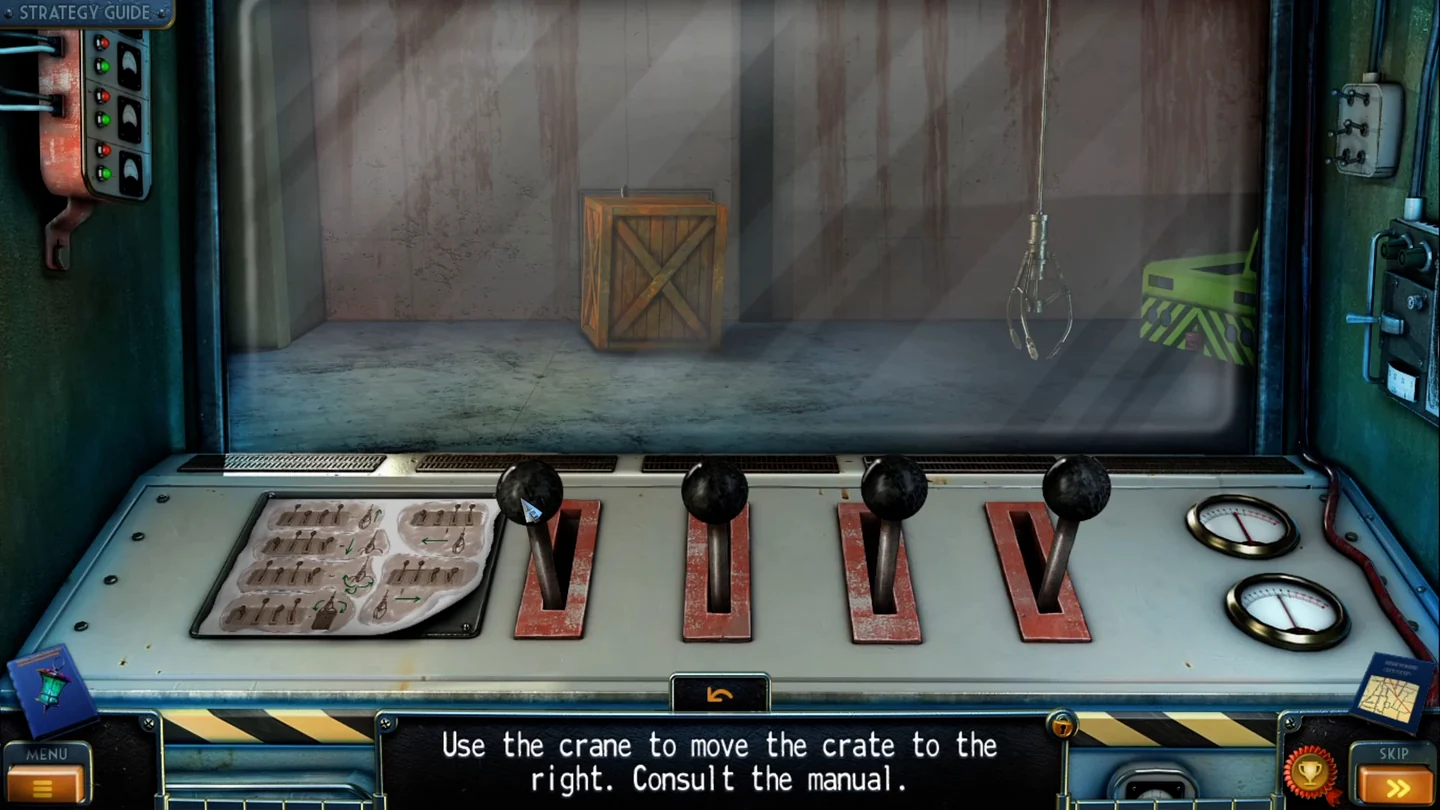
Use the crane manual's lever codes to move the heavy crate in the hangar.
- In the hangar, put the CRANE MANUAL on the crane cabin console.
- The manual shows four levers; push a lever up (U) or pull it down (D) to set a command, read from left to right. Move left: D D U U. Lower the claw: D U U D. Grab: D U D U. Raise: U D D U. Move right: U U D D. Open the claw: U D U D. Move the claw left over the crate, lower it, grab the crate, raise it, move it right, lower it and release it.CODEleft DDUU, down DUUD, grab DUDU, up UDDU, right UUDD, down DUUD, open UDUD
The locomotive and the cryo drawer
Fit the lever in the boiler-room locomotive and drive from the boiler room into the underwater tunnel, then return to the boiler-room furnace to light the torch and open the iced cryo drawer for the floor-hatch handle.
- Take the LEVER from the wall opening behind the moved crate. Fit it into the empty slot of the locomotive control panel in the boiler room. Will drives the locomotive out of the boiler room into the underwater tunnel.
- Take the EXTINGUISHED TORCH. The wire cage needs a tool that can saw through metal. Light the torch in the boiler-room furnace.
- In the cryo chamber, melt the ice on the filing-cabinet keyhole with the TORCH and open the drawer with the KEY. Read the note about the submarine docked behind the underwater tunnel and take the HANDLE.
- Attach the HANDLE to the floor hatch in the underwater tunnel, open it and climb down to the pump room.
The pump room
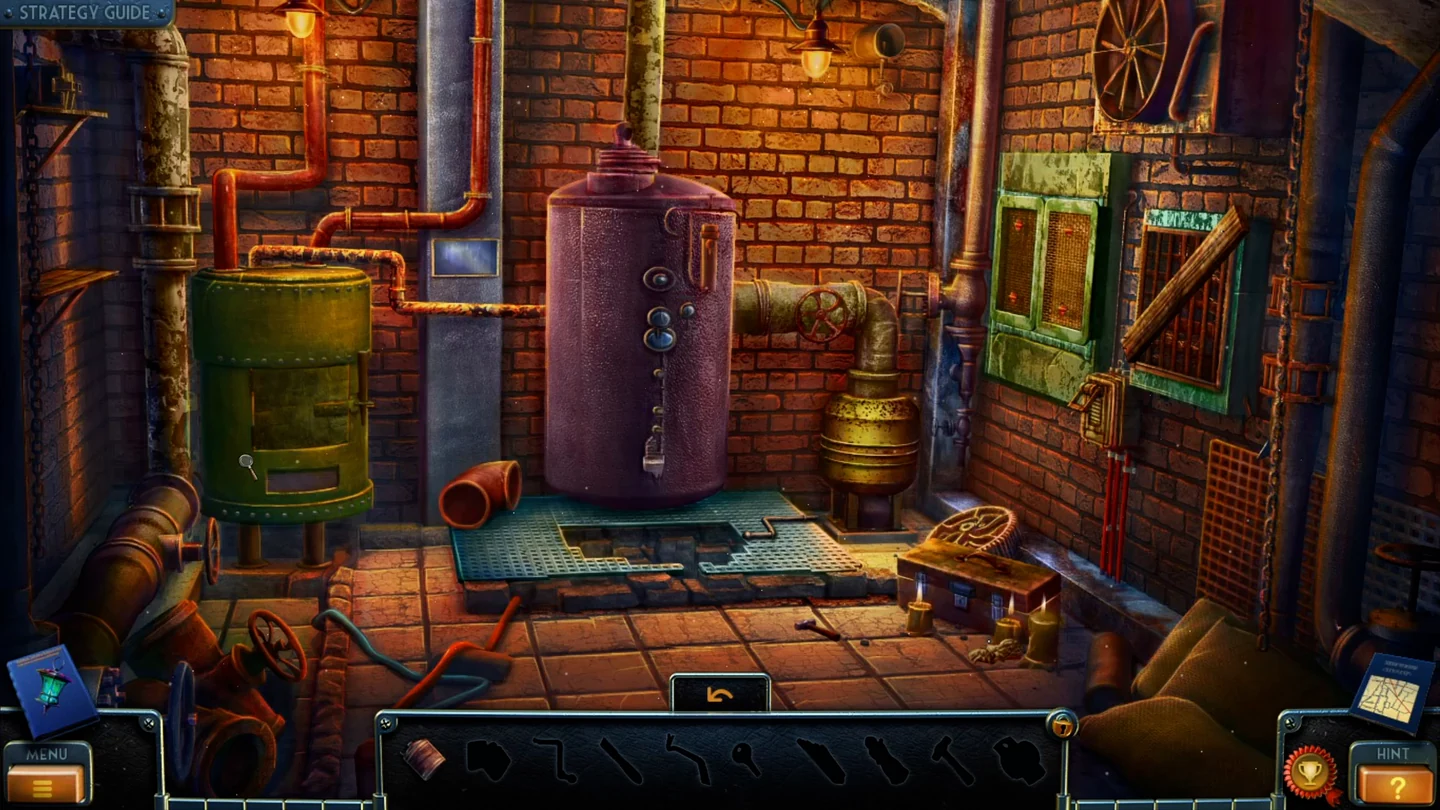
The pump room is an interactive search scene with ten silhouette objects; its items stay inside the scene.
- Take the JERRY CAN OF GAS left of the tank and the HAMMER in front. Hammer the pivot out of the green furnace and take the CROWBAR from inside. Prise the diagonal board off the grate on the right wall with the CROWBAR: take the PLANKS and the SPREADER at the bottom of the gear mechanism.
- Scrape the wax off the candle box with the SPREADER and take the LIGHTER. Put the PLANKS into the furnace, pour in the gas and light it with the LIGHTER. Steam now leaks from a pipe on the tank, and you need a yoke to repair it.
- Take the CRANK from the floor grating in front of the tank. Attach it to the gear mechanism behind the grate and turn it: the green double door opens. Take the KEY from the shelf, open the toolbox on the floor by the candles and take the YOKE.
- Clamp the leaking pipe with the YOKE: the code 482 appears on the wall behind the steam. Set the number drums inside the green door to 4 8 2 and take the second KEY. Open the orange box in the floor pit with it and take the IMAGE WITH HINT.CODE482
The cryo chest
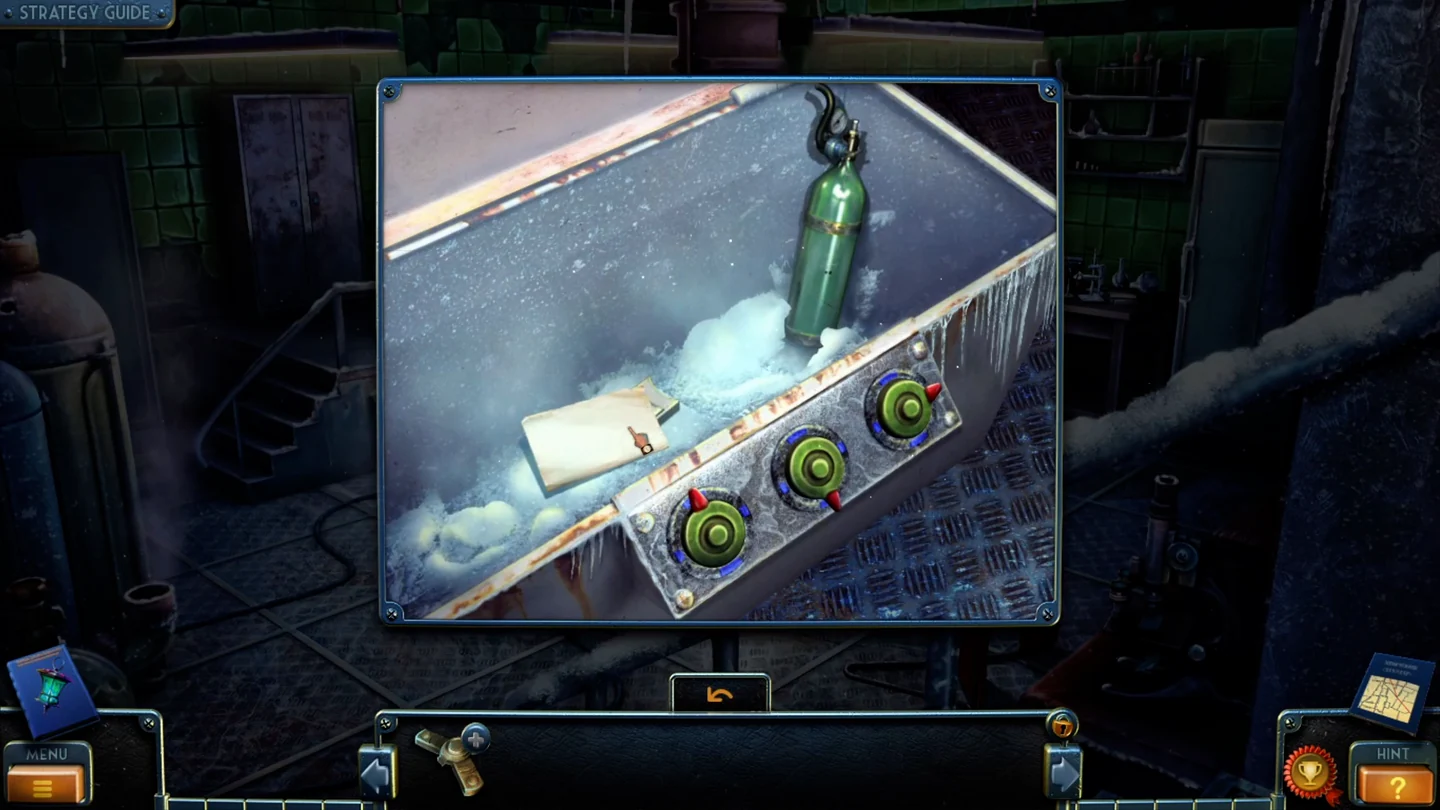
Set the three switches of the cryo chest to match the pointers on the hint image.
- Return to the cryo chamber and place the IMAGE WITH HINT on the lid of the white chest.
- Turn the three green switches like the pointers in the drawing: left switch pointing up, middle switch pointing down and right switch pointing right. The chest opens: read the note about the cryostasis substance and take the DEACTIVATOR PART and the NITROGEN TANK.CODEleft up, middle down, right right
The pool room and the dive
Cool the hot valve wheel, reach the pool room and fit the scuba tank so Will can dive to the bathyscaphe.
- In the underwater tunnel the red valve wheel in the steam is too hot. Cool it with the NITROGEN TANK and turn it: the steam stops and you can walk on to the pool room.
- Note the elevator grating that needs a special key, the wall pipe with no valve, the flooded shaft and the faulty white device by the pool. Take the KEY lying beside the twin scuba cylinders and unscrew the clamp: the damaged right cylinder comes off.
- In the greenhouse, unscrew the red cylinder on the tank with the KEY and take the TANK. Fit the TANK into the empty slot of the scuba set in the pool room.
- Will dives down the shaft to a yellow bathyscaphe and takes a KEY. The bathyscaphe is the way out, but the rocket launch must be stopped first.
The equation panel
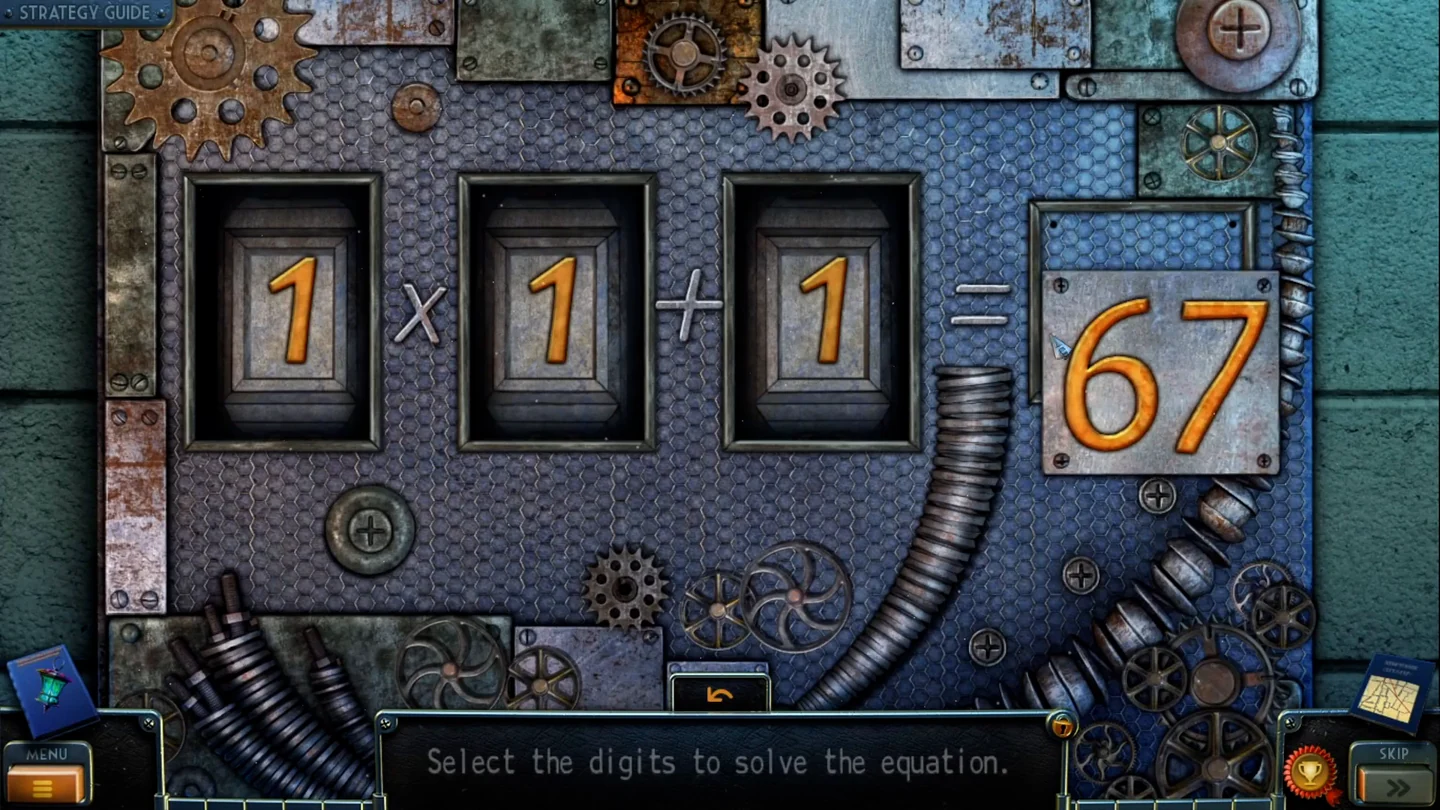
Ride down to the launch-control room, find the missing number plate and correct the equation panel to raise the bathyscaphe.
- Unlock the elevator grating with the KEY and ride down to the launch-control room. Take the VALVE from the floor in front of the floor grating; the grating is screwed shut. The equation panel on the left has an empty slot, and the red console asks for the deactivator.
- In the pool room, fit the VALVE on the wall pipe and turn it. Take the PLATE WITH NUMBER from the niche.
- Put the PLATE WITH NUMBER into the empty slot of the equation panel: it reads "1 x 1 + 1 = 67". Click the drums to change the digits to 8 x 8 + 3 = 67. The panel opens: take the GEAR.CODE8 x 8 + 3 = 67
- Fit the GEAR into the faulty white device by the pool, then pull down the lever on its right side: the bathyscaphe rises to the surface.
The bathyscaphe and the deactivator
Search the bathyscaphe for the bent plate and file, then open the launch-room floor grating to complete the deactivator.
- Enter the bathyscaphe. The console needs a key. Take the BENT PLATE and the FILE from the torn wall panel; the hole needs a flat metal plate. The battery compartment at the lower right needs another battery: take the SCREWDRIVER there.
- In the launch-control room, unscrew the floor grating with the SCREWDRIVER. Take the BATTERY and the last DEACTIVATOR PART: the DEACTIVATOR is complete.
Stopping the launch and the escape
Stop the rocket launch with the deactivator, repair the bathyscaphe and escape into the East River.
- Insert the DEACTIVATOR into the red launch console. The countdown stops and the rocket silos close.
- In the underwater tunnel, saw through the wire cage with the FILE and take the WELDING DEVICE.
- In the workshop, put the BENT PLATE under the red press and press it flat. Take the METAL PLATE.
- In the bathyscaphe, put the METAL PLATE over the hole and weld it with the WELDING DEVICE. Put the BATTERY into the battery compartment.
- In the launch-control room, open the yellow drawer below the red console and take the KEY.
- Put the KEY into the ignition on the bathyscaphe console. Will dives out of the bunker and surfaces in the East River by the Brooklyn Bridge. The bonus chapter is complete.