Restroom Vent and Storage Room
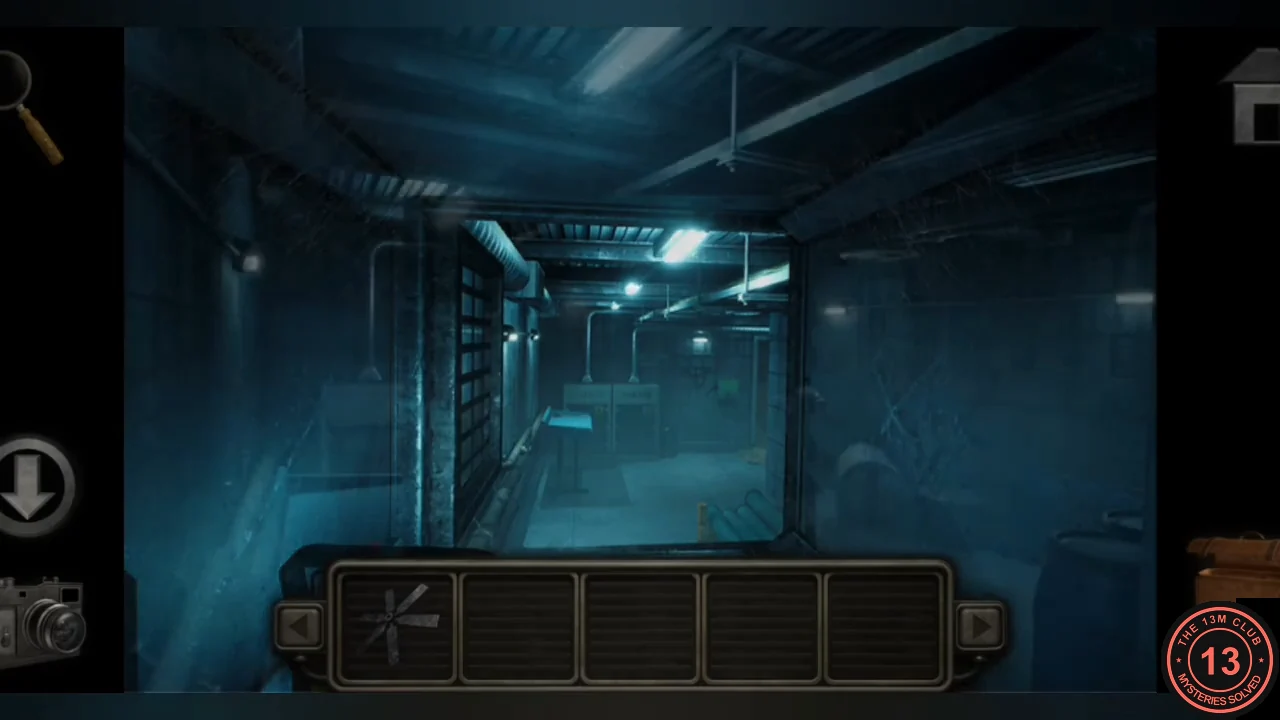
Climb into the ventilation duct above the restroom shower and crawl through to a small storage room.
- Place the ladder under the high vent in the restroom shower and climb in. The duct is dark: use the flashlight, which your character sets down to light the way.
- Squeeze past the fan into the storage room. Take the battery from the bench on the left. Look down at the broken metal door lying on the floor and take the keycard tucked into it. Then take the crowbar beside the crates. The green console here has no power yet.
- Crawl back into the duct. When the flashlight dies, use the battery on it to restore the light.
- Follow the duct out to the access tunnels. In the rock tunnel outside the Power Room, use the crowbar on the wall box and take the four coloured wires.
Console Room: Coloured Wires A+B+C+D=E
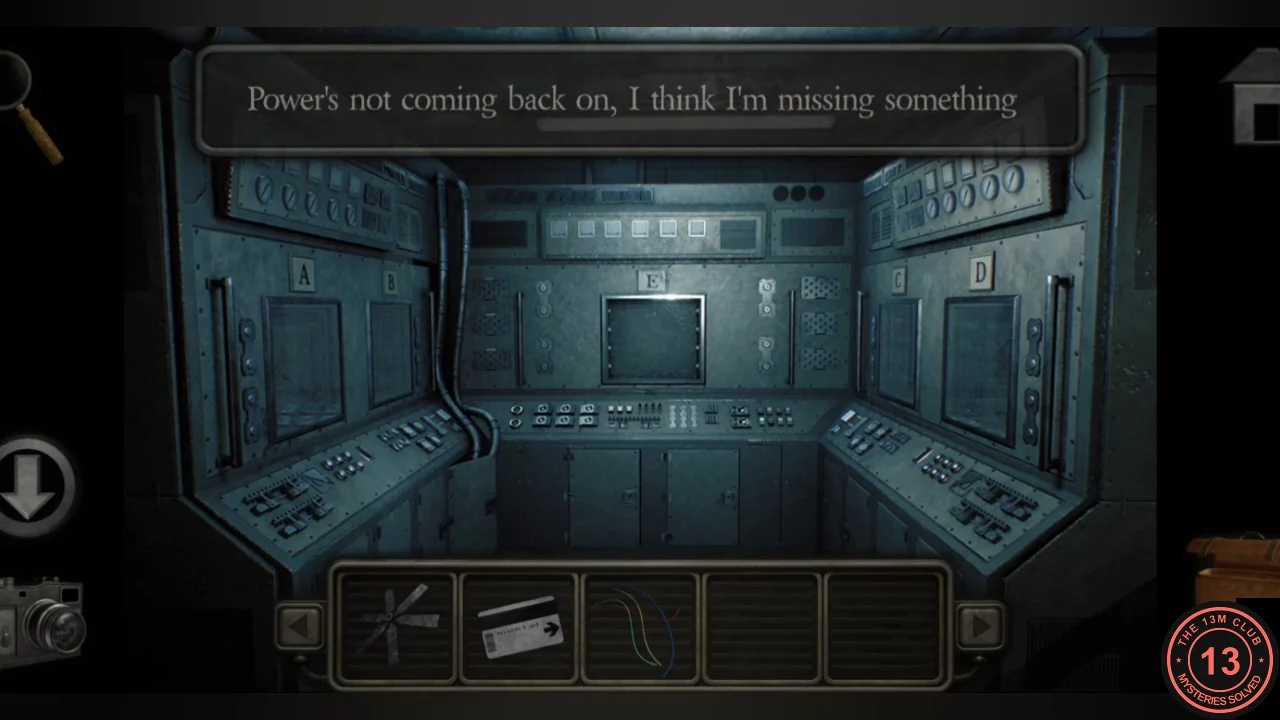
In the console room by the Power Room, panels A and B on the left and C and D on the right each show several wired connections; panel E in the middle is empty. The Living Quarters whiteboard gives each letter a colour: A red, B blue, C yellow, D green. Panel E needs only the wire of each panel's own colour.
- Try the PRIMARY POWER CONTROL UNIT lever in the corridor. It does not restore the power yet.
- Use the four coloured wires on the empty panel E in the console room.
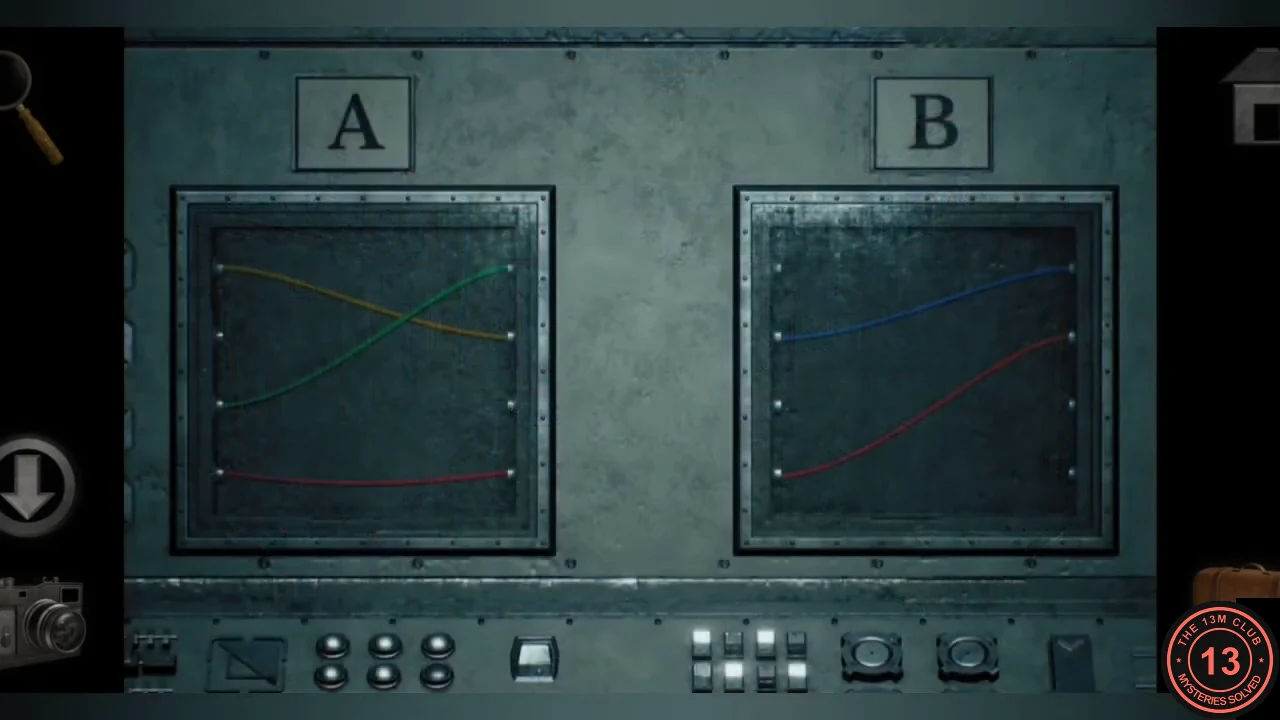
Panels A and B. Only the red wire in A and the blue wire in B matter. 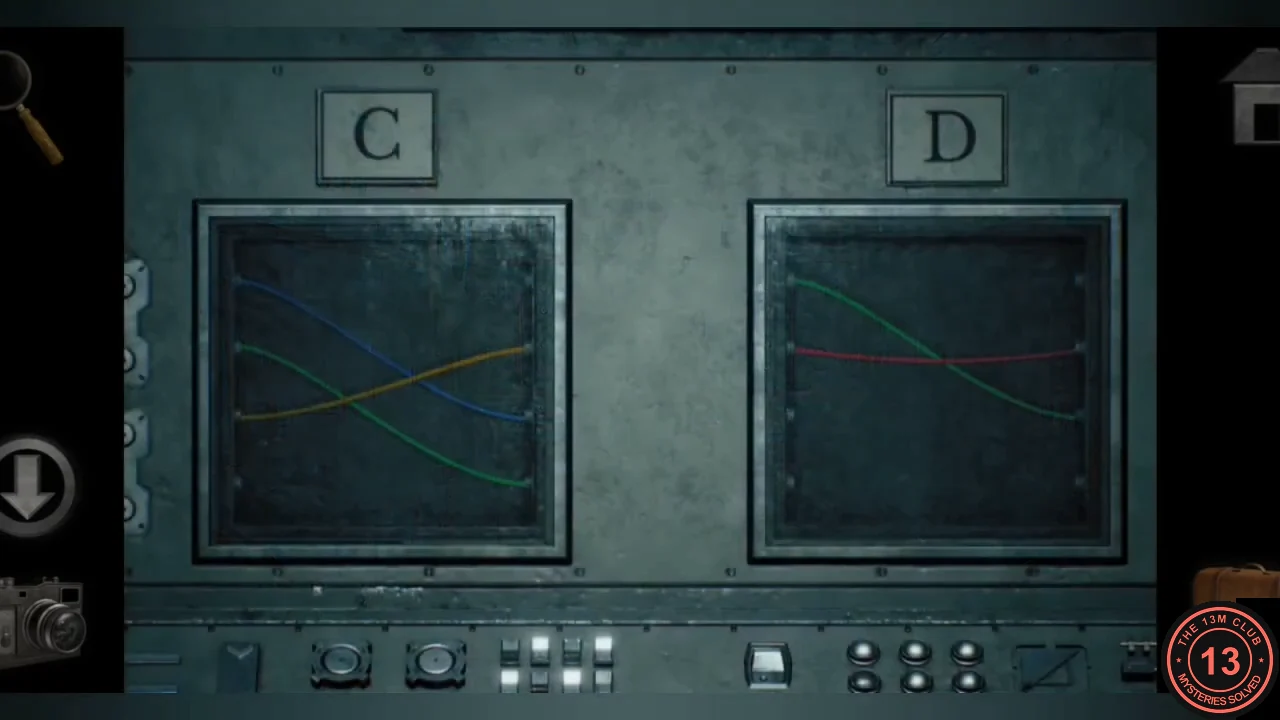
Panels C and D. Only the yellow wire in C and the green wire in D matter. - Number the pins on each side 1 to 4 from the top. Copy only the wire in each panel's colour: red from A (left pin 4 to right pin 4), blue from B (left 2 to right 1), yellow from C (left 3 to right 2) and green from D (left 1 to right 3). Drag the wire ends on panel E to make those four connections.
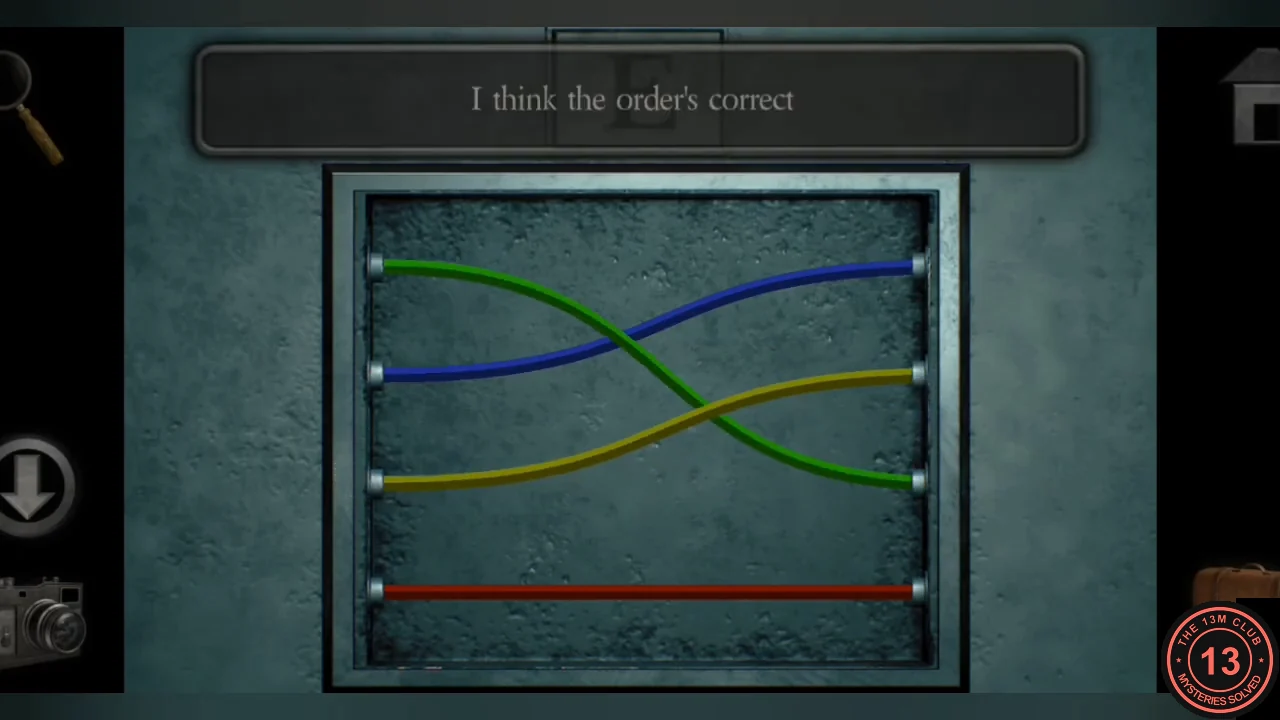
Panel E solved.
Power Room Corridor: Music Slider Panel
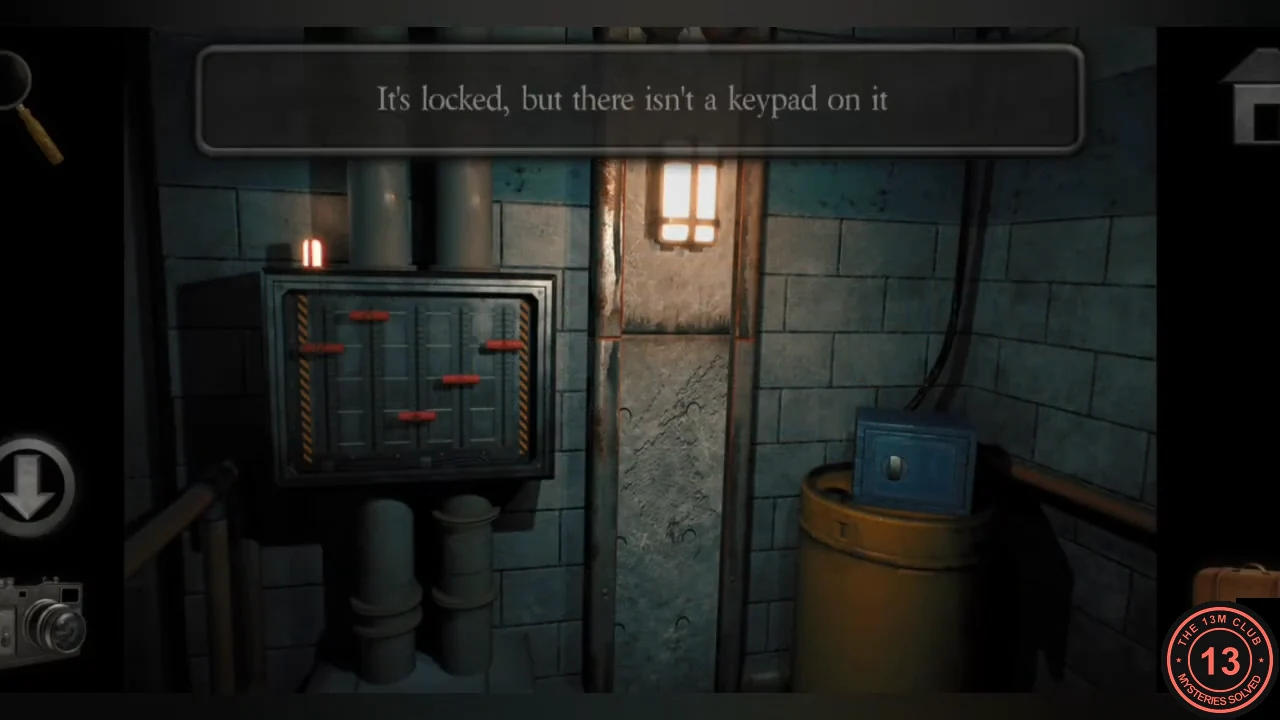
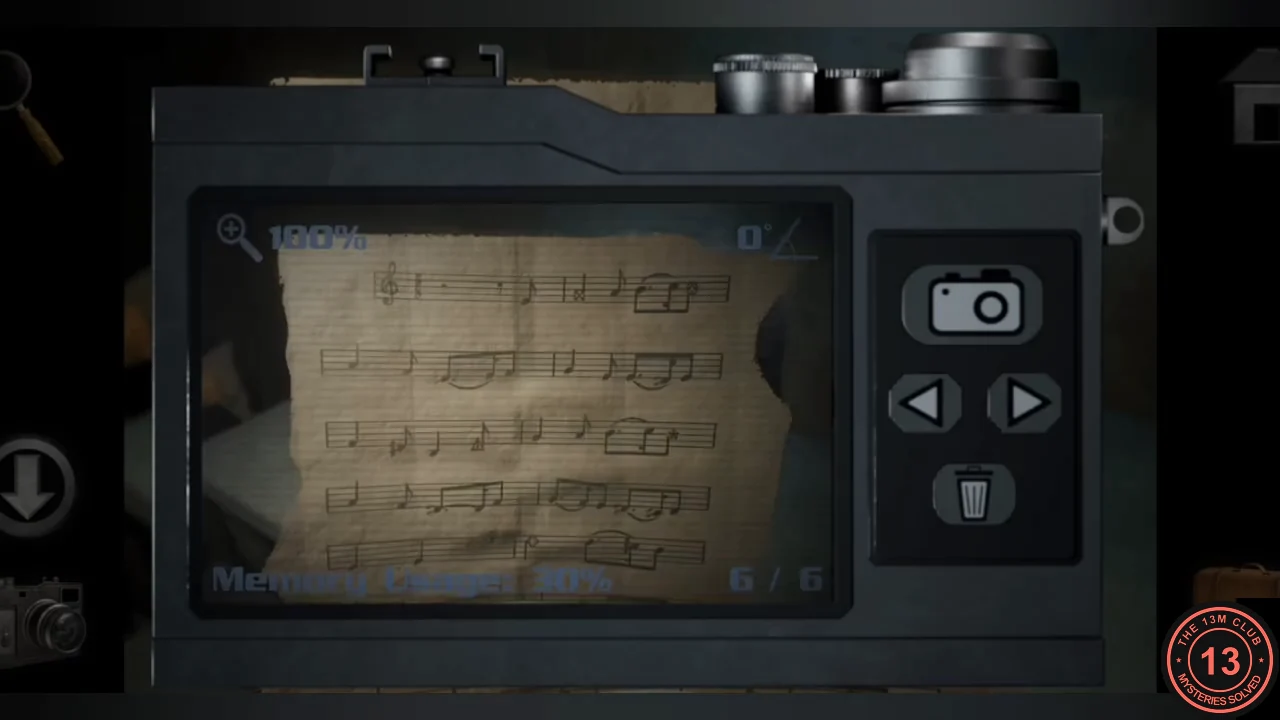
A panel in the alcove by the pipes in the Power Room corridor has five red symbol sliders on a five-line staff. The torn music sheet shows where each symbol sits on its staff. Count the lines from the top.
- Move the sliders, left to right, to: crossed square on line 4, diamond on line 2, star on line 3, circled symbol on line 3 and triangle on line 5. The panel lights turn green.
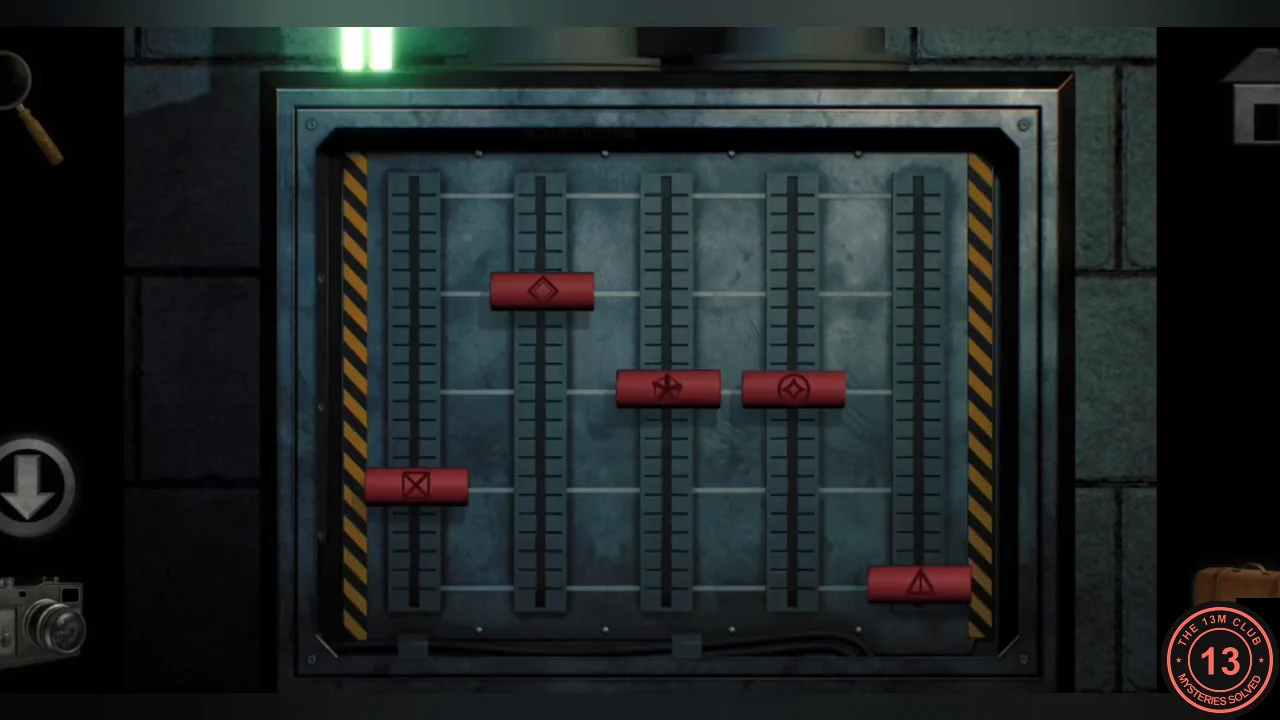
The solved slider positions; the light above is green. - Now pull the PRIMARY POWER CONTROL UNIT lever from OFF to ON; its light turns green and the facility has power.
- The small box on the yellow drum nearby has opened. Take the pair of wire cutters.
Cutting the Duct Fan Power
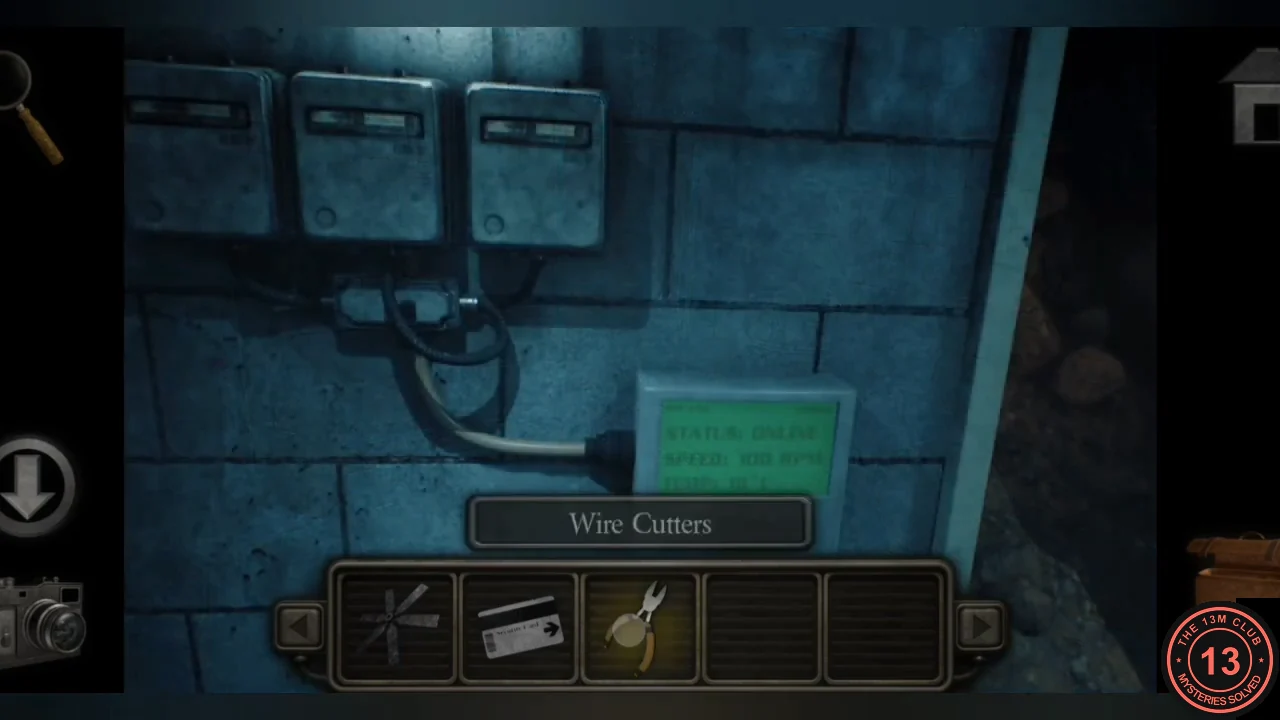
With the power back on, the green console in the storage room is online and drives the duct fan. Cut its cable before heading to the Control Room computer.
- Enter the side storage room off the Power Room corridor and climb into its high vent. Crawl through to the storage room and use the wire cutters on the cable of the green console (STATUS: ONLINE). Its display goes blank.
- Crawl back through the duct and out of the restroom shower vent, then make your way to the Control Room.
Control Room Computer: Safe and Floppy Disk
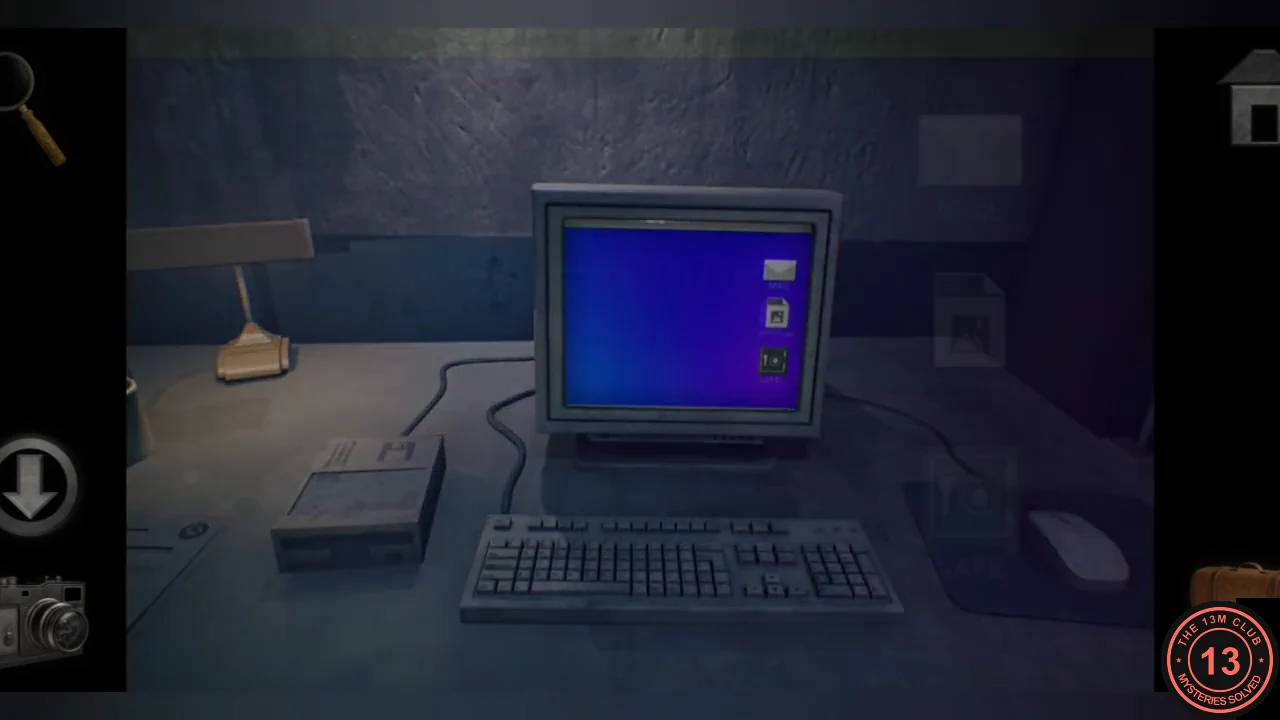
With power restored, the Control Room computer is on. Its desktop shows MAIL, planets.jpg and SAFE.
- Open MAIL: the messages are encrypted. Open planets.jpg and photograph the solar-system picture; it is needed in the Machine Room.
- Open SAFE and press Unlock. Its status changes to Unlocked.
- Take the floppy disk labelled "Decryption Program" from the safe that has opened in the Control Room.
- Insert the floppy disk into the computer, open DecryptoScript and choose Mail messages to start the decryption levels.
DecryptoScript: Orb Levels
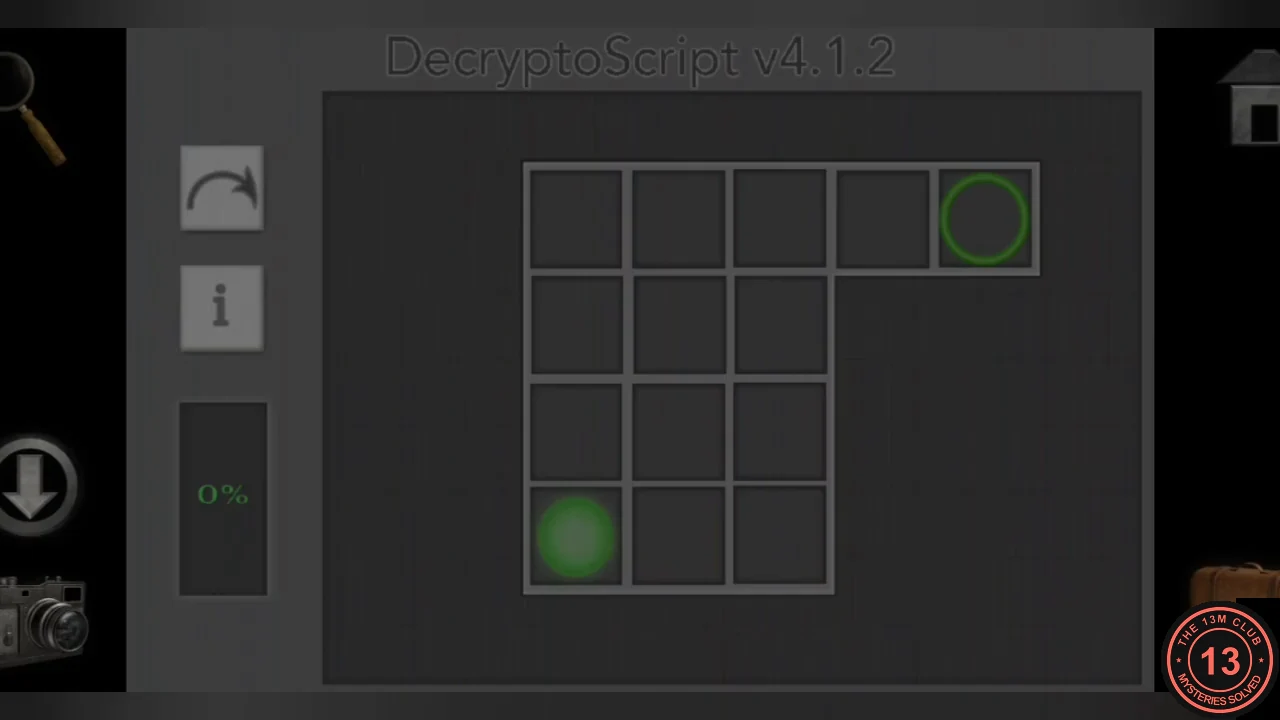
DecryptoScript has five grid levels. Swipe or tap an orb toward a neighbouring square and every orb moves one square in that direction at the same time. An orb with no square in that direction stays where it is, and orbs lined up behind one another move together. A level is solved when every orb sits on a ring. Directions below: U up, D down, L left, R right. Each level can be solved in several ways; the sequences below are short working solutions, so if you have already made other moves, finish the level by hand or start again from its opening layout.
- Level 1: U U U R R R R.CODEUUURRRR
- Level 2: L U L L D R U.CODELULLDRU
- Level 3: L U U R U R U L. Note that the middle square of the middle row cannot be entered, even though it looks like a square.CODELUURURUL
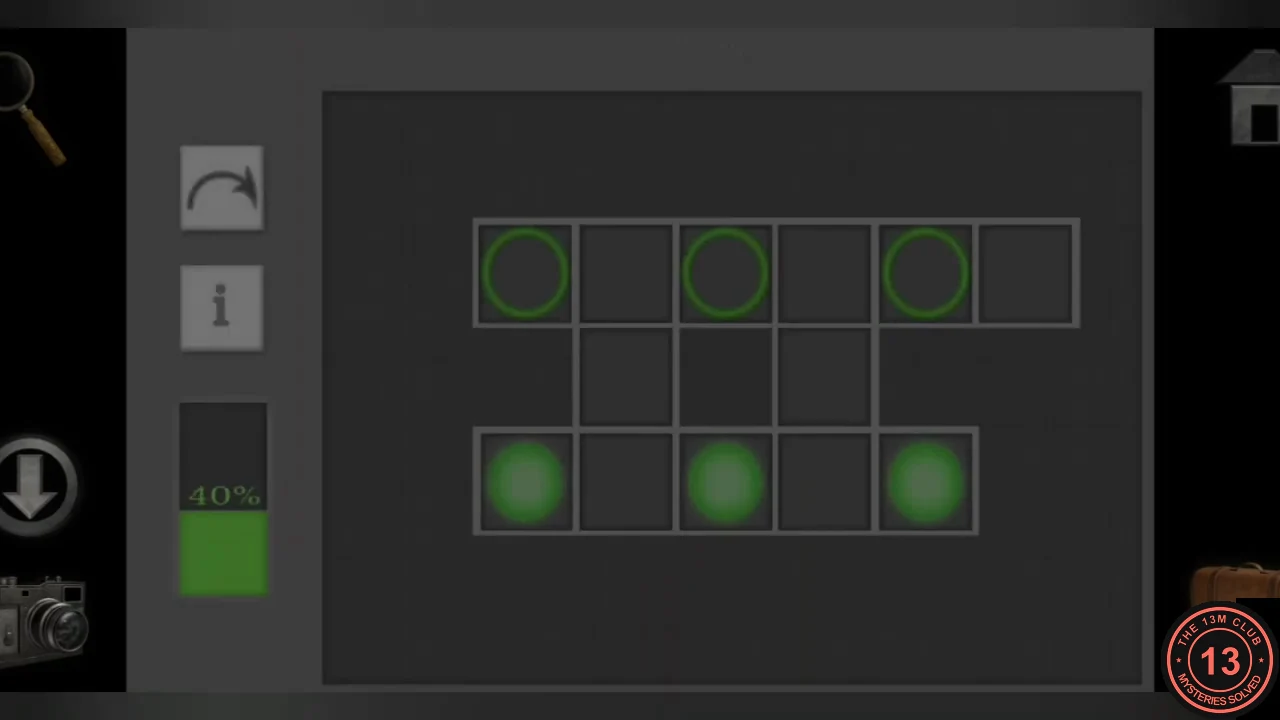
Level 3 at its start: three orbs on the bottom row, three rings on the top row. - Level 4: D L D R D R U R R R D U L D R R.CODEDLDRDRURRRDULDRR
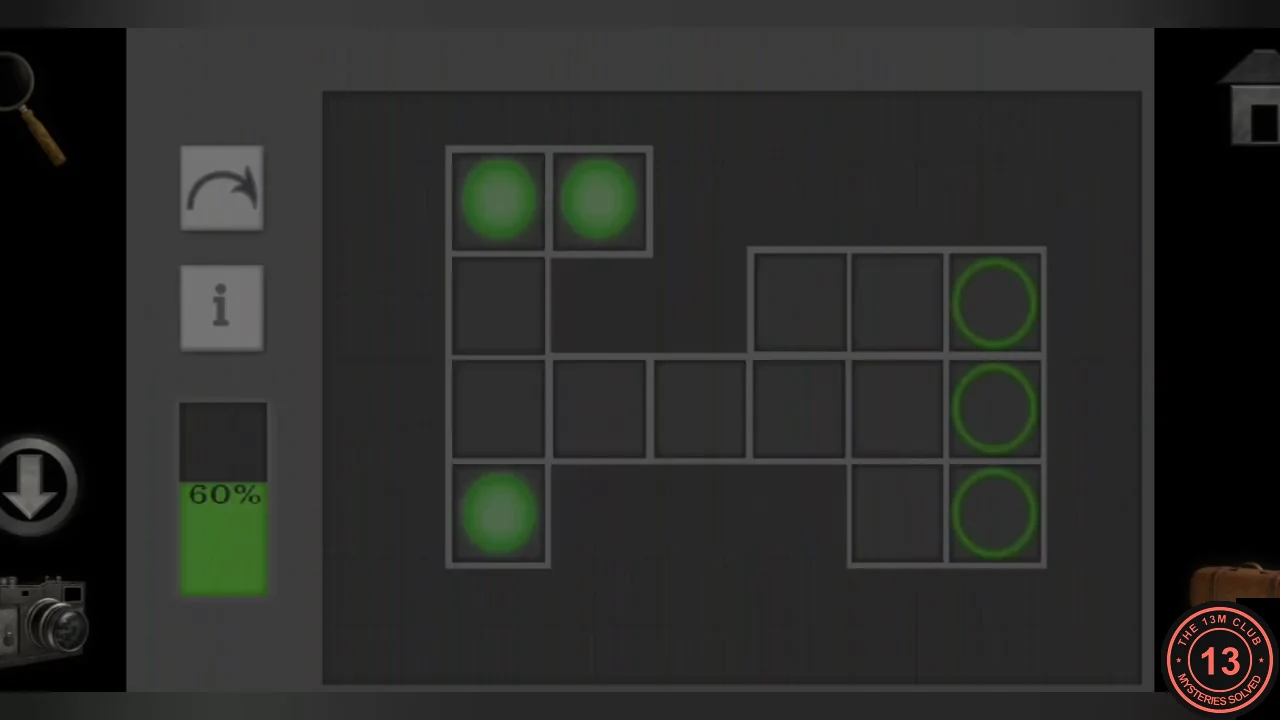
Level 4 at its start. - Level 5: U L L L U L L D D L D.CODEULLLULLDDLD
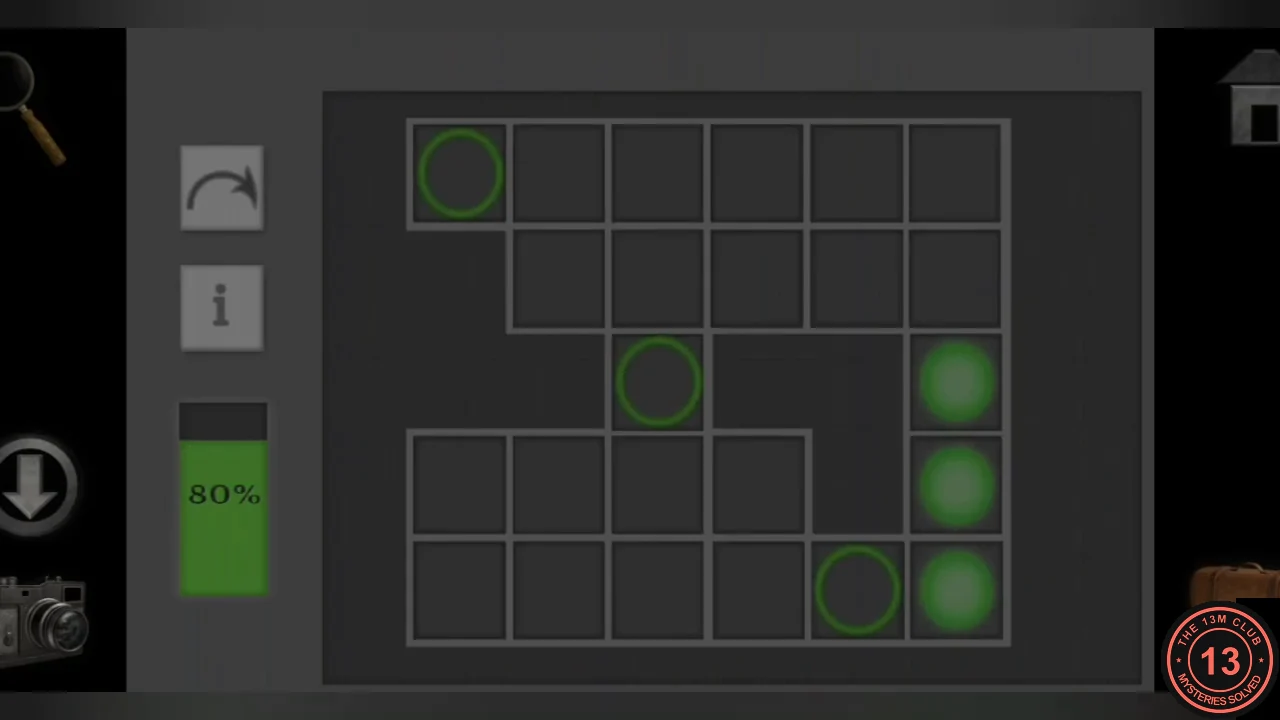
Level 5 at its start. - After Decryption Complete, open MAIL and read "Security Changes": the Machine Room password is now 51413.