Residence Area and Game Room
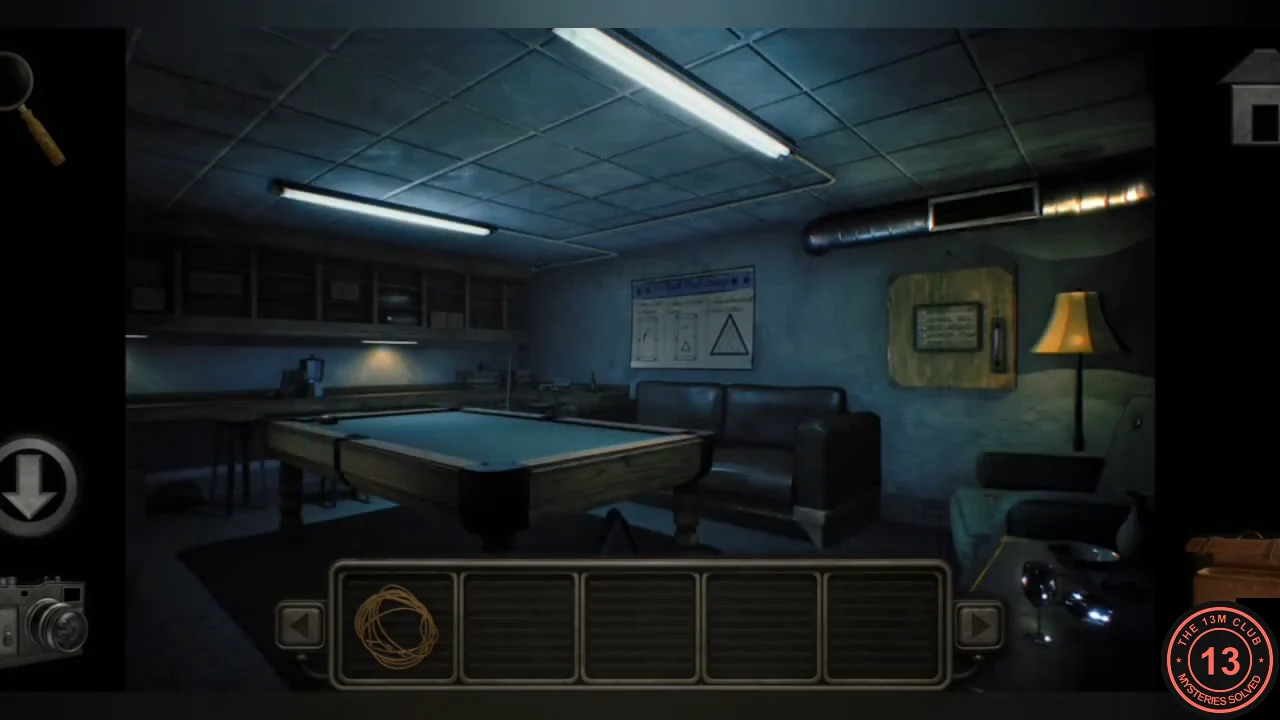
The residence key opens the living side of the facility. Start by noting a few fixtures you will come back to, then gather the first Game Room clues.
- Use the residence key on the blue Residence Area door at the end of the left tunnel.
- Inside, note the round vent grate in the hallway (fastened too tightly to open by hand) and the flooded stairs leading down. Both come into play later.
- Go right into the Game Room. Photograph the "10 Ball Pool Setup" poster: cue ball on the head spot, rack on the foot spot and the balls racked, top to bottom, as 10 / 2 3 / 7 8 4 / 9 5 6 1. Also note the locked pegboard cabinet labelled with the initials S.N., A.L., S.W., T.H. and T.O.
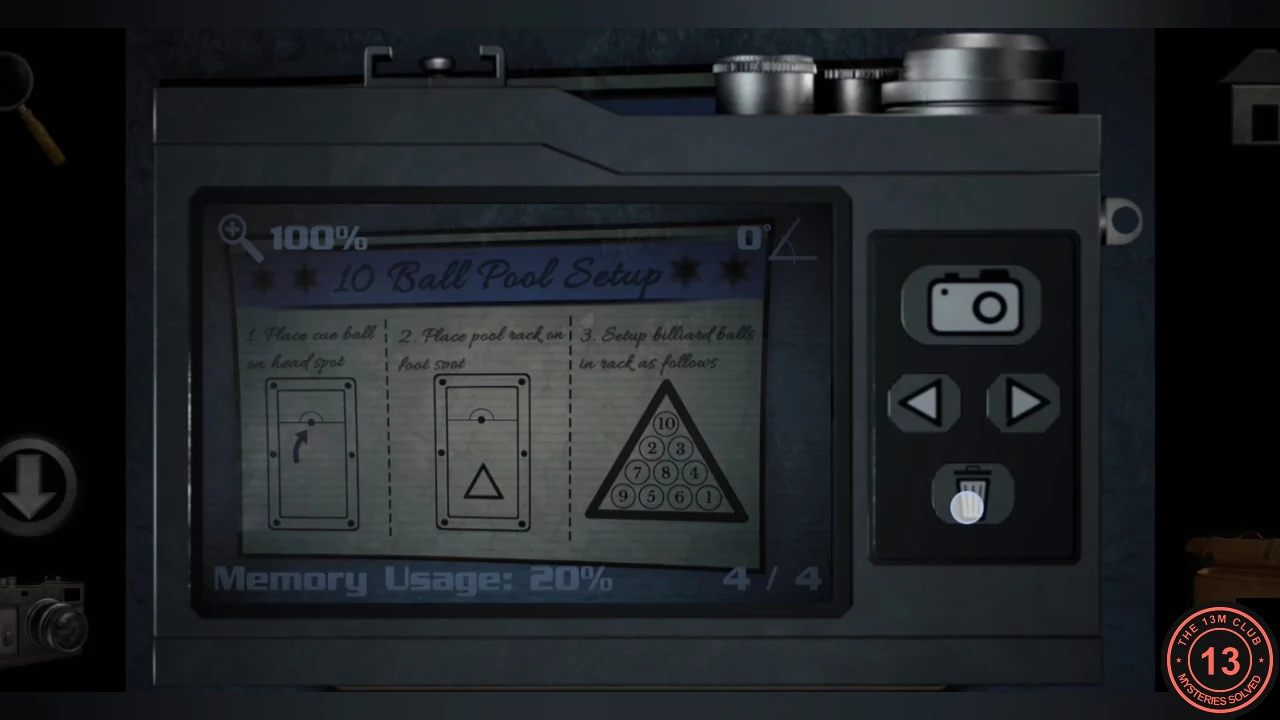
The "10 Ball Pool Setup" poster. - Pick up the pool triangle lying near the front of the pool table and place it on the foot spot at the right-hand end of the table.
Basement Corridor: Light Panel
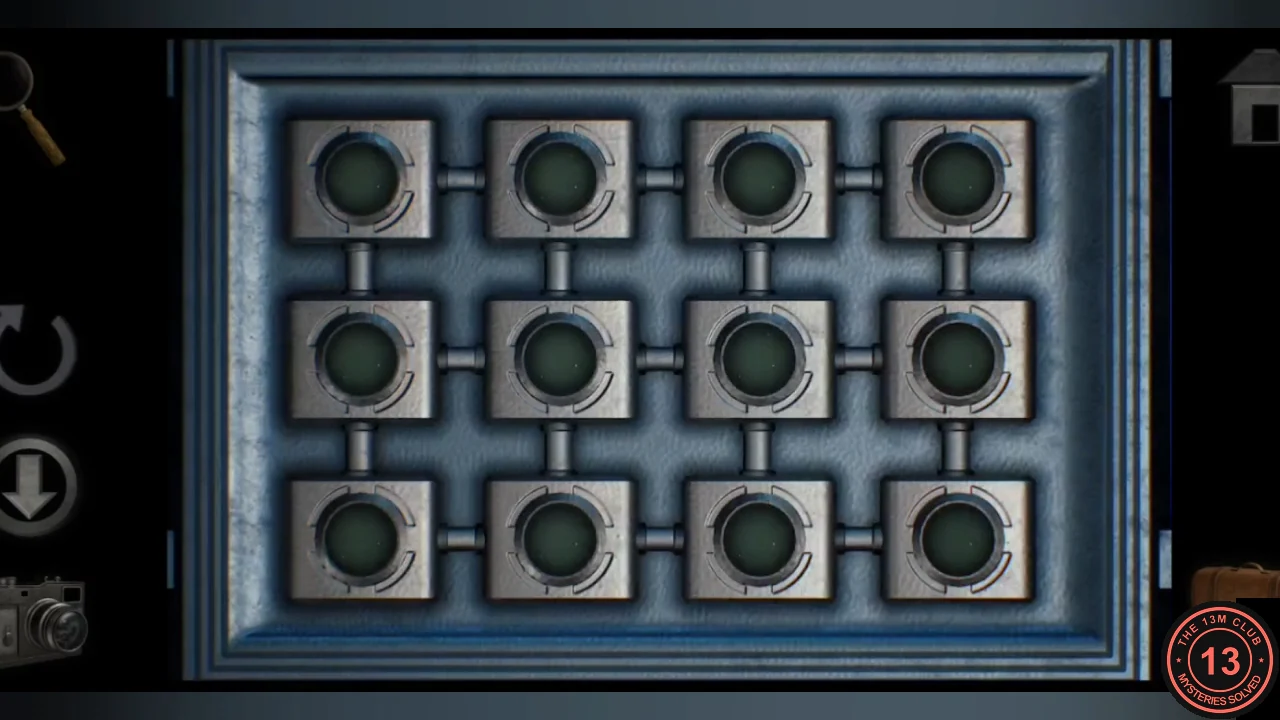
Down the basement stairs, a blue door carries a chalk dartboard and a triangle keypad; you will open it later. Further along, a wall hatch has a panel of twelve lights in three rows of four. Pressing a light switches it and the lights directly above, below, left and right of it between off and green. The goal is all twelve green.
- Go down the basement stairs, past the blue chalk-marked door, to the wall hatch with twelve unlit lights.
- Starting from all lights off, press all four lights of the top row, then all four of the bottom row, then the rightmost and leftmost lights of the middle row. All twelve turn green.
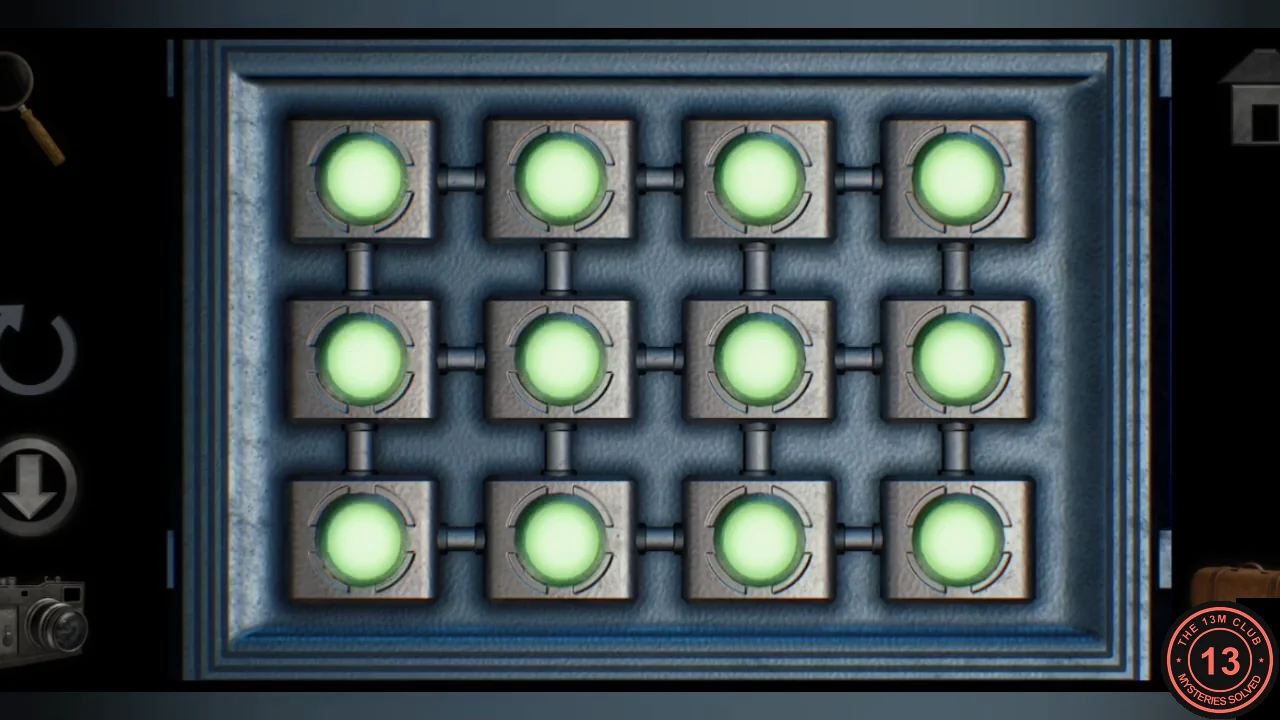
The solved light panel. - The hatch drops open. Take the mallet from inside.
Pump Room, Lounge and Bar
Collect two wooden shapes for the lounge sofa tray, the darts and the dart scores, and break open the bar cabinet. The pump room machinery is repaired later.
- Continue along the basement to the pump room. The pump is missing a part, the yellow generator and the PUMP CONTROL PANEL have no power, and the lever does nothing yet. Pick up the small wooden triangle near the panel.
- Back in the Game Room, take the toy cube from the bookshelf and read the DIY Fuel note on the worktable: water in a large container, plus sugar, strong alcohol and fertilizer, then heat. The blue case with dial lock A on the side table is opened later.
- In the lounge, take the handful of darts from the old TV stand. The TV itself does nothing yet.
- Place the triangle and the cube in the matching hollows of the wooden shape tray in the corner of the sofa. One round hollow stays empty for now.
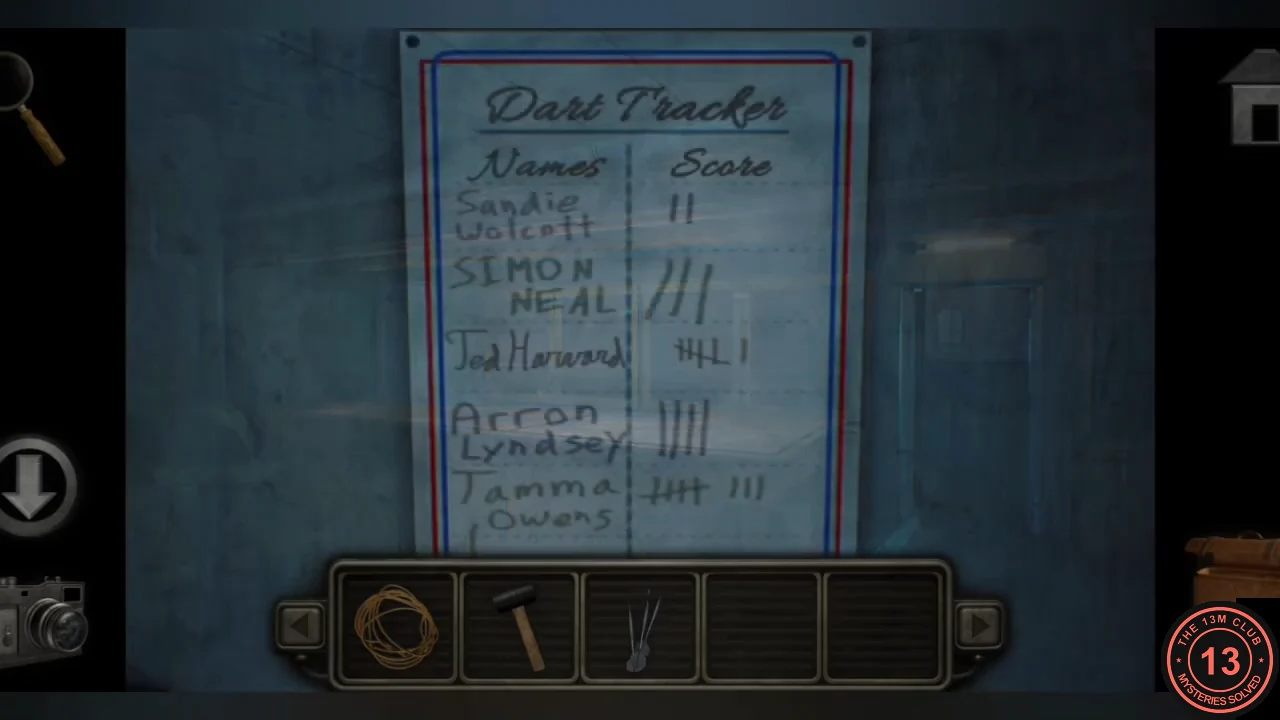
- Photograph the Dart Tracker on the bar wall. Scores: Sandie Wolcott 2, Simon Neal 3, Arron Lyndsey 4, Tod Harwood 6 and Tamma Owens 8 (first place).
- Use the mallet on the strong glass cabinet behind the bar to smash it, then take the box filled with billiard balls.
Kitchen: Domino Dice Panel
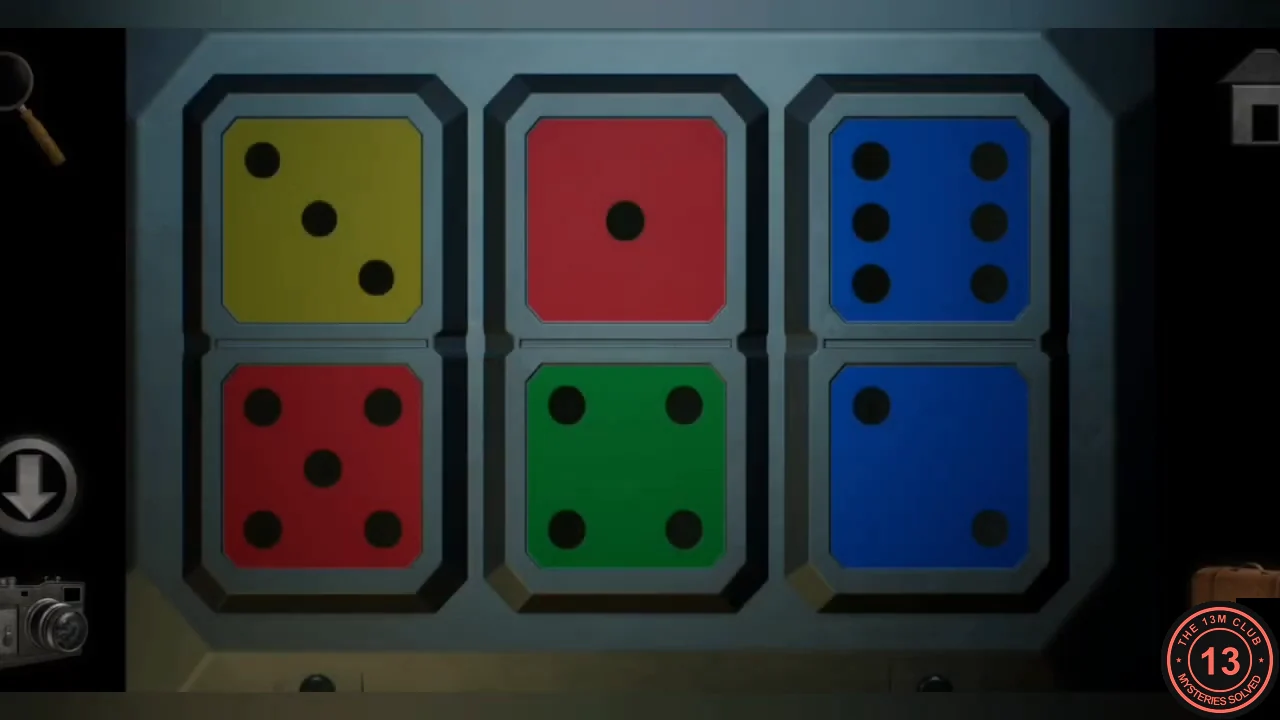
The kitchen has a working stove, a fridge chained shut and a panel of six coloured dice beside the fridge. The clue is a set of dominoes hidden in the lounge shape tray.
- In the kitchen, pick up the cooking pot and the wooden cylinder beside the cans. The sticky note ("hope you like your eggs HARD boiled") is a hint for later.
- Place the cylinder in the last hollow of the lounge shape tray. A drawer opens with three dominoes inside; photograph them.
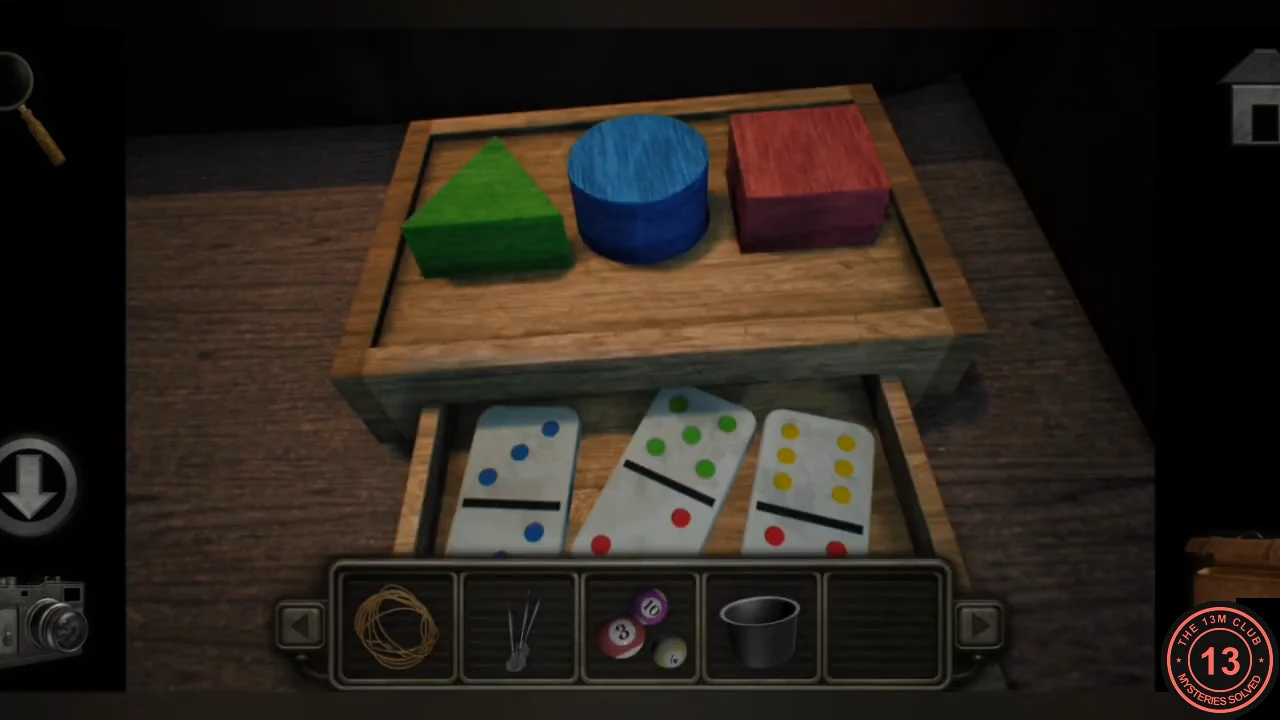
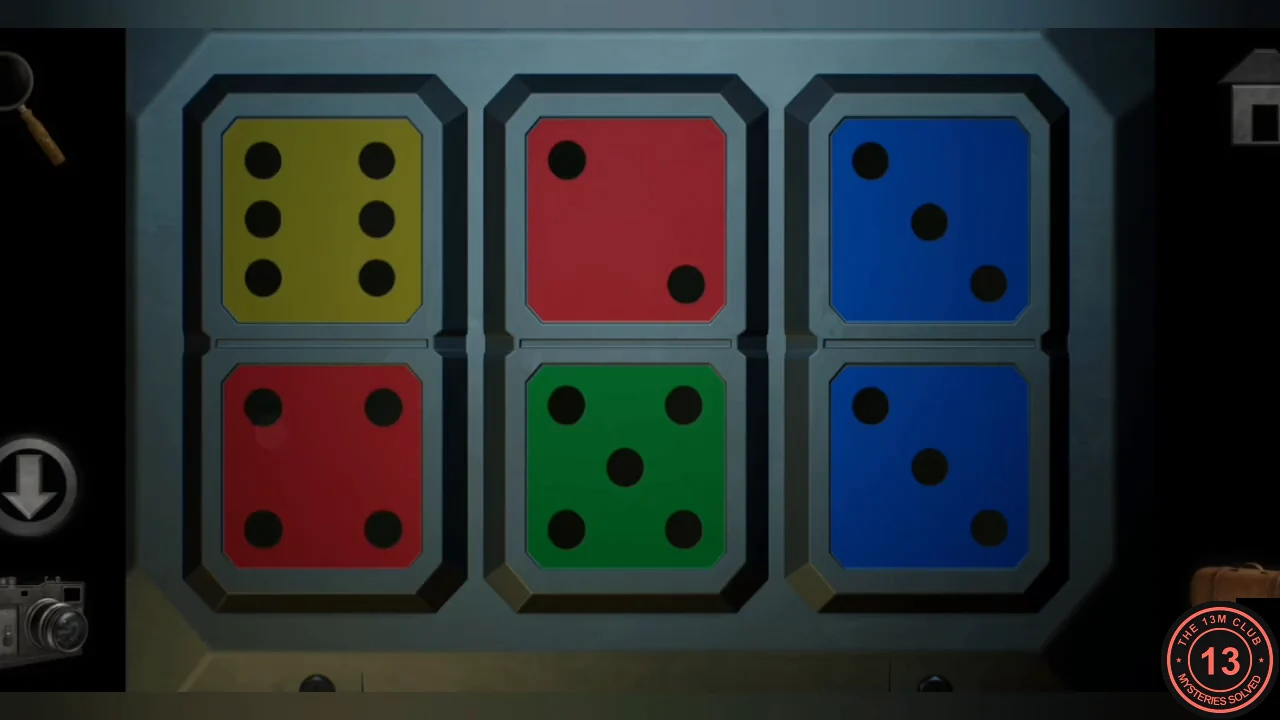
The three dominoes from the shape tray drawer. - Each column of two dice copies one domino, both in colour and in number of pips. Tap the dice to change their values until the top row reads yellow 6, red 2, blue 3 and the bottom row reads red 4, green 5, blue 3. The cupboard above opens.
The dice set to copy the dominoes. - Take the bag of sugar from the cupboard.
Game Room: Dart Cabinet
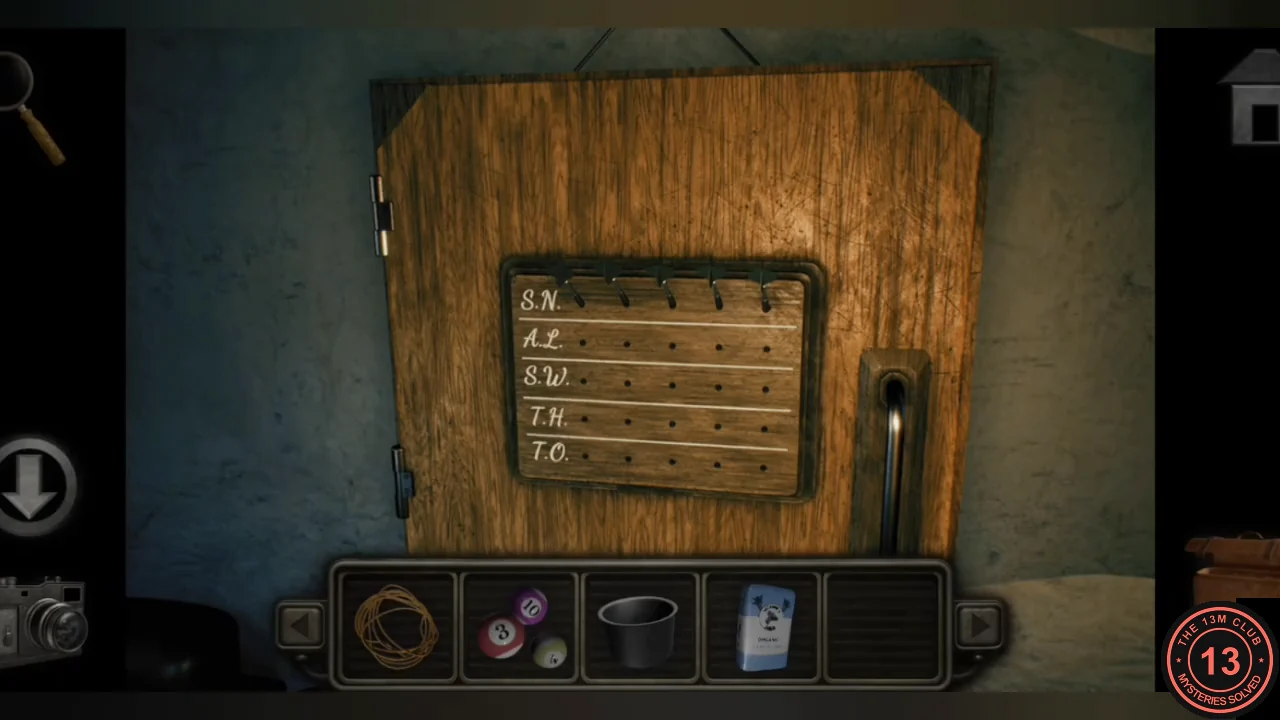
The pegboard cabinet has one row of five holes for each player (S.N., A.L., S.W., T.H. and T.O.). Rank the players by their Dart Tracker scores, highest first, and put each dart in the hole for that player's finishing place.
- Use the handful of darts on the Game Room pegboard cabinet.
- Place one dart in each row, counting holes from the left: T.O. (Tamma Owens, 8 points) in hole 1, T.H. (Tod Harwood, 6) in hole 2, A.L. (Arron Lyndsey, 4) in hole 3, S.N. (Simon Neal, 3) in hole 4 and S.W. (Sandie Wolcott, 2) in hole 5. The cabinet opens.
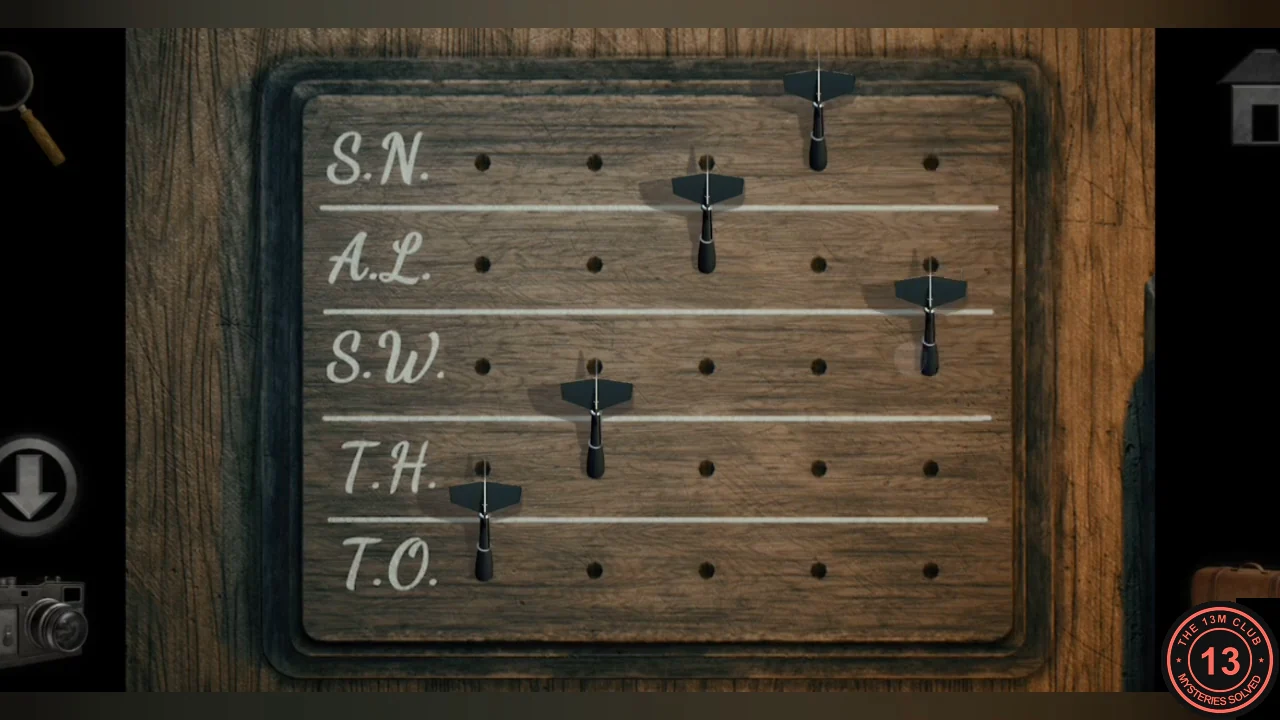
Darts placed according to the Dart Tracker. - Take the small key and photograph the coloured dartboard inside: sectors 7 and 3 are red, 8 and 1 blue, 4 and 10 purple, 5 and 6 green, and 2 and 9 orange.
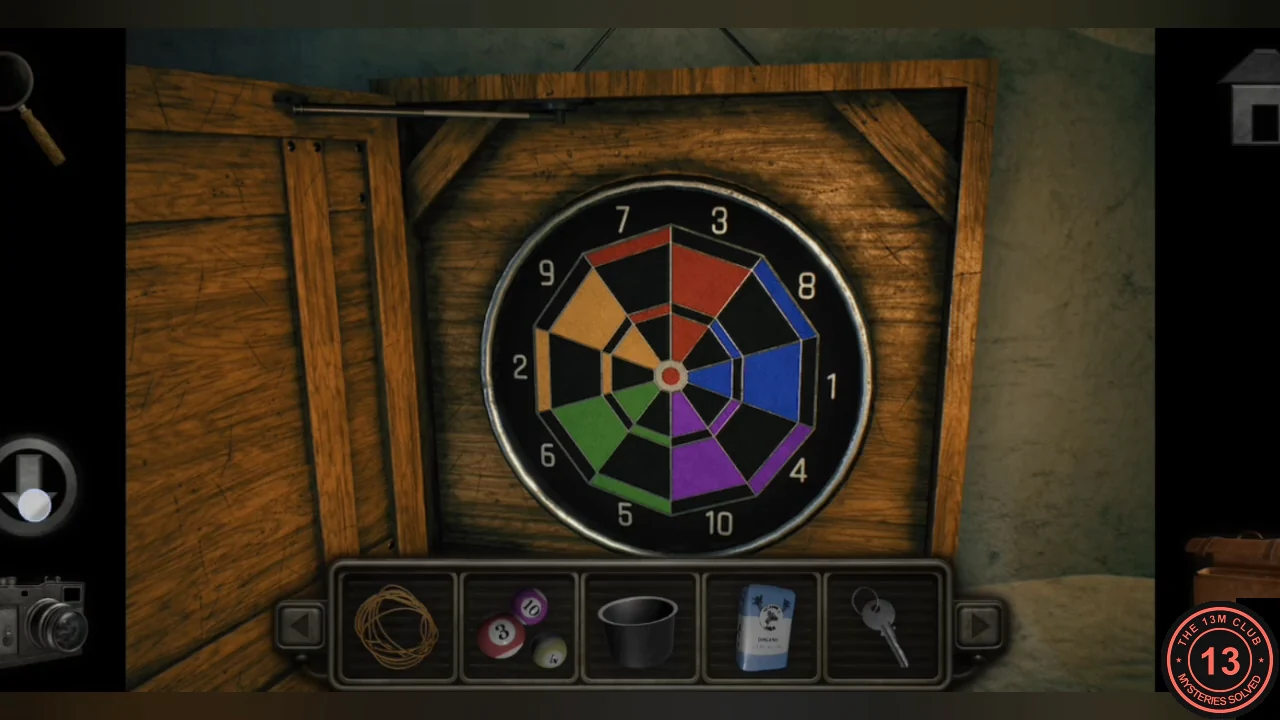
The coloured dartboard inside the cabinet.
Pool Rack and Basement Door
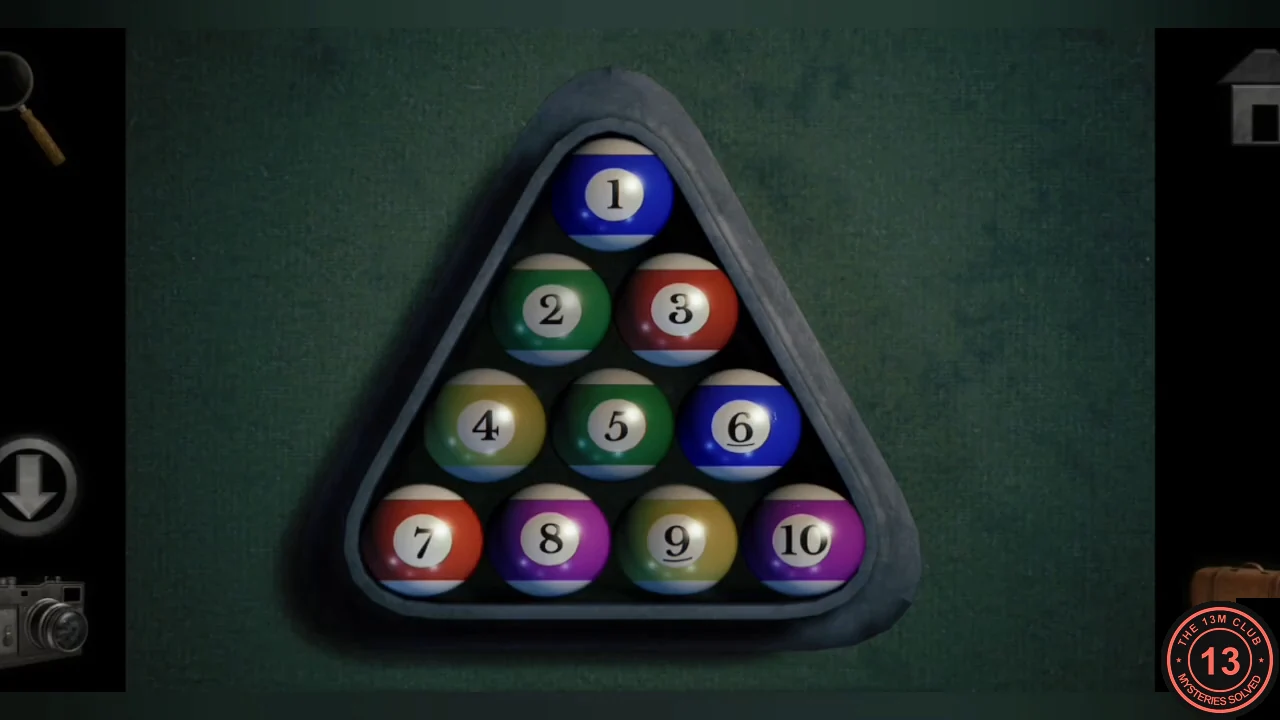
Rack the balls exactly as the poster shows. The basement door keypad is laid out like the rack: press the positions where a ball's colour matches the colour of its number on the dartboard.
- Use the box of billiard balls on the rack, then swap balls until they match the poster, top to bottom: 10 / 2 3 / 7 8 4 / 9 5 6 1.
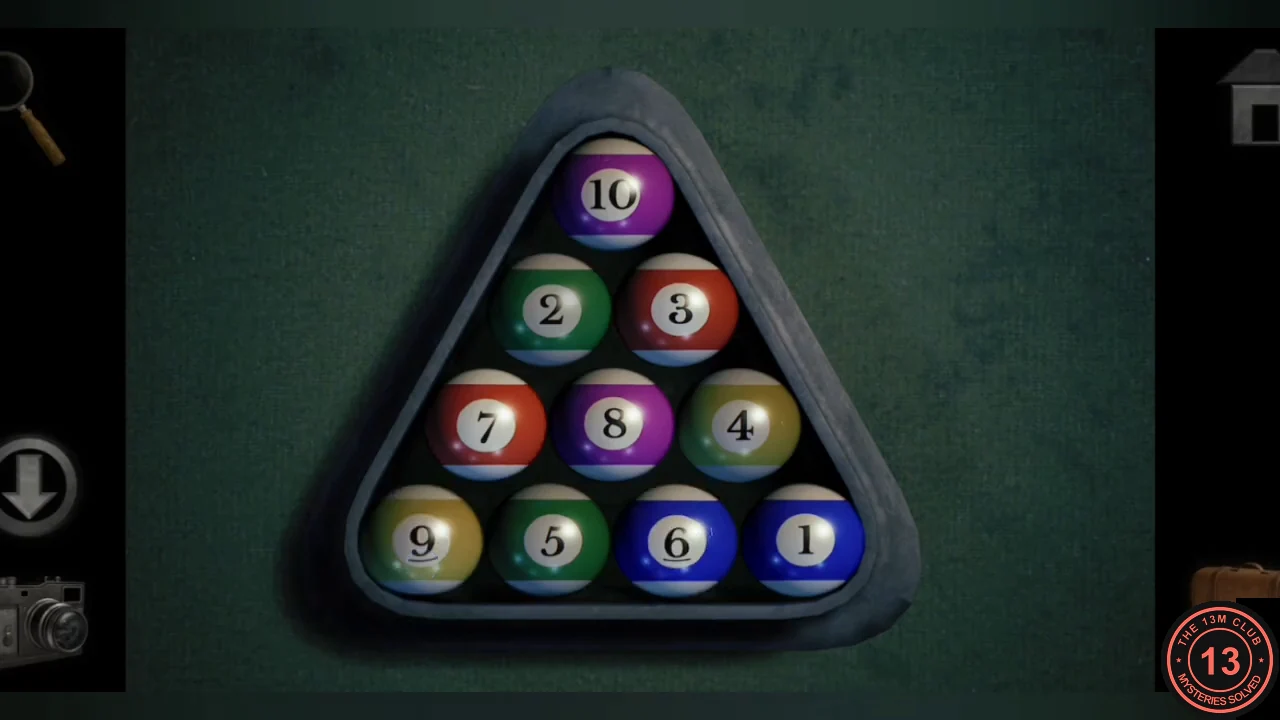
Balls racked in poster order: 10 / 2 3 / 7 8 4 / 9 5 6 1. - At the blue basement door, press the six triangle buttons whose ball colour matches the same number on the dartboard: 10 (the top button), 3 (right of row 2), 7 (left of row 3), and 9, 5 and 1 (first, second and fourth of the bottom row). Ball 9 looks more yellow than orange, but it counts as a match; leave 2, 8, 4 and 6 unpressed. The door opens.
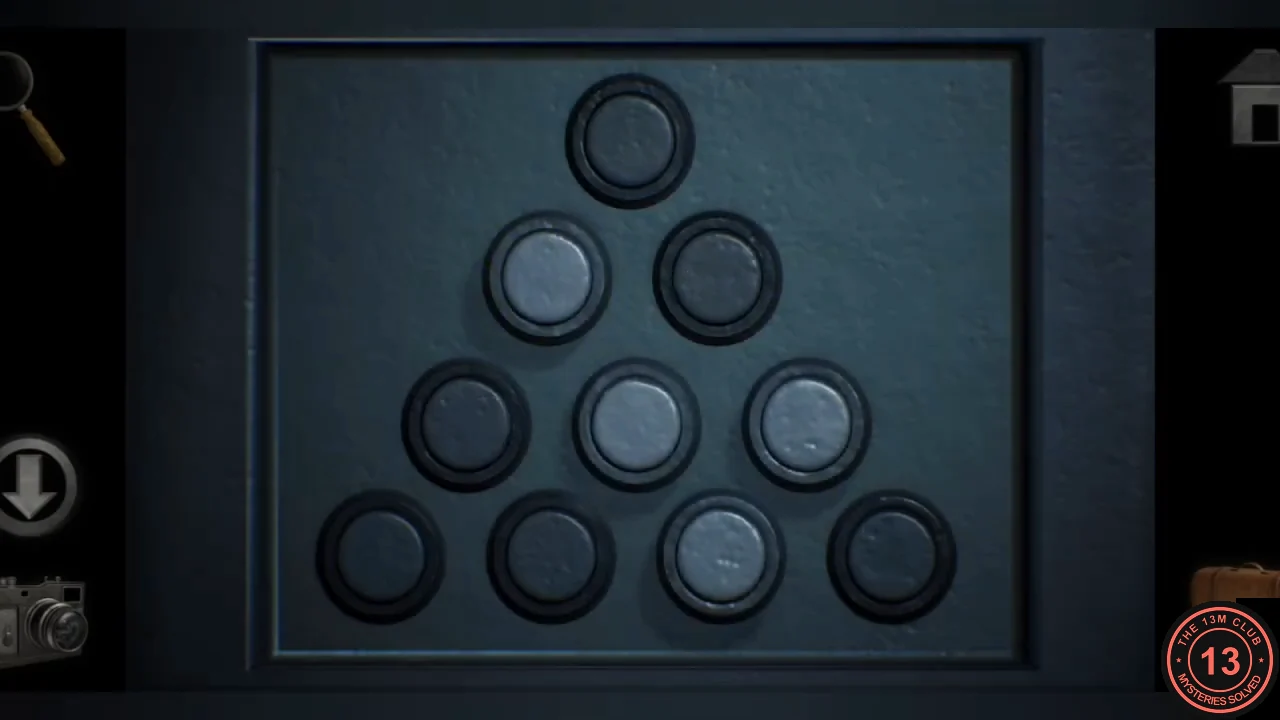
Pressed buttons look dark: 10, 3, 7, 9, 5 and 1. - Go through the door into the basement workshop.