Right Balcony cart and the concrete mold
Make a mold of the fractured gear on the balconies over the lava.
- Go To the Right Balcony and take the Bucket from the hook at the upper left.
- Steambug (Underground): on the Right Balcony, on the pipe right of the pillar with the hanging bucket, upper centre-right. Click it to collect it.
- Take the Iron Rod (a thin two-pronged rod) lying on the floor in front of the mine cart.
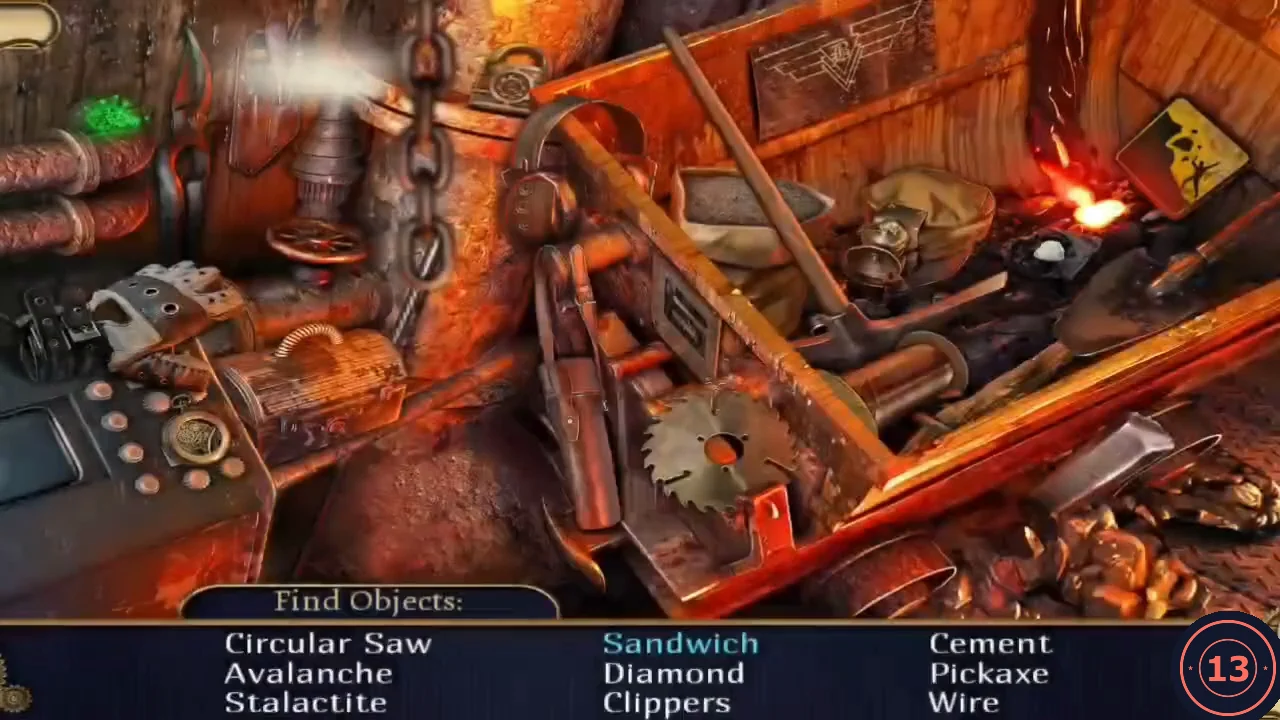
- Search the mine cart (Find Objects). Interactive: click the gold lunch tin left of the cart front to get the Sandwich. Others: Cement (grey sack top centre), Clippers (upper left by the green crystal), Circular Saw (front centre), Avalanche (yellow warning sign upper right), Pickaxe, Wire, Diamond (among the coal), Stalactite (lower right). Reward: Concrete.
- On the Left Balcony take the Chisel (metal rod) from the base of the mold box.
- Steambug (Underground): on the Left Balcony, on the slanted beam just above and left of the mold box. Click it to collect it.
- On the Right Balcony zoom on the pipe at the right: put the Bucket on the flange, set the Chisel in the crack and hit it with the Hammer. Take the Bucket of Water.
- At the mold box on the Left Balcony pour in the Bucket of Water, pour the Concrete on it to set it, then press the Fractured Gear in: the mold is ready.
Casting the Big Gear
Melt silver in the lava and cast the replacement gear.
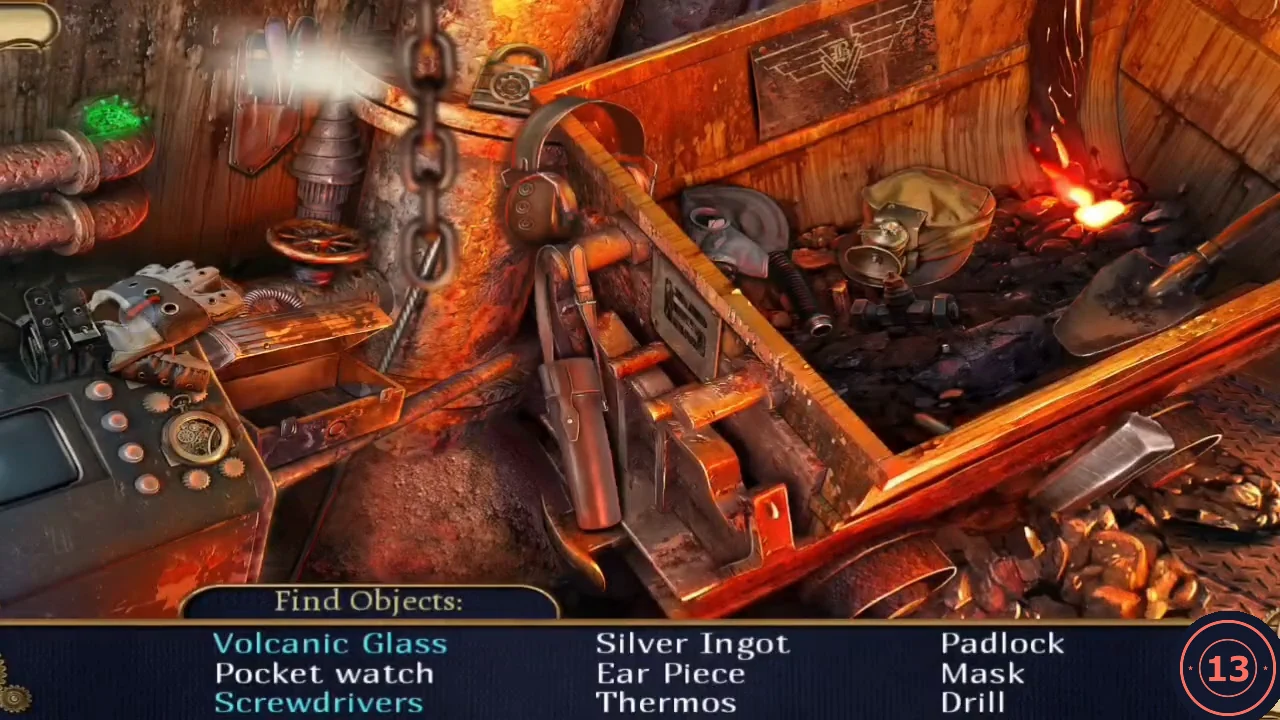
- Search the mine cart again. Interactive: Volcanic Glass - take the shovel right of the cart, scoop the sand pile at the front left and drop it on the glowing coals at the upper right, then take the glass; Screwdrivers - turn the valve wheel to the left of the hot steam pipe at the upper left, then take them. Others: Pocket watch (console lower left), Padlock (hanging chain left), Mask, Ear Piece (headphones on the cart's left edge), Drill, Thermos. Reward: Silver Ingot.
- On the Left Balcony put the Silver Ingot in the LEFT hanging bucket (it lowers into the lava), then put the Heavy Stone in the right bucket to raise it. Lift the molten silver with the Iron Rod.
- Pour the melted silver into the mold and take the Big Gear. Go To the Central Part and give the Big Gear to Ink ("We'll have to replace this part!"). He fits it into the machine; after the cutscene you are in the Machine Bowels.
Scaffolding and the four nails
Secure the loose plank so you can reach Barber's robot.
- On the Scaffolding notice the pendant-shaped slot on Barber's robot. Take the Rubber Gloves from the floor by the railing.
- Use Matthew on the plank hanging high above; it drops onto the beam. Zoom on it and take Nails 1/4.
- In the Machine Bowels open the nail-gun case on the floor left of the generator and take Nails 2/4.
- Steambug (Underground): in the Machine Bowels, on the thick black hose at the upper left. This is the last steambug of the game. Click it to collect it.
- Move the sparking cable on the left floor with the Rubber Gloves and take Nails 3/4. The last nail is stuck too deep for now.
Floor panel: symbols and cables
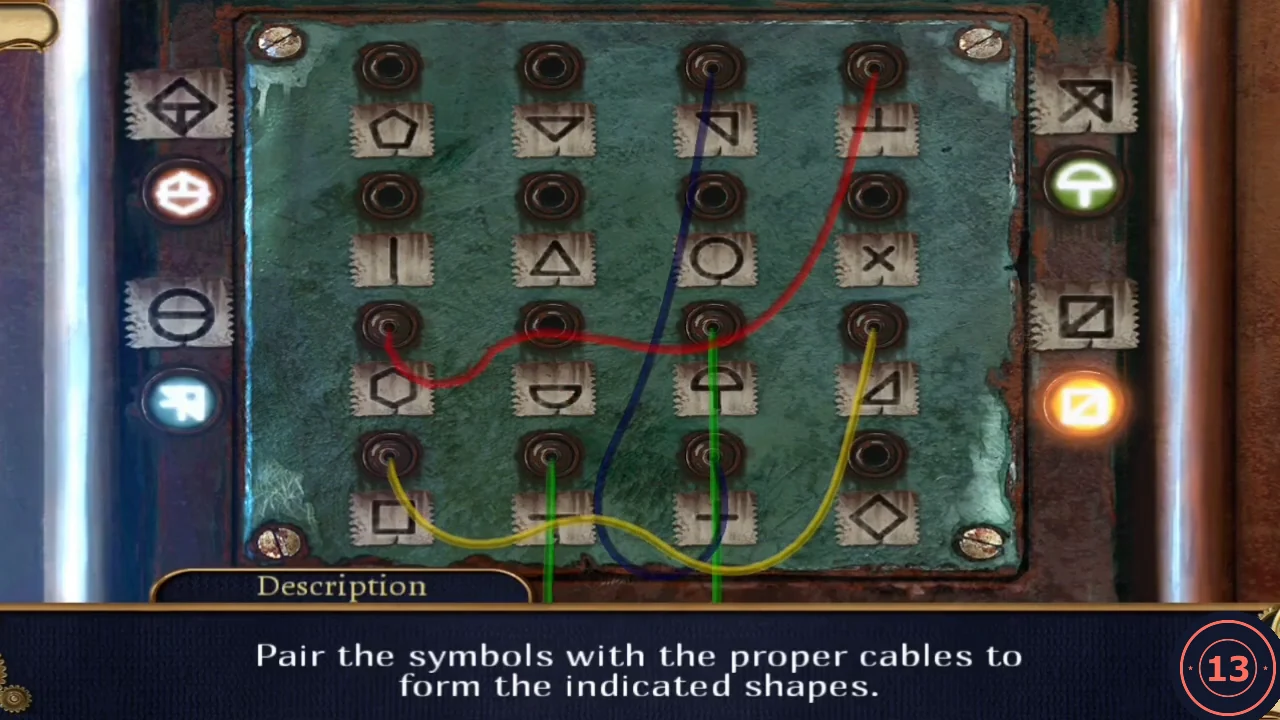
Plug each coloured cable into two sockets whose symbols combine into the shape shown above its display. Socket positions can vary between games, but the symbol pairs stay the same: the row and column positions below describe the recorded layout, so if yours differs, connect the same symbol pairs wherever they appear.
- Zoom on the floor panel at the lower left. Overlaying a cable's two end symbols must give the target shape above that cable's display. Symbol pairs: red = T-shape + diamond; blue = half circle + circle; green = corner triangle + X; yellow = square + slashed triangle. In the recorded layout these were at: red row 4, columns 2 and 4; blue row 3 column 2 and row 2 column 3; green row 1 column 3 and row 2 column 4; yellow row 4 column 1 and row 3 column 4 (yellow started on the vertical line at row 2, column 1 and the slashed triangle; moving its first end onto the square lit the yellow display). Your sockets may be arranged differently, so find each pair by its symbols and connect or check all four cables, including yellow.
A Last Tremor: the ending
Finish the nail gun, cross to the robot and stop Barber.
- With the panel solved, zoom on the cracked floor beside the cable again and click the nail stuck in the crack: Nails 4/4. Then zoom on the nail-gun case and put all four nails in it: Nail Gun.
- On the Scaffolding nail the plank down with the Nail Gun, then take the Pulley from the plank close-up.
- Put the Pulley on the cable at the upper right and click it to slide over to Barber's robot.
- Put the Pendant Key into the pendant-shaped slot on the robot's console. A Last Tremor is completed and the ending plays. Finishing Evangeline's Story unlocks Ink's Story.
All 19 achievements
The Google Play version has 19 achievements. Eight unlock automatically as you play the story; the other eleven depend on what you collect, read or skip and on the playing mode, so read this list before you start a new game.
- Story achievements (unlock automatically as you play): Amongst Bugs (first Find Parts scene, Chapter 1), Hello, Birdie (power up Matthew), Too Many Legs (crush Barber's Myriapod on the zeppelin), Gliding Over All (reach Barber's castle), Even Deeper (enter the underground laboratory), My Savior (free Dr. Ink), World Owes You (stop Barber's Tremor Machine) and Prequel (finish Ink's Story). Two more are easy but not automatic: First of Many needs your first steambug (collect one), and That Paper Smell needs 10 documents and pop-up notes read (read every note, letter and blueprint you click).
- No Skipping (finish 3 minigames without skipping) and The Challenge (solve all minigames without skipping): never press Skip on a puzzle. Both notices appeared in a skip-free game, after the Steam Horse drink and after the final cable panel.
- Movie Watcher: watch 5 cutscenes without skipping them. Letting every cutscene play is the simplest way.
- Spy Master: complete the game on Expert. The playing mode is chosen when you start Evangeline's Story, so pick Expert there.
- Marksman: finish a hidden-object (Find Objects) scene with no more than one wrong tap. Take your time in any one list scene, such as the kitchen hanging rack, and tap only items you are sure of.
- People Person: talk to the characters you meet, especially the guests in the Gearwheel Inn, and keep talking until they have nothing new to say.
- Steambug sets: Entomologist (all 11 Hochwald steambugs), Master Debugger (all 8 castle steambugs) and Catch Them All (all 11 underground steambugs). Each area closes behind you, so collect every steambug in the chapter where this guide lists it. Ink's Story has no steambugs.